Skip to content
DisclaimerTerms Of UseGDPR PolicyCookie Policy

greenmealmap

  • Home
  • Drinks
  • Appetizers
  • Dinner
  • Dessert
  • About
  • Contact
  • Privacy Policy
DisclaimerTerms Of UseGDPR PolicyCookie Policy

NO-ING-IMG

- 1 pound Italian sausage - 2 cups broccoli florets - 1 red bell pepper, sliced - 1 yellow bell pepper, sliced - 1 medium red onion, sliced - 3 cloves garlic, minced - 3 tablespoons olive oil - 1 teaspoon dried oregano - 1 teaspoon smoked paprika - Salt and pepper to taste - Fresh parsley for garnish These ingredients come together to create a tasty and colorful sheet pan dinner. The Italian sausage adds a nice kick, while the veggies bring freshness. You can use mild or spicy sausage based on your taste. Broccoli adds crunch and nutrition. The bell peppers offer sweetness, and red onion gives a touch of sharpness. Garlic enhances the flavors, while olive oil helps everything cook evenly and adds richness. Dried oregano and smoked paprika provide depth. Don’t forget the salt and pepper; they boost all the flavors. Lastly, fresh parsley brightens the dish. Feel free to tweak this list to match your preferences. You can add or swap vegetables and even try different sausages. This dish is all about flexibility and flavor. For the full recipe, check out the instructions above. Enjoy your tasty creation! 1. Preheat the oven: Start by preheating your oven to 425°F (220°C). This ensures a nice, hot cooking environment for the food. 2. Prepare vegetables: Chop 2 cups of broccoli florets, slice 1 red bell pepper, and slice 1 yellow bell pepper. Also, slice 1 medium red onion and mince 3 cloves of garlic. This mix will add color and flavor. 3. Cut sausage: Take 1 pound of Italian sausage and cut it into 1-inch pieces. You can choose mild or spicy sausage based on your taste. 1. Toss veggies with oil and spices: In a large bowl, combine the chopped veggies. Drizzle 2 tablespoons of olive oil over them. Add 1 teaspoon of dried oregano, 1 teaspoon of smoked paprika, and salt and pepper to taste. Toss well to coat all the veggies evenly. 2. Position veggies and sausage on baking sheet: Transfer the seasoned veggies to one side of a lined baking sheet. Spread them out in a single layer. Then, add the sausage pieces to the other side of the sheet. Drizzle the remaining tablespoon of olive oil over the sausage and season lightly with salt and pepper. 1. Cooking time: Place the sheet pan in the preheated oven. Roast everything for about 25-30 minutes. The sausage should be browned and cooked through, while the veggies become tender and slightly caramelized. 2. Stirring halfway through: Make sure to stir the ingredients halfway through the cooking time. This helps everything roast evenly and develop great flavor. For the full recipe, check out the detailed instructions to make this meal a delight! To get the best out of your sausage and veggie sheet pan dinner, aim for perfect doneness. Cook the sausage until it is golden brown and fully cooked. This usually takes about 25 to 30 minutes. The veggies should be tender and slightly caramelized. Stir everything halfway through. This helps it cook evenly. Evenly distributing the ingredients on the pan is key. Spread the veggies and sausage apart to ensure they roast well. If they are too close, they may steam instead of roast. Use a large baking sheet to give them room. Adding extra spices can elevate your dish. Try using Italian seasoning or red pepper flakes for a kick. You can also experiment with garlic powder or onion powder for more depth. These small changes can make a big difference. Fresh herbs are great for garnish. Chopped parsley adds color and freshness. You could also use basil or thyme. Sprinkle these on right before serving for the best flavor. Prep your veggies ahead of time. Chopping them the night before saves you time on busy weeknights. Store them in the fridge until you’re ready to cook. You can also explore alternative cooking methods. If you’re short on time, use an air fryer. This method cooks food quickly and keeps it crispy. Just follow the same steps, adjusting the cook time as needed. For the full recipe, check out the details above. {{image_2}} You can choose between spicy and mild sausage. Spicy sausage adds a kick to your meal. It wakes up your taste buds. On the other hand, mild sausage offers rich flavors without the heat. If you want to try something different, consider using chicken or tofu. Chicken provides lean protein. Tofu is great for a plant-based option. Both alternatives work well in this dish. Using seasonal vegetables makes this meal even better. You can swap in vegetables based on what’s fresh. For spring, consider using asparagus or peas. Summer favorites include zucchini or eggplant. In fall, root vegetables like carrots or sweet potatoes shine. Feel free to add more veggies to the mix. The more colors on your plate, the more fun it is to eat! You can change up the flavors by using different spice blends. Try adding cumin and coriander for a warm touch. For a zesty twist, mix in some lemon zest or chili flakes. You can also incorporate sauces or marinades. A splash of balsamic vinegar or soy sauce can elevate the dish. Experiment with flavors to find your perfect balance. Check out the Full Recipe for more details! To keep your sausage and veggie sheet pan dinner fresh, first let it cool. Place leftovers in a shallow container. This helps them cool fast. Cover the container tightly with a lid or plastic wrap. Store it in your fridge. Use these tips for best results: - Store within two hours of cooking. - Keep leftovers for up to three days. When you're ready to eat leftovers, reheating is key. The best method is to use the oven. It keeps the sausage and veggies tasty. Here is how you can do it: 1. Preheat your oven to 350°F (175°C). 2. Place leftovers on a baking sheet. 3. Cover them with foil to keep moisture in. 4. Heat for about 15-20 minutes. This way, your meal stays flavorful and warm. Meal prep saves time on busy nights. You can chop veggies and sausage ahead. Store them in the fridge for up to two days. This speeds up cooking. For long-term storage, try freezing: - Place cooked sausage and veggies in freezer bags. - Use airtight containers to prevent freezer burn. - Label bags with the date. You can freeze them for up to three months. When you're ready to eat, just thaw and reheat! For the full recipe, check back to the ingredients list. To make this dish, start by preheating your oven to 425°F (220°C). Line a large baking sheet with parchment paper for easy cleanup. In a bowl, mix broccoli, bell peppers, onion, and garlic. Drizzle olive oil over the veggies and add dried oregano, smoked paprika, salt, and pepper. Toss to coat. Spread the veggies on one side of the baking sheet. Cut the sausage into 1-inch pieces and place them on the other side. Drizzle with olive oil and season. Roast in the oven for 25-30 minutes. Stir halfway through for even cooking. Once done, garnish with parsley and serve hot. For a detailed guide, check the Full Recipe. Yes, you can use frozen vegetables. Frozen veggies are convenient and save time. However, fresh vegetables offer better texture and flavor. If using frozen, adjust cooking time. They may need a few extra minutes to roast well. Make sure to thaw and drain excess water before adding them to the pan. This helps avoid soggy results. This meal pairs well with many sides. Consider serving it with a simple green salad for freshness. Garlic bread or crusty rolls also complement this dish nicely. For drinks, a light white wine or sparkling water with lemon can enhance the meal. These options balance the hearty flavors of the sausage and veggies. Enjoy experimenting with different combinations! This blog post covered a tasty sausage and veggie sheet pan dinner. We reviewed the ingredients, step-by-step instructions, and helpful tips. You can mix in seasonal veggies and choose different proteins to customize the dish. Proper storage and reheating ensure your leftovers stay fresh and delicious. I hope you feel inspired to try this easy meal. It’s a great way to enjoy wholesome food with minimal effort. Now, gather your ingredients and enjoy cooking!

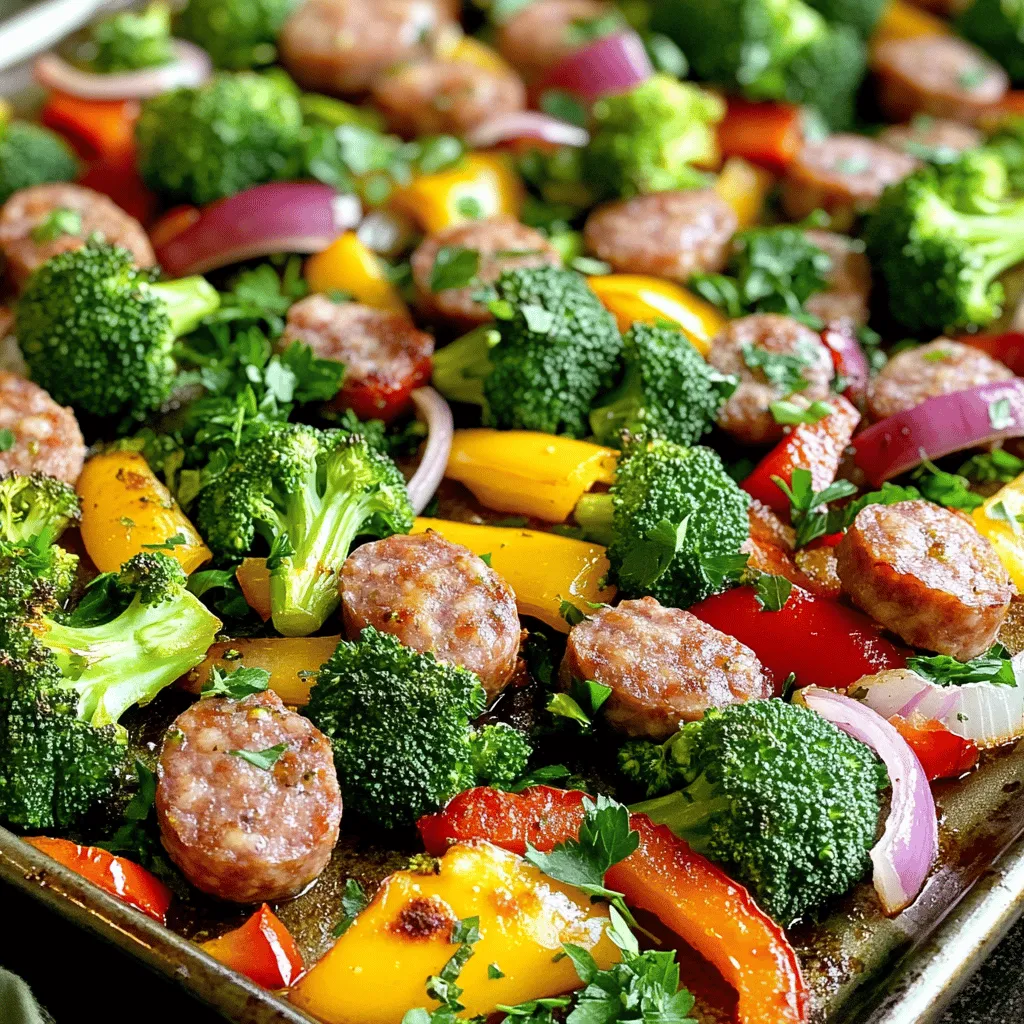
Sausage and Veggie Sheet Pan Dinner Easy Weeknight Meal

Looking for a simple, tasty meal that’s ready in no time? This Sausage and Veggie Sheet Pan Dinner is just

To make Easy Garlic Butter Naan, gather these key ingredients: - 2 cups all-purpose flour - 1 teaspoon baking powder - 1/2 teaspoon salt - 1/2 cup warm water - 1/2 cup plain yogurt - 3 tablespoons unsalted butter, melted - 3-4 cloves garlic, minced - 2 tablespoons fresh cilantro, chopped (for garnish) - 1 teaspoon nigella seeds or sesame seeds (optional) These ingredients work together to create that soft and fluffy naan we all love. The flour provides structure, while the yogurt keeps it moist. You can add a few optional ingredients to boost the taste: - 1 teaspoon nigella seeds or sesame seeds - A pinch of cayenne pepper for heat - Fresh herbs, like chopped parsley or mint These extras can elevate your naan and make it unique. Feel free to mix and match based on what you like. Not all ingredients are set in stone. Here are some swaps: - Use whole wheat flour instead of all-purpose for a healthier option. - Greek yogurt can replace regular yogurt for a thicker texture. - If you’re out of butter, olive oil works well. These substitutions can help you customize your naan based on what you have at home. Try different combinations to find your favorite! For the full recipe, check out the details above. To make the dough, start with a large bowl. Add 2 cups of all-purpose flour, 1 teaspoon of baking powder, and 1/2 teaspoon of salt. Mix them well. In another bowl, combine 1/2 cup of warm water and 1/2 cup of plain yogurt. Whisk these together until smooth. Slowly pour the yogurt mix into the flour mix. Use a spoon to stir until a soft dough starts to form. Next, knead the dough on a floured surface for about 5 minutes. You want it to be smooth and elastic. Once it's ready, place it in a lightly greased bowl and cover it with a clean kitchen towel. Let the dough rest for 1 hour in a warm spot. This helps it rise and become fluffy. After the dough has rested, divide it into 6 equal pieces. Shape each piece into a ball. Now, roll each ball into an oval or round shape about 1/4 inch thick. Make sure to keep the surface floured to avoid sticking. Heat a skillet or flat pan over medium-high heat. While it's heating, melt 3 tablespoons of unsalted butter in a small bowl. Mix in 3-4 cloves of minced garlic. When the skillet is hot, place one rolled naan in it. Cook for 1-2 minutes until you see bubbles forming. Flip the naan over and brush the cooked side with the garlic butter. Cook for another 1-2 minutes until it turns golden brown. Remove the naan from the skillet and keep it warm in a kitchen towel or a warm oven. Repeat this process with the rest of the dough until all naan is cooked. Before serving, sprinkle the naan with fresh cilantro. You can also add nigella seeds or sesame seeds for extra flavor. Serve the warm naan in a basket lined with a cloth. This keeps it fresh and cozy. Pair it with your favorite dipping sauces or curries for a perfect meal. Enjoy the garlic butter naan with your loved ones! For the full recipe, check the earlier section. To get soft naan, knead the dough well. Kneading builds gluten, making the naan chewy and soft. Let the dough rest for one hour. This helps the dough relax, making it easier to roll out. Roll it out to about 1/4 inch thick for the best results. When cooking, high heat is key. A hot skillet helps create those lovely bubbles. Melt your butter and mix in minced garlic. This mix is the star of your naan. Brush the garlic butter on the naan while it's hot. The heat helps the flavors blend in. If you want extra flavor, let the garlic sit in the butter for a bit before using. Fresh herbs, like cilantro, add a nice touch too. Sprinkle them on right before serving for a fresh look. If your naan is tough, check the kneading time. Too little kneading can lead to dense bread. If the dough sticks, add a little flour while rolling. To avoid burning, keep an eye on the skillet heat. If your naan is doughy inside, cook it longer on each side. Adjust the heat as needed. Remember, practice makes perfect! For more detailed steps, check the Full Recipe. {{image_2}} You can spice up your naan by adding herbs. Try mixing in dried herbs like oregano or thyme. Fresh herbs, such as rosemary or parsley, work well too. Add about one tablespoon of herbs to the dough. This will give your naan extra flavor. You can use this method with the original recipe for garlic butter naan. If you love cheese, this variation is a must-try. Simply take a portion of your dough and flatten it. Place a small amount of shredded cheese in the center. Fold the dough over the cheese and pinch it closed. Roll it out gently to keep the cheese inside. Cook as usual. The melted cheese adds a creamy texture and a delightful surprise! For a gluten-free naan, swap the all-purpose flour with a blend of gluten-free flours. You can use almond flour or coconut flour. Mix in a binding agent like xanthan gum to help with the texture. Be sure to follow the same steps in the recipe. Your gluten-free naan will be just as tasty and soft! I hope you find these variations fun to try! For the full recipe, check out the detailed instructions. To store leftover naan, first let it cool. Place it in a plastic bag or wrap it in foil. Keep it at room temperature for up to two days. If you want to keep it longer, move it to the fridge. Naan will stay fresh for four to five days in the fridge. When you’re ready to enjoy leftover naan, you have a few options. You can use a skillet for a quick reheat. Heat the skillet on medium heat, and add the naan for about 1 minute on each side. You can also use an oven. Preheat it to 350°F (175°C). Wrap the naan in foil and heat for about 10 minutes. Freezing naan is a great way to keep it fresh. First, let the naan cool completely. Then, stack the naan with parchment paper in between each piece. Wrap the stack tightly in plastic wrap. Place the wrapped naan in a freezer bag, and label it. Naan can stay in the freezer for up to three months. When you want to eat it, just reheat it straight from the freezer! You can make naan without yogurt by using milk or water instead. Mix 2 cups of flour, 1 teaspoon of baking powder, and 1/2 teaspoon of salt. Then blend 1/2 cup of warm water with the dry mix until it forms a dough. Knead the dough for about 5 minutes. Let it rest for 1 hour, then roll and cook as usual. Yes, you can use whole wheat flour for naan. It will give the naan a denser texture and a nutty flavor. Replace all-purpose flour with whole wheat flour in the same amount. You may need to adjust the water to reach the right dough consistency. Garlic butter naan pairs well with many dishes. You can enjoy it with curries, stews, or soups. It also goes great with yogurt sauces or dips. Try serving it with chicken tikka masala, lentil dal, or a spicy vegetable curry for a complete meal. Garlic butter naan lasts about 2-3 days at room temperature. Keep it in an airtight container or wrap it in foil to maintain freshness. For longer storage, you can freeze naan for up to 3 months. Just reheat it in a skillet or oven when ready to eat. For the full recipe of Easy Garlic Butter Naan, refer to the recipe section. You learned how to make easy garlic butter naan with simple steps. We covered ingredients, from the base to fun variations. You can now try spiced or cheese-stuffed naan, too. Remember the tips for perfect texture and flavor. Storing and reheating naan can help you enjoy it later. With these insights, you are ready to impress your friends and family. Naan makes any meal better. Get creative with your ingredients and enjoy every bite!

Easy Garlic Butter Naan Quick and Flavorful Recipe

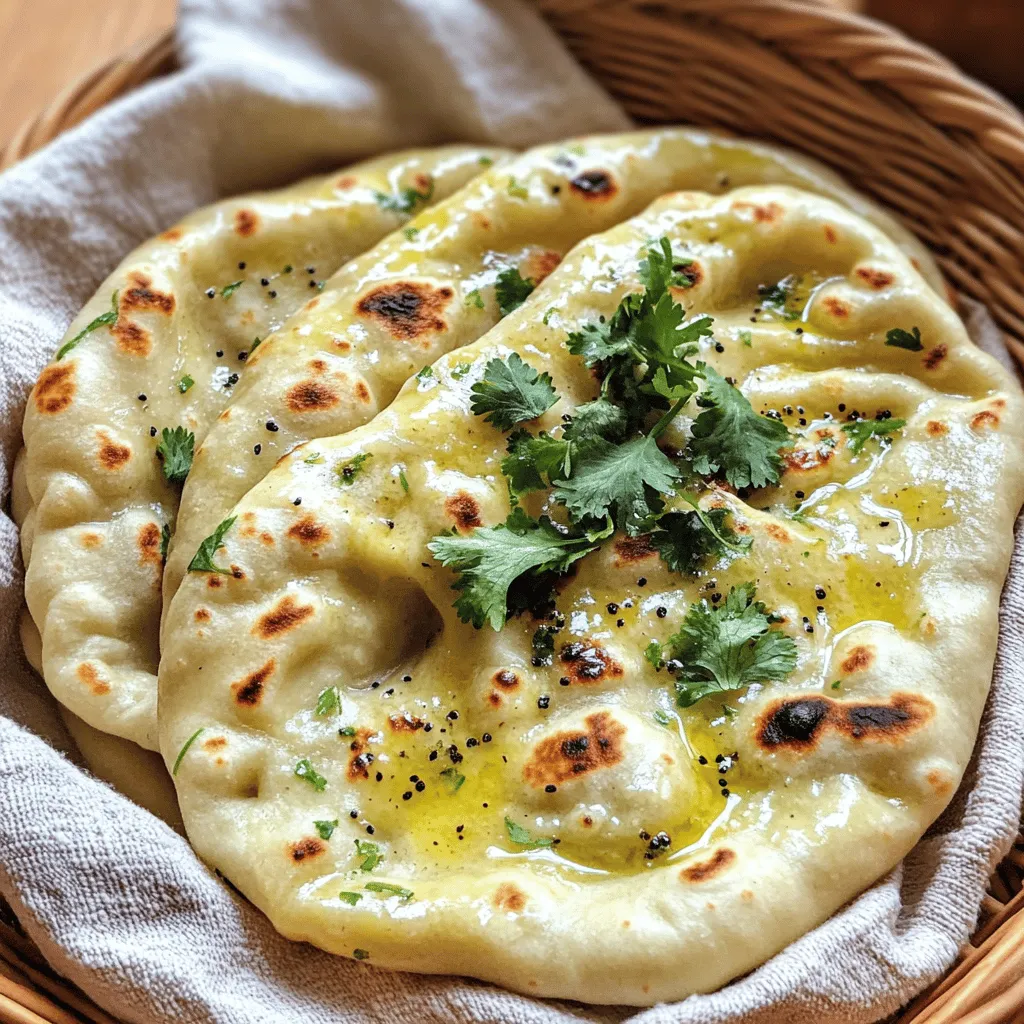
Are you ready to impress your family and friends with a delicious homemade bread? This Easy Garlic Butter Naan recipe

To make Chicken Fajita Lettuce Wraps, you need some key items. Here’s what you will need: - 2 boneless, skinless chicken breasts, sliced into thin strips - 1 tablespoon olive oil - 1 teaspoon chili powder - 1 teaspoon cumin - 1/2 teaspoon garlic powder - 1/2 teaspoon onion powder - 1 bell pepper (any color), sliced - 1 small red onion, thinly sliced - 8 large romaine or butter lettuce leaves - 1 avocado, diced - 1/2 cup cherry tomatoes, halved - Fresh cilantro, chopped (for garnish) - Lime wedges (for serving) - Salt and pepper to taste These ingredients give the dish its bold flavor and fresh crunch. The chicken brings protein, while the veggies add color and texture. For a perfect finish, you can add some garnishes. Here are my favorites: - Diced jalapeños for a spicy kick - Sour cream or Greek yogurt for creaminess - Shredded cheese for extra flavor - A drizzle of hot sauce for heat These toppings can elevate your wraps and make them even more fun to eat. If you have dietary needs, don’t worry! Here are some easy swaps: - Use tofu or tempeh instead of chicken for a veggie option. - Swap out the lettuce with collard greens for a sturdier wrap. - Replace olive oil with avocado oil if you prefer. - Use gluten-free taco seasoning if you are avoiding gluten. These substitutions keep the meal tasty while fitting your diet. You can enjoy Chicken Fajita Lettuce Wraps your way! For the full recipe, check out the details above. Start by slicing the chicken breasts into thin strips. Place them in a bowl. Add olive oil, chili powder, cumin, garlic powder, onion powder, salt, and pepper. Mix well until every piece is coated. This step adds great flavor to the chicken. Heat a non-stick skillet over medium-high heat. Once hot, add the chicken strips. Cook for about 5-7 minutes. Stir often until the chicken is cooked through and no longer pink. Next, add the sliced bell pepper and red onion to the pan. Sauté them for an extra 3-4 minutes. You want them tender but still crisp. After cooking, remove the skillet from heat and let it cool a bit. Grab a large lettuce leaf. Spoon a good amount of the chicken and veggie mix onto the leaf. Top it with diced avocado and halved cherry tomatoes. Don’t forget the fresh cilantro for garnish! Serve with lime wedges on the side. A little squeeze of lime juice adds a nice zing! For the full recipe, check out the previous section. To cook chicken well, start with fresh, high-quality meat. Cut chicken breasts into thin strips. This helps them cook evenly and quickly. Season the strips with olive oil and spices. Use chili powder and cumin for a great flavor. Cook the chicken in a hot skillet for 5-7 minutes. Stir often to avoid burning. The chicken should be white and firm, with no pink inside. Let it rest for a few minutes before serving. This keeps the juices in, making it more tasty. Choosing the right lettuce is key for these wraps. I recommend using romaine or butter lettuce. Both types have wide leaves that hold fillings well. Look for fresh, crisp leaves without holes or browning. Romaine adds a nice crunch, while butter lettuce gives a soft feel. If you want a fun twist, try using cabbage leaves. They add a different texture and flavor to your meal. To boost flavor, add more than just chicken and veggies. Fresh lime juice brightens the taste. Top your wraps with diced avocado for creaminess. Cherry tomatoes add sweetness and color. Don't forget fresh cilantro for that pop of flavor. You can also mix in some jalapeños for spice. These small additions make a big difference. For a full guide on making your Chicken Fajita Lettuce Wraps, check out the Full Recipe. {{image_2}} You can easily turn chicken fajita lettuce wraps into a vegetarian treat. Swap the chicken for hearty veggies. Bell peppers, mushrooms, and zucchini work well. You can also use black beans or lentils for protein. Season them with the same spices from the full recipe. This keeps the great taste while making it plant-based. Want a kick? Add more chili powder or fresh jalapeños to your wraps. If you prefer mild flavors, reduce the chili powder. Try different spices like smoked paprika or taco seasoning. Each will give your wraps a unique twist. Remember to taste as you go. This helps you find the right balance for your palate. Get creative with your fillings! You can add corn, diced mango, or even shredded cheese. Each adds a new layer of flavor. Try using different types of lettuce too. Butter lettuce gives a sweet taste, while iceberg adds crunch. You can even serve the filling in a bowl. This way, everyone can build their own wraps! After enjoying your Chicken Fajita Lettuce Wraps, store any leftover filling in an airtight container. Make sure to let it cool to room temperature before sealing. This process helps keep the chicken and veggies fresh. Store it in the fridge for up to three days. When you are ready to eat the leftovers, heat them gently. Use a skillet over medium heat for the best results. Stir the filling often until it warms through. This method keeps the flavors vibrant and the texture just right. Avoid using the microwave, as it can make the chicken rubbery. If you want to save the filling for later, freezing is a great option. Place the cooled filling in freezer-safe bags. Remove as much air as possible before sealing. You can freeze the filling for up to three months. When you're ready to use it, thaw it in the fridge overnight. Reheat it as mentioned above for a tasty meal in no time. For the full recipe, check out the instructions above! Yes, you can use other proteins. Turkey, beef, or shrimp all work great. Each protein adds its own unique taste. For turkey, use the same spices as chicken. For beef, try flank steak or ground beef. Shrimp cooks fast, so add it last to the skillet. To keep lettuce fresh, store it properly. Wrap the leaves in paper towels and place them in a bag. This helps absorb excess moisture. Use a salad spinner to dry leaves after washing. Store them in the fridge and use within a week for best crunch. To meal prep these wraps, cook the chicken and veggies ahead of time. Store them in airtight containers in the fridge. Keep the lettuce leaves separate to avoid sogginess. Assemble the wraps just before eating. This keeps everything fresh and tasty. For a full recipe, check [Full Recipe]. Chicken fajita lettuce wraps are easy and fun to make. We covered the main ingredients and ways to add your favorite toppings. You learned how to cook the chicken and vegetables and assemble the wraps. I shared tips for cooking chicken perfectly and choosing the right lettuce. We also explored vegetarian options and how to store leftovers. In closing, these wraps are flexible and tasty. Enjoy making them your way! Experiment, have fun, and dig in!

Chicken Fajita Lettuce Wraps Flavorful Low-Carb Meal

Looking for a tasty low-carb meal? You’ll love these Chicken Fajita Lettuce Wraps. They are easy to make, fun to

To make a tasty roasted tomato basil soup, gather these simple ingredients: - 6 cups ripe tomatoes, halved - 1 large onion, quartered - 4 cloves garlic, unpeeled - 3 tablespoons olive oil - Salt and pepper to taste - 1 cup fresh basil leaves, packed - 3 cups vegetable broth - 1 tablespoon balsamic vinegar - 1 teaspoon sugar (optional for sweetness) - 1/2 cup heavy cream (or coconut cream for dairy-free) If you need to convert measurements, here are a few handy tips: - 1 tablespoon = 3 teaspoons - 1 cup = 8 ounces - 1/2 cup = 4 ounces - 1 tablespoon = 15 milliliters - 1 cup = 240 milliliters You can swap some ingredients if you have dietary needs or preferences: - Use canned tomatoes if fresh ones are not available. - For onion, shallots can add a nice taste. - Instead of garlic, try garlic powder. - Any oil can replace olive oil, but it may change flavor. - If fresh basil is not around, dried basil works too, but use less. - Vegetable broth can be swapped with chicken broth. - You can leave out sugar if you prefer less sweetness. - For cream, use any non-dairy milk if you want a lighter soup. This section gives you the building blocks for a lovely soup. You can mix and match as needed. Check out the Full Recipe for detailed steps to create this delightful dish! First, gather your ingredients. You need ripe tomatoes, onion, garlic, olive oil, salt, and pepper. Also grab fresh basil, vegetable broth, balsamic vinegar, and sugar if you want it sweeter. Prepare your baking sheet by laying down the tomatoes and onion. Cut them in half and quarters, respectively. Place the garlic cloves around them. Drizzle olive oil over everything. Sprinkle with salt and pepper, then toss to coat. This simple step brings out the flavors. Next, preheat your oven to 400°F (200°C). Roast the vegetables for about 30 to 35 minutes. You want the tomatoes to blister and caramelize. This roasting process adds depth to your soup. Once done, take the baking sheet out. Let it cool for a moment. This helps with blending later. Now it's time to blend. Squeeze the roasted garlic from its skins into your blender. Add the roasted tomatoes, onion, and fresh basil. Pour in the vegetable broth and balsamic vinegar. If you want a touch of sweetness, add sugar. Blend until the mixture is smooth. Pour this into a pot and bring to a simmer over medium heat. Let it cook for about 10 minutes. This melds all the flavors together. Finally, stir in the cream. Adjust with more salt and pepper if needed. Heat through but don’t let it boil. Now you have a rich, flavorful soup ready to serve! To boost the taste of your roasted tomato basil soup, try these tips: - Use ripe, juicy tomatoes. They add sweetness and depth. - Roast your garlic with the tomatoes. It turns soft and sweet. - Add fresh basil at the end. It keeps its bright flavor. - A splash of balsamic vinegar brightens the soup. It adds a nice tang. - For a creamy touch, stir in heavy cream or coconut cream. Here are some mistakes to steer clear of: - Don’t skip the roasting step. It brings out the best flavors. - Avoid using unripe tomatoes. They can taste sour and bland. - Don’t over-blend the soup. A bit of texture is nice. - Forgetting to taste and adjust seasoning can lead to bland soup. - Be careful with the cream. Adding it too soon can change the texture. Roasting tomatoes is key for flavor. Follow these best practices: - Preheat your oven to 400°F. This ensures even cooking. - Cut tomatoes in half to help them cook well. - Spread them out on the baking tray, so they roast, not steam. - Use olive oil generously. It adds richness and aids caramelization. - Roast until they are blistered and golden. This takes about 30-35 minutes. For the full recipe, check out the details above. {{image_2}} You can choose between creamy or dairy-free versions of this soup. For a rich, creamy taste, add heavy cream. This makes the soup smooth and indulgent. If you prefer a dairy-free option, use coconut cream. Coconut cream gives a slight sweetness that pairs well with tomatoes. Both options are delicious, so pick what fits your needs! You can boost the soup's nutrition by adding vegetables and proteins. Try adding carrots or bell peppers before roasting. These veggies add color and flavor. For protein, consider adding cooked lentils or chickpeas. They make the soup heartier and more filling. Just blend them in with the other ingredients for a tasty twist. You can enhance the flavor with spices and herbs. Consider adding a pinch of red pepper flakes for heat. Fresh herbs like thyme or oregano can elevate the taste as well. You can also experiment with smoked paprika for a deeper flavor. These small changes can create a new soup experience every time! For the full recipe, check out the Full Recipe section. Enjoy discovering these fun variations! To keep your roasted tomato basil soup fresh, let it cool first. Then, pour the soup into an airtight container. Seal it tightly and place it in the fridge. Leftovers will stay fresh for up to five days. If you want to enjoy it later, freezing is a great option. You can freeze this soup for a quick meal later. Use freezer-safe containers or heavy-duty freezer bags. Leave some space at the top, as the soup will expand when frozen. It will last in the freezer for about three months. Be sure to label the containers with the date. To reheat, take the soup out of the fridge or freezer. If frozen, let it thaw overnight in the fridge. Heat the soup in a pot over medium heat, stirring often. If it seems too thick, add a splash of vegetable broth or water. Heat until it is warm throughout. You can also microwave it in a bowl, stirring halfway for even heating. Enjoy your soup hot! I suggest using ripe plum tomatoes for this soup. They have a nice balance of sweetness and acidity. Roma tomatoes work well too. Look for tomatoes that feel heavy and smell sweet. Fresh tomatoes give the best flavor, but canned tomatoes can work in a pinch. Choose whole peeled tomatoes if you go the canned route. Yes, you can make this soup ahead of time. Simply prepare it and let it cool. Store it in an airtight container in the fridge for up to four days. You can also freeze it for up to three months. Just remember to let it cool completely before freezing. Reheat it gently on the stove before serving. To thicken your soup, add more heavy cream or a bit of cornstarch mixed with water. Pureeing more of the soup can also help thicken it. If it’s too thick, just add more vegetable broth. Stir well and heat it up again. Adjust to your desired consistency. For a smoother texture, blend it longer. You can easily customize it to your liking. For the complete recipe, check the Full Recipe provided. This blog post covered all you need for a great roasted tomato basil soup. We looked at key ingredients, cooking steps, and tips to enhance flavors. You can try various options, from creamy to dairy-free. Proper storage can keep your leftovers fresh. If you follow these steps, you'll enjoy a delicious soup every time. Remember, cooking is about experimenting. Don't be afraid to try new flavors or techniques. Your next batch of soup could be your best!

Roasted Tomato Basil Soup Flavorful and Simple Recipe

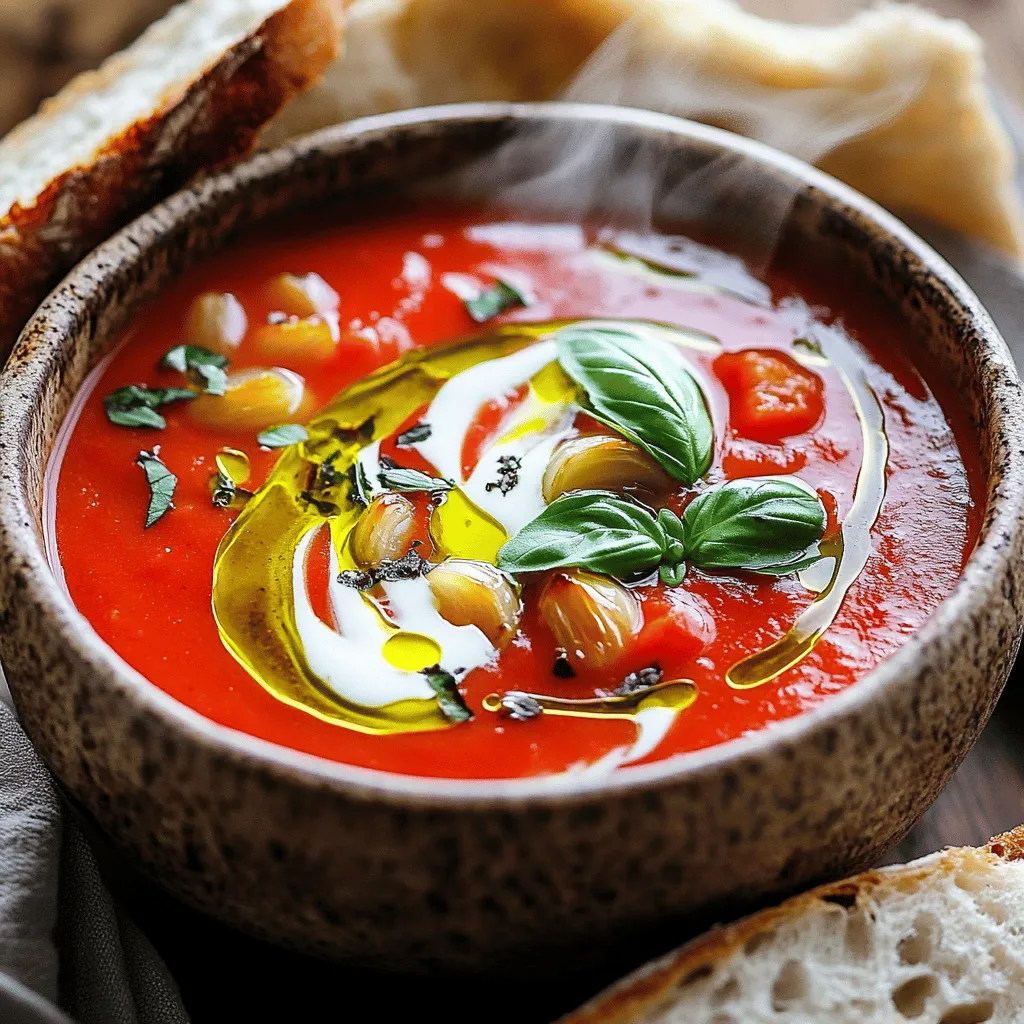
Are you ready to enjoy a bowl of warm comfort? I’ll show you how to make Roasted Tomato Basil Soup

For baked chicken taquitos, you need a few key items. These ingredients create a tasty filling. Here’s what you will gather: - 2 cups shredded cooked chicken - 1 cup black beans, rinsed and drained - 1 cup corn kernels (fresh or frozen) - 1 cup shredded cheddar cheese - 10 small corn tortillas - 2 tablespoons olive oil Seasonings bring out the best flavors in your taquitos. I use simple spices that add depth. Here’s what you need: - 1 teaspoon cumin - 1 teaspoon garlic powder - 1 teaspoon onion powder - 1/2 teaspoon smoked paprika - Salt and pepper to taste These spices enhance the taste of the chicken and beans. You will love the warmth and aroma they add. You can serve your taquitos with a few extras. These items make your meal even more special. Consider these optional ingredients: - Salsa for serving - Fresh cilantro for garnish Adding salsa provides a fresh kick. Cilantro adds a nice touch of color and flavor. These options make your dish look and taste amazing. For the full recipe, check out the details above. Enjoy making these crispy and flavorful treats! First, preheat your oven to 400°F (200°C). This step gets your oven ready for the taquitos. In a large bowl, mix the shredded cooked chicken, black beans, corn, shredded cheese, cumin, garlic powder, onion powder, smoked paprika, salt, and pepper. Use a spoon to combine them well. You want every bite to be full of flavor! If your corn tortillas feel hard, warm them in the microwave. Heat them for about 30 seconds to make them soft and easy to roll. This makes filling them much easier. Now, it’s time to fill the taquitos! Take a warm tortilla and place about 2 tablespoons of the chicken mixture in the center. Roll it tightly from one end to the other. Make sure to tuck in the sides as you roll. This helps keep the filling inside. Once you have rolled all the taquitos, place them seam-side down on a baking sheet lined with parchment paper. This keeps them from sticking. Next, brush the tops of the taquitos with olive oil. This gives them that crispy texture we all love. Make sure each taquito gets a nice coat of oil. Now, put the baking sheet in the preheated oven. Bake for 20-25 minutes, or until the taquitos turn golden brown and crispy. Keep an eye on them to avoid burning. When they are done, take them out and let them cool slightly. Serve them with salsa on the side and garnish with fresh cilantro. Enjoy your crunchy and tasty baked chicken taquitos! For the complete guide, check out the Full Recipe. To get crispy taquitos, use olive oil wisely. Brush the tops before baking. This helps them brown and crisp nicely. Make sure to place them seam-side down on the baking sheet. This keeps them rolled tight and prevents them from unrolling. Bake them until golden brown, about 20 to 25 minutes. Corn tortillas work best for taquitos. They are thin and get crispy when baked. Look for small, fresh corn tortillas. If they are stiff, warm them in the microwave for about 30 seconds. This makes them easier to roll without breaking. You can also try flour tortillas, but they won’t be as crispy. Serve your taquitos with a side of salsa. Fresh salsa adds flavor and a nice kick. You can also top them with avocado or guacamole for creaminess. Fresh cilantro makes a great garnish. It adds color and a fresh taste. Enjoy these with a cold drink for a perfect meal! For more details on making these tasty treats, check the Full Recipe. {{image_2}} You can switch the chicken for other meats. Ground beef or turkey works well. Just cook the meat first. Shred or crumble it into small pieces. Mix it with the other filling ingredients. This change adds a new flavor. Beef gives a richer taste, while turkey is leaner. For a meat-free version, skip the chicken. You can use more beans or veggies instead. Try adding sautéed bell peppers, zucchini, or mushrooms. These add texture and taste. Use a mix of black beans and pinto beans for extra protein. You can also add cheese for creaminess. Want more heat? Add chopped jalapeños or diced green chilies to the filling. You can also sprinkle in some cayenne pepper or crushed red pepper flakes. Adjust the amount to your liking. For a milder flavor, leave out the spicy ingredients. Enjoy experimenting with flavors! For the full recipe, check the [Full Recipe]. After you enjoy your taquitos, let them cool completely. Place them in an airtight container. Keep them in the fridge. They will stay fresh for up to three days. This way, you can savor those yummy flavors again! To reheat, preheat your oven to 375°F (190°C). Place the taquitos on a baking sheet. Heat them for about 10 to 15 minutes, or until they are hot and crispy again. You can also use a microwave if you're in a hurry. Just warm them for about 30 seconds, but they won’t be as crispy. Want to save some for later? You can freeze taquitos! First, let them cool completely. Wrap each taquito in plastic wrap. Then, place them in a freezer-safe bag. They can last up to three months in the freezer. When you’re ready to eat, just bake them straight from the freezer. Bake at 400°F (200°C) for about 25 to 30 minutes. This makes for a quick and tasty meal! For the full recipe, check out the complete guide to Baked Chicken Taquitos. Yes, you can use frozen chicken. Just make sure to cook it first. You can boil, bake, or sauté it until it's fully cooked. After cooking, shred the chicken and follow the recipe as usual. Using frozen chicken can save time if you are in a hurry. Just remember to check that it is thoroughly cooked before mixing it with the other ingredients. To keep your taquitos crispy, here are some tips: - Use fresh or warmed tortillas. This helps them stay pliable and roll easily. - Avoid overfilling the tortillas. Too much filling can cause sogginess. - Brush the rolled taquitos with olive oil. This helps create a crispy outer layer while baking. - Bake them until golden brown. This ensures they are crispy and delicious. You can serve taquitos with many tasty sides. Here are some great options: - Salsa is a classic choice. It adds a zesty kick. - Guacamole pairs well and adds creaminess. - A fresh salad can balance the meal. - Rice or beans make a filling side. - Add some sour cream for a rich touch. You can find the full recipe for these crispy baked chicken taquitos to explore more ideas! You now have a clear recipe and tips for baked chicken taquitos. From selecting the right ingredients to achieving that perfect crispy texture, you can make a tasty meal. Variations give you options for different diets. Remember to store leftovers properly and reheat them for later. With a few simple steps, you’ll serve delicious taquitos that everyone will love. Enjoy making and sharing this fun dish!

Baked Chicken Taquitos Crispy and Flavorful Treat

If you love crispy snacks packed with flavor, you’re in for a treat! Baked Chicken Taquitos are a fun way

To make the best cinnamon sugar donut muffins, you need simple, fresh ingredients. Here’s what you’ll need: - 1 ½ cups all-purpose flour - 1 tsp baking powder - ½ tsp baking soda - ½ tsp salt - ½ tsp ground cinnamon - ¼ cup unsalted butter, softened - ¾ cup granulated sugar - 1 large egg - 1 tsp vanilla extract - ½ cup buttermilk - Cinnamon sugar coating ingredients: - ¼ cup granulated sugar - 1 tbsp ground cinnamon - 2 tbsp melted butter Each ingredient plays a key role in making muffins soft and tasty. The butter adds richness, while the buttermilk makes them moist. The baking powder and baking soda help them rise, giving that perfect fluffy texture. Using fresh ground cinnamon will make the flavors pop. You can even adjust the sugar levels based on your taste. For a fun twist, try mixing in some chocolate chips or nuts. For the full recipe, just follow the steps and enjoy your masterpiece! Set your oven temperature to 350°F (175°C). This is the perfect heat for baking. Grease your muffin tin with some butter or use paper liners. This helps the muffins come out easily. In a mixing bowl, whisk together the following: - 1 ½ cups all-purpose flour - 1 tsp baking powder - ½ tsp baking soda - ½ tsp salt - ½ tsp ground cinnamon Make sure to mix well. This step ensures even flavors throughout the muffins. In another bowl, beat together: - ¼ cup unsalted butter, softened - ¾ cup granulated sugar Mix until it gets light and fluffy. This may take about 2-3 minutes. Next, add in: - 1 large egg - 1 tsp vanilla extract Mix until everything is well combined. Gradually add your dry ingredients to the wet mixture. Alternate this with: - ½ cup buttermilk Start and end with the dry mix. This helps keep the batter smooth, so mix until just combined. Spoon the batter into your prepared muffin cups. Fill each cup about ⅔ full to allow room for rising. Bake in the preheated oven for 15-18 minutes. A toothpick inserted into the center should come out clean. While the muffins bake, prepare your cinnamon sugar. In a small bowl, mix: - ¼ cup granulated sugar - 1 tbsp ground cinnamon This will give your muffins that sweet, cinnamon flavor. Once the muffins are baked, let them cool in the tin for about 5 minutes. Then, brush the tops with: - 2 tbsp melted butter Immediately dip each muffin into the cinnamon sugar mixture until well coated. This adds a delightful crunch and sweetness that makes them special. To check if your muffins are done, insert a toothpick into the center. If it comes out clean, they are ready. You can also lightly press the top. If it springs back, you’re good to go. Keep an eye on them after the 15-minute mark. If they look golden brown, they’re likely done. Buttermilk is key for moisture in these muffins. It helps keep them soft and fluffy. After baking, store muffins in an airtight container. This will help them stay fresh. If you have extras, consider freezing them. Just wrap them tightly in plastic wrap, then place them in a freezer bag. They will taste great later! For a great cinnamon sugar coating, brush each muffin with melted butter right after baking. This helps the sugar stick. Mix your cinnamon and sugar well before coating. Dip the muffin in the mixture so it covers all sides. Shake off any excess. This way, you get a nice, even layer of sweetness. {{image_2}} You can make your cinnamon sugar donut muffins even better. Adding nuts, chocolate chips, or fruit can change the taste. For nuts, use walnuts or pecans. They add crunch and flavor. If you love chocolate, mix in mini chocolate chips. They melt and create a sweet surprise. You can also add fresh fruit. Blueberries or diced apples work well. Just fold in the extras gently to avoid breaking the batter. Want a healthier version? You can use whole wheat flour instead of all-purpose flour. This switch adds fiber and makes the muffins more filling. Another option is to cut back on sugar. You can use less sugar in the batter and the coating. Try using natural sweeteners like honey or maple syrup. They add flavor without too much sugar. You can still enjoy these muffins while staying mindful of health. If you want a fun twist, try a glaze instead of the cinnamon sugar coating. To make a simple glaze, mix powdered sugar with milk. Start with one cup of powdered sugar and a few tablespoons of milk. Stir until smooth. After baking, dip the tops of the muffins into the glaze. It gives a sweet, shiny finish. This glaze adds a delightful touch to your cinnamon sugar donut muffins. For the full recipe, check out the instructions above. I love to keep my cinnamon sugar donut muffins fresh. You can store them on the countertop or in the fridge. If you keep them on the countertop, place them in an airtight container. They stay fresh for about three days. If you want them to last longer, store them in the fridge. This way, they can last up to a week. To enjoy warm muffins, reheating is easy. You can use the microwave or the oven. If you use the microwave, heat them for about 10-15 seconds. If you prefer the oven, preheat it to 350°F (175°C). Place the muffins on a baking sheet and heat for about 5-10 minutes. Both methods bring back that soft, warm goodness. Freezing muffins is a great option for later enjoyment. To freeze, first, let them cool completely. Then, wrap each muffin in plastic wrap. Place the wrapped muffins in a freezer bag. Be sure to squeeze out as much air as possible. They can stay in the freezer for up to three months. To thaw, just leave them in the fridge overnight or at room temperature for a few hours. Enjoy your delicious muffins anytime! For the complete recipe, check out the Full Recipe. Yes, you can use regular milk. If you do, add a splash of vinegar or lemon juice. This will help create acidity, making it similar to buttermilk. Use one tablespoon for each cup of milk. Let it sit for about five minutes before using. This small trick will keep your muffins soft and tasty. If you run out of ground cinnamon, don’t worry! You can use nutmeg or pumpkin pie spice instead. Both spices add a warm flavor to your muffins. Just use the same amount as you would cinnamon. Experiment and see which flavors you like best. To check if your muffins are done, stick a toothpick in the center. If it comes out clean, they are ready. You can also gently press the tops. If they spring back, they are done. Keep an eye on them during baking. Every oven is different. You may find cinnamon sugar donut muffins at local bakeries or cafes. Many grocery stores also sell them in their bakery section. If you want the best, check out artisanal bakeries. They often make fresh versions. Asking around in your community can lead you to great finds! Yes, you can make mini muffins! Just adjust the baking time. Fill each mini cup about halfway. Bake for about 10-12 minutes instead of the full time. Check doneness with a toothpick. These little treats are perfect for parties or snacks. Each muffin has about 150 calories. They contain roughly 5 grams of fat, 2 grams of protein, and 23 grams of carbs. You also get a good amount of sugar from the coating. If you want to make them healthier, consider using whole wheat flour or less sugar. For the full recipe, check out the details above! In this blog post, I shared a simple recipe for delicious cinnamon sugar muffins. We covered key ingredients, step-by-step instructions, and tips for success in baking. Remember, using buttermilk keeps your muffins moist and flavorful. Feel free to add your favorite nuts or fruits for a twist. Store the muffins properly for the best taste. You can even make mini versions! Try these ideas, enjoy the process, and savor the muffins fresh from your oven. Happy baking!

Cinnamon Sugar Donut Muffins Simple and Tasty Treat

Craving a sweet treat that’s easy to make? Look no further! These Cinnamon Sugar Donut Muffins combine the soft texture

To make Chocolate Peanut Butter Energy Balls, you need these main items: - 1 cup rolled oats - 1/2 cup natural peanut butter - 1/3 cup honey or maple syrup - 1/4 cup unsweetened cocoa powder These ingredients come together to create a tasty and healthy snack. Rolled oats give you fiber, while peanut butter adds protein. Honey or maple syrup provides natural sweetness, and cocoa powder gives a rich chocolate flavor. You can enhance the energy balls with these extras: - 1/4 cup dark chocolate chips - 1/4 cup ground flaxseed - 1 teaspoon vanilla extract - A pinch of sea salt These add-ins boost flavor and nutrition. Dark chocolate chips add indulgence. Flaxseed offers omega-3s, while vanilla extract adds aroma. A pinch of sea salt balances the sweetness. Each energy ball is packed with good nutrients. Here are some key points: - Calories per serving: About 100 - Macronutrient breakdown: 5g protein, 10g carbs, 6g fat - Health benefits: These ingredients promote energy and fullness. Rolled oats and peanut butter help keep you full. They also provide lasting energy for your day. Enjoy these energy balls as a healthy snack or a quick breakfast on the go. 1. Mixing dry ingredients In a large bowl, add the rolled oats, ground flaxseed, cocoa powder, and sea salt. Stir these dry ingredients until they blend well. 2. Combining wet ingredients In another bowl, mix the natural peanut butter, honey or maple syrup, and vanilla extract. Stir until it becomes smooth and creamy. 3. Forming the energy balls Pour the wet mix into the dry ingredients. Stir until all ingredients combine. Then, fold in the dark chocolate chips. Use your hands to scoop out a tablespoon of the mixture. Roll it into a ball. Repeat until you use all the mix. Place each ball on a parchment-lined baking sheet. - Chilling process for firmness Place the baking sheet with the balls in the fridge for about 30 minutes. This helps them firm up nicely. - Storage in an airtight container Once chilled, store the energy balls in an airtight container. Keep them in the fridge for up to one week. - Freezing for longer shelf life For longer storage, freeze the energy balls. They can last for about three months in the freezer. - Presentation ideas Serve the energy balls in a small bowl. You can sprinkle cocoa powder on top for a nice touch or use a colorful plate with fresh fruit. - Perfect pairings These energy balls pair well with yogurt or fresh fruits. They make a great snack after school or before workouts. - Ideal snacking occasions Enjoy them anytime you need a quick energy boost. They are perfect for busy mornings or afternoon cravings. For the complete breakdown of ingredients and full preparation steps, check out the Full Recipe. You can make these energy balls your own. Add spices like cinnamon or nutmeg for warmth. Try mixing in nuts such as almonds or walnuts for crunch. You can swap peanut butter for almond or sunflower seed butter if you wish. Adjust the sweetness by adding more honey or less, based on your taste. Just remember, small changes can lead to big flavor shifts! One common mistake is overmixing the ingredients. This can make the balls too tough. Another mistake is not allowing them to chill in the fridge. Chilling helps them hold their shape. Lastly, keep an eye on your ingredient ratios. Too much dry or wet can lead to a messy mix that won’t roll well. For freshness, store your energy balls in an airtight container. A glass jar works great! They can last up to a week in the fridge. If you want them to last longer, freeze them. Just make sure to separate them with parchment paper. Watch for signs they’ve gone bad, like an off smell or change in texture. {{image_2}} You can easily change the flavors of your energy balls. Here are some tasty ideas: - Peanut butter and chocolate chip: This classic mix is always a hit. The chocolate chips add a sweet touch to the peanut butter base. - Almond butter and coconut: Swap peanut butter for almond butter. Add shredded coconut for a tropical twist. - Cashew butter with vanilla: Using cashew butter gives a creamy taste. A splash of vanilla makes it even more special. Feel free to change up ingredients to fit your needs: - Nut-free alternatives: Try sun butter or soy nut butter if you can't use nuts. They work great and still taste good! - Gluten-free options: Use certified gluten-free oats. This way, everyone can enjoy these energy balls. - Vegan modifications: Replace honey with maple syrup. This makes the recipe vegan and just as sweet. You can mix energy balls with other snacks for fun treats: - Energy balls in smoothie bowls: Crumble them on top of smoothie bowls. They add crunch and flavor. - Pairing with granola or yogurt: Enjoy energy balls with your favorite granola or yogurt. It’s a great snack or breakfast. - Incorporating into trail mix: Chop the energy balls into pieces and add them to trail mix. This gives a sweet surprise with each bite. These variations and swaps make your chocolate peanut butter energy balls even more exciting. For the full recipe, check out the link! These energy balls stay fresh in the fridge for about one week. Store them in an airtight container to keep them from drying out. If you want to save them longer, freeze them! They can last up to three months in the freezer. Just let them thaw before you enjoy. Yes, you can easily modify the recipe for allergies. For nut-free options, use sunflower seed butter or soy nut butter instead of peanut butter. For gluten-free variations, make sure to use certified gluten-free oats. This way, everyone can enjoy these tasty snacks! These energy balls offer great nutritional benefits. They contain whole grains from oats, healthy fats from peanut butter, and natural sweetness from honey or maple syrup. They give you a good energy boost, making them perfect for post-workout snacks or a midday pick-me-up. Enjoy them knowing they are good for you! To make Chocolate Peanut Butter Energy Balls, you need just a few simple ingredients. Grab rolled oats, natural peanut butter, honey or maple syrup, cocoa powder, dark chocolate chips, ground flaxseed, vanilla extract, and a pinch of sea salt. Here’s how to make them in a few easy steps: 1. Mix the dry ingredients in a bowl. 2. Combine the wet ingredients in another bowl. 3. Stir the wet mix into the dry mix. 4. Roll the mixture into small balls. 5. Chill them in the fridge for 30 minutes. Preparation time is about 10 minutes, and you will need 30 minutes to chill. This recipe makes 12 to 15 energy balls. These energy balls are great for a quick snack or a tasty treat. You can serve them in a bowl with a sprinkle of cocoa powder or on a colorful plate with fresh fruit. Enjoy the sweet and nutty flavor! Now you know how to make Chocolate Peanut Butter Energy Balls. You learned the key ingredients and optional add-ins. You have steps for preparation and storage to keep them fresh. You also saw tips to customize flavors and avoid common mistakes. These energy balls offer a great snack that fuels your day. Try different ingredients to find your favorite mix. Enjoy these healthy bites on your next adventure or as a quick treat! Happy snacking!

Chocolate Peanut Butter Energy Balls Simple Snack Idea

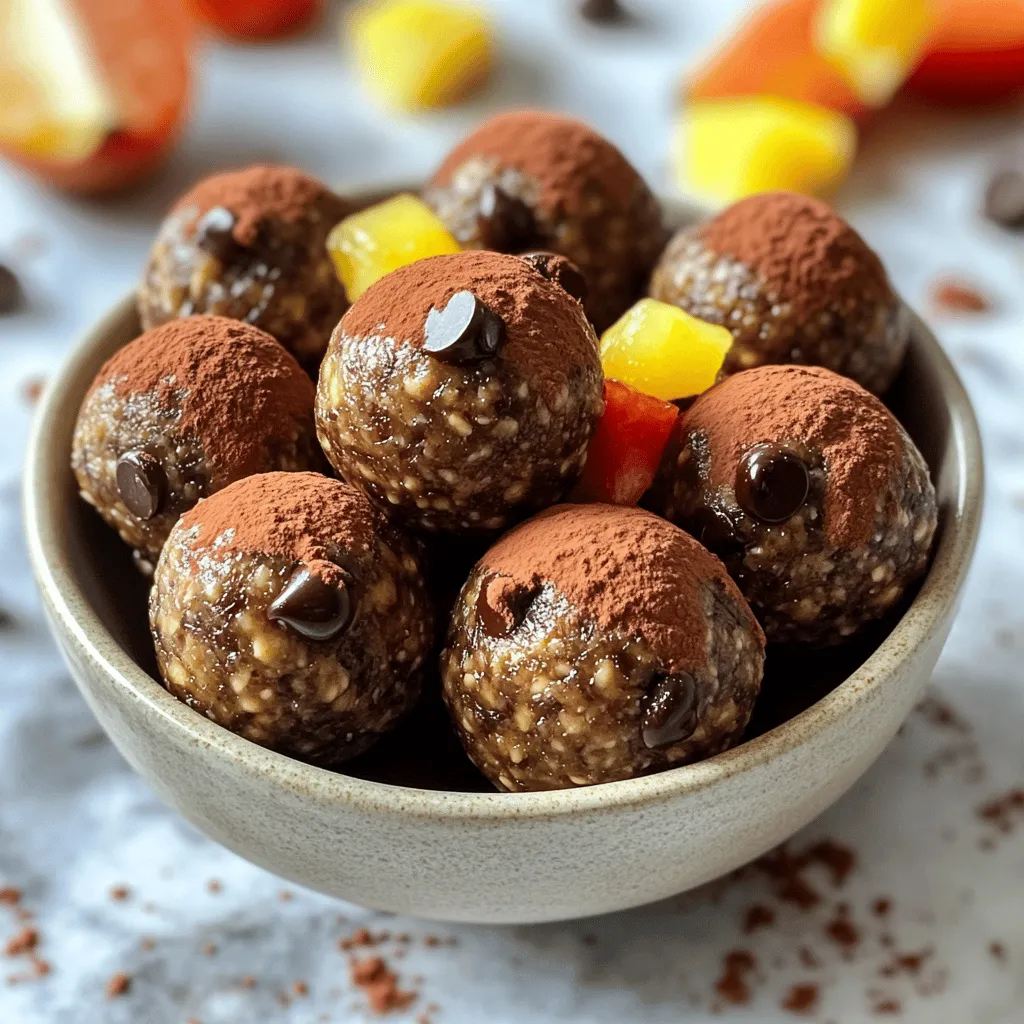
Looking for a tasty and simple snack? Chocolate Peanut Butter Energy Balls might be your answer! These bites are not

For a tasty Baked Chicken Parmesan, gather these key ingredients: - 4 boneless, skinless chicken breasts - 1 cup breadcrumbs (preferably panko for extra crunch) - 1/2 cup grated Parmesan cheese - 1 cup marinara sauce (homemade or store-bought) - 1 cup shredded mozzarella cheese These ingredients create a delicious base for the dish. The chicken breasts are juicy, and the cheeses add a rich flavor. The marinara sauce brings everything together. To enhance the taste, you will need these spices: - 1 teaspoon dried basil - 1 teaspoon garlic powder - 1 teaspoon onion powder - Salt and pepper to taste These spices are simple but effective. They add depth to your chicken without overpowering it. To finish your dish, consider adding: - Fresh basil leaves Fresh basil not only looks nice, but it also adds a bright flavor. You can sprinkle it on top just before serving for a lovely touch. This Baked Chicken Parmesan recipe is straightforward. Follow the Full Recipe for easy steps to enjoy this meal at home. First, preheat your oven to 400°F (200°C). This helps the chicken cook evenly. Next, gather all your ingredients. You will need chicken breasts, breadcrumbs, marinara sauce, and cheese. Having everything ready makes cooking easier. Now, let’s mix the breadcrumb mixture. In a shallow bowl, combine the breadcrumbs, grated Parmesan, dried basil, garlic powder, onion powder, salt, and pepper. This mix gives the chicken its flavor. For the chicken, take each breast and brush them with olive oil on both sides. This helps the breadcrumbs stick. Dip each chicken breast into the breadcrumb mix, pressing down firmly. Make sure the crumbs stick well. Place the coated chicken breasts on a baking sheet lined with parchment paper. Bake them in the oven for 25 minutes. Flip them halfway to get that nice crispiness. After 25 minutes, take the chicken out. Top each piece with marinara sauce and a layer of mozzarella cheese. This adds creaminess and flavor. Return the chicken to the oven for another 10 minutes. You want the cheese to melt and bubble. Once it is done, let the chicken rest for 5 minutes. Garnish with fresh basil leaves before serving. Enjoy your delicious Baked Chicken Parmesan! For the complete details, check the Full Recipe. To get that perfect crunch, start with the right breadcrumbs. I suggest using panko breadcrumbs. They are light and crisp, giving your chicken a nice texture. Regular breadcrumbs can work, but panko shines for this dish. Next, don’t skip the olive oil. It helps the crumbs stick and creates that golden crust. Brush both sides of the chicken with olive oil. This step is key for that crispy finish. Adding herbs and spices can really boost the taste. I often add some dried oregano or Italian seasoning for extra flavor. These herbs give a lovely aroma and depth to the dish. For the marinara sauce, go for homemade if you can. It tastes fresher and richer. If you use store-bought, look for one with no added sugars. This keeps the sauce savory and delicious. Pair your Baked Chicken Parmesan with sides that complement its flavor. A simple green salad or garlic bread works well. For presentation, slice the chicken before serving. Arrange it on a nice plate and drizzle extra marinara on top. Add fresh basil leaves for a pop of color. This makes the dish look as good as it tastes. For the full recipe, check the details provided above. {{image_2}} You can change the protein in this dish. Instead of chicken, try turkey or eggplant. Both options taste great and provide a nice twist. For cheese, use provolone or gouda if you want something different. These cheeses melt well and add rich flavor. Want a quicker option? Use an air fryer for your Baked Chicken Parmesan. It cooks faster and gives you that nice crisp. Just set it to 375°F (190°C) and cook for about 15-20 minutes. Flip the chicken halfway for even cooking. You can also use a skillet. Sear the chicken in olive oil first, then bake it in the oven to finish. This method adds flavor and keeps the chicken juicy. If you're gluten-free, use gluten-free breadcrumbs. They work just as well and keep the dish tasty. For dairy-free options, look for cheese alternatives made from nuts or soy. These options melt nicely and taste great. You can enjoy this dish even with dietary restrictions! After you enjoy your baked chicken Parmesan, store leftovers in proper containers. Use airtight containers to keep the chicken fresh. This helps prevent moisture loss and keeps flavors intact. Baked chicken Parmesan lasts about 3 to 4 days in the fridge. Be sure to let it cool down first before sealing the container. Freezing is a great way to keep extra chicken Parmesan. First, allow it to cool completely. Then, wrap each piece in plastic wrap. After that, place the wrapped pieces in a freezer bag. Remove as much air as you can. Baked chicken Parmesan can last for about 3 months in the freezer. When you’re ready to enjoy it, thaw it in the fridge overnight. This helps keep the texture nice. To reheat, you have two main options: oven or microwave. The oven gives the best results. Preheat it to 350°F (175°C). Place the chicken on a baking sheet and cover it with foil. Heat for about 15-20 minutes. This keeps it crispy. If you use the microwave, place the chicken on a plate. Heat in 1-minute intervals until warm. The microwave may make it softer, but it's faster. Enjoy your meal! Yes, you can make Baked Chicken Parmesan ahead of time. Cook the chicken and let it cool. Then, cover it and store it in the fridge. You can prepare it a day in advance. When you are ready to serve, add the sauce and cheese. Bake it again until hot and bubbly. This keeps the flavors fresh and tasty. I recommend using mozzarella cheese for that gooey, melty texture. You can also mix in provolone or gouda for a unique flavor. Parmesan cheese adds a nice sharpness and depth. The combination of these cheeses really enhances the dish. Use fresh cheese for the best results. Absolutely! Store-bought marinara sauce works great in this recipe. It saves time and still tastes delicious. Look for a brand with simple, quality ingredients. You can enhance the flavor by adding extra herbs or spices if you like. Homemade sauce is always an option too. To check if the chicken is fully cooked, use a meat thermometer. The internal temperature should reach 165°F (75°C). If you don’t have one, cut into the thickest part of the chicken. The meat should be white and the juices should run clear. This ensures your chicken is safe to eat. Serve Baked Chicken Parmesan hot, right from the oven. Pair it with a side of pasta or a fresh salad. A sprinkle of fresh basil adds a nice touch. You could serve it with garlic bread for a complete meal. For a fun twist, try it on a sub roll for a sandwich! For the full recipe, check the previous sections. This blog post covered all you need for Baked Chicken Parmesan. We talked about the key ingredients, like chicken breasts and marinara sauce. I shared tips for perfecting the crunch and enhancing flavor. You learned about fun variations and how to store leftover meals. With these simple steps, you can make this dish a family favorite. Enjoy making it, and have fun experimenting with your own twist!

Baked Chicken Parmesan Tasty and Simple Recipe

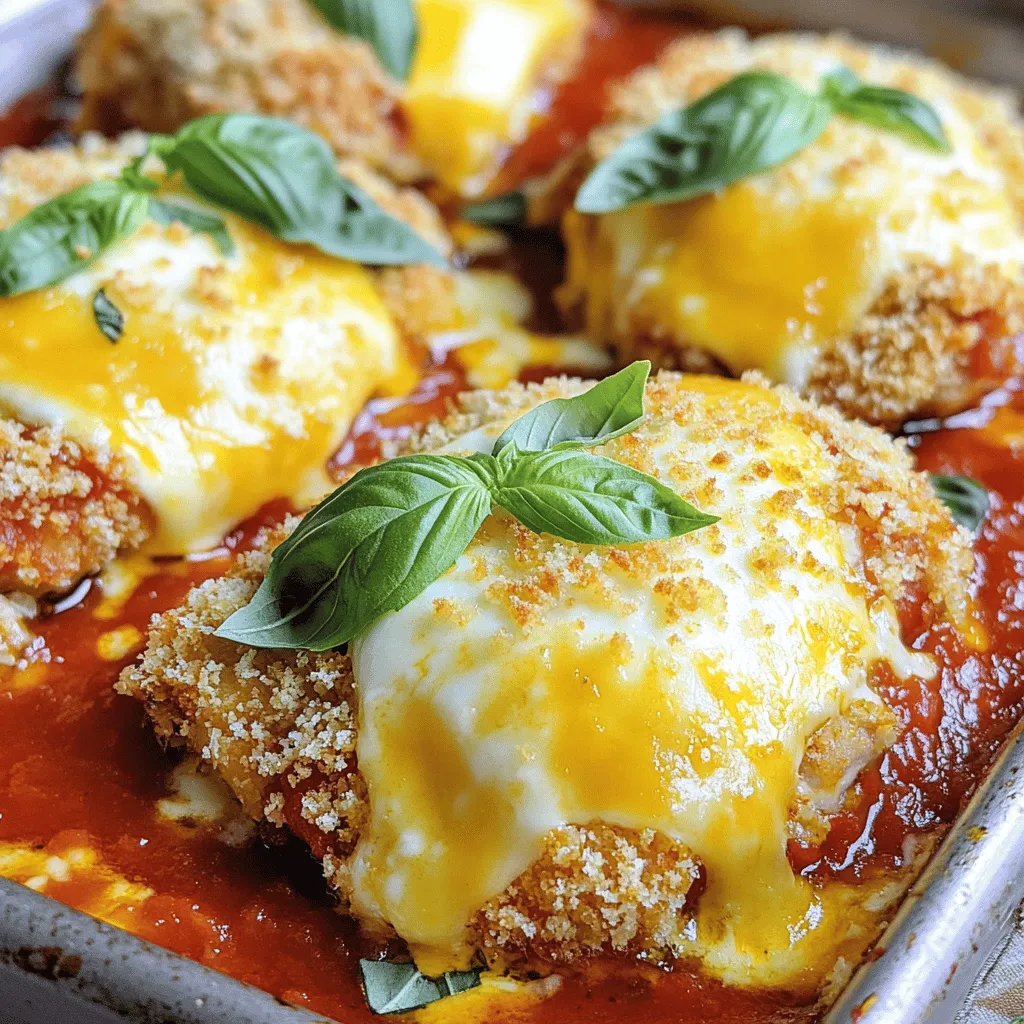
If you crave a dish that’s both delightful and easy, look no further! My Baked Chicken Parmesan recipe is your

To make Cheesy Cauliflower Gratin, you need fresh, simple ingredients that create rich flavors. Here’s what you'll need: - 1 medium head of cauliflower, cut into florets - 2 cups sharp cheddar cheese, grated - 1 cup Gruyère cheese, grated - 1 cup heavy cream - 1 cup milk - 2 tablespoons unsalted butter - 2 tablespoons all-purpose flour - 1 teaspoon garlic powder - 1 teaspoon onion powder - Salt and pepper to taste - 1/2 cup breadcrumbs (for topping) - 2 tablespoons fresh parsley, chopped (for garnish) These ingredients blend together to form a creamy, cheesy delight. The cauliflower gives it a healthy twist while the cheese adds that irresistible comfort. I love using sharp cheddar for its bold taste, and Gruyère brings a nutty flavor. The heavy cream and milk create a smooth sauce that coats each floret perfectly. When you prepare this dish, make sure to use fresh cauliflower. It keeps the dish light and bright. The breadcrumbs on top give it a lovely crunch, while parsley adds a pop of color. You can find the Full Recipe for detailed steps to follow. Enjoy cooking this classic comfort dish! - First, cut your cauliflower into small florets. - Bring a pot of salted water to a boil. - Blanch the florets in boiling water for about 5 minutes. - The cauliflower should be slightly tender but still firm. - Once done, drain the florets and set them aside. - In a medium saucepan, melt the butter over medium heat. - Add the flour and whisk it for 1-2 minutes to make a roux. - Gradually pour in the milk and cream while whisking. - Keep stirring until the mix thickens, about 5 minutes. - Add garlic powder, onion powder, salt, and pepper to flavor the sauce. - Remove the saucepan from the heat. - Fold in 1.5 cups of cheddar and Gruyère cheese until melted. - In a large bowl, mix the blanched cauliflower with the cheese sauce. - Stir until every piece of cauliflower is coated. - Transfer this cheesy mixture into a greased baking dish. - In a small bowl, mix the remaining cheese with breadcrumbs. - Sprinkle this mix evenly over the top of your dish. - Bake at 375°F (190°C) for 25-30 minutes. - The top should be golden and bubbling when done. - Let it rest for 5 minutes before serving. - Garnish with fresh parsley for a pop of color. For the Full Recipe, check the ingredients and steps listed above. Enjoy this comforting dish! When picking cauliflower, look for firm, white heads. Freshness shows in tight florets. Avoid any brown spots or wilting leaves. These signs mean the cauliflower is old. To clean it, remove the leaves and cut off the stem. Rinse the florets under cold water. Make sure to wash all the nooks and crannies. This gets rid of dirt and bugs. For a great gratin, use sharp cheddar and Gruyère cheese. These cheeses melt well and add rich flavor. You can also mix in mozzarella for extra creaminess. If you prefer dairy-free options, try vegan cheese or cashew cheese. These can work well for a tasty, creamy dish. To make your gratin pop, add spices and herbs. Garlic powder and onion powder work wonders. You can also try adding thyme or nutmeg for a deeper flavor. When it comes to salt, taste as you go. Each cheese has its salt level. Adjust the salt to your liking for the best taste. {{image_2}} You can easily switch up the veggies in this dish. Broccoli and Brussels sprouts work well. They add great flavor and nutrition. You can also mix different cheeses. Mozzarella and gouda can bring a unique taste. Try a blend for a fun twist. You can cook this dish on the stovetop or in the oven. The stovetop method is quick and easy. It’s perfect for busy nights. You can also make it ahead of time. Just prepare the gratin and store it in the fridge. Bake it when you're ready to serve. It’s a great way to save time. Cheesy cauliflower gratin pairs well with many main dishes. It goes nicely with roasted chicken or baked fish. You can also serve it with a fresh salad for balance. Think about adding some crusty bread too. It helps soak up all that cheesy goodness! To store leftovers, place them in an airtight container. This keeps the cheesy cauliflower gratin fresh. Make sure to refrigerate within two hours of cooking. It will last up to three days in the fridge. When reheating, use the oven for the best results. Preheat it to 350°F (175°C). Cover the dish with foil to keep moisture in. Heat for about 15-20 minutes or until warm. You can also use the microwave, but the oven keeps the top crispy. To freeze cheesy cauliflower gratin, let it cool completely first. Portion it into freezer-safe containers. Leave some space at the top for expansion. It will stay fresh for up to three months. When you’re ready to eat, thaw it in the fridge overnight. Reheat in the oven at 350°F (175°C) for about 25-30 minutes. Cover with foil if it starts to brown too much. Enjoy the creamy, cheesy goodness again! For the full recipe, check the earlier section. You can use whole milk or half-and-half. Both make a lighter dish. You can also try coconut milk for a dairy-free option. Just remember, these swaps may change the taste and texture a bit. Yes, you can prepare it in advance. Cook the cauliflower and make the cheese sauce. Put everything together and store it in the fridge. Bake it just before serving for the best results. To reheat, place it in the oven at 350°F (175°C). Cover it with foil to keep it creamy. Heat for about 20 minutes or until warm. This method prevents it from drying out. It lasts about 3-5 days in the fridge. Keep it in an airtight container. Always check for signs of spoilage before eating leftovers. Yes, you can make it gluten-free easily. Just swap the all-purpose flour for a gluten-free flour blend. This keeps the dish safe for those with gluten sensitivities. Absolutely! Frozen cauliflower works well. Just thaw it and drain any extra water. This will help keep your gratin from being watery. You might need to adjust the cooking time slightly, so keep an eye on it. Cheesy Cauliflower Gratin is an easy dish to make and enjoy. You learned how to pick fresh cauliflower, create a creamy cheese sauce, and bake it to perfection. Tips and variations helped expand your cooking ideas. Remember, this dish is flexible. You can switch veggies or cheese types to fit your taste. With great storage options, you can enjoy leftovers for days. So dive in and create your own twist on this warm, cheesy classic!

Cheesy Cauliflower Gratin Irresistible Comfort Dish

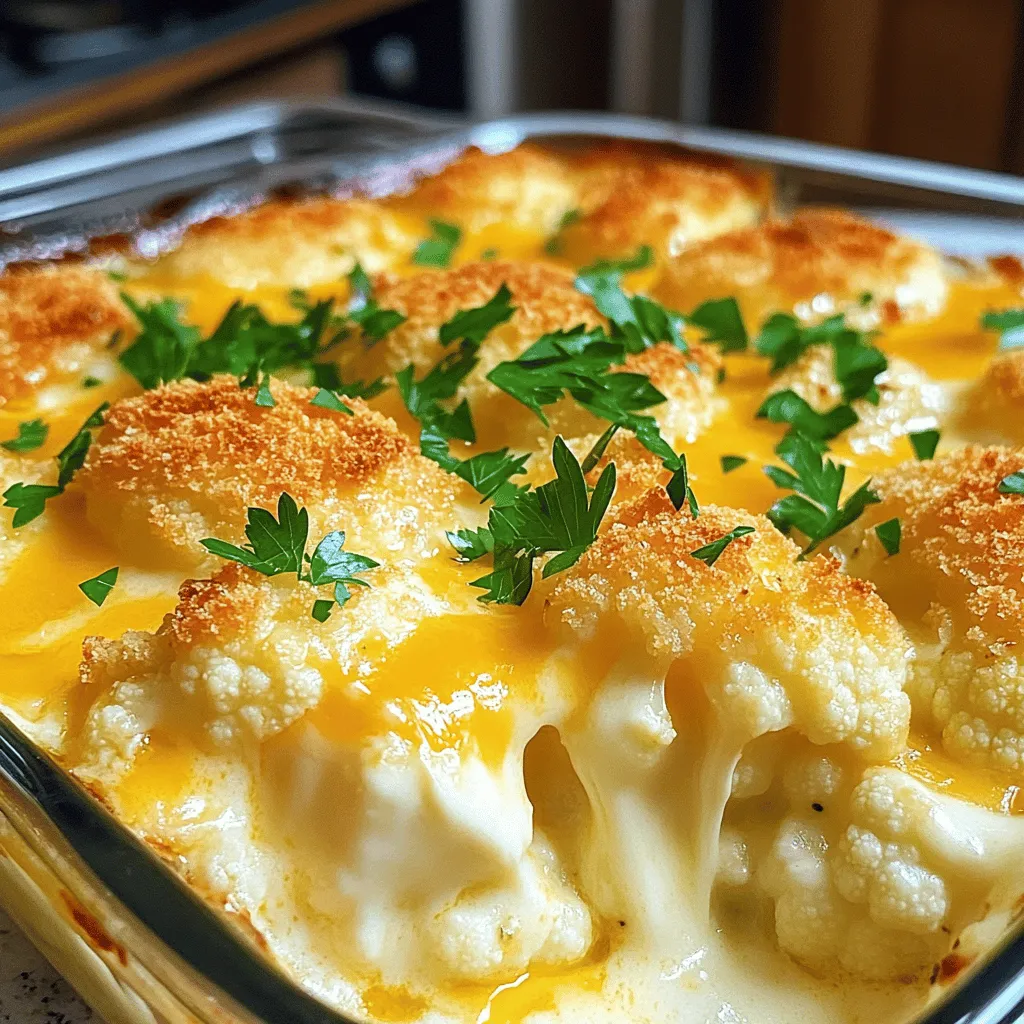
Craving a warm, cheesy dish that will make your taste buds sing? Look no further! Cheesy Cauliflower Gratin is your

For these tasty tacos, you will need: - 2 chicken breasts, cut into strips - 2 tablespoons olive oil - 2 tablespoons fresh lime juice - 1 tablespoon lime zest - 1-2 jalapeños, finely chopped (seeds removed for less heat) - 2 garlic cloves, minced - 1 teaspoon ground cumin - 1 teaspoon chili powder - Salt and pepper to taste - 8 small corn or flour tortillas - 1 cup purple cabbage, shredded - 1 avocado, sliced - Fresh cilantro, for garnish - Optional: lime wedges for serving You can add some extras for more flavor: - Sliced radishes for crunch - Diced tomatoes for freshness - Sour cream for creaminess If you don't have something, don't worry! Here are some swaps: - Use chicken thighs instead of breasts for more flavor. - Swap olive oil with avocado oil for a different taste. - If you don’t like jalapeños, use bell peppers for a milder flavor. - You can replace purple cabbage with green cabbage or lettuce. This recipe is simple and fun to make. Check out the Full Recipe to get all the details! To start, gather your ingredients. In a bowl, add the olive oil, lime juice, and lime zest. Next, chop the jalapeños and add them in. If you want less heat, remove the seeds. Then, add minced garlic, cumin, chili powder, salt, and pepper. Mix everything well. This marinade will give your chicken great flavor. Now, take your chicken strips and place them in the marinade. Toss the chicken to coat each piece evenly. This step is key for tasty tacos. Let the chicken marinate for at least 30 minutes. If you can, marinate it longer for even more flavor. Preheat your grill or stovetop pan over medium-high heat. Once hot, take the chicken from the marinade. Shake off any extra liquid before placing it on the grill. Grill the chicken for about 5-7 minutes on each side. You want it cooked through and slightly charred. If your pan is full, cook in batches. While the chicken cooks, warm your tortillas. You can do this on the grill or in a skillet. Heat them for about 1 minute on each side. This makes them soft and easy to fold. Once the chicken is done, it's time to assemble your tacos. Place a few strips of grilled chicken on each tortilla. Top them with shredded cabbage and avocado slices. Finish with fresh cilantro. Serve with lime wedges on the side for extra zest. For the full recipe, check out the details above. Enjoy your meal! For the best flavor, use fresh ingredients. Fresh lime juice makes a big difference. I recommend marinating the chicken for at least 30 minutes. This helps the spices soak in well. You can also try letting it marinate longer for even more flavor. Adding salt to the marinade enhances the taste. Grilling is key to great tacos. Preheat your grill to medium-high heat. This gives the chicken nice grill marks. Don't crowd the grill. Cook in batches if you need to. This ensures even cooking. Flip the chicken only once. This helps keep it juicy and tender. Serve the tacos with fresh toppings. Shredded purple cabbage adds crunch. Sliced avocado gives a creamy texture. You can also add fresh cilantro for a burst of flavor. Pair the tacos with lime wedges on the side. A cold drink, like iced tea or a light beer, complements them well. For a complete meal, serve with rice or beans. You can find the full recipe [here](#). {{image_2}} You can make these tacos spicy or mild. For a spicy kick, use more jalapeños. Keep the seeds in for extra heat. If you prefer mild, simply remove the seeds. You can also swap jalapeños for bell peppers. They add flavor without the heat. This allows everyone to enjoy the tacos, regardless of their spice tolerance. You can easily make these tacos vegetarian. Instead of chicken, use grilled veggies. Zucchini, bell peppers, and mushrooms are great options. You can also choose plant-based proteins like tofu or tempeh. Marinate them just like the chicken for extra flavor. These swaps keep the meal light yet tasty. Toppings can change the whole dish. Along with cabbage and avocado, try adding pico de gallo. Fresh salsa or a dollop of sour cream also works well. You can even add cheese for richness. Lime wedges are a must for that zesty finish. Each topping brings a new flavor and texture. Explore different combinations to find your favorite! To keep your Jalapeno Lime Chicken Tacos fresh, store leftovers in an airtight container. Make sure the chicken and toppings are separate to avoid sogginess. This way, the flavors stay bright and tasty. You can keep them in the fridge for up to three days. When you're ready to enjoy the leftovers, heat the chicken in a pan over medium heat. This method keeps the chicken juicy. Warm the tortillas in a separate skillet for a minute on each side. This keeps them soft and ready for filling. If you want to save your tacos for later, freezing works great. Place the grilled chicken in a freezer-safe bag and remove as much air as possible. You can freeze it for up to three months. Just remember to thaw it in the fridge overnight before reheating. You can also freeze tortillas if you wrap them tightly. This way, you’ll have everything ready for a quick meal. For the best taste, add fresh toppings like cabbage and avocado after reheating. Enjoy your tasty meal anytime! The best way to cut chicken for tacos is to slice it into strips. Use a sharp knife for even cuts. Make sure your chicken is slightly frozen for better control. This makes it easier to cut and helps with cooking. Yes, you can make Jalapeno Lime Chicken Tacos in advance. You can marinate the chicken ahead of time. Just let it sit in the fridge for up to 24 hours. This allows the flavors to blend well. You can also prep the toppings like cabbage and avocado earlier. To adjust the spice levels, control the jalapeños. Remove the seeds for less heat. You can use one jalapeño instead of two for milder tacos. If you like it spicy, you can add more jalapeños or even a pinch of cayenne pepper. This article has covered all you need for Jalapeno Lime Chicken Tacos. We looked at the key ingredients, step-by-step instructions, and tips to enhance flavor. You learned about variations, storage, and answers to common questions. Remember, the right marinade and grilling techniques are key. Don't shy away from trying different toppings or making it vegetarian. Enjoy making these tacos your own, and savor every bite!

Jalapeno Lime Chicken Tacos Flavorful and Simple Meal

Are you ready to spice up your weeknight dinners? My Jalapeno Lime Chicken Tacos are not just flavorful; they are

Older posts
Newer posts
← Previous Page1 … Page67 Page68 Page69 … Page85 Next →

dsad

© 2026 greenmealmap • Built with GeneratePress

Our Policies

  • Copyright Policy
  • Cookie Policy
  • GDPR Policy
  • Privacy Policy
  • Disclaimer
  • Terms Of Use

More Information

  • Home
  • About
  • Contact
  • Appetizers
  • Dessert
  • Dinner
  • Drinks
©2026, greenmealmap About Back To Top