Skip to content
DisclaimerTerms Of UseGDPR PolicyCookie Policy

greenmealmap

  • Home
  • Drinks
  • Appetizers
  • Dinner
  • Dessert
  • About
  • Contact
  • Privacy Policy
DisclaimerTerms Of UseGDPR PolicyCookie Policy

NO-ING-IMG

For this roasted carrot ginger soup, you need: - 1 lb carrots, peeled and cut into chunks - 1 medium onion, chopped - 2 tablespoons olive oil - 2 teaspoons fresh ginger, grated - 3 cups vegetable broth - 1 can (14 oz) coconut milk - 1 teaspoon ground cumin - Salt and pepper to taste - Fresh cilantro, for garnish - Optional: 1 tablespoon lemon juice for added freshness Each ingredient plays a role in making the soup rich and tasty. The carrots add natural sweetness, while the ginger gives a spicy kick. The onion brings depth, and coconut milk adds creaminess. You can swap some ingredients if needed. - Instead of carrots, you can use sweet potatoes. - For a different flavor, try using shallots in place of onion. - If you do not have coconut milk, almond milk works well too. - For a spicy touch, add a pinch of cayenne pepper. - You can use chicken broth instead of vegetable broth for a non-vegan option. These substitutions keep the soup delicious while catering to your pantry. This soup is not just tasty; it is also good for you. - Carrots provide beta-carotene, which is great for your eyes. - Ginger is known for helping with digestion and reducing inflammation. - Coconut milk offers healthy fats that can boost energy. - Onions are packed with antioxidants, which help your body stay strong. - Cumin can support digestion and add a unique flavor. With these ingredients, you enjoy a bowl of comfort that is also nutritious. {{ingredient_image_1}} Start by gathering your ingredients. You need 1 pound of carrots and one medium onion. Peel the carrots and cut them into chunks. Chop the onion into small pieces. This helps it cook faster. Place both the carrots and onions in a bowl. Add 2 tablespoons of olive oil, salt, and pepper. Toss them together until well coated. This step adds great flavor to the soup. Now, preheat your oven to 400°F (200°C). Spread the carrot and onion mix on a baking sheet. Make sure they are in a single layer. This helps them roast evenly. Roast them for 25-30 minutes. Check them halfway through and toss them again. You want the carrots to be tender and slightly caramelized. This brings out their natural sweetness. Once the veggies are roasted, transfer them to a large pot. Add 3 cups of vegetable broth and 2 teaspoons of grated ginger. Bring this mixture to a boil. Then, reduce the heat and let it simmer for 10 minutes. This allows the flavors to blend well. Using an immersion blender, blend the soup until it is smooth. If you don’t have one, you can use a countertop blender in batches. After blending, stir in 14 ounces of coconut milk and 1 teaspoon of ground cumin. Heat the soup through and taste it. Adjust the salt and pepper as needed. For a fresh touch, you can add 1 tablespoon of lemon juice. Enjoy your delicious soup! To boost the taste of your soup, consider adding a pinch of spices. Ground cumin adds warmth and depth. You can also add fresh herbs like cilantro for a bright finish. If you want some zing, a tablespoon of lemon juice adds freshness. When blending, taste your soup and adjust the salt and pepper to ensure it shines. A common mistake is not roasting the carrots long enough. Roasting brings out their natural sweetness. Make sure they get tender and caramelized. Another pitfall is adding too much liquid at once. Start with less broth, then add more if needed. Lastly, don't skip the coconut milk; it adds creaminess and balances the flavors. Using the right tools makes cooking easier. An immersion blender is great for blending soup directly in the pot. If you don't have one, a countertop blender works well too. A sharp knife helps you cut the carrots and onions easily. Finally, make sure to have a sturdy baking sheet for roasting. These tools will help you create the best roasted carrot ginger soup. Pro Tips Choose Fresh Carrots: Opt for vibrant, firm carrots for the best flavor and sweetness. Adjusting Spice Levels: If you prefer a spicier soup, consider adding a pinch of cayenne pepper or a dash of hot sauce. Blend for Creaminess: For an ultra-smooth texture, ensure to blend the soup thoroughly until all chunks are eliminated. Storage Tips: This soup stores well in the refrigerator for up to 5 days. Reheat gently on the stove. {{image_2}} You can make roasted carrot ginger soup even more exciting by adding spices. Try adding 1 teaspoon of ground coriander for a fresh note. A pinch of cayenne pepper can give it heat. For a warm touch, add a dash of cinnamon. Each spice brings a new twist to the flavor. This soup is already dairy-free, thanks to coconut milk. If you want to keep it vegan, just stick with the recipe. You can also use almond milk instead of coconut milk. This change will give the soup a nutty flavor while keeping it creamy. Feel free to mix in other veggies for added taste. Sweet potatoes add sweetness and creaminess. You can also use butternut squash for a richer flavor. Adding bell peppers gives it a nice color and taste. Just roast them along with the carrots for the best results. You can store leftover soup in the fridge. Use an airtight container to keep it fresh. It will last for about 4 to 5 days. Make sure the soup cools down before you put it in the fridge. If you want to save some for later, freezing works great. Pour the soup into freezer-safe containers. Leave some space at the top, as soup expands when frozen. It can stay good for about 3 months. When you’re ready to eat it, just thaw it overnight in the fridge. To reheat, pour the soup into a pot. Heat it over medium heat, stirring often. You can also use a microwave. Heat it in short bursts, stirring in between. If the soup is too thick, add a splash of broth or water to get the right texture. This keeps every bowl flavorful and warm. Roasted carrot ginger soup lasts about 4 to 5 days in the fridge. Store it in an airtight container. You can also freeze it for up to 3 months. Just make sure to cool it completely before freezing. This way, it keeps its great taste. Yes, you can use frozen carrots! They work well in this recipe. Just thaw them before roasting. You may need to adjust the roasting time slightly. Aim for them to be tender and slightly caramelized. This soup pairs well with crusty bread or a fresh salad. You could also serve it with grilled cheese for a cozy meal. The flavors blend nicely and make a comforting dish. Try adding a dollop of yogurt or sour cream on top for creaminess. To add some heat, try adding a pinch of cayenne pepper or red pepper flakes. You can also add fresh chili peppers when blending. Start with a small amount and taste as you go to find your perfect spice level. Roasted Carrot Ginger Soup is rich in flavor and nutrients. I covered key ingredients and their benefits, plus tips on how to prep and roast them. We explored variations to keep it interesting and how to store leftovers. Remember, you can adjust the spices to fit your taste. In the end, this soup offers warmth and comfort, making it perfect every time. Enjoy creating your own version and happy cooking!

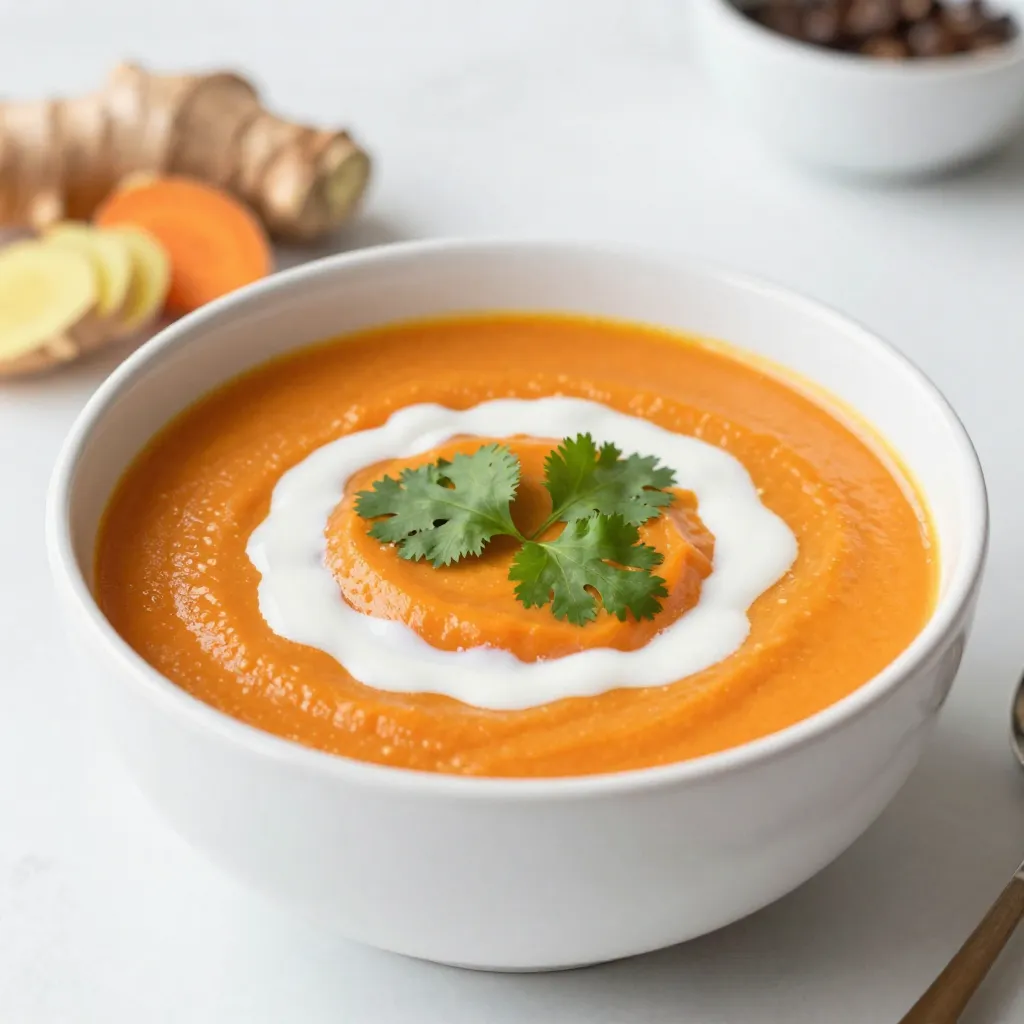
Roasted Carrot Ginger Soup Flavorful and Comforting

Looking for a warm and tasty dish that’s easy to make? Try my Roasted Carrot Ginger Soup! This flavorful blend

- 2 cups all-purpose flour - 1/2 cup warm milk - 1 large apple, peeled and diced To make these rolls tasty, you need a few main items. The flour gives the rolls their structure. The warm milk helps the dough rise and stay soft. The apple adds sweetness and flavor. - 2 tablespoons granulated sugar - 1/4 cup brown sugar - 1/4 cup caramel sauce Sweeteners bring out the flavors in the rolls. Granulated sugar helps the dough rise. Brown sugar adds a rich taste, while caramel sauce makes everything better. You can drizzle extra caramel on top for a treat. - Chopped pecans or walnuts - Nutmeg Optional items can add special touches. Nuts give a nice crunch, and nutmeg adds warmth. You can mix these in for extra flavor. {{ingredient_image_1}} To start, gather your dry ingredients. In a large bowl, mix 2 cups of all-purpose flour, 2 tablespoons of granulated sugar, 1 packet of instant yeast, and 1/2 teaspoon of salt. Make sure it is well mixed. Next, combine your wet ingredients. In another bowl, whisk together 1/2 cup of warm milk, 1/4 cup of melted unsalted butter, 1 large egg, and 1 teaspoon of vanilla extract until smooth. Now, pour the wet mixture into the dry ingredients. Stir until a dough begins to form. Kneading is next. Turn the dough onto a floured surface. Knead it for about 5 to 7 minutes. You want it to feel smooth and elastic. Time to let the dough rise. Place it in a greased bowl. Cover it with a towel and let it sit in a warm spot. Wait for about 1 hour or until it doubles in size. While the dough rises, prepare the apple filling. Take 1 large apple, peel and dice it. Toss the apple in a bowl with 1 tablespoon of lemon juice, 1/2 teaspoon of cinnamon, and 1/4 cup of brown sugar. If you like, add a pinch of nutmeg for extra flavor. Set this mixture aside. Once the dough has risen, punch it down. Roll it out on a floured surface into a rectangle, about 1/4 inch thick. Now, spread 1/4 cup of caramel sauce over the dough. Leave a small border around the edges. Evenly distribute the apple mixture on top of the caramel. If you want some crunch, sprinkle chopped pecans or walnuts over the apples. Start rolling the dough tightly from the longer side. Pinch the seam to seal it. Cut the log into 8 equal pieces. Place the rolls in a greased 9x9-inch baking dish. Cover them again and let them rise for another 30 minutes. To get smooth and elastic dough, start with the right flour. Use all-purpose flour, as it gives the best texture. When mixing, add the wet ingredients slowly. This helps the dough come together evenly. Knead the dough on a floured surface for about 5-7 minutes. You want it soft and stretchy, not sticky. For rising, find a warm spot in your kitchen. A sunny window or a cozy oven works well. Cover the dough with a towel to keep it warm. Let it rise until it doubles in size. This usually takes about an hour. Choosing the right apple is key. I recommend using Granny Smith apples. They add a nice tartness that balances the sweetness of the caramel. You can also try Honeycrisp or Fuji apples for a sweeter flavor. For an extra kick, you can add spices like nutmeg or cardamom. They pair well with cinnamon and make your rolls even tastier. Don’t forget optional toppings! Chopped pecans or walnuts add a nice crunch. When serving, presentation matters. Place the rolls on a large platter. Drizzle extra caramel sauce over the top. A sprinkle of chopped nuts adds a nice touch. For drinks, consider serving with a warm cup of cider or coffee. A scoop of vanilla ice cream on the side makes it an indulgent treat. Enjoy every bite! Pro Tips Use Room Temperature Ingredients: Ensure that your milk, butter, and egg are at room temperature for a smoother dough that rises better. Choose the Right Apples: Granny Smith apples are ideal for this recipe due to their tartness, which balances the sweetness of the caramel. Allow for Proper Rising: Give your dough enough time to rise; this is key for achieving fluffy and soft rolls. Drizzle with Warm Caramel: For a gooey finish, warm your caramel sauce slightly before drizzling over the rolls after baking. {{image_2}} You can mix things up with different fruits. Try pears or peaches for a new twist. They add a juicy flavor that pairs well with caramel. If you like a chewy texture, add dried fruits like raisins or cranberries. They bring a sweet surprise in every bite. You can change the taste of your rolls by adding flavored extracts. Almond or maple extracts give a warm, rich note. You can also use nuts for a crunch. Chopped pecans or walnuts add a nice crunch and flavor. They complement the soft rolls and sweet filling perfectly. If you need a gluten-free option, use gluten-free flour. It will still taste great! For a vegan version, swap the egg for applesauce. Use almond milk instead of regular milk. These changes keep the rolls soft and yummy while meeting dietary needs. To keep your caramel apple cinnamon rolls fresh, store them in an airtight container. This will help keep them soft. If you have leftover rolls, you can keep them at room temperature for up to three days. Just make sure they are covered well. For longer storage, freeze the rolls. Wrap each roll in plastic wrap, then place them in a freezer bag. This helps to prevent freezer burn. You can freeze them for up to three months. When you are ready to eat, just thaw them in the fridge overnight. You can heat your rolls in the microwave or the oven. If using the microwave, place a roll on a plate and cover it with a damp paper towel. Microwave it for about 15-20 seconds. This keeps the roll moist. If you prefer the oven, preheat it to 350°F (175°C). Place the rolls on a baking sheet and cover them with foil. Heat for about 10 minutes. This method helps the rolls stay soft and fluffy. Enjoy your warm treats! How do I know when the dough has risen enough? Look for the dough to double in size. This usually takes about one hour. It should feel soft and puffy when you touch it. If you poke it with your finger, the dough should spring back slowly. Can I make the rolls ahead of time? Yes, you can! Prepare the rolls up to the second rise. Cover and chill in the fridge overnight. In the morning, let them warm up for about 30 minutes before baking. What are the best ways to serve caramel apple cinnamon rolls? Serve these rolls warm on a large platter. Drizzle them with extra caramel sauce. You can also top them with chopped nuts or a scoop of vanilla ice cream for a treat. How can I make them more caramel-y? Add more caramel sauce in the filling. You can also drizzle extra on top after baking. For a rich flavor, use a thicker sauce or even make your own. Can I add other spices to the filling? Absolutely! You can add nutmeg or allspice for more depth. A pinch of ginger can also give a nice twist. Just remember to balance the flavors so they don’t overpower the apples. How can I adjust the sweetness? To lower the sweetness, reduce the brown sugar or caramel sauce. You can also use tart apples like Granny Smith. If you want it sweeter, add more caramel or sugar in the filling. In this article, we covered the key ingredients and steps to make delicious caramel apple cinnamon rolls. You learned how to prepare the dough, fill it with apples, and roll it up perfectly. I also shared tips for enhancing flavors and suggested variations to try. Remember, enjoy experimenting with different fruits and spices. Proper storage keeps your rolls fresh and tasty. Baking is all about creativity, so have fun with it!

Caramel Apple Cinnamon Rolls Soft and Irresistible Treat

If you love warm, gooey treats, you’re in for a delight! Caramel Apple Cinnamon Rolls are the perfect mix of

- 3 cups all-purpose flour - 1 tablespoon baking powder - 1 teaspoon salt - 1 teaspoon garlic powder - 1 cup sharp cheddar cheese, shredded - 1-2 jalapeños, finely chopped (remove seeds for less heat) - 12 oz non-alcoholic beer (or sparkling water) - 1/4 cup honey - 1/4 cup unsalted butter, melted This recipe has simple ingredients that create big flavors. You start with all-purpose flour, which gives the bread a nice texture. Baking powder makes it rise well. Salt adds a touch of flavor, while garlic powder gives it a savory kick. The star of the show is the sharp cheddar cheese. It melts into the bread, adding creaminess and depth. Jalapeños bring a spicy note, but remember to remove the seeds if you want less heat. Next, you’ll need some non-alcoholic beer or sparkling water. This adds a unique flavor and helps the bread rise. Honey sweetens the mix, while melted unsalted butter adds richness. With these ingredients, you can make a delicious and easy Jalapeño Cheddar Beer Bread. You’ll enjoy the blend of flavors in every bite! {{ingredient_image_1}} 1. Preheat your oven to 375°F (190°C). Grease a 9x5 inch loaf pan with butter or cooking spray. 2. In a large mixing bowl, whisk together the following dry ingredients: - 3 cups all-purpose flour - 1 tablespoon baking powder - 1 teaspoon salt - 1 teaspoon garlic powder 3. Next, add the fun stuff! Stir in: - 1 cup sharp cheddar cheese, shredded - 1-2 jalapeños, finely chopped (remove seeds for less heat) 4. In another bowl, mix the wet ingredients. Combine: - 12 oz non-alcoholic beer (or sparkling water) - 1/4 cup honey Mix until the honey is fully dissolved. 5. Pour the wet ingredients into the dry mix. Gently combine until just mixed. It's okay if there are a few lumps. 1. Pour the batter into your prepared loaf pan. Smooth the top with a spatula. 2. For a special touch, sprinkle extra cheddar cheese and jalapeño slices on top. 3. Bake in the preheated oven for 40-45 minutes. Check for doneness by inserting a toothpick in the center. It should come out clean. 4. Let the bread cool in the pan for about 10 minutes. Then, transfer it to a wire rack to cool completely. Enjoy your tasty Jalapeño Cheddar Beer Bread! How do I avoid dense bread? To keep your bread light, do not overmix the batter. Mix gently until the flour is just combined. Lumps are okay! Why is ingredient temperature important? Using room temperature ingredients helps the batter mix evenly. Cold ingredients can make the bread dense. How much resting time do I need for better texture? Let the batter sit for a few minutes before baking. This gives the flavors time to blend. What are the best ways to enjoy Jalapeño Cheddar Beer Bread? Enjoy this bread warm, straight from the oven. It pairs well with butter or a spread. What are good pairing options? Try jalapeño-infused olive oil for a spicy kick. You can also add fresh herbs like cilantro or chives for color and flavor. Pro Tips Cheese Choice: Use a mix of sharp and mild cheddar for a more complex flavor profile. Jalapeño Heat: Adjust the amount of jalapeños to your heat preference; remove seeds for a milder bread. Beer Selection: Experiment with different types of non-alcoholic beers for varied flavors; a stout can add richness. Serving Suggestion: Serve warm with butter or a dip and garnish with fresh herbs for an appealing presentation. {{image_2}} You can change the cheese to fit your taste. Try mozzarella for a milder flavor. Pepper jack gives it more heat. Even a mix of cheeses can add depth. For the beer, you can use a light lager or a stout. If you prefer non-alcoholic options, sparkling water works well too. This keeps the bread light and fluffy. Add extra herbs and spices for a unique twist. Try oregano or thyme for a floral note. If you want a kick, add cayenne pepper or smoked paprika. These flavors can boost the bread. You can also mix in different veggies. Diced bell peppers or corn can add sweetness. If you want protein, try adding cooked bacon or sausage. These additions make the bread heartier and more filling. To keep your Jalapeño Cheddar Beer Bread fresh, store it properly. First, let the bread cool completely. Wrap it tightly in plastic wrap or aluminum foil. You can also place it in an airtight container. This helps keep moisture in and air out. If you want to freeze the bread, slice it first. This makes it easy to thaw just what you need. Wrap each slice in plastic wrap, then place them in a freezer bag. This way, the bread stays fresh for up to three months. When it’s time to enjoy your bread again, reheating is key. For the best texture, preheat your oven to 350°F (175°C). Place the bread on a baking sheet. Heat it for about 10-15 minutes. This warms it through and keeps the crust crispy. If you have individual slices, you can use the microwave. Heat a slice for about 15-20 seconds. This method is quick, but the crust might not be as crisp. Enjoy your bread warm for the best flavor! Can I make this bread gluten-free? Yes, you can use a gluten-free flour blend instead of all-purpose flour. Look for blends that include xanthan gum. This helps mimic the texture of traditional bread. How do I adjust the heat level with jalapeños? To lower the heat, remove the seeds and ribs from the jalapeños before chopping. For more heat, leave some seeds in or add extra jalapeños. Can I use a different type of pan? You can use a round pan or muffin tins if you prefer. Just adjust the baking time. Muffins will take less time to bake. How to know when the bread is fully baked? The bread is done when the top is golden brown. Insert a toothpick in the center; it should come out clean if baked properly. What’s the best way to serve this bread? Serve the bread warm, sliced with butter or jalapeño-infused olive oil for dipping. Garnish with fresh herbs like cilantro or chives for extra flavor. Jalapeño Cheddar Beer Bread combines simple ingredients for a tasty treat. We covered each step, from mixing to baking. I shared tips for texture and flavor. Try different cheeses or add herbs for variety. Remember to store it right for freshness. Enjoying this bread is easy with butter or olive oil. Whether you serve it at a gathering or as a snack, it will please everyone. Happy baking!

Jalapeño Cheddar Beer Bread Flavorful and Easy Recipe

Are you ready to bake something amazing? Jalapeño Cheddar Beer Bread is fun and easy to make! This tasty bread

- 1 lb Brussels sprouts, trimmed and halved - 4 cloves garlic, minced - 1/4 cup grated Parmesan cheese - 3 tablespoons olive oil - 1 teaspoon garlic powder - 1/2 teaspoon red pepper flakes (optional) - Salt and freshly ground black pepper to taste - 2 tablespoons balsamic glaze (for drizzling) - Fresh parsley, chopped (for garnish) - Baking sheet - Parchment paper - Mixing bowl - Chef's knife To make Garlic Parmesan Brussels sprouts, you need simple, fresh ingredients. The Brussels sprouts are the star. Choose firm, bright green ones for the best flavor. The garlic adds a savory kick. Minced garlic and garlic powder give a double dose of flavor. Parmesan cheese brings a rich, salty note to the dish. Olive oil helps to roast the sprouts evenly and adds a nice golden color. Red pepper flakes give a hint of heat, but you can skip them if you prefer mild flavors. Salt and black pepper enhance everything, making it all taste better. Use a baking sheet lined with parchment paper for easy cleanup. A mixing bowl is great for tossing the ingredients together. A good chef's knife helps you cut the sprouts cleanly. These tools make cooking easy and fun. With these ingredients and tools, you’re ready to create a delicious side dish that everyone will love! - Preheat oven to 400°F (200°C). - Prepare Brussels sprouts by trimming and halving. To start, you need to preheat your oven. This step is key for getting those Brussels sprouts crispy. While the oven heats, trim the ends off each sprout. Then, slice them in half. This will help them cook evenly and soak up all the flavor. - Toss Brussels sprouts with olive oil, garlic, seasonings. - Spread on a baking sheet and roast. - Adjust cooking time for desired doneness. Next, grab a large bowl. Add your halved Brussels sprouts and minced garlic. Pour in the olive oil, then sprinkle the garlic powder, red pepper flakes, salt, and pepper. Mix everything well until the sprouts are coated. Now, spread the Brussels sprouts on a baking sheet lined with parchment paper. Make sure they sit in a single layer. This helps them roast evenly. Bake them for 20 to 25 minutes. Stir them halfway through to ensure they roast nicely. Check for a golden brown color and tenderness to see if they are done. - Add Parmesan cheese and melt in the oven. - Drizzle with balsamic glaze and garnish. Once the Brussels sprouts are cooked, take them out of the oven. Right away, sprinkle the grated Parmesan cheese on top. Pop them back in the oven for about 5 minutes. This melts the cheese and adds a creamy touch. After that, drizzle balsamic glaze over the sprouts. This adds a tangy sweetness that pairs perfectly with the savory cheese. Finally, sprinkle some chopped fresh parsley on top before serving. This adds a nice color and fresh flavor. Enjoy your Garlic Parmesan Brussels Sprouts! To make Garlic Parmesan Brussels sprouts, you want them to cook evenly. Here are some tips to help: - Trim and halve: Always trim the ends and halve the sprouts. This helps them cook faster and more evenly. - Single layer: Spread your Brussels sprouts in a single layer on the baking sheet. This ensures they roast well and do not steam. - Stir halfway: Stir the sprouts halfway through cooking. This promotes even browning and crispiness. For a crispy texture, consider these tips: - High heat: Roasting at 400°F (200°C) gives a nice crunch. It helps the edges caramelize. - Olive oil: Use enough olive oil to coat the sprouts, but not too much. This helps them brown without being greasy. - Cheese at the end: Add Parmesan cheese during the last five minutes. It melts beautifully and adds a crunchy topping. Garlic Parmesan Brussels sprouts pair well with many dishes. Here are some ideas: - With protein: Serve alongside chicken, fish, or steak for a balanced meal. - Grains: They complement grains like quinoa or rice. The flavors blend well, making a filling dish. - As an appetizer: These sprouts make a great starter. Just serve them with a dipping sauce for fun. You can enjoy them as a side dish or a tasty snack. They are versatile and fit many meal types. If you want to switch things up, consider these substitutes: - Cheese options: Try using Pecorino Romano or nutritional yeast for a dairy-free option. Both add great flavor. - Spice alternatives: If you want less heat, skip the red pepper flakes. You can add lemon zest for brightness instead. - Frozen vs. fresh: Frozen Brussels sprouts are great if you are short on time. They are quick to prepare, but fresh sprouts offer better texture and taste. If using frozen, roast them longer to achieve crispiness. {{image_2}} You can change the flavor of Garlic Parmesan Brussels sprouts easily. Adding bacon or pancetta gives them a rich taste. Chop the bacon and cook it until crispy. Then mix it with the Brussels sprouts before roasting. This adds depth and a savory kick. Another fun idea is to add nuts. Almonds or walnuts bring a nice crunch. Chop the nuts and toss them in with the sprouts before roasting. They add texture and flavor, making each bite exciting. Want a healthier option? Try the air fryer! It cooks the Brussels sprouts quickly while keeping them crispy. Set your air fryer to 375°F (190°C). Cook the sprouts for about 15 minutes. Shake the basket halfway through for even cooking. If you need a quick meal, sautéing works well. Heat olive oil in a large pan over medium heat. Add the Brussels sprouts and cook for about 10-12 minutes, stirring often. This method keeps them tender and allows the garlic flavor to shine. You can switch things up with seasonal produce. In fall or winter, try adding cranberries or pecans. Toss in a handful of dried cranberries before serving. They add a sweet contrast to the savory sprouts. During holiday meals, you can adjust the flavors, too. Add a pinch of nutmeg or cinnamon for a festive touch. These warm spices make the dish feel special and cozy for gatherings. To keep your Garlic Parmesan Brussels sprouts fresh, store them in an airtight container. Make sure they cool down first. This helps maintain their flavor and texture. They will last in the fridge for about 3 to 5 days. If you want them to stay fresh longer, avoid adding the balsamic glaze until you serve them. When reheating, aim to keep that nice texture. For the best results, use the oven. Preheat the oven to 350°F (175°C). Spread the sprouts on a baking sheet. Heat for about 10 to 15 minutes. This will help them regain their crispness. If you're in a hurry, you can use the microwave. Just heat in short bursts of 30 seconds. Stir between each burst to avoid sogginess. If you want to freeze these sprouts, first cool them completely. Place them in a single layer on a baking sheet and freeze for about 1 hour. Once frozen, transfer them to a freezer-safe bag. They can last for up to 3 months. When you're ready to eat, thaw them in the fridge overnight. Reheat them in the oven to help restore their texture. Expect soft sprouts after freezing, but the flavor will still shine through! Can I use frozen Brussels sprouts for this recipe? Yes, you can use frozen Brussels sprouts. However, they may not get as crispy. Thaw them first and pat them dry. This helps remove excess moisture. What can I replace Parmesan cheese with for a dairy-free option? You can use nutritional yeast for a cheesy flavor. It adds a nice taste without dairy. Another option is to use a dairy-free cheese substitute. Each serving has about 150 calories. You get 8 grams of fat, 5 grams of carbs, and 4 grams of protein. The Brussels sprouts provide vitamins C and K. Garlic adds flavor and health benefits. This recipe serves about 4 people. If you need more, simply double the ingredients. For smaller servings, you can cut the recipe in half. This makes it easy to adjust for any gathering. This post covered making Garlic Parmesan Brussels Sprouts, from ingredients to cooking tips. We learned how to achieve that crispy texture and add flavor. You can adjust the recipe with variations like bacon or nuts. Storing leftovers is easy, and reheating maintains taste. This dish is a great side or appetizer for any meal. Embrace these steps and enjoy a delicious, healthy treat.

Garlic Parmesan Brussels Sprouts Flavorful Side Dish

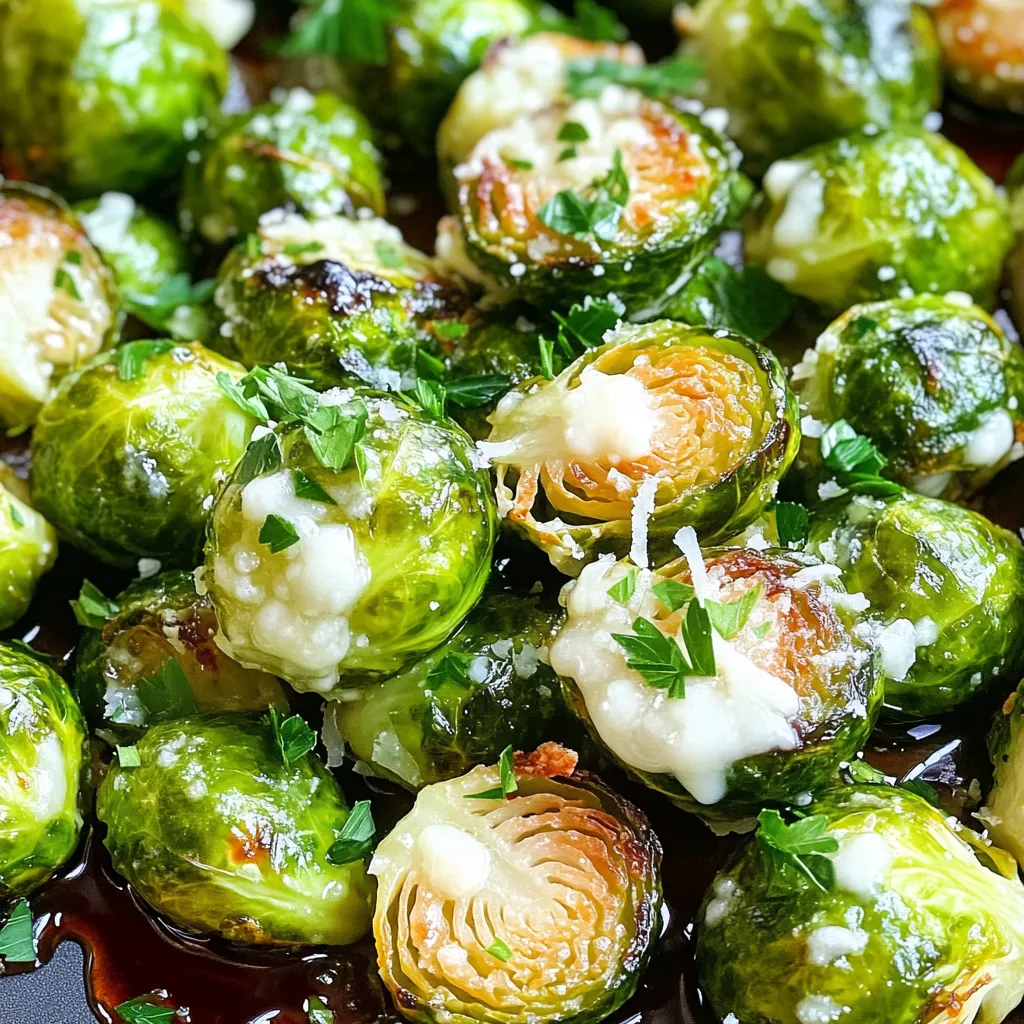
Are you ready to elevate your side dish game? Garlic Parmesan Brussels Sprouts are here to impress! With just a

- 8 oz rotini pasta - 1 cup cherry tomatoes, halved - 1 cup fresh mozzarella balls (bocconcini) - 1 cup fresh basil leaves, torn - 1 cup homemade or store-bought basil pesto - 2 tablespoons extra virgin olive oil - ¼ cup pine nuts, toasted - Salt and pepper to taste How to measure pasta and pesto accurately: When measuring pasta, use a kitchen scale for precise amounts. 8 oz of rotini pasta is about 2 cups dry. For pesto, a standard measuring cup works best. Fill it to the top for the right amount. Tips for selecting fresh ingredients: Choose firm and vibrant cherry tomatoes. Look for mozzarella balls that are smooth and shiny. Fresh basil should smell sweet and have bright green leaves. Always pick high-quality extra virgin olive oil for the best flavor. First, boil water in a large pot. Add salt to taste. Once boiling, add the rotini pasta. Cook it until it is al dente. This means it should be firm to the bite. Check the package for the cooking time, usually around 8-10 minutes. When the pasta is done, drain it in a colander. Rinse it under cold water. This stops the cooking process and cools the pasta down. By rinsing, you keep it from becoming sticky. Now, grab a large mixing bowl. Add the cooled rotini pasta to the bowl. Cut the cherry tomatoes in half and add them. Next, toss in the fresh mozzarella balls. Then, tear the fresh basil leaves and add them to the mixture. Drizzle the basil pesto and olive oil over the ingredients. Toss everything gently. Make sure each piece is well-coated with the pesto. This helps all the flavors blend together. Next, season the salad with salt and pepper. Taste it to see if you need more. If you like, add toasted pine nuts for a nice crunch. Toss the salad again to mix in the pine nuts. Finally, cover the bowl with plastic wrap. Place the salad in the fridge for about 30 minutes. This helps the flavors meld together. Before serving, give it one last toss to ensure everything is well mixed. Enjoy your fresh and flavorful dish! To make your Pesto Caprese Pasta Salad shine, focus on pairing fresh ingredients. The bright taste of cherry tomatoes complements the creamy mozzarella and the herbaceous pesto. Use ripe tomatoes for the best flavor. Add salt and pepper at the end. This helps you control the taste. Start with a pinch, then taste. You can always add more later if needed. Serve your salad in a large, shallow dish. This makes it look inviting. You can also use individual bowls for a personal touch. For garnishing, add whole basil leaves on top. Drizzle with a little olive oil. This gives it a fresh and elegant look. If you have dietary needs, you can switch out ingredients. Use gluten-free pasta if you prefer. For a dairy-free option, try using vegan cheese or skip the cheese altogether. Adding proteins can make your salad heartier. Grilled chicken or shrimp works well. If you want a vegetarian option, consider chickpeas or tofu. You can also add more veggies, like bell peppers or spinach, to boost nutrition and flavor. {{image_2}} You can make this dish even more exciting. For meat substitutes, try using grilled mushrooms or marinated artichokes. Both options add great flavor. You can also toss in more vegetables. Think about adding bell peppers, zucchini, or even spinach. These extra veggies boost nutrition and color. Want to make it heartier? Add grilled chicken or shrimp for a protein punch. They blend well with the flavors. If you prefer plant-based options, try adding tofu or chickpeas. Both are great sources of protein and keep the dish filling. Changing up the pesto can bring new life to this salad. Try sun-dried tomato pesto or arugula pesto for a twist. Each type brings its own unique taste. You can also play with cheese options. Instead of mozzarella, try feta or goat cheese. They add a tangy flavor that pairs nicely with the other ingredients. To keep your Pesto Caprese Pasta Salad fresh, store it in an airtight container. Refrigerate it right after serving. This helps keep the ingredients from wilting or getting soggy. If you have leftovers, make sure to seal them well. You can freeze the pasta salad if you want to save it longer. Place it in a freezer-safe container, but leave out the fresh basil and tomatoes. These do not freeze well. To reheat, thaw the salad in the fridge overnight. Then, add fresh basil and tomatoes before serving again. In the fridge, your salad can last about 3 to 5 days. Always check for signs of spoilage. If you see any mold or if it smells off, it’s best to throw it away. Enjoy your salad while it’s fresh for the best taste! To make basil pesto, you'll need a few simple ingredients: - 2 cups fresh basil leaves - 1/2 cup extra virgin olive oil - 1/3 cup pine nuts - 1/2 cup grated Parmesan cheese - 2 garlic cloves - Salt to taste Here’s a quick recipe for homemade pesto: 1. Blend: Place the basil, garlic, and pine nuts in a food processor. Pulse until finely chopped. 2. Add Oil: With the processor running, slowly drizzle in the olive oil until smooth. 3. Mix Cheese: Add the Parmesan cheese. Pulse until fully combined. 4. Season: Taste and add salt as needed. This homemade pesto is fresh and perfect for your pasta salad. Yes, you can use gluten-free pasta! Some of the best types are: - Brown rice pasta - Quinoa pasta - Chickpea pasta - Lentil pasta Cooking tips for gluten-free pasta include: - Cook according to the package instructions. - Stir occasionally to prevent sticking. - Rinse it under cold water after cooking to stop the process. These tips help you enjoy a tasty dish without gluten. You can serve many dishes with Pesto Caprese Pasta Salad. Some great options are: - Grilled chicken or shrimp for protein - A fresh green salad for extra veggies - Garlic bread for a crunchy side Popular pairing suggestions include: - A classic caprese salad for a full Italian theme - Roasted vegetables for a colorful plate - A light white wine to enhance the meal These pairings make your dining experience more delightful and satisfying. This blog post explored making a delicious Pesto Caprese Pasta Salad. We reviewed key ingredients, including rotini pasta and fresh mozzarella. I shared step-by-step instructions for preparing and mixing the salad. You learned tips for enhancing flavors and presentation. We also discussed variations and how to store the salad for optimal freshness. In closing, this salad is versatile and easy to make. Feel free to experiment with your favorite ingredients. Enjoy your tasty creation and share it with friends!

Pesto Caprese Pasta Salad Fresh and Flavorful Dish

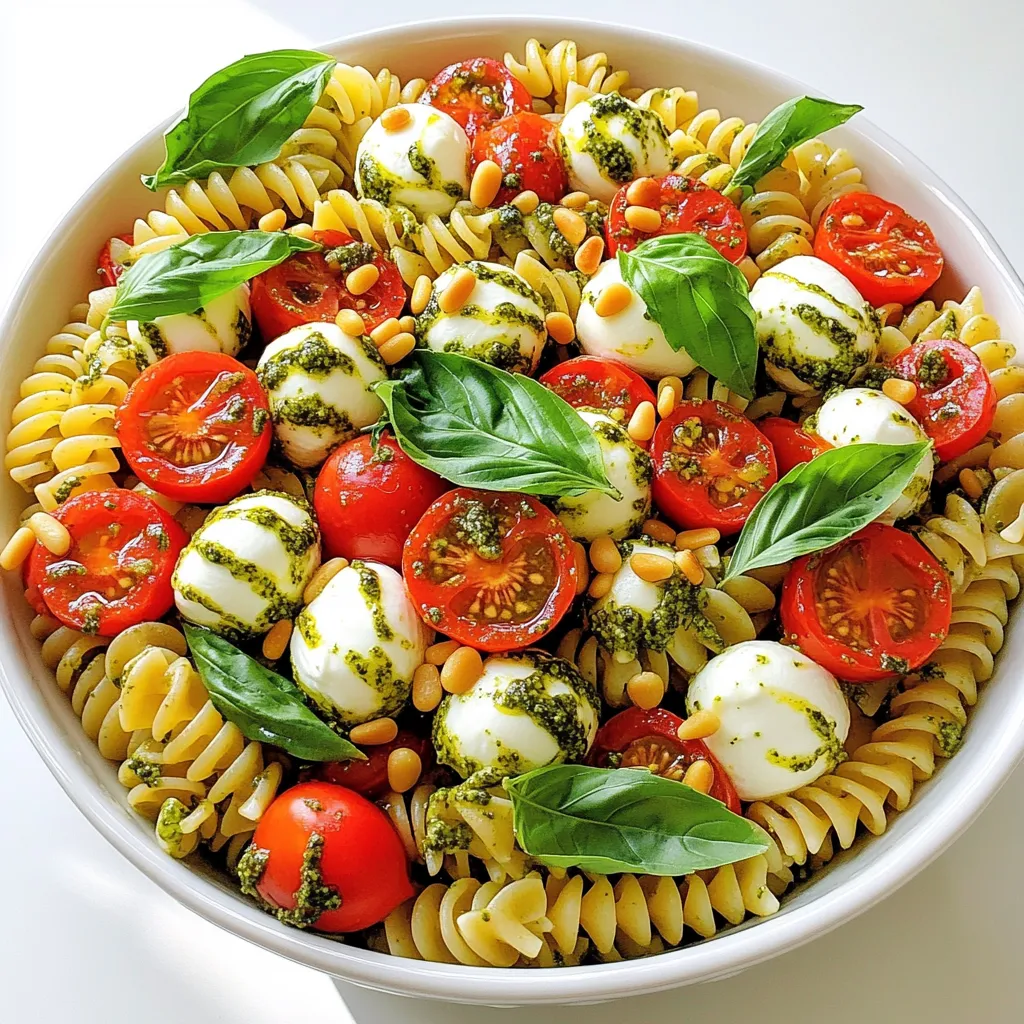
Looking for a fresh and tasty dish that impresses? Let me introduce you to Pesto Caprese Pasta Salad! This vibrant

- 8 rice paper wrappers - 1 cup red cabbage, finely shredded - 1 carrot, julienned - 1 cucumber, julienned - 1 bell pepper (any color), julienned - 1 avocado, sliced - ½ cup fresh mint leaves - ½ cup fresh cilantro leaves - 1 cup cooked vermicelli noodles - ¼ cup peanut butter (for dipping sauce) - 2 tablespoons soy sauce (for dipping sauce) - 1 tablespoon lime juice (for dipping sauce) - Salt and pepper to taste You need a few simple items to make rainbow veggie spring rolls. Start with rice paper wrappers. They are thin and flexible. Next, gather fresh veggies. Red cabbage, carrots, cucumbers, bell peppers, and avocado add color and crunch. Fresh herbs like mint and cilantro brighten the flavors. You also want some cooked vermicelli noodles for a nice base. For the dipping sauce, you’ll need peanut butter, soy sauce, and lime juice. These ingredients blend well, making a tasty dip. Don’t forget to add salt and pepper for extra flavor. With these ingredients, you can make a fun and healthy snack! Start by washing all your vegetables. Use cold water to rinse them well. This step keeps them fresh and clean. Next, cut the vegetables into thin strips. Use a sharp knife for easy cutting. - Red cabbage: Finely shred it for a colorful crunch. - Carrot: Julienned for a sweet bite. - Cucumber: Also julienned, adds a cool taste. - Bell pepper: Any color works, julienned for fun. - Avocado: Slice it for creamy texture. - Mint and cilantro: Keep them whole for flavor. Place each vegetable in its own bowl. This makes the assembly quick and fun. For the rice paper wrappers, use a shallow dish. Fill it with warm water. Make sure the water is warm, but not boiling. Soak one wrapper for about 20-30 seconds. It should become soft and pliable. Once it’s ready, take it out and shake off the excess water. Lay it flat on a clean surface. Now comes the fun part: assembling your spring rolls! Start with the softened rice paper wrapper laid flat. - Add a small handful of cooked vermicelli noodles in the center. - Then, layer on the shredded veggies: red cabbage, carrot, cucumber, bell pepper, and avocado. - Finally, add a few whole mint and cilantro leaves. Season the filling with a pinch of salt and pepper. This adds a nice flavor boost. To roll the spring roll, fold the sides over the filling. Then, roll it tightly from the bottom to the top. Make sure the filling stays secure inside. Repeat this for the rest of the wrappers and filling. Enjoy the process of creating these vibrant rainbow rolls! To avoid tearing and sticking, start with warm water. Dip the rice paper wrapper for 20 to 30 seconds. When it softens, lay it flat on a clean surface. Place a small amount of filling in the center. Make sure not to overfill, or it may break. Fold the sides in first, then roll tightly from the bottom. Season the veggies with salt and pepper to boost flavor. You can also add garlic powder or chili flakes for a kick. Try using lime zest for a fresh twist. Mixing fresh herbs like basil or parsley can also elevate the taste. For a sweet touch, add a little honey or agave syrup to your dipping sauce. For easy handling, keep your rice paper wrappers covered with a damp cloth. If they dry out, they can crack. Store unused wrappers in an airtight container to keep them fresh. When you’re ready to use them, just soak them in warm water again. This method helps make the wrappers more pliable and easier to roll. {{image_2}} You can switch up the veggies in these spring rolls. Try using shredded carrots, zucchini, or even beets. Each adds unique flavors and colors. You can also add fruits like mango or pineapple for a sweet twist. For protein, tofu is a great choice. You can use firm tofu, marinated and baked. Shrimp is another option if you want a seafood touch. Just boil or grill the shrimp until it's cooked through. Peanut sauce is a classic, but you can change it up. To make a spicy version, add some sriracha or chili paste. For a sweeter sauce, mix in honey or brown sugar. You might also enjoy a soy-sesame sauce. Just mix soy sauce with sesame oil and a splash of lime juice. This adds a nice nutty flavor. Other options include sweet chili sauce or a creamy avocado dip. Each sauce pairs well with the fresh spring rolls. To keep your veggies fresh, store them right. Use airtight containers for each type. This keeps the colors bright and flavors crisp. Place your cut veggies like cabbage, carrots, and cucumbers in these containers. You can also wrap herbs like mint and cilantro in a damp paper towel. This helps them stay fresh longer. Keep the rice paper wrappers in their original package. Store them in a cool, dry place. If you have leftover vermicelli noodles, keep them in a separate container. They will stay fresh for a few days. Once you have rolled your spring rolls, wrap them in damp paper towels. This keeps them from drying out. Place the wrapped rolls in a sealed container. Refrigerate them right away for best results. Your spring rolls will last for about 1 to 2 days in the fridge. If you want to eat them later, make sure to enjoy them cold. They taste great even without reheating. Just remember, the fresher the rolls, the better the crunch! Yes, you can make rainbow veggie spring rolls in advance. However, they taste best fresh. If you want to prepare them ahead of time, keep the filling and wrappers separate. Store the filling in an airtight container and cover the rice paper wrappers with a damp cloth to avoid drying out. Assemble them right before serving for the best flavor and texture. To keep rice paper wrappers fresh, store them in a cool, dry place. Once opened, seal the package tightly to prevent moisture. If you have leftover wrappers, place them in a zip-top bag. To keep them pliable, avoid exposing them to air. If they do dry out, you can briefly soak them in warm water to soften. Yes, rainbow veggie spring rolls can be gluten-free. The rice paper wrappers are made from rice flour, which is gluten-free. Just be cautious with your dipping sauce. Some soy sauces contain gluten. Choose a gluten-free soy sauce or tamari for dipping to ensure the whole dish remains gluten-free. You can easily customize the filling to suit your needs. Swap the veggies for your favorites, like spinach or radish. If you need protein, add cooked shrimp, chicken, or tofu. For a twist, try adding fruits like mango or strawberries. This dish is versatile, so feel free to experiment with different flavors! Making rainbow veggie spring rolls is simple and fun. You need fresh vegetables, herbs, and rice paper wrappers. Proper preparation helps them taste great. I shared tips for easy rolling and storage, too. Remember, you can fill spring rolls with your favorite veggies or proteins, and dip them in different sauces. This recipe allows you to be creative while enjoying healthy snacks. Try making them today, and enjoy a burst of flavors!

Rainbow Veggie Spring Rolls Fresh and Flavorful Treat

Are you ready to brighten your meal with a splash of color and flavor? Rainbow Veggie Spring Rolls are not

- 1 cup all-purpose flour - 1 tablespoon baking powder - 1/2 teaspoon salt - 1/4 cup granulated sugar - 1 teaspoon ground cinnamon - 1 cup milk - 1 large egg - 1/4 cup unsalted butter, melted - 1 teaspoon vanilla extract - 1/4 cup granulated sugar (for coating) - 2 teaspoons ground cinnamon (for coating) You can swap the all-purpose flour with a gluten-free blend. Use almond milk or oat milk instead of regular milk. For the butter, coconut oil works well. If you want to cut sugar, use a sweetener like stevia. You can skip the egg and use a flaxseed meal mix for a vegan option. Use a dry measuring cup for flour. Level off the top with a straight edge for accuracy. When measuring brown sugar, pack it down firmly. For liquids, use a clear measuring cup to ensure you get the right amount. A kitchen scale can help for precise measurements if you have one. Start by preheating your waffle iron. Follow the maker’s instructions for best results. Each iron heats differently, so check for a ready light. This ensures your waffles cook evenly and turn out crispy. In a large bowl, add these dry ingredients: - 1 cup all-purpose flour - 1 tablespoon baking powder - 1/2 teaspoon salt - 1/4 cup granulated sugar - 1 teaspoon ground cinnamon Whisk these ingredients together until they blend well. This step is key for fluffy waffles. In a separate bowl, mix the wet ingredients: - 1 cup milk - 1 large egg - 1/4 cup melted unsalted butter - 1 teaspoon vanilla extract Whisk until smooth and creamy. This helps create a rich batter. Pour about 1/2 cup of batter into the center of the preheated waffle iron. Close the lid and cook for about 4-5 minutes. Check for a golden brown color. If your iron has a ready light, wait for it to signal that your waffles are done. While your waffles cook, mix the coating: - 1/4 cup granulated sugar - 2 teaspoons ground cinnamon Once the waffles are ready, remove them from the iron. Dip both sides into the cinnamon-sugar mix. Make sure they are well coated for that sweet churro taste. Serve your churro waffles warm. You can add toppings like whipped cream, chocolate sauce, or caramel drizzle. These extras make your treat even more delightful and fun to eat! Enjoy the crispy, sweet goodness. To make perfect churro waffles, follow these tips: - Preheat your waffle iron: Always heat it according to the manual. A hot iron makes crispy waffles. - Don’t overmix the batter: Stir just until combined. Lumps are okay. This keeps waffles light and fluffy. - Use the right amount of batter: About 1/2 cup per waffle works well. Too much batter can spill over. Here are some mistakes to watch out for: - Skipping the cinnamon sugar coating: This adds that churro taste. Don’t miss it! - Using cold ingredients: Make sure your milk and egg are at room temperature. This helps the batter mix better. - Not greasing the waffle iron: Even if it’s non-stick, a light spray helps. This keeps waffles from sticking. You can boost the flavor of your churro waffles with these ideas: - Add chocolate chips: Fold in some chips for a sweet surprise in each bite. - Try different spices: Mix in nutmeg or cardamom for a unique twist. - Top with fresh fruit: Strawberries or bananas add a fresh touch. They pair well with the sweetness. {{image_2}} You can easily make these waffles gluten-free. Just swap the all-purpose flour for a gluten-free blend. Look for one that measures cup-for-cup. This change keeps the texture light and fluffy. The taste stays just as delicious! Want to add chocolate? Toss in a half cup of chocolate chips. You can mix them into the batter right before cooking. The warm melted chocolate makes each bite special. These waffles are perfect for chocolate lovers! Toppings can change the game! Try whipped cream for a fluffy touch. Drizzle chocolate sauce or caramel for a sweet kick. Fresh fruit like strawberries or bananas also adds a great flavor. Be creative with your toppings and make each serving unique! After enjoying your churro waffles, let them cool down. Place any leftover waffles in an airtight container. Store them in the fridge if you plan to eat them within a few days. This keeps them fresh and ready for your next treat. To reheat the waffles, you have a few options. The easiest way is to use a toaster or an oven. For a toaster, pop them in until they are warm and crispy. If you use an oven, set it to 350°F (175°C) and heat for about 5-7 minutes. This way, your waffles stay crunchy and tasty. If you want to save your waffles for a long time, freezing is a great choice. First, cool the waffles completely. Then, place them in a single layer on a baking sheet. Freeze them for about an hour. Once frozen, transfer the waffles to a freezer-safe bag or container. This helps avoid freezer burn. They can last up to three months in the freezer. When you're ready, just reheat them as mentioned before. Enjoy your delicious treat anytime! Cinnamon sugar churro waffles are a delightful twist on a classic treat. They combine the crispy, sweet flavor of churros with the lightness of waffles. These waffles are coated in a mix of cinnamon and sugar. Each bite is warm, sweet, and full of cinnamon goodness. You can make these waffles ahead of time easily. Prepare the batter and store it in the fridge for up to 24 hours. When you are ready, just heat up your waffle iron and cook them fresh. You can also cook the waffles in advance and store them in an airtight container. Reheat them in the toaster for a crispy finish. Yes, you can use different types of milk for these waffles. Almond milk, soy milk, or oat milk work well too. Just keep in mind that the flavor may change slightly. Make sure to use unsweetened milk if you want to keep the sugar level right. Finding restaurants that serve churro waffles can be fun. Check local dessert shops or cafes. Many places that specialize in waffles or churros may have them on their menu. You can also search online for "churro waffles near me" to find nearby options. These cinnamon sugar churro waffles are fun and easy to make. We covered the key ingredients, how to mix them, and cook them perfectly. I shared tips to avoid mistakes and ideas for cool variations. Remember to store any leftovers correctly and reheat for the best taste. Now, you can enjoy these tasty treats at home or share them with friends. Your breakfast just got a lot sweeter!

Cinnamon Sugar Churro Waffles Easy and Delicious Treat

If you love the warm, sweet taste of churros, you will adore these Cinnamon Sugar Churro Waffles. They are easy

To make tasty coconut curry meatballs, you need a few key items: - 1 pound ground chicken (or turkey) - 1/2 cup breadcrumbs - 1/4 cup fresh cilantro, chopped - 1 tablespoon ginger, minced - 2 cloves garlic, minced - 1 tablespoon curry powder - 1/2 teaspoon cumin - Salt and pepper to taste - 1 tablespoon vegetable oil (for cooking) - 1 can (14 oz) coconut milk - 1 tablespoon red curry paste - 1 tablespoon lime juice - Cooked jasmine rice, for serving These ingredients create a lovely mix of flavors. The chicken or turkey provides a soft base. The breadcrumbs help the meatballs hold their shape. Fresh cilantro, ginger, and garlic add a burst of flavor. The spices, like curry powder and cumin, bring warmth and depth. You can switch things up by adding more flavors. Here are some optional items: - Chopped green onions - A pinch of red pepper flakes - Chopped bell peppers or carrots Adding these ingredients can give the dish more texture and taste. Green onions add a fresh crunch. Red pepper flakes can spice things up. Bell peppers or carrots bring extra color and sweetness. If you don't have some ingredients, no problem! Here are some swaps: - Use ground beef or pork instead of chicken. - Swap breadcrumbs for crushed crackers or oats. - Use lime zest if you lack lime juice. - Coconut milk can be replaced with almond milk, but the flavor will change. These swaps keep the recipe easy and flexible. You can still enjoy the dish even if you run out of something. Just remember that each swap may change the final taste a bit. Start by gathering all your ingredients. You need ground chicken, breadcrumbs, cilantro, ginger, garlic, curry powder, cumin, salt, and pepper. In a large bowl, combine 1 pound of ground chicken with 1/2 cup of breadcrumbs. Add 1/4 cup of chopped cilantro and 1 tablespoon of minced ginger. Next, add 2 cloves of minced garlic, 1 tablespoon of curry powder, and 1/2 teaspoon of cumin. Season with salt and pepper to taste. Mix everything until well combined. You want a nice, even mixture. Now, form the mixture into meatballs. Aim for about 1 inch in diameter. You should get around 18 to 20 meatballs. Heat 1 tablespoon of vegetable oil in a large skillet over medium heat. Once the oil is hot, add the meatballs in batches. Cook them for about 6 to 8 minutes. Turn them often so they brown on all sides. Once they are golden brown, remove the meatballs from the skillet and set them aside. In the same skillet, add 1 can of coconut milk and 1 tablespoon of red curry paste. Stir well to combine. Bring the mixture to a gentle simmer. After that, return the meatballs to the skillet. Let them simmer in the sauce for about 10 minutes. This helps the flavors mix well. Finally, add 1 tablespoon of lime juice and stir well before serving. Enjoy your Coconut Curry Meatballs over jasmine rice for a delicious meal! To make great meatballs, use fresh ingredients. Fresh herbs like cilantro add a bright taste. Mix the meatball mixture gently. Overmixing can make them tough. Aim for meatballs that are about one inch wide. This size cooks evenly and stays juicy. Add lime juice at the end for a fresh zing. You can also experiment with spices. Try adding a pinch of turmeric or paprika for extra warmth. For a sweeter touch, a dash of honey works well. These small tweaks can elevate your dish. Serve the meatballs over fluffy jasmine rice. Drizzle extra curry sauce on top for more flavor. Garnish with fresh cilantro and lime wedges for a pop of color. You can also add steamed vegetables for a complete meal. Enjoy your delightful creation! {{image_2}} You can make this dish vegetarian easily. Instead of ground chicken, use lentils or chickpeas. Cooked quinoa also works well for a good texture. Mix these with breadcrumbs, herbs, and spices like curry powder. This keeps the flavor rich and satisfying. Do you like heat? You can change the spice level. Add more red curry paste for a kick. If you want it milder, use less paste or add coconut milk. A dash of chili flakes can also boost the heat. Always taste as you go to find your perfect balance. You can switch up the protein in this recipe. Ground turkey is a great choice for a leaner meatball. You can also try ground beef or pork for a richer flavor. Even fish can work; just adjust the cooking time. Each protein offers a new twist to the dish. To keep your coconut curry meatballs fresh, let them cool first. Place them in an airtight container. You can store them in the fridge for up to three days. If you want to enjoy them later, freezing is a great option. When you’re ready to enjoy your leftovers, reheat them gently. You can use a microwave or skillet. If using a microwave, heat in short bursts. Stir often to avoid hot spots. If you use a skillet, add a splash of coconut milk or water. This will keep the meatballs moist. For freezing, place meatballs in a single layer on a baking sheet. Let them freeze for about two hours. Once frozen, transfer them to a freezer-safe bag. Make sure to remove as much air as possible. They can stay frozen for up to three months. When you’re ready to eat, thaw them overnight in the fridge before reheating. Yes, you can use other meats. Ground turkey works well. You can also try pork or beef. If you prefer, you could even use a plant-based meat substitute. This adds variety and keeps the dish exciting. To make this dish gluten-free, choose gluten-free breadcrumbs. Many stores sell these. You can also crush gluten-free crackers as a substitute. Always check labels to ensure no hidden gluten is present. I love serving these meatballs over fluffy jasmine rice. The rice soaks up the curry sauce perfectly. You can also serve them with rice noodles or quinoa for a healthy twist. Add a side of steamed veggies for a balanced meal. Leftovers last about three days in the fridge. Store them in an airtight container. If you want them to last longer, freeze them for up to three months. Just reheat them well before serving. Coconut curry meatballs are a tasty and fun dish. We covered the key ingredients and how to mix them. I shared warming tips and tricks for cooking perfect meatballs. You learned about variations, from vegetarian swaps to spice levels. Proper storage helps keep leftovers fresh and safe. Enjoy making this dish. It’s easy to customize and share. You'll impress family and friends with your delicious coconut curry meatballs.

Coconut Curry Meatballs Flavorful and Easy Recipe

If you’re looking for a tasty dish that’s both easy and satisfying, you’ll love my Coconut Curry Meatballs recipe. Bursting

- 1 medium head of cauliflower - 1 cup mixed vegetables (carrots, peas, and corn) - 2 tablespoons sesame oil - 3 green onions - 2 cloves garlic - 2 eggs - 3 tablespoons low-sodium soy sauce - 1 tablespoon ginger - Salt and pepper - Optional: Chopped cilantro or parsley In this recipe, the main star is cauliflower. It gives a light base and tastes great. I use one medium head of cauliflower, which I grate into rice-sized pieces. You can also pulse it in a food processor. Next, I add one cup of mixed vegetables, like carrots, peas, and corn. These add color and sweetness. I love using sesame oil for flavor. It has a nutty taste and helps the dish shine. You’ll need two tablespoons. For extra crunch and taste, I add three chopped green onions and two minced garlic cloves. These ingredients create a tasty aroma. Two eggs bring protein and richness to the dish. I use low-sodium soy sauce to keep it healthy. Three tablespoons give the right saltiness. Fresh ginger adds a kick, so I grate one tablespoon. Finally, season with salt and pepper to taste. For a fresh touch, you can sprinkle chopped cilantro or parsley as a garnish. This dish is not just tasty; it’s colorful and healthy, perfect for any meal! - Start by removing the leaves and stem of the cauliflower. - Cut the cauliflower into small florets. - Grate it using a box grater or pulse it in a food processor. Aim for rice-sized pieces. - Heat 1 tablespoon of sesame oil in a large skillet over medium heat. - Add the minced garlic and freshly grated ginger. Sauté them for about 30 seconds until they smell great. - Then, add 1 cup of mixed vegetables to the skillet. Stir-fry for 3 to 4 minutes until they are tender. - Push the vegetables to one side of the skillet. - Add the second tablespoon of sesame oil to the empty side. - Pour in the 2 beaten eggs and scramble them until they are just set. - Once the eggs are cooked, mix them with the vegetables. - Now, add the cauliflower rice and 3 tablespoons of low-sodium soy sauce. Stir everything together and cook for 5 to 7 minutes. Make sure the cauliflower is tender but not mushy. - Stir in the 3 chopped green onions. Season with salt and pepper to taste. - Cook for one more minute to heat everything through. - Remove from heat and serve hot. Garnish with chopped cilantro or parsley if you like. To get the right texture, start with fresh cauliflower. A medium head works best. Remove leaves and stem, then cut it into smaller florets. Use a food processor to pulse the florets until they look like rice. If you don’t have a processor, a box grater is a great option. Avoiding mushiness is key. Do not overcook the cauliflower rice. Cook it for just 5 to 7 minutes. Check for tenderness but keep it firm. This helps maintain the rice-like texture. Using the right pan makes a big difference. A large skillet or wok is ideal for even cooking. These options help with heat distribution. Cooking times can vary based on your stove. If you have a gas stove, you might need less time. Electric stoves may take a bit longer. Always watch the cauliflower closely as it cooks. Adding spices can boost flavor. Consider a dash of garlic powder or a pinch of pepper. Low-sodium soy sauce adds a nice umami taste, but feel free to adjust to your liking. Think about variations, too. You can add sriracha for heat or sesame seeds for crunch. If you like fresh herbs, cilantro or parsley adds brightness. Customize your dish based on what you enjoy! {{image_2}} You can change up your cauliflower fried rice with different veggies. Try adding bell peppers or broccoli for more color and crunch. These veggies give extra nutrients and taste. For protein, consider using chicken, shrimp, or tofu. Each option adds a unique flavor. Chicken is lean and filling, shrimp is light and sweet, while tofu is great for plant-based diets. Spice lovers will enjoy a spicy version. Just add sriracha when cooking. This adds a nice kick without overpowering the dish. For an Asian-inspired twist, sprinkle sesame seeds on top. This adds a nutty flavor and a nice crunch. You can also use a dash of rice vinegar for a tangy touch. If you need gluten-free options, use tamari instead of soy sauce. Tamari has a similar taste but is safe for those avoiding gluten. For vegan adaptations, simply skip the eggs or use a plant-based egg substitute. The dish will still be tasty and satisfying. This way, everyone can enjoy cauliflower fried rice! To keep your cauliflower fried rice fresh, store it in an airtight container. This method helps prevent moisture loss and keeps flavors intact. Place the container in the fridge after cooling it to room temperature. Your fried rice will last about 3 to 4 days in the refrigerator. When reheating, use a skillet or microwave. For the skillet, heat on medium and add a splash of water. This keeps it moist. Stir often to avoid sticking. In the microwave, cover the dish with a damp paper towel. This traps steam and keeps it from drying out. You can freeze cauliflower fried rice for longer storage. Pack it in a freezer-safe bag or container, removing as much air as possible. It will stay fresh for up to 3 months in the freezer. To thaw, leave it in the fridge overnight. You can reheat it straight from frozen, but it may take a few extra minutes. Just stir often to heat evenly. Yes, cauliflower fried rice is very healthy. Cauliflower is low in calories and high in fiber. It gives you vitamins C and K, which help your body stay strong. Cauliflower also has antioxidants that fight off harmful free radicals. This dish is lower in carbs than regular rice, making it great for a low-carb diet. You get all these benefits while enjoying a tasty meal. You can make cauliflower fried rice ahead of time. To do this, cook the dish as usual and let it cool. Store it in an airtight container in the fridge. It will stay fresh for about 3 to 4 days. When you are ready to eat, just reheat it in a skillet or microwave. This saves time on busy days and still gives you a healthy meal. If you need a soy sauce substitute, try coconut aminos. It has a similar taste but is soy-free. You can also use tamari for a gluten-free option. For a different flavor, try using Worcestershire sauce or teriyaki sauce. These choices keep your dish tasty while meeting dietary needs. Absolutely! You can add many vegetables to your fried rice. Think about bell peppers, broccoli, or snap peas for extra crunch. You could also add spinach or kale for more greens. Just chop them small and stir-fry them along with the other ingredients. This way, you boost the flavor and nutrition of your meal. Cauliflower fried rice is a tasty and healthy dish. You’ve learned how to prepare it with fresh ingredients, cooking techniques, and storage tips. Feel free to experiment with flavors and vegetables based on your taste. This dish is easy to adapt for different diets too. Enjoy your cooking and the delicious meals you create!

Cauliflower Fried Rice Healthy and Flavorful Recipe

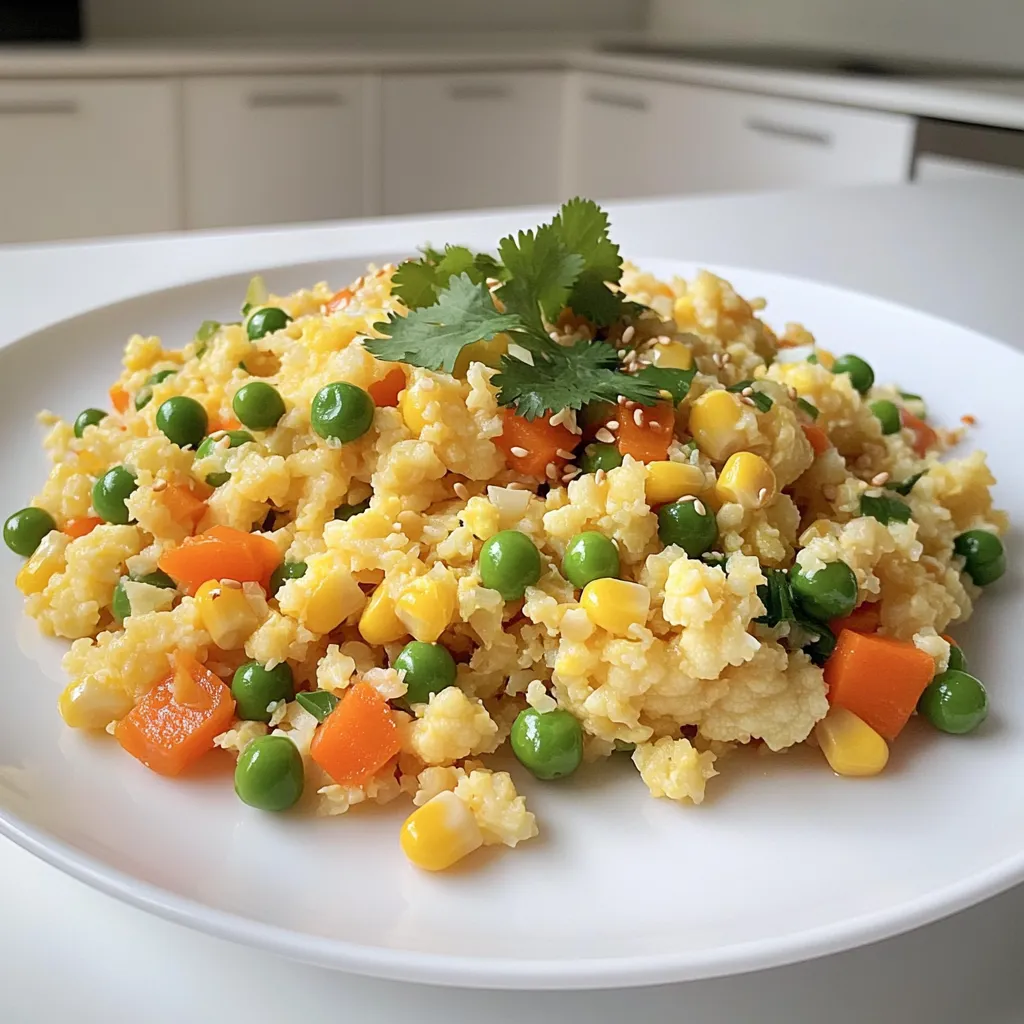
Looking for a healthy twist on your favorite fried rice? My Cauliflower Fried Rice recipe is packed with flavor and

- 1 cup pure pumpkin puree - 1/2 cup unsweetened applesauce - 1/2 cup brown sugar, packed - 1/4 cup granulated sugar - 2 large eggs - 1 teaspoon vanilla extract - 1 1/2 cups all-purpose flour The main ingredients make these muffins rich and moist. The pumpkin puree adds a lovely texture. Applesauce brings natural sweetness, cutting down on added sugar. Brown sugar gives a deep flavor, while granulated sugar keeps it light. Eggs bind everything together, and vanilla adds warmth. Flour is the base that holds the muffins up. - 1 teaspoon baking powder - 1 teaspoon baking soda - 1 teaspoon ground cinnamon - 1/2 teaspoon ground nutmeg - 1/2 teaspoon ground ginger - 1/4 teaspoon salt Baking powder and baking soda help the muffins rise. Cinnamon, nutmeg, and ginger add warmth and spice. Salt enhances the flavors, giving them a balanced taste. Each of these ingredients plays a key role in making your muffins fluffy and flavorful. - 1 cup semi-sweet chocolate chips - 1/2 cup chopped walnuts or pecans Chocolate chips bring a rich sweetness that pairs perfectly with pumpkin. You can use semi-sweet or dark chocolate, depending on your taste. Nuts add a nice crunch and extra flavor. Feel free to mix and match these add-ins based on what you prefer. - Preheat oven to 350°F (175°C). - Prepare muffin tin with liners or greasing. First, combine these wet ingredients: - 1 cup pure pumpkin puree - 1/2 cup unsweetened applesauce - 1/2 cup brown sugar, packed - 1/4 cup granulated sugar - 2 large eggs - 1 teaspoon vanilla extract Whisk these together until smooth. This step ensures the flavors mix well. In a separate bowl, mix the dry ingredients: - 1 1/2 cups all-purpose flour - 1 teaspoon baking powder - 1 teaspoon baking soda - 1 teaspoon ground cinnamon - 1/2 teaspoon ground nutmeg - 1/2 teaspoon ground ginger - 1/4 teaspoon salt Gradually add the dry mixture to the wet mixture. Stir gently to blend. Be careful not to overmix; this keeps the muffins light. Fold in 1 cup of semi-sweet chocolate chips. You can also add 1/2 cup chopped walnuts or pecans, if you like. Mix until evenly distributed. Now, fill the muffin cups about two-thirds full. This allows room for rising. Bake in the preheated oven for 18-22 minutes. To check if they’re done, use a toothpick. Insert it into the center of a muffin. If it comes out clean, the muffins are ready. To make the best chocolate chip pumpkin muffins, focus on mixing. Mix the wet and dry ingredients gently. Overmixing can make your muffins tough. Aim for a few lumps in the batter. This keeps them soft and fluffy. The temperature of your ingredients matters too. Use eggs at room temperature. This helps the batter mix well. Warm pumpkin puree also blends better. It creates a smooth, even batter. Want more flavor? Try adding extra spices. A dash of allspice or cloves can work wonders. You can also add extracts, like almond or maple. These little tweaks can elevate your muffins. When it comes to chocolate chips, be creative. You can use semi-sweet chips or dark chocolate. For a fun twist, try white chocolate or milk chocolate. Mixing different types adds depth and richness to each bite. Presentation makes your muffins even more appealing. Serve them warm with a sprinkle of powdered sugar. This adds a nice touch and makes them look fancy. You can also serve your muffins with whipped cream. A dollop on the side turns a simple treat into a dessert. This combination is sure to impress family and friends. {{image_2}} You can easily make these muffins gluten-free. Just swap the all-purpose flour for gluten-free flour. Use a blend that has xanthan gum for the best texture. This change keeps the muffins moist and fluffy, just like the original. To make these muffins vegan, you can replace the eggs. Use 1 tablespoon of ground flaxseed mixed with 2.5 tablespoons of water for each egg. Let it sit until it thickens. For dairy, substitute the unsweetened applesauce with your favorite plant-based option. Almond or coconut milk works well in this recipe. You can boost the flavor with fun additions. Try adding dried fruits like cranberries or blueberries. They add a nice burst of sweetness. You can also mix in spices like cloves or cardamom to enhance the taste. A pinch of nutmeg adds warmth too. These simple changes make the muffins even more exciting! After baking, let the muffins cool for about 5 minutes in the pan. This helps them set. Then, transfer them to a wire rack. Let them cool completely for best flavor and texture. Once cool, store the muffins in an airtight container. Use parchment paper to separate layers if stacking. This keeps them fresh for up to 4 days at room temperature. To freeze your muffins, start with completely cooled ones. Wrap each muffin in plastic wrap. Place them in a zip-top freezer bag. Squeeze out all the air before sealing. Label the bag with the date. You can freeze muffins for up to 3 months. When you want to eat them, remove a muffin from the bag. You can thaw muffins in several ways. Leave them in the fridge overnight for a slow thaw. For a quick option, microwave them for about 20 seconds. You can also let them sit at room temperature for about an hour. This way, they taste fresh and delightful. To reheat muffins, the oven works best. Preheat it to 350°F (175°C). Place muffins on a baking sheet and heat for about 5-10 minutes. You can also use the microwave for a quick warm-up. Heat them for 10-15 seconds. To keep muffins fresh after reheating, store any leftovers in an airtight container. Enjoy your muffins warm for the best taste! Yes, you can use fresh pumpkin! To make fresh pumpkin puree, follow these steps: - Choose a small sugar pumpkin, not a carving pumpkin. - Cut the pumpkin in half, scoop out the seeds, and place it cut side down on a baking sheet. - Roast it in a 350°F (175°C) oven for about 45 minutes. - Once it cools, scoop out the flesh and blend it until smooth. This puree works great in your muffins! These muffins stay fresh for about 3 days at room temperature. - Store them in an airtight container to keep moisture in. - If you want them to last longer, place them in the fridge. They can last up to a week in the fridge. Absolutely! Non-dairy milk can work well. - Almond milk, soy milk, or oat milk are great options. - Use the same amount as regular milk in the recipe. This keeps your muffins moist and tasty! Yes, you can lower the sugar. - Try cutting the brown sugar by a quarter. - You can also use unsweetened applesauce for sweetness. Just remember, too much sugar makes your muffins fluffy and moist! You now have a complete guide to making delicious chocolate chip pumpkin muffins. We covered the essential ingredients, provided easy step-by-step instructions, shared handy tips, and explored variations to suit your needs. These muffins are not just tasty; they offer a warm hint of fall with every bite. Remember, you can customize them to match your dietary preferences. Whether you’re enjoying them fresh or storing for later, these muffins are sure to please. Happy baking!

Chocolate Chip Pumpkin Muffins Irresistible Delight

If you love fall flavors, you need to try these Chocolate Chip Pumpkin Muffins. They are easy to make and

Older posts
Newer posts
← Previous Page1 Page2 Page3 Page4 … Page85 Next →

dsad

© 2026 greenmealmap • Built with GeneratePress

Our Policies

  • Copyright Policy
  • Cookie Policy
  • GDPR Policy
  • Privacy Policy
  • Disclaimer
  • Terms Of Use

More Information

  • Home
  • About
  • Contact
  • Appetizers
  • Dessert
  • Dinner
  • Drinks
©2026, greenmealmap About Back To Top