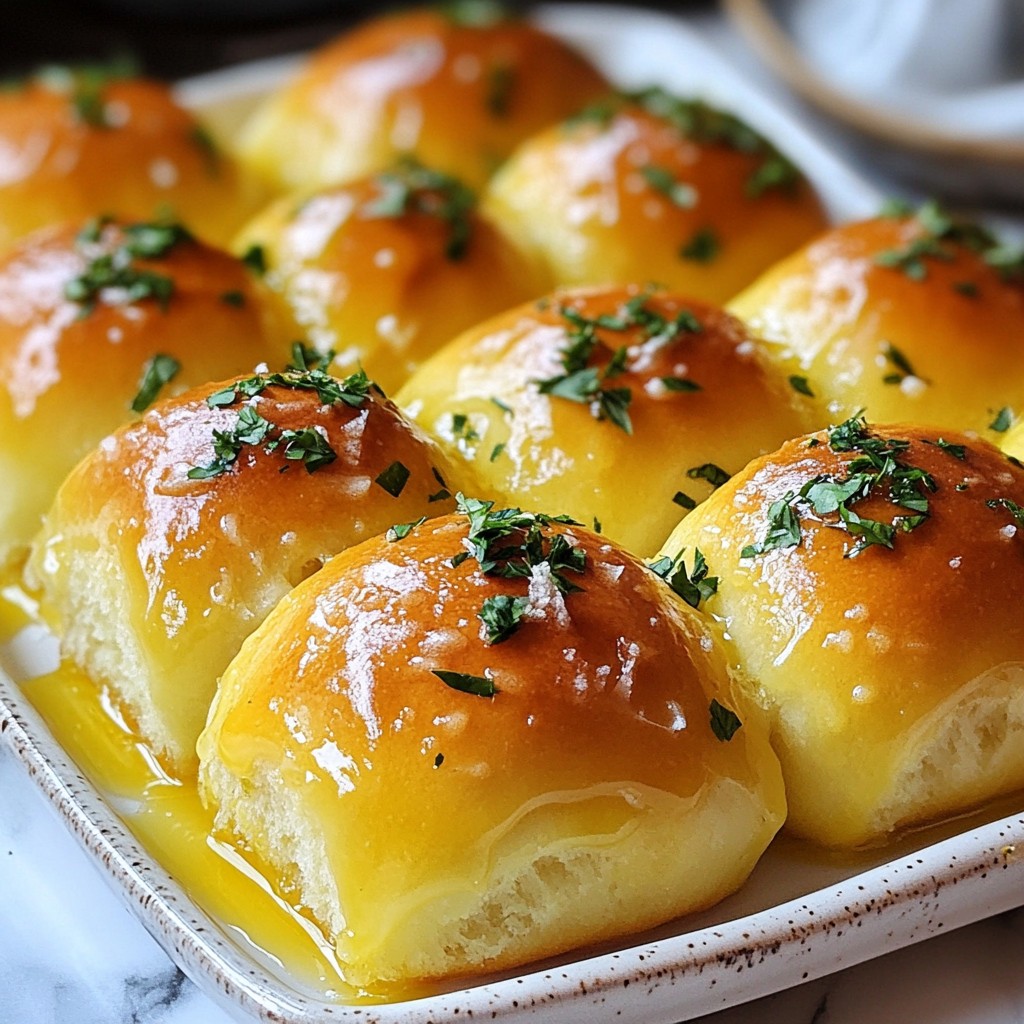
Get ready to impress your family and friends with my Buttery Thanksgiving Herb-Infused Dinner Rolls! These soft, fluffy rolls will be the star of your holiday table. Imagine the warm aroma of fresh herbs as they bake. In this post, I will guide you through easy steps, helpful tips, and fun variations. Whether you’re a baking novice or a seasoned pro, you’ll find everything you need to create these delightful rolls. Let’s get started!
Why I Love This Recipe
- Comforting Flavor: These rolls are infused with aromatic herbs, making them a delightful addition to any Thanksgiving table.
- Perfectly Soft: The combination of warm milk and butter creates an incredibly soft and fluffy texture that melts in your mouth.
- Easy to Make: With simple ingredients and straightforward steps, these rolls are accessible for bakers of all skill levels.
- Versatile Pairing: Whether served with turkey, gravy, or as a snack on their own, these rolls complement various dishes beautifully.
Ingredients
Main Ingredients Needed
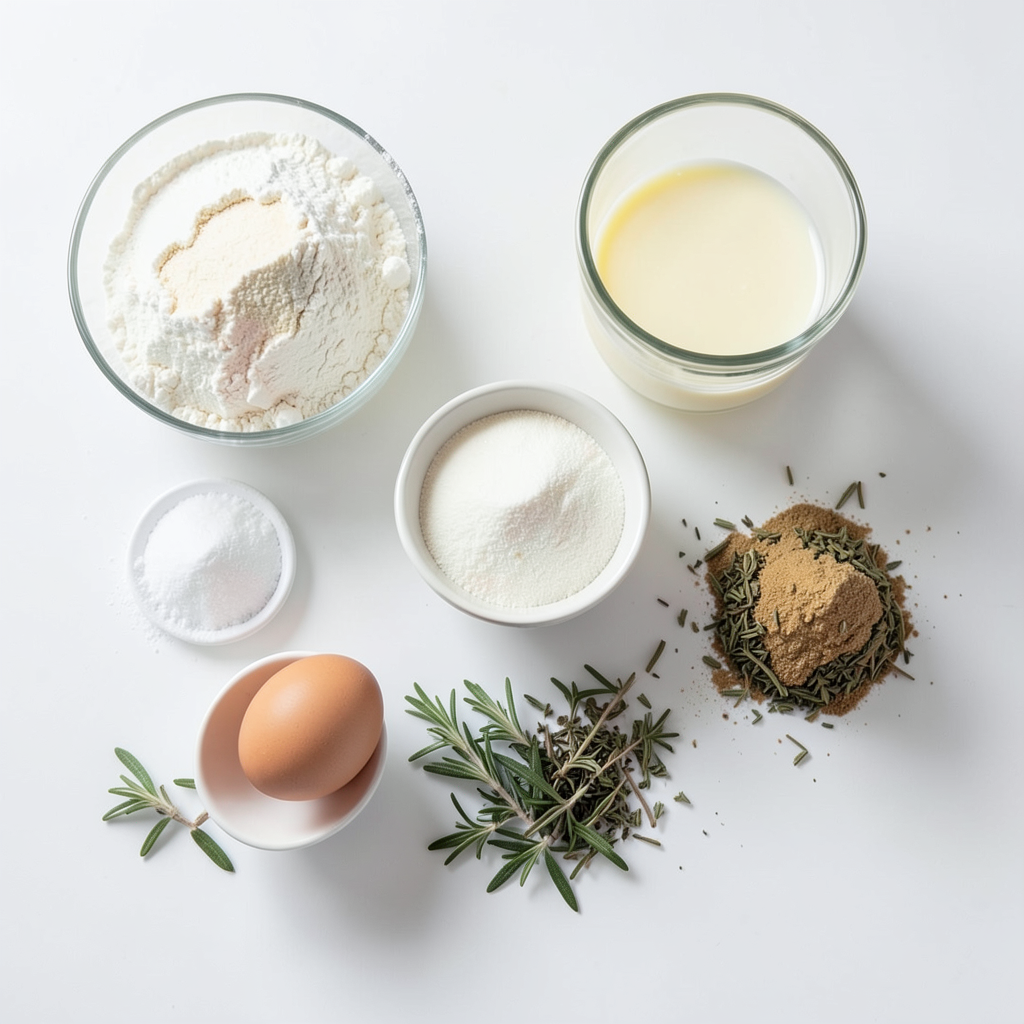
To make these buttery rolls, gather the following items:
- 4 cups all-purpose flour
- 1 packet (2 1/4 teaspoons) instant yeast
- 1/4 cup granulated sugar
- 1 cup warm milk (110°F/43°C)
- 1/2 cup unsalted butter, melted (plus extra for brushing)
- 1 teaspoon salt
- 2 large eggs
- 1 teaspoon dried rosemary
- 1 teaspoon dried thyme
- 1 teaspoon garlic powder
These ingredients create a soft and fluffy dough. The warm milk activates the yeast, making the rolls rise. The butter gives them a rich, buttery flavor.
Optional Ingredients for Garnish
For extra flavor and beauty, consider these garnishes:
- Fresh herbs (like rosemary or thyme)
Adding fresh herbs on top makes these rolls look lovely. They also add a fresh taste that complements the buttery flavor.
Equipment List
Here’s what you need to gather before you start:
- Large mixing bowl
- Kitchen towel
- Measuring cups and spoons
- Greased baking dish (9x13 inch)
- Oven
- Rolling pin (optional)
Having these tools ready will make the process smooth. You’ll easily mix, rise, and bake your rolls to perfection.
Step-by-Step Instructions
Preparing the Yeast Mixture
Start by warming your milk to about 110°F (43°C). This heat helps the yeast wake up. In a large bowl, mix the warm milk, sugar, and instant yeast. Let it sit for about 5 minutes. You want to see bubbles form. This means your yeast is active and ready to go.
Making the Dough
Next, add melted butter, salt, and eggs to your yeast mix. Stir well until everything is combined. Now, it’s time to add the flour. Do this one cup at a time. Mix it until you see a soft dough form. Then, sprinkle in dried rosemary, thyme, and garlic powder. Knead the dough for 8-10 minutes. You want the dough smooth and elastic.
Shaping and Rising the Rolls
After kneading, put the dough in a greased bowl. Cover it with a kitchen towel. Let it rise in a warm spot for about 1 hour. The dough should double in size. Once it’s risen, punch it down and divide it into 16 equal pieces. Roll each piece into a ball. Place them in a greased 9x13 inch baking dish, leaving space between each roll. Cover the dish with a towel again. Let the rolls rise for another 30 minutes while you preheat your oven to 350°F (175°C). Bake the rolls for 20-25 minutes until golden brown. Brush the tops with melted butter right after they come out of the oven for that extra flavor.
Tips & Tricks
How to Achieve the Perfect Rise
To get fluffy rolls, warm milk is key. Use milk at 110°F (43°C). This warmth wakes up the yeast and helps it grow. Let the yeast, sugar, and milk mix sit for five minutes. You should see bubbles forming. This means the yeast is ready. After mixing in the butter and eggs, let the dough rise in a warm spot. Cover it well. A good rise takes about one hour, or until the dough doubles in size.
Best Practices for Kneading Dough
Kneading is fun and important. It builds gluten, which gives rolls their soft texture. Use your hands to push the dough down and fold it over. Do this for about eight to ten minutes. If the dough sticks to your hands, sprinkle a little flour on it. The dough should feel smooth and elastic when you’re done. You can even test it by stretching a small piece. If it stretches without tearing, you did it right!
Brushing with Butter for Golden Finish
Brushing melted butter on your rolls makes them shine. It adds flavor and helps them look great. As soon as the rolls come out of the oven, use a brush to coat the tops. This will give them a golden color and a rich taste. For extra flair, sprinkle fresh herbs on top after brushing. It makes your rolls not only taste good but also look stunning on the table!
Pro Tips
- Use Fresh Herbs: For an even more aromatic flavor, consider using fresh herbs instead of dried. Add them to the dough for an extra burst of freshness.
- Perfecting the Dough: Ensure your dough is well-kneaded until it's smooth and elastic, which will help achieve a light and fluffy texture in your rolls.
- Adjusting Rising Times: Rising times can vary based on your kitchen's temperature. If it’s cooler, let the dough rise longer; if it’s warmer, it may rise faster.
- Storage Tips: For leftovers, store the rolls in an airtight container at room temperature for up to 2 days or freeze them for up to 3 months. Reheat before serving.
Variations
Herb Alternatives to Use
You can change the herbs in these rolls. Try using fresh herbs for a bright taste. Basil, parsley, or oregano can work well. If you want a stronger flavor, add sage. For a twist, use dill or fennel seeds. Mix and match to find your favorite blend. Each option gives a new twist to your rolls.
Adding Cheese or Other Flavors
Cheese can make these rolls extra special. Try adding shredded cheddar or mozzarella for a savory touch. You can also mix in crumbled feta or goat cheese. Adding a bit of grated Parmesan gives a nice salty flavor. For a sweet twist, mix in some chopped dried fruit or nuts. This adds texture and flavor. Choose what you love to make these rolls your own.
Gluten-Free Adaptations
For gluten-free rolls, swap regular flour for a gluten-free blend. Look for a blend that includes xanthan gum. This helps the dough hold together. You may need to adjust the liquid a bit. Start with less milk and add more as needed. Follow the same steps in the recipe to enjoy gluten-free rolls. They can be just as fluffy and tasty!
Storage Info
How to Store Leftover Rolls
After your tasty rolls are gone, store any leftovers in an airtight bag. This keeps them fresh for about 2 days at room temperature. If you want to keep them longer, use the freezer. Make sure the rolls are completely cool before you store them. This prevents moisture from building up and making them soggy.
Freezing Instructions
To freeze your rolls, wrap each one in plastic wrap. Then place them in a freezer-safe bag. You can freeze them for up to 3 months. When you’re ready to enjoy them again, simply take out the number of rolls you need. Let them thaw in the fridge overnight or on the counter for a few hours.
Reheating Tips
To reheat your dinner rolls, preheat your oven to 350°F (175°C). Place the rolls on a baking sheet. Heat them for about 10-15 minutes, or until warm. If you want a soft texture, cover them with foil while they heat. For a crispier finish, leave them uncovered. Brush with melted butter right before serving for that extra touch!
FAQs
How do I know when the dough has risen enough?
You can tell the dough has risen enough when it doubles in size. To check this, gently press your finger into the dough. If the indentation stays, it's ready. If it springs back, give it more time. This step is important for light and fluffy rolls.
Can I make these rolls ahead of time?
Yes, you can prepare these rolls ahead of time. After shaping the rolls, place them in the fridge instead of letting them rise. Cover them with plastic wrap. They can stay in the fridge for up to 24 hours. When you're ready, let them sit at room temperature for about 30 minutes before baking.
What type of flour is best for dinner rolls?
All-purpose flour works best for dinner rolls. It gives the rolls a nice texture without being too dense. You can also use bread flour for a chewier bite. Just remember, the key is to measure your flour correctly for the best results.
You learned about the key ingredients for making delicious dinner rolls. We discussed step-by-step instructions from yeast mixture to shaping dough. I shared helpful tips for perfect rising and kneading. You also explored fun variations and smart storage methods.
Making dinner rolls can be simple and rewarding. With practice, you'll impress everyone with your skills. Enjoy the process, and don't forget to have fun!