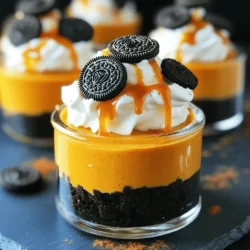
No Bake Oreo Pumpkin Cheesecake Cups
Indulge in the ultimate fall treat with these No Bake Oreo Pumpkin Cheesecake Cups! Combining creamy pumpkin cheesecake with a crunchy Oreo crust, this quick and easy recipe will delight your taste buds. Perfect for gatherings or a cozy night in, these delicious cups are sure to impress. Ready to whip up this irresistible dessert? Click through to discover the full recipe and enjoy a taste of autumn today!