Skip to content
DisclaimerTerms Of UseGDPR PolicyCookie Policy

greenmealmap

  • Home
  • Drinks
  • Appetizers
  • Dinner
  • Dessert
  • About
  • Contact
  • Privacy Policy
DisclaimerTerms Of UseGDPR PolicyCookie Policy

NO-ING-IMG

- 1 can (15 oz) chickpeas, drained and rinsed - 1 tablespoon olive oil - 1 teaspoon smoked paprika - 1 teaspoon garlic powder - 1/2 teaspoon ground cumin - 1/2 teaspoon sea salt - 1/4 teaspoon cayenne pepper (optional for heat) - Fresh parsley for garnish (optional) To make crispy air fryer chickpeas, you need simple ingredients. Start with a can of chickpeas. Be sure to drain and rinse them well. This step helps remove excess sodium and prepares them for crisping. Next, gather some olive oil. It adds flavor and helps the spices stick. For the spices, use smoked paprika, garlic powder, and ground cumin. These spices create a lovely taste. Add sea salt to enhance the flavor. If you want some heat, cayenne pepper is great for a kick. Lastly, parsley adds a pop of color, though it's optional. This mix of ingredients makes a tasty snack. You can play with the spices to suit your taste. I love how easy it is to make these crunchy bites! For the full recipe, check out the section above. - Preheat air fryer to 400°F (200°C). - Rinse and dry chickpeas thoroughly. Start by preheating your air fryer. This step helps to get the chickpeas crispy. Set it to 400°F (200°C) and let it warm for about five minutes. While it heats, take a can of chickpeas. Open it, drain the liquid, and rinse the chickpeas under cold water. This removes excess salt and keeps them fresh. After rinsing, dry them well using a clean towel. The drier they are, the crispier they will get when cooked. - Combine chickpeas and seasonings in a bowl. - Place chickpeas in air fryer basket. - Air fry for 15-20 minutes; shake halfway through. Next, take a mixing bowl and add the dried chickpeas. Then pour in one tablespoon of olive oil. Add one teaspoon each of smoked paprika, garlic powder, and half a teaspoon of ground cumin and sea salt. If you like some heat, toss in a quarter teaspoon of cayenne pepper. Mix everything well, ensuring each chickpea gets coated with the seasoning. Now, put the chickpeas in the air fryer basket. Spread them out in a single layer. Avoid stacking them to ensure even cooking. Set the timer for 15-20 minutes. At the halfway mark, give the basket a good shake. This helps them cook evenly. After about 15 minutes, check for a golden brown color. If they look crispy, they are ready! Remove them and let them cool for a few minutes. They will continue to crisp up as they cool. For a nice touch, you can sprinkle fresh parsley on top. Enjoy your crispy air fryer chickpeas as a snack or a topping for salads! For the full recipe, feel free to check the detailed instructions above. To make crispy air fryer chickpeas, drying them is key. After you drain and rinse the chickpeas, use a clean kitchen towel. Pat them dry until no moisture remains. The drier they are, the crispier they get. Another important tip is to avoid overcrowding in the air fryer. If you fill the basket too much, the chickpeas won’t cook evenly. They need space to get hot air all around them. A single layer is best for that perfect crunch. Now, let’s talk about flavor! You can try many spices to make your chickpeas pop. Smoked paprika and garlic powder are great choices. But don’t stop there! Experiment with spices like cumin or even curry powder. Here are some seasoning combinations you might enjoy: - Spicy Kick: Add cayenne pepper and chili powder. - Herb Delight: Try oregano and thyme for a fresh taste. - Zesty Twist: Mix lemon zest and dill for a bright flavor. These tips will help you create a tasty and unique snack every time. For the full recipe, check out the details provided earlier. {{image_2}} You can create different flavors for your crispy air fryer chickpeas. - For a spicy version, add more cayenne and a sprinkle of chili powder. This adds heat and a bold flavor. - If you want a herb-infused flavor, mix in dried oregano and thyme. These herbs give a fresh touch to each bite. Feel free to play around with spices. You can find the perfect mix that suits your taste. Crispy air fryer chickpeas make a great snack. You can serve them right from the bowl. You can also sprinkle them on salads for extra crunch. They add texture and flavor to your greens. If you like grain bowls or wraps, toss some chickpeas in for added protein. They pair well with rice, quinoa, or any grains. Get creative! These chickpeas can fit into many meals. Check out the Full Recipe for more ideas. To store leftover crispy chickpeas, first, let them cool completely. Place them in an airtight container. This helps keep them fresh. Avoid using plastic bags, as they can trap moisture. You can keep the chickpeas at room temperature for up to two days. For longer storage, try a glass jar. To reheat crispy chickpeas, use your air fryer again. Set it to 350°F (175°C). Heat the chickpeas for about five minutes. This keeps them crunchy. You can also use an oven. Spread them on a baking sheet and heat for the same time. Enjoy the great taste! For the full recipe, check out the link. Can I use dried chickpeas instead of canned? Yes, you can use dried chickpeas. However, you need to soak and cook them first. This takes more time but gives you a fresh taste. If you choose this option, cook them until tender before air frying. How do I prevent chickpeas from getting soggy? To keep your chickpeas crispy, dry them well after rinsing. Use a clean kitchen towel to absorb all moisture. The drier they are, the crunchier they will become in the air fryer. What air fryer temperature works best for chickpeas? The best temperature is 400°F (200°C). This high heat cooks the chickpeas quickly and helps them crisp up nicely. Preheat the air fryer before adding the chickpeas for the best results. Important nutritional information and serving sizes. One serving of crispy air fryer chickpeas contains about 120 calories. They provide protein and fiber, making them a healthy snack. Each can (15 oz) serves about four people. How long do crispy air fryer chickpeas last? Crispy air fryer chickpeas stay fresh for about 3-5 days in an airtight container. They may lose crispiness over time, so it is best to eat them soon after cooking. For the full recipe, check the details above. Crispy air fryer chickpeas are simple and fun to make. We covered each step, from the right ingredients to cooking tips. You learned how to enhance flavors and explore fun variations. Remember, drying the chickpeas is key for crispiness. Store extras properly to enjoy later. With these ideas, you can make a tasty snack that fits any meal. Enjoy your cooking adventure with chickpeas, and let your creativity shine!

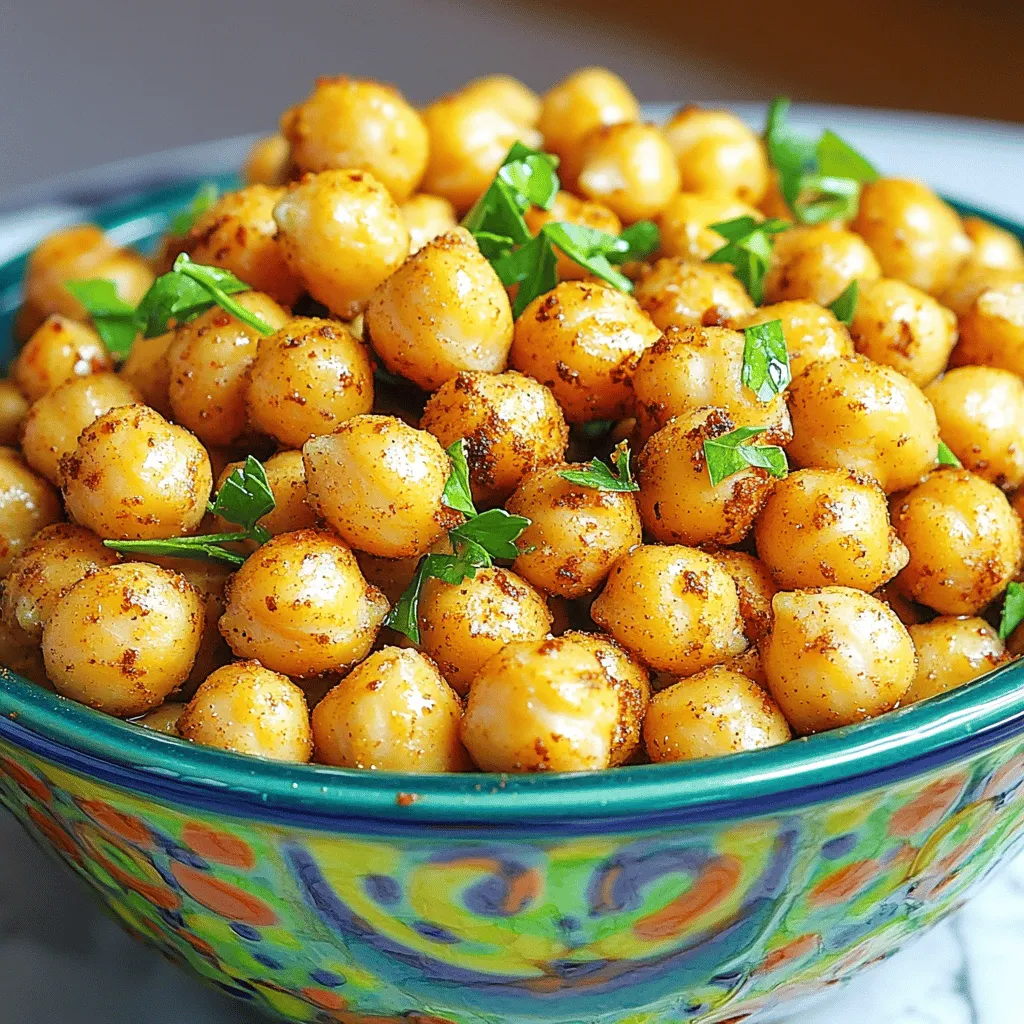
Crispy Air Fryer Chickpeas Quick and Tasty Snack

Are you in search of a quick and tasty snack? Look no further! Crispy air fryer chickpeas will satisfy your

- 1 pound boneless, skinless chicken breast - 1/2 cup honey - 1/4 cup soy sauce - 2 tablespoons sriracha - 1 tablespoon rice vinegar - 1 teaspoon garlic powder - 1/2 teaspoon ground ginger - 1/4 teaspoon black pepper - 2 tablespoons sesame seeds - 2 green onions - 2 tablespoons vegetable oil When you gather these ingredients, you set the stage for a flavor-packed dish. The boneless, skinless chicken breast is your canvas. Honey adds sweetness, while soy sauce brings that umami punch. The sriracha gives it a nice kick, making your taste buds dance. Rice vinegar balances the flavors, ensuring every bite is just right. The garlic powder and ground ginger add depth. Black pepper rounds it out with a subtle warmth. Don’t forget the sesame seeds and green onions for a fresh crunch. They also make your dish look great! Make sure to check out the Full Recipe for detailed steps on how to combine these ingredients into something truly delicious. Cooking is all about balance, and these ingredients work together seamlessly to create sweet and spicy chicken bites. - In a bowl, whisk together honey, soy sauce, sriracha, rice vinegar, garlic powder, ground ginger, and black pepper. This mix gives the chicken its sweet and spicy kick. - Once mixed, add the chicken pieces to the marinade. Make sure each piece is well coated. Cover the bowl and let it sit in the fridge for at least 30 minutes. For the best flavor, let it marinate for up to 2 hours. - Heat 2 tablespoons of vegetable oil in a large skillet over medium-high heat. The oil should shimmer when it's ready. - Remove the chicken from the marinade and lay it in the skillet in a single layer. Reserve the marinade for later use. - Cook the chicken for 4-5 minutes on each side. Look for a golden brown color. Make sure the chicken is cooked through before moving on. - While the chicken cooks, pour the reserved marinade into a small saucepan. Bring it to a simmer over medium heat. Let it cook for about 5 minutes until it thickens a bit. - Once the chicken is done, drizzle the thickened sauce over it in the skillet. Toss to coat the chicken evenly. Cook for an additional 2 minutes to blend the flavors. - Remove the skillet from heat and sprinkle the chicken bites with sesame seeds and sliced green onions for a nice finish. For the full recipe, check out the Sweet and Spicy Chicken Bites. Enjoy your cooking! To make sweet and spicy chicken bites just right, you can change the heat level. If you want it milder, use less sriracha. You can also try different hot sauces. Here are some great options: - Chili garlic sauce: This adds heat and flavor. - Hot pepper flakes: Sprinkle these for a quick kick. - Chipotle sauce: This adds a smoky spice. If you love more heat, feel free to add extra sriracha. You can also mix it with a bit of honey to balance it out. Marinating is key for great taste. Letting the chicken soak in the marinade makes it juicier and more flavorful. I recommend marinating for at least 30 minutes. For the best flavor, aim for 2 hours. Here are some tips for marinating: - Use a sealed bag: This helps the marinade coat the chicken well. - Refrigerate: Always keep the chicken in the fridge while marinating. - Don’t skip the time: The longer you marinate, the better the taste. You have two great options for cooking: grilling or pan-frying. Each method gives a different flavor and texture. - Grilling: This adds a smoky flavor. Preheat your grill and cook the chicken until it's charred. - Pan-frying: This gives a nice crispy texture. Use medium-high heat and cook in batches. To get that perfect crispy bite, make sure not to overcrowd the pan. This helps the chicken cook evenly. You want a golden-brown crust. For the full recipe and to create these delicious bites, check out the [Full Recipe]. {{image_2}} You can change the protein in this dish. Instead of chicken, try shrimp or tofu. Both work well with the sweet and spicy sauce. Shrimp cooks quickly, so keep an eye on it. Tofu soaks up flavors nicely. If you need a gluten-free option, use tamari instead of soy sauce. This keeps the taste without gluten. You can add citrus for a fresh kick. Try lime or orange juice in the marinade. This adds a bright flavor that enhances the dish. You can also mix in other spices. Garlic powder is great, but you can try paprika or cayenne for heat. Experimenting with spices can bring new flavors to your bites. Pair your chicken bites with tasty side dishes. Rice or quinoa is a great choice to soak up the sauce. You can also serve them with a crisp salad for a fresh touch. For sauces, sweet chili sauce or peanut sauce works well. They add extra flavor and make each bite even better. Remember, the right side dish and sauce can elevate your meal. Check out the Full Recipe for more tips! To keep your sweet and spicy chicken bites fresh, refrigerate them right away. Place them in an airtight container. This helps lock in moisture and flavor. Your chicken should stay safe in the fridge for up to four days. If you want to keep them longer, freezing is a great option. For freezing, make sure to cool the chicken first. Then, wrap each piece in plastic wrap. After that, place them in a freezer-safe bag. Remove as much air as possible. This method helps prevent freezer burn. When it's time to enjoy your leftovers, reheating needs care. The oven works best for keeping the chicken bites crispy. Preheat your oven to 350°F. Spread the chicken on a baking sheet. Heat for about 10-15 minutes. This method keeps them juicy and flavorful. If you're in a hurry, you can use the microwave. Place the chicken on a microwave-safe plate. Cover it with a damp paper towel to keep moisture. Heat in short bursts of 30 seconds. Check the temperature often to avoid drying them out. How long can sweet and spicy chicken bites last? In the fridge, they last up to four days. In the freezer, they can stay good for about three months. Look for signs of spoilage. If you see any mold or an off smell, it's best to toss them. The chicken should always look and smell fresh. Enjoy your tasty bites safely! You can pair these chicken bites with several tasty sides. Here are some ideas: - Steamed rice: White or jasmine rice works well. It soaks up the sauce. - Vegetable stir-fry: Broccoli, bell peppers, and carrots add color and crunch. - Coleslaw: A cool, crunchy slaw balances the heat nicely. - Corn on the cob: Sweet corn brings a fun texture contrast. For sauces, try these options: - Sweet chili sauce: Adds more sweetness with a hint of heat. - Soy sauce: A classic choice that enhances the flavor. - Ranch dressing: Creamy ranch cools down the spice. Yes, you can prepare these chicken bites in advance. Here’s how: - Meal prep tips: Marinate the chicken a day ahead. This helps the flavors deepen. - Storage: Keep the marinated chicken in the fridge until you cook it. To reheat without losing flavor: - Oven method: Preheat the oven to 350°F (175°C). Bake for 10-15 minutes. - Skillet method: Heat a little oil in a skillet. Cook the chicken on medium heat for 5 minutes. This keeps it juicy. Absolutely! You can make delicious meatless options. Here are some substitutes: - Tofu: Use firm or extra-firm tofu. Cut it into bite-sized pieces. - Tempeh: This is a great source of protein. It has a nutty flavor. - Cauliflower: Cut it into florets. It roasts well and absorbs flavors. To adjust cooking methods for plant-based proteins: - Marinating: Just like chicken, marinate your tofu or tempeh. - Cooking: Cook in the same way as chicken, but check for doneness. They take less time to cook. For the full recipe, you can refer to the main section above. This blog post covered how to make delicious sweet and spicy chicken bites. We discussed key ingredients, from chicken and honey to sriracha and sesame seeds. I shared step-by-step instructions to ensure success in the kitchen. You learned tips for adjusting spice levels and flavorful variations. Lastly, we covered how to store leftovers and answered common questions. Enjoy making this dish, and don’t forget to experiment with your own twists for flavor! Your taste buds will thank you.

Sweet and Spicy Chicken Bites Tasty Flavor Explosion

Get ready for a flavor explosion with my Sweet and Spicy Chicken Bites! This dish combines the perfect blend of

- 1 can (15 oz) black beans, rinsed and drained - 1 cup corn kernels (fresh or frozen) - 1 red bell pepper, diced - 1 small red onion, finely chopped - 1 avocado, diced - Juice of 2 limes - 2 tablespoons olive oil - 1 teaspoon cumin - 1 teaspoon chili powder - Salt and pepper to taste - Step 1: In a large bowl, combine black beans, corn, diced red bell pepper, and chopped red onion. - Step 2: Add halved cherry tomatoes and diced avocado to the bowl. - Step 3: In a small bowl, whisk lime juice, olive oil, cumin, chili powder, salt, and pepper. - Step 4: Gently fold in cilantro to mix well. - Step 5: Adjust seasoning as needed and let sit for 10 minutes. This salad is colorful and tasty. You can find the Full Recipe to make it easy! To make your Zesty Black Bean Salad pop, allow the flavors to meld. After mixing, let it sit for about ten minutes. This time helps the tastes blend together. You can also adjust spices to fit your taste. If you like it spicy, add more chili powder. If you want a milder dish, use less. Always taste and tweak as needed. Serving the salad in glass bowls is a great idea. It shows off the vibrant colors. You can also serve it in individual cups for a fun touch. To make it even prettier, garnish with cilantro and lime. This adds a splash of color and fresh flavor. A well-presented dish makes everyone excited to eat! Feel free to change the ingredients to suit your needs. You can add proteins like chicken or shrimp for a hearty meal. For a vegetarian or vegan option, leave out any animal products. You can swap in other veggies too, like diced cucumbers or jalapeños. It's all about what you enjoy. You can try different oils for the dressing. Avocado oil gives a nice flavor twist. You might also want to use herbs like basil or parsley. These additions can change the taste profile and keep it fresh. Experiment with what you have to find your favorite mix. For the full recipe, check the main article. To keep your zesty black bean salad fresh, store it in the fridge. Use an airtight container. The salad will stay good for about 3 days. If you notice any browning on the avocado, eat it sooner. You can freeze this salad, but some parts change texture. If you want to freeze it, skip adding the avocado and cilantro first. Pack the rest in a freezer-safe bag. It’s best to eat it within 3 months. When ready to eat, let it thaw in the fridge overnight. Then, mix in fresh avocado and cilantro for the best flavor. Black beans offer a lot of fiber. One cup has about 15 grams. This helps with digestion and keeps you full longer. Other ingredients also add value. Corn gives you vitamins, while bell peppers add antioxidants. Together, they make this salad not just tasty but healthy. A good serving size is about 1 cup. This amount provides a nice mix of nutrients. It helps you get enough fiber and vitamins without overdoing it. Enjoy this salad as a side or a main dish for balanced meals. For the complete recipe, check the [Full Recipe]. {{image_2}} How do I make a Zesty Black Bean Salad? To make this salad, gather your ingredients. You will need black beans, corn, red bell pepper, red onion, avocado, cherry tomatoes, and cilantro. Then, rinse and drain the black beans. Chop the veggies and mix them in a bowl. For the dressing, whisk lime juice, olive oil, cumin, chili powder, salt, and pepper. Pour this over the salad. Toss gently to mix, then fold in the cilantro. This salad is fresh and colorful! Can I prepare this salad ahead of time? Yes, you can make this salad ahead of time! It tastes even better after the flavors blend. Just prepare all the ingredients, but wait to add the avocado and cilantro until closer to serving. This keeps the avocado fresh and green. You can store it in the fridge for up to two days. Just stir it well before serving. What can I add for extra protein? For extra protein, you can add cooked chicken or shrimp. Black beans already provide some protein, but these additions give a nice boost. You can also use quinoa or chickpeas for a vegetarian option. They blend well with the other flavors and make the dish heartier. This blog post covered how to make a tasty Zesty Black Bean Salad. We talked about main ingredients like black beans, corn, and avocado, plus a flavorful dressing. I shared step-by-step instructions to help you mix and serve the salad perfectly. Use the tips to enhance flavor and presentation. Remember, this salad is customizable to fit your taste. Whether you want to add protein or try a new dressing, feel free to experiment. Enjoy healthy eating with this simple, vibrant dish!

Zesty Black Bean Salad Vibrant and Flavorful Dish

Are you ready to add a burst of flavor to your table? The Zesty Black Bean Salad is a vibrant

- 2 cups elbow macaroni - 1 cup raw cashews - 1/2 cup nutritional yeast The base of this vegan mac and cheese is simple yet powerful. Elbow macaroni serves as the heart of the dish. You can use gluten-free pasta if needed. Raw cashews bring creaminess and a nutty taste. Nutritional yeast adds a cheesy flavor without dairy. - 1/4 teaspoon smoked paprika - Fresh parsley for garnish For those who want to jazz up their dish, smoked paprika adds a rich, smoky taste. A sprinkle of fresh parsley not only adds color but also gives a fresh burst of flavor. Both are great options but not required. - Gluten-free pasta options - Plant-based milk alternatives If you're avoiding gluten, many brands offer gluten-free elbow macaroni. You can also choose any plant-based milk, like almond or oat milk, for a creamy sauce. These swaps make the recipe adaptable to various diets while keeping it delicious. Check the Full Recipe for all ingredients and detailed steps. To cook elbow macaroni perfectly, boil water in a large pot. Add a pinch of salt to the water. Once boiling, add the macaroni. Cook according to the package instructions, usually about 8-10 minutes. Stir the pasta occasionally to prevent sticking. For an al dente texture, check the pasta a minute or two before the time is up. It should be firm but not hard. Drain the macaroni and set it aside. To make the cheese sauce, combine soaked cashews, nutritional yeast, almond milk, lemon juice, Dijon mustard, garlic powder, onion powder, turmeric, salt, and pepper in a blender. Blend until the mixture is smooth and creamy. You may need to stop and scrape the sides to mix well. If the sauce is too thick, add more almond milk. Blend again until you reach a creamy consistency. In a large saucepan over medium heat, pour the blended cheese sauce. Cook for about 5 minutes, stirring often until warmed through. Add the cooked macaroni to the saucepan. Stir well to coat all the pasta with the creamy sauce. Cook for an additional 2-3 minutes. This helps the flavors meld together. If you want extra flavor, sprinkle in smoked paprika. Mix well and taste to adjust seasonings if needed. Now, you have a delicious vegan mac and cheese ready to enjoy! For the full recipe, check out the complete instructions. Soaking cashews is key for a smooth sauce. When you soak them for 2-4 hours, they soften and blend easily. This makes the sauce rich and creamy. If you skip this step, the sauce can turn out grainy. For the best smoothness, use a high-speed blender. Start on low speed and gradually increase to high. Blend until the mixture is silky, which usually takes about one minute. Stop to scrape the sides if needed. Spices and herbs can elevate your mac and cheese. I love adding garlic powder and onion powder for depth. You can also try smoked paprika for a warm flavor. Experiment with different spices to find what you enjoy. Nutritional yeast gives a cheesy taste. Different brands can offer various flavors. Some are nuttier while others are more savory. Try a few to see which one you like best. Pair your vegan mac and cheese with fun sides. A fresh salad adds crunch and bright flavors. Roasted vegetables also work great for balance. For garnishes, fresh parsley adds color and freshness. You can also sprinkle some more nutritional yeast on top. A dash of smoked paprika can make the dish pop. {{image_2}} You can make vegan mac and cheese without cashews. One great option is a creamy cauliflower-based sauce. Steam cauliflower and blend it with nutritional yeast and almond milk. This mix makes a smooth and cheesy flavor. You can also add garlic and onion for a richer taste. Adding roasted vegetables boosts nutrition. Try mixing in some roasted carrots or bell peppers. They add color and flavor. You can even sneak in some spinach for extra greens. The kids won’t even notice! Want to spice things up? Add jalapeños for a kick. Chop them finely and mix them into the sauce. This twist creates a spicy vegan mac and cheese that's perfect for adventurous eaters. Another fun idea is to drizzle truffle oil over your dish. This oil adds a rich, earthy flavor. Just a little goes a long way, so start with a small amount. It brings a gourmet touch to your vegan mac and cheese. Getting kids to eat veggies can be tricky. A great trick is to blend spinach or carrots into the cheese sauce. They will blend in and change the color without changing the taste. Kids love it, and you can feel good about it! Using fun-shaped pasta can also make this dish appealing. Try stars, shells, or even dinosaur-shaped pasta. The fun shapes make the meal exciting and engaging for little ones. Plus, they’ll love it just as much as regular elbow macaroni! To keep your vegan mac and cheese fresh, store it in airtight containers. Glass or BPA-free plastic containers work best. Make sure to let it cool before sealing to avoid moisture buildup. For refrigeration, keep it in the fridge for up to four days. If you want to store it longer, freezing is a great option. Just place the mac and cheese in freezer-safe containers, leaving some space at the top for expansion. When reheating vegan mac and cheese, you want to keep it creamy. The best method is to use a stovetop. Add the mac and cheese to a pan over low heat. Stir often and add a splash of almond milk to keep it smooth. If you use a microwave, heat it in short bursts. Stir between each burst to avoid hot spots. Adding a little moisture helps keep it from drying out. Vegan mac and cheese lasts about four days in the fridge. Check for any off smells or changes in texture. If it looks dry or clumpy, it’s time to toss it. Always trust your senses; when in doubt, throw it out. For longer storage, freezing is best. You can enjoy it for up to three months in the freezer. Just remember to defrost it in the fridge overnight before reheating. For the full recipe, check out the Creamy Dreamy Vegan Mac & Cheese. Yes, you can. Making Vegan Mac and Cheese ahead of time is easy. Store it in the fridge for up to three days. Use an airtight container to keep it fresh. If you want to keep it longer, freeze it. It can last in the freezer for about three months. Just remember to thaw it overnight in the fridge before reheating. Yes, it can be gluten-free! To make it gluten-free, use gluten-free elbow macaroni. Many brands offer tasty options. You can find them in most grocery stores. Be sure to check the label to confirm they are gluten-free. Making this recipe nut-free is simple! Instead of cashews, use cooked potatoes and carrots. Blend them with the other sauce ingredients. This gives a creamy texture without the nuts. You can also try silken tofu as another option. Adjust the seasonings to your taste for the best flavor. Vegan mac and cheese offers a tasty, plant-based twist on a classic dish. We explored the main ingredients, like pasta, cashews, and nutritional yeast. Optional flavors and smart substitutions elevate this recipe. With easy steps to cook the pasta and make a creamy cheese sauce, anyone can master it. I shared tips for texture, flavor, and storage. No matter how you serve it, vegan mac and cheese can please any crowd. Enjoy the creativity and flavor as you make your own delicious version!

Vegan Mac and Cheese Creamy Delight for Everyone

Get ready for a creamy delight that everyone will love—Vegan Mac and Cheese! This dish proves you can enjoy comfort

To make peanut butter overnight oats, you need just a few simple ingredients. Here’s what you’ll need: - 1 cup rolled oats - 2 cups almond milk (or any milk of choice) - 2 tablespoons natural peanut butter - 1 medium ripe banana, mashed - 1 tablespoon honey or maple syrup (optional, for sweetness) - 1 teaspoon vanilla extract - 1/2 teaspoon cinnamon - Toppings: sliced banana, chopped nuts, chia seeds, or dark chocolate chips These ingredients work together to create a creamy and tasty meal. The rolled oats provide fiber and texture. Almond milk makes it creamy while keeping it light. Natural peanut butter adds healthy fats and a rich flavor. The ripe banana sweetens the oats naturally and gives a nice creaminess. Honey or maple syrup can add extra sweetness if you like. Vanilla extract and cinnamon give it warmth and depth. You can mix and match toppings to keep things exciting. Sliced banana adds freshness, while nuts give crunch. Chia seeds are great for extra fiber. Dark chocolate chips are a fun treat! With these ingredients, you can enjoy a tasty breakfast that’s ready when you wake up. Check the Full Recipe for precise measurements and tips. 1. Mixing the ingredients: Start by taking a large bowl. Add 1 cup of rolled oats, 2 cups of almond milk, and 2 tablespoons of natural peanut butter. Then, mash 1 ripe banana and add it to the bowl. If you want more sweetness, include 1 tablespoon of honey or maple syrup. Finally, add 1 teaspoon of vanilla extract and 1/2 teaspoon of cinnamon. Stir everything well until the peanut butter is mixed in nicely. 2. Dividing into jars or containers: Once your mix is ready, it’s time to portion it out. Grab some jars or containers with lids. Divide the mixture evenly among them. This helps with easy serving later on. 3. Refrigeration time and method: Seal the jars tightly. Place them in the fridge for at least 4 hours, but overnight is best. This lets the oats soak up the milk and flavors blend together. 1. Stirring and adjusting consistency: When morning comes, take your jars out of the fridge. Give each jar a good stir. If the oats seem too thick, add a splash of milk to make them creamier. This helps create a smooth texture. 2. Adding toppings before serving: Now comes the fun part! Top your oats with sliced banana, some chopped nuts, chia seeds, or dark chocolate chips. These toppings not only add flavor but also make your oats look great. Enjoy your Peanut Butter Overnight Oats! For the complete recipe, check the Full Recipe section. To get creamy oats, mix the peanut butter well. This helps spread the rich flavor. Use a whisk or fork to blend it with the oats. If you see clumps, your oats will not taste as good. You may need to adjust the consistency with milk. If your oats are too thick, add a splash of milk. Stir until you reach your desired creaminess. This makes each bite smooth and enjoyable. You can make your oats sweeter or spicier. Try using honey, maple syrup, or agave for sweetness. Each one adds a unique taste. For extra flavor, add cinnamon, nutmeg, or even cocoa powder. These small changes can make a big difference. Toppings can bring fun to your oats. Consider sliced bananas, chopped nuts, or chia seeds. You can also add dark chocolate chips for a sweet touch. These options keep your breakfast exciting and fresh. Check the Full Recipe for more details! {{image_2}} You can easily switch up your peanut butter overnight oats for fun flavors. Here are two great ideas: - Chocolate peanut butter overnight oats: Just mix in two tablespoons of cocoa powder with the other ingredients. This gives a rich, chocolatey taste. You can also add some chocolate chips on top for extra sweetness. - Berry-infused peanut butter oats: Instead of banana, use fresh or frozen berries. Strawberries, blueberries, or raspberries work great. Just mix in a cup of your favorite berries. This adds a burst of fruity flavor to your oats. You can enjoy these oats even if you have dietary needs. Here are some easy swaps: - Vegan alternatives: Use plant-based milk, like almond or soy milk. Replace honey with maple syrup or agave nectar for sweetness. This keeps your oats vegan-friendly. - Gluten-free options: Make sure to choose certified gluten-free oats. Most rolled oats are naturally gluten-free, but it's good to check the label. This way, you can enjoy your oats without worry. To keep your peanut butter overnight oats fresh, choose airtight containers. Glass jars work great because they seal well and are easy to clean. You can also use plastic containers, but make sure they close tightly. When stored properly, your oats last up to five days in the fridge. Make enough for a few days, so you can enjoy them again. Can you reheat overnight oats? Yes, you can! Some people like them cold, while others prefer warmth. To reheat, place the oats in a microwave-safe bowl. Heat them in short bursts, about 30 seconds. Stir in between to avoid hot spots. If they seem too thick, add a splash of milk. This keeps your oats creamy and tasty. How long do peanut butter overnight oats last? Peanut butter overnight oats can last up to five days in the fridge. Store them in airtight containers. This makes meal prep easy. You can grab a jar each morning. Can you use steel-cut oats? Steel-cut oats are not the best choice for overnight oats. They need more cooking time to soften. Rolled oats work better because they soak up liquid faster. This gives you a creamy texture. Is it okay to skip the sweetener? Yes, you can skip sweeteners if you want. The banana adds natural sweetness. If you prefer a less sweet taste, just leave it out. You always have the option to adjust flavors to your liking. What can I substitute for almond milk? You can use any milk you like. Cow's milk, oat milk, or soy milk are great options. Choose the one that suits your taste or dietary needs best. Alternatives for peanut butter? If you want a different nut butter, try almond butter or cashew butter. You can also use sunbutter for a nut-free option. Each choice will give a unique flavor to your oats. Peanut butter overnight oats are easy and fun to make. You can use simple ingredients like rolled oats, almond milk, and ripe bananas. Mix them, let them chill, and enjoy a healthy breakfast. Customize with different flavors and toppings for a tasty twist. Remember to store oats in the fridge, so they stay fresh. With these tips and tricks, your mornings will be quick and delicious. I hope you enjoy making your oats just the way you like them!

Peanut Butter Overnight Oats Easy and Tasty Meal

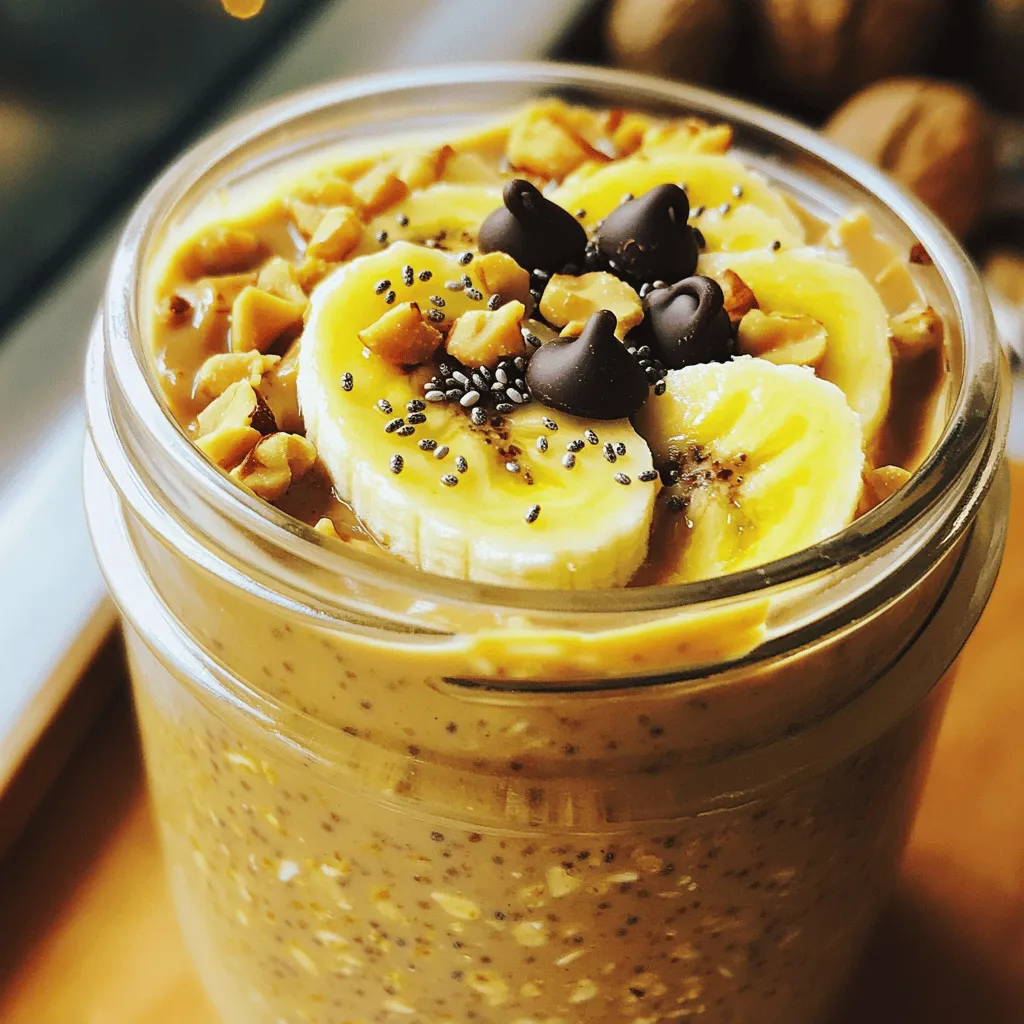
Looking for a quick, tasty breakfast? Peanut Butter Overnight Oats are your answer! With just a few simple ingredients, you

- 1 lb boneless skinless chicken thighs - 1/2 cup soy sauce - 1/4 cup brown sugar - 2 tablespoons honey - 2 tablespoons rice vinegar - 2 cloves garlic, minced - 1 teaspoon ginger, grated - 1 tablespoon cornstarch - 2 tablespoons sesame seeds - 3 green onions, chopped - Cooked rice or quinoa For this easy teriyaki chicken recipe, you’ll need a few key ingredients. The chicken thighs are juicy and tender, making them perfect for this dish. Soy sauce adds depth, while brown sugar and honey give it that sweet touch. Next, rice vinegar adds a bit of tang. Garlic and ginger bring fresh flavor to the table. Cornstarch helps thicken the sauce, making it nice and sticky. When it comes to garnishes, sesame seeds and green onions add great crunch and color. Serve this dish over rice or quinoa for a complete meal. For the full recipe, check out the details in the provided link! First, gather all your marinade ingredients in a mixing bowl. You will need soy sauce, brown sugar, honey, rice vinegar, minced garlic, and grated ginger. Whisk these together until the sugar dissolves completely. Next, add the chicken thighs to the bowl. Make sure each piece is well-coated in the marinade. Cover the bowl and refrigerate it for at least 30 minutes. If you have extra time, let it marinate for up to 2 hours for more flavor. Now, it’s time to cook the chicken. Preheat your skillet over medium-high heat. Take the chicken out of the marinade, but save the marinade for later. Place the chicken thighs in the hot skillet. Cook each side for about 5 to 7 minutes until they turn golden brown. You want the chicken to reach an internal temperature of 165°F (75°C) to ensure it is safe to eat. While the chicken cooks, let's make the sauce. Pour the reserved marinade into a small saucepan over medium heat. In another bowl, mix the cornstarch with water until smooth. When the marinade starts to simmer, stir in your cornstarch mixture. Keep cooking for about 2 to 3 minutes until the sauce thickens nicely. Once the chicken is cooked, slice it into strips. Add the chicken back to the skillet and pour the thickened teriyaki sauce over it. Toss the chicken in the sauce to coat it evenly. Cook for an additional 2 minutes so the flavors mix well. Finally, serve the teriyaki chicken over cooked rice or quinoa. For a finishing touch, sprinkle sesame seeds and chopped green onions on top. Enjoy your delicious meal! Recommended marinating time For the best flavor, marinate your chicken for at least 30 minutes. If you can, aim for 2 hours. This gives the sauce time to soak in. How to avoid dry chicken To keep chicken juicy, do not overcook it. Cook it until it reaches 165°F (75°C). Using thighs helps too, as they are more tender than breasts. Best skillet types for cooking A non-stick skillet works great for this teriyaki chicken. It helps prevent sticking and makes cleanup easy. Cast iron can also work, but it may need a bit more oil. Tips for achieving perfect browning Make sure your skillet is hot before adding chicken. This helps create a nice golden color. Don't overcrowd the pan; cook in batches if needed. How to adjust sweetness or saltiness If your sauce is too sweet, add a splash of soy sauce. If it's too salty, mix in a bit of water or more honey. Taste as you go! Adding heat or other flavors To spice things up, add red pepper flakes or sriracha. For a fruity twist, try mixing in some pineapple juice. These changes can make your dish unique! For the complete recipe, check out the Full Recipe above. {{image_2}} You can switch up the protein in this dish to suit your taste. - Using chicken breast instead of thighs: Chicken breast is leaner. It cooks faster and can still be juicy. Just be careful not to overcook it. - Vegetarian options: Tofu or tempeh are great choices. They soak up flavors well. Press and cube them before marinating for the best results. Want to spice things up? There are fun ways to change the flavor. - Spicy teriyaki chicken: Add red pepper flakes or sriracha to the sauce. This will give your dish a kick. Adjust the amount based on your heat preference. - Adding pineapple for a tropical twist: Pineapple chunks add sweetness and a fresh taste. Combine them with the chicken while cooking for a delightful mix. You can enjoy teriyaki chicken in many ways. - Teriyaki chicken stir-fry: Toss the chicken with mixed veggies. This makes for a colorful and healthy meal. Serve it over rice or noodles. - Teriyaki chicken wraps or sandwiches: Shred the chicken and wrap it in a tortilla or serve it in a sandwich. Add lettuce and sauce for crunch and flavor. Experiment with these variations to make your teriyaki chicken your own! You can find the full recipe above for guidance. To keep your teriyaki chicken fresh, use an airtight container. This helps lock in moisture and flavor. Place the cooled chicken in the container and close it tightly. Store the leftovers in the fridge. They will stay good for up to three days. When reheating, I recommend using the stove for the best results. Heat a non-stick skillet over medium heat. Add a splash of water or chicken broth to keep it moist. This method helps avoid dryness. Stir the chicken gently until heated through. You can also use a microwave. Use a microwave-safe dish and cover it with a damp paper towel. Heat in short intervals to keep it juicy. You can freeze cooked teriyaki chicken or uncooked chicken. If freezing cooked chicken, let it cool completely first. Place it in a freezer-safe bag, removing as much air as possible. For uncooked chicken, marinate it, then freeze. Thaw in the fridge overnight before cooking. This method gives you the best taste and texture when you’re ready to enjoy your Easy Teriyaki Chicken again. For the full recipe, check the previous sections. Yes, you can use chicken breast or even drumsticks. Chicken breast cooks faster, so watch it closely. Drumsticks may take longer and need more time to cook through. Adjust the cooking time based on the cut you choose. To make this dish gluten-free, use gluten-free soy sauce. Tamari is a great choice. It has a similar taste and works well in the marinade. Just replace regular soy sauce with tamari in the recipe. Teriyaki chicken goes well with many sides. Try steamed broccoli, sautéed green beans, or fried rice. You can also serve it over quinoa for a nutty flavor. A simple salad with sesame dressing adds freshness too. Yes, you can make teriyaki sauce easily. Combine 1/2 cup soy sauce, 1/4 cup brown sugar, 2 tablespoons honey, and 2 tablespoons rice vinegar. Add minced garlic and grated ginger for more flavor. Cook it on low heat until it thickens. To make the chicken tender, marinate it longer. Aim for at least 2 hours. You can also pound the chicken slightly before marinating. Cooking it on medium heat prevents it from drying out. Always check that it reaches 165°F. For the full recipe, check out the Teriyaki Chicken Delight section above. In this blog post, I shared a simple recipe for delicious teriyaki chicken. We covered main and additional ingredients, plus how to marinate and cook the chicken. I also offered tips for great cooking and variations to try. Remember, cooking can be fun and tasty. Don’t be afraid to experiment with flavors and ingredients. Enjoy making this meal and sharing it with friends and family!

Easy Teriyaki Chicken Quick and Flavorful Dish

Looking for a quick and tasty meal? My Easy Teriyaki Chicken recipe will have you covered. With just a few

For my savory stuffed portobello mushrooms, I focus on fresh and simple ingredients. This dish is hearty and packed with flavor. You can find the full recipe above. Here’s what you need to make these tasty mushrooms: - 4 large portobello mushrooms - 1 cup cooked quinoa - 1/2 cup cherry tomatoes, halved - 1/2 cup baby spinach, chopped - 1/4 cup feta cheese, crumbled - 1/4 cup pine nuts, toasted - 2 tablespoons olive oil - 1 teaspoon garlic powder - Salt and pepper to taste These ingredients come together to create a filling that bursts with flavor. Each one plays a key role. The mushrooms provide a rich base, while quinoa adds protein and texture. You can also add these for extra flair: - Fresh basil or parsley for garnish - A squeeze of lemon juice for brightness - Artichoke hearts for a tangy twist - Bell peppers for added crunch Using optional ingredients can customize your dish. Feel free to experiment and find what you love most! First, gather your ingredients. You need large portobello mushrooms, cooked quinoa, cherry tomatoes, baby spinach, feta cheese, pine nuts, olive oil, garlic powder, salt, and pepper. You will also want fresh basil or parsley for garnish. Next, preheat your oven to 375°F (190°C). While it heats, clean the mushrooms. Remove the stems and scoop out the gills with a spoon. This creates a nice space for the stuffing. Place them open side up on a baking sheet lined with parchment paper. Now, let’s prepare the stuffing. In a bowl, mix the cooked quinoa, halved cherry tomatoes, chopped spinach, crumbled feta cheese, and toasted pine nuts. Add olive oil, garlic powder, salt, and pepper. Mix until everything is well combined. Once your mixture is ready, divide it among the mushrooms. Pack the filling lightly into each one. Bake the mushrooms in the preheated oven for 20-25 minutes. They should be tender and the filling should turn golden. After baking, take them out of the oven and let them cool for a few minutes. This helps with handling them later. Garnish your stuffed mushrooms with fresh basil or parsley for a pop of color. You can serve them as a main dish or a side. Pair them with a refreshing salad or some crusty bread. They also make a great appetizer for a gathering. Enjoy your delicious stuffed portobello mushrooms! For the complete recipe, check out the Full Recipe section. To make stuffed portobello mushrooms great, start with fresh mushrooms. Look for large caps that are firm and dry. Clean them gently. Use a damp cloth to wipe off the dirt. Avoid soaking them in water, as this can make them soggy. When you stuff them, pack the filling well. This keeps the mixture from falling out during baking. Bake until the mushrooms are tender and the filling is golden. This usually takes about 20-25 minutes. One common mistake is using too much moisture in the filling. If the filling is too wet, it will make the mushrooms soggy. Always squeeze out extra liquid from ingredients like spinach or tomatoes. Another mistake is not preheating the oven. This can lead to uneven cooking. Also, don’t skip on seasoning. Salt and pepper enhance all the flavors. Taste your mixture before stuffing the mushrooms. Stuffed mushrooms pair well with many dishes. Serve them with a light salad for a fresh side. A garlic bread or crusty baguette complements them nicely too. For a drink, try a crisp white wine or sparkling water. If you want something heartier, serve them alongside grilled chicken or fish. You can find the full recipe for these tasty stuffed portobello mushrooms above. {{image_2}} You can easily make stuffed portobello mushrooms vegetarian. Use the recipe with only plant-based ingredients. For a heartier filling, try adding cooked lentils or black beans. These give protein and texture. You can also swap feta cheese for mozzarella or goat cheese. Both add a nice creamy taste. To make this dish vegan, just leave out the cheese. Use mashed avocado or cashew cream instead. These options keep the filling rich and creamy. You can also add nutritional yeast for a cheesy flavor without dairy. It’s a great way to add extra nutrients too. Want more flavor? Add spices like cumin or smoked paprika to the quinoa mix. Fresh herbs like thyme or oregano can brighten the dish. You could also drizzle balsamic glaze on top before serving. This adds a sweet and tangy touch. For crunch, try adding breadcrumbs on top before baking. They will create a crispy layer that tastes amazing. For the full recipe, check out the ingredients and steps above! After enjoying your stuffed portobello mushrooms, store any leftovers in an airtight container. Place them in the fridge. They can last up to three days this way. Make sure they cool down first. This helps keep them fresh and tasty. To reheat stuffed portobello mushrooms, use your oven. Preheat it to 350°F (175°C). Place the mushrooms on a baking sheet. Heat them for about 10 to 15 minutes. This keeps them warm without drying them out. You can also use a microwave if you're in a hurry. Just cover them with a damp paper towel to keep moisture in. You can freeze stuffed portobello mushrooms if you want to save some for later. First, let them cool completely. Wrap each mushroom tightly in plastic wrap. Then, place them in a freezer bag. They can last up to two months in the freezer. When you're ready to enjoy them, thaw in the fridge overnight before reheating. This method will keep their flavor intact. The best mushrooms for stuffing are portobello and cremini. Portobello mushrooms are large and sturdy. They hold the filling well. Cremini mushrooms are smaller but pack great flavor. You can also use button mushrooms, but they are less robust. Choose mushrooms that are firm and fresh. Always check for any dark spots or soft areas. Yes, you can make stuffed mushrooms ahead of time. Prepare the filling and stuff the mushrooms. Then, cover them and place them in the fridge. You can do this a few hours or even a day ahead. Just bake them when you are ready to enjoy. This saves time, especially for parties or busy nights. Stuffed mushrooms last about 3 to 4 days in the fridge. Store them in an airtight container. Make sure they are cooled before sealing. If you think you won't eat them in time, consider freezing them. They can last up to three months in the freezer. Just thaw and reheat when you are ready to eat. Enjoy them as a snack or appetizer! You now have a full guide to making stuffed mushrooms. We covered what ingredients you need, both essential and optional. I gave you step-by-step instructions to help you cook them perfectly. You learned some tips and tricks to avoid common mistakes and enhance flavors. Variations like vegetarian and vegan options offer more ideas. Finally, I shared how to store leftovers, reheat them, and freeze them for later. I hope you feel ready to create a tasty dish!

Stuffed Portobello Mushrooms Flavorful and Easy Recipe

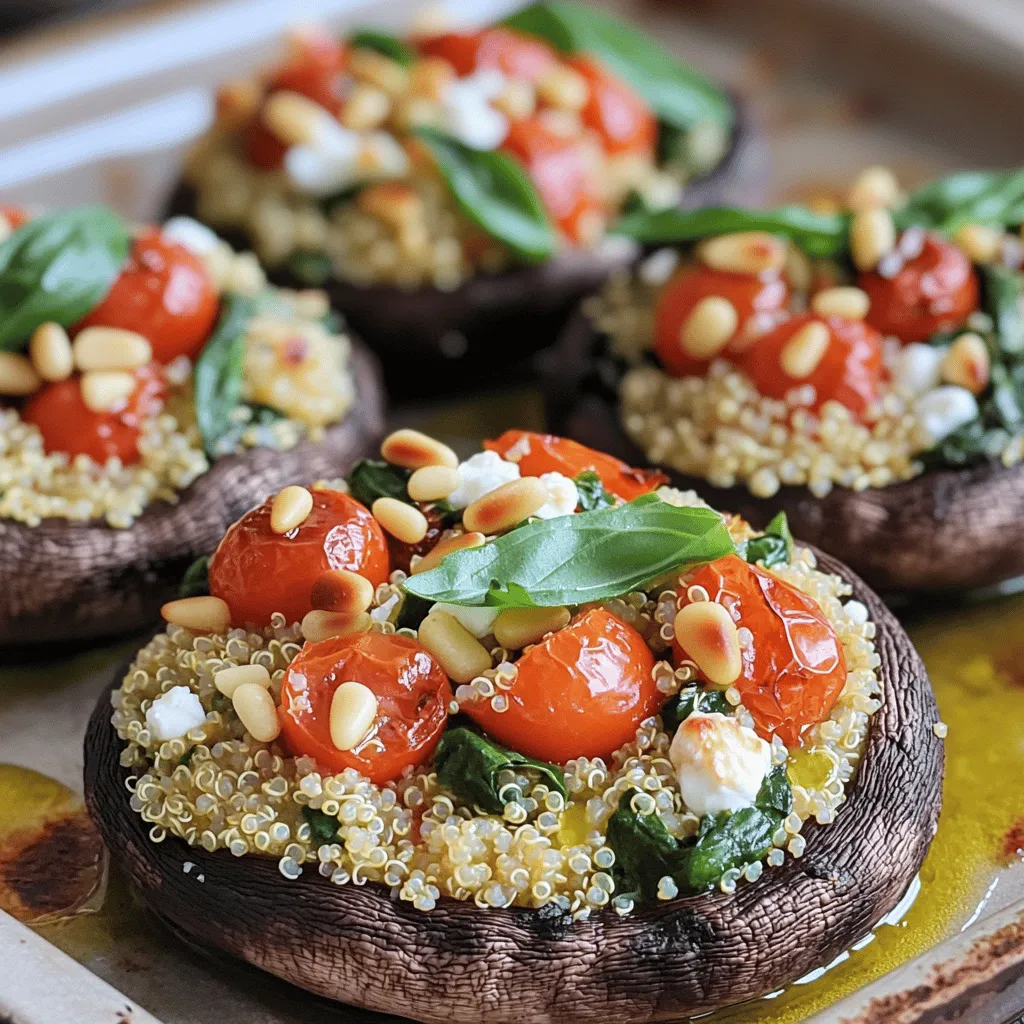
Are you ready to impress your family and friends with a delicious dish? This Stuffed Portobello Mushrooms recipe is both

To make Garlic Parmesan Roasted Broccoli, you need a few simple items. Here’s what you will need: - 1 large head of broccoli, cut into florets - 4 tablespoons olive oil - 4 cloves garlic, minced - 1/2 cup grated Parmesan cheese - 1 teaspoon paprika - Salt and pepper to taste - 1 tablespoon lemon juice - Zest of 1 lemon - Optional: Red pepper flakes for heat Each ingredient plays a key role in the dish. The large head of broccoli gives you a fresh base. Olive oil helps to crisp the florets and adds a rich taste. Garlic brings a savory depth that pairs well with the cheese. Parmesan cheese adds a creamy texture and salty flavor. Paprika adds a hint of warmth and color. The lemon juice and zest brighten the dish, while salt and pepper enhance all the flavors. If you like it spicy, red pepper flakes can give it an extra kick. This combination not only tastes great but also makes your meal colorful and inviting. You can find the full recipe detailed above for more guidance as you cook. 1. Preheat your oven and prepare the baking sheet. Set your oven to 425°F (220°C). While it heats, grab a large baking sheet. Line it with parchment paper for easy cleanup. 2. Combine ingredients in a bowl. In a big bowl, mix the broccoli florets, olive oil, minced garlic, paprika, salt, and pepper. Use your hands or a spoon to toss it all together. Make sure the broccoli is well coated. 3. Spread and roast the broccoli. Place the seasoned broccoli on the baking sheet. Spread it out in a single layer. This helps the broccoli roast evenly. Roast in the oven for about 15-20 minutes. Halfway through, toss the broccoli to help it cook on all sides. It’s ready when the edges are crispy and it feels tender. 1. Add cheese, lemon juice, and zest. Once you take the broccoli out, sprinkle the grated Parmesan cheese on top. Add the lemon juice and zest right away. Toss gently while it's still hot. The cheese melts slightly, coating the broccoli. 2. Optional garnishing. If you like some heat, sprinkle red pepper flakes on top. For a nice look, add more Parmesan cheese if you want. Enjoy your dish warm! You can find the Full Recipe above for more details and tips. To make your Garlic Parmesan Roasted Broccoli truly shine, you want it crispy. Here’s how to achieve that perfect crispiness: - Use high heat: Preheat your oven to 425°F (220°C). The high heat helps the broccoli get crispy. - Single layer: Spread the broccoli out on the baking sheet. If they crowd each other, they will steam and not roast. - Toss halfway through: Stir the broccoli after about 10 minutes. This helps all sides get that nice golden color. To prevent soggy broccoli, make sure to dry it well after washing. Water left on the florets can create steam while roasting. To boost the flavor of your Garlic Parmesan Roasted Broccoli, try these options: - Extra seasonings: Besides garlic and Parmesan, consider adding lemon zest or red pepper flakes. These add layers of flavor and a little heat. - Pairing suggestions: This dish goes great with grilled chicken, steak, or fish. It adds a nice veggie side to any meal. For the full recipe, check out the detailed steps above! {{image_2}} You can switch up the cheese in this dish. Instead of Parmesan, try using cheddar or feta. These cheeses add nice flavors that mix well with broccoli. You could even use a vegan cheese for a plant-based twist. Adding extra veggies is also fun. Carrots or bell peppers roast well with broccoli. They bring different colors and tastes to your plate. Just make sure to cut them into similar sizes. This helps them cook evenly with the broccoli. If you follow a vegan or dairy-free diet, don’t worry! You can skip the cheese. Instead, add nutritional yeast. It gives a cheesy flavor without dairy. You can also use olive oil with herbs to keep it tasty. For those on a low-carb diet, this dish fits perfectly. Broccoli is low in carbs and high in fiber. You can enjoy this as a side dish or even a main meal. Pair it with grilled chicken or fish for a complete meal. You can find the full recipe to get started on this healthy and tasty dish! To keep Garlic Parmesan Roasted Broccoli fresh, use a few simple methods. First, let the broccoli cool down to room temperature. Then, place it in an airtight container. This helps prevent moisture loss. Store it in your fridge for up to three days. Make sure to keep it away from moisture to avoid sogginess. If you want to store it for a longer time, freezing is a great option. Place the cooled broccoli in a freezer-safe bag. Remove as much air as possible before sealing. You can freeze it for up to three months. Label the bag with the date so you remember when you froze it. When it comes to reheating, you want to keep that great flavor and texture. The best way is to use an oven. Preheat your oven to 350°F (175°C). Spread the broccoli on a baking sheet and cover it with foil. Heat it for about 10-15 minutes. This method helps maintain crispness. You can also use a microwave if you’re short on time. Place the broccoli in a microwave-safe dish. Add a splash of water to keep it moist. Cover the dish with a microwave-safe lid or wrap. Heat it in short bursts of 30 seconds, stirring in between. This way, you avoid overcooking it. Enjoy your leftovers just like when they were fresh! How long can Garlic Parmesan Roasted Broccoli be stored? You can store Garlic Parmesan Roasted Broccoli in the fridge for up to four days. Make sure to place it in an airtight container. This keeps the flavors fresh and the broccoli crisp. If you want to keep it longer, you can freeze it for up to three months. Just remember to use a freezer-safe bag. Can I use frozen broccoli for this recipe? Yes, you can use frozen broccoli. However, frozen broccoli tends to be softer after cooking. To get a better texture, let it thaw and drain any excess water first. This way, the broccoli will roast better and not become mushy in the oven. What can I serve with Garlic Parmesan Roasted Broccoli? Garlic Parmesan Roasted Broccoli pairs well with many dishes. You can serve it with grilled chicken, steak, or fish. It also goes great with pasta and rice. For a lighter meal, add it to a salad. You can find the full recipe to help create a delicious meal around this tasty side. In this article, I covered how to make Garlic Parmesan Roasted Broccoli. We explored the key ingredients, like broccoli, garlic, and cheese. The step-by-step instructions guide you from prep to perfect roasting. I shared tips to achieve crispiness and flavor, plus ways to modify the dish for various diets. Remember, proper storage keeps your leftovers fresh. Enjoy this simple dish that is both tasty and good for you. Try these tips and make it your own!

Garlic Parmesan Roasted Broccoli Tasty and Healthy Dish

If you’re looking for a tasty and healthy side dish, Garlic Parmesan Roasted Broccoli is a perfect choice! Packed with

To make Mushroom and Spinach Pasta, you will need fresh and simple ingredients. Here’s a detailed list: - Pasta selection: Choose 300g of your favorite pasta, like fettuccine or spaghetti. - Vegetables: Use 200g of fresh spinach. Make sure to wash it well. For mushrooms, select 250g of button or cremini, sliced thin. - Seasoning essentials: Gather 3 cloves of minced garlic, 1/2 teaspoon of red pepper flakes (optional for heat), and salt to taste. - Sauce components: You will need 1/2 cup of vegetable broth and 1/2 cup of heavy cream. For the finishing touch, have 50g of grated Parmesan cheese ready. With these ingredients, you create a dish that is both delightful and easy to prepare. For the full recipe, follow the steps carefully! To start, fill a large pot with water. Add a good amount of salt to the water. Bring it to a boil over high heat. Once boiling, add your pasta. I like to use fettuccine, but any type works well. Cook the pasta until it is al dente, which means it should still have a little bite. This usually takes about 8-10 minutes. To check doneness, taste a piece. If it feels firm but cooked, it's ready. Remember to reserve half a cup of the pasta water before draining. Next, heat a large skillet over medium heat. Add olive oil and let it get hot. You want the oil shimmering but not smoking. Now, add sliced mushrooms to the skillet. Spread them out so they brown nicely. Don’t stir too often; let them sit for a bit. This helps them get that golden color. After about 5-7 minutes, they should be tender and browned. Once the mushrooms are ready, stir in minced garlic and red pepper flakes if you like some heat. Cook for just one minute until the garlic smells great. Then, add the fresh spinach. Cook it until it wilts down. Now, pour in the vegetable broth, scraping up any bits stuck on the bottom of the skillet. This adds great flavor! Let it simmer for 2-3 minutes. After that, add the heavy cream and stir well. This will help the sauce thicken. Now, it's time to bring it all together. Add your cooked pasta right into the skillet with the sauce. Toss everything together gently. If the sauce seems too thick, add a bit of the reserved pasta water. This helps to get the right creamy texture. For the final touch, stir in the grated Parmesan cheese. It should melt into the sauce, making it rich and creamy. Taste it and add salt and pepper as needed. When serving, dish the pasta into bowls and top with fresh basil leaves. This adds a nice pop of color and flavor. Enjoy your Mushroom and Spinach Pasta Delight! You can find the full recipe above. To avoid mushy pasta, cook it just until al dente. This means it should have a slight bite. After draining, you can toss it with a little olive oil. This helps it stay separate and not stick together. To enhance flavor, use fresh herbs like basil or thyme. Adding herbs at the end boosts the taste. You can also sprinkle some lemon zest for a fresh twist. One common mistake is overcooking the spinach and mushrooms. Cook mushrooms until golden brown but not too soft. For spinach, add it at the end and just wilt it. This keeps the color bright and the texture nice. Another mistake is using cold cheese. Always use cheese at room temperature. This helps it melt better into your pasta, making it creamy. If you want to change up the cheese, try goat cheese or feta. Both add a nice tangy flavor. You can also use nutritional yeast for a vegan option. For protein, consider adding grilled chicken or shrimp. You can even use chickpeas for a vegetarian boost. These options make your pasta heartier and more filling. You can find the full recipe for Mushroom and Spinach Pasta in the earlier sections. Enjoy your cooking! {{image_2}} For a vegan twist, you can swap out the heavy cream and cheese. Use coconut cream or cashew cream instead. These options give you a rich flavor without dairy. You can also add chickpeas or lentils for more plant-based protein. They make the dish filling and nutritious. If you're gluten-free, choose pasta made from rice, quinoa, or chickpeas. These options work well and taste great. Cooking times might differ, so check the package. You want the pasta to stay firm and not mushy. Want some heat? Add red pepper flakes to the garlic when you sauté it. You can also use spicy sausage for more flavor. If you like, try adding jalapeños or chili oil. These ingredients give a nice kick to the dish. Check out the Full Recipe for more details on making this dish your own! To keep your mushroom and spinach pasta fresh, follow these steps: - Refrigeration: Place leftovers in the fridge within two hours of cooking. This helps prevent bacteria growth. - Containers: Use airtight containers. Glass or plastic containers work well. When reheating, aim for the best texture: - Avoid Soggy Pasta: Add a splash of water or broth when reheating. This keeps the pasta moist without making it soggy. - Methods: Use the stovetop or microwave. If using a microwave, cover the dish to trap steam and heat evenly. Freezing allows you to enjoy this dish later: - Freezing: Cool the pasta completely before freezing. Use freezer-safe bags or containers. This prevents freezer burn and keeps the taste. - Thawing Tips: Thaw in the fridge overnight. For quick thawing, use the microwave. Reheat gently to maintain quality. Following these storage tips helps you enjoy your mushroom and spinach pasta at its best! For the full recipe, check out the details above. Mushroom and spinach pasta stays fresh for about 3 to 5 days in the fridge. To store it safely, put the pasta in an airtight container. This keeps moisture out and helps prevent spoilage. Before you eat it again, check for any strange smells or signs of mold. If it looks good, heat it up on the stove or in the microwave. Yes, you can use frozen spinach. Just remember it may change the taste and texture. Frozen spinach often has more moisture. Thaw it, drain excess water, and squeeze it dry before adding it to your dish. This way, your pasta won't become watery and will still taste great. You can enjoy mushroom and spinach pasta with various side dishes. A simple green salad adds crunch and freshness. Garlic bread is also a tasty choice, perfect for soaking up sauce. For a heartier meal, try pairing it with grilled chicken or shrimp. These options balance well with the pasta's flavors. If you don’t have vegetable broth, you can use water or chicken broth. Water works fine, but broth adds more flavor. You can also make a quick broth by simmering water with herbs or spices. This will enhance the taste of your dish without needing specific broth. You can make this dish dairy-free by using coconut milk or almond milk. These plant-based milks can replace heavy cream. For cheese, try nutritional yeast or cashew cheese. These options give a creamy texture and a cheesy taste without dairy. Enjoy your tasty pasta without any dairy! For the full recipe, check out the details above. In this post, we explored the key ingredients and steps for making mushroom and spinach pasta. You learned how to select the right pasta, sauté mushrooms, and prepare a creamy sauce. I shared tips to avoid common mistakes and variations for vegan and gluten-free options. Remember, cooking is about enjoying the process. Don't stress if things don’t go as planned. With practice, you’ll create a delicious dish that impresses everyone. Use this guide as a handy reference and have fun in the kitchen!

Mushroom and Spinach Pasta Delightful and Easy Recipe

Are you ready to elevate your pasta game? My Mushroom and Spinach Pasta is both delightful and easy to make.

Newer posts
← Previous Page1 … Page84 Page85

dsad

© 2026 greenmealmap • Built with GeneratePress

Our Policies

  • Copyright Policy
  • Cookie Policy
  • GDPR Policy
  • Privacy Policy
  • Disclaimer
  • Terms Of Use

More Information

  • Home
  • About
  • Contact
  • Appetizers
  • Dessert
  • Dinner
  • Drinks
©2026, greenmealmap About Back To Top