Skip to content
DisclaimerTerms Of UseGDPR PolicyCookie Policy

greenmealmap

  • Home
  • Drinks
  • Appetizers
  • Dinner
  • Dessert
  • About
  • Contact
  • Privacy Policy
DisclaimerTerms Of UseGDPR PolicyCookie Policy

NO-ING-IMG

This Cheesy Jalapeño Cornbread uses simple and tasty ingredients. Here’s what you need: - 1 cup cornmeal - 1 cup all-purpose flour - 1 tablespoon baking powder - 1/2 teaspoon salt - 1/4 cup sugar - 1 cup milk - 2 large eggs - 1/4 cup unsalted butter, melted - 1 cup shredded cheddar cheese - 1/2 cup pickled jalapeños, diced (or fresh jalapeños for more heat) - 1/4 cup green onions, sliced Choosing fresh jalapeños can make a big difference. Fresh ones have a bright taste and a nice crunch. If you prefer more heat, opt for fresh jalapeños instead of pickled. You can also change up the cheese. Try pepper jack for a spicy kick or gouda for a smoky flavor. Mixing different cheeses can create a unique taste that fits your style. This recipe is perfect for gatherings or a cozy night in. You can find the full recipe above to guide you through each step. Enjoy each bite of this cheesy, spicy treat! 1. Preheat oven and prepare baking dish Start by setting your oven to 400°F (200°C). While it heats, grease an 8-inch square baking dish or a cast-iron skillet. This will help the cornbread come out easily. 2. Mixing dry ingredients In a large bowl, combine 1 cup of cornmeal, 1 cup of all-purpose flour, 1 tablespoon of baking powder, 1/2 teaspoon of salt, and 1/4 cup of sugar. Whisk them together until they are well mixed. This mix forms the base of your cornbread. 3. Combining wet ingredients In a separate bowl, whisk together 1 cup of milk, 2 large eggs, and 1/4 cup of melted butter. It should be smooth. This mixture adds moisture and richness to your cornbread. 1. Description of batter mixing Pour the wet mixture into the dry ingredients. Stir gently until just combined. It’s okay if there are a few lumps. Overmixing can make the cornbread tough. 2. Pouring and smoothing the batter Fold in 1 cup of shredded cheddar cheese, 1/2 cup of diced jalapeños, and 1/4 cup of sliced green onions. Mix gently to spread them evenly. Then, pour the batter into the prepared dish. Use a spatula to smooth the top. 3. Baking time and checking for doneness Bake your cornbread for 20-25 minutes. It's done when the top is golden brown. Insert a toothpick into the center; if it comes out clean, your cornbread is ready. Let it cool for a few minutes before slicing. Enjoy that warm, cheesy goodness! For the full recipe, check out the details above. To get the best texture in your cornbread, don't overmix. Overmixing makes it tough. Mix just enough to combine the wet and dry ingredients. A few lumps are okay! You want the right level of moisture. The batter should be thick but pourable. If it feels too dry, add a splash of milk. If it’s too wet, a sprinkle of flour can help. For the best baking results, use a preheated oven. This helps the cornbread rise nicely. Bake it in a cast-iron skillet for a crispy crust. Check it at 20 minutes. A toothpick should come out clean when it’s done. You can add many herbs and spices to boost flavor. Consider adding garlic powder or smoked paprika for a twist. They add depth to the cornbread. Adjust the spice level based on your taste. Use pickled jalapeños for a milder heat. If you want more kick, fresh jalapeños work great! Remove the seeds for less heat. When it comes to cheese, cheddar is a classic choice. But feel free to mix it up! Pepper jack adds heat, while Monterey Jack offers a creamy texture. Experiment to find your favorite mix! For the complete recipe, check out the Full Recipe section above! {{image_2}} To make a gluten-free version, you can swap regular flour for gluten-free flour. Almond flour or a mix of rice flour and tapioca starch works well. Keep in mind that gluten-free flours absorb liquid differently. You may need to add a bit more milk to get the right batter texture. Start with an extra quarter cup of milk, then adjust as needed. For a vegan twist, replace the eggs with flaxseed meal or chia seeds. Use one tablespoon of flaxseed mixed with three tablespoons of water per egg. For milk, almond or soy milk will work great. Use vegan butter or coconut oil instead of regular butter. These swaps keep the flavor strong and the texture nice. You will still enjoy that cheesy, spicy goodness without animal products. To keep your cornbread fresh, store it properly. Place leftover cornbread in an airtight container. It stays good in the fridge for about three days. If you want to save it longer, freeze it. Wrap the cornbread in plastic wrap, then put it in a freezer bag. This method keeps it tasty for up to three months. When it’s time to enjoy your cornbread again, use the right method. The best way to reheat is in the oven. Preheat it to 350°F (175°C). Place the cornbread on a baking sheet and cover it with foil. Heat for about 10-15 minutes. This keeps it warm and soft. If you need a quicker option, you can use the microwave. Heat each piece for about 20-30 seconds. Be careful not to overdo it, or the cornbread will dry out. To avoid this, add a small cup of water in the microwave. This steam helps keep the moisture in. Following these steps ensures your cheesy jalapeño cornbread tastes just as good as when it was fresh. Enjoy every bite! Yes, you can make Cheesy Jalapeño Cornbread ahead of time. It stores well and tastes great later. Here’s how to prepare and store it: - Bake the cornbread as per the recipe. Let it cool completely. - Wrap it tightly in plastic wrap or aluminum foil. - Store it in the fridge for up to three days. You can also freeze it for up to three months. - When ready to eat, thaw it overnight in the fridge if frozen. - Reheat it in the oven at 350°F for about 10-15 minutes. This keeps it moist and warm. Want more spice in your cornbread? It’s easy! Here are some tips: - Use fresh jalapeños instead of pickled ones. They are spicier and add fresh flavor. - Add more jalapeños to the batter. Start with an extra 1/4 cup and adjust to your taste. - Incorporate hot sauce into the wet ingredients. A tablespoon can really kick up the heat. - Spice blends like cayenne or chili powder can add heat without changing the texture. Cheesy Jalapeño Cornbread pairs well with many dishes. Here are some tasty ideas: - Chili: A hearty bowl of chili complements the cornbread perfectly. - Grilled meats: Serve it alongside grilled chicken or ribs for a filling meal. - Salads: A fresh salad balances the rich flavors of the cornbread. - Soups: Try it with a warm bowl of soup for a cozy dinner. For more cooking ideas, check out the Full Recipe! This article covered how to make Cheesy Jalapeño Cornbread. You learned the best ingredients, how to prepare and bake it, and tips for the perfect texture. I shared some fun variations, like gluten-free and vegan options, along with storage tips. Remember, using fresh jalapeños and the right cheese makes a big difference. Enjoy experimenting with flavors and share this tasty treat with friends and family. Happy baking!

Cheesy Jalapeño Cornbread Flavorful and Easy Recipe

Are you ready to take your cornbread game to a whole new level? This Cheesy Jalapeño Cornbread recipe is bursting

To make a healthy veggie stir fry, gather these fresh ingredients: - 1 cup broccoli florets - 1 red bell pepper, sliced - 1 yellow bell pepper, sliced - 1 cup snap peas, trimmed - 2 large carrots, julienned - 1 cup mushrooms, sliced - 1 zucchini, sliced - 3 cloves garlic, minced - 2 tablespoons ginger, minced - 3 tablespoons soy sauce (low sodium) - 1 tablespoon sesame oil - 1 tablespoon olive oil - 1 tablespoon honey or maple syrup - 1 teaspoon chili flakes (optional for heat) - Salt and pepper to taste - Cooked rice or quinoa for serving Each ingredient in this stir fry brings unique health benefits: - Broccoli: Rich in vitamins C and K. It helps boost your immune system. - Bell Peppers: Packed with antioxidants. They support eye health and skin health. - Snap Peas: High in fiber and protein. They aid digestion and keep you full. - Carrots: Loaded with beta-carotene. They improve vision and skin health. - Mushrooms: Low in calories and high in nutrients. They may improve heart health. - Zucchini: Hydrating and low in calories. It provides vitamins C and A. - Garlic: Contains compounds that may reduce blood pressure. It boosts immunity. - Ginger: Known for its anti-inflammatory properties. It helps with digestion. - Soy Sauce: Adds flavor with fewer calories. Choose low sodium for health. - Sesame Oil: Offers healthy fats. It may benefit heart health. - Olive Oil: Rich in healthy fats. It can lower bad cholesterol levels. - Honey or Maple Syrup: Natural sweeteners that provide energy and flavor. - Chili Flakes: Contains capsaicin. It may boost metabolism and add heat. When buying vegetables, look for these signs of freshness: - Color: Choose vibrant colors. Bright veggies are usually fresher and tastier. - Texture: Veggies should feel firm and crisp. Avoid any that are soft or wrinkled. - Smell: Fresh vegetables often have a pleasant, earthy scent. A strong odor may mean they are past their prime. - Seasonality: Buy seasonal vegetables for the best flavor and price. Research what’s in season for your area. - Local Sources: Shop at local markets if possible. They often have fresher produce. For the full recipe, check out the details. Happy cooking! Before you start cooking, gather your ingredients. Wash and cut each vegetable into bite-sized pieces. This helps them cook evenly. I usually set them aside in separate bowls to keep things tidy. Here’s a quick list of the main veggies you’ll need for your stir fry: - 1 cup broccoli florets - 1 red bell pepper, sliced - 1 yellow bell pepper, sliced - 1 cup snap peas, trimmed - 2 large carrots, julienned - 1 cup mushrooms, sliced - 1 zucchini, sliced - 3 cloves garlic, minced - 2 tablespoons ginger, minced This prep makes cooking smooth and fun! Now, let’s cook! Start by heating a large wok or skillet over medium-high heat. Add olive oil and let it shimmer. This means it is hot enough. Then, toss in the minced garlic and ginger. Stir for about 30 seconds until you smell the aroma. Next, add the broccoli, carrots, and snap peas. Stir-fry these for about 3-4 minutes. You want them to start softening but still be crisp. After that, add the sliced red and yellow bell peppers, zucchini, and mushrooms. Cook for another 4-5 minutes. They should all be tender-crisp by now. Now for the fun part! Drizzle in the soy sauce, sesame oil, honey or maple syrup, and chili flakes if you like some heat. Toss everything together so the sauce coats the veggies well. Let it cook for an additional 1-2 minutes. Taste and adjust with salt and pepper if needed. Once cooked, it's time to serve! Take the wok off the heat and dish the stir fry over a bed of cooked rice or quinoa. This adds more texture and flavor. For a pretty look, use a large platter. Garnish with sesame seeds and sliced green onions. It makes your meal pop! If you want the full recipe, check out the Vibrant Veggie Delight Stir Fry 🥦. Enjoy! One big mistake is overcrowding the pan. If your pan is too full, the heat drops. This means veggies will steam instead of fry. Always cook in batches if needed. Another mistake is cutting veggies unevenly. If sizes vary, some will cook faster than others. Aim for uniform pieces to ensure even cooking. Also, don’t skip the prep. Have all your ingredients ready before you start cooking. This keeps your stir-fry smooth and fast. Start with the right pan. A large wok or skillet helps heat the veggies evenly. Preheat your pan and oil until they shimmer. Add aromatics first. Garlic and ginger bring amazing flavor. Stir them quickly to avoid burning. Cook hardy veggies first. Start with broccoli and carrots, as they take longer to soften. Then, add softer ones like bell peppers and zucchini. Stir constantly. This helps keep everything moving and prevents burning. Use a spatula to toss and flip the veggies well. Soy sauce is key for flavor. It adds saltiness and umami. Try low-sodium to keep it healthier. Sesame oil boosts the flavor too. Drizzle it just before finishing cooking for a nutty kick. For some heat, add chili flakes or fresh chili. Adjust the amount based on your taste. You can also mix in fresh herbs like cilantro or basil. They add freshness and a pop of flavor. For more ideas, check out the Full Recipe for a vibrant veggie delight stir fry. {{image_2}} You can easily make this stir fry vegan. Simply skip the honey and use maple syrup instead. You can also add tofu for protein. Tofu absorbs flavor well and adds great texture. Try using firm tofu, and cut it into cubes. Sauté it until golden before adding the vegetables. If you want more protein, consider adding edamame or chickpeas. Both options blend well and boost nutrition. Cooked shrimp or chicken can also enhance the dish's taste. Just make sure to cook them before adding the veggies. This way, you keep all the flavors intact. For a gluten-free option, use tamari instead of soy sauce. Tamari offers a similar flavor without gluten. You can also serve this stir fry with rice or quinoa, as these grains are gluten-free. Always check labels on sauces to ensure they fit your diet. Explore the [Full Recipe] for more details on this delightful dish! After enjoying your vibrant veggie delight stir fry, cool any leftovers. Place them in a container with a tight lid. Store in the fridge for up to three days. This way, you keep the colors and crunch. To reheat, use a skillet over medium heat. Add a splash of water or oil to help steam. This method keeps the veggies crisp. Stir often for even heating. You can also microwave them, but check every 30 seconds to avoid overcooking. If you want to save your stir fry for later, freezing is a great option. Let it cool completely first. Then, portion it into freezer bags or containers. Squeeze out excess air before sealing. You can freeze it for up to three months. When ready to eat, thaw in the fridge overnight. Reheat directly from frozen in a skillet, adding a bit of water or oil to help it heat evenly. Enjoy your tasty meal anytime! To add heat, use chili flakes. Start with one teaspoon for mild spice. For more heat, add more flakes. You can also slice fresh chili peppers into the mix. Jalapeños or serranos work well. If you want a deeper flavor, try adding a dash of hot sauce. Combine these options to find your perfect level of spice. The best veggies for stir fry are fresh and colorful. I love using broccoli, bell peppers, and snap peas. Carrots add sweetness, while mushrooms bring umami. Zucchini also cooks quickly and adds a nice texture. You can mix and match based on what you like. Just make sure they all cut evenly for even cooking. Yes, you can use frozen vegetables! They are a great option when fresh ones are not available. Just be sure to thaw them first. Drain any excess water to prevent a soggy stir fry. Frozen veggies cook faster, so adjust your cooking time accordingly. This way, you still get a tasty meal without a lot of fuss. For the full recipe, check out the Vibrant Veggie Delight Stir Fry. This blog post covered key points about stir-frying. We discussed essential ingredients and their benefits. You learned how to prepare and cook vegetables step by step. I shared tips to avoid common mistakes and enhance flavors. We explored tasty variations, including vegan options and protein additions. Lastly, I provided storage tips for your leftovers. Stir-frying is fun and healthy. You can make many dishes with what you have. Enjoy experimenting with flavors and techniques. Happy cooking!

Healthy Veggie Stir Fry Tasty and Nutritious Meal

Looking for a quick, tasty meal that packs a nutritional punch? You’re in the right place! My Healthy Veggie Stir

To make Parmesan crusted tilapia, you need a few key items. Here is what you will need: - 4 tilapia fillets - 1 cup grated Parmesan cheese - 1 cup panko breadcrumbs - 2 garlic cloves, minced - 1 teaspoon dried Italian herbs (oregano, basil, thyme) - 1/2 teaspoon red pepper flakes (optional) - 2 large eggs - 1 tablespoon lemon juice - Salt and pepper to taste - 2 tablespoons olive oil - Lemon wedges for serving These ingredients create a tasty and crispy crust that makes tilapia shine. You can add some ingredients to boost the flavor even more. Here are a few ideas: - Fresh herbs like parsley or dill for a bright taste. - A splash of white wine for a little depth. - Capers for a salty pop. - Paprika for a hint of smokiness. Feel free to mix and match to find your perfect taste! When serving Parmesan crusted tilapia, sides make it even better. Here are some great choices: - Steamed broccoli or green beans for a healthy crunch. - Roasted potatoes for a cozy, filling touch. - A fresh salad with lemon vinaigrette to balance the rich fish. - Quinoa or rice for a light and fluffy base. These sides will complement your meal and make it truly special. Check the Full Recipe for more details on making this delicious dish! Start by gathering all your ingredients. You need tilapia, Parmesan cheese, panko breadcrumbs, garlic, herbs, eggs, lemon juice, and olive oil. Prepare a baking sheet by lining it with parchment paper. This step keeps the fish from sticking and makes cleanup easy. In a shallow dish, mix the Parmesan, panko, minced garlic, herbs, and some salt and pepper. Stir until well combined. In another bowl, whisk the eggs and lemon juice until smooth. Dip each tilapia fillet into the egg mix, letting any extra drip off. Then, coat the fillet in the Parmesan mixture. Press it gently to help the coating stick. Place the coated fillets on the baking sheet. Drizzle them with olive oil to add flavor. Now, preheat your oven to 400°F (200°C). Once it's hot, put the baking sheet in the oven. Bake for 15 to 20 minutes. You want the tilapia to be cooked all the way through. The crust should be golden brown and crispy. After baking, let the fish rest for a couple of minutes before serving. This allows the juices to settle in the fish, making it moist. Serve with lemon wedges for a fresh touch. For the full recipe, check the previous section. To get a crispier crust on your tilapia, use panko breadcrumbs. Panko is lighter and crunchier than regular breadcrumbs. Mix the panko well with grated Parmesan cheese. This helps create a strong, tasty coating. For extra crunch, spray the fillets lightly with cooking oil before baking. This step helps the crust brown and become crispy. Bake your tilapia at 400°F (200°C) for the best results. This temperature cooks the fish evenly while crisping the crust. Check your fish at 15 minutes. It should flake easily with a fork. If you want a deeper golden color, leave it in for up to 20 minutes. Just watch it closely to prevent burning. Parmesan crusted tilapia pairs well with many sides. I love serving it with garlic mashed potatoes or a fresh salad. You can also add a squeeze of lemon juice for a bright flavor. Roasted vegetables or steamed asparagus are great options, too. For a fun twist, try it with a creamy tartar sauce. You can find the full recipe to guide you through this delicious dish. {{image_2}} If you cannot find tilapia, don't worry! You can use other fish. Cod, haddock, or catfish work great too. They have a mild taste, just like tilapia. Each option will give you a tasty dish. You can make this dish even more exciting! Try using fresh herbs like parsley or dill. They add a bright flavor. You can also mix in spices like paprika or cumin. Just a pinch can change the flavor a lot. Want to make this gluten-free? Use crushed rice crackers instead of panko. They give a nice crunch. You can also skip the breadcrumbs altogether. Just coat the fish in the Parmesan cheese mix for a cheesy kick. Enjoy the Full Recipe to explore all these options! Store leftover Parmesan crusted tilapia in an airtight container. Place it in the fridge. It will stay fresh for about 2-3 days. Make sure to let it cool down first. This helps keep the fish from getting soggy. If you have extra lemon wedges, keep them separate. To reheat tilapia, use the oven for the best taste. Preheat your oven to 350°F (175°C). Place the fish on a baking sheet. Heat for about 10 minutes or until warm. You can also use an air fryer. It will help keep the crust crispy. Avoid using the microwave, as it can make the fish rubbery. You can freeze Parmesan crusted tilapia for later use. Wrap each piece tightly in plastic wrap. Then, place them in a freezer bag. Make sure to remove as much air as possible. The fish can stay frozen for up to 2 months. When you’re ready to eat, thaw it in the fridge overnight. Then, reheat in the oven for the best taste. Yes, you can use frozen tilapia for this recipe. Just thaw it first. Place the frozen fillets in the fridge overnight or run them under cold water for faster thawing. Pat them dry before you coat them to help the crust stick better. Tilapia is fully cooked when it reaches an internal temperature of 145°F (63°C). The fish should be opaque and flake easily with a fork. If it looks dry or has a white, flaky texture, it is ready to eat. You can serve Parmesan Crusted Tilapia with many sides. Here are some tasty options: - Steamed broccoli - Garlic mashed potatoes - Mixed green salad - Rice pilaf - Roasted vegetables These sides add color and flavor to your meal. Making homemade tartar sauce is easy and quick. Here’s a simple recipe: - 1 cup mayonnaise - 2 tablespoons chopped pickles - 1 tablespoon lemon juice - 1 teaspoon Dijon mustard - Salt and pepper to taste Mix all the ingredients in a bowl. Adjust the salt and pepper to your liking. This sauce pairs perfectly with the tilapia. For the full recipe, check the main article. This blog post covered how to make Parmesan crusted tilapia. We discussed the main ingredients and optional additions for flavor. You learned easy steps for prepping, coating, and baking tilapia to crispy perfection. Remember the tips for the best crust and perfect bake time. I also shared ways to vary the recipe and store leftovers properly. Enjoy trying out this dish and its many flavors. Happy cooking!

Parmesan Crusted Tilapia Simple and Tasty Recipe

If you’re searching for an easy yet delicious dinner option, look no further! My Parmesan Crusted Tilapia recipe packs a

To make Easy Chicken Tortilla Soup, gather these essential items: - 2 tablespoons olive oil - 1 medium onion, chopped - 2 garlic cloves, minced - 1 bell pepper (any color), diced - 1 jalapeño, diced (optional for extra heat) - 1 teaspoon ground cumin - 1 teaspoon smoked paprika - 1 (14.5 oz) can diced tomatoes, with juice - 4 cups chicken broth - 2 cups cooked chicken, shredded (use rotisserie for ease) - 1 (15 oz) can black beans, rinsed and drained - 1 cup corn (fresh, frozen, or canned) - Salt and pepper to taste - Juice of 1 lime - Corn tortilla strips for garnish - Fresh cilantro, chopped for garnish - Avocado, diced for garnish (optional) - Shredded cheese for garnish (optional) When selecting fresh produce, choose vibrant and firm vegetables. Look for onions and peppers that are shiny and heavy for their size. Fresh herbs, like cilantro, should be bright green and fragrant. For canned goods, opt for low-sodium options. They keep the soup tasty without too much salt. To make the soup gluten-free, use corn tortillas instead of flour ones. For dairy-free garnishes, skip the cheese and add extra avocado. You can also use nutritional yeast for a cheesy flavor without dairy. To start, gather your fresh veggies and chicken. Here are the steps: - Chop 1 medium onion. - Mince 2 garlic cloves. - Dice 1 bell pepper (any color). - If you like spice, dice 1 jalapeño. - Shred 2 cups of cooked chicken (using rotisserie is easy). For tools, use a large pot or Dutch oven. A good knife and cutting board are key. A can opener will help with canned goods too. Now, let’s cook! Follow these steps: 1. In your pot, heat 2 tablespoons of olive oil over medium heat. 2. Add the chopped onion. Cook for about 5 minutes until it turns soft and clear. 3. Stir in the minced garlic, diced bell pepper, and jalapeño (if you want heat). Cook for 2-3 more minutes. 4. Sprinkle 1 teaspoon of ground cumin and 1 teaspoon of smoked paprika over the veggies. Stir well. 5. Pour in 1 (14.5 oz) can of diced tomatoes (juice included) and 4 cups of chicken broth. Bring this mix to a boil. 6. When it boils, lower the heat. Add in the shredded chicken, 1 (15 oz) can of black beans (drained), and 1 cup of corn. Simmer for 10-15 minutes. 7. Taste your soup! Add salt, pepper, and juice from 1 lime to make it pop. Serve your soup hot for the best taste. Here are some tips to make it look great: - Use crispy tortilla strips on top for crunch. - Sprinkle chopped cilantro for freshness. - Diced avocado and shredded cheese add creaminess. For the full recipe, check the section above! Enjoy your delicious chicken tortilla soup! To make your Easy Chicken Tortilla Soup really shine, focus on flavor. Start by adding spices early. Cumin and smoked paprika boost the taste. Fresh garlic and onion create a strong base. If you want more depth, try a splash of lime juice. This adds brightness and balances the flavors. I love to use rotisserie chicken for this soup. It cuts down prep time by a lot. Just shred it and toss it in. You can also cook everything in one pot. This saves on dishes and makes cleanup easy. Choose a good chicken broth. It sets the tone for the soup. Look for low-sodium options to control salt. For canned goods, pick brands with fewer additives. Fresh herbs like cilantro add a burst of flavor. Always aim for the best quality to elevate your dish. {{image_2}} You can easily make this soup vegetarian. Just swap the chicken for legumes or tofu. Black beans or chickpeas work great. If you choose tofu, use firm tofu and cube it. Adjust the cooking time to allow for the tofu to heat through, about 5 minutes. You may also want to add more veggies, like zucchini or carrots, for extra flavor. If you love heat, this soup can pack a punch! Add more jalapeños or chili powder to boost the spice level. You can also incorporate hot sauce or fresh peppers like serrano for extra kick. Start with a small amount, then taste. You can always add more spice, but it's hard to take it away. Feel free to get creative with extra vegetables. Spinach, kale, or bell peppers add color and nutrients. You can also add grains like quinoa or rice to make it heartier. This will give you a filling meal, perfect for lunch or dinner. Enjoy customizing your Easy Chicken Tortilla Soup to fit your taste! For the full recipe, check the link. Store your chicken tortilla soup in an airtight container. Glass or BPA-free plastic works best. It can stay fresh in the fridge for up to three days. Make sure to let it cool before sealing the container. To freeze the soup, allow it to cool completely. Then, pour it into freezer bags or containers. Remove as much air as possible to prevent freezer burn. The soup can last for about three months in the freezer. When you're ready to eat, thaw it overnight in the fridge. Reheat your soup on the stove over medium heat. Stir occasionally to keep it even. You can also use the microwave in a safe dish. If the soup seems thick, add a splash of broth or water. After reheating, taste it again. You may want to adjust the flavors with salt, pepper, or lime juice. For this soup, you can use fresh or cooked chicken. I often use rotisserie chicken for its ease and flavor. You can shred it and add it straight to the pot. If you prefer fresh chicken, cook and shred it before adding. This will give you a tasty and tender result. Yes, you can make this soup ahead of time! It tastes even better after the flavors meld. Store it in an airtight container in the fridge for up to three days. To reheat, simply warm it on the stove until hot. You can also freeze it for up to three months. If you want a thicker soup, there are a few ways to do this. You can mash some of the black beans against the pot. Another option is to add a cornstarch slurry. Mix equal parts cornstarch and cold water, stir it in, and let it simmer. This will help achieve your desired consistency. Easy Chicken Tortilla Soup is a versatile dish. You learned about essential ingredients and clever substitutions for dietary needs. I shared tips for prepping, cooking, serving, and storing your soup. Variations suit different tastes, from vegetarian to spicy versions. Quality ingredients enhance flavor and texture. This soup is easy to make and enjoy. Keep experimenting with flavors and methods. You’ll find your perfect bowl.

Easy Chicken Tortilla Soup Healthy Quick Meal Recipe

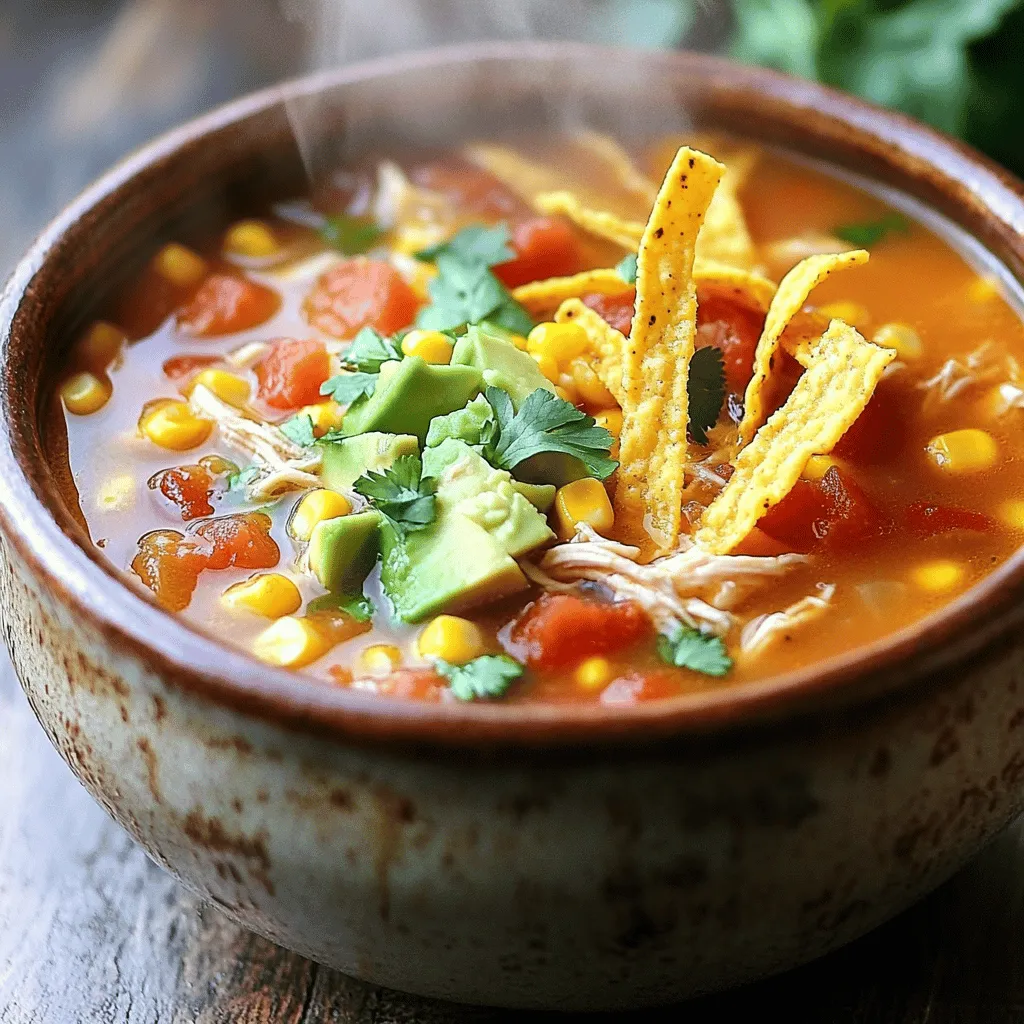
Looking for a quick, healthy meal that packs flavor? You’re in the right place! My Easy Chicken Tortilla Soup is

To make a delicious Raspberry Lemon Loaf Cake, gather these simple ingredients: - 1 cup fresh raspberries - 1 ½ cups all-purpose flour - 1 cup granulated sugar - ½ cup unsalted butter, softened - 3 large eggs - ½ cup buttermilk - Zest of 1 lemon - 2 tablespoons lemon juice - 1 teaspoon vanilla extract - ½ teaspoon baking powder - ½ teaspoon baking soda - ¼ teaspoon salt - Optional: Powdered sugar for dusting These ingredients come together to create a moist and flavorful loaf. The fresh raspberries add a burst of flavor, while the lemon zest gives it a refreshing twist. The buttermilk keeps the cake tender and light. Be sure to use fresh raspberries for the best taste. You can find them in most grocery stores. If you want to add a bit of sweetness, the optional powdered sugar is great for dusting the top before serving. With this list in hand, you're ready to create a delightful Raspberry Lemon Loaf Cake. If you want the full recipe, you can find it mentioned above. - Preheat the oven to 350°F (175°C). - Grease and line a loaf pan with parchment paper. This helps with easy removal. - In a large bowl, cream together the butter and sugar. Mix until light and fluffy. - Add the eggs one by one. Then, stir in the lemon zest, lemon juice, and vanilla. This adds great flavor. - In another bowl, whisk together the flour, baking powder, baking soda, and salt. - Gradually add this dry mix to the wet mixture. Alternate with the buttermilk. Start and end with flour. Mix just until combined. - Gently fold in the fresh raspberries. Be careful not to crush them. This keeps the cake light. - Pour the batter into your prepared loaf pan. Smooth the top with a spatula. - Bake for 50-60 minutes. Check for doneness with a toothpick. It should come out clean. For the full recipe, refer to the instructions provided above. This cake is truly a delight! How to know when the loaf is done? Check the loaf after 50 minutes. Insert a toothpick in the center. If it comes out clean, the loaf is done. If it has batter on it, bake for another 5-10 minutes. The edges should be golden brown, and the top should spring back when touched. Avoiding common baking mistakes - Overmixing: Mix just until combined to keep the loaf light. - Wrong oven temp: Always preheat your oven. An oven thermometer helps ensure accuracy. - Not using parchment paper: This helps with easy removal and prevents sticking. Pairing with beverages This loaf pairs well with tea or coffee. A light herbal tea enhances the lemon flavor. If you prefer something cold, try a glass of lemonade. The tartness works well with the sweet loaf. Presentation tips for serving Serve slices on a colorful plate. Garnish with whole raspberries and a mint sprig. Dust the top with powdered sugar for a sweet look. This adds a nice touch and makes the loaf more inviting. Consider serving with whipped cream for extra indulgence. {{image_2}} You can add herbs to your Raspberry Lemon Loaf Cake for a twist. Rosemary and thyme work well. These herbs add depth to the citrus flavor. You might be surprised at how much you enjoy this! You can also use other fruits. Blueberries and strawberries are great options. They add sweetness and color. Mixing different fruits keeps your cake fresh and exciting. Try these changes to find your favorite version. A simple lemon glaze is an easy choice. Just mix powdered sugar with lemon juice. Drizzle it over the cooled cake. This glaze adds a nice shine and extra lemon flavor. Another fun option is cream cheese frosting. It gives a rich taste that pairs well with the tartness of the cake. You can blend cream cheese with powdered sugar and a splash of lemon juice. Spread it on the cooled cake for a lovely finish. If you want to explore more ideas, check the Full Recipe for inspiration. Keep your raspberry lemon loaf cake fresh by wrapping it tightly in plastic wrap. This prevents air from drying it out. Store it at room temperature for up to three days. If you want to keep it longer, place it in the fridge for up to a week. However, the loaf may dry out a bit in the refrigerator. You can freeze slices of the loaf for later use. Wrap each slice in plastic wrap and then place them in a freezer bag. This keeps them fresh for up to three months. When you’re ready to enjoy a slice, take it out and let it thaw at room temperature. If you prefer it warm, pop it in the microwave for a few seconds. Enjoy your delicious treat anytime! For the full recipe, check out the previous section. Yes, you can use frozen raspberries. However, they may change texture. Fresh raspberries keep their shape better. Frozen ones can become mushy when mixed in. If you use frozen raspberries, do not thaw them first. This keeps them from breaking down too much in the batter. To make this loaf gluten-free, swap all-purpose flour for a gluten-free blend. Look for a blend that includes xanthan gum. This helps with the loaf's rise and texture. You can also use almond flour or coconut flour, but be aware they may change the taste and texture. A dense loaf can happen for a few reasons. You may have overmixed the batter, which can create a heavy texture. Ensure you mix just until combined. Also, check your oven temperature. An oven that is too cool can lead to density issues. If needed, add a bit more buttermilk to lighten it up next time. To boost the lemon flavor, add more lemon zest. You can also increase the lemon juice slightly. Try using fresh lemon juice instead of bottled for a brighter taste. Another option is to add a bit of lemon extract for extra citrus notes. Yes, you can double this recipe! Use a larger mixing bowl and loaf pans. Divide the batter evenly between two pans. Keep an eye on the baking time, as it may take longer. Check for doneness with a toothpick to ensure the center is baked through. For the best results, bake one loaf at a time. For the full recipe, see the previous section. This blog post covered how to make a tasty raspberry lemon loaf. We talked about selecting the right ingredients, baking steps, and helpful tips. You can even try variations to make it unique. Storing and freezing your loaf are also easy. Enjoy your time baking and sharing this delightful treat!

Raspberry Lemon Loaf Cake Delightful and Easy Recipe

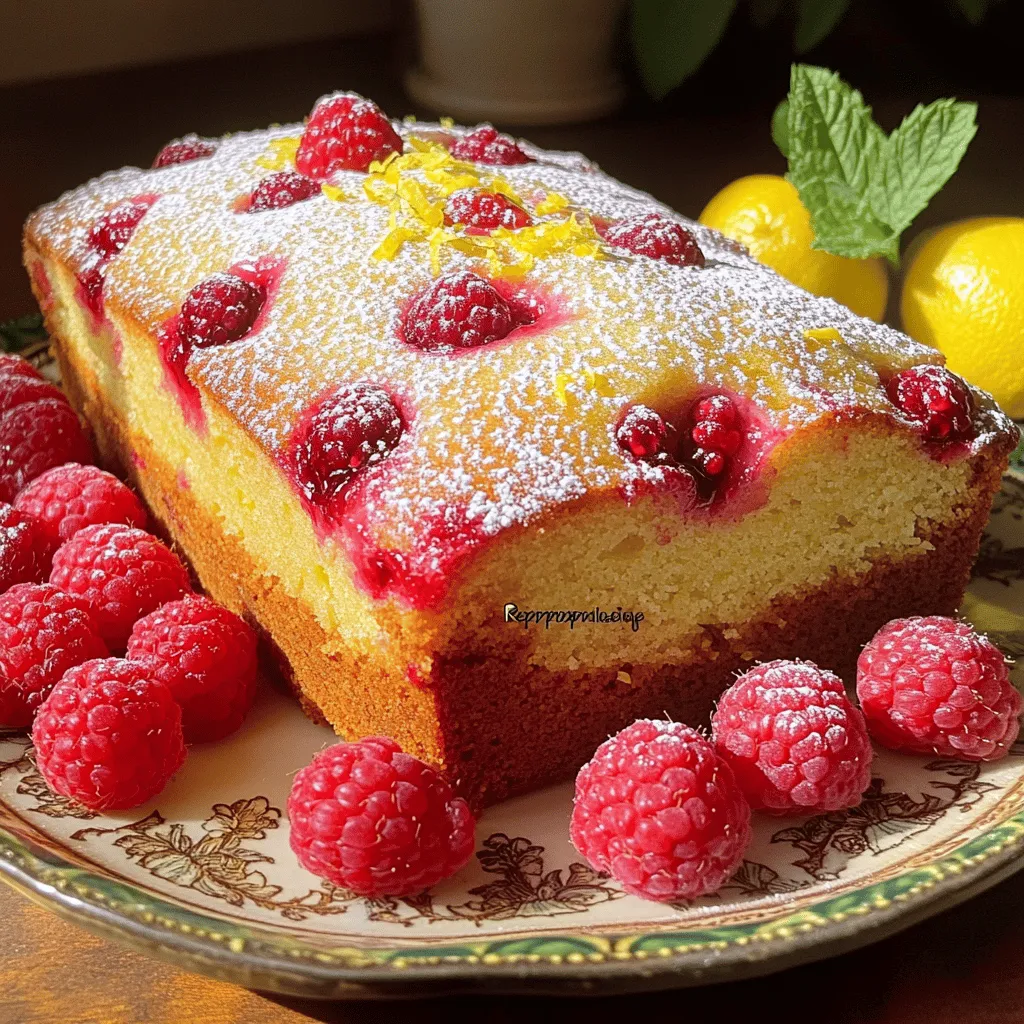
Are you ready to bake something delightful? This Raspberry Lemon Loaf Cake combines sweet and tart flavors in a moist,

- 6 large eggs - 1 cup milk (or non-dairy milk) - 2 cups diced bread (whole grain or sourdough) - 1 cup bell peppers, diced (red and green) - 1 cup spinach, chopped - 1/2 cup red onion, diced - 1 cup shredded cheese (cheddar or a blend) - 1 teaspoon garlic powder - 1 teaspoon onion powder - Salt and pepper to taste - 1 tablespoon olive oil (for sautéing) - Fresh herbs (like parsley or chives) for garnish, optional To make the Easy Breakfast Casserole, you need a few simple ingredients. You start with six large eggs. They provide the base for our dish. You will also need one cup of milk, which can be regular or non-dairy. This helps make the casserole creamy. Next, grab two cups of diced bread. Whole grain or sourdough works best. They add texture and heartiness to your meal. Now, add one cup of diced bell peppers. You can mix red and green for color. One cup of chopped spinach adds a fresh touch. Then, you need half a cup of diced red onion for flavor. To finish it off, use one cup of shredded cheese. Cheddar is a great choice, but feel free to use a blend. You will also need garlic powder and onion powder, each at one teaspoon. Don’t forget salt and pepper to taste. Lastly, have one tablespoon of olive oil ready for sautéing. These ingredients blend to create a delicious, filling breakfast casserole. If you want to see how to put it all together, check out the Full Recipe. 1. Preheat your oven to 350°F (175°C). This step is key for a good bake. 2. In a large skillet, heat 1 tablespoon of olive oil over medium heat. Add 1/2 cup of diced red onion and 1 cup of diced bell peppers. Sauté these veggies until they soften, which takes about 5 minutes. 3. Next, stir in 1 cup of chopped spinach and cook for about 2 minutes. This helps wilt the spinach and blend the flavors. 4. In a large mixing bowl, whisk together 6 large eggs, 1 cup of milk, 1 teaspoon of garlic powder, 1 teaspoon of onion powder, and salt and pepper to taste. Mix until smooth. 5. Add the sautéed veggies to the egg mixture. Then, fold in 2 cups of diced bread and half of the 1 cup of shredded cheese. Gently mix until the bread is coated well. 1. Grease a 9x13 inch baking dish and pour the mixture into it. Spread the mixture evenly across the dish. 2. Top with the remaining cheese. This creates a nice, cheesy crust on top. 3. Bake in the preheated oven for 35-40 minutes. Check for doneness by inserting a toothpick in the center. It should come out clean when ready. 1. Once baked, let the casserole cool for a few minutes before slicing. This helps it set better. 2. Serve warm and cut into squares. You can also garnish with fresh herbs like parsley or chives for a pop of color and flavor. Sautéing vegetables makes a big difference. It unlocks their flavors and adds depth. Start with onions and peppers. Cook them in olive oil until soft. This step takes about five minutes. Then, add spinach and cook for two more minutes. This softens the spinach and makes it tasty. For the egg mixture, you want a smooth blend. Whisk together eggs, milk, garlic powder, and onion powder. Make sure it is well mixed. The right consistency helps the casserole set properly. Baking at the right temperature is key. Preheat your oven to 350°F. This ensures even cooking. Bake for 35 to 40 minutes. Watch for a golden top. A toothpick should come out clean when done. To avoid over-baking, set a timer. Check the casserole a few minutes early. If the edges are browning too fast, cover them with foil. Adding herbs and spices boosts flavor. Try fresh parsley, chives, or thyme. These herbs brighten the dish. You can also use garlic powder and onion powder for extra taste. Cheese makes casseroles creamy and rich. Cheddar is a great choice, but feel free to mix it up. Try mozzarella or a blend of your favorites. This adds a unique twist to each bite. For the complete recipe, check out the [Full Recipe]. {{image_2}} You can change the veggies in your casserole. Here are some tasty options: - Mushrooms - Zucchini - Broccoli - Cherry tomatoes Instead of bread, try these options: - Croissants - Bagels - Gluten-free bread - Tortillas Make this dish gluten-free. Use gluten-free bread instead of regular bread. For a dairy-free option, swap milk for a non-dairy milk like almond or oat. You can also skip the cheese or use a dairy-free cheese. Want more protein? Add these to your casserole: - Cooked sausage - Crispy bacon - Diced ham - Tofu for a vegetarian option You can give your casserole a fun twist. For a Southwest-style, add: - Black beans - Corn - Chopped jalapeños - Spices like cumin and chili powder Try a Mediterranean twist by adding: - Feta cheese - Kalamata olives - Sun-dried tomatoes - Fresh herbs like basil or oregano These variations make your breakfast casserole exciting and unique. Check out the Full Recipe for more details! To keep your breakfast casserole fresh, place it in an airtight container. Make sure it cools down first. Store it in the fridge for up to five days. If you have more than you can eat, freezing is a great option too. Cut the casserole into portions. Wrap each piece tightly in plastic wrap, then place them in a freezer-safe bag. This keeps them safe from freezer burn. You can heat the casserole in the oven or microwave. For the oven, preheat it to 350°F (175°C). Place the casserole in a baking dish and cover it with foil. Heat for about 20 minutes. This helps maintain the texture. In the microwave, place a portion on a plate and cover it. Heat for 1-2 minutes, checking every 30 seconds. Make sure to stir it halfway through to keep the flavors even. Your breakfast casserole lasts about five days in the fridge. After that, it may start to spoil. Look for signs like unusual smells or mold. If it looks off or smells funny, it’s best to throw it away. Enjoy your delicious breakfast casserole while it’s fresh! For a detailed guide on making this dish, check the Full Recipe. Yes, you can make this casserole ahead of time. To do this, prepare the casserole as directed up to the baking step. Instead of baking it right away, cover it with plastic wrap or foil and place it in the fridge. You can bake it the next day. Just make sure to add a few extra minutes to the baking time. This method keeps the flavors fresh and makes mornings easier. To serve fewer people, you can scale down the ingredient amounts. For example, if you want to make a smaller casserole for three, use three eggs and half a cup of milk. Adjust the bread and veggies as well. You can keep the same ratios, so it still tastes great. Use a smaller baking dish, like an 8x8 inch one, to fit your smaller recipe. This casserole pairs well with many side dishes. You can serve it with fresh fruit, like berries or melon. A light salad with greens adds a nice touch, too. For drinks, consider orange juice or a hot cup of coffee. These options balance the meal and add brightness to your breakfast. Yes, this recipe is great for meal prep. You can portion out the casserole into individual servings after it cools. Store these portions in airtight containers. When you want to eat, just reheat in the microwave or oven. This keeps your meals quick and easy during busy days. It also helps you enjoy a tasty, homemade breakfast anytime. This blog post showed you how to create a tasty breakfast casserole. You learned about the best ingredients, tools, and steps to make it. I provided helpful tips for flavor and storage. Feel free to swap ingredients or adjust for your diet. Remember, this dish is great for meal prep or sharing. Make it ahead and enjoy a warm, filling meal any day. With these steps, you can impress yourself and others with a delicious dish that everyone will love. Cook and enjoy!

Easy Breakfast Casserole Simple and Tasty Recipe

Start your day off right with my Easy Breakfast Casserole! This simple and tasty recipe combines eggs, fresh veggies, and

- 4 medium sweet potatoes - 3 tablespoons olive oil - 2 teaspoons dried thyme - 1 teaspoon dried rosemary - 1 teaspoon garlic powder - Salt and pepper - Fresh parsley for garnish When I make herb roasted sweet potatoes, I focus on fresh ingredients. Sweet potatoes are the star here. I choose medium-sized ones for even cooking. Their natural sweetness shines through when roasted. I use olive oil to help the herbs stick. It also adds a nice flavor. Dried thyme and rosemary give a lovely aroma. I add garlic powder for a savory kick. Salt and pepper balance everything out. To finish, I love adding fresh parsley. It brightens up the dish and adds color. You can find the full recipe at the end! - Preheat the oven to 425°F (220°C). - Cube four medium sweet potatoes into 1-inch pieces. - In a large bowl, coat the cubes with three tablespoons of olive oil. To get the best flavor, make sure each piece gets a nice layer of oil. This helps them roast evenly and get that lovely taste. - Add two teaspoons of dried thyme, one teaspoon of dried rosemary, one teaspoon of garlic powder, salt, and pepper to taste. - Mix thoroughly until the sweet potatoes are evenly coated. Use your hands or a spoon to toss the sweet potatoes well. The herbs and spices should stick to each piece. This step is where the magic happens! - Spread the sweet potato mixture on a baking sheet in a single layer. - Roast for 25-30 minutes, flipping halfway through. This helps them brown nicely on all sides. You want them to be soft inside and crispy on the outside. After roasting, they will smell amazing and taste even better! Check out the Full Recipe for more details. When picking sweet potatoes, choose firm ones with smooth skin. Look for rich color, which means they are fresh and sweet. Avoid any with soft spots or blemishes. It helps to select sweet potatoes that are similar in size. This makes sure they cook evenly. Uniform cutting size is key. If some are small and others are big, the smaller ones can burn while the larger ones stay raw. To get tender and crispy sweet potatoes, cut them into 1-inch cubes. This size helps them cook properly. Next, coat them well with olive oil. The oil helps them crisp up in the oven. Spread the sweet potatoes out on the baking sheet. Do not crowd them. Proper spacing allows the heat to reach all sides evenly. This way, you get that perfect crunch. Boost the flavor by adding spices or herbs. Consider using smoked paprika or chili powder for a kick. Fresh herbs like cilantro or basil can also add a nice twist. Balancing flavors is important, too. A squeeze of lemon juice can brighten up the dish. If you want it sweeter, drizzle a little honey or maple syrup. This balance makes each bite exciting. For the full recipe, check out the detailed instructions above. {{image_2}} You can change up the herbs in this recipe. Oregano and basil work great. They add fresh tastes and new flavors. You can also mix herbs. Try combining thyme with rosemary for a lovely blend. Each herb brings its own twist. Feel free to experiment with your favorites. To add a sweet touch, drizzle some honey or maple syrup. This balance of sweet and savory makes it special. You can also add spices like cumin or paprika. Cumin gives it a warm flavor, while paprika adds depth. This twist can make the dish even more exciting. If you need a gluten-free dish, this recipe is perfect. All the ingredients are naturally gluten-free. For a vegan option, just skip any dairy. This dish is already plant-based and full of flavor. Enjoy it as is or with your favorite vegan dips. For the full recipe, see the details above. To keep your herb roasted sweet potatoes fresh, place them in an airtight container. Make sure to cool them first. Store the container in the refrigerator. They will stay good for about 3 to 5 days. If you want to keep them longer, freezing is a great option. To freeze, spread the cooled sweet potatoes on a baking sheet. Place them in the freezer for 1 hour. Once frozen, transfer them to a freezer-safe bag. This way, they won’t stick together and you can grab a handful when needed. When reheating, you want to keep them tasty and crispy. The best way is to use the oven. Preheat your oven to 375°F (190°C). Spread the sweet potatoes on a baking sheet. Heat them for about 10 to 15 minutes. They will regain some crispness this way. If you need to use a microwave, place them in a microwave-safe dish. Heat for 1 to 2 minutes. Check after each minute to avoid sogginess. The oven gives better texture, while the microwave is quicker. Choose based on your time and texture needs. Yes, you can use other types of potatoes. White potatoes, red potatoes, or Yukon gold work well. They all roast nicely and taste great. Just cut them into 1-inch cubes like the sweet potatoes. The cooking time may vary slightly, so check for tenderness. Each type gives a unique flavor, so feel free to experiment! To make herb roasted sweet potatoes ahead of time, follow these steps: 1. Prep the sweet potatoes: Peel and cut them into cubes. 2. Mix with oil and spices: Combine olive oil, thyme, rosemary, garlic powder, salt, and pepper. 3. Store: Place the coated sweet potatoes in an airtight container. Keep them in the fridge for up to 24 hours. 4. Roast: When ready, spread them on a baking sheet and roast as directed. This method keeps the flavors fresh and ready! You can pair herb roasted sweet potatoes with many dishes. Here are some tasty options: - Grilled chicken or fish: The savory flavors balance well. - Salads: A fresh green salad adds crunch and brightness. - Quinoa or rice: These grains complement the sweet potatoes nicely. - Roasted vegetables: Mix with other seasonal veggies for more flavor. Creating a balanced meal is easy with these yummy pairings. For the full recipe, check out the previous sections! This blog post covered how to make herb roasted sweet potatoes. We discussed key ingredients, step-by-step instructions, and tips for perfect texture. You learned about flavor enhancements and variations to suit your taste. Proper storage and reheating methods ensure your leftovers remain delicious. Experiment with different herbs or add a sweet twist for variety. Enjoy your cooking, and remember that variations keep meals exciting. Keep these tips handy, and happy roasting!

Herb Roasted Sweet Potatoes Flavorful and Easy Recipe

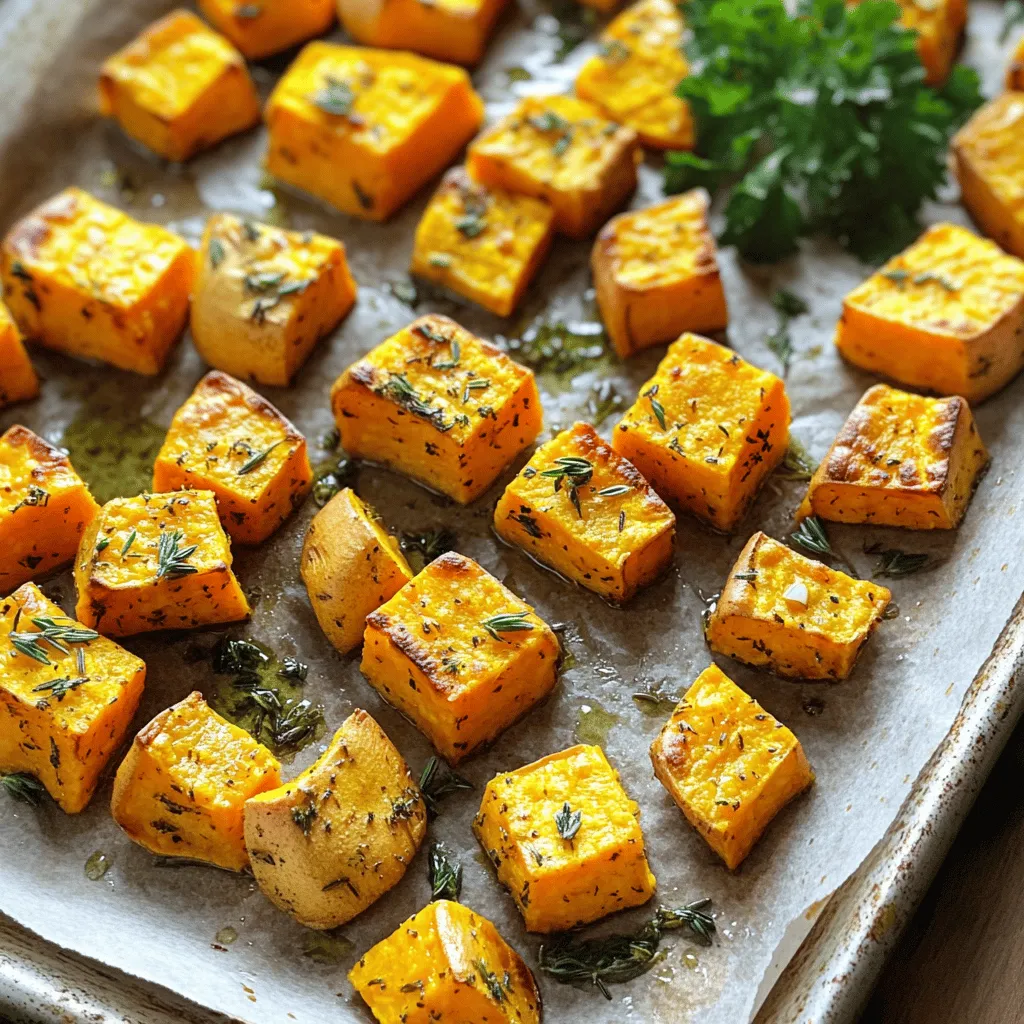
Looking for a simple yet flavorful side dish? Herb roasted sweet potatoes are the answer! This easy recipe combines tender

To make buffalo chicken meatballs, you'll need a few key items. Here they are: - 1 pound ground chicken - 1/2 cup breadcrumbs (preferably whole wheat) - 1/4 cup grated Parmesan cheese These main ingredients form the base of the meatballs. Ground chicken gives them a light, tender texture. Breadcrumbs help hold everything together. Parmesan adds a rich, savory flavor. Next, let's add some flavor with seasonings. You will want: - 1/4 cup buffalo sauce - 1 teaspoon garlic powder - 1 teaspoon onion powder Buffalo sauce brings the heat and tanginess. Garlic powder and onion powder enhance the taste. They make your meatballs exciting and tasty. If you want extra flair, consider these optional items: - 1/4 cup blue cheese crumbles - Fresh celery sticks and carrot sticks for serving Blue cheese crumbles add a creamy, bold taste. Celery and carrot sticks provide a crunchy side. They balance the heat of the meatballs and make a great plate. For the full recipe, check [Full Recipe]. 1. First, preheat your oven to 400°F (200°C). This helps cook the meatballs evenly. 2. Next, line a baking sheet with parchment paper. This makes cleanup easy. 3. Now, in a large mixing bowl, combine the ground chicken, breadcrumbs, Parmesan cheese, and chopped green onions. 4. Add the egg, buffalo sauce, garlic powder, onion powder, salt, and black pepper. 5. Mix everything well with your hands or a spoon until combined. 1. Using your hands, shape the mixture into small meatballs. Aim for about one inch in size. 2. Carefully place the meatballs on the prepared baking sheet. Space them apart for even cooking. 1. Place the baking sheet in the oven. Bake the meatballs for 20 to 25 minutes. 2. Check for doneness by cutting one open. It should be cooked through and golden brown. 3. Once done, remove the meatballs from the oven. Toss them in additional buffalo sauce for extra flavor. 4. Serve hot. Enjoy with fresh celery and carrot sticks for a crunchy side. For the full recipe, follow the link to Buffalo Chicken Meatballs. To get the best texture in your meatballs, mix the ingredients by hand. This helps keep them tender. You want to avoid overmixing, which makes them tough. Aim for small meatballs, about 1 inch in diameter. This size cooks evenly and gives you a perfect bite. Add extra spices to boost the flavor. Try paprika or cayenne for more heat. You can also mix in a dash of Worcestershire sauce for depth. After forming the meatballs, let them rest for a few minutes. Resting helps flavors develop and keeps them juicy. Serve your meatballs on a platter with fresh celery and carrot sticks. These add crunch and color. Drizzle some extra buffalo sauce over the top for a pop of flavor. For a creamy touch, sprinkle blue cheese crumbles on meatballs. This makes them look great and taste even better. For more ideas, check the Full Recipe. {{image_2}} You can switch things up with chicken meatball variations. Use ground turkey or lean beef for a twist. Add herbs like parsley or basil for extra flavor. You can even try different cheeses, like mozzarella, for a gooey surprise. For those who prefer plant-based meals, there are vegetarian or vegan options. Use lentils or chickpeas as a base. Combine with breadcrumbs, spices, and some veggies. Create a similar texture, and you’ll have delicious meatless meatballs. Want to make your meatballs extra spicy? Just add more hot sauce! You can also mix in jalapeños for a kick. This will make your Buffalo Chicken Meatballs fiery and fun. If you like sweet and tangy tastes, try adding honey or maple syrup. This blend balances the heat of the buffalo sauce. You can also mix in a splash of apple cider vinegar for extra zing. Pair your meatballs with fresh celery and carrot sticks. They add crunch and coolness to balance the spice. You can also serve them with ranch or blue cheese dressing for dipping. Meal prep is easy with these meatballs. Make a large batch and store them. They are great for quick lunches or snacks. Just reheat and enjoy! Check out the Full Recipe for more ideas on serving. After you make your Buffalo chicken meatballs, store the leftovers in the fridge. Place them in an airtight container. This keeps them fresh and tasty. You can enjoy them for up to 3 days. If you wait longer, they may not taste as good. You can freeze both cooked and uncooked meatballs. For cooked meatballs, let them cool first. Then, place them in a freezer-safe bag or container. They last for up to 3 months in the freezer. For uncooked meatballs, shape them, then freeze on a baking sheet. Once firm, transfer them to a bag. When it's time to eat, thaw them in the fridge overnight. To reheat, bake them at 350°F (175°C) until warm. To reheat meatballs, the oven is the best choice. Bake them at 350°F (175°C) for about 10-15 minutes. This keeps them moist and tasty. You can also heat them in a pan with a bit of buffalo sauce. Just stir gently to keep the flavors fresh. Enjoy your meatballs with extra buffalo sauce for a kick! Check out the Full Recipe for more delicious details. You can use gluten-free breadcrumbs instead of regular ones. Look for brands that are labeled gluten-free. You can also make your own breadcrumbs using gluten-free bread. Just toast the bread and crumble it. This way, you keep the taste while making it safe for gluten-free diets. Yes, you can! Ground turkey works well and gives a nice flavor. You may also try ground beef or pork. Just remember that cooking times may change slightly based on the meat you choose. The best way is to use a meat thermometer. The inside should reach 165°F (74°C). If you don't have one, cut a meatball in half. It should be fully cooked and no longer pink inside. Serve them hot with extra buffalo sauce drizzled on top. You can add blue cheese crumbles for extra flavor. Pair them with celery and carrot sticks for a crunchy side. This makes them great for a party or game day. Yes, you can! Mix and shape the meatballs ahead of time. Place them on a baking sheet and cover them in the fridge. You can also freeze them uncooked. Just thaw them before baking. Buffalo chicken meatballs go great with ranch dressing or blue cheese dip. You can also try a spicy sriracha mayo for a kick. These dips add flavor and make your meatballs even more fun to eat. In this blog post, we explored how to make Buffalo Chicken Meatballs. We covered the key ingredients, like ground chicken, breadcrumbs, and Parmesan cheese. You learned steps for preparing, shaping, and cooking the meatballs. We shared valuable tips for flavor and presentation. Variations and storage methods were also discussed. These meatballs are tasty and easy to make. Customize them to suit your taste and enjoy!

Buffalo Chicken Meatballs Flavorful and Easy Recipe

Craving a tasty snack that’s easy to make? Let me share my Buffalo Chicken Meatballs recipe! This dish packs a

- 1 pound chicken breast, cut into 1-inch cubes - 1/3 cup honey - 1/4 cup Dijon mustard - 2 tablespoons olive oil - 2 tablespoons soy sauce - 2 garlic cloves, minced - 1 teaspoon smoked paprika - Salt and black pepper to taste - Wooden or metal skewers (if using wooden, soak them in water for 30 minutes) - Optional: fresh parsley, chopped (for garnish) For the chicken, you can use thighs if you prefer more flavor. If you want a sweeter taste, add more honey. For a spicier kick, use spicy mustard instead of Dijon. You can swap olive oil for another oil, like avocado oil. If you need a soy sauce alternative, try coconut aminos. You will need a medium bowl for mixing the marinade. A whisk helps to blend the ingredients well. Skewers are important for grilling. If you use wooden skewers, soak them in water for 30 minutes to prevent burning. Finally, a grill or grill pan is key to cooking the chicken evenly. {{ingredient_image_1}} First, grab a medium bowl. In it, whisk together 1/3 cup honey and 1/4 cup Dijon mustard. Next, add 2 tablespoons of olive oil and 2 tablespoons of soy sauce. Toss in 2 minced garlic cloves and 1 teaspoon of smoked paprika. Add salt and black pepper to taste. Mix this well until it blends nicely. Now, take 1 pound of chicken breast and cut it into 1-inch cubes. Place the chicken into the marinade, making sure every piece gets coated. Cover the bowl and refrigerate for at least 30 minutes. If you want more flavor, marinate for up to 2 hours. While the chicken is marinating, it’s time to prepare your grill. Preheat your grill or grill pan over medium-high heat. If you’re using wooden skewers, remember to soak them in water for 30 minutes. This step helps prevent burning on the grill. If you have metal skewers, you can skip this. Once your grill is hot, thread the marinated chicken pieces onto the skewers. Make sure to leave a little space between each piece. This helps them cook evenly. Place the skewers on the grill and cook for about 10-12 minutes. Turn them occasionally until the chicken is cooked through. Check that the internal temperature reaches 165°F (75°C). After grilling, remove the skewers and let them rest for a few minutes. If you like, garnish with fresh chopped parsley before serving. Enjoy! To make your honey mustard chicken skewers shine, marinate the chicken well. Use a medium bowl to mix honey, Dijon mustard, olive oil, soy sauce, minced garlic, smoked paprika, salt, and pepper. Whisk them together until they blend nicely. Add the chicken cubes and stir until they are fully coated. Cover the bowl with plastic wrap and place it in the fridge. For the best flavor, let it sit for at least 30 minutes. If you can, aim for 2 hours. This helps the chicken soak up all the sweet and tangy goodness. To ensure even cooking, it’s key to prepare your skewers properly. When threading the chicken onto the skewers, leave a little space between each piece. This step allows heat to circulate around the chicken. Preheat your grill or grill pan over medium-high heat. Once ready, place the skewers on the grill and keep an eye on them. Turn them every few minutes. This way, you’ll avoid burning and get nice grill marks. You want the chicken to reach 165°F (75°C) for safe eating. Garnishing brings your dish to life. After grilling, let the skewers rest for a few minutes. This helps keep them juicy. Then, sprinkle fresh chopped parsley over the skewers. The green adds color and freshness to the dish. You can also serve them with lemon wedges. A squeeze of lemon brightens the flavors. For a fun twist, try serving with a side of extra honey mustard for dipping. Enjoy the burst of flavor! Pro Tips Marinate Longer for More Flavor: For a more intense flavor, marinate the chicken for up to 2 hours. This allows the flavors to penetrate the meat better. Use a Meat Thermometer: To ensure your chicken is perfectly cooked, use a meat thermometer to check that the internal temperature reaches 165°F (75°C). Soak Skewers for Moisture: If using wooden skewers, soak them in water for at least 30 minutes before grilling. This prevents them from burning on the grill. Add Veggies for Color: Consider adding bell peppers, zucchini, or cherry tomatoes to your skewers. They add color and additional flavor to the dish. {{image_2}} Do you want to switch up the chicken? You can use shrimp or firm tofu. Both options soak up the honey mustard sauce well. For shrimp, use large ones and grill them for about 3-5 minutes. If you choose tofu, press it to remove water, then cut it into cubes. Marinate as you would chicken, and grill until golden. Want to add a twist to your skewers? Try adding herbs like rosemary or thyme. A splash of lemon juice gives it a fresh zing. You can also use spicy mustard for a kick. If you like sweetness, mix in some brown sugar or maple syrup. Feel free to experiment with your favorite flavors! No grill? No problem! You can cook these skewers in the oven. Preheat it to 400°F (200°C). Place the skewers on a baking sheet lined with foil. Bake for about 15-20 minutes, flipping halfway. For an air fryer, set it to 380°F (193°C) and cook for 8-10 minutes. Both methods yield juicy and tasty skewers! After you enjoy your honey mustard chicken skewers, store any leftovers in an airtight container. The chicken stays fresh in the fridge for about 3 to 4 days. Make sure to let the skewers cool down to room temperature before you put them away. This helps keep the chicken juicy. To reheat the chicken skewers, you can use your grill, oven, or microwave. If you use the grill or oven, heat them at medium heat until warm, about 5 to 7 minutes. This keeps the outside crispy. If you choose the microwave, heat them for 30 seconds at a time. Check the chicken often to avoid overcooking. If you want to save some skewers for later, freeze them! Wrap each skewer tightly in plastic wrap and then in foil. This helps keep the flavor and texture. They can last in the freezer for up to 3 months. When you're ready to cook, thaw them in the fridge overnight before reheating. You should marinate the chicken for at least 30 minutes. This allows the flavors to soak in. If you have time, marinate it for up to 2 hours. The longer it sits, the more tasty it gets. Yes, you can use other types of mustard. Yellow mustard works well if you want a milder taste. Spicy brown mustard can add a kick. Feel free to mix and match to find your favorite flavor. Many sides go great with these skewers. Here are a few ideas: - Grilled vegetables like bell peppers and zucchini - A fresh green salad with vinaigrette - Rice or quinoa for a filling option - Corn on the cob for a sweet touch These sides complement the sweet and tangy flavors of the chicken. This blog post covered the key steps for making honey mustard chicken skewers. We explored the ingredients, measurements, and the tools you need. You learned how to marinate the chicken, prepare the grill, and grill your skewers perfectly. Tips on even cooking and garnishing added extra flavor. We discussed variations with other proteins and cooking methods. Finally, you gained insights on storing leftovers and reheating them. Enjoy your grilling adventure, and remember that the best meals come from a mix of good practices and creativity!

Honey Mustard Chicken Skewers Tasty Grilling Recipe

Get ready to fire up your grill with this amazing Honey Mustard Chicken Skewers recipe! With its sweet and tangy

To make homemade garlic knots, you’ll need the following: - 2 cups all-purpose flour - 1 teaspoon instant yeast - 1 teaspoon sugar - 1 teaspoon salt - ¾ cup warm water (about 110°F) - ¼ cup unsalted butter, melted - 4 cloves garlic, minced - 2 tablespoons fresh parsley, chopped - Additional butter for brushing - Grated Parmesan cheese (optional) These ingredients come together to create soft, flavorful knots that are perfect for any meal. You will need a few simple tools to make this recipe: - Mixing bowl - Rolling pin - Baking sheet - Kitchen towel - Oven With these items, you can easily prepare and bake your garlic knots. Enjoy the process! - In a mixing bowl, combine 2 cups of all-purpose flour, 1 teaspoon of instant yeast, 1 teaspoon of sugar, and 1 teaspoon of salt. Mix these dry ingredients well. - Slowly add ¾ cup of warm water to the dry mix. Stir until a dough begins to form. - Knead the dough on a floured surface for about 5 to 7 minutes. Keep kneading until it feels smooth and elastic. - Place the dough in a greased bowl. Cover it with a kitchen towel and let it rise in a warm spot for about 1 hour. The dough should double in size. - Once it has risen, punch the dough down to remove air. Place it on a lightly floured surface and divide it into 8 equal pieces. - Roll each piece into a long strip, about 12 inches long. Tie each strip into a knot. Place the knots on a greased baking sheet. - In a small bowl, mix ¼ cup of melted unsalted butter, 4 cloves of minced garlic, and 2 tablespoons of chopped fresh parsley. - Brush the garlic butter mixture generously over each garlic knot. - Preheat your oven to 400°F (200°C). Bake the knots for about 15 to 20 minutes. They should turn golden brown. - Once they are out of the oven, you can brush them with extra melted butter if you like. Optionally, sprinkle grated Parmesan cheese on top. This recipe for homemade garlic knots is simple and fun. You will enjoy making and sharing them! For the full details of this recipe, check the full recipe section. To make the best garlic knots, you must have the right dough. The dough should be smooth and elastic. If it feels too sticky, add a little flour. If it is too dry, add a bit of warm water. This balance is key for great texture. Kneading is another important step. You want to knead the dough for about 5-7 minutes. This builds strength in the dough. A good tip is to fold and push the dough with your palms. This method helps develop gluten, which gives the knots their chewy texture. Letting the dough rise is crucial. Place it in a warm area, covered with a towel. It should double in size in about an hour. This process makes the knots light and fluffy. If your kitchen is cold, try placing the dough near a warm oven. To achieve that perfect golden brown color, keep an eye on your knots while baking. Bake them at 400°F for about 15-20 minutes. If they are browning too quickly, lower the temperature slightly. This way, the inside cooks just right without burning the outside. Garlic knots are great on their own, but they shine with accompaniments. Serve them warm with marinara sauce for dipping. The tomato sauce balances the garlic flavor. You can also pair them with garlic butter for extra richness. For a unique twist, try serving them with pesto. The herby taste of pesto complements the knots well. You may even sprinkle some grated Parmesan cheese on top for added flavor. Garlic knots also make a great side dish. They pair well with pasta or salad. You can place them on the dinner table for everyone to enjoy. They are perfect for parties or family dinners, adding a fun touch to any meal. For the complete recipe, check the [Full Recipe](#). {{image_2}} You can add fun twists to your garlic knots. Here are some ideas: - Cheesy garlic knots with mozzarella: Add small chunks of mozzarella cheese inside each knot. The cheese melts and gives a gooey center that pairs well with garlic. - Spicy garlic knots with red pepper flakes: Mix in red pepper flakes with your garlic butter. This will give your knots a nice kick and a bit of heat. - Herb-infused versions with different fresh herbs: Use fresh herbs like basil or thyme in the garlic butter. This adds a fresh taste and a beautiful aroma to your knots. You can easily adjust garlic knots for different diets: - Gluten-free garlic knots option: Use a gluten-free flour mix instead of all-purpose flour. Make sure your yeast is also gluten-free. - Vegan substitution for butter and dairy: Replace butter with plant-based butter. Skip the Parmesan cheese or use a vegan cheese alternative. These changes keep the taste while being vegan-friendly. Enjoy experimenting with these variations! For the complete instructions, check out the Full Recipe. To store leftover garlic knots, let them cool completely first. Place them in an airtight container. This will help keep them soft. You can also wrap them in foil or plastic wrap. Keep them at room temperature for up to three days. If you want to keep them longer, consider the freezer. To freeze garlic knots, let them cool down after baking. Arrange them in a single layer on a baking sheet. Place the sheet in the freezer until they freeze solid, about 1-2 hours. Then, transfer the knots to a freezer bag, removing as much air as possible. They will stay fresh for up to three months. To reheat frozen garlic knots, preheat your oven to 350°F (175°C). Place the frozen knots on a baking sheet. Bake for about 10-15 minutes or until heated through. Brush with melted butter for extra flavor. Enjoy your homemade garlic knots just like fresh! For the complete process, check the Full Recipe. You can prepare the dough in advance. First, mix the dry ingredients and add the warm water. Knead the dough well. Then, let it rise. After it rises, you can store unbaked knots in the fridge. Wrap them tightly in plastic wrap. They stay fresh for up to two days. When you're ready, let them come to room temperature. Bake them as the recipe states for fresh knots. If your dough won't rise, check the yeast. It might be old or inactive. Use fresh yeast for better results. Warm water should be about 110°F. If it's too hot, it can kill the yeast. If it's too cold, the yeast won't activate. Make sure to knead the dough well. This helps develop gluten, which is key for rising. Yes, you can use store-bought dough. It saves time and effort. When using premade dough, let it thaw completely. Roll and knot the pieces as you would with homemade dough. Adjust the baking time slightly. Store-bought dough may bake faster. Keep an eye on them, and check for that golden brown color. You can still add garlic butter for extra flavor! You now have all the steps to create delicious garlic knots. From mixing the dough to adding flavors, this recipe covers it all. Remember to focus on kneading well and letting the dough rise. Experiment with different flavors and toppings. Store any leftovers properly or freeze them for later. With a few tips, you can master this dish. Enjoy making and sharing these tasty knots with family and friends!

Homemade Garlic Knots Tasty and Easy Recipe Guide

Are you ready to dive into the world of Homemade Garlic Knots? This easy recipe will have your kitchen filled

Older posts
Newer posts
← Previous Page1 … Page80 Page81 Page82 … Page85 Next →

dsad

© 2026 greenmealmap • Built with GeneratePress

Our Policies

  • Copyright Policy
  • Cookie Policy
  • GDPR Policy
  • Privacy Policy
  • Disclaimer
  • Terms Of Use

More Information

  • Home
  • About
  • Contact
  • Appetizers
  • Dessert
  • Dinner
  • Drinks
©2026, greenmealmap About Back To Top