Skip to content
DisclaimerTerms Of UseGDPR PolicyCookie Policy

greenmealmap

  • Home
  • Drinks
  • Appetizers
  • Dinner
  • Dessert
  • About
  • Contact
  • Privacy Policy
DisclaimerTerms Of UseGDPR PolicyCookie Policy

NO-ING-IMG

- 1 cup oat milk - 1 espresso shot or 1/2 cup brewed coffee - 1 tablespoon honey (adjust to taste) - 1/2 teaspoon ground cinnamon - 1/4 teaspoon vanilla extract - A pinch of sea salt - Cinnamon stick or ground cinnamon for garnish If you cannot find oat milk, you can use almond milk or soy milk. Both options offer a creamy texture. For honey, maple syrup is a great alternative if you want a vegan choice. You could also use agave syrup. If you want a stronger cinnamon flavor, try adding 1 teaspoon of cinnamon instead of 1/2 teaspoon. - Oat Milk: This milk is dairy-free and rich in fiber. It helps keep your heart healthy. - Espresso or Coffee: Coffee boosts your energy and can improve focus. It is also rich in antioxidants. - Honey: Honey adds sweetness and has natural antibacterial properties. It can soothe a sore throat. - Ground Cinnamon: This spice has anti-inflammatory effects and may help regulate blood sugar. - Vanilla Extract: This adds flavor and has calming properties, improving your mood. - Sea Salt: A pinch of salt can enhance sweetness and improve overall flavor. This Cinnamon Honey Oat Milk Latte is not just tasty; it's also packed with benefits from each ingredient. Enjoy making this rich and creamy drink! For the full recipe, check out the instructions above. To make your Cinnamon Honey Oat Milk Latte, start by brewing your coffee. You can use a shot of espresso or a half cup of brewed coffee. Set this aside to cool slightly. Next, heat your oat milk in a small saucepan. Use medium heat to warm it gently, stirring often. You want it warm but not boiling, as this can change the taste. Once warm, whisk in the honey, ground cinnamon, vanilla extract, and a pinch of sea salt. This step is key for blending the flavors. After combining, pour the brewed coffee into a large mug. Slowly add the cinnamon honey oat milk on top. Stir gently to mix everything well. For the final touch, sprinkle a bit of ground cinnamon on top or add a cinnamon stick for a nice look. This adds flavor and makes your drink feel special. If you choose to brew coffee, make sure it is strong. Use fresh, quality coffee beans for the best flavor. Grind your beans just before brewing for freshness. If you use an espresso machine, follow the machine’s instructions for the best shot. Remember, a good espresso should have a rich, thick crema on top. This gives your latte a nice look and taste. Frothing oat milk at home is easy and fun. You can use a whisk, a frother, or even a jar with a lid. If you use a whisk, whisk quickly until you see bubbles forming. If you use a frother, dip it into the oat milk and turn it on. Move it up and down to froth well. With the jar method, fill the jar halfway, close the lid tightly, and shake it hard. Do this for about 30 seconds. Let it sit for a minute to settle before using. Frothy oat milk makes your latte rich and creamy. For the complete recipe, check out the Full Recipe section! When making a cinnamon honey oat milk latte, some errors can ruin the drink. Here are key mistakes to watch for: - Heating Oat Milk Too Much: If you let it boil, it can curdle. - Not Whisking Properly: You need to whisk well to mix the flavors. - Using Old Coffee: Fresh coffee makes a big difference in taste. - Skipping the Salt: A pinch of sea salt enhances all the flavors. To make your latte just right, you can change the sweetness and flavor. If you want it sweeter, add more honey. Just keep tasting as you go. If you like it spicier, add more ground cinnamon. You can also play with vanilla extract for a richer flavor. Try adding a dash of cocoa powder for a chocolate twist. Serving your latte well can make it even more special. Use a large mug to show off the layers. A sprinkle of ground cinnamon on top gives it a nice look. You can also add a cinnamon stick for garnish. This adds flavor and makes the drink feel cozy. Serve it warm and enjoy the rich taste with every sip. For the complete recipe, check out the Full Recipe section. {{image_2}} If you want a dairy-free option, oat milk is a great choice. It has a rich taste. You can also try almond milk or cashew milk for a nutty flavor. Coconut milk adds a creamy texture and a hint of coconut. Experiment to find your favorite! You can customize your cinnamon honey oat milk latte with fun flavors. Add a splash of maple syrup for extra sweetness. Try a dash of nutmeg or cardamom for warmth. You can even mix in some cocoa powder for a mocha twist. Get creative and find what you love! To make an iced version, brew your coffee and let it cool. Fill a glass with ice cubes. Pour in the cooled coffee, and then add your cinnamon honey oat milk. Stir well, and enjoy a refreshing drink on a hot day. This iced treat is perfect for summer! For the full recipe, check out the Cinnamon Honey Oat Milk Latte recipe above. Store any leftover oat milk latte in an airtight container. Keep it in the fridge. Use it within two days for the best taste. The oat milk can separate, so give it a good shake before you drink it again. To reheat your latte, pour it into a saucepan. Heat it on low heat. Stir it gently to mix the flavors back together. Avoid boiling it, as this can change the taste. If you want a frothy top, you can whisk it while heating. Homemade oat milk lasts about 3 to 5 days in the fridge. Honey and cinnamon have a long shelf life. Store honey in a cool, dark place, and it can last for years. Ground cinnamon stays fresh for about 2 to 3 years when stored tightly closed in a cool spot. If you want more tips, check the Full Recipe for details on making this delicious drink! Yes, you can use other milk options. Almond milk, soy milk, and coconut milk work well. Each type adds a unique flavor. Almond milk is nutty, while soy milk is creamy. Coconut milk gives a tropical twist. Choose what you like best! To make this drink vegan, swap honey for maple syrup or agave nectar. Both options add sweetness without animal products. Use a plant-based milk like oat, almond, or soy. This keeps your drink tasty and cruelty-free. Many cafes now serve oat milk lattes. Look for coffee shops that offer oat milk. Ask if they can add cinnamon and honey. Some chain cafes may have this drink on their menu. Local shops often create their unique versions. The best way to sweeten your drink is with honey, maple syrup, or agave. Start with a tablespoon and taste. Add more if you want it sweeter. You can also try flavored syrups for a fun twist. Enjoy experimenting! For the full recipe of this delightful drink, check the earlier section. You now have a clear guide to making a delicious Cinnamon Honey Oat Milk Latte. Start with the right ingredients and substitutes for health benefits. Follow the steps closely to brew and froth like a pro. Remember to avoid common mistakes and adjust flavors to your taste. Explore fun variations and store leftovers wisely. With careful practice, you can enjoy this drink at home. Embrace creativity and enjoy every sip of your latte journey.

Cinnamon Honey Oat Milk Latte Rich and Creamy Drink

Craving a deliciously creamy drink that warms your soul? The Cinnamon Honey Oat Milk Latte is your answer! This delightful

- 1 large head of cauliflower, chopped into florets - 1 whole bulb of garlic - 2 tablespoons olive oil - 1 medium onion, chopped - 4 cups vegetable broth - 1 cup coconut milk (or heavy cream for a richer flavor) - 1 teaspoon thyme (fresh or dried) - Salt and pepper to taste - Fresh chives or parsley for garnish Choosing the best ingredients makes a big difference. I always look for fresh produce. Fresh cauliflower should be firm, with no brown spots. The garlic should feel heavy and have tight skin. When you pick an onion, look for smooth skin. The olive oil should be extra virgin, as it gives the soup a rich taste. For the broth, I prefer low-sodium vegetable broth. It allows me to control the salt better. As for the coconut milk, I suggest the full-fat version. It gives the soup a creamy texture and rich flavor. When I shop, I often choose organic produce. Organic cauliflower and garlic have fewer chemicals. They also tend to taste better. However, if organic isn’t available, conventional produce works fine. Just be sure to wash everything well. Using quality ingredients leads to a more flavorful and creamy soup. You can find the full recipe above to get started right away! 1. Preheat your oven to 400°F (200°C). This heat will help caramelize the cauliflower and garlic. 2. On a baking sheet, toss the cauliflower florets with 1 tablespoon of olive oil, salt, and pepper. Make sure each piece gets coated. 3. Cut the top off the bulb of garlic to expose the cloves. Drizzle it with a little olive oil. Wrap it in aluminum foil. This will keep the garlic soft and sweet. 1. Heat the remaining tablespoon of olive oil in a large pot over medium heat. Add the chopped onion and sauté until it is soft and translucent. This takes about 5-7 minutes. 2. Once your garlic is roasted, let it cool slightly. Squeeze the roasted cloves out of their skins and add them to the pot with the onions. The flavor will be rich and sweet. 3. Now, add the roasted cauliflower to the pot. Pour in the vegetable broth and thyme. Bring this mix to a simmer and cook for 10 minutes. This part develops the soup's taste. 1. Use an immersion blender to puree the soup until it is smooth and creamy. If you do not have an immersion blender, carefully transfer the soup to a countertop blender in batches. 2. Stir in the coconut milk or heavy cream. Season your soup with salt and pepper to taste. Heat it through until just warmed. 3. Serve the soup hot. Garnish it with fresh chives or parsley for a pop of color and flavor. For the complete recipe, check the Full Recipe section. Enjoy every spoonful of this tasty dish! To make your soup super creamy, use coconut milk or heavy cream. Both add richness, but coconut milk keeps it dairy-free. Blend your soup well with an immersion blender. This tool gives you a smooth texture quickly. If you don’t have one, pour the soup into a regular blender in batches. Just be careful with hot liquids. Always leave room for steam to escape. Roasting garlic makes it sweet and soft. This change in flavor adds depth to your soup. When you roast garlic, it turns golden and caramelized. Cut the top off the bulb and drizzle with olive oil. Wrap it in foil and bake it alongside the cauliflower. This way, you infuse the soup with rich, roasted flavor. One common mistake is overcooking the cauliflower. You want it tender but not mushy. Keep an eye on it while it roasts. Another mistake is not seasoning enough. Taste your soup before serving. Adjust salt and pepper to your liking. Lastly, don’t skip blending the soup. This step is key for a creamy result. Follow these tips, and your soup will shine. For the complete recipe, check out the Full Recipe section. {{image_2}} If you want a dairy-free version of this soup, use coconut milk. It gives a creamy texture and adds a subtle sweetness. You can also use almond or cashew milk, but coconut milk is my favorite. For a vegan option, ensure your vegetable broth is free from animal products. This way, you keep all flavors and stay plant-based. If you want to boost protein, add beans or lentils. White beans work well and blend smoothly. Add them during the cooking process, just before blending. This keeps the soup rich and creamy. For lentils, red lentils are a great choice. They cook quickly and blend nicely. To add more flavor, think about spices or extra vegetables. A pinch of cumin or smoked paprika can give depth to the soup. You could also toss in some chopped carrots or celery when you sauté the onions. This adds layers of taste and texture. If you enjoy heat, a dash of cayenne pepper can spice things up. Try these ideas to create your own special twist on this soup. For the full recipe, check out the detailed guide above. To keep your roasted garlic cauliflower soup fresh, place it in an airtight container. Make sure the soup cools down to room temperature first. This step helps avoid condensation. Store it in the fridge for up to five days. If you plan to eat it later, this method keeps the flavors intact. You can freeze the soup for later use. Pour it into freezer-safe containers, leaving some space at the top. The soup expands when frozen. Label the containers with the date. The soup can last in the freezer for up to three months. When you're ready to enjoy it, thaw it in the fridge overnight. Reheating is simple. You can use a microwave or a pot on the stove. If using a microwave, heat in 30-second intervals, stirring in between. On the stove, gently warm it over low heat. Stir often to prevent burning. If the soup is too thick, add a splash of broth or water to reach your desired consistency. Enjoy your delicious soup warm! You can use heavy cream instead of coconut milk for a richer taste. Almond milk is another option if you want a dairy-free choice. It will change the flavor but still keep it creamy. You may also try cashew cream for a nutty twist. Each substitute gives the soup a unique flavor, so feel free to experiment. Roasted Garlic Cauliflower Soup lasts about four days in the fridge. Store it in an airtight container to keep it fresh. If you notice any changes in smell or color, it is best to throw it out. Always reheat it well before serving to enjoy the flavors again. Yes, you can make the soup ahead of time! It tastes even better after resting for a day. Just let it cool and store it in the fridge. When you're ready to eat, reheat it on the stove or in the microwave. This is a great way to save time on busy days. For the full recipe, check out the earlier section. This article provided a clear recipe for Roasted Garlic Cauliflower Soup. You learned about key ingredients, preparation steps, and cooking tips. We discussed variations, including how to make it dairy-free. Knowing how to store leftovers ensures you enjoy this dish longer. In summary, simple swaps can enhance your soup. Don’t hesitate to get creative! This soup can be a comforting meal for anyone. Happy cooking, and enjoy every spoonful!

Roasted Garlic Cauliflower Soup Flavorful and Creamy

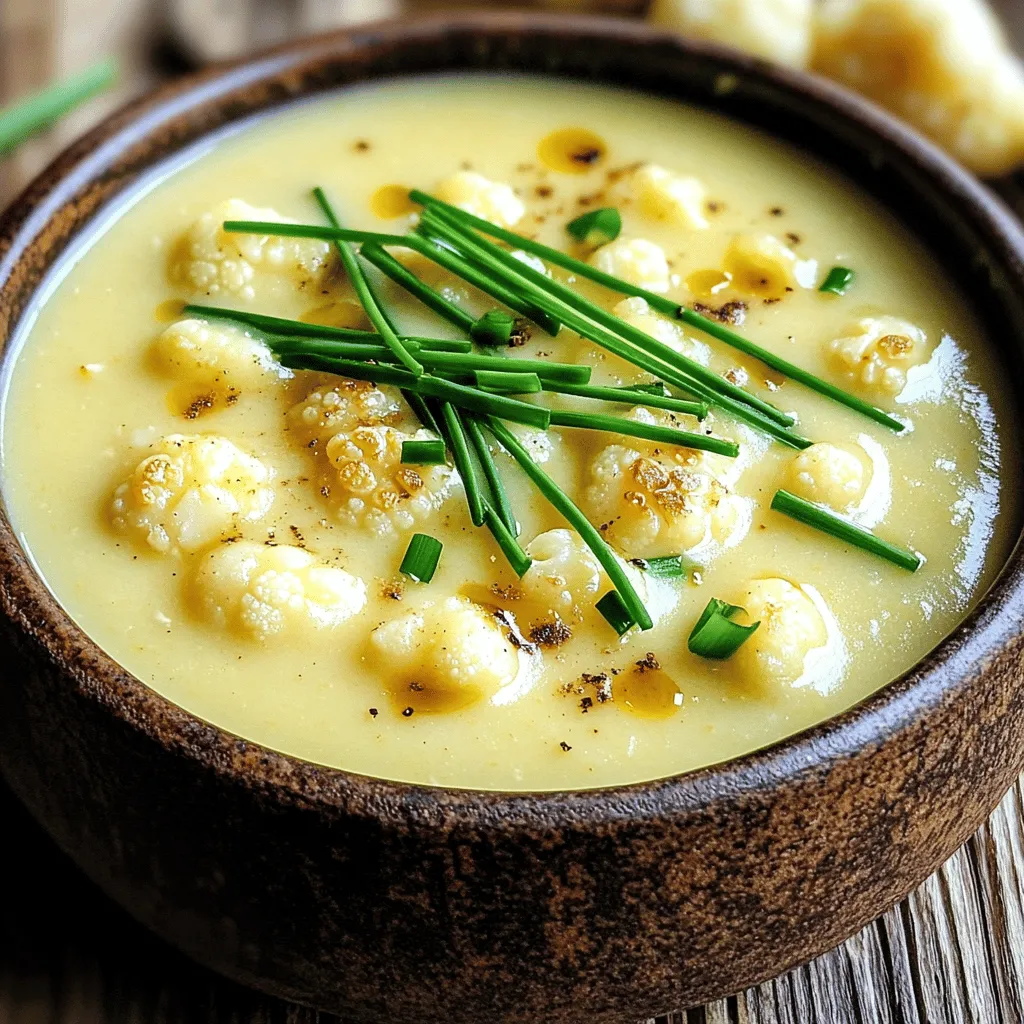
Are you ready to savor a delicious bowl of Roasted Garlic Cauliflower Soup? This creamy and flavorful soup is easy

To make easy chicken fried rice, you will need: - 2 cups cooked jasmine rice (preferably day-old) - 1 cup cooked chicken, diced - 1 cup mixed vegetables (peas, carrots, corn) - 2 eggs, beaten - 3 tablespoons soy sauce (or tamari for gluten-free) - 1 tablespoon sesame oil - 2 tablespoons vegetable oil - 3 green onions, sliced - 2 cloves garlic, minced - Salt and pepper to taste These ingredients create a vibrant and tasty dish. Using day-old rice helps keep the fried rice fluffy and prevents it from getting mushy. If you don't have some ingredients, here are great swaps: - Use brown rice instead of jasmine rice for a nutty flavor. - Swap chicken for shrimp or tofu for a different taste. - Feel free to use frozen mixed veggies. They work just as well. - If you want less sodium, try low-sodium soy sauce. - For a vegan option, skip the eggs and use tofu instead. These substitutes can help you use what you have on hand. The best rice for fried rice is jasmine rice. Its light texture and aroma make it perfect. Here are some other good options: - Basmati rice offers a nice flavor and fluffy texture. - Long-grain rice stays separate when cooked, ideal for fried rice. - Short-grain rice can be used but may be a bit sticky. Using the right rice makes your fried rice more enjoyable. For the complete recipe, see [Full Recipe]. Before you start cooking, gather your ingredients. This makes the process smooth and easy. For chicken fried rice, you need: - 2 cups cooked jasmine rice (preferably day-old) - 1 cup cooked chicken, diced - 1 cup mixed vegetables (peas, carrots, corn) - 2 eggs, beaten - 3 tablespoons soy sauce - 1 tablespoon sesame oil - 2 tablespoons vegetable oil - 3 green onions, sliced - 2 cloves garlic, minced - Salt and pepper to taste Make sure your rice is cold. This helps it fry better. Dice your chicken into small pieces. Chop the vegetables if they are not pre-cut. This prep time is key. Now, let's cook! Heat the vegetable oil in a large skillet or wok over medium-high heat. Add the minced garlic and stir for about 30 seconds until it smells good. Next, push the garlic to one side of the skillet. Pour in the beaten eggs. Scramble them until they are fully cooked, then mix them with the garlic. This step adds protein and flavor to your dish. Add the diced chicken and mixed vegetables to the skillet. Stir-fry for about 2-3 minutes. You want the veggies to be slightly tender but still colorful. Now, it's time for the rice. Add the day-old rice to the skillet. Break up any clumps with a spatula. Stir well to combine everything. Drizzle the soy sauce and sesame oil over the rice. Stir-fry again for another 3-4 minutes. This helps all the flavors mix together. Finally, season your fried rice with salt and pepper to taste. Fold in the sliced green onions for a fresh crunch. Once everything is well mixed and heated through, your chicken fried rice is ready! Serve it hot in a large bowl. Garnish with extra green onions or sesame seeds for a nice touch. You can even add a lime wedge for a burst of flavor. For the full recipe, check out the details above. Enjoy your cooking! To make perfect fried rice, use day-old rice. Fresh rice is too moist. Day-old rice is drier and easier to fry. If you must use fresh rice, cool it in the fridge for a bit. This helps reduce moisture. Also, spread the rice out on a tray. Let it cool completely before using. Use high heat for frying. This helps the rice get crispy. A wok is great for this. The shape allows for even cooking. Always add ingredients in order. Start with garlic, then eggs, and finally rice. Stir quickly, so nothing sticks. Mixing well ensures every grain is coated in flavor. Don’t overcrowd the pan. This leads to steaming, not frying. Cook in batches if needed. Also, avoid using too much soy sauce. It can make the rice soggy. Remember to taste as you go. This way, you can adjust seasoning. Lastly, don’t skip the green onions. They add freshness and crunch. For the full recipe, check out the detailed instructions above. {{image_2}} You can swap out chicken for other proteins. Shrimp adds a nice touch. Just cook the shrimp until pink. Tofu is a great vegetarian option. Use firm tofu for the best texture. Cut it into small cubes. Sauté it until golden brown. This adds a great flavor to the dish. Feel free to mix up the veggies. Broccoli, bell peppers, and snap peas work well. You can use fresh or frozen vegetables. If using frozen, no need to thaw. Just toss them in during cooking. This keeps your meal colorful and healthy. More veggies mean more nutrients! To boost flavor, try adding spices. A pinch of ginger gives warmth. For heat, sprinkle in some red pepper flakes. You can also add sauces. Hoisin sauce or oyster sauce adds depth. Experiment with what you like. Each addition can change the dish in fun ways. Make it your own! Store your chicken fried rice in an airtight container. Allow it to cool first. Keep the rice in the fridge for up to three days. Make sure it is sealed well to prevent drying out. When you're ready to eat, reheat your rice on the stove or in the microwave. If using the stove, add a splash of water to keep it moist. Stir often until it's hot. In the microwave, cover with a damp paper towel. Heat in short bursts, stirring in between. You can freeze chicken fried rice for up to three months. Use a freezer-safe container or bag. Make sure to squeeze out any air before sealing. Thaw it overnight in the fridge before reheating. This keeps the texture nice and tasty. For the best results, reheat on the stove. This gives you that fresh-made taste. Don't forget to check out the Full Recipe for more tips! Yes, you can use fresh rice. However, day-old rice works best. Fresh rice has more moisture. This moisture can make the fried rice mushy. To fix this, spread fresh rice on a tray and cool it. Chill it in the fridge for about 30 minutes. This helps it dry out a bit. The best soy sauce for fried rice is light soy sauce. It adds saltiness without overpowering the dish. You can also use tamari if you need a gluten-free option. Both types will enhance the flavors in your fried rice. Experiment with different brands to find your favorite taste. To make this recipe vegetarian, skip the chicken. Instead, use tofu or extra vegetables. Cook tofu until golden for added flavor. You can add more mixed vegetables like bell peppers or broccoli. Adjust the soy sauce to enhance the taste. Check the Full Recipe for additional tips! This blog post covers all you need to make great fried rice. We discussed essential ingredients, how to cook them, and tips for perfect results. You learned about ingredient swaps and the best rice to use. I shared common mistakes and how to avoid them. Plus, we explored different flavors and ways to store leftovers. Fried rice is simple to make and fun to customize. Try new flavors next time you cook. Enjoy your meal!

Easy Chicken Fried Rice Quick and Flavorful Meal

Craving a quick and tasty meal? Easy Chicken Fried Rice is your answer! This dish blends tender chicken, crisp veggies,

- 1 large sweet potato, peeled and cubed - 1 can (15 oz) chickpeas, drained and rinsed - 1 tablespoon olive oil - 1 teaspoon cumin - 1 teaspoon smoked paprika - Salt and pepper to taste - 2 cups cooked quinoa - 1 avocado, sliced - 1 cup baby spinach - 1/4 cup tahini - 2 tablespoons lemon juice - 2 tablespoons water - 1 tablespoon maple syrup (optional) - Sesame seeds for garnish The sweet potato brings a rich, sweet flavor. It also adds creaminess to the bowl. Chickpeas add protein and fiber, making the dish filling. Olive oil provides healthy fats and helps with roasting. Cumin and smoked paprika give depth and warmth. Salt and pepper enhance all the flavors. You will love how they work together. The quinoa is a great base, adding texture and nutrients. Avocado brings creaminess and healthy fats. Baby spinach adds a fresh touch. The tahini dressing ties it all together with its nutty flavor. Lemon juice adds brightness. Maple syrup can add a touch of sweetness, but it is optional. Sesame seeds make a lovely garnish, adding crunch. This mix of ingredients creates a tasty and healthy meal. You can find the full recipe above for step-by-step instructions. Enjoy making this colorful Buddha bowl! - Preheat the oven to 400°F (200°C). - Peel and cube the sweet potato. - Drain and rinse the chickpeas. First, I set my oven to heat up. This step is key for getting a nice roast. I peel the sweet potato and chop it into cubes. I also grab a can of chickpeas, drain it, and rinse them under cold water. This helps remove the canning liquid and makes them taste better. - Toss ingredients in olive oil and spices. - Roast in the oven. Next, I take a mixing bowl and toss the sweet potato cubes and chickpeas with olive oil. I add cumin, smoked paprika, salt, and pepper. This mix gives a great flavor. I spread the sweet potato and chickpeas on a baking sheet lined with parchment paper. I roast them in the oven for about 25 to 30 minutes. I stir halfway through to ensure an even roast. The sweet potatoes should be tender and slightly caramelized when done. - Prepare tahini dressing. - Layer ingredients in bowls. - Drizzle dressing and garnish. While the mixture roasts, I whip up a tahini dressing. I mix tahini, lemon juice, water, and maple syrup in a small bowl until smooth. I adjust the thickness with more water if needed. After the sweet potato and chickpeas finish roasting, I grab two bowls. I layer cooked quinoa, a handful of baby spinach, and the roasted sweet potato and chickpeas. I place avocado slices on top. Finally, I drizzle the tahini dressing over each bowl and sprinkle sesame seeds for a nice touch. For the full recipe, refer to the detailed instructions provided earlier. - Achieving the perfect roast on sweet potatoes: To get sweet potatoes just right, cut them into equal cubes. This helps them cook evenly. Toss them with olive oil and spices before roasting. Keep an eye on them as they roast, stirring halfway through. This step helps them caramelize nicely while avoiding burning. - How to avoid mushy chickpeas: Start with well-drained chickpeas. If you use canned chickpeas, rinse them under cold water. This washes away extra starch. Toss them with olive oil and spices before roasting. This method gives them a crisp texture, making them a tasty addition to your bowl. - Best sides to pair with the Buddha bowl: This Buddha bowl works well with fresh sides. Try a simple green salad or some crunchy raw veggies. You can also serve it with a slice of crusty bread or whole grain pita. These sides add more texture and flavor to your meal. - Portion size recommendations: For a balanced meal, aim for one cup of quinoa, half a sweet potato, and a quarter can of chickpeas per bowl. Adjust portions based on your hunger level. Add more salad or veggies if you want a lighter meal. - Customizing the tahini dressing: You can tweak the tahini dressing to fit your taste. If you like it tangy, add more lemon juice. For a sweeter touch, mix in a bit of maple syrup. If the dressing is too thick, add water slowly until you reach your desired consistency. - Alternative dressing ideas: If tahini isn't your thing, try a yogurt-based dressing or a simple olive oil and vinegar mix. These options add different flavors while keeping your bowl fresh and delicious. Experiment with herbs for extra zest. You can find the full recipe for a Sweet Potato Chickpea Buddha Bowl [Full Recipe]. {{image_2}} You can change the grains in your Buddha bowl. Try using brown rice or farro instead of quinoa. Both have great textures and flavors. You can also mix in different veggies. Roasted broccoli, bell peppers, or zucchini work well. Each adds its own taste and color. To boost flavor, explore different spices. Add curry powder for warmth or chili powder for heat. You can change the vibe with smoked paprika or garlic powder too. Fresh herbs make a big difference. Sprinkle cilantro or parsley on top for a fresh touch. These herbs add brightness to your bowl. This recipe is vegan and gluten-free. If you want a nut-free option, swap tahini for sunflower seed butter. This keeps the creaminess without the risk of nuts. Use a simple lemon and olive oil dressing if you prefer. Just mix lemon juice, olive oil, and a pinch of salt for a quick fix. For the full recipe, check out the original Sweet Potato Chickpea Buddha Bowl. Enjoy experimenting and making it your own! To keep your Sweet Potato Chickpea Buddha Bowl fresh, store leftovers in airtight containers. This keeps out air and moisture. Place them in the fridge within two hours of cooking. The flavors blend better overnight. For best taste, eat leftovers within three days. When reheating, do it slowly in the microwave or on the stove. Add a splash of water to keep the quinoa moist. Stir occasionally to avoid hot spots. You want each bite warm, not dried out. Batch cooking makes meal prep easy. Roast a big batch of sweet potatoes and chickpeas at once. Cook extra quinoa to save time. Store these items separately in the fridge. For quick assembly, keep all components ready. Grab a bowl, add quinoa, spinach, and the roasted mix. Top with avocado and tahini dressing when you’re ready to eat. This way, you enjoy fresh meals throughout the week. The ingredients in your Buddha bowl have different shelf lives. Cooked quinoa lasts about five days in the fridge. Roasted sweet potatoes and chickpeas can stay fresh for up to three days. Check for signs of spoilage. If the sweet potatoes smell sour or feel slimy, toss them. Chickpeas that are mushy or have off odors are also bad. Always trust your senses to keep meals safe and tasty. For the full recipe, check out the Sweet Potato Chickpea Buddha Bowl! What’s the best way to cook sweet potatoes? The best way to cook sweet potatoes is to roast them. This brings out their natural sweetness. You can peel and cube them, then toss with olive oil and spices. Roast at 400°F (200°C) for 25-30 minutes. They should be tender and slightly caramelized. This method keeps them flavorful and nutritious. Can I make this ahead of time? Yes, you can make this Buddha bowl ahead of time. Cook the sweet potatoes and chickpeas, then store them in the fridge. Keep the quinoa, spinach, and avocado separate until you're ready to eat. This way, everything stays fresh. Reheat the sweet potatoes and chickpeas before serving for the best taste. How many calories in a Sweet Potato Chickpea Buddha Bowl? A typical Sweet Potato Chickpea Buddha Bowl has about 600 calories per serving. This depends on the specific amounts of each ingredient. The bowl is filling and packed with nutrients, making it a great meal choice. What are the health benefits of the ingredients? Sweet potatoes are high in fiber and vitamins. They help with digestion and boost your immune system. Chickpeas provide protein and iron, which are important for energy. Quinoa is a complete protein, meaning it has all essential amino acids. Avocado adds healthy fats, and spinach is rich in vitamins and minerals. Can I use canned sweet potatoes? Yes, you can use canned sweet potatoes for convenience. Just drain them well and rinse. However, canned sweet potatoes may be softer than fresh ones. This means they might not roast as well. You can add them toward the end of the cooking time to warm them through. What can I substitute for tahini? If you don't have tahini, you can use peanut butter or almond butter. Both will give a creamy texture and a nutty flavor. You can also blend plain yogurt as a substitute for a different taste. Just adjust the lemon juice and salt to balance the flavor. For a nut-free option, try using sunflower seed butter. This blog post covers how to make a delicious Sweet Potato Chickpea Buddha Bowl. You learned about key ingredients, like sweet potatoes, chickpeas, and spices, and how to combine them into tasty meals. I shared tips for cooking and serving, along with ideas for variations and storage. You can enjoy this meal in many ways. Feel free to mix things up based on your taste. Prepare it ahead and enjoy healthy meals all week!

Savory Sweet Potato Chickpea Buddha Bowl Recipe

Looking for a tasty and healthy meal? My Savory Sweet Potato Chickpea Buddha Bowl recipe has just the right mix

To make Summer Berry Chia Pudding, gather these simple ingredients: - 1 cup almond milk (or any plant-based milk) - 1/4 cup chia seeds - 2 tablespoons maple syrup (or honey) - 1 teaspoon vanilla extract - 1 cup mixed berries (strawberries, blueberries, raspberries) - Fresh mint leaves for garnish - 2 tablespoons sliced almonds (optional) Each ingredient plays a role in taste and texture. The almond milk gives creaminess, while chia seeds thicken the pudding. Maple syrup or honey adds natural sweetness. The fresh berries bring bright flavors and color. Chia seeds are packed with fiber, protein, and omega-3 fatty acids. They help you feel full and support heart health. Berries provide vitamins, antioxidants, and minerals. They help boost your immune system. Almond milk is low in calories and dairy-free, making it a great choice for many diets. This pudding is not only tasty but also good for you. You can customize this recipe based on what you have. Use any plant-based milk like oat or soy milk. For sweetness, try agave syrup or coconut sugar. If you want a different flavor, use flavored extracts like almond or coconut. You can swap mixed berries for other fruits like peaches or mangoes. Get creative and make this pudding your own! You can find the full recipe above for more detailed steps. To start, grab a mixing bowl. Add 1 cup of almond milk and 1/4 cup of chia seeds. Next, mix in 2 tablespoons of maple syrup and 1 teaspoon of vanilla extract. Use a whisk to blend everything well. This step is key for flavor. Let the mixture sit for about 10 minutes. After that, whisk it again to stop clumping. Now, cover the bowl and put it in the fridge. Let it chill for at least 2 hours, or overnight for best results. The chia seeds will soak up the milk. They will swell and create a pudding-like texture. When you take it out, stir it well. If it is too thick, add a bit more almond milk and mix again. Now comes the fun part! Choose your favorite serving bowls or clear glasses. Start by adding a layer of chia pudding at the bottom. Next, add a layer of mixed berries. You can use strawberries, blueberries, and raspberries. Repeat the layers until you reach the top. Finish with fresh mint leaves for a pop of color. If you want, sprinkle some sliced almonds on top for crunch. Serve chilled and enjoy this fresh delight! You can find the full recipe and more tips in the [Full Recipe]. To get a smooth and creamy texture, use good quality chia seeds. When you mix the chia seeds with almond milk, let it sit. I suggest waiting about ten minutes before whisking again. This step helps break up clumps. After mixing, cover and chill it for at least two hours. If you prefer a thicker pudding, add a bit more chia seeds. To make your pudding extra tasty, use fresh vanilla extract. You can also try adding a pinch of salt. Salt helps balance the sweetness and brings out flavors. If you want more sweetness, drizzle in extra maple syrup or honey. You can also blend in some ripe bananas for a natural sweetness boost. For a stunning look, serve your pudding in clear glasses. This way, everyone can see the lovely layers of pudding and berries. You can alternate layers for a beautiful effect. Top each glass with a single berry and a mint leaf. This adds a pop of color and freshness. For added crunch, sprinkle some sliced almonds on top. This makes each bite even more delightful. For full preparation details, check out the Full Recipe. {{image_2}} You can mix your berries for fun. Try strawberries, blueberries, and raspberries. Each fruit adds its unique taste and color. If you want a twist, use mango or peaches. They give a sweet and tropical flavor. You can also add bananas for creaminess. Experiment with what you love most! Spices can boost the taste of your pudding. Try adding a pinch of cinnamon for warmth. Nutmeg can add a lovely, earthy note. You can also stir in some cardamom for a hint of spice. These little touches make your pudding exciting and fresh. This recipe is simple to make vegan. Use maple syrup or agave nectar instead of honey. For a sugar-free option, use a sugar-free sweetener like stevia. This way, you can enjoy the pudding without added sugar. Both options keep it healthy and delicious. For the full recipe, refer to the [Full Recipe]. To keep your Summer Berry Chia Pudding fresh, store it in an airtight container. This helps keep out air and moisture that can spoil your pudding. Make sure your fridge is set to a cool temperature, around 40°F (4°C). Avoid placing the pudding near the fridge door. The door's warmth can affect the pudding's freshness. When stored properly, your chia pudding can last up to five days in the fridge. After a few days, check for any changes in texture or smell. If the pudding starts to smell off or looks watery, it's best to toss it. Remember, fresh is always best for taste and texture. You can freeze leftover chia pudding for a longer shelf life. Pour it into freezer-safe containers, leaving some space for expansion. Chia pudding can last up to three months in the freezer. When you're ready to eat it, move it to the fridge to thaw overnight. You may need to stir it well before serving to restore its creamy texture. Enjoy your Summer Berry Chia Pudding anytime with these storage tips, and check out the Full Recipe for a delightful treat! Chia seeds are small, black seeds from the Salvia hispanica plant. They are rich in fiber, protein, and omega-3 fatty acids. These seeds can absorb water and expand, making them great for puddings. Eating chia seeds can help keep you full for longer. They also support heart health and improve digestion. Yes, you can use any plant-based milk. Almond milk, coconut milk, or oat milk all work well. Each type of milk will add its own flavor. You can even use dairy milk if you prefer. Just keep in mind that the taste and texture may change slightly. You can store Summer Berry Chia Pudding in the fridge for up to five days. Make sure to keep it in an airtight container. The pudding will stay fresh and thick. Just give it a good stir before serving again. Absolutely! In fact, making it in advance is a great idea. Chia pudding tastes even better after it sits for a while. You can prepare it the night before and let it chill overnight. This way, you have an easy and healthy breakfast ready to go. Mixed berries work best for this pudding. Strawberries, blueberries, and raspberries add color and flavor. You can also try blackberries or even sliced peaches. The variety gives your pudding a fresh taste. Plus, berries are packed with vitamins and antioxidants. Summer Berry Chia Pudding is simple and fun to make. We explored key ingredients, nutrition, and alternatives. I shared step-by-step instructions for a perfect pudding. You learned tips for texture, flavor, and presentation. Variations let you try different fruits and spices. Proper storage keeps it fresh longer. Enjoy your pudding created with care! Share your experiences and variations with others, and savor every bite. This dish is a healthy treat packed with goodness.

Summer Berry Chia Pudding Fresh and Healthy Delight

Looking for a fresh and healthy treat this summer? Dive into my Summer Berry Chia Pudding! This delightful pudding is

- 2 cups fresh broccoli florets - 1 large apple (preferably a sweet variety like Honeycrisp), diced - 1/2 cup walnuts, chopped - 1/4 cup dried cranberries - 1/4 cup shredded cheese (cheddar or a sharp cheese works well) - 1/4 cup plain Greek yogurt - 2 tablespoons mayonnaise - 1 tablespoon honey - 1 tablespoon apple cider vinegar - Salt and pepper to taste This salad packs a good punch of nutrients. Each serving has about: - Calories: 250 - Protein: 8g - Fiber: 5g - Fat: 15g - Carbohydrates: 27g - Broccoli: Full of vitamins C and K, it boosts your immune system. - Apple: This fruit adds fiber and antioxidants, which are great for heart health. - Walnuts: They contain healthy fats and support brain health. - Greek Yogurt: A great source of protein and probiotics, aiding digestion. - Cranberries: These sweet bites are rich in vitamins and can help prevent urinary tract infections. I love how each ingredient in this salad works together for a tasty, healthy meal. The crunchiness of the broccoli pairs well with the sweetness of the apple. The walnuts add a nice texture, while the cranberries give a touch of sweetness. This dish is not just a salad; it’s a vibrant mix of flavors! For the full recipe, check out the details above. - Rinse and steam broccoli. Begin by rinsing the broccoli florets under cold water. This removes dirt and ensures freshness. Next, steam the broccoli for about 2-3 minutes. You want it tender-crisp. After steaming, drain and let it cool. - Prepare the apple and other ingredients. While the broccoli cools, dice a large sweet apple, like Honeycrisp. Chop half a cup of walnuts. Gather your dried cranberries and shredded cheese. Mix these ingredients in a large bowl. This creates a colorful base for your salad. - Ingredients for the dressing. For the dressing, you will need: - 1/4 cup plain Greek yogurt - 2 tablespoons mayonnaise - 1 tablespoon honey - 1 tablespoon apple cider vinegar - Salt and pepper to taste - Whisking technique for a smooth consistency. In a separate bowl, combine the Greek yogurt, mayonnaise, honey, and apple cider vinegar. Use a whisk to blend everything together. This helps create a smooth dressing. Make sure to taste and adjust the salt and pepper as you like. - Mixing and tossing ingredients. Once the broccoli has cooled, add it to the bowl with the apples and other ingredients. Pour the dressing over this mix. Gently toss everything together. You want all components to be well coated with the dressing. - Recommended resting time for flavor enhancement. Let the salad sit for about 10-15 minutes. This resting time allows the flavors to blend. Enjoy the vibrant and fresh taste of your broccoli apple salad! For the full recipe, check out the details provided earlier. - Selecting the best apples: Choose sweet apples like Honeycrisp or Fuji. They add a nice crunch and balance the savory broccoli. Look for firm apples with vibrant skin. Avoid bruised or soft ones for the best flavor. - Preventing browning of apple slices: To keep your apple slices fresh, squeeze some lemon juice on them. The acidity slows down browning. You can also soak the slices in a mix of water and lemon juice for a few minutes. - Adding proteins: You can add cooked chicken or tofu for extra protein. Chicken adds a savory touch, while tofu is perfect for a plant-based option. Cube them and mix them into the salad. - Substituting ingredients: Feel free to swap out ingredients based on your taste. If you don’t like walnuts, try pecans or sunflower seeds. You can also use other fruits like grapes or pears. - Pairing with meals: This salad pairs well with grilled chicken or fish. It adds color and freshness to your plate. Serve it alongside sandwiches for a light lunch. - Presentation tips: Serve the salad in a large bowl or on a platter. For an attractive finish, sprinkle some extra walnuts and cranberries on top. Add a sprig of parsley for a pop of green. This makes the dish appealing and ready for sharing. For the full recipe, check out the details in the earlier sections! {{image_2}} You can change the dressing for your Broccoli Apple Salad to fit your taste. Here are some ideas: - Creamy Dressings: Use ranch or blue cheese for a rich flavor. - Vinaigrettes: Try a simple lemon vinaigrette for a fresh touch. If you want vegan options, you can use: - Cashew Cream: Blend soaked cashews with lemon juice and salt. - Tahini Dressing: Mix tahini with water, lemon juice, and garlic for a nutty taste. Switching out ingredients can make the salad unique. Here are some swaps to consider: - Seasonal Fruits: Use pears or berries when apples are out of season. - Nuts: Try pecans or almonds for a different crunch. Adding grains can also add texture. Consider: - Quinoa: This adds protein and fiber. - Brown Rice: A hearty option that makes the salad more filling. You can easily adapt this salad for various diets. Here’s how: - Gluten-Free Options: All the ingredients are naturally gluten-free. Just check your dressing. - Low-Carb Variations: Skip the dried cranberries and use fewer apples for fewer carbs. These variations allow everyone to enjoy the salad while fitting their diet. For the full recipe, please refer to the earlier section. To keep your salad fresh, store it in an airtight container. This helps prevent air from making it soggy. Glass containers work great because they don’t stain. Plastic options are also fine, just make sure they seal well. This salad can last up to three days in the fridge. After that, it may lose its crunch. Signs the salad has gone bad include a sour smell or a slimy texture. If you see these signs, it’s best to toss it out. You can prep the ingredients ahead of time. Chop the broccoli and apple, and store them separately. Keep the nuts and cheese in a different container. Assemble everything just before serving for the best taste and crunch. Enjoy the fresh flavors! Yes, you can make this salad ahead of time. I suggest preparing it up to a day in advance. Just keep the dressing separate until you are ready to serve. This keeps the salad fresh and crisp. The flavors will blend nicely if you let it sit for a bit. For this salad, I recommend sweet apples. Honeycrisp apples are my favorite. They add a nice crunch and sweetness. Other great choices include Fuji or Gala apples. Avoid tart apples, as they may overpower the salad's flavor. Broccoli works well both raw and cooked. For this salad, I prefer lightly steaming the broccoli. This keeps it tender yet crisp. Raw broccoli gives a crunchier texture. Choose what you like best! You can make this salad more filling by adding proteins. Rotisserie chicken or chickpeas are great options. You can also add quinoa or couscous for extra texture. These ingredients will make your salad a complete meal. If you need quick dressing alternatives, try these ideas: - Olive oil and lemon juice for a light option. - Balsamic vinegar mixed with honey for sweetness. - Store-bought vinaigrettes like ranch or Italian work well too. These options can save time and still taste good! For the complete recipe, check out the Full Recipe section above. This blog post covered delicious broccoli apple salad recipes and tips. We explored key ingredients and their health benefits, plus how to make it step-by-step. I shared best practices for selecting apples and making it your own with proteins. We also discussed variations, storage tips, and answers to common questions. Now, you have all the tools to create a fresh and tasty salad. Enjoy this healthy dish and feel free to try your own twists!

Healthy Broccoli Apple Salad Vibrant and Crisp Meal

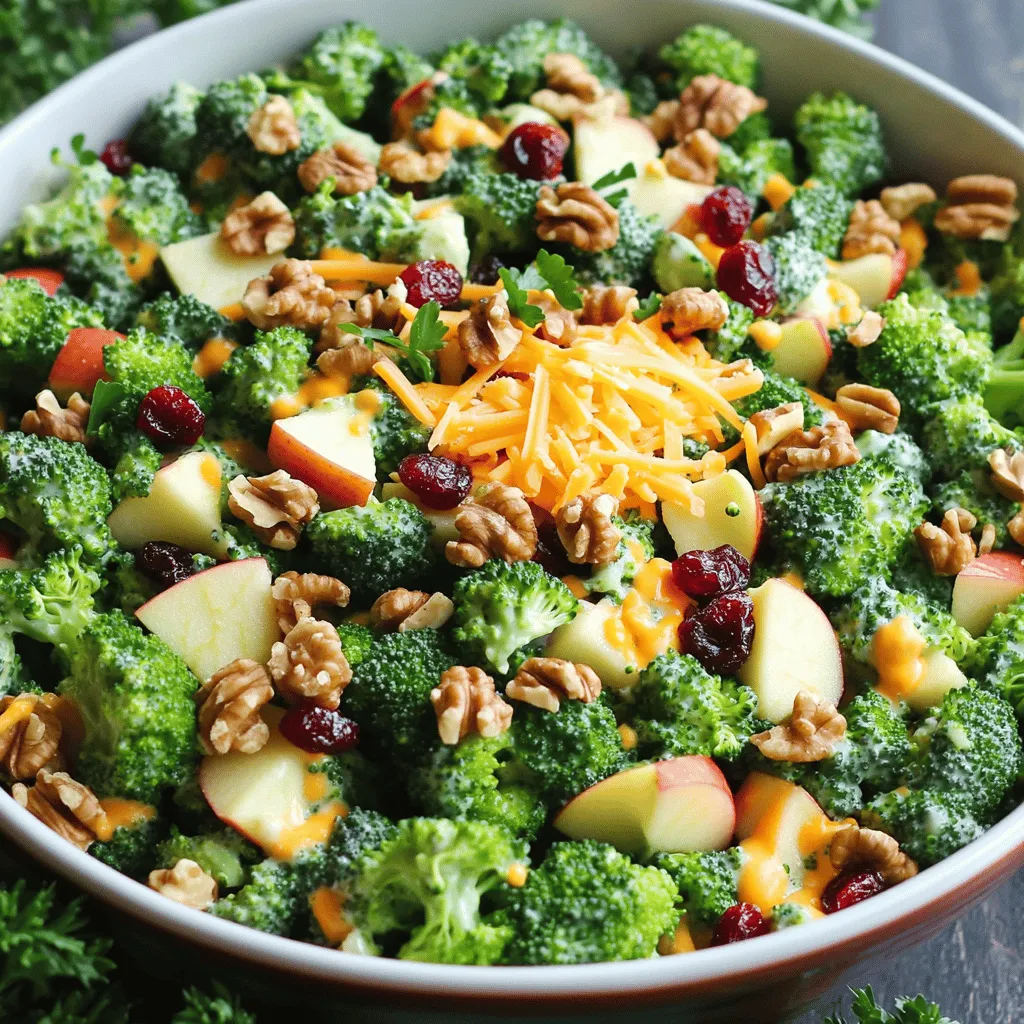
Are you ready to brighten up your meals? This Healthy Broccoli Apple Salad is a crunchy delight that’s vivid and

To make a tasty Vegan Crunchwrap Supreme, gather these ingredients: - 4 large flour tortillas - 1 cup cooked quinoa - 1 can black beans, rinsed and drained - 1 cup corn kernels (fresh or frozen) - 1 cup shredded lettuce - 1 large tomato, diced - 1/2 cup diced red onion - 1 avocado, sliced - 1 cup vegan cheese shreds - 1/4 cup salsa - 1 tablespoon taco seasoning - Olive oil for cooking - Salt and pepper to taste You can add some fun twists to your crunchwrap. Here are optional ingredients: - Sliced jalapeños for heat - Chopped cilantro for freshness - Sliced black olives for extra flavor - A squeeze of lime for zest These options let you make each crunchwrap your own! Each serving of your Vegan Crunchwrap Supreme packs a punch! Here's the nutritional info: - Calories: 400 - Protein: 15g - Fat: 18g - Carbohydrates: 45g - Fiber: 12g This meal is not only delicious but also healthy! You can enjoy it guilt-free. For the full recipe, check the details above. To start, grab a mixing bowl. Add 1 cup of cooked quinoa. Next, toss in 1 can of black beans that you rinsed and drained. Then, add 1 cup of corn kernels. You can use fresh or frozen corn. Now, dice 1 large tomato and 1/2 cup of red onion. Mix these in too. Finally, sprinkle in 1 tablespoon of taco seasoning. Add salt and pepper to taste. Stir everything well. This will be your filling for the crunchwrap. Now, get a large flour tortilla. Place it on a clean surface. In the center, add a few tablespoons of your filling mixture. Top it with a handful of shredded lettuce. Then, add a few slices of avocado and a sprinkle of vegan cheese. Top it off with a spoonful of salsa. Next, fold the edges of the tortilla inward. Make pleats as you go to fully enclose the filling. It should look like a round envelope. Repeat this for all the tortillas and filling. Heat a skillet over medium heat. Drizzle some olive oil in the pan. Carefully place a folded crunchwrap seam-side down. Cook it for about 3-4 minutes until it turns golden brown. Flip the crunchwrap and cook the other side for another 3-4 minutes. Repeat this for all the crunchwraps. When they are done, let them rest for a minute. Cut each crunchwrap in half diagonally. Serve with extra salsa on the side. You can find the full recipe for more details. To make your Vegan Crunchwrap Supreme shine, focus on flavor balance. Use fresh veggies for crunch and color. Add more spices to the filling for extra zest. You can try different beans or grains. For a richer taste, use smoked paprika or cumin. Cooking your crunchwrap until golden brown gives it that nice crunch. Adjust the heat to avoid burning. Many people overfill their crunchwraps. This can lead to messy folding. Remember to keep the filling in the center. Make sure your tortillas are large enough to fold easily. If they tear, they won't hold the filling well. Also, avoid cooking at too high of a heat. It can burn the outside before the inside warms up. When serving, cut the crunchwraps in half for a nice look. Arrange the halves on a plate like triangles. Add a sprinkle of fresh cilantro on top for color. A lime wedge adds a fun twist and freshness. Serve with extra salsa for dipping. This makes it more appealing and tasty. For a complete meal, pair with a side salad or chips. {{image_2}} You can easily spice up your crunchwrap. Just add sliced jalapeños to the filling. The heat adds a wonderful kick. It pairs well with the creamy avocado and cool salsa. You can adjust the amount based on your taste. If you love heat, use more! Want a gluten-free crunchwrap? You can swap out flour tortillas for corn tortillas. They are just as tasty and hold the filling well. Check the label to ensure they're certified gluten-free. This way, everyone can enjoy the crunchwrap without worries. You can customize the filling to fit different diets. Here are a few ideas: - For protein lovers: Add some grilled tofu or tempeh. - For a Mediterranean twist: Use hummus, cucumber, and olives. - For a cheesy option: Replace vegan cheese with cashew cheese. Feel free to mix and match to create your own version. The full recipe gives you a great base to start from! To store leftover crunchwraps, let them cool first. Place them in an airtight container. You can keep them in the fridge for up to three days. If you want to store them longer, freezing is best. To reheat, use a skillet for the best crisp. Heat the skillet over medium heat. Add a bit of olive oil. Place the crunchwrap seam-side down and cook for about 3 minutes. Flip and cook for another 3 minutes. This keeps them crispy. To freeze, wrap each crunchwrap in plastic wrap. Then, place them in a freezer bag. This protects them from freezer burn. They can last up to three months in the freezer. When ready to eat, thaw them overnight in the fridge before reheating. For the full recipe, check the earlier sections. Yes, you can make the Vegan Crunchwrap Supreme ahead of time. Prepare the filling and wrap them up. Store the wrapped crunchwraps in the fridge for one day. When you're ready to eat, just heat them in the skillet until crispy. This saves time on busy days. A few great side dishes pair well with the crunchwrap. Here are some ideas: - Fresh guacamole - Crispy tortilla chips - A simple green salad - Mexican street corn - Spicy black bean soup These sides add flavor and texture to your meal. To lower the calories in your crunchwrap, try these tips: - Use smaller tortillas - Replace vegan cheese with avocado for creaminess - Skip the olive oil and use a non-stick pan - Reduce the amount of quinoa and beans - Add more fresh veggies instead These changes keep the crunchwrap tasty while cutting calories. Enjoy your delicious meal while keeping it light! In this post, you learned how to make a tasty Vegan Crunchwrap Supreme. I shared a full list of ingredients and tips for perfecting your dish. You can customize it with spicy or gluten-free options. I also covered how to store leftovers and reheat them well. Making your crunchwrap fun and tasty is easy! Enjoy your cooking and share this yummy meal with others.

Vegan Crunchwrap Supreme Tasty and Easy Recipe

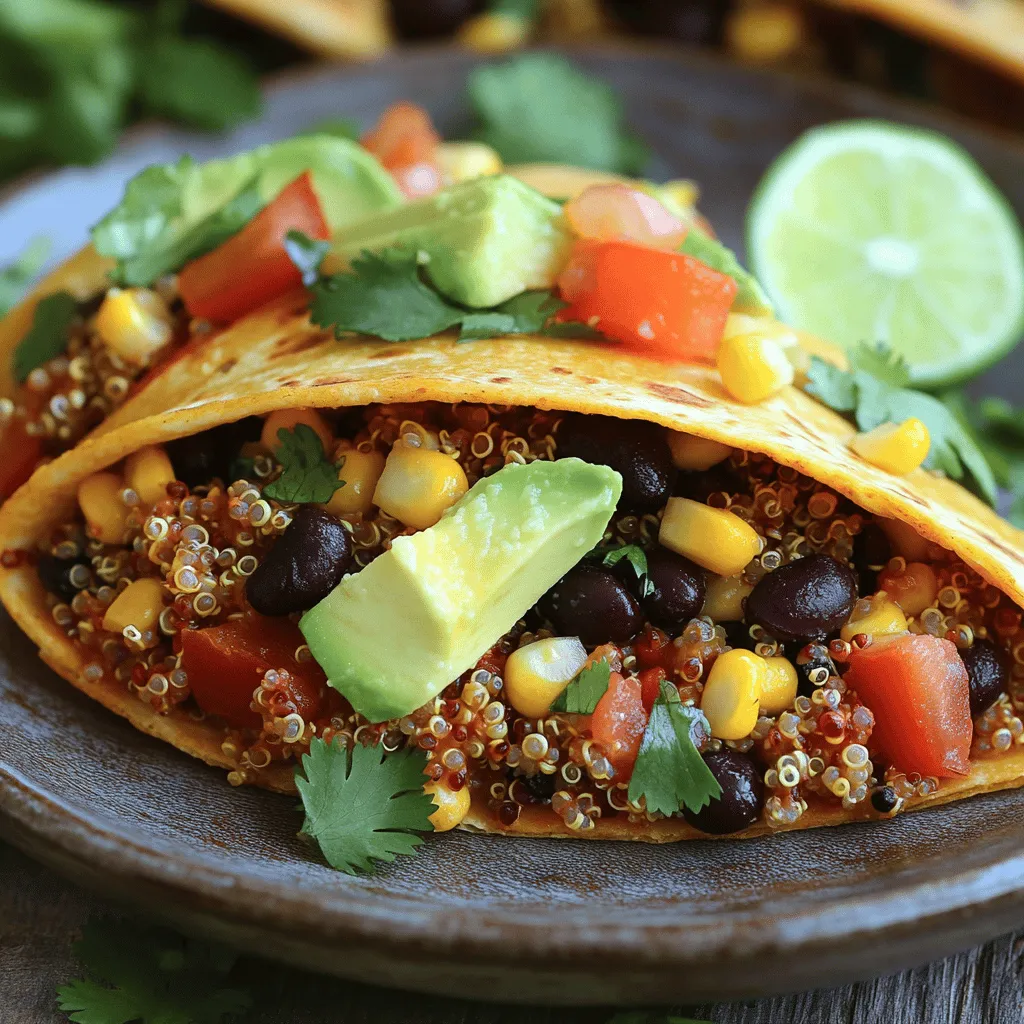
Are you ready to dive into a tasty and easy vegan treat? The Vegan Crunchwrap Supreme is delicious, filling, and

For these savory Chicken Parmesan sliders, you will need: - 1 lb ground chicken - 1/2 cup breadcrumbs - 1 cup marinara sauce These three ingredients form the heart of the dish. The ground chicken gives the sliders their protein. Breadcrumbs help bind everything together and add texture. Marinara sauce adds rich, tangy flavor. Next, we add cheese and some seasoning to boost the taste: - 1/4 cup grated Parmesan cheese - 1 cup shredded mozzarella cheese - 1 teaspoon garlic powder - 1 teaspoon onion powder - 1 teaspoon Italian seasoning - Salt and pepper to taste Parmesan cheese gives a nice salty bite, while mozzarella melts beautifully on top. Garlic, onion, and Italian seasoning add depth and warmth to the dish. Finally, we need a few more items: - 6 slider buns - Fresh basil leaves for garnish (optional) Slider buns are perfect for holding all the tasty goodness. Fresh basil adds a pop of color and a hint of freshness. For the full recipe, check the details. This dish is easy to make and packed with flavor! First, preheat the oven to 375°F (190°C). This helps the sliders bake evenly. Next, gather all your ingredients. You need ground chicken, breadcrumbs, Parmesan cheese, garlic powder, onion powder, Italian seasoning, salt, and pepper. Also, have slider buns, marinara sauce, and mozzarella cheese ready. It’s best to have everything close by as you cook. In a large bowl, mix the ground chicken with breadcrumbs. Add in the grated Parmesan cheese, garlic powder, onion powder, and Italian seasoning. Don’t forget to season with salt and pepper! Use your hands or a spoon to mix until everything is well combined. This is key for tasty patties. Now, shape the mixture into small patties. Aim for patties the size of your slider buns. In a large skillet, heat some oil over medium heat. Cook the patties for about 5 minutes on each side. They should be golden brown and fully cooked through. This gives them a nice crust and great flavor. Now it’s time to assemble your sliders. Place the slider buns on a baking sheet. On each bottom bun, add one cooked chicken patty. Spoon a generous amount of marinara sauce over the patties. Top with shredded mozzarella cheese. This will create that gooey, cheesy goodness everyone loves. Place the baking sheet in the oven and bake for 10-12 minutes. You want the cheese to melt and bubble. Once they look delicious, take them out. If you like, add fresh basil leaves on top for a nice touch. Enjoy your Chicken Parmesan Sliders! For more details, check the Full Recipe. To make great chicken Parmesan sliders, shape your patties evenly. Uniform patties cook better and stay juicy. Aim for each patty to match the size of your slider buns. This helps with even cooking and presentation. Keep your heat at medium to avoid burning the outside while the inside cooks. Pairing marinara sauce with your sliders is key. Use a rich, flavorful marinara for the best taste. I love using homemade sauce for extra freshness, but store-bought works too. Heat the sauce before serving to keep it warm. Drizzle some extra sauce over the sliders for a delicious finish. Think about what to serve with your sliders. A fresh salad pairs well, adding crunch and color. You can also serve sweet potato fries for a tasty side. If you want to add a garnish, fresh basil leaves add a burst of flavor. They also make your sliders look beautiful. For a fun twist, serve the sliders with a side of garlic knots. These tips will make your meal even more enjoyable. Enjoy your cooking! {{image_2}} You can swap ground chicken for ground turkey. Turkey has a lighter taste. It works well in this recipe. If you want a vegetarian option, use chickpeas or lentils. They give a nice texture. You may also try store-bought veggie patties. Just make sure they fit your slider buns. To spice things up, add red pepper flakes or smoked paprika. These spices bring heat and depth. You can also try different cheeses. Swap mozzarella for provolone or fontina. Each cheese adds a unique flavor. Mixing cheeses can create a richer taste. Make your sliders a full meal with sides. Pair them with a fresh salad or sweet potato fries. You can also serve with garlic bread for extra flavor. For a fun twist, add pickles or coleslaw on the side. This adds crunch and tang to your meal. Check the Full Recipe for more ideas on sides. To store leftover sliders, let them cool first. Place the sliders in an airtight container. You can keep them in the fridge for up to three days. If you want to eat them later, do not add marinara sauce until you are ready to heat them. This keeps the buns from getting soggy. For freezing, wrap each slider tightly in plastic wrap. Then, put them in a freezer-safe bag. Make sure to remove as much air as possible. You can freeze these sliders for up to three months. To reheat, thaw them overnight in the fridge. Then bake at 350°F (175°C) for about 15-20 minutes. This warms them and keeps the buns soft. Chicken Parmesan Sliders can last up to three days in the fridge. If frozen, they can last for about three months. After that, the sliders may lose flavor and texture. For the best taste, enjoy them within this time frame. For the full recipe, refer back to the earlier section. What can I substitute for ground chicken in this recipe? You can use ground turkey in place of ground chicken. It has a similar taste and texture. If you want a vegetarian option, try using lentils or chickpeas. Just mash them well and mix with the other ingredients. This keeps the sliders tasty and fun. How do I know when the chicken patties are fully cooked? To check if the chicken patties are done, use a meat thermometer. Insert it into the center of a patty. The safe temperature is 165°F (75°C). If you don't have a thermometer, cut a patty in half. The meat should be white, not pink. Can I use gluten-free breadcrumbs for this recipe? Yes, you can use gluten-free breadcrumbs. They work well and keep the sliders intact. Many brands offer gluten-free options that taste great. Plus, they help you enjoy this dish without gluten. For the full recipe, check out the earlier sections. These Chicken Parmesan Sliders are a fun dish to make and share. We explored the key ingredients like ground chicken, marinara sauce, and cheese. You learned how to mix and cook the patties, assemble the sliders, and bake them perfectly. I shared tips on how to store leftovers and variations to keep things fresh. Now you can enjoy these tasty sliders at your next meal. Try them with your favorite sides or customize them for your taste. Enjoy cooking!

Savory Chicken Parmesan Sliders Easy and Delicious Meal

Craving a meal that’s easy to make and bursting with flavor? Let me introduce you to Savory Chicken Parmesan Sliders!

To make the One-Pan Sausage Veggie Skillet, you will need: - 4 Italian sausages (chicken or turkey for a lighter option) - 1 medium bell pepper, diced (any color) - 1 medium zucchini, sliced - 1 cup cherry tomatoes, halved - 1 red onion, sliced - 2 cups baby spinach - 2 cloves garlic, minced - 2 tablespoons olive oil - 1 teaspoon dried oregano - 1 teaspoon smoked paprika - Salt and pepper to taste - Fresh parsley for garnish You can swap Italian sausages with other types. Try chicken, turkey, or even plant-based options. Each choice gives a different taste. If you prefer less fat, go for chicken or turkey. For a vegetarian twist, use veggie sausages. The key is to find flavors you enjoy. Fresh vegetables taste great and add crunch. They also cook quickly. However, frozen veggies are just as good. They save time and are often more convenient. If you use frozen, make sure to thaw them first. This way, they cook evenly and mix well with the sausages. Both options work well in this dish. Choose what fits your needs best! First, grab a large skillet and place it on the stove. Turn the heat to medium. Pour in two tablespoons of olive oil. Let it heat up for a minute. This oil will help cook the sausages and veggies nicely. Next, take four Italian sausages and add them to the hot skillet. Cook them for about 5 to 7 minutes. Turn them often. You want them brown and fully cooked. Once done, remove them from the skillet and set them aside on a plate. Now, it’s time for the veggies! In the same skillet, add one sliced red onion. Cook it for 2 to 3 minutes until it softens. Then, add one diced bell pepper and one sliced zucchini. Sauté these for about 5 minutes. You want them to be tender but not mushy. After the veggies are ready, stir in one cup of halved cherry tomatoes and two minced garlic cloves. Cook this for another 2 to 3 minutes. The tomatoes should soften and give off their juices. Then, slice the cooked sausages into bite-sized pieces. Add them back to the skillet along with two cups of baby spinach, one teaspoon of dried oregano, one teaspoon of smoked paprika, salt, and pepper to taste. Cook everything together for another 2 to 3 minutes until the spinach wilts. When everything is mixed well and heated through, remove the skillet from the heat. For a touch of freshness, garnish your dish with some chopped parsley. This One-Pan Sausage Veggie Skillet is ready to enjoy! Serve it hot and watch everyone dig in. When picking sausages, think about flavor and type. Italian sausages bring a nice taste. You can also try chicken or turkey for lighter meals. Check the label for quality. Look for sausages without many fillers. Fresh sausages have a better texture and taste. To cook veggies evenly, cut them into similar sizes. This helps them cook at the same rate. Start with firmer veggies like onions and peppers. Then add softer ones like zucchini and tomatoes. Stir often to prevent sticking. This will keep them bright and tasty. Garnishing can make your dish pop. Fresh parsley adds color and flavor. You might also sprinkle some grated cheese on top. Crushed red pepper flakes can give a nice kick. A squeeze of lemon juice brightens the dish too. Use your favorite herbs to match your taste. {{image_2}} You can make a tasty vegetarian version of this dish. Swap the Italian sausages with plant-based sausage or leave them out entirely. Use firm tofu or tempeh instead. This adds protein and keeps the meal filling. You can also add more beans like chickpeas or black beans. They add fiber and flavor. Feel free to get creative with your veggies! You can add broccoli, asparagus, or carrots. Each of these adds unique flavors and textures. Just chop them into small pieces for faster cooking. You can also mix in sweet corn or peas for a pop of color. The goal is to keep it colorful and vibrant! If you like heat, you can spice things up! Add some crushed red pepper flakes when cooking. You can also use spicy sausage instead of mild. For an extra kick, try jalapeños or diced chili peppers. These will make your meal exciting and full of flavor. Enjoy the burst of spice with each bite! For the complete recipe and more ideas, check out the Full Recipe. To keep your One-Pan Sausage Veggie Skillet fresh, let it cool first. Then, place the leftovers in an airtight container. Store it in the fridge for up to three days. Make sure to label the container with the date. This way, you can easily track how long it’s been stored. When you're ready to enjoy leftovers, you have a couple of easy options. You can reheat in the microwave for 1-2 minutes. Stir halfway through to heat evenly. Alternatively, heat it on the stove over medium-low heat. This method keeps the flavors vibrant. Add a splash of olive oil if needed to prevent sticking. If you want to save some for later, freezing is a great choice. Allow the skillet to cool completely. Then, transfer it to a freezer-safe container. It’s best to use it within three months for the best taste. When ready to eat, thaw it in the fridge overnight. Reheat as mentioned above. Enjoy your delicious meal anytime! Yes, you can use any sausage you like. Try chicken, turkey, or pork. Each type brings a different flavor. If you prefer a bit of heat, use spicy sausage. You can also try plant-based sausage for a meat-free option. To make this dish gluten-free, choose gluten-free sausage. Most chicken and turkey sausages are gluten-free. You can also check labels for any added sauces or spices. This meal pairs well with rice, quinoa, or crusty bread. You can also serve a simple green salad on the side. These options add texture and balance to your plate. If cooking for more people, simply double the ingredients. Use a larger skillet or two pans. Cooking in batches helps keep everything evenly cooked. Adjust seasonings to taste as needed. Yes, you can prepare this dish ahead of time. Store it in an airtight container in the fridge for up to three days. Reheat on the stove or in the microwave. It tastes great even after a day or two! For the full recipe, check the above sections. This blog covered the key parts of making a One-Pan Sausage Veggie Skillet. We talked about ingredients, cooking steps, and great tips to enhance your dish. You can swap ingredients and even make it vegetarian. Remember, cooking should be fun and easy. Use this guide to create tasty meals with what you have. Enjoy your time in the kitchen and savor every bite!

One-Pan Sausage Veggie Skillet Quick and Easy Meal

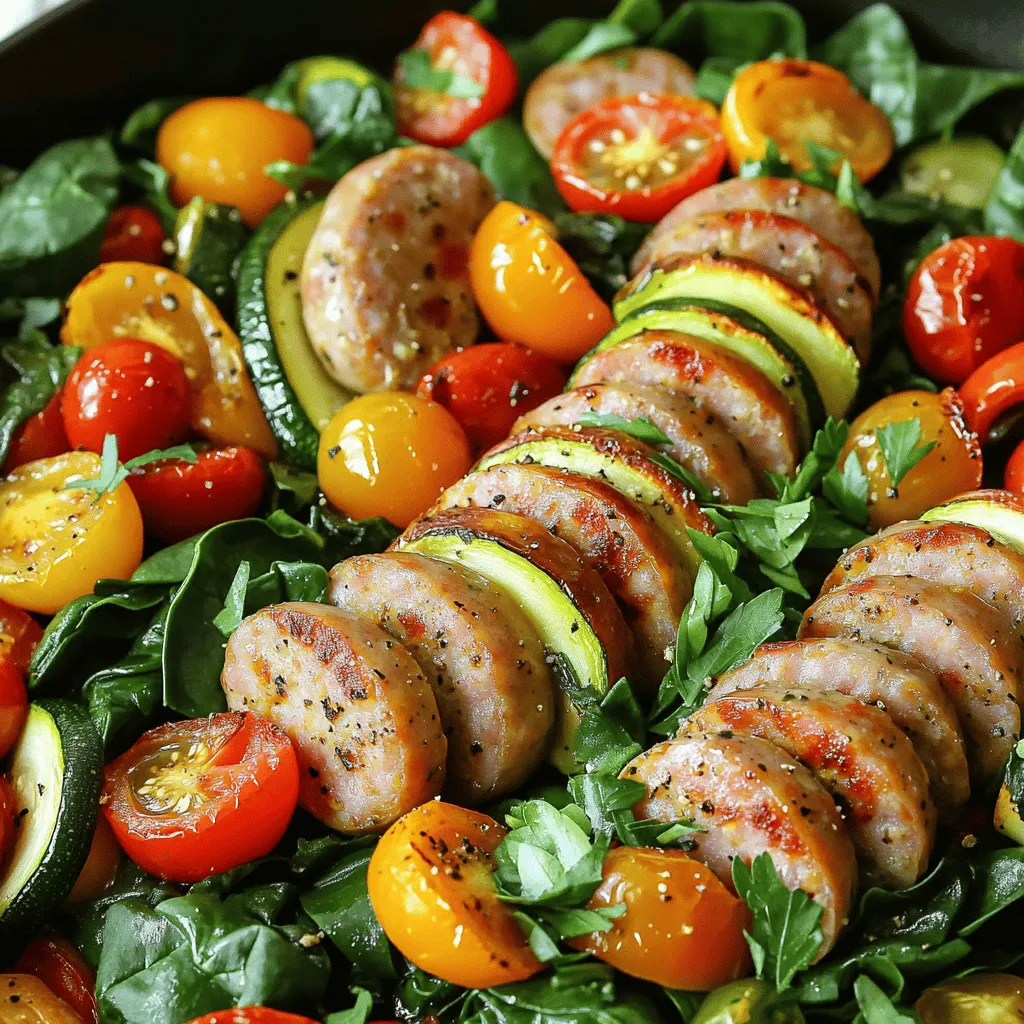
Looking for a simple and tasty meal? The One-Pan Sausage Veggie Skillet is your answer! This dish combines savory sausages

- 8 oz fusilli or bowtie pasta - 2 cups fresh spinach, roughly chopped - 1 cup strawberries, hulled and sliced - 1/2 cup feta cheese, crumbled - 1/4 cup walnuts, toasted and chopped - 2 tablespoons olive oil - 2 tablespoons balsamic vinegar - 1 tablespoon honey - Salt and pepper to taste Choosing fresh ingredients makes this salad shine. First, pick bright, green spinach. Look for leaves that are crisp and free from brown spots. Next, select strawberries that are red and firm. They should smell sweet. For the pasta, pick a shape you love, like fusilli or bowtie. When it comes to feta cheese, choose blocks over crumbles. Block cheese is fresher and has better flavor. For walnuts, find raw ones that you can toast yourself. Toasting brings out their nutty taste. Now, let’s talk about olive oil. Quality matters here. Look for extra virgin olive oil for your dressing. It has a rich, fruity taste that lifts the salad. Always check the label for freshness. A good olive oil can change your dish from good to great. Using high-quality ingredients sets the stage for this Strawberry Spinach Pasta Salad. Each bite should burst with flavor and freshness. For the full recipe, check the section above. First, you need to cook the pasta. Boil water in a large pot. Add a pinch of salt to the water. Once it boils, add 8 oz of fusilli or bowtie pasta. Cook according to the package instructions, which usually takes about 8 to 10 minutes. Stir the pasta to keep it from sticking. When it's done, drain it in a colander. Rinse the pasta under cold water. This cools it and stops the cooking. Set it aside to drain well. Next, prepare the salad. In a large bowl, combine your cooled pasta and 2 cups of roughly chopped fresh spinach. Add 1 cup of hulled and sliced strawberries. Then, sprinkle in 1/2 cup of crumbled feta cheese. Finally, toss in 1/4 cup of toasted and chopped walnuts. These ingredients create a colorful mix. Their flavors work well together. Now, let’s make the dressing. In a small bowl, whisk together 2 tablespoons of olive oil, 2 tablespoons of balsamic vinegar, and 1 tablespoon of honey. Add a pinch of salt and pepper to taste. Whisk until the mixture is smooth and well combined. Drizzle this dressing over your salad components. Toss gently to ensure everything is coated. Let the salad sit for about 10 minutes. This helps the flavors meld. Before serving, give it one last gentle toss. For the full recipe, check out the complete instructions. To cook pasta perfectly, use a large pot with lots of water. Bring the water to a full boil before adding salt. Use about one tablespoon of salt for every four quarts of water. Add the pasta and stir right away. This helps keep it from sticking. Cook according to the package time. Taste a piece to check for doneness. You want it al dente, which means it should be firm but not hard. Once done, drain it well and rinse under cold water. This stops the cooking process. When you toss your salad, use a large bowl. This gives you plenty of space to mix. Start with the pasta at the bottom, then add spinach, strawberries, feta, and walnuts. Drizzle the dressing over the top. Use clean hands or salad tongs to gently mix. Be careful not to break the strawberries or feta. Toss just enough to coat everything, then let it rest. This helps the flavors blend together nicely. To boost flavor, consider adding a squeeze of fresh lemon juice. This adds brightness and balances the sweetness of the strawberries. You can also try adding fresh herbs like basil or mint for extra depth. If you like a little heat, sprinkle in some red pepper flakes. For a twist, swap balsamic vinegar for apple cider vinegar. Each option gives a new layer of taste to your salad. {{image_2}} You can make your Strawberry Spinach Pasta Salad more filling by adding protein. Some great options are grilled chicken, shrimp, or chickpeas. Just cook the protein you choose, then chop it into bite-sized pieces. Mix it in with the pasta and veggies for a hearty meal. Each protein adds its own flavor, so try different ones to see what you like best. While strawberries shine in this salad, you can switch them out for other fruits. Blueberries, raspberries, or sliced peaches work well too. Each fruit gives its own taste and color. Experiment with different combinations to create your favorite mix. You can even use dried fruits like cranberries for a chewy texture. The dressing plays a big role in this salad's flavor. If you want a change, try adding a splash of orange juice to the balsamic vinegar. You can also mix in some mustard for a nice kick. Another option is to use a creamy dressing, like yogurt-based ranch. Each dressing can change the whole vibe of the salad, making it fun to try new ones. For more ideas, check the Full Recipe. To store leftover Strawberry Spinach Pasta Salad, place it in an airtight container. This keeps the salad fresh and tasty. Make sure to cover it well to avoid air exposure. You can keep it in the fridge for up to three days. For the best freshness, store the salad without the dressing if you plan to keep it. Dress the salad only when you're ready to eat. This helps prevent soggy pasta and wilted spinach. If you want to add extra flavor, keep some fresh strawberries and feta cheese aside for later. Most of the time, you won’t need to reheat this salad. It tastes best cold. If you want to warm it up, do so gently in the microwave for a few seconds. Keep an eye on it so the pasta doesn’t get too hot. Enjoy the salad fresh for the best flavor! For the full recipe, check the section above. To make this salad vegan, swap the feta cheese. Use a plant-based cheese or skip it. You can also add extra nuts or seeds for a creamy texture. The dressing is already vegan, so you are all set! This way, you keep the fresh flavors while making it plant-based. Yes, you can prepare this salad in advance. Make the salad up to a day ahead. Keep the dressing separate and add it just before serving. This keeps the spinach fresh and crisp. If you mix it too early, the pasta may soak up the dressing. Serve this salad in a large, colorful bowl. Garnish with extra strawberry slices and a sprinkle of feta. This makes it look nice and inviting. Pair it with grilled chicken or fish for a complete meal. You can also enjoy it as a light lunch or picnic dish. Explore the full recipe for more tips! This article detailed how to create a delicious Strawberry Spinach Pasta Salad. We covered essential ingredients, tips for choosing fresh items, and the importance of quality olive oil. You learned step-by-step instructions for cooking and assembling the salad, along with variations to suit your taste. Storing tips and common questions were answered too. With this recipe, you can enjoy a tasty meal that is both healthy and versatile. Don’t hesitate to experiment and make it your own!

Strawberry Spinach Pasta Salad Fresh and Flavorful Meal

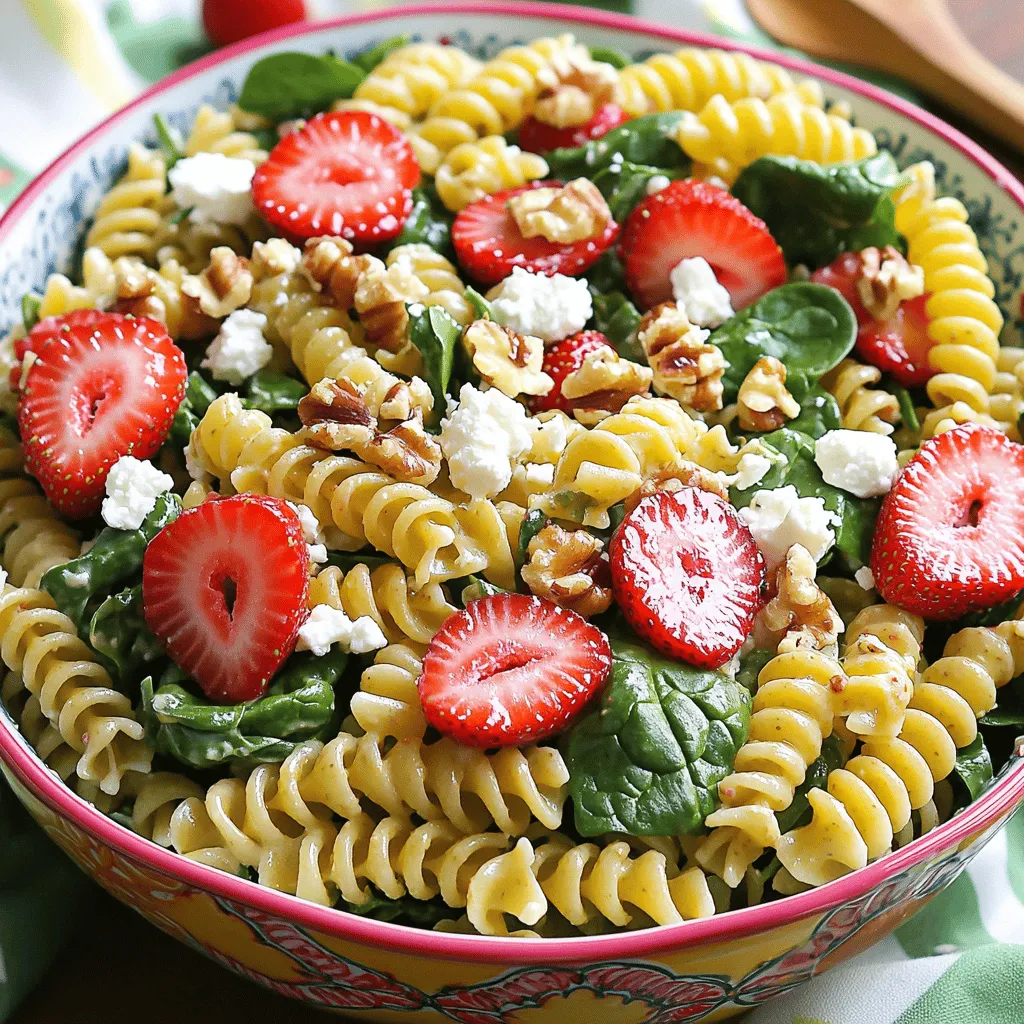
Looking for a bright, tasty dish that’s easy to make? This Strawberry Spinach Pasta Salad is perfect! Combining fresh spinach

Older posts
Newer posts
← Previous Page1 … Page71 Page72 Page73 … Page85 Next →

dsad

© 2026 greenmealmap • Built with GeneratePress

Our Policies

  • Copyright Policy
  • Cookie Policy
  • GDPR Policy
  • Privacy Policy
  • Disclaimer
  • Terms Of Use

More Information

  • Home
  • About
  • Contact
  • Appetizers
  • Dessert
  • Dinner
  • Drinks
©2026, greenmealmap About Back To Top