Skip to content
DisclaimerTerms Of UseGDPR PolicyCookie Policy

greenmealmap

  • Home
  • Drinks
  • Appetizers
  • Dinner
  • Dessert
  • About
  • Contact
  • Privacy Policy
DisclaimerTerms Of UseGDPR PolicyCookie Policy

NO-ING-IMG

- 12 oz fettuccine pasta - 1 can (15 oz) pure pumpkin puree - 2 cups heavy cream For this creamy pumpkin alfredo, I love using fettuccine pasta. It holds the sauce well and adds a nice texture. Pure pumpkin puree is key for that rich, autumn flavor. Heavy cream makes the sauce smooth and indulgent. - 1 cup grated Parmesan cheese - 1 cup vegetable broth - 4 cloves garlic, minced - 1 teaspoon onion powder - 1 teaspoon garlic powder - 1 teaspoon ground nutmeg - 1 teaspoon salt - ½ teaspoon black pepper The seasonings bring life to the dish. Grated Parmesan cheese adds a savory touch. Vegetable broth keeps the sauce rich without being too heavy. Garlic, onion powder, and nutmeg create a warm, cozy feel. Salt and pepper enhance all the flavors in this meal. - 1 tablespoon olive oil - Fresh parsley, chopped Garnishes make a dish pretty and tasty. A drizzle of olive oil adds shine and flavor. Fresh parsley gives a pop of color and freshness. - First, grease the slow cooker with olive oil. This step helps to prevent the pasta from sticking. - Next, add 12 ounces of fettuccine pasta directly into the greased cooker. - In a bowl, whisk together the pumpkin puree, heavy cream, and vegetable broth. - Add minced garlic, onion powder, garlic powder, nutmeg, salt, and black pepper. Keep whisking until the mixture is smooth. - Pour this creamy pumpkin sauce over the pasta in the slow cooker. - Stir everything gently to coat all the pasta with the sauce. - Cover the slow cooker with its lid. - Cook on low for 3 to 4 hours or on high for 1.5 to 2 hours. The pasta should be tender and the sauce creamy. - About 10 minutes before serving, stir in 1 cup of grated Parmesan cheese. This adds a rich flavor. - Taste and adjust the seasoning if needed. Stir again to blend all the flavors. - Serve hot, garnished with fresh chopped parsley for a beautiful finish. To get a smooth sauce, mix the pumpkin puree, heavy cream, and broth well. A whisk works great for this. Make sure there are no lumps. Stir in the garlic and spices slowly to blend their flavors. This helps create that creamy texture you want. For the pasta, cook it just right. Add the fettuccine to the slow cooker dry. It will soak up the sauce as it cooks. This keeps the pasta from getting mushy. When using a slow cooker, cooking on low for 3 to 4 hours works best. If you are short on time, use high for 1.5 to 2 hours. Always cover your slow cooker while it cooks. This keeps the heat in and helps the pasta cook evenly. To check if it’s done, look for tender pasta. The sauce should be thick and creamy. Stir it gently to see if it mixes well. Want to boost the flavor? Try adding a pinch of cayenne for some heat. A touch of sage or thyme can bring out fall flavors too. Pair this dish with a simple salad or crusty bread. The light flavors balance the rich sauce. Fresh herbs like thyme can also add a nice touch on top. {{image_2}} You can switch up the pasta type if you like. Try penne or rotini for a fun twist. These shapes hold the creamy sauce well. You can also use whole wheat or gluten-free pasta for a healthier option. For dairy-free choices, use coconut cream instead of heavy cream. This gives a rich taste while keeping it plant-based. Nutritional yeast can replace Parmesan cheese for a cheesy flavor without dairy. Adding veggies boosts nutrition and flavor. Spinach or kale blends well with the creamy sauce. Just stir in fresh greens 10 minutes before serving. For holiday cheer, consider adding cranberries or pecans. They add a nice crunch and a sweet touch. You can also mix in sage or thyme for more fall flavor. Pair this dish with a simple green salad. A light vinaigrette will balance the creamy pasta well. Garlic bread also makes a great side, perfect for soaking up sauce. For drinks, a crisp white wine or sparkling water works wonders. You can also serve with a sprinkle of extra Parmesan on top for added flavor. Enjoy your meal! After enjoying your creamy pumpkin Alfredo pasta, store any leftovers in the fridge. Use an airtight container to keep it fresh. This method prevents moisture loss and keeps flavors intact. The pasta stays good for about 3 to 5 days in the fridge. Be sure to check for any off smells or changes in texture before eating. When you're ready to enjoy your leftovers, reheating them takes just a few minutes. The best way is to use a microwave or stovetop. If using a microwave, heat small portions for 1 to 2 minutes. Stir halfway through to make sure it heats evenly. If you prefer the stovetop, add a splash of broth or cream. This helps keep the sauce creamy. Stir gently over low heat until warmed. You can also freeze this dish for later. To freeze, let the pasta cool completely. Then, transfer it to a freezer-safe bag or container. Make sure to remove as much air as possible. This helps avoid freezer burn. The pasta can last for up to 3 months in the freezer. When you’re ready to eat, thaw it overnight in the fridge. Reheat it on the stove with a bit of cream to restore its creaminess. Yes, you can easily make this dish vegetarian. Start by using vegetable broth instead of chicken broth. This keeps the flavor rich while sticking to a meat-free option. You can also swap the heavy cream for a plant-based cream. Coconut cream or cashew cream work well and add a nice taste. To make this dish lighter, consider a few swaps. Use whole wheat fettuccine for more fiber. You can replace heavy cream with Greek yogurt or a low-fat cream alternative. This change gives you a creamy sauce with fewer calories. Adding more vegetables, like spinach or mushrooms, boosts nutrition and flavor. If your pasta turns out too thick, don’t worry! Simply add a bit more vegetable broth or cream. Stir it in slowly until you reach the desired consistency. If you want a thinner sauce, add a splash of pasta water. This helps keep the flavors intact while adjusting the sauce. Yes, you can make this dish on the stovetop! Start by cooking the fettuccine according to package instructions. In a separate pot, whisk together the pumpkin puree, cream, and spices over low heat. Once warm, mix in the cooked pasta. Stir until well combined, then add the cheese. Cook for a few more minutes until everything is hot and creamy. This blog post shared a delicious slow cooker fettuccine recipe with creamy pumpkin sauce. You learned about the main ingredients, step-by-step instructions, and helpful tips for the dish. We explored ways to customize the recipe and storage tips for leftovers. In closing, this dish is tasty and easy to prepare. Enjoy making it your own. With simple tweaks, you can create a meal everyone will love!

Creamy Pumpkin Alfredo Pasta Slow Cooker Delight

If you’re craving a cozy meal that’s both creamy and comforting, you’re in for a treat! My Creamy Pumpkin Alfredo

- 4 chicken sausages (preferably flavored with herbs) - 1 medium butternut squash, peeled and cubed - 1 zucchini, sliced - 1 red bell pepper, sliced - 2 tablespoons olive oil - 1/4 cup pure maple syrup - 1 teaspoon Dijon mustard - 1 teaspoon garlic powder - 1 teaspoon smoked paprika - Salt and pepper to taste - Fresh thyme sprigs for garnish (optional) Gather these ingredients to create a delicious meal. Chicken sausages add protein and flavor. Choose sausages with herbs for extra taste. Butternut squash brings a sweet, nutty flavor and pairs well with the glaze. Zucchini and red bell pepper add color and crunch, making your dish more inviting. For the pantry staples, olive oil helps roast the veggies and sausages evenly. Pure maple syrup gives the dish its sweet glaze. Dijon mustard adds a hint of sharpness, balancing the sweetness. Garlic powder and smoked paprika offer depth and warmth to your meal. Seasoning with salt and pepper enhances all the flavors. Fresh thyme sprigs add a lovely touch to your dish. This combination of ingredients makes the perfect Maple Glazed Chicken Sausage with Squash Sheet Pan. Enjoy every bite! Set your oven to 400°F (200°C). This heat helps the sausages and veggies cook well. While the oven heats, grab a large baking sheet. Line it with parchment paper for easy cleanup. In a large bowl, add the cubed butternut squash, sliced zucchini, and red bell pepper. Drizzle 2 tablespoons of olive oil over the veggies. Sprinkle with salt, pepper, garlic powder, and smoked paprika. Toss everything well. Make sure each piece is coated evenly. This step adds great flavor. Take the chicken sausages and place them on a cutting board. Use a sharp knife to make a few shallow slits on one side of each sausage. This helps them cook evenly and allows the glaze to seep in. In a small bowl, combine 1/4 cup of pure maple syrup and 1 teaspoon of Dijon mustard. Whisk them together until smooth. The glaze should be thick but pourable. This sweetness balances the savory flavors of the dish. Spread the seasoned vegetables evenly on the large sheet pan. Nestle the chicken sausages among the veggies. Drizzle the maple glaze generously over both the sausages and the vegetables. Make sure every piece gets some glaze for the best flavor. Place the sheet pan in the preheated oven. Roast for 25-30 minutes. The sausages should be browned and cooked through, reaching an internal temperature of 165°F. Stir the vegetables halfway through cooking for even roasting. After roasting, take the pan out of the oven and let it cool for a few minutes. On a plate, serve the chicken sausages surrounded by the roasted squash and colorful vegetables. Drizzle any remaining glaze from the pan over the top. If you like, add fresh thyme sprigs for a fragrant touch. - Ensuring even cooking: Make shallow slits in each sausage. This helps heat reach inside. It also allows the glaze to soak in well. - Avoiding dryness: Cook sausages until they reach 165°F. This keeps them juicy. Use a meat thermometer to check the temperature. - Suggested herbs and spices: Fresh thyme adds a nice touch. You can also use rosemary or sage for extra flavor. - Additional glaze ideas: Try mixing maple syrup with balsamic vinegar for a tangy twist. Honey can also work well in place of maple syrup. - What to do if veggies are undercooked: If veggies aren’t tender, return them to the oven. Cook for another 5-10 minutes. Stir them to ensure even cooking. - Adjusting cooking times: Thicker sausages may need more time. Check them regularly to avoid overcooking. Adjust the time based on your oven’s performance. {{image_2}} You can switch out chicken sausage for turkey sausage. Turkey sausage has a lighter taste but still gives great flavor. If you want a plant-based option, use vegan sausage. Many brands offer tasty vegan sausages that work well in this dish. These changes help if you have dietary restrictions. Always check labels for gluten or allergens. This way, you can enjoy your meal without worry. Feel free to swap the butternut squash for other squash types. Acorn or spaghetti squash also work great. They add different textures and flavors. You can also add seasonal veggies. Think about Brussels sprouts in fall or asparagus in spring. Mixing in different veggies keeps the dish fresh and fun. If you like to mix it up, try honey or agave syrup instead of maple syrup. Both options add sweetness but change the flavor a bit. You can also play with the mustard. Use spicy brown mustard for a kick, or honey mustard for a sweeter touch. These simple swaps can give your dish a whole new flavor. To store your Maple Glazed Chicken Sausage with Squash, use airtight containers. Glass or plastic containers work great. Make sure the dish cools down before sealing it. In the fridge, it lasts about 3 to 4 days. Always label your containers with dates for easy tracking. For reheating, the oven is best. Preheat it to 350°F (175°C) and place the dish inside. Heat for about 15-20 minutes until warm. This keeps the sausage from getting too soggy. You can also use the microwave, but cover the dish with a paper towel to avoid splatters. If you want to freeze this meal, let it cool first. Divide it into portions and use freezer-safe bags or containers. It will stay good for about 2 to 3 months. To thaw, place it in the fridge overnight. Reheat as mentioned earlier for the best taste and texture. You can make this dish lighter by using less maple syrup. Try cutting the amount in half. You can also swap chicken sausages for turkey or veggie sausages. Use olive oil sparingly, or replace it with a low-calorie spray. Adding more vegetables can boost fiber and nutrients without adding many calories. Yes, you can use frozen vegetables! They are convenient and save prep time. However, frozen veggies may need a bit more time to cook. Check the texture as they may be softer than fresh ones. Stir them halfway through cooking to ensure even roasting. This dish pairs well with simple sides. A light green salad adds freshness. Mashed potatoes or quinoa can add heartiness. You could also serve it with crusty bread to soak up the glaze. Yes, this recipe is gluten-free. Just make sure to check the labels of your sausages and Dijon mustard. Some brands may add gluten, so it’s best to be cautious. To check if the sausages are done, use a meat thermometer. The internal temperature should reach 165°F. This ensures they are safe to eat and juicy. If you don’t have a thermometer, look for a nice brown color and clear juices. In this blog post, we explored a delicious sheet pan meal featuring chicken sausages, butternut squash, zucchini, and red bell pepper. I outlined easy steps for preparation, cooking, and serving, along with tips for flavor and storage. You can change the recipe by using different proteins or seasonal veggies. Remember, cooking is fun! Enjoy experimenting with flavors and textures. This dish is simple, tasty, and great for meal prep. I hope you try it and make it your own!

Maple Glazed Chicken Sausage with Squash Sheet Pan Delight

Looking for a simple, tasty meal? Let me introduce you to my Maple Glazed Chicken Sausage with Squash Sheet Pan

To make Apple Cinnamon Energy Balls, you need these main items: - 1 cup rolled oats - 1/2 cup almond butter (or any nut butter) - 1/2 cup finely chopped dried apples - 1/4 cup honey or maple syrup - 1 teaspoon ground cinnamon - 1/4 teaspoon nutmeg - Pinch of salt These ingredients come together to create a tasty and healthy snack. You can add more flavor and crunch with these optional ingredients: - 1/4 cup chopped walnuts - 1/4 cup mini chocolate chips (for a sweet twist) - 1/4 cup shredded coconut These extras can make your energy balls even more delightful. Each ingredient has its own health perks: - Rolled oats: Great for energy and full of fiber. They help you feel full. - Almond butter: Packed with healthy fats and protein. It gives you lasting energy. - Dried apples: Provide natural sweetness and vitamins like A and C. - Honey or maple syrup: Natural sweeteners that add flavor and quick energy. - Cinnamon: Adds flavor and may help control blood sugar levels. - Nutmeg: Gives warmth and may boost digestion. - Walnuts: Offer omega-3 fatty acids, which are good for your heart. Using these ingredients, you create a snack that fuels your body and tastes great! First, gather your dry ingredients. You need: - 1 cup rolled oats - 1/2 cup finely chopped dried apples - 1 teaspoon ground cinnamon - 1/4 teaspoon nutmeg - Pinch of salt - 1/4 cup chopped walnuts (optional) In a mixing bowl, add rolled oats, chopped dried apples, and walnuts if you like. Sprinkle in the cinnamon, nutmeg, and salt. Now, stir everything well. This helps mix the flavors, so every bite is tasty. Next, we will mix the wet ingredients. You need: - 1/2 cup almond butter (or your favorite nut butter) - 1/4 cup honey or maple syrup In a separate bowl, add almond butter and honey (or maple syrup). Mix until it becomes smooth and creamy. This step is key for binding the energy balls together. Now, it’s time to make the energy balls. Pour the wet mixture into the dry ingredients. Mix it all together until it’s well combined and sticky. Use your hands to scoop out small portions of the mixture, about 1 tablespoon each. Roll them into balls. If it feels too sticky, chill the mixture in the fridge for a few minutes. Place the energy balls on a parchment-lined tray. Chill them in the fridge for at least 30 minutes to firm up. After that, store the balls in an airtight container. Enjoy them for up to one week! To get the best texture, balance is key. You want your energy balls to be sticky but not too wet. Use rolled oats for a chewy base. If the mixture feels too dry, add a bit more almond butter or honey. If it’s too sticky, chill it for a few minutes. This makes rolling easier. The goal is a firm but soft ball. Store your energy balls in an airtight container. This keeps them fresh for up to one week. Place them in the fridge to maintain their texture. If you want longer storage, freeze them. Just remember to let them thaw before eating. This helps keep them tasty and healthy. Enjoy these energy balls as a quick snack. They pair well with fruit or yogurt for breakfast. You can also take them on hikes or to work for a boost. For a fun twist, try drizzling some nut butter on top. This adds flavor and makes them even more satisfying. {{image_2}} You can use many nut butters for your energy balls. Almond butter is great, but peanut butter adds a fun twist. Sunflower seed butter is a good choice if you need nut-free. Each nut butter brings its own flavor and texture. Just keep the same amount as the recipe calls for. Want to add more nutrients? Try mixing in chia seeds or flaxseeds. These tiny seeds pack a lot of fiber and healthy fats. You might also add protein powder for an energy boost. Dried fruits like cranberries or raisins can add sweetness too. Just remember to keep the total amount of mix-ins around half a cup. You can change the flavor of your energy balls easily. Swap out the cinnamon for pumpkin spice for fall vibes. Or, try adding cocoa powder for a chocolatey kick. Vanilla extract can also enhance the taste. Don’t be afraid to get creative with what you have at home. Each swap can lead to a new favorite snack! To keep your Apple Cinnamon Energy Balls fresh, use an airtight container. This helps prevent them from drying out. I recommend placing parchment paper between layers. This keeps them from sticking together. Store them in the fridge for the best taste and texture. They stay good for up to one week. Freezing these energy balls is a great way to keep them longer. After forming the balls, place them on a baking sheet. Make sure they are not touching each other. Freeze them for about an hour. Once firm, transfer them to a freezer bag. Label the bag with the date. They can last up to three months in the freezer. When ready to eat, thaw them in the fridge overnight. These energy balls have a shelf life of one week in the fridge. If stored properly in the freezer, they last for three months. Always check for signs of spoilage before eating. If they smell off or change color, it’s best to toss them. Enjoying your energy balls fresh ensures the best flavor and nutrition. Yes, you can easily make these energy balls vegan. Just swap honey with maple syrup. This change keeps the sweetness but keeps it plant-based. You can also use almond butter or any nut butter. Both options are vegan-friendly and add flavor. Each energy ball has about 100 calories. This number can change based on the nut butter you use and if you add walnuts. If you want a lower-calorie snack, use less nut butter or skip the nuts. These energy balls are a great choice for a healthy snack. If your mixture is too sticky, try chilling it in the fridge. Refrigerating for about 10 minutes helps firm it up. You can also wet your hands with water when rolling the balls. This trick makes it easier to shape them without sticking to your hands. You learned how to make healthy apple cinnamon energy balls. We covered the key ingredients, step-by-step instructions, and tips for success. You can enjoy variations to fit your taste, plus you'll know how to store them well. Making these energy balls offers nutrition and flavor. They can be a fun snack that keeps you energized. Try different nut butters or add-ins to customize your treats. Enjoy your tasty, healthy creation!

Apple Cinnamon Energy Balls Healthy Snack Idea

Looking for a tasty snack that fuels your day? Apple Cinnamon Energy Balls are your answer! These easy-to-make bites pack

For this dish, I like using sushi rice or jasmine rice. Sushi rice is sticky and gives a nice texture. Jasmine rice is fluffy and aromatic. Both types work well in fried rice. Choose what you prefer or what you have on hand. You can use fresh or frozen vegetables in this recipe. Fresh vegetables taste great and have a nice crunch. Frozen vegetables are quick and easy. They save time and still taste good. I often keep frozen peas and carrots handy for busy days. To elevate your spicy garlic shrimp fried rice, consider adding extra ingredients. You might try ginger for a zesty kick. Lime juice adds brightness and a fresh taste. You can also include chopped cilantro for a herbaceous note. These extras can make your meal more delicious and unique. To start, rinse 1 cup of sushi rice under cold water. Keep rinsing until the water runs clear. This removes extra starch, giving the rice a nice texture. Next, add the rinsed rice and 2 cups of water to a medium saucepan. Bring the pot to a boil. After it boils, reduce the heat to low. Cover the pot and let it simmer for 15 minutes. Once done, remove the pot from heat. Let it sit, covered, for another 10 minutes to finish cooking. Fluff the rice with a fork and set it aside. Heat 1 tablespoon of sesame oil in a large skillet or wok over medium-high heat. Add 4 cloves of minced garlic and sauté for 30 seconds. The garlic should smell great but not burn. Next, add 1 pound of peeled and deveined shrimp. Cook the shrimp for about 2-3 minutes until they turn pink. Season them with a pinch of salt and pepper. When cooked, remove the shrimp from the skillet and set them aside. In the same skillet, add another tablespoon of sesame oil. Sauté 1 small finely chopped onion and 1 diced red bell pepper for about 3-4 minutes. Wait until they become soft. Add 1 cup of peas and carrots next, cooking for an extra 2 minutes. Push the veggies to one side of the skillet and pour in 2 lightly beaten eggs on the other side. Scramble the eggs until they are just set. Now, mix everything together in the skillet. Add the cooked rice, stirring it well with the veggies and eggs. Pour in 3 tablespoons of soy sauce and 1 tablespoon of sriracha. Stir until it’s all combined and taste it. Adjust the seasonings if needed. Finally, return the cooked shrimp to the skillet, stirring until everything is heated through. You can change the heat in this dish easily. Sriracha is a great choice. It adds spice and flavor. Start with one tablespoon if you like mild heat. If you want it spicier, add more. You can also try chili paste or red pepper flakes. Mix and match to find the right heat for you. To make great fried rice, use cold, day-old rice if you can. Fresh rice can be too sticky. Cold rice helps keep the grains separate. When cooking, use a hot skillet or wok. This helps to fry the rice and veggies quickly. Stir often to ensure even cooking. Avoid using too much sauce. It can make the rice soggy. Use just enough to flavor the dish. Also, don’t overcrowd the pan. If there’s too much food, it won’t fry well. Lastly, be careful not to overcook the shrimp. They should be pink and tender, not tough. {{image_2}} You can switch the shrimp for chicken or tofu. Chicken works well and adds nice flavor. Use about 1 pound of chicken, diced small. Cook it in the same way as the shrimp. Tofu is a great choice for a veggie option. Use firm tofu, cut into cubes. Sauté it until golden, just like the shrimp. You can also add more veggies, like broccoli or zucchini, for a colorful dish. Adding ginger brings a warm and spicy taste. Just grate a small piece and sauté it with the garlic. Lime juice can brighten the dish. Squeeze some fresh lime over the rice before serving. You can also add a splash of fish sauce for depth or chili flakes for extra heat. Each of these boosts flavor and gives you a unique twist on the dish. This fried rice is tasty on its own, but a few sides can enhance your meal. Serve it with a simple salad for crunch. A cucumber salad with vinegar is refreshing. You might enjoy spring rolls or dumplings as a fun side. If you want more spice, pair it with kimchi. These sides add variety and make the meal feel special. Store your spicy garlic shrimp fried rice in an airtight container. This keeps it fresh. Make sure to let it cool down first. Place it in the fridge within two hours of cooking. It should last about 3 to 4 days. If you're unsure about the freshness, check for any off smells or changes in color. When reheating, use a skillet or a wok. Add a splash of water or broth to keep it moist. Heat it on medium until hot. Stir often to ensure even heating. If you prefer the microwave, cover the bowl with a damp paper towel. This helps steam the rice and keeps it from drying out. Heat in short bursts, stirring in between. You can freeze the fried rice for later use. Portion it into freezer-safe bags or containers. Remove as much air as possible before sealing. This helps prevent freezer burn. It can last up to 3 months in the freezer. When ready to eat, thaw it in the fridge overnight. Reheat as described above for best results. The best rice for fried rice is sushi rice or jasmine rice. Sushi rice has a sticky texture, which holds well when frying. Jasmine rice is fragrant and fluffy. Both types work great in this dish. When using either, rinse the rice until the water runs clear. This step removes extra starch and helps prevent clumping. Yes, you can easily make this fried rice without shrimp. You can substitute shrimp with chicken, tofu, or even just veggies. If using chicken, make sure to cook it fully before adding it to the dish. Tofu works well too; just sauté it until golden. This recipe is flexible, so feel free to get creative! To make this fried rice gluten-free, swap regular soy sauce for gluten-free soy sauce or tamari. These options provide the same salty flavor without gluten. Always check labels to ensure no gluten-containing ingredients are included. Enjoy this delicious meal without worry! To wrap up, we explored the key ingredients for fried rice, including rice options and vegetables. Next, we looked at cooking rice and shrimp for the perfect dish. I shared tips for flavor and common mistakes to avoid. We discussed variations with proteins and flavor enhancers, plus storage tips for leftovers. With these insights, you'll make delicious fried rice every time. Enjoy your cooking journey and keep experimenting to find your perfect recipe!

Spicy Garlic Shrimp Fried Rice Flavorful and Easy Meal

Looking for a quick and tasty meal? My Spicy Garlic Shrimp Fried Rice hits the spot! It’s packed with flavor

- 1 cup pumpkin puree - 2 oz cream cheese, softened - 1/2 cup sugar - 1/2 teaspoon vanilla extract - 1/2 teaspoon ground cinnamon - 1/4 teaspoon ground nutmeg - 1/2 cup unsweetened cocoa powder - 2/3 cup all-purpose flour - 1/2 teaspoon baking powder - 1/2 teaspoon salt - 3/4 cup granulated sugar - 1/2 cup melted butter - 2 large eggs - 1 teaspoon vanilla extract (for brownie mix) You’ll need just the right amounts to make these treats shine. - Pumpkin puree: 1 cup gives a rich flavor. - Cream cheese: 2 oz creates a creamy texture. - Sugar: You’ll use 1/2 cup for the cheesecake and 3/4 cup for the brownie mix. - Vanilla extract: 1/2 teaspoon for the cheesecake, plus 1 teaspoon for the brownie mix. - Ground cinnamon: Just 1/2 teaspoon adds warmth. - Ground nutmeg: A pinch of 1/4 teaspoon enhances the spice. - Cocoa powder: 1/2 cup provides that deep chocolate flavor. - All-purpose flour: Use 2/3 cup for a good base. - Baking powder and salt: 1/2 teaspoon each helps the texture. - Melted butter: 1/2 cup adds richness. - Large eggs: 2 eggs help bind everything together. For the best taste, I recommend using high-quality ingredients. - Pumpkin puree: Canned options like Libby's work well. You can also use homemade puree. - Cream cheese: Philadelphia is a classic choice. If you need a dairy-free option, use cashew cream. - Sugar: Granulated sugar is best, but you could try coconut sugar for a twist. - Vanilla extract: Pure vanilla extract is ideal. I avoid imitation for better flavor. - Cocoa powder: Look for unsweetened varieties like Hershey's or Ghirardelli. - Flour: All-purpose flour is great, but you can use gluten-free flour for a swap. First, you need to preheat your oven to 350°F (175°C). This step is key for even baking. While your oven heats, line a mini muffin tin with paper liners. You can also grease it well if you prefer. This makes it easy to remove the bites later. In a mixing bowl, combine 1 cup of pumpkin puree, 2 ounces of softened cream cheese, and 1/2 cup of sugar. Add 1/2 teaspoon of vanilla extract, 1/2 teaspoon of ground cinnamon, and 1/4 teaspoon of ground nutmeg. Mix these ingredients until the mixture is smooth and creamy. Set this filling aside; it will add rich flavor to your bites. In a large bowl, whisk together 1/2 cup of melted butter and 3/4 cup of granulated sugar. This step helps blend the ingredients well. Add 2 large eggs and 1 teaspoon of vanilla extract. Whisk until everything is fully mixed. Next, sift in 1/2 cup of unsweetened cocoa powder, 2/3 cup of all-purpose flour, 1/2 teaspoon of baking powder, and 1/2 teaspoon of salt. Stir gently until the mixture is just combined. Be careful not to over-mix it! Now it’s time to fill the muffin tin. Spoon about 1 teaspoon of brownie batter into each muffin cup. Then, add 1 teaspoon of the pumpkin cheesecake filling on top. Finally, cover with another teaspoon of brownie batter. Make sure the cheesecake filling is partially covered. This layering creates a delightful surprise in each bite. Place the muffin tin in the preheated oven and bake for 18-20 minutes. To check if they are done, insert a toothpick into the center. It should come out mostly clean. Once baked, allow the brownie bites to cool in the tin for 10 minutes. After that, transfer them to a wire rack to cool completely. For a special touch, you can dust them with powdered sugar or add a dollop of whipped cream on top. Enjoy your delicious treats! To make pumpkin cheesecake brownie bites with the right texture, focus on the batter. Mix the brownie batter until just combined. Over-mixing can make them tough. When making the cheesecake filling, ensure the cream cheese is soft. This helps it blend smoothly with the pumpkin puree. A smooth mixture gives a creamy, rich filling. You can add more flavors to your bites. Consider mixing in chocolate chips for extra sweetness. A pinch of ginger or cloves can give a warm spice note. You might also try different extracts, like almond or maple, for a unique taste. These flavors work well with pumpkin and cream cheese. One common mistake is not preheating the oven. Always ensure your oven is hot before baking. This helps the bites rise properly. Another mistake is filling the muffin cups too much. Only fill them halfway to allow room for rising. Finally, do not rush the cooling process. Letting them cool in the tin first helps them hold their shape better. {{image_2}} You can easily make these bites gluten-free. Use a gluten-free flour blend instead of all-purpose flour. This swap keeps the texture nice without losing flavor. Many brands offer great gluten-free options. Just check for a blend that includes xanthan gum for the best results. To jazz up your brownie bites, add spices or chocolate chips. A pinch of ginger or allspice can add warmth. You could also mix in semi-sweet or dark chocolate chips. This extra touch brings out the rich flavors of pumpkin and chocolate. Serving these bites with festive toppings makes them even more special. Dust them with powdered sugar for a sweet touch. A dollop of whipped cream on top adds creaminess. For a fun twist, drizzle caramel or chocolate sauce over them. These toppings not only taste great but also make your dessert look stunning! To keep your pumpkin cheesecake brownie bites fresh, store them in an airtight container. This helps prevent them from drying out. Place parchment paper between layers to avoid sticking. If you have leftovers, they will stay soft and tasty this way. Always let the bites cool completely before storage. In the fridge, your brownie bites will last about five days. They may lose some flavor after that. If you store them at room temperature, they stay good for about three days. Avoid direct sunlight and heat. For the best taste, eat them within the first few days. Freezing these bites is simple and perfect for later cravings. First, let them cool completely. Then, wrap each bite in plastic wrap. Place the wrapped bites in a freezer bag or container. Label them with the date. They can last up to three months in the freezer. To enjoy, just thaw them in the fridge overnight. Yes, you can use fresh pumpkin. Just cook the pumpkin, then mash it until smooth. Make sure to remove any excess water. This will keep your brownie bites from getting too wet. Check them after 18 minutes. Insert a toothpick in the center of a bite. If it comes out mostly clean, they are done. The edges should look firm, and the center should be slightly soft. You can use Greek yogurt or mascarpone cheese. Both options will give a creamy texture. If you want a dairy-free choice, try silken tofu blended until smooth. They can be made to fit various diets. To make them gluten-free, use a gluten-free flour blend. For a dairy-free version, substitute the cream cheese and butter with plant-based options. Always check ingredient labels for allergens. We explored the key ingredients for your brownie bites, including quantities and brands. I shared step-by-step instructions for making them, from prepping the tin to baking. I offered tips for perfect texture and flavor, plus common mistakes to avoid. Then, we discussed fun variations and smart storage practices. In summary, these brownie bites are easy, tasty, and perfect for any occasion. Enjoy making them your own!

Pumpkin Cheesecake Brownie Bites Delicious Dessert Treat

If you love fall flavors, you need to try these Pumpkin Cheesecake Brownie Bites. They blend rich brownie with creamy

- 4 boneless, skinless chicken breasts - 2 tablespoons olive oil - 2 lemons (zested and juiced) - 4 cloves garlic, minced - 1 teaspoon dried oregano - 1 teaspoon dried thyme - 1 teaspoon paprika - Salt and pepper, to taste - 1 pound fresh green beans, trimmed - 1 cup cherry tomatoes, halved - Fresh parsley, chopped (for garnish) Gather these ingredients to make your Lemon Herb Chicken & Green Beans. The chicken gives you a tasty protein. Fresh lemons add bright flavor. Olive oil keeps everything moist. Next, the seasonings will make this dish shine. Garlic brings a savory touch. Oregano and thyme add earthy notes. Paprika gives a slight smokiness. Salt and pepper enhance the taste. Now, let's not forget the veggies! Green beans add crunch, while cherry tomatoes bring sweetness. Together, they create a colorful plate. Fresh parsley adds a bright finish. This mix makes it simple to cook a great meal. Each bite will be full of flavor. You will love how easy this is! - Preheat the oven to 400°F (200°C). - Line a large baking sheet with parchment paper. This helps with easy cleanup. - In a small bowl, whisk together these ingredients: - 2 tablespoons olive oil - Zest and juice of 2 lemons - 4 cloves garlic, minced - 1 teaspoon dried oregano - 1 teaspoon dried thyme - 1 teaspoon paprika - Salt and pepper, to taste. - Make sure everything blends well. The mix should smell bright and fresh. - Place the chicken breasts on one half of the baking sheet. - Pour half of the lemon herb mixture over the chicken. - Make sure the chicken is coated well. - In a bowl, toss the green beans and cherry tomatoes with the rest of the herb mixture. - Spread the veggies on the other half of the sheet pan. - Bake everything in the oven for 25-30 minutes. - Check that the chicken reaches an internal temperature of 165°F (74°C). The veggies should be tender but still crisp. - Once done, take the sheet pan out of the oven. - Let it cool for a couple of minutes. - Garnish the dish with fresh parsley before serving. This adds a nice touch and color. To make sure your chicken cooks just right, check its internal temperature. It should reach 165°F (74°C). You can use a meat thermometer for accuracy. Insert it into the thickest part of the chicken. If you don’t have a thermometer, look for these signs. The juices should run clear, and the meat will be firm. Avoid cutting into the chicken, as this lets the juices escape. For more flavor, try adding different seasonings. Some ideas include cumin, rosemary, or even a splash of soy sauce. These can add a nice twist to your dish. Fresh herbs can really boost taste. They give a brighter, bolder flavor than dried herbs. However, if fresh herbs aren't available, dried herbs still work well. Just use about one-third of the amount of dried herbs compared to fresh for the best results. A beautiful plate makes food more appealing. Serve the chicken on a large platter. Surround it with vibrant green beans and cherry tomatoes. This creates a colorful display. To add flavor and color, drizzle some of the herb sauce over the chicken. Use a spoon for a neat look. You can also sprinkle some fresh parsley on top for that final touch. This step makes your meal look and taste gourmet! {{image_2}} You can change the taste by adding different veggies. Seasonal vegetables work best. Try bell peppers, zucchini, or carrots. These add color and flavor. You can also roast potatoes or asparagus. They pair well with chicken. Just chop them up and toss with the herb mix. You don’t have to bake the chicken if you want a change. Grilling is a great option. It adds a smoky flavor. Just marinate the chicken as you would for baking. Cook it on medium heat until it’s done. Another quick way is cooking in a skillet. Heat a little olive oil in the pan. Add the chicken and cook for about 6-7 minutes on each side. This method saves time and keeps the chicken juicy. For a lighter dish, consider using fish or shrimp. Both cook quickly and soak up the lemon herb flavor. Season them the same way you would the chicken. If you prefer a vegetarian option, tofu or chickpeas are great choices. Marinate the tofu like the chicken. For chickpeas, toss them with the herb mix and roast until crispy. Both options are tasty and filling. To keep your Lemon Herb Chicken and green beans fresh, refrigerate them soon after serving. Place the leftovers in airtight containers. They should stay good for up to three days. Make sure to cool the food to room temperature before sealing it. For the best taste, reheat chicken and vegetables in the oven. Preheat it to 350°F (175°C) and place the food in a baking dish. Cover it with foil to keep moisture in. Heat for about 15-20 minutes, or until warm. You can also use the microwave. Heat in short bursts to avoid drying out the chicken. Stir the green beans in between to ensure even heating. Yes, you can freeze this dish! Let it cool completely, then place it in freezer-safe bags or containers. For better texture, freeze the chicken and vegetables separately. This way, you can mix and match them later. They can last for up to three months in the freezer. When ready to eat, thaw in the fridge overnight before reheating. Cooking time depends on the chicken's thickness and your oven. Typically, it takes about 25 to 30 minutes. Thicker chicken breasts may need a bit more time. Always check for doneness to ensure safety. Yes, you can prep this dish a day before. Marinate the chicken and toss the veggies in the herb mix. Store them separately in the fridge. When ready, just bake them together. This saves time and still tastes fresh. Simple sides work great with this dish. Try garlic bread, rice pilaf, or a fresh salad. These options balance the flavors and provide a complete meal. They are easy to make and add color to your plate. Chicken must reach an internal temperature of 165°F (74°C) for safety. Use a meat thermometer to check. This ensures the chicken is cooked through and safe to eat. Following this rule keeps your meal healthy and delicious. This post covered a simple recipe for Lemon Herb Chicken and Green Beans. You learned about key ingredients and step-by-step instructions for cooking. I shared tips for seasoning, presenting the dish, and variations to try. In the end, this recipe is not just easy; it's flexible and delicious. You can make it your own while enjoying great flavors. Whether you grill, bake, or choose different veggies, this dish fits any meal. Enjoy your cooking!

Lemon Herb Chicken & Green Beans Sheet-Pan Delight

Do you crave a simple, tasty meal? Look no further! My Lemon Herb Chicken & Green Beans Sheet-Pan Delight offers

To make this cozy pumpkin spice bread pudding, gather these ingredients: - 4 cups stale brioche or challah bread, cubed - 2 cups pumpkin puree - 2 cups milk (or non-dairy alternative) - 4 large eggs - 3/4 cup brown sugar - 1 tablespoon vanilla extract - 1 tablespoon pumpkin pie spice - 1/2 teaspoon ground cinnamon - 1/4 teaspoon salt - 1/2 cup chopped walnuts or pecans (optional) - Whipped cream for serving Each ingredient plays a key role in building flavor and texture. The stale bread helps soak up the custard, while the pumpkin puree adds moistness and warmth. You can switch some ingredients based on your taste: - Use gluten-free bread for a gluten-free option. - Swap brown sugar for maple syrup for a lighter flavor. - Try almond milk or oat milk instead of regular milk. - If you don’t like nuts, skip them or use chocolate chips instead. These options let you customize the recipe to fit your needs. Choosing the right bread is crucial. Look for: - Stale bread: Fresh bread won't soak in the custard well. Stale bread absorbs the liquid better. - Brioche or challah: These breads are soft and rich. They give a nice texture to your pudding. If you can’t find brioche or challah, use any sturdy bread. Just make sure it’s a bit dry. First, you need to preheat your oven to 350°F (175°C). This step is key for even baking. While the oven warms up, grab a 9x13 inch baking dish. Grease it well with butter or cooking spray. This helps the bread pudding not to stick. Now it’s time to mix the custard. In a large bowl, add 2 cups of pumpkin puree. Pour in 2 cups of milk or your favorite non-dairy milk. Crack in 4 large eggs. Next, add 3/4 cup of brown sugar, 1 tablespoon of vanilla extract, 1 tablespoon of pumpkin pie spice, 1/2 teaspoon of ground cinnamon, and 1/4 teaspoon of salt. Whisk all these ingredients together until smooth. This mixture will give your bread pudding its rich flavor. Take your cubed bread, about 4 cups of stale brioche or challah. Add it to the custard mixture. Make sure each piece is coated well. If you like nuts, fold in 1/2 cup of chopped walnuts or pecans gently. Pour the entire mixture into your greased baking dish. Press down on the bread cubes lightly. This helps them soak up the custard. Bake in your preheated oven for 30-40 minutes. You want the top to be golden and the custard to be set. To check, insert a toothpick in the center. If it comes out clean, it’s ready. Let it cool for about 10 minutes before serving. Enjoy warm with a drizzle of whipped cream on top for a cozy treat! To get the best texture, use stale bread. Stale bread soaks up the custard well. I like using brioche or challah for their soft and rich taste. Cut the bread into even cubes, about one inch. This helps them soak up the custard evenly. Let the bread sit in the custard for at least 30 minutes before baking. This ensures every bite is moist and flavorful. Serve your pumpkin spice bread pudding warm. A dollop of whipped cream on top makes it even better. You can also drizzle caramel sauce for extra sweetness. If you want a crunch, add chopped nuts on top. Consider serving it alongside vanilla ice cream for a nice contrast. This dessert is great for cozy nights or holiday gatherings. To store leftovers, cover them tightly and place them in the fridge. They will stay fresh for up to three days. When ready to enjoy, heat individual portions in the microwave. You can also reheat it in the oven at 350°F. Bake until warmed through, about 15-20 minutes. Add a splash of milk before reheating to keep it moist. {{image_2}} You can make this dish dairy-free and vegan. Use non-dairy milk like almond or coconut. Replace eggs with flax eggs or silken tofu. These swaps keep the texture creamy and rich. They also keep the flavors bold. Your guests won't know the difference! Want to boost the flavor? Add chocolate chips or dried fruits. Raisins or cranberries give a nice chew. For a nutty twist, use pecans or walnuts. Each option adds depth and makes it special. You can also stir in some maple syrup for extra sweetness. Change it up for the season! In fall, add fresh apple or pear slices. For winter, try a sprinkle of nutmeg. Top with caramel sauce for a sweet finish. You can also serve with whipped cream or vanilla ice cream. Each topping brings a new taste. Enjoy exploring different flavors! Each serving of Pumpkin Spice Bread Pudding has about 300 calories. You get 10 grams of fat and 45 grams of carbs. There are also 5 grams of protein. The fiber content is around 2 grams. This dessert packs a lovely mix of flavors and nutrition. You can make this dish healthier. Use whole wheat bread instead of brioche or challah. Swap out brown sugar for coconut sugar to reduce calories. Almond milk or oat milk can replace regular milk for a lighter option. If you prefer, leave out the nuts or use seeds instead. Each swap helps make your pudding a bit healthier. This recipe contains common allergens. It includes eggs, milk, and wheat. To make it nut-free, skip the nuts or use seeds. For a dairy-free version, use a non-dairy milk. Always check labels to avoid hidden allergens. If you have specific allergies, be careful when choosing ingredients. Yes, you can use fresh bread, but stale bread works best. Stale bread soaks up the custard better. Fresh bread may turn mushy and not hold its shape. If you use fresh, let it sit out for a few hours to dry. You can prepare the bread pudding the night before. Just make it as usual and pour the mixture into your baking dish. Cover it with plastic wrap and refrigerate. When you're ready, bake it straight from the fridge. You may need to add a few extra minutes to the baking time. Whipped cream is a classic choice. You can also serve it with vanilla ice cream for extra sweetness. A drizzle of caramel sauce adds a nice touch. For a fun twist, try it with a scoop of pumpkin ice cream. Fresh berries give a nice contrast and add color to your dish. You now have all the details for making delicious Pumpkin Spice Bread Pudding. We covered the key ingredients, steps, and helpful tips tailored for great results. Don't forget the variations you can try, like dairy-free options or fun toppings. Always aim for the perfect texture and consider healthy swaps when you can. This dish is not just for fall; it can bring joy any season. Enjoy creating and sharing this warm treat with loved ones!

Pumpkin Spice Bread Pudding Cozy Dessert Delight

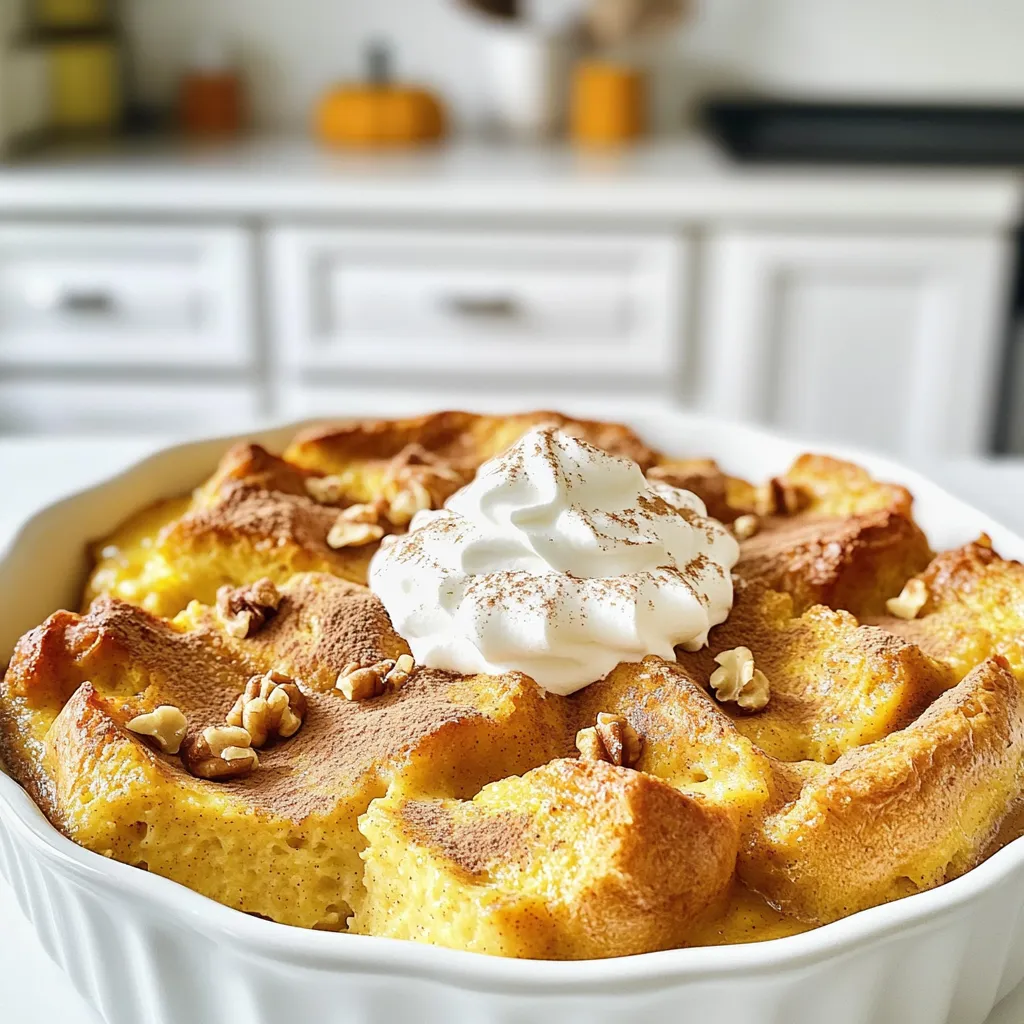
Warm, cozy, and bursting with fall flavors, Pumpkin Spice Bread Pudding is the dessert you need. Imagine soft bread soaked

- 1 can of refrigerated cinnamon roll dough - 2 medium sized apples, peeled, cored, and diced - 1/2 cup caramel sauce (store-bought or homemade) - 1 teaspoon ground cinnamon - 1 tablespoon sugar - 1/4 cup chopped nuts (walnuts or pecans) - Optional: whipped cream for serving To make Caramel Apple Cinnamon Roll Cups, you need some simple ingredients. First, grab a can of refrigerated cinnamon roll dough. This dough forms the base of our cups. Next, pick two medium apples. Make sure to peel, core, and dice them. You want sweet apples for the best flavor. Now, let's talk about the caramel. Use 1/2 cup of caramel sauce. You can buy it or make your own. Either way, it will add a rich taste. You will also need 1 teaspoon of ground cinnamon. This spice will enhance the apple flavor. Next, add 1 tablespoon of sugar to sweeten the apples. You can adjust this based on your taste. Finally, use 1/4 cup of chopped nuts, like walnuts or pecans, for some crunch. If you want to make it extra special, consider adding whipped cream on top when serving. This will add a creamy layer and complete your dessert. With these ingredients, you will create a warm, sweet treat that everyone will love. Now, let’s get cooking! - Preheat the oven to 350°F (175°C). - Lightly grease a muffin tin with cooking spray. - Combine diced apples with ground cinnamon and sugar. - Stir well until the apples are evenly coated. - Separate and flatten cinnamon rolls. - Press and mold rolls into muffin cups. - Spoon apple mixture into cups. - Drizzle caramel sauce and add nuts. - Bake until golden brown (15-18 minutes). - Allow to cool before removing. - Drizzle with extra caramel and add whipped cream if desired. To make your caramel apple cinnamon roll cups great, flatten the dough evenly. Take each roll and press it out with your fingers. This step helps the dough fit nicely in the muffin tin. Next, fill each cup with apple mix. Make sure the apple filling is even in each cup. This way, every bite has the same tasty flavor. Want to kick up the flavor? Add a pinch of nutmeg or cloves to the apple mix. These spices add warmth and depth. You can also try different apples. Crisp apples like Granny Smith give a nice tartness. Sweet apples like Fuji or Honeycrisp add a rich taste. Serving your cups is fun! Pair them with a scoop of vanilla ice cream or a dollop of yogurt. The cold creaminess balances the warm, sweet cups. For garnishing, drizzle extra caramel sauce on top. You can also sprinkle some chopped nuts for crunch. These small touches make your treats look and taste even better! {{image_2}} You can switch apples for other fruits. Pears work great in this recipe. They add a sweet, juicy bite. Berries also make a fun change. Try blueberries or raspberries for a burst of flavor. You can even add raisins or dried fruits. They add a chewy texture that contrasts well with the soft cinnamon rolls. If you need gluten-free options, use gluten-free cinnamon roll dough. Many brands offer this now. For a vegan twist, look for plant-based caramel sauce. You can make your own with coconut milk and brown sugar. These swaps keep the treat tasty and suitable for everyone. You can serve these cups in fun ways. Try making a dessert platter. Place the cups next to ice cream or yogurt. This adds variety and makes it festive. For a more personal touch, serve them in individual dessert cups. This way, each person gets their own sweet treat. To keep your Caramel Apple Cinnamon Roll Cups fresh, you have two options. First, if you plan to eat them soon, you can refrigerate them uncovered. This helps prevent sogginess. If you want to store them for longer, place them in airtight containers. This way, they stay moist and tasty. When it's time to enjoy your leftover cups, the best method is using an oven. Preheat it to 350°F (175°C) and warm the cups for about 10 minutes. This method helps keep them crisp. If you’re in a hurry, you can use a microwave. Heat each cup for about 20-30 seconds. Serve them warm, as they taste best this way. You can freeze the cinnamon roll cups for later. First, let them cool completely. Then, wrap each cup tightly in plastic wrap. Place the wrapped cups in a freezer-safe bag or container. To thaw, move them to the fridge overnight. When ready to eat, reheat them in the oven or microwave. Enjoy a delicious treat anytime! Caramel Apple Cinnamon Roll Cups taste best fresh. However, they can last for up to three days in the fridge. Store them in an airtight container. This keeps them soft and moist. If you leave them out, they may dry out quickly. I suggest enjoying them warm for the best taste. Yes, you can use homemade cinnamon roll dough. It adds a special touch to your treats. Just make sure your dough is easy to roll and shape. Homemade dough can taste fresher than store-bought. Just follow the same steps for shaping and baking. You will get a great result! I recommend using sweet apples like Honeycrisp or Fuji. These apples give your cups a nice flavor. They also hold their shape when baked. Granny Smith is another option if you like a tart flavor. Mixing sweet and tart apples can add depth to your dish. Choose what you enjoy! These Caramel Apple Cinnamon Roll Cups are easy to make and fun to eat. We covered the ingredients, from the dough to the apples and nuts. You learned how to bake and serve them with tasty twists. Remember to try different fruits and spices for extra flavor. Store any leftovers properly so you can enjoy them later. These treats are perfect for gatherings or a sweet snack. I hope you feel inspired to make your own delicious cups today!

Caramel Apple Cinnamon Roll Cups Sweet and Simple Treat

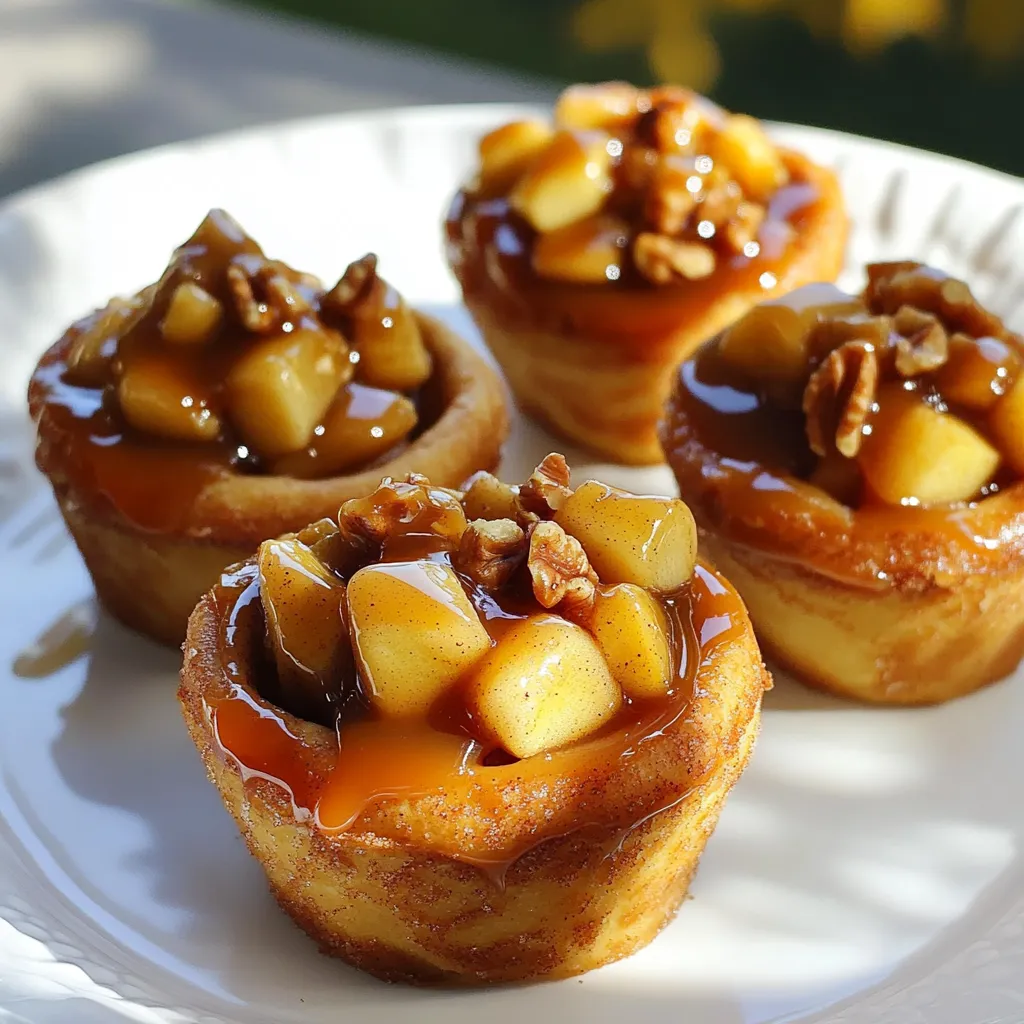
Looking for a sweet and simple treat? These Caramel Apple Cinnamon Roll Cups are your answer! With just a few

- 2 cups dry white beans (cannellini or great northern), rinsed and soaked overnight - 4 cups vegetable broth - 1 medium onion, finely chopped - 3 cloves garlic, minced The main ingredients create a hearty base for creamy Tuscan white beans. I love using dry white beans because they soak up flavors well. Rinsing and soaking them overnight ensures they cook evenly. Vegetable broth adds depth and richness. The onion and garlic give a nice aroma and savory taste. - 1 cup sun-dried tomatoes, chopped - 1 cup fresh spinach, roughly chopped - 1 teaspoon dried oregano - 1 teaspoon dried basil - 1/2 teaspoon red pepper flakes (optional, for heat) Sun-dried tomatoes bring a sweet and tangy taste. They add color and texture to the dish. Fresh spinach not only boosts nutrition but also adds a beautiful green hue. Dried herbs like oregano and basil enhance the Italian flavor profile. If you like heat, add red pepper flakes for a kick. - 1 cup coconut cream (or heavy cream for a non-vegan option) - Salt and pepper to taste - Fresh parsley for garnish The creamy element makes this dish truly delightful. Coconut cream gives a rich texture and a hint of sweetness. For non-vegans, heavy cream works just as well. Salt and pepper are essential for balancing the flavors. Lastly, fresh parsley adds a pop of color and freshness when serving. First, rinse the dry white beans. Soak them overnight in water. Soaking softens the beans and helps them cook better. After soaking, drain the beans and add them to the slow cooker. This is where the magic begins! Next, layer your veggies and herbs. Start with the chopped onion and minced garlic. These add great flavor. Then, add the sun-dried tomatoes for a rich taste. Sprinkle in the dried oregano, basil, and red pepper flakes if you like heat. Stir the mixture well. This helps blend all the flavors together. Now it’s time to cook! Set your slow cooker on low for 6-8 hours or high for 3-4 hours. The beans should become tender and creamy. Check them around the end of the cooking time. If they are soft, it’s time to add the spinach and coconut cream. Stir until the spinach wilts and the dish turns creamy. Season with salt and pepper to your taste. Enjoy the delightful aroma that fills your kitchen! To achieve creaminess in your creamy Tuscan white beans, use coconut cream. It adds smoothness and richness. You can also use heavy cream if you prefer. Stir it in after cooking. This makes the dish velvety and lush. For bean cooking, always soak your beans overnight. This softens them and helps them cook evenly. Use dry white beans like cannellini or great northern. They provide the best texture. Adjusting seasonings can enhance your dish. Start with salt and pepper, then taste. You can always add more. If you want more flavor, add fresh herbs. For heat, add red pepper flakes. Start with a little and increase as needed. This adds a nice kick without overpowering the dish. For finishing touches, fresh herbs work best. Parsley adds a bright flavor and color. You can also use basil for an Italian twist. When serving, pair these beans with crusty bread. They also work well over rice or pasta. This way, you can enjoy every creamy bite! {{image_2}} To make creamy Tuscan white beans vegan, swap heavy cream for coconut cream. Coconut cream gives a rich, creamy texture. It adds a subtle sweetness, making the dish shine. For seasonings, you can use smoked paprika instead of red pepper flakes for a unique twist. You can easily boost the nutrients in this dish. Adding more vegetables like carrots, bell peppers, or zucchini works well. These veggies bring color and flavor. For protein options, consider adding lentils or chickpeas. They blend beautifully and round out the meal. Feel free to explore Italian-style add-ins. Try adding olives or artichokes for a briny kick. If you want a Mediterranean twist, toss in feta cheese and fresh herbs like dill. These additions create a lovely fusion of flavors. To store leftover creamy Tuscan white beans, place them in an airtight container. This helps keep them fresh. Make sure the beans cool to room temperature first. The beans will last in the fridge for about 4 to 5 days. Always check for signs of spoilage before using leftovers. If they smell off or look strange, it’s best to toss them. To freeze creamy Tuscan white beans, use a freezer-safe container. Leave some space at the top for expansion. Freeze the beans for up to 3 months. When you’re ready to use them, thaw in the fridge overnight. You can also use the microwave for quick thawing. When you reheat, add a splash of broth or water. This helps keep the beans creamy and tasty. You can repurpose creamy Tuscan white beans in many fun ways. Try them on toast for a quick lunch. They also make a great filling for wraps. You can mix them into pasta for a hearty dish. For a simple pairing, serve them with roasted vegetables or a fresh salad. The beans add protein and flavor to any meal! Yes, you can use canned beans. They save time and work well in this dish. Just rinse and drain them before adding. Use about three cups of canned beans. Cook on low for just two to three hours. This way, the beans stay soft but do not turn mushy. If you prefer not to use coconut cream, heavy cream is a great choice. You can also try cream cheese or a cashew cream for a creamy texture. Adjust the amount to your taste. Each option gives a slightly different flavor, so choose what you like best. Yes, this recipe is gluten-free. Just check the labels on your vegetable broth to be sure. Some broth brands may add gluten or gluten-containing ingredients. Overall, the beans and veggies are safe for a gluten-free diet. Enjoy without worry! In this blog post, I shared a simple and tasty recipe for creamy Tuscan white beans. We covered the main ingredients like beans, broth, and flavor enhancers. You learned how to prepare the beans, mix in the flavors, and cook them perfectly. I included tips for the best texture, seasoning adjustments, and fun variations. For final thoughts, this dish is easy to make and delicious. Enjoy experimenting with your own twists!

Creamy Tuscan White Beans Slow Cooker Delight

Discover the magic of Creamy Tuscan White Beans, made effortlessly in your slow cooker! This dish combines rich flavors and

- 200g ramen noodles - 300g shrimp, peeled and deveined - 4 cloves garlic, minced - 2 tablespoons sesame oil - 1 tablespoon sriracha (adjust to taste) - 2 cups vegetable or chicken broth - 1 tablespoon soy sauce - 1 teaspoon ginger, grated In this dish, each ingredient plays a key role. The ramen noodles are the base, giving a nice chewy texture. Shrimp adds protein and a sweet flavor. Garlic and ginger bring warmth and zest, while sesame oil offers a rich, nutty taste. Sriracha adds heat, making the dish exciting. Broth and soy sauce create a savory depth, tying all the flavors together. - Green onion - Fresh cilantro - Lime wedges Garnishes can elevate your ramen. Green onion adds crunch and color. Fresh cilantro gives a bright, herbal note. Lime wedges bring a fresh tang that enhances the entire dish. Feel free to mix and match based on what you like! First, boil a pot of water. Use enough water to cover the noodles. Once the water boils, add 200g of ramen noodles. Cook them according to the package instructions, usually about 3-4 minutes. When they are done, drain the noodles and set them aside. This keeps them from sticking together. Next, grab a large skillet. Heat 2 tablespoons of sesame oil over medium heat. Once hot, add 4 cloves of minced garlic and 1 teaspoon of grated ginger. Sauté these for about 30 seconds. You want to smell the nice aroma but not burn them. Now, it’s time to add the shrimp. Place 300g of peeled and deveined shrimp in the skillet. Cook for about 2-3 minutes. The shrimp will turn pink and opaque when done. Stir in 1 tablespoon of sriracha for a spicy kick. Pour in 2 cups of vegetable or chicken broth and add 1 tablespoon of soy sauce. Stir well and bring the mixture to a gentle simmer. Once the broth is bubbling, add the cooked ramen noodles to the skillet. Gently toss everything together to combine. Heat through for about 1-2 minutes. The noodles should soak up the spicy flavors. Ladle the spicy garlic shrimp ramen into bowls. Garnish with sliced green onion and fresh cilantro if you like. Serve with lime wedges on the side to add a zesty finish. Enjoy your quick and flavorful dish! To make your spicy garlic shrimp ramen shine, adjust the sriracha. Start with one tablespoon. You can add more later if you like it spicier. Fresh ingredients matter too. Use fresh garlic and ginger for the best flavor. They make a big difference in taste. Preparation is key for a quick meal. Chop your garlic and ginger before you start cooking. This saves time. If you want to make it even faster, use pre-cooked shrimp. They only need a few minutes to warm up, cutting your cooking time. Think about what to serve with your ramen. A simple side salad or steamed veggies works well. For presentation, use a nice bowl. Garnish with green onions and cilantro. A lime wedge on the side adds a fresh touch. It looks great and tastes even better! {{image_2}} You can switch shrimp for chicken or tofu. If you use chicken, cut it into small pieces. Cook it longer until it’s no longer pink. For tofu, use firm tofu. Just cube it and sauté until golden. This keeps your ramen tasty and fun. Add greens like bok choy or spinach for more nutrition. Toss in bok choy in the last minutes of cooking. Spinach wilts quickly, so add it right before serving. You can also add carrots, bell peppers, or snap peas. These veggies add color and crunch to your dish. If you need gluten-free, use gluten-free ramen noodles. They cook just like regular noodles. Check labels for gluten-free sauces. Tamari is a great soy sauce alternative. It has a similar taste and is safely gluten-free. You can still enjoy this ramen without worrying about gluten. To keep your spicy garlic shrimp ramen fresh, follow these best practices for refrigeration: - Let the dish cool to room temperature. - Place it in an airtight container. - Store it in the fridge for up to 3 days. For reheating, use a microwave or a skillet. Heat until hot, stirring gently. Add a splash of broth if it seems dry. This will help bring back some moisture. Freezing ramen can be tricky, but you can do it successfully. Here’s how: - Allow the dish to cool completely. - Separate the shrimp and noodles from the broth. - Store them in airtight containers or freezer bags. This helps avoid mushy noodles when you thaw. For thawing, place in the fridge overnight. Reheat in a pot over low heat. Add fresh broth to bring back the flavor and texture. Spicy Garlic Shrimp Ramen lasts about 3 to 4 days in the fridge. Store it in an airtight container. To keep it fresh, let it cool before sealing. Yes, you can use different noodles. Udon, soba, or even rice noodles work well. Each noodle type brings its own texture. Make sure to follow cooking times for your chosen noodles. If you don't have sesame oil, use olive oil or canola oil. These oils will still give good flavor. You can add a sprinkle of sesame seeds for a hint of that nutty taste. Yes, this recipe is great for meal prep. You can make it ahead and store it in individual containers. Just add garnishes fresh when you're ready to eat. To make it less spicy, reduce or skip the sriracha. You can also add more broth to dilute the heat. Adding a bit of sugar can help balance flavors too. This blog post shows you how to make Spicy Garlic Shrimp Ramen. We went over key ingredients, cooking steps, and tips for flavor. You can use different proteins and veggies, too. Remember to store leftovers properly or freeze them for later. With these tips, you can create quick, tasty meals at home. Enjoy making this dish and feel free to experiment with your own flavors!

Spicy Garlic Shrimp Ramen Quick and Flavorful Dish

Craving a quick meal that packs a punch? My Spicy Garlic Shrimp Ramen is just what you need! In just

Older posts
Newer posts
← Previous Page1 … Page6 Page7 Page8 … Page85 Next →

dsad

© 2026 greenmealmap • Built with GeneratePress

Our Policies

  • Copyright Policy
  • Cookie Policy
  • GDPR Policy
  • Privacy Policy
  • Disclaimer
  • Terms Of Use

More Information

  • Home
  • About
  • Contact
  • Appetizers
  • Dessert
  • Dinner
  • Drinks
©2026, greenmealmap About Back To Top