Skip to content
DisclaimerTerms Of UseGDPR PolicyCookie Policy

greenmealmap

  • Home
  • Drinks
  • Appetizers
  • Dinner
  • Dessert
  • About
  • Contact
  • Privacy Policy
DisclaimerTerms Of UseGDPR PolicyCookie Policy

NO-ING-IMG

- 2 ripe avocados - 1 can (15 oz) chickpeas, drained and rinsed - 1 tablespoon tahini - 1 tablespoon lemon juice - 1 garlic clove, minced - 4 slices of whole grain bread - Salt and pepper to taste - ½ teaspoon smoked paprika - Fresh herbs (like cilantro or parsley) for garnish - Optional toppings: red pepper flakes, cherry tomatoes, or radish slices To make Smashed Avocado Chickpea Toast, you start with fresh and vibrant ingredients. Ripe avocados bring creaminess and healthy fats. Chickpeas add protein and fiber, making this meal filling. The tahini gives it a nutty flavor, while lemon juice brightens everything up. Garlic adds a nice kick that rounds out the taste. Whole grain bread gives the toast a hearty base. You can choose any bread you like, but whole grain is best for extra nutrients. For seasoning, salt and pepper are must-haves. The smoked paprika adds a hint of smokiness that pairs well with the avocado. Fresh herbs like cilantro or parsley brighten the dish and make it look nice. You can also add optional toppings for fun. Red pepper flakes bring heat. Cherry tomatoes add sweetness and color. Radish slices give a crunchy bite. Each ingredient plays a role in making this toast not just healthy, but also a joy to eat. For the full recipe, visit the section above. - In a mixing bowl, combine the drained chickpeas with tahini, lemon juice, garlic, and smoked paprika. - Use a fork or potato masher to smash the mixture. Aim for a mostly smooth yet textured consistency. This adds depth to the flavor and makes the chickpeas more enjoyable. - Next, scoop out the flesh of the ripe avocados into another bowl. - Mash the avocados with a fork until creamy. Season with salt and pepper to taste. Adjust the seasoning to your liking for the best flavor. - Toast the slices of whole grain bread until they are golden and crispy. This step is crucial for adding crunch to your meal. - Spread a generous layer of smashed avocado over each slice of toast. - Top each avocado toast with a layer of the smashed chickpea mixture. This adds protein and flavor. - Feel free to garnish with fresh herbs and any extra toppings you desire. Enjoy your meal! For the full recipe, check the earlier section. To get the right texture for your smashed avocado chickpea toast, it’s all about balance. You want the chickpeas to be mostly smooth but still have some bite. Use a fork for a chunkier mash or a potato masher for a smoother finish. For the avocados, make sure they are ripe. A ripe avocado mashes easily and blends well with the chickpeas. Aim for a creamy yet slightly chunky mix. This will add nice depth to your toast. Spices and herbs can really boost the flavor of your dish. Consider adding cumin, chili powder, or fresh herbs like dill or basil. These will make your toast pop with flavor. Pair your toast with a refreshing drink. A cool lemonade or herbal tea complements the creamy texture of the avocado and chickpeas. This makes for a well-rounded meal. Garnishing your dish makes it look appealing. Sprinkle fresh herbs on top for color. You can also add red pepper flakes for a pop of color and heat. For gatherings, use different platters. A large wooden board allows everyone to dig in. Arrange the toast with colorful toppings like sliced radishes or cherry tomatoes for a beautiful spread. For the complete recipe, check out the [Full Recipe]. {{image_2}} You can make this recipe gluten-free by using alternative bread. Look for gluten-free options like rice bread or almond flour bread. These still taste great and keep the meal healthy. For vegan-friendly substitutions, you can swap tahini with sunflower seed butter or a nut-free spread. This keeps your dish creamy and rich while meeting various dietary needs. To change the taste, think about adding spices. Cumin brings a warm flavor, while chili powder adds heat. You can also try mixing in seasonal vegetables like roasted bell peppers or sautéed spinach. Other legumes, like black beans or lentils, can add protein and texture. They make the dish even more filling. This smashed avocado chickpea toast works well with many sides. Pair it with a fresh salad or some sliced fruit for a balanced meal. You can enjoy this dish for breakfast, lunch, or as a snack. It’s quick to make and perfect any time of day. Check the Full Recipe for more details! To store leftover smashed chickpea and avocado mixtures, use an airtight container. This keeps air out and helps prevent browning. If you have avocado left, squeeze some lemon juice on it. This helps slow down oxidation. For the chickpea mix, store it separately to keep the flavors fresh. To keep the bread from getting soggy, store it in a bread box or a paper bag. Avoid plastic bags, as they trap moisture. If you want to eat it later, toast the slices right before serving. This ensures a crisp texture. You can freeze both the chickpea mix and the avocado separately. For the chickpea mix, place it in a freezer-safe bag. Squeeze out extra air and seal it tightly. For avocados, mash them first and add a little lemon juice to keep the color. Then, put the mash in a bag and remove the air. When you want to use the frozen mixes, thaw them in the fridge overnight. For reheating, place the chickpeas in a pan over low heat. Stir until warm, but avoid overcooking. If the avocado mash is thick, add a splash of lemon juice to help smooth it out. Enjoy your Smashed Avocado Chickpea Toast fresh and delicious! For the full recipe, check out the earlier section. To pick ripe avocados, look for a few signs: - Firmness: Gently squeeze the avocado. It should feel slightly soft but not mushy. - Color: Dark green or black skin indicates ripeness. - Stem Check: If you see a small stem, remove it. A green stem means it's ripe. A brown stem means it's overripe. Yes, you can meal prep this recipe! Here are some tips: - Chickpea Mixture: Make it in advance. Store it in an airtight container. - Avocado: Mash it fresh. To keep it green, add lemon juice before storing. - Bread: Toast slices just before serving. This keeps the bread crispy. If you have allergies or dietary needs, try these substitutes: - Sunflower Seed Butter: Great for nut allergies and has a similar taste. - Greek Yogurt: Adds creaminess without nuts. - Peanut Butter: Use smooth peanut butter for a unique flavor twist. Add some heat with these ideas: - Red Pepper Flakes: Sprinkle them on top for a quick kick. - Sriracha Sauce: Drizzle it over the avocado for spicy flavor. - Infused Oils: Use chili-infused oil for a more intense heat. For the complete Smashed Avocado Chickpea Toast recipe, check out the Full Recipe above. This blog covered how to make delicious smashed avocado chickpea toast. You learned about key ingredients and step-by-step instructions. I shared tips for texture, flavor, and presentation to make your dish stand out. You can customize the recipe to meet dietary needs and enjoy leftovers later. With these insights, you can create a yummy and fun meal. Enjoy sharing and tasting this healthy toast!

Smashed Avocado Chickpea Toast Healthy and Tasty Meal

Ready to elevate your meals with a healthy twist? Smashed Avocado Chickpea Toast is not only delicious but also packed

- 4 salmon fillets - 3 tablespoons olive oil - 4 cloves garlic, minced - Juice and zest of 2 lemons - 1 teaspoon dried oregano - 1 teaspoon paprika - Salt and pepper to taste - Fresh parsley, chopped, for garnish When I cook Baked Lemon Garlic Salmon, I love to use fresh ingredients. The salmon fillets provide a rich taste. The olive oil adds a smooth texture, while garlic gives it a nice kick. Lemons bring a bright flavor, making the dish feel fresh and lively. The oregano and paprika add layers of flavor. Salt and pepper enhance everything, making it all pop. Fresh parsley not only looks great but adds a burst of color. - Asparagus or quinoa for serving - Lemon wedges for garnish If you want to add more to your meal, I suggest serving it with asparagus or quinoa. They both complement the salmon well. Lemon wedges make a tasty garnish and add even more zing to every bite. For the full recipe, check out the details on how to create this easy and flavorful dish. - Preheat the oven to 400°F (200°C). - Line a baking sheet with parchment paper. Getting the oven ready is key for a perfect bake. The parchment paper helps with cleanup and keeps the fish from sticking. - Combine olive oil, garlic, lemon juice, lemon zest, oregano, paprika, salt, and pepper. Mixing these ingredients creates a flavorful marinade. The lemon juice brightens the dish while garlic adds depth. - Place salmon fillets skin-side down on the baking sheet. - Brush with the marinade and allow to marinate for 15–20 minutes. Make sure the salmon is skin-side down. This keeps the fish moist as it cooks. Letting it marinate allows the flavors to soak in nicely. - Bake in the oven for 12–15 minutes. - Check for doneness and flakiness. Baking time depends on the thickness of the fillets. Check for flakiness by gently using a fork. Once it flakes easily, it's ready to eat. Enjoy the fresh flavors from your Baked Lemon Garlic Salmon! For the complete recipe, see the Full Recipe section. To ensure your salmon cooks just right, look for flakiness. Flaky salmon means it is cooked through. You can use a fork to check this. The internal temperature should reach 145°F (63°C). This is safe and tasty. Marinating is key for flavor. I recommend marinating for at least 15–20 minutes. This lets the garlic and lemon soak in well. If you have more time, you can marinate for up to an hour. Just remember to keep it in the fridge. Grilling salmon adds a smoky flavor that many love. You can grill it on a gas or charcoal grill. Just make sure to oil the grill grate to prevent sticking. Grill for about 5–6 minutes per side. Pan-searing is another great option. It gives the salmon a crispy outside. Heat oil in a pan over medium-high heat. Place the salmon skin-side down and sear for about 4–5 minutes. Flip and cook for another 3–4 minutes. You can add more herbs and spices for a custom taste. Try dill or thyme for a fresh twist. A sprinkle of red pepper flakes can also add some heat. For a one-pan meal, add vegetables. Broccoli, asparagus, or zucchini work well. Just arrange them around the salmon on the baking sheet. They will roast nicely while the salmon cooks. For the complete recipe, check the Full Recipe section for all steps and details. {{image_2}} You can easily change the taste of baked lemon garlic salmon. For a Thai twist, try adding coconut milk and chili. This mix gives it a sweet and spicy kick. Simply pour coconut milk over the salmon before baking. Add sliced chili for heat and garnish with cilantro for a fresh touch. For a Mediterranean flair, use olives and sun-dried tomatoes. This combo adds a salty and tangy flavor. Just chop the olives and tomatoes, then sprinkle them on top of the salmon before baking. The extra flavors brighten up each bite. If you're looking for low-carb options, serve the salmon with cauliflower rice. It’s a great substitute for regular rice. Simply steam or sauté the cauliflower until soft. This pairing keeps your meal light and healthy. For gluten-free tips, ensure your marinade ingredients are gluten-free. Most olive oils and spices are safe. Serve the salmon with fresh veggies or gluten-free grains like quinoa. This way, everyone can enjoy the dish without worry. Pair your salmon with sides like steamed vegetables or rice. Broccoli, asparagus, or green beans work well. They add color and nutrition to your plate. To enhance the dish, create a lemon garlic sauce for drizzling. Mix leftover marinade with a bit of water and simmer it. This sauce adds moisture and an extra burst of flavor. For the full recipe, check the link provided. Enjoy your culinary journey! To keep your baked salmon fresh, store it in an airtight container. Make sure to cool it down first. You can place it in the fridge for up to three days. If you want to keep it longer, freezing is a good option. When reheating salmon, do it gently. I suggest using the oven or microwave. For the oven, set it to 300°F (150°C) and warm the salmon for about 10 minutes. In the microwave, cover the salmon with a damp paper towel. Heat for 30 seconds at a time until warm. This helps keep it moist and tasty. To freeze baked salmon, wrap each piece tightly in plastic wrap and then foil. This prevents freezer burn. You can freeze it for up to three months. When you’re ready to eat, thaw it in the fridge overnight. This way, it will retain its flavor and texture. For more detailed steps, check the Full Recipe for Baked Lemon Garlic Salmon. Bake salmon at 400°F for 12 to 15 minutes. This time works well for fillets that are about 1 inch thick. For thicker pieces, add a few more minutes. Check the salmon for flakiness. The fish should easily separate with a fork when done. Yes, you can marinate salmon overnight. Longer marination boosts the flavor. It allows the garlic and lemon to seep into the fish. However, be careful not to marinate too long. The acid in the lemon can change the texture of the fish, making it mushy. Serve your salmon with a range of sides. Steamed asparagus or quinoa pairs nicely. A fresh salad adds a crunchy contrast. For a heartier dish, try roasted potatoes. Lemon wedges enhance the citrus flavor of the salmon. Salmon is very healthy. It is rich in omega-3 fatty acids, which support heart health. Salmon also provides high-quality protein and essential nutrients. Eating salmon regularly can boost brain health and lower inflammation. For the complete Baked Lemon Garlic Salmon recipe details, check the [Full Recipe]. This blog post covered a simple and tasty recipe for baked lemon garlic salmon. We discussed the key ingredients and step-by-step instructions for a perfect meal. I shared tips for cooking, variations, and how to store leftovers. Salmon is not only delicious but also packed with nutrients. Remember, you can enjoy this dish in many ways. Whether you choose to grill or try different flavors, the options are endless. Now, it’s time to get cooking and savor every bite!

Baked Lemon Garlic Salmon Easy and Flavorful Dish

Looking for a simple yet delicious dish that impresses every time? Baked Lemon Garlic Salmon is the answer! This easy

- 4 large eggs, hard-boiled and chopped - 3 tablespoons mayonnaise - 1 tablespoon Greek yogurt - 1 teaspoon Dijon mustard - 1 tablespoon fresh chives, chopped - 1 tablespoon fresh dill, chopped - Salt and pepper to taste - 1 head of romaine lettuce, leaves separated - 1/4 cup cucumber, finely diced - Optional: Cherry tomatoes, sliced for garnish Egg salad lettuce wraps are not only tasty but also healthy. The main ingredients come together to create a balance of flavors. The hard-boiled eggs provide protein, while the mayonnaise and Greek yogurt add creaminess. Fresh herbs like chives and dill give a vibrant taste. I always use romaine lettuce for the wraps. Its sturdy leaves hold the filling well. Cucumber adds a nice crunch, making every bite refreshing. You can also top the wraps with cherry tomatoes for extra color and flavor. For the full recipe, check out the Egg-cellent Egg Salad Lettuce Wraps section. You’ll find all the steps to make this easy meal. The fresh ingredients in this recipe make it perfect for a light lunch or snack. To hard-boil eggs perfectly, place them in a pot. Cover them with water and bring it to a boil. Once boiling, reduce the heat to low. Simmer the eggs for 9-12 minutes. After cooking, remove the pot from heat. Quickly transfer the eggs to an ice bath for 5 minutes. This cools them down fast. Once cooled, peel the eggs and chop them into small pieces. In a mixing bowl, combine the chopped eggs with mayonnaise, Greek yogurt, and Dijon mustard. Add in fresh chives and dill for great flavor. Stir the mixture until all the ingredients blend well. Taste the egg salad and adjust the flavors. You can add more salt, pepper, or even more yogurt for creaminess. Start by washing the romaine lettuce leaves. Dry them thoroughly so they stay crisp. Choose sturdy leaves to hold the filling well. Spoon the egg salad mixture into the center of each lettuce leaf. Make sure to leave space on the edges for folding. This helps keep the filling inside. Top the wraps with diced cucumbers for a nice crunch. You can also add sliced cherry tomatoes for a splash of color. Enjoy your fresh and healthy egg salad lettuce wraps right away or chill them for a bit before serving. For the full recipe, check out the details above. To create a creamy egg salad, I suggest a good ratio. Use three tablespoons of mayonnaise for every four eggs. Adding one tablespoon of Greek yogurt makes it light and tangy. You can also mix in one teaspoon of Dijon mustard for a zesty kick. For extra flavor, try adding different herbs and spices. Fresh chives and dill work well, but consider parsley or tarragon too. A dash of garlic powder or smoked paprika adds depth to the taste. Egg salad wraps shine when paired with fresh ingredients. Slice cucumbers into tiny pieces for a crisp bite. Cherry tomatoes not only taste great but also add color. You can also serve them with a side of carrot sticks or radishes for crunch. When plating your dish, arrange the wraps neatly. Place them on a colorful plate to make the meal pop. Garnish with extra herbs for freshness. This will make your dish look as good as it tastes. For the full recipe on how to make these wraps, check out the earlier sections. {{image_2}} You can make your egg salad even better with fun add-ins. Try adding protein like diced chicken or tuna. You can also mix in some beans for extra fiber. For veggies, think about including bell peppers or shredded carrots. They add crunch and color. Different dressings can change the flavor too. Try using ranch dressing instead of mayonnaise for a zesty twist. A splash of hot sauce can give it a kick. You can also add spices like paprika or celery salt for more taste. Lettuce isn't the only way to wrap your egg salad. You can use large collard greens or even Swiss chard. Both provide a nice, sturdy base. Want something different? Try using a whole grain tortilla. It adds fiber and taste. You can also serve egg salad in a bowl with veggies around for dipping. This way, it becomes a fun snack for everyone. For the full recipe, check out the Egg-cellent Egg Salad Lettuce Wraps. To keep your egg salad fresh, place it in an airtight container. This helps prevent it from drying out. You can store it in the fridge for up to three days. If you have leftovers in lettuce wraps, try to eat them within a day. The lettuce can get soggy over time. If you notice any changes in smell or color, it’s best to toss it out. It’s best to eat egg salad cold, but if you want to warm it up, here’s how. Place the egg salad in a microwave-safe bowl. Heat it in short bursts of 10-15 seconds, stirring in between. Check the temperature to avoid overheating. Always make sure to reheat egg dishes to at least 165°F for safety. This helps kill any harmful bacteria. How to make egg salad healthier? To make egg salad healthier, use less mayonnaise. Swap some mayonnaise for Greek yogurt. Add more vegetables like diced cucumbers or bell peppers. These changes boost nutrition without losing flavor. Can I use different herbs in the recipe? Yes, you can use different herbs! Try parsley, cilantro, or even basil. Each herb adds a unique taste. Experiment to find your favorite mix. How long can egg salad be kept in the refrigerator? Egg salad stays fresh in the fridge for up to three days. Be sure to store it in an airtight container. This keeps it tasty and safe to eat. Is this recipe gluten-free? Yes, this recipe is gluten-free! Using lettuce as a wrap means no gluten. Just check all your ingredients, like mayonnaise, to ensure they are gluten-free. Can I meal prep egg salad wraps in advance? You can meal prep egg salad wraps! Prepare the egg salad and store it separately from the lettuce. Assemble them just before eating to keep the lettuce crisp. For the full recipe, check the earlier section. This blog post covered making egg salad lettuce wraps from scratch. You learned about ingredients, step-by-step directions, and useful tips. I shared ways to customize your dish and store leftovers too. Egg salad wraps are easy, tasty, and offer many variations. Try new flavors to keep things fresh. Enjoy your cooking while impressing your family and friends with this healthy meal.

Easy Egg Salad Lettuce Wraps Healthy Meal Option

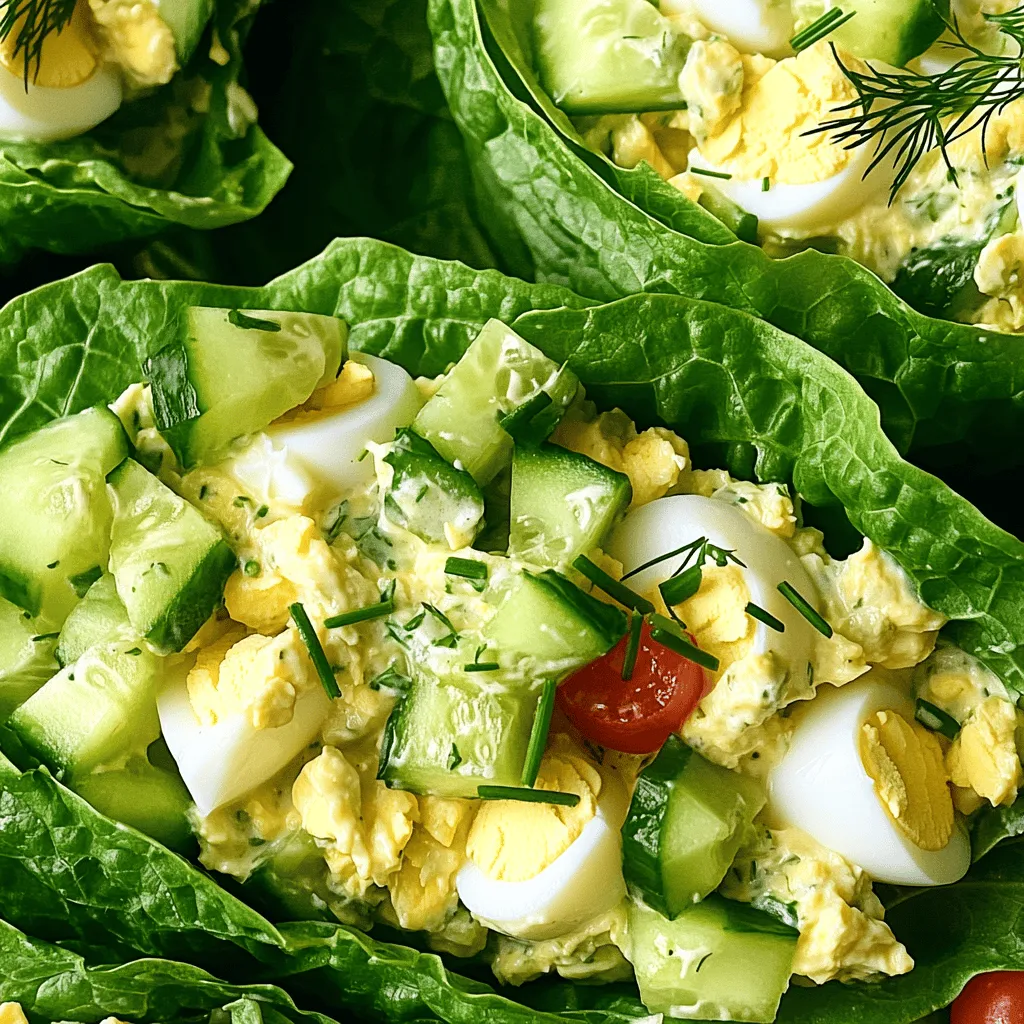
Looking for a quick and healthy meal option? Try my Easy Egg Salad Lettuce Wraps! This delicious, low-carb dish is

- 1 cup Arborio rice - 4 cups vegetable broth (heated) - 2 tablespoons olive oil - 1 medium onion, finely chopped - 3 cloves garlic, minced - 2 cups mixed mushrooms (such as cremini and shiitake), sliced To make creamy mushroom risotto, these essential ingredients are key. Arborio rice gives risotto its creamy texture. It absorbs flavors well and becomes tender. Vegetable broth adds depth and richness. Use a good quality broth for the best taste. Olive oil is needed for sautéing the base. It adds flavor and helps cook the onions and garlic. Onions and garlic create a fragrant base. They bring sweetness and aroma to the dish. Mixed mushrooms add umami flavor and texture. I love using cremini and shiitake for their earthiness. - 1 teaspoon fresh thyme, chopped - 1 tablespoon nutritional yeast (optional, for added creaminess) - ½ cup heavy cream or coconut cream For added flavor, you can use fresh thyme. It pairs well with mushrooms and adds a herbal note. Nutritional yeast is a great choice for a cheesy flavor without dairy. It also boosts the creaminess of the dish. Heavy cream or coconut cream makes the risotto even richer. Coconut cream is perfect for a vegan option while still keeping it creamy. - Salt and pepper - Fresh parsley, chopped (for garnish) Seasoning is crucial. Salt and pepper enhance all the flavors. Use them to taste, but remember, less is more at first. Fresh parsley adds a pop of color and freshness when you serve the risotto. It brightens up the dish and makes it more appealing. For a full recipe, check the details above. Enjoy crafting your creamy mushroom risotto! First, you need to heat the vegetable broth. Pour the broth into a saucepan. Use low heat to warm it gently. Keep it at a simmer while you cook. This step helps the rice absorb the flavors. In a large skillet, add olive oil over medium heat. Once hot, add the chopped onion. Cook until the onion is soft and clear, about 3-4 minutes. Next, add minced garlic and stir for a minute. Be careful not to let it burn. Now, it’s time to add the mushrooms. Mix in the sliced mushrooms and cook them for 5-7 minutes. They should soften and turn slightly brown. Toss in fresh thyme and stir for one more minute. Add the Arborio rice to your skillet. Stir it well for about 2 minutes. You want the rice to feel coated and just a little clear on the edges. Now comes the fun part! Begin adding the warm broth, one ladle at a time. Stir often as you add more broth. Only add another ladle when most of the liquid is soaked up. Keep doing this until the rice turns creamy and is al dente, which takes about 18-20 minutes. Once the rice is ready, remove the skillet from heat. Stir in the heavy cream or coconut cream. Add the nutritional yeast for an extra touch of creaminess. Season with salt and pepper to your liking. Serve your creamy mushroom risotto right away. Sprinkle fresh parsley on top for a lovely finish. For the complete recipe, check out the Full Recipe. To get that rich, creamy texture in your risotto, you must stir often. This helps release the starch from the Arborio rice, creating a silky sauce. Some people think they can leave it alone, but that’s a mistake. Aim for a cook time of around 18 to 20 minutes. This gives the rice time to absorb the broth and soften nicely. When it’s done, the risotto should be creamy but still have a slight bite. Using the right herbs can boost your risotto's taste. I recommend fresh thyme and parsley for a bright flavor. You can also mix in some rosemary or sage for a deeper taste. If you want to add protein, try cooked chicken, shrimp, or even chickpeas. They blend well and make the dish more filling. Just be sure to add them toward the end of cooking to warm them through. One big mistake is using cold broth. Always keep your broth warm while cooking; this helps the rice absorb it better. Cold broth can shock the rice and slow down cooking. Another mistake is overcooking the rice. If you let it go too long, it turns mushy. Taste it as it cooks to find that perfect "al dente" point. With these tips, you’ll create a creamy mushroom risotto that impresses everyone. For the complete recipe, check out the Full Recipe link. {{image_2}} You can easily make this risotto vegetarian or vegan. To do this, swap out the heavy cream for coconut cream or cashew cream. You can also add nutritional yeast for a cheesy taste without dairy. For extra nutrition, toss in more vegetables. Spinach, peas, or asparagus work great. They add color and flavor. Mushrooms bring unique flavors to risotto. You can use many types, like cremini, shiitake, or portobello. Each one adds its own taste and texture. For instance, shiitake mushrooms have a rich, earthy flavor. Mixing mushrooms gives a fun texture. Try combining a soft mushroom with a firmer one. This way, you enjoy different bites in each spoonful. Risotto is popular in many regions of Italy. Each area has its own twist. In some places, they add saffron for a beautiful color. Others may use local cheeses, like Parmigiano-Reggiano or Gorgonzola, for added richness. You can also switch out the cheese. Try goat cheese or a vegan cheese to match your taste. For the full recipe, check out the Creamy Mushroom Risotto section. This dish is easy to customize, so feel free to get creative! To store leftover risotto, let it cool first. Place it in a container with a lid. I recommend glass or plastic containers that seal well. This helps keep it fresh and safe. You can enjoy it for up to three days in the fridge. You can freeze risotto if you have a lot left over. First, cool it completely. Next, put it in freezer-safe bags or containers. Remove as much air as you can. To thaw, move it to the fridge overnight. When ready to eat, reheat it on the stove. Add a splash of broth to keep it creamy. In the fridge, risotto stays fresh for about three days. Look for changes in color or smell as signs of spoilage. If it smells sour or looks off, it’s best to throw it out. Enjoy your creamy mushroom risotto with confidence, and check the Full Recipe for more tips! The best rice for risotto is Arborio rice. It has a high starch content, which gives risotto its creamy texture. The grains are short and round, allowing them to absorb broth while still being firm. If you can't find Arborio rice, there are alternatives. Carnaroli rice is another great choice, known for its creamy finish. Vialone Nano is also good, offering a slightly different texture. Yes, you can make risotto in advance. To do this, cook the risotto until it's just firm. Remove it from heat and let it cool. Store it in an airtight container in the fridge. When reheating, add a splash of broth or water. This helps bring back the creamy texture. Heat it slowly on the stove, stirring often to avoid sticking. To make risotto less creamy, adjust the cream and broth ratios. Use less cream or replace it with more broth. This change keeps the dish flavorful without the rich texture. You can also try using less Arborio rice. This will reduce the starch and creaminess. For a lighter texture, consider using a mix of Arborio with long-grain rice. For the full experience, check out the Full Recipe for Creamy Mushroom Risotto. This blog post covered essential ingredients, step-by-step instructions, and helpful tips for making risotto. Choosing Arborio rice and properly preparing your broth are key steps. Remember to stir for a creamy texture and avoid common mistakes like using cold broth. Experiment with variations and storage tips to keep your risotto fresh. With practice, you'll master this dish and impress everyone. Enjoy creating your perfect risotto, mixing flavors and textures to make it your own. Happy cooking!

Creamy Mushroom Risotto Rich and Flavorful Dish

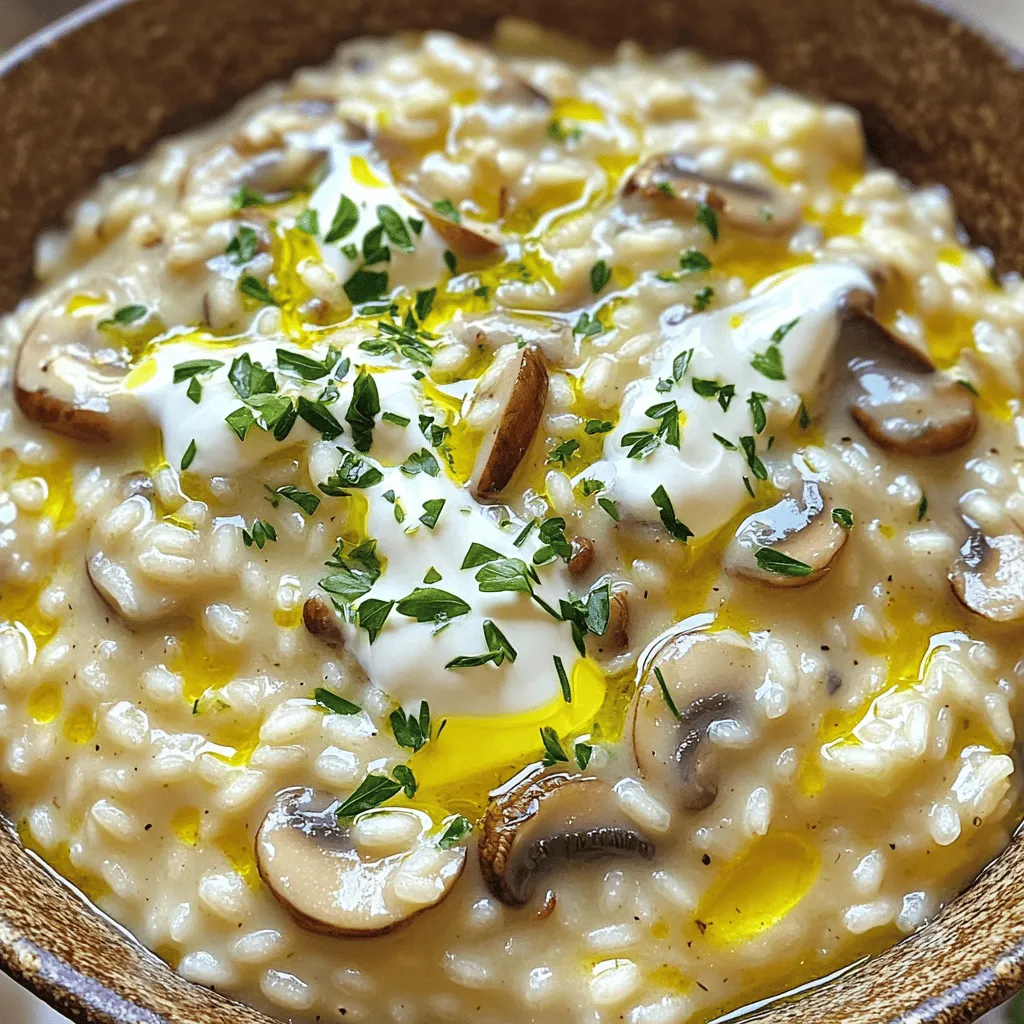
Are you ready to dive into a bowl of creamy mushroom risotto? This rich and flavorful dish is not just

To make delicious Buffalo Chicken Stuffed Peppers, you need a few key items. Here’s the list: - 4 large bell peppers (any color) - 2 cups cooked chicken, shredded - 1/2 cup buffalo sauce (mild or hot) - 1 cup cream cheese, softened - 1 cup shredded cheddar cheese - 1/2 cup celery, diced - 1/4 cup green onions, sliced - Salt and pepper to taste - Fresh parsley for garnish These ingredients create a great blend of flavors. The bell peppers act as a tasty, crunchy shell. The chicken and buffalo sauce give it a spicy kick. Cream cheese adds creaminess, while cheddar cheese gives a nice melt. You can add extra toppings to make your dish unique and fun. Here are some ideas: - Crumbled blue cheese - Extra hot sauce for spice - Sliced jalapeños for heat - Avocado slices for creaminess These toppings can adjust the flavor to your liking. Try them out to find your favorite mix! Having the right tools makes cooking easier. Here’s what I recommend: - A sharp knife for cutting peppers - A baking dish to hold the stuffed peppers - A mixing bowl for combining ingredients - A spatula for mixing Using these tools will help you make the dish quickly and efficiently. You can find the full recipe for Buffalo Chicken Stuffed Peppers to guide you through the cooking process. Start by preheating your oven to 375°F (190°C). While it heats, grab four large bell peppers. You can choose any color that you like. Cut the tops off the peppers and remove the seeds and membranes. This step makes space for the filling. Set the prepared peppers aside. In a big bowl, combine two cups of shredded chicken and 1/2 cup of buffalo sauce. You can use mild or hot sauce, based on your taste. Add in 1 cup of softened cream cheese and half of the cheddar cheese. Next, toss in 1/2 cup of diced celery and 1/4 cup of sliced green onions. Season with salt and pepper. Mix everything well until it is fully combined. This mixture will be the star of your dish! Spoon the buffalo chicken mixture into each bell pepper. Fill them generously to the top. Place the stuffed peppers upright in a baking dish. Sprinkle the remaining cheddar cheese over the peppers. Cover the dish with aluminum foil and bake for 25 minutes. After that, remove the foil and bake for another 10-15 minutes. This will make the cheese bubbly and golden brown. Once done, take them out and let them cool for a few minutes. You can garnish with fresh parsley before serving. Enjoy your tasty creation! For the full recipe, refer to the instructions above. When picking bell peppers, look for ones that are firm and heavy. The skin should be shiny and smooth. Avoid any peppers with soft spots or wrinkles. Color matters too! Red, yellow, and orange peppers are sweeter than green ones. If you want a milder taste, go for these vibrant colors. For the best flavor, use cooked chicken that is juicy. You can use rotisserie chicken for a quick option. Shred the chicken into small pieces for even mixing. When mixing the chicken with buffalo sauce, ensure it is well-coated. This gives every bite a zesty kick. Don't forget to taste your mixture! Adjust the salt and pepper to get it just right. Buffalo sauce can be hot or mild. To control the heat, start with a mild sauce. You can always add more to your mixture if you love spice. If you want less heat, mix in some cream cheese to cool it down. This makes the filling creamy and balances the flavors. Remember, you can always taste and adjust before stuffing your peppers. {{image_2}} You can make buffalo chicken stuffed peppers healthier. Use lean chicken breast to cut fat. Swap cream cheese for Greek yogurt. It adds creaminess with fewer calories. You can also use low-fat shredded cheese or skip it entirely. This way, you still enjoy the flavors without the extra calories. For a vegetarian version, skip the chicken. Instead, use black beans or lentils. Mix them with buffalo sauce and cream cheese. Add chopped veggies like zucchini or mushrooms for texture. This keeps the dish filling and flavorful while being meat-free. You can swap chicken for other proteins. Ground turkey works well and keeps it lean. Ground beef adds richness and depth. For a plant-based option, try firm tofu. Crumble it and mix with buffalo sauce for a tasty filling. Each protein brings its own flavor, making this dish versatile. Try the full recipe to find your favorite variation! To store leftover stuffed peppers, let them cool first. Place them in an airtight container. They can stay fresh in the fridge for up to four days. Make sure to seal the container tightly to keep out air. When you want to enjoy your leftovers, preheat your oven to 350°F (175°C). Place the stuffed peppers in a baking dish. Cover them with foil to keep them moist. Heat for about 20 minutes, or until they are warm throughout. If you want crispy cheese, remove the foil for the last five minutes. You can freeze stuffed peppers for later use. Wrap each pepper in plastic wrap or foil. Then, place them in a freezer-safe bag. They can stay in the freezer for up to three months. When you’re ready to eat, thaw them in the fridge overnight before reheating. This keeps their taste and texture nice. For the full recipe, check the earlier section. Yes, you can prepare Buffalo Chicken Stuffed Peppers in advance. To do this, follow the recipe until you fill the peppers. Then, cover and chill them in the fridge. They can stay fresh for up to 24 hours. When you're ready to bake, just add an extra 5-10 minutes to the cooking time. This method saves you time on busy days. Buffalo Chicken Stuffed Peppers pair well with many sides. Here are some ideas: - Celery sticks with ranch dressing - Carrot sticks for a crunchy bite - Side salad with mixed greens - Corn on the cob for a sweet touch - Rice or quinoa to make it a full meal These sides complement the spicy flavor of the peppers and add variety to your plate. If you want to kick up the heat, try these tips: - Use hot buffalo sauce instead of mild. - Add chopped jalapeños to the filling. - Mix in some red pepper flakes when you prepare the chicken. - Serve with a side of spicy dipping sauce. These adjustments will bring more heat and flavor to your Buffalo Chicken Stuffed Peppers. Buffalo Chicken Stuffed Peppers are a delicious and easy dish. We covered the main ingredients, important cooking tools, and steps for prep and baking. I shared tips for the best bell peppers and seasoning. You can mix up flavors with healthy or vegetarian options. Storing leftovers and reheating tips keep your meal fresh. Remember, you can prepare them ahead or adjust the spice to fit your taste. Try this recipe and create something tasty that everyone will love!

Buffalo Chicken Stuffed Peppers Tasty and Easy Recipe

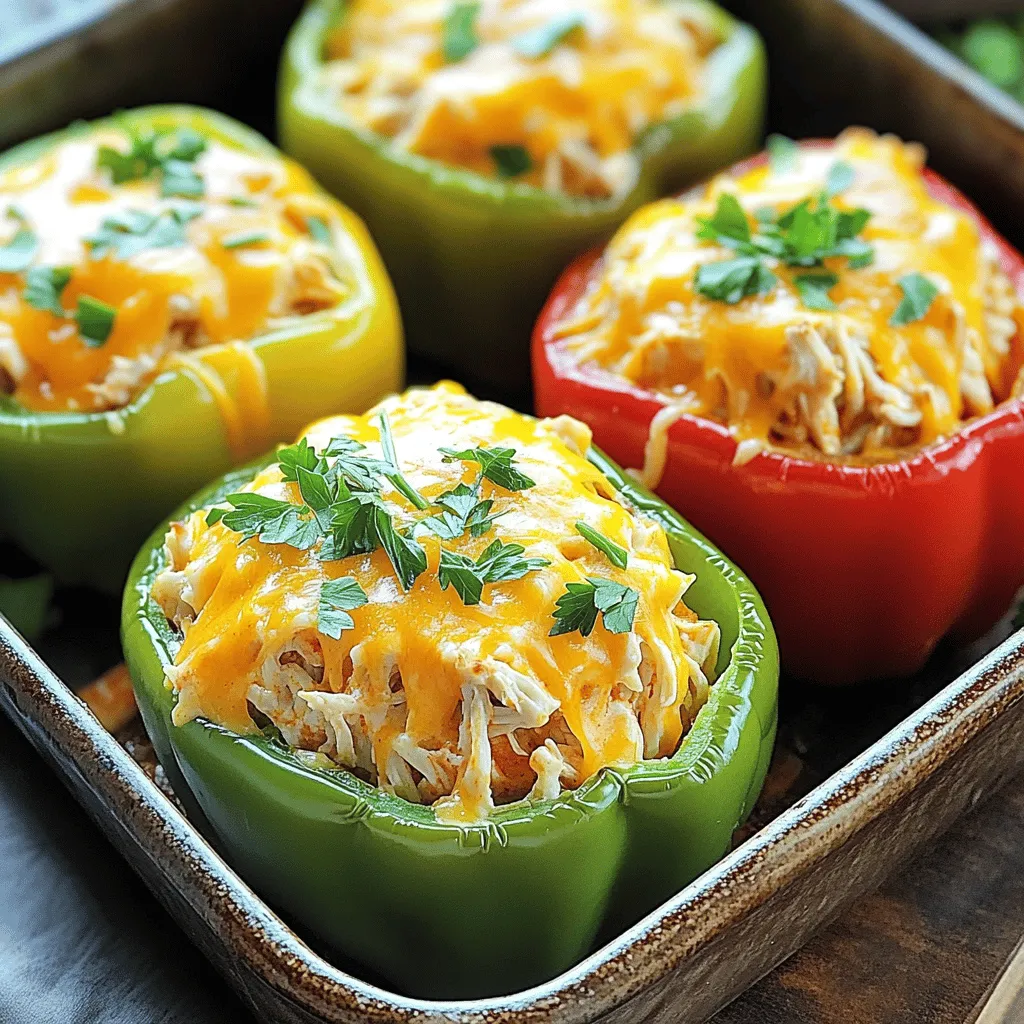
Are you ready to spice up your dinner? Buffalo Chicken Stuffed Peppers are an easy and tasty dish that packs

To make vegan chocolate mousse, you need some simple ingredients. Here’s what you will use: - 1 cup silken tofu, drained - 1/2 cup unsweetened cocoa powder - 1/2 cup maple syrup (or agave syrup) - 1/4 cup almond milk (or any plant-based milk) - 1 teaspoon vanilla extract - A pinch of sea salt - 1/4 cup dark chocolate chips (dairy-free) Silken tofu gives the mousse a creamy texture. Cocoa powder adds rich chocolate flavor. Maple syrup sweetens it up, while almond milk makes it smooth. Vanilla extract adds warmth, and sea salt enhances all the flavors. Dark chocolate chips bring extra chocolate richness. Garnishes can make your mousse look even better. Here are some ideas to try: - Fresh berries (strawberries, raspberries, or blueberries) - Mint leaves These garnishes add color and a fresh taste. They also make your dessert more appealing. Each serving of vegan chocolate mousse is packed with nutrients. Here’s what you can expect: - Calories: About 160 - Protein: 5 grams - Carbohydrates: 22 grams - Fat: 7 grams This mousse is a tasty treat that also offers healthy protein from tofu. It’s a great dessert choice for anyone looking to enjoy something sweet without dairy. For the full recipe, check out the details above. To start, gather all your ingredients. This makes the process smooth and easy. First, drain the silken tofu well. This step is key for a creamy mousse. Next, measure out the cocoa powder and maple syrup. Pour these into your blender. Also, add the almond milk, vanilla extract, and a pinch of sea salt. It’s time to blend these ingredients on high speed until everything is smooth. You want a rich and creamy texture without lumps. Now, let’s focus on the chocolate. You can melt dark chocolate chips in two ways. The first is using a microwave. Place the chips in a microwave-safe bowl. Heat them in 20-second bursts. Stir after each burst. This prevents burning. The second method is a double boiler. Fill a pot with water and bring it to a simmer. Place a heat-proof bowl on top, making sure it doesn’t touch the water. Add the chocolate chips and stir until melted. Let it cool slightly before adding it to your mousse mix. When you add the melted chocolate to the blender, blend again until fully combined. This ensures the chocolate mixes evenly with the tofu and cocoa. Taste the mousse and adjust the sweetness if you like. If you want it sweeter, simply add a bit more maple syrup. Pour the mousse into serving cups or bowls. Cover them and refrigerate for at least one hour. This helps the mousse set and become fluffier. Remember, presentation matters! Serve in clear cups to show off that delicious texture. Enjoy your Vegan Chocolate Mousse! For the full recipe, check out the earlier section. To get a smooth and creamy mousse, use silken tofu. Make sure it's well-drained. Blend the tofu until it’s super smooth. If you still see lumps, blend longer. Adding melted dark chocolate helps create a rich texture. Chill the mousse for at least one hour. This step makes it fluffier and firmer. Taste the mousse before serving. You may want it sweeter. If so, add more maple syrup. A little goes a long way, so add just a bit at a time. Remember, the cocoa powder can make it taste less sweet. Adjust until it feels just right for you. Don’t skip draining the tofu. It can lead to a watery mousse. Avoid using too much cocoa powder. This can overpower the other flavors. Be careful when melting chocolate; it can burn quickly. Stir often to ensure it melts evenly. Finally, don't forget to chill it! Serving it too soon can ruin the texture. For the full recipe, check out the complete steps above. {{image_2}} You can use avocado for a creamy vegan chocolate mousse. The ripe avocado gives a smooth texture. It also adds healthy fats. To make this, blend 1 ripe avocado, 1/2 cup cocoa powder, and 1/4 cup agave syrup. Add a splash of almond milk to help it blend. This mix is rich and full of flavor. You will love the taste! If you want a lighter mousse, use silken tofu as in the full recipe. Silken tofu gives a fluffy texture. You can also try firm tofu for more protein. Just make sure to blend it well. The key is to get it smooth and creamy. This option is great for those who want a protein boost. You can make your mousse special with flavor additions. Try adding a teaspoon of espresso powder for a coffee twist. A pinch of cinnamon gives warmth and spice. For a fruity touch, add pureed fruit like raspberries or bananas. These flavors can take your mousse to new heights! Store any leftover vegan chocolate mousse in the fridge. Use an airtight container. This keeps it fresh and creamy. It can last up to five days. Make sure to cover the mousse well to avoid absorbing any odors. If you notice any separation, just give it a gentle stir before serving again. You can freeze vegan chocolate mousse for a longer shelf life. To freeze, place it in an airtight container or freezer-safe bag. Make sure to leave some space at the top. The mousse expands when frozen. It can last up to two months in the freezer. When you are ready to eat, thaw it in the fridge overnight. I recommend glass containers for storing mousse. They are easy to clean and do not hold odors. If using plastic, choose BPA-free containers. Small jars or cups work well for portioning. These help keep the mousse fresh while making it easy to grab a serving. Vegan chocolate mousse lasts about 3 to 5 days in the fridge. Store it in an airtight container. This way, it stays fresh and tasty. The mousse gets even thicker as it chills. Enjoy it cold for the best flavor! Yes, you can use other sweeteners. Agave syrup works well as a substitute. You can also use cane sugar or coconut sugar. Just remember to adjust the amount. Not all sweeteners are as sweet as maple syrup. Taste as you go to find the right balance. Yes, this recipe is nut-free. It uses silken tofu and almond milk. If you have nut allergies, simply use a different plant-based milk. Soy milk or oat milk are great choices. Always check labels to ensure they meet your dietary needs. For the full recipe, check out the details above! This vegan chocolate mousse is easy to make and fun to enjoy. We covered key ingredients, helpful tips, and tasty variations. You can whip up a delicious treat using avocados or tofu. Store leftovers with care to keep them fresh. Always remember to adjust the sweetness to match your taste. With these insights, you can make this dessert your own. Enjoy every creamy bite and impress your friends with your skills!

Vegan Chocolate Mousse Rich and Decadent Delight

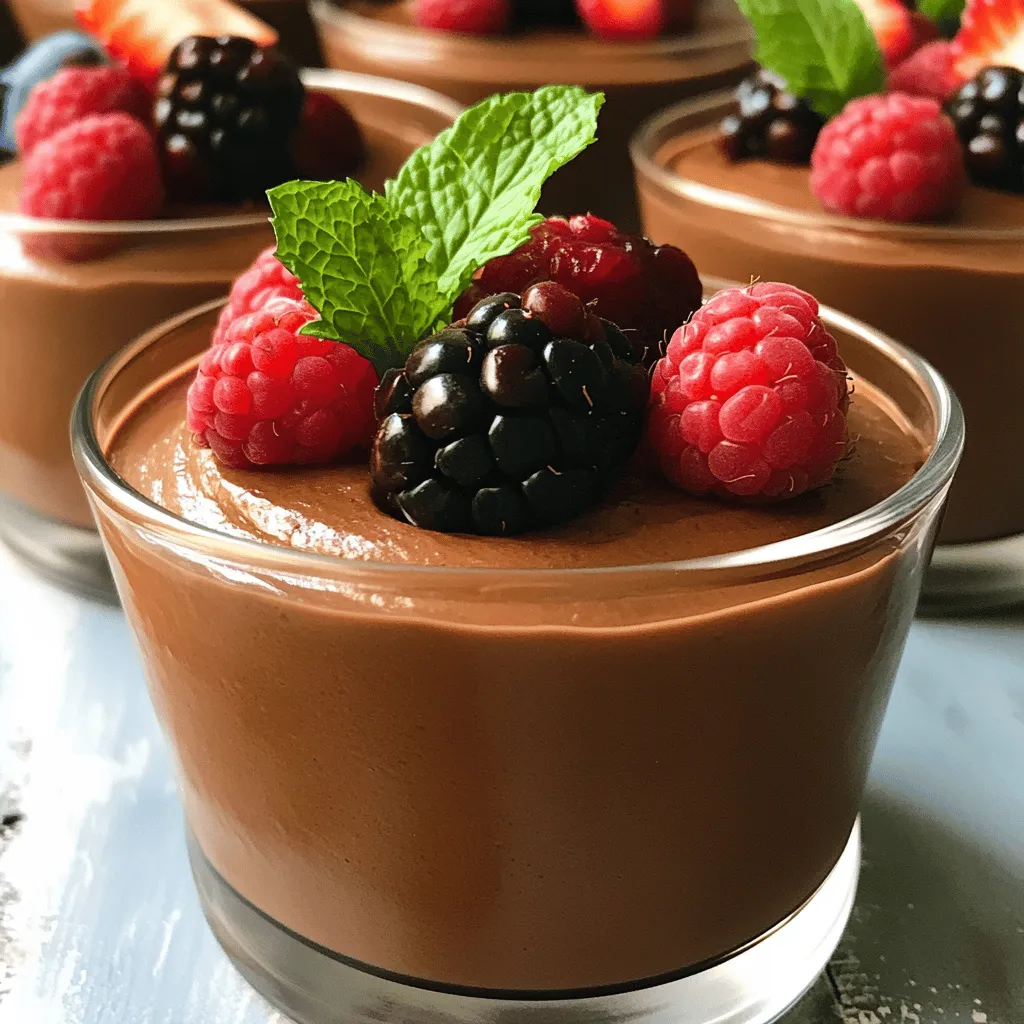
Indulging in dessert doesn’t have to mean skipping health. This Vegan Chocolate Mousse is rich and simple to make. You’ll

To make a tasty Cheesy Spinach Artichoke Dip, gather these ingredients: - 1 cup frozen spinach, thawed and drained - 1 can (14 oz) artichoke hearts, drained and chopped - 1 cup cream cheese, softened - 1/2 cup sour cream - 1 cup mayonnaise - 1 cup shredded mozzarella cheese - 1/2 cup grated Parmesan cheese - 2 cloves garlic, minced - 1 teaspoon lemon juice - 1/2 teaspoon crushed red pepper flakes (optional) - Salt and pepper to taste - Tortilla chips or bread slices for serving You can easily swap out some dairy items if needed. Here are a few options: - Use Greek yogurt instead of sour cream for a tangy twist. - Try cottage cheese in place of cream cheese for a lighter dip. - Replace mayonnaise with avocado for a creamy, healthy option. Want to jazz up your dip? Here are a few fun add-ins to try: - Mix in some cooked bacon bits for a smoky flavor. - Add chopped jalapeños for a spicy kick. - Toss in sun-dried tomatoes for a burst of sweetness. For the full recipe, check out the details above. Enjoy creating this delicious dish! To make Cheesy Spinach Artichoke Dip, start by mixing creamy ingredients. Then, fold in spinach and artichokes. Finally, bake until golden and bubbly. This dip is simple and quick, making it great for gatherings. 1. Preheat your oven to 350°F (175°C). 2. In a large bowl, mix the cream cheese, sour cream, and mayonnaise. Blend until smooth. 3. Add the drained spinach, chopped artichoke hearts, minced garlic, and lemon juice. 4. Toss in half of the mozzarella and Parmesan cheese. Stir until mixed well. 5. Season with salt and pepper to your liking. 6. Transfer the mixture to a baking dish. Spread it evenly across the dish. 7. Sprinkle the remaining mozzarella and Parmesan cheese on top. 8. Bake for 25-30 minutes until the dip bubbles and the top is golden. 9. Let it cool for a few minutes before serving. To get the best texture, drain spinach well to avoid excess water. Use room temperature cream cheese for easy mixing. Bake until the top is golden and slightly crisp. This creates a nice contrast to the creamy dip. To make the best Cheesy Spinach Artichoke Dip, start with good ingredients. Always use fresh artichokes if you can find them. If not, canned works fine. Make sure to squeeze all the water out of the spinach. This keeps the dip thick and creamy. When mixing, blend the cream cheese, sour cream, and mayonnaise well. This helps avoid lumps. Layer the cheese on top for a nice golden crust. One common mistake is not draining the spinach well. If it’s too wet, the dip can become runny. Another mistake is baking it too long. You want it bubbly and slightly golden, not burnt. Don’t skip the garlic; it adds great flavor. Also, be careful with salt. Taste as you go to avoid an overly salty dip. You can prepare the dip a day in advance. Just cover it and put it in the fridge. When you’re ready to bake, let it sit at room temperature for about 30 minutes. Preheat the oven to 350°F (175°C) and bake it for 30-35 minutes. If you want to reheat leftovers, use the oven instead of the microwave. This keeps the texture nice. For the full recipe, check the earlier section. {{image_2}} You can change the cheese to make this dip your own. Try using cheddar cheese for a sharp flavor. Gouda adds a smoky touch. You can also mix in cream cheese for extra creaminess. Keep mozzarella for that stretchy cheese pull. Parmesan gives a nice salty bite. Experiment with your favorites! For a lighter version, swap out the cream cheese for Greek yogurt. This keeps the dip creamy while cutting calories. You can also use low-fat sour cream and mayonnaise. Use fresh spinach instead of frozen for a fresher taste. Lastly, serve with veggie sticks instead of chips for a crunchy twist. Think beyond chips! Serve this dip with sliced baguette or pita chips. You can also use small bread bowls for a fun presentation. For a fresh twist, top the dip with diced tomatoes or avocado. This adds color and flavor. Pair it with a crisp salad for a complete meal. Don't forget to check the Full Recipe for all the details! To keep your Cheesy Spinach Artichoke Dip fresh, store it in an airtight container. Let the dip cool before sealing it. This helps keep moisture out. Use it within three to four days. If you have a large batch, divide it into smaller containers. This makes it easier to reheat and share. When you're ready to enjoy the leftovers, preheat your oven to 350°F (175°C). Place the dip in a baking dish. Cover it with foil to prevent it from drying out. Heat for about 15-20 minutes. If you want a crispy top, remove the foil for the last five minutes. You can also reheat it in the microwave. Use a microwave-safe dish and heat in short bursts of 30 seconds. Stir in between to ensure even heating. You can freeze Cheesy Spinach Artichoke Dip for later. First, let it cool completely. Then, transfer it to a freezer-safe container. Label it with the date. It can last up to three months in the freezer. To thaw, move it to the fridge overnight. Reheat it as mentioned above. This way, you can enjoy this tasty dip any time you want! For the complete recipe, check out the Full Recipe. Cheesy Spinach Artichoke Dip lasts about three to four days in the fridge. Store it in an airtight container. Make sure it cools down before putting it away. If you notice any changes in smell or texture, it’s best to toss it. Yes, you can make this dip in advance! Prepare it a day before and store it in the fridge. Just cover it well. When you are ready to serve, bake it as directed in the Full Recipe. This saves time and makes your party stress-free! Serve Cheesy Spinach Artichoke Dip with tortilla chips, sliced baguette, or fresh veggies. Tortilla chips add crunch, while bread soaks up the creamy dip. Fresh veggies, like carrots or bell peppers, offer a nice balance. You can even try crackers for a different twist! In this post, we explored all you need for the perfect Cheesy Spinach Artichoke Dip. We covered ingredients, including substitutions for dairy. The step-by-step instructions guide you to ideal texture. Tips help you avoid common mistakes. You learned about fun variations and how to store leftovers. You now have the tools to impress your guests with a delicious dip. Use these tips for a great dish anytime!

Cheesy Spinach Artichoke Dip Flavorful Crowd Pleaser

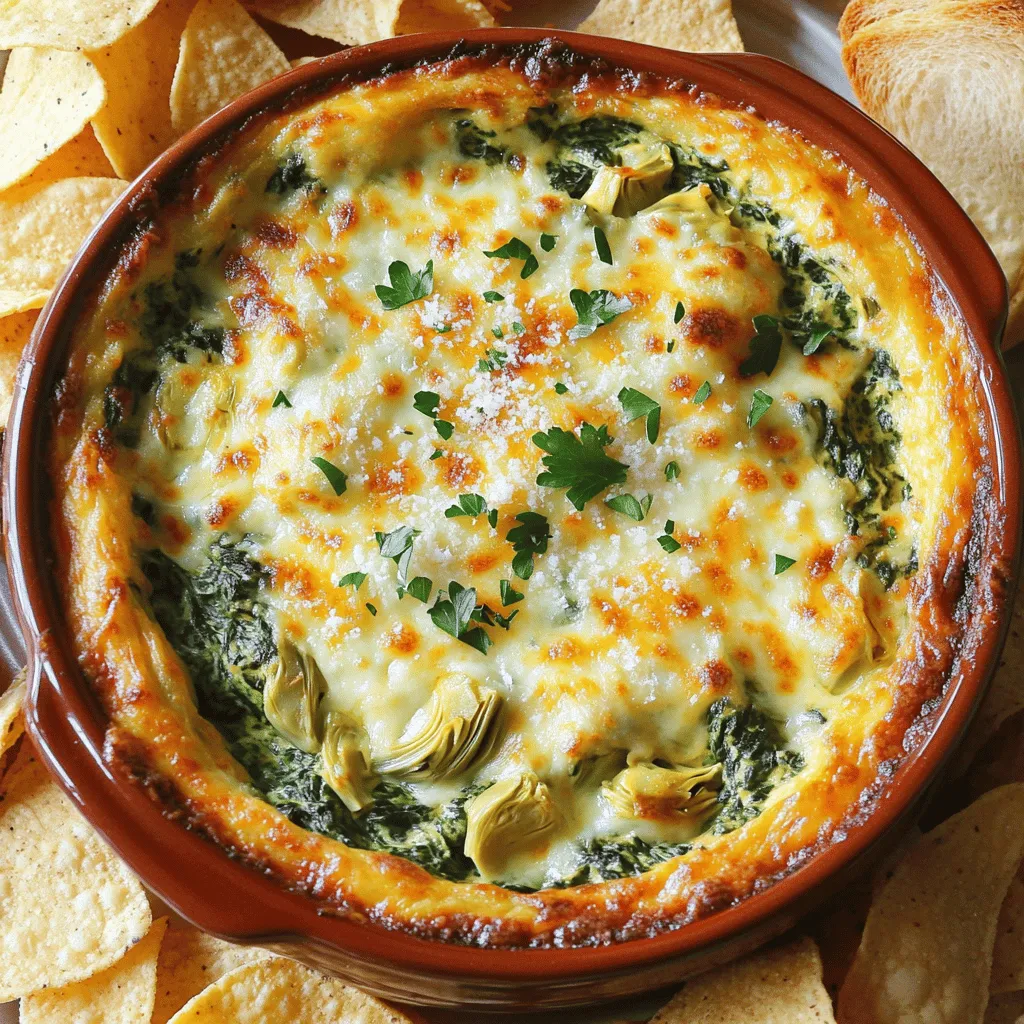
If you’re looking for a dip that impresses at every party, you’ve found it! Cheesy Spinach Artichoke Dip is creamy,

- 1 pound ground turkey or beef - 1 red bell pepper, diced - 1 cup cherry tomatoes, halved - 1 avocado, diced - 2 cups romaine lettuce, chopped - 1 cup corn (canned or frozen) - 1 can black beans, rinsed and drained Fresh ingredients are key to a tasty taco salad. I like to use ground turkey for a leaner option, but beef works well too. Dicing the red bell pepper and cherry tomatoes adds color and crunch. Avocado brings creaminess, while romaine lettuce gives a nice base. Black beans and corn add protein and sweetness. - 1/2 cup shredded cheddar cheese - 1/2 cup sour cream or Greek yogurt - Tortilla chips for serving Toppings make your salad fun! Shredded cheese adds richness, and sour cream or Greek yogurt gives a tangy kick. I enjoy serving with crispy tortilla chips. They add a nice crunch and texture. You can also use them as a scoop for the salad. - 1 packet taco seasoning (or homemade blend) - 1/4 cup freshly chopped cilantro - Juice of 1 lime - Salt and pepper to taste For flavor, I use a taco seasoning packet. You can also make your own blend with spices. Fresh cilantro and lime juice brighten up the salad. Don’t forget to season with salt and pepper! These simple steps make a big difference in flavor. For the full recipe, check out the details above. - Brown the Ground Turkey or Beef In a large skillet, heat your pan over medium heat. Add 1 pound of ground turkey or beef. Cook it until it’s browned, stirring often to break it apart. This should take about 5 to 7 minutes. If there is too much fat, drain it off. - Add Taco Seasoning and Simmer Next, add a packet of taco seasoning to the meat. You can also use a homemade blend if you prefer. Pour in about 1/4 cup of water and stir well. Let this simmer for about 5 minutes. This helps the flavors mix and taste great. - Combine Corn, Black Beans, and Vegetables In a separate bowl, mix together 1 cup of corn and 1 can of black beans that you rinsed and drained. Then, add 1 diced red bell pepper and 1 cup of halved cherry tomatoes. Toss in 1 diced avocado and 1/4 cup of chopped cilantro for freshness. - Season and Toss the Mixture Drizzle the salad mixture with the juice of 1 lime. Then, season with salt and pepper to taste. Gently toss everything together. You want it mixed but not mushy. - Layering with Romaine Lettuce Start by chopping 2 cups of romaine lettuce. Place this at the bottom of each bowl. This will be your base and adds crunch. - Adding Meat, Salad Mixture, and Toppings Next, layer the seasoned meat on top of the lettuce. Then, spoon the corn and bean mixture on top. Finish by sprinkling 1/2 cup of shredded cheddar cheese over everything. For extra flavor, add a dollop of sour cream or Greek yogurt. Serve with tortilla chips on the side or crumbled on top for some crunch. You can also add extra cilantro and lime wedges if you like. For the complete recipe, check out the Full Recipe. You can easily make this salad fit your needs. If you want a gluten-free dish, skip the tortilla chips or use corn chips. For a vegetarian option, swap the meat for black beans or lentils. You can also use quinoa for added protein. Adding more veggies can boost flavor and nutrition. Try diced cucumbers, shredded carrots, or sliced radishes. These add color and crunch. You can also mix in some cooked corn for sweetness. Crunchy tortilla chips make a great topping. To keep them crisp, add them just before serving. You could also bake the chips for a healthier option. Just brush them lightly with olive oil and bake until golden. For dressings, you can explore different flavors. A creamy avocado dressing adds richness. Salsa verde gives a fresh kick. Experiment with what you like best! Make your salad look stunning by serving it in clear bowls. This lets the colorful layers shine through. You can also use mason jars for a fun twist. Layer the ingredients for a beautiful visual. Garnish with lime wedges and extra cilantro on top. This not only adds flavor but also makes the dish pop. Your friends will be impressed by the look and taste! {{image_2}} You can change the protein to suit your taste. Ground chicken works great instead of beef. For a plant-based option, use tofu or legumes. Black beans or lentils add protein and fiber. These swaps keep the meal healthy and tasty. Dressing can change the whole flavor of your salad. A creamy avocado dressing adds richness. You can also try salsa verde for a fresh kick. Both options complement the zesty flavors in the salad. You can serve this dish in many ways. Use taco shells for a fun, handheld meal. Burrito bowls offer a hearty option and hold all the flavors well. Lettuce wraps are a low-carb choice that keeps it light. Each style gives a unique twist to the same delicious ingredients. To keep Zesty Taco Salad Bowls fresh, store leftovers in an airtight container. Make sure to separate the meat from the salad mix and toppings. The meat can last in the fridge for about 3 to 4 days. The salad mix will stay fresh for 2 to 3 days. Always cool the food before putting it in the fridge. You can freeze the meat mixture for longer storage. Place it in a freezer-safe bag or container. Make sure to remove excess air to prevent freezer burn. It will stay good for about 2 to 3 months. Avoid freezing the salad mix and toppings, as they do not freeze well. When ready to eat, thaw the meat in the fridge overnight. Reheat it in a pan over medium heat until hot. You can also use the microwave, but check it often to avoid overcooking. Prepare fresh salad and toppings just before serving. This keeps the flavors bright and the textures crisp. For more details, check the Full Recipe. To make Zesty Taco Salad Bowls vegetarian, simply swap out the meat. Use one can of black beans or kidney beans. You can also try lentils or crumbled tofu. These options add protein and heartiness. These salad bowls pair well with many side dishes. Try serving them with: - Cornbread or tortilla chips - Guacamole or salsa - Mexican rice or quinoa - A fresh fruit salad - A light Mexican-style soup These sides will enhance your meal and add more flavor. You can prepare these tasty bowls in about 30 minutes. The prep takes about 15 minutes, and the cooking time is around 15 minutes. This makes it a quick and easy meal option. Enjoy this fun dish with friends or family. Check out the Full Recipe for more details on making this delightful meal. This blog post shared how to make tasty taco salad bowls. We looked at fresh ingredients like ground turkey and colorful veggies. I walked you through cooking and mixing your salad. You got tips on customizing and serving your dish. Remember, make it your own with different proteins and dressings. Enjoy your creations and share them with friends. Taco salads are fun and healthy meals for everyone!

Zesty Taco Salad Bowls Healthy and Flavorful Meal

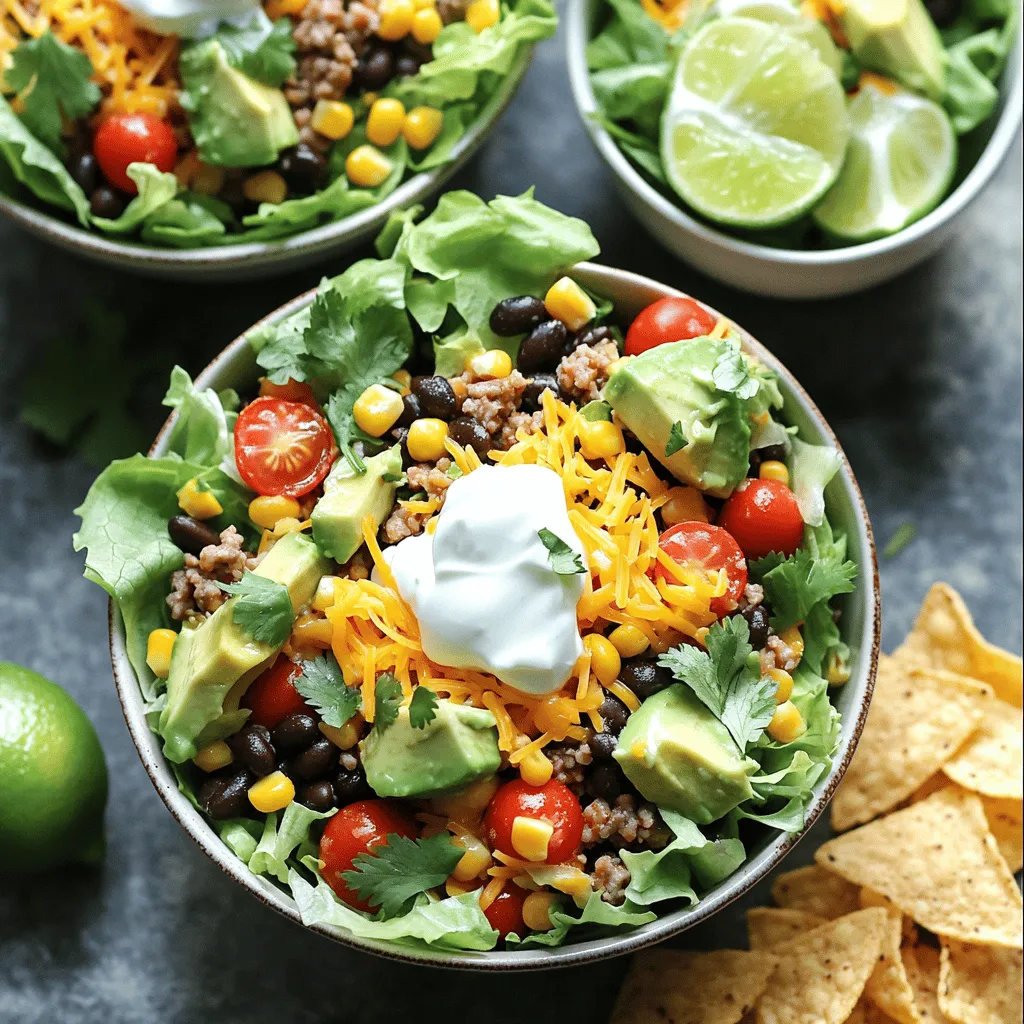
Looking for a quick, healthy meal packed with flavor? You’ve landed in the right spot! My Zesty Taco Salad Bowls

For the filling, you need fresh and ripe peaches. I recommend using about 4 cups. Peel and slice them into thin pieces. The peaches should be sweet and juicy. You also need 1 tablespoon of lemon juice to brighten the flavors. For sweetness, add 1/2 cup of granulated sugar. This will help create a syrupy mix. To thicken it, use 1 tablespoon of cornstarch. Finally, sprinkle in 1 teaspoon of ground cinnamon for warmth. The topping is what makes this peach crisp special. You will need 1 cup of rolled oats for a hearty crunch. Mix it with 1/2 cup of all-purpose flour to bind the topping. For sweetness, add 1/2 cup of packed brown sugar. A pinch of 1/4 teaspoon salt will enhance all the flavors. To make it rich, pour in 1/2 cup of melted unsalted butter. Lastly, add 1/2 teaspoon of vanilla extract for a lovely aroma. You can easily customize this recipe. If you want a gluten-free option, use gluten-free oats and flour. For a touch of spice, try adding nutmeg or ginger. You can also swap peaches for other fruits like apples or berries. If you need less sugar, reduce the granulated sugar. You can also use honey or maple syrup instead. Each change makes the dish your own. This recipe is flexible and forgiving, so feel free to experiment. For the complete details, refer to the Full Recipe. Start with four cups of fresh peaches. Peel and slice them into thin pieces. I love using ripe peaches for the best flavor. In a large bowl, mix the sliced peaches with one tablespoon of lemon juice. This adds brightness to the dish. Next, add half a cup of granulated sugar, one tablespoon of cornstarch, and one teaspoon of ground cinnamon. Toss everything together until the peaches are well coated. This step is key for a tasty filling. In another bowl, combine one cup of rolled oats, half a cup of all-purpose flour, and half a cup of packed brown sugar. Add a quarter teaspoon of salt to balance the sweetness. Now, drizzle half a cup of melted unsalted butter and half a teaspoon of vanilla extract over the dry mix. Stir until the mixture is crumbly. This topping gives a nice crunch to the dessert. Preheat your oven to 350°F (175°C). Transfer the peach mixture into a greased 9x13-inch baking dish. Spread it out evenly. Now, sprinkle the oat topping over the peaches, covering them mostly. Bake for 30 to 35 minutes. The topping should be golden brown, and the peaches should be bubbly. Once done, remove it from the oven and let it cool for a few minutes before serving. This dessert is best warm and can be enjoyed with a scoop of vanilla ice cream. You can find the Full Recipe for more details. Select peaches that smell sweet and feel slightly soft. Look for a golden color, which shows ripeness. If they are hard, let them sit at room temperature for a day or two. Once ripe, use them right away for the best flavor. For the perfect topping, mix oats, flour, and sugars well. You want a crumbly texture that holds together but still breaks apart easily. Adding melted butter is key; it helps create a golden crust. If you like extra crunch, consider adding nuts or coconut to the mixture. Serve your peach crisp warm right from the oven. A scoop of vanilla ice cream on top is a classic choice. For extra flavor, sprinkle cinnamon over the ice cream. You can also add a drizzle of caramel sauce for a delightful twist. Enjoy the warm peach filling with your favorite toppings! {{image_2}} You can take your peach crisp to the next level with spices. A dash of nutmeg gives it warmth. Ginger adds a nice zing. You might also try cardamom for a unique twist. Just remember, less is more. Start with a small amount. You can always add more if you like. A splash of almond extract can also boost flavor. It pairs well with peaches. Peaches are great, but mix and match other fruits too. Try adding blueberries or raspberries for a burst of color. Cherries work well with peaches, bringing a sweet-tart balance. Pineapple adds a tropical touch that’s fun. You can use any fruit you love. Just keep the total to about four cups. This keeps the texture and flavor just right. You can make peach crisp gluten-free easily. Swap all-purpose flour for almond or oat flour. Use gluten-free oats if needed. For vegan options, replace butter with coconut oil or vegan butter. You can also use maple syrup instead of sugar for sweetness. These swaps keep the dessert delicious and satisfying. Enjoy your peach crisp knowing it fits your diet! For the full recipe, check out the Classic Peach Crisp Delightful and Easy Dessert Recipe. After you enjoy your peach crisp, let it cool completely. Cover it with plastic wrap or aluminum foil. Store it in the fridge for up to three days. This keeps the crisp fresh and tasty. If you have leftovers, you can freeze them. Cut the peach crisp into pieces. Place them in an airtight container or freezer bag. Make sure to remove as much air as possible. You can freeze it for up to three months. Just remember to label the bag with the date. To reheat your peach crisp, preheat your oven to 350°F (175°C). Place the crisp in an oven-safe dish. Cover it with foil to keep it moist. Bake for about 15 to 20 minutes. You want it to be warm and the topping crispy again. You can also reheat individual servings in the microwave for about 30 seconds. Enjoy your peach crisp again! For the full recipe, check out the ingredients and steps above. Yes, you can use frozen peaches. Just thaw them first. Drain any extra juice. This helps avoid a soggy crisp. Frozen peaches work well, but fresh ones taste best. Use fresh peaches when they are in season for a sweeter flavor. You will know it is done when the top is golden brown. The peaches should bubble around the edges. If you see this, it is ready to take out. The crisp usually takes about 30-35 minutes to bake. Let it cool for a few minutes before serving. Peach crisp pairs well with vanilla ice cream. You can also serve it with whipped cream. A drizzle of caramel sauce adds a nice touch. For a fun twist, try a scoop of yogurt. Each adds a creamy contrast to the warm, sweet crisp. For the full recipe, check the earlier section. This blog post covered how to make a delicious peach crisp. We looked at key ingredients like fresh peaches and topping options. I shared step-by-step instructions to guide your baking. We explored tips for choosing ripe peaches and perfecting your crisp topping. I also offered variations, including gluten-free options. Lastly, we discussed storage and reheating tips to keep your dessert fresh. Enjoy your baking journey. A warm peach crisp is worth every bite!

Classic Peach Crisp Delightful and Easy Dessert Recipe

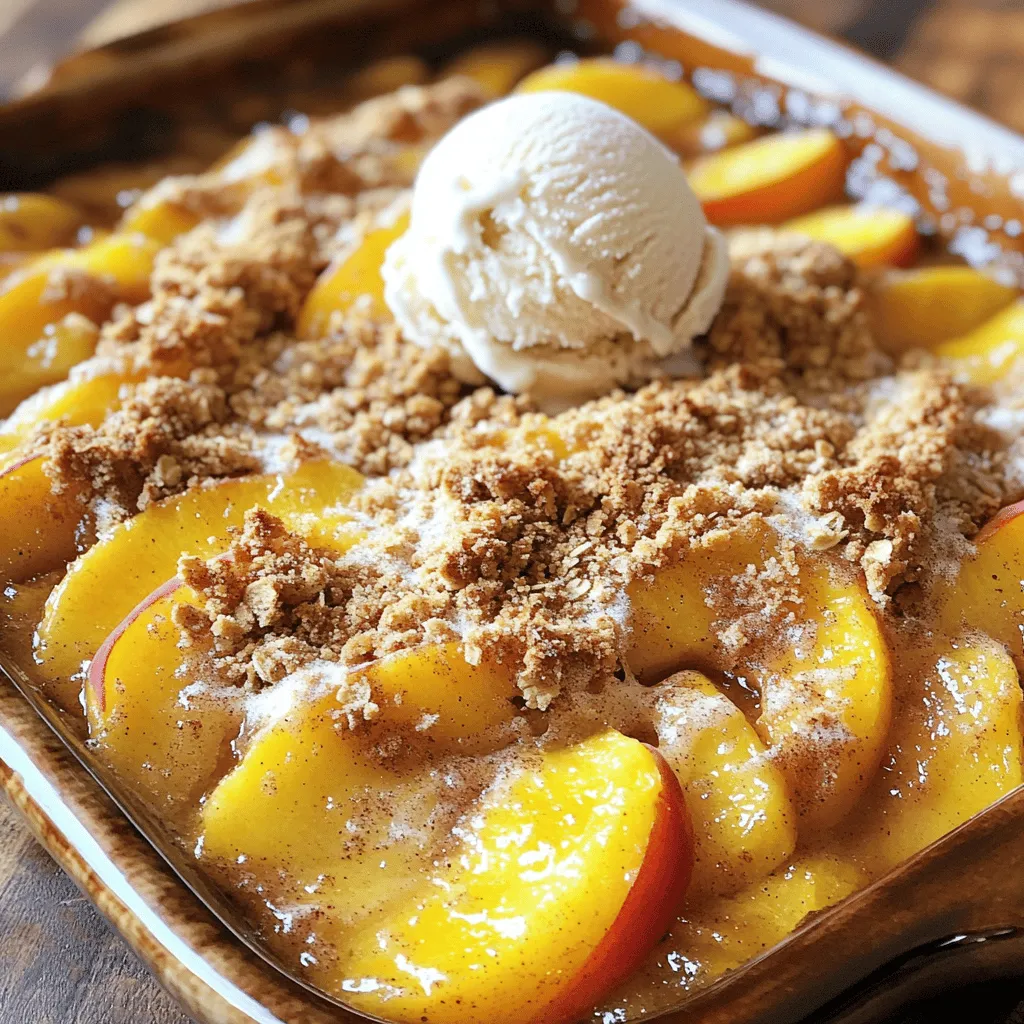
Are you ready to enjoy a warm, comforting dessert that bursts with flavor? You’ll love this Classic Peach Crisp. It

To make these colorful sushi rolls, gather these key ingredients: - 1 cup sushi rice - 1 ¼ cups water - ¼ cup rice vinegar - 1 tablespoon sugar - 4 sheets nori (seaweed) - 1 avocado, sliced - 1 cucumber, julienned - 1 carrot, julienned - 1 bell pepper (any color), thinly sliced - ½ red cabbage, finely shredded - 2 tablespoons sesame seeds - Soy sauce (for serving) These ingredients give the sushi its flavor and color. The sushi rice forms the base, while the fresh veggies add crunch and nutrition. Don't forget the nori, as it holds everything together. You can add your favorite ingredients to make the rolls unique. Here are some ideas: - Radishes for a spicy kick - Cream cheese for a creamy texture - Pickled ginger for tanginess - Green onions for extra flavor - Sweet potato for a hearty twist Feel free to mix and match based on what you like. This flexibility makes it fun and tasty! Each ingredient in these sushi rolls brings something good for you: - Sushi rice: Provides energy and carbs to fuel your day. - Avocado: Packed with healthy fats and vitamins. - Cucumber: Hydrating and low in calories. - Carrot: Full of beta-carotene, great for your eyes. - Bell pepper: High in vitamin C, good for your immune system. - Red cabbage: Rich in fiber and antioxidants. Eating these rolls is a tasty way to get your daily vitamins and minerals. Enjoying colorful foods helps you feel good inside and out. For a complete guide, check the Full Recipe. To start, rinse 1 cup of sushi rice under cold water. This step removes excess starch. Keep rinsing until the water runs clear. In a medium saucepan, combine the rinsed rice and 1 ¼ cups of water. Bring this mixture to a boil. Once it boils, lower the heat, cover, and let it simmer for 15 minutes. The rice should absorb all the water. After cooking, remove the saucepan from heat and let the rice cool slightly. Next, mix ¼ cup rice vinegar, 1 tablespoon sugar, and a pinch of salt in a small bowl. Stir until the sugar dissolves. Once the rice is cool, gently fold this vinegar mixture into the rice. Let the rice cool completely before using it in your rolls. Now, it's time to create your rolls. Place a bamboo sushi mat on a clean surface. Lay a sheet of nori, shiny side down, on the mat. With wet hands, spread a thin layer of sushi rice over the nori. Leave about 1 inch at the top edge. In a horizontal line across the rice, arrange your colorful veggies: 1 sliced avocado, 1 julienned cucumber, 1 julienned carrot, 1 thinly sliced bell pepper, and ½ finely shredded red cabbage. This creates a vibrant rainbow effect. Sprinkle 2 tablespoons of sesame seeds over the veggies. Carefully lift the edge of the mat closest to you and start rolling away from you. Keep the filling tightly packed. Roll until you reach the top edge of the nori. Wet the edge with a little water to seal the roll. Using a sharp knife, cut the roll into bite-sized pieces. Wipe the knife with a damp cloth between cuts. This keeps the edges clean and neat. Repeat this process with the remaining nori sheets and fillings. For serving, arrange the sushi rolls on a platter. Place soy sauce in a small bowl for dipping. You can also garnish with extra sesame seeds and cucumber slices. Add ginger and wasabi on the side for extra flavor if you like. Enjoy your beautiful and tasty rainbow veggie sushi rolls! To make rainbow veggie sushi rolls, you need a few key tools. Here’s what I recommend: - Bamboo sushi mat - Sharp knife - Rice cooker (optional) - Small bowls for ingredients - Plastic wrap These tools help you create perfect sushi rolls. The bamboo mat makes rolling easier. A sharp knife ensures clean cuts. Rolling sushi takes practice, but you can master it. Start by laying the nori shiny side down. Spread a thin layer of rice, leaving an inch at the top. Place your colorful veggies in a line across the rice. Here’s the trick: lift the mat while rolling. Tuck the filling in tightly. Use your fingers to keep the roll compact. When you reach the top edge, wet it to seal the roll. Soggy sushi is no fun! Here are some tips to keep your rolls fresh: - Use dry veggies. Pat them with a paper towel if needed. - Don’t overfill your rolls. Too much filling can lead to sogginess. - Keep the rice cool before rolling. Warm rice can make the nori wet. These tips help you make tasty rainbow sushi rolls that stay crisp. For the full recipe, check out the details above! {{image_2}} You can easily swap ingredients to make your sushi unique. For example, try using quinoa instead of sushi rice. Quinoa adds a nutty flavor and packs extra protein. You can also use different veggies, like radishes or sweet potatoes. These swaps keep the rolls colorful and tasty. Experiment with herbs, too! Fresh basil or cilantro can give your sushi a fresh twist. Rainbow veggie sushi can fit vegan and gluten-free diets. Use tamari instead of soy sauce for a gluten-free dip. You can also fill your rolls with marinated tofu or tempeh for added protein. Wrap the veggies in rice paper instead of nori for a fun change. This option makes the rolls light and crispy. Don't worry; they will still look vibrant! Dipping sauces can elevate your sushi experience. Soy sauce is a classic choice, but there are other options. Try mixing soy sauce with a bit of lime juice for a zesty kick. Peanut sauce adds creaminess and flavor. You can also make a spicy mayo by mixing mayo with sriracha. These sauces add fun flavors and complement the fresh veggies perfectly. For the full recipe, you can check the complete cooking instructions. Store leftover sushi rolls in an airtight container. Place a damp paper towel in the container to keep the rolls fresh. This helps prevent the rice from drying out. Try to eat the rolls within 24 hours for the best taste. If you want them to last longer, store them in the fridge. They can stay fresh for one day in the fridge. Sushi is best fresh, but you can refresh it. Remove the sushi from the fridge. Let it sit at room temperature for about 10 minutes. This helps the rice regain some of its original texture. Avoid using the microwave, as it can make the sushi soggy. If you want to warm the sushi slightly, use a steamer for a few seconds. You can freeze sushi rolls if you want to save them for later. Wrap each roll tightly in plastic wrap. Then, place them in a freezer bag or airtight container. Make sure to label the bag with the date. You can freeze sushi for up to one month. When you are ready to eat, thaw them in the fridge overnight. Enjoy them cold or let them sit at room temperature before serving. Yes, you can use brown rice. However, sushi rice is sticky and helps hold the roll together. Brown rice has a firmer texture and may not stick as well. If you choose brown rice, cook it longer and add a little more water. This will help achieve a better texture for rolling. You can use many colorful veggies! Here are some great options: - Avocado - Cucumber - Carrot - Bell pepper (any color) - Red cabbage - Radish These veggies add both color and crunch. You can mix and match to fit your taste! Homemade sushi rolls are best eaten fresh. If you must store them, wrap them tightly in plastic wrap. They can last in the fridge for about 24 hours. After that, the rice may dry out, and the veggies can lose their crunch. Using a bamboo mat makes rolling easier and neater, but it’s not required. If you don't have one, you can use a clean kitchen towel or just your hands. Just be careful to keep the roll tight and even. If you want to skip the seaweed, use thin slices of cucumber or rice paper instead. Cucumber slices can add a fresh crunch, while rice paper wraps hold everything together nicely. Just layer your fillings as you would with nori, and roll them up! For a full recipe, check out the Rainbow Veggie Sushi Rolls section in this article! You learned about the key ingredients for rainbow veggie sushi rolls and their benefits. I gave step-by-step instructions for making sushi, from rice prep to serving. We covered tips for tools and rolling techniques to make your sushi perfect. I shared fun variations and how to store or reheat leftovers for later. Enjoy making and sharing your rainbow veggie sushi. It’s fun, tasty, and good for you!

Rainbow Veggie Sushi Rolls Tasty and Colorful Snack

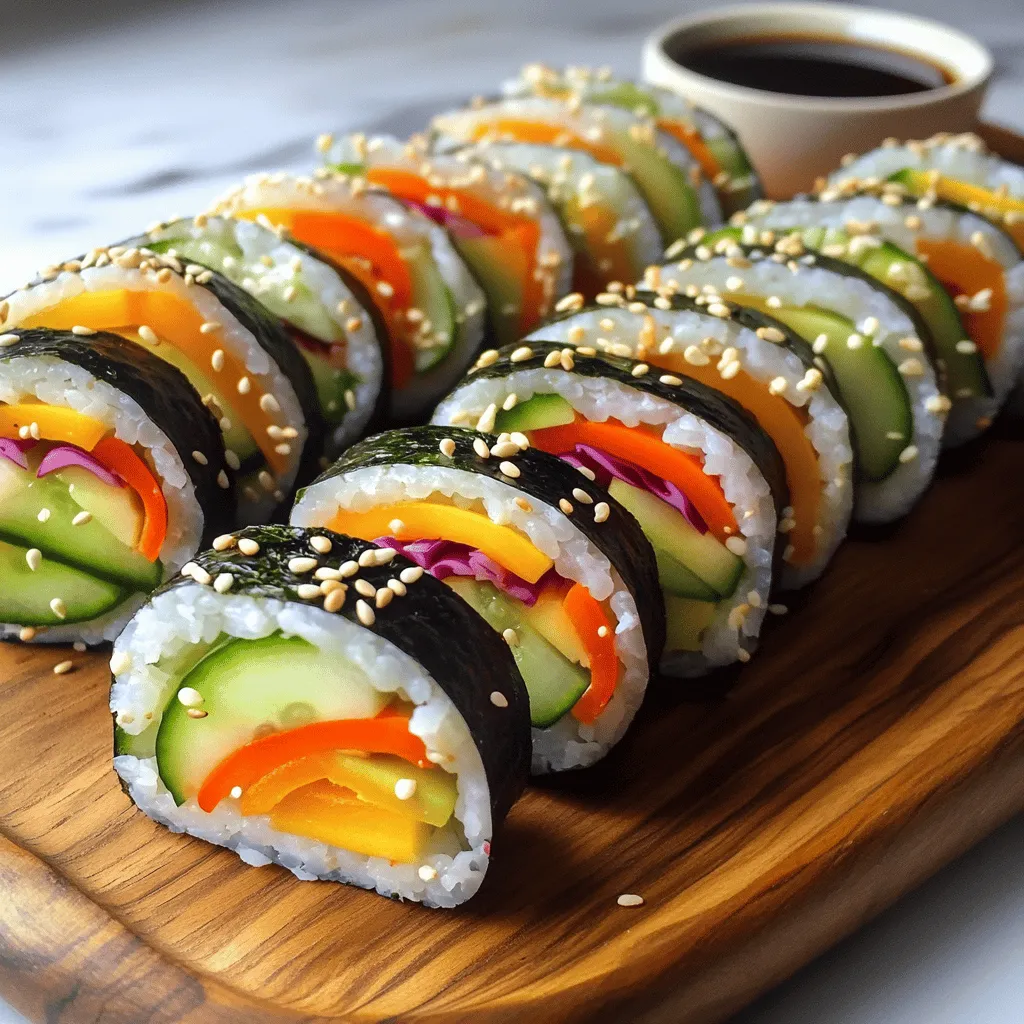
Are you ready to dive into a colorful culinary adventure? Rainbow Veggie Sushi Rolls are not just a feast for

Older posts
Newer posts
← Previous Page1 … Page66 Page67 Page68 … Page85 Next →

dsad

© 2026 greenmealmap • Built with GeneratePress

Our Policies

  • Copyright Policy
  • Cookie Policy
  • GDPR Policy
  • Privacy Policy
  • Disclaimer
  • Terms Of Use

More Information

  • Home
  • About
  • Contact
  • Appetizers
  • Dessert
  • Dinner
  • Drinks
©2026, greenmealmap About Back To Top