Skip to content
DisclaimerTerms Of UseGDPR PolicyCookie Policy

greenmealmap

  • Home
  • Drinks
  • Appetizers
  • Dinner
  • Dessert
  • About
  • Contact
  • Privacy Policy
DisclaimerTerms Of UseGDPR PolicyCookie Policy

NO-ING-IMG

To make this tasty dish, you need the following ingredients: - 250g spaghetti or fettuccine - 200g fresh mushrooms (cremini, shiitake, or button), sliced - 4 cloves garlic, minced - 50g unsalted butter - 2 tablespoons olive oil - 1 teaspoon dried thyme - Salt and pepper to taste - ¼ cup grated Parmesan cheese (optional) - Fresh parsley, chopped (for garnish) You can easily change this dish to suit your taste. Here are some options: - Add a splash of white wine for extra flavor. - Toss in red pepper flakes for a spicy kick. - Include spinach or kale for added greens. - Use different cheese, like goat cheese or feta. If you do not have something on hand, don't worry! You can swap ingredients easily: - For pasta, use any kind you prefer, like penne or gluten-free options. - Instead of butter, try using vegan butter or olive oil for a lighter dish. - If you lack fresh mushrooms, canned ones work too, but fresh is best for taste. - Use fresh herbs like basil or oregano instead of dried thyme for a fresh twist. For the full recipe, check out the detailed cooking steps. Enjoy your cooking! 1. Cook the Pasta: Start by boiling a large pot of salted water. Add 250g of spaghetti or fettuccine. Cook them until they are al dente. This usually takes about 8-10 minutes. Save ½ cup of the pasta water before draining. 2. Sauté the Mushrooms: In a large skillet, heat 2 tablespoons of olive oil and 25g of unsalted butter over medium heat. Once the butter melts, add 200g of sliced mushrooms. Stir and cook for 5-7 minutes until they turn golden brown. 3. Add Garlic and Seasoning: Toss in 4 minced garlic cloves and 1 teaspoon of dried thyme. Stir for 1-2 minutes until the garlic smells great. Add salt and pepper to taste. 4. Combine Pasta and Sauce: Add your drained pasta to the skillet. Toss it with the mushrooms. Gradually pour in the reserved pasta water. This helps create a nice sauce. 5. Finish with Butter and Cheese: Take the skillet off the heat. Stir in the remaining 25g of butter until it melts and coats the pasta. If you like, sprinkle ¼ cup of grated Parmesan cheese on top. 6. Serve: Spoon the pasta onto plates. Garnish with freshly chopped parsley for a pop of color. - Cooking Pasta: Always use plenty of water. This helps the pasta cook evenly. Add salt to enhance the flavor. - Sautéing: Keep the heat at medium. This allows mushrooms to brown without burning. Stir often to avoid sticking. - Creating Sauce: Using reserved pasta water is key. It helps bind the pasta and sauce together. - Prep Ingredients First: Slice mushrooms and mince garlic before cooking. This saves time. - Use Two Pots: Cook pasta in one pot while sautéing mushrooms in another. This speeds up the process. - Stay Organized: Keep your workspace tidy. It helps you focus and cook faster. For more detailed instructions, check the Full Recipe. To cook pasta well, always use a large pot of water. Salt the water before boiling. This adds flavor to your pasta. Add the pasta once the water is boiling. Stir it often to keep it from sticking. Cook until it's al dente, which means firm but not hard. This takes around 8-10 minutes for spaghetti or fettuccine. Always save some pasta water; it helps to make your sauce smooth. For the best sauce, use the pasta water you saved. This water has starch that helps bind the sauce. Start by mixing the drained pasta with the sautéed mushrooms. Gradually add the reserved pasta water. Toss the pasta as you add the water. Stop when the sauce looks creamy and coats the pasta well. If the sauce is too thin, let it cook a bit longer. If it's too thick, add more pasta water. Garlic butter mushroom pasta pairs well with many dishes. A light green salad adds fresh crunch. Garlic bread is a great side for extra flavor. You can also serve it with grilled chicken or shrimp for protein. If you want to keep it simple, roasted vegetables make a nice addition. For a drink, a crisp white wine works well with this meal. For more ideas, check the Full Recipe. {{image_2}} You can change the flavor of your garlic butter mushroom pasta by using different mushrooms. Each type adds a unique taste. Here are some options: - Cremini mushrooms: Earthy and meaty in flavor. - Shiitake mushrooms: Rich and slightly smoky. - Oyster mushrooms: Delicate and sweet. - Portobello mushrooms: Meaty and robust. Mix and match these mushrooms to find your favorite blend. Experimenting with these options can make your dish even more exciting. Adding proteins or vegetables can make your dish heartier. Here are some great options: - Grilled chicken: Adds a nice texture and flavor. - Shrimp: Cooks quickly and gives a seafood twist. - Spinach: Adds color and nutrients. - Broccoli: A healthy crunch that pairs well. These additions not only make the dish filling but also boost its nutritional value. You can easily adapt this recipe to fit vegetarian or vegan diets. Here are some tips: - For a vegetarian version: Skip the Parmesan cheese or use a vegetarian alternative. - For a vegan option: Use plant-based butter and omit the cheese. Nutritional yeast can replace the Parmesan for a cheesy flavor. These swaps make the dish suitable for everyone, keeping it delicious and satisfying! For the full recipe, please refer to the earlier sections. Once you finish your meal, let the pasta cool down. Place it in an airtight container. This helps keep it fresh. Store it in the fridge for up to three days. If you want to enjoy it later, freezing is a good option. When you're ready to eat, take the pasta out of the fridge. You can reheat it in a few ways. The best method is on the stove. Add a splash of water or broth to keep it moist. Heat it over medium-low heat, stirring gently. You can also use the microwave. Just cover it and heat in short bursts, stirring in between. If you want to save the pasta for longer, freezing is great. Divide the pasta into single-serving portions. Use freezer-safe bags or containers. Remove as much air as you can before sealing. Properly stored, it can last up to three months. When you’re ready to eat, thaw it overnight in the fridge or use the microwave. For the best taste, reheat it on the stove. Enjoy your Garlic Butter Mushroom Pasta again with ease! For the full recipe, check out the detailed instructions. Yes, you can use dried mushrooms. Dried mushrooms have a strong flavor. To use them, soak the dried mushrooms in warm water for about 20 minutes. This will help them soften. After soaking, drain and chop them. Then, add them to your dish like fresh mushrooms. The flavor will be rich, making your pasta tasty. To make this dish gluten-free, swap regular pasta for gluten-free pasta. Many brands now offer great options. You can find gluten-free spaghetti or fettuccine in stores. Just follow the cooking instructions on the package. This way, you still enjoy the rich garlic and mushroom flavors without gluten. Some great side dishes include: - Garlic bread: Perfect for soaking up the sauce. - Green salad: Fresh greens add a nice crunch. - Roasted vegetables: Carrots, zucchini, or bell peppers work well. - Steamed broccoli: Adds color and nutrition. These sides balance the meal and keep it light. You can find the Full Recipe for Garlic Butter Mushroom Pasta above to enjoy this dish at home! This blog post covered how to make Garlic Butter Mushroom Pasta. We explored ingredients, steps, and tips for cooking. You learned about customizing your dish and keeping leftovers fresh. Remember to experiment with flavors and textures. Cooking should be fun, so feel free to change things up! Enjoy this tasty dish with your favorite sides. You now have the tools to make a delicious meal when you want. Happy cooking!

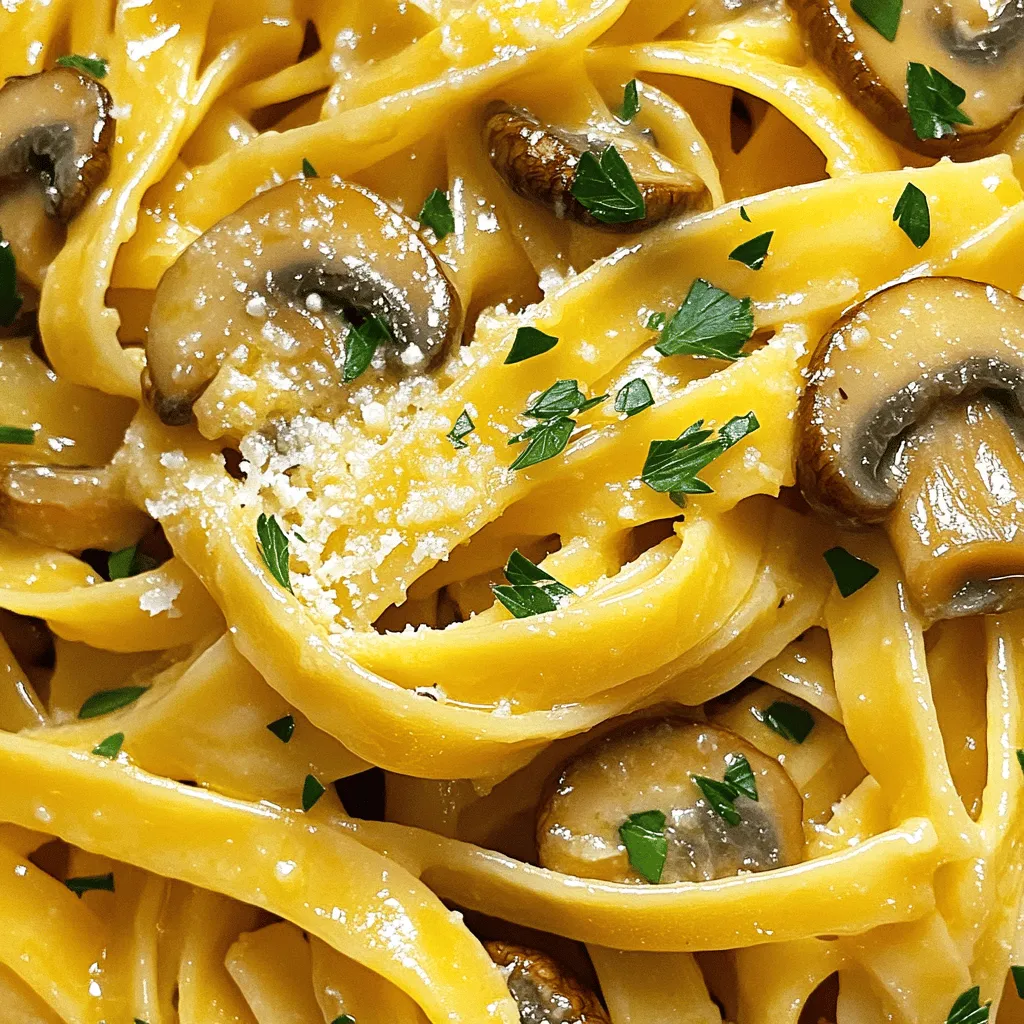
Savory Garlic Butter Mushroom Pasta Easy and Delicious

Looking for a quick and tasty dinner? You’re in the right place! My Savory Garlic Butter Mushroom Pasta is easy

To make chocolate zucchini muffins, you will need: - 1 cup grated zucchini (about 1 medium zucchini) - 1 cup all-purpose flour - 1/2 cup unsweetened cocoa powder - 1/2 teaspoon baking soda - 1 teaspoon baking powder - 1/2 teaspoon salt - 1/2 cup granulated sugar - 1/4 cup brown sugar, packed - 1/2 cup vegetable oil (or melted coconut oil) - 2 large eggs - 1 teaspoon vanilla extract - 1/2 cup chocolate chips (semi-sweet or dark) - Optional: 1/4 cup chopped walnuts or pecans These muffins are not just tasty; they are also good for you. Each muffin has about: - Calories: 150-180 - Protein: 3-4 grams - Carbohydrates: 20-24 grams - Fat: 7-9 grams - Fiber: 1-2 grams - Sugar: 8-10 grams The zucchini adds moisture and fiber without many calories. This makes these muffins a smart choice. Zucchini is more than just a filler. It brings great benefits to baking: - Moisture: Zucchini keeps muffins soft and tender. - Nutrition: It adds vitamins A and C, plus potassium. - Low-Calorie: Zucchini helps reduce the calorie count. - Fiber: It boosts fiber, aiding digestion and keeping you full longer. Using zucchini in your muffins is a fun way to sneak in veggies while enjoying a sweet treat. You can find the full recipe for chocolate zucchini muffins to try at home. First, you need to preheat your oven to 350°F (175°C). This step is key for baking. While the oven heats, line a 12-cup muffin tin with liners. If you don't have liners, spray the tin with non-stick spray. This helps the muffins come out easily after baking. Next, grab a large mixing bowl. In this bowl, combine 1 cup of grated zucchini, 1/2 cup of granulated sugar, and 1/4 cup of brown sugar. Add 1/2 cup of vegetable oil, 2 large eggs, and 1 teaspoon of vanilla extract. Mix these ingredients well. Make sure they blend smoothly. This mix gives the muffins moisture and taste. Now, take another bowl. Whisk together 1 cup of all-purpose flour, 1/2 cup of cocoa powder, 1/2 teaspoon of baking soda, 1 teaspoon of baking powder, and 1/2 teaspoon of salt. This step helps evenly distribute the dry ingredients. It is important for the muffins to rise well. Gradually add the dry mix to the wet mix. Use a spatula to fold gently. Be careful not to overmix; a few lumps are fine. This keeps the muffins fluffy. After combining, stir in 1/2 cup of chocolate chips. You can also add 1/4 cup of chopped walnuts or pecans if you like. Spoon the batter evenly into the muffin tin, filling each cup about 3/4 full. Place the tin in the oven. Bake for 18-22 minutes. To check for doneness, insert a toothpick into the center of a muffin. If it comes out clean, the muffins are ready. After baking, cool them in the tin for 5 minutes. Then transfer them to a wire rack. Enjoy your delicious creations! For the complete recipe, check out the Full Recipe. Overmixing can make your muffins tough. Mix just until you see no dry flour. A few lumps in the batter are just fine. This helps keep your muffins soft and fluffy. Remember, you want a tender crumb. Grate your zucchini using a box grater or a food processor. Aim for small, even pieces. This helps the zucchini blend well into the batter. After grating, squeeze out extra moisture with a clean towel. Too much water can make the muffins soggy. Store your muffins in an airtight container. This keeps them fresh for about three days. You can also freeze them for later. To freeze, place the muffins in a freezer bag. They stay good for up to three months. Just thaw them at room temperature when you’re ready to eat! For the full recipe, check the earlier section. {{image_2}} You can make Chocolate Zucchini Muffins healthier by swapping some ingredients. Use whole wheat flour instead of all-purpose flour. This change adds fiber and nutrients. You can also use coconut sugar instead of granulated sugar. Coconut sugar has a lower glycemic index, which means it can help keep your blood sugar stable. To make your muffins even more exciting, think about adding nuts or dried fruit. Chopped walnuts or pecans add a nice crunch. You can mix in dried cranberries or raisins for a sweet surprise. If you love chocolate, try using dark chocolate chips or even white chocolate. Each type gives a unique taste, making your muffins special. If you need a gluten-free option, you can easily adjust the recipe. Replace all-purpose flour with a gluten-free flour blend. Look for one that measures cup-for-cup to keep the texture right. Be sure to check that your cocoa powder and chocolate chips are also gluten-free. Making these small changes allows everyone to enjoy these tasty muffins. For the full recipe, check out the complete instructions to bake these delightful treats! To keep your muffins fresh, place them in an airtight container. You can store them at room temperature for up to three days. If you want to keep them longer, consider refrigerating them. Just make sure to seal them well to avoid drying out. Freezing is a great way to save your chocolate zucchini muffins. First, let them cool completely. Then, wrap each muffin tightly in plastic wrap or place them in a freezer bag. They can last up to three months in the freezer. When you're ready to enjoy, just thaw them in the fridge overnight. To reheat muffins, you have a few options. You can use the microwave for a quick warm-up. Heat them for about 15-20 seconds. For a crispier texture, place them in an oven set to 350°F (175°C) for about 5-10 minutes. This will bring back their delightful freshness. Enjoy your muffins warm! Yes, you can substitute ingredients. Use whole wheat flour for a healthier option. You can swap granulated sugar with coconut sugar for a lower glycemic index. If you need a dairy-free option, use non-dairy milk instead of eggs. Check the muffins after 18 minutes. Insert a toothpick into the center of a muffin. If it comes out clean, the muffins are done. If it has wet batter on it, bake for a few more minutes. Keep an eye on them to avoid overbaking. Yes, you can use frozen zucchini. Just thaw it first and squeeze out excess moisture. This helps keep the muffins from getting soggy. Frozen zucchini works well and still gives a nice flavor and texture. For the complete recipe, check out the Full Recipe section. Enjoy your baking! You learned how to bake delicious zucchini muffins. We covered the ingredients, nutrition, and benefits of zucchini in baking. I provided clear steps to mix and bake, along with tips to avoid overmixing and store muffins. Variations let you try healthier options and tasty add-ins. Zucchini offers great health benefits while keeping muffins moist. Enjoy experimenting with this recipe for tasty, nutritious snacks!

Chocolate Zucchini Muffins Nutritious and Delicious Treat

If you love a sweet treat that doesn’t ditch nutrition, you’ll love my Chocolate Zucchini Muffins! These tasty muffins pack

To make Peanut Butter Chocolate Overnight Oats, you need simple ingredients. Here’s what you’ll need: - 1 cup rolled oats - 2 cups almond milk (or any milk of choice) - 2 tablespoons natural peanut butter - 2 tablespoons unsweetened cocoa powder - 1 tablespoon maple syrup (or honey) - 1/2 teaspoon vanilla extract - Pinch of salt - 1 banana, sliced (for topping) - Chopped nuts or chocolate chips (optional for garnish) These ingredients come together to create a creamy, rich dish. The oats will soak overnight, absorbing all the flavors. The peanut butter gives it a nutty taste, while the cocoa powder adds a chocolatey kick. Sweeten it to your liking with maple syrup or honey. You can also top it with fresh banana slices for a fruity touch. If you like a bit of crunch, sprinkle some chopped nuts or chocolate chips on top. This simple recipe is not just tasty; it’s also filling and provides energy for your day. For the full recipe, check out Peanut Butter Chocolate Bliss Overnight Oats. - Mixing the ingredients Start by taking a large mixing bowl. Add 1 cup of rolled oats, 2 cups of almond milk, and 2 tablespoons of natural peanut butter. Next, add 2 tablespoons of unsweetened cocoa powder, 1 tablespoon of maple syrup, and 1/2 teaspoon of vanilla extract. Toss in a pinch of salt for flavor. Use a whisk to mix everything until smooth. Make sure all the ingredients blend well. - Dividing into jars Once your mixture is ready, grab two mason jars or any airtight containers. Pour the mixture evenly into each jar. This makes it easy to grab and enjoy later. - Refrigeration time needed Seal the jars tightly and place them in the fridge. Let them chill overnight, or for at least 4 hours. This time allows the oats to soak up the liquid and become soft. - Stirring before serving When you’re ready to eat, take the jars out of the fridge. Give each jar a good stir. This helps mix any ingredients that settled at the bottom. - Topping ideas Top your oats with sliced banana for sweetness. You can also add chopped nuts or chocolate chips for an extra crunch. These toppings make the dish even more fun and tasty. For a special touch, drizzle a bit more peanut butter on top! Enjoy your Peanut Butter Chocolate Overnight Oats! For the full recipe, check the section above. To make the best peanut butter chocolate overnight oats, get the oat-to-liquid ratio right. I use 1 cup of rolled oats to 2 cups of almond milk. This mix ensures the oats soak up enough liquid. If you want thicker oats, use less milk. For a creamier texture, add a bit more. Mixing is key. Start by adding all your ingredients in a large bowl. Use a whisk to blend them well. Make sure there are no dry clumps of oats. A smooth mix helps the oats soak in the flavors. Looking to boost flavor? There are many great toppings. Try adding fresh fruit like berries or sliced apples. Chopped nuts give a nice crunch and add protein. For a sweet touch, drizzle honey or sprinkle cinnamon on top. If you want to change up the sweetness, swap maple syrup for agave nectar. You can also use stevia or coconut sugar for a different taste. These small swaps make a big difference in flavor and health. For the full recipe, check out the Peanut Butter Chocolate Bliss Overnight Oats. {{image_2}} You can change the flavor of your peanut butter chocolate overnight oats in fun ways. Adding fruits like strawberries or blueberries makes them fresh and tasty. Just chop up the fruit and mix it in before refrigerating. These fruits add natural sweetness and color. If you want to try different nut butters, almond or cashew butter works well. They give a unique twist while keeping it creamy. You can switch up flavors every time you make this recipe. For those who need dairy-free options, almond milk is a great choice. You can also use oat or coconut milk for a creamy texture. Choose a milk that fits your taste and diet. If you are gluten-free, make sure to use certified gluten-free rolled oats. This simple switch keeps your oats safe to eat while still being delicious. You can enjoy this treat without worrying about gluten. To keep your peanut butter chocolate overnight oats fresh, store them in the fridge. Use airtight containers or mason jars. This way, they stay tasty for breakfast or snacks. Make sure to seal them tight. If you want to freeze them, it's easy! Just put the oats in freezer-safe jars. Leave some space at the top as they expand when frozen. These overnight oats stay fresh for about 3 to 5 days in the fridge. After that, the oats may lose some texture and flavor. If you freeze them, they can last up to 3 months. Just remember to thaw them in the fridge overnight before eating. Enjoy your delicious peanut butter chocolate bliss! For the full recipe, check out the complete details. Can I use steel-cut oats instead of rolled oats? No, steel-cut oats do not work well for overnight oats. They are too tough and take longer to cook. Rolled oats absorb liquid better and soften nicely overnight. Stick with rolled oats for the best texture. How long do overnight oats last in the fridge? Overnight oats can last up to five days in the fridge. Make sure to store them in airtight containers. This way, you can prep multiple jars at once for busy mornings. Can I make these oats vegan? Yes, you can easily make these oats vegan. Just use almond milk or any plant-based milk. Also, replace honey with maple syrup or agave nectar for sweetness. Caloric content per serving Each serving of these Peanut Butter Chocolate Overnight Oats has about 350 calories. This number may vary based on your choice of milk and added toppings. Benefits of key ingredients - Rolled oats: Great source of fiber, which helps with digestion. - Peanut butter: Packed with protein and healthy fats. It keeps you full longer. - Cocoa powder: Rich in antioxidants and adds a delicious chocolate flavor. - Bananas: A good source of potassium and adds natural sweetness. This blog post walks you through making delicious overnight oats. You learned about key ingredients, prep steps, and how to enhance flavor. I shared tips to perfect your recipe and offered variations for different diets. Storing your oats correctly ensures they stay fresh, plus FAQs answered common concerns. Try these oats as a quick breakfast. They are tasty, easy, and customizable. Enjoy experimenting with flavors to find your favorite!

Peanut Butter Chocolate Overnight Oats Simple Recipe

Are you ready to enjoy a tasty, healthy breakfast? Peanut Butter Chocolate Overnight Oats are perfect for busy mornings. This

- Iceberg lettuce - Cherry tomatoes - Red onion - Blue cheese The main star of our wedge salad is the crisp iceberg lettuce. Its crunch adds a great texture. Next, we have vibrant cherry tomatoes. They bring sweetness and color to the dish. The red onion gives a lovely bite, balancing the flavors. Finally, blue cheese adds a rich, creamy element that ties everything together. - Sour cream - Mayonnaise - Lemon juice - Garlic The dressing is the heart of the wedge salad. I use sour cream for creaminess and a slight tang. Mayonnaise adds richness, making the dressing smooth. A splash of lemon juice brightens the flavors. Garlic gives it a bold punch that you will love. - Crispy chickpeas - Fresh chives - Additional toppings I enjoy adding crispy chickpeas for extra crunch. They also add protein, making the salad heartier. Fresh chives bring a mild onion flavor and a pop of green. You can also add other toppings like bacon or nuts for even more flavor and texture. For the full recipe, check out Crisp & Creamy Wedge Salad. To start, grab your head of iceberg lettuce. Carefully cut it into quarters. Each quarter will be a wedge. Rinse each wedge under cold water. This helps remove dirt and keeps your salad fresh. After rinsing, gently pat the wedges dry with paper towels. This step prevents sogginess in your salad. Next, we will make the dressing. In a bowl, combine sour cream, mayonnaise, lemon juice, and minced garlic. Add salt and pepper for flavor. Stir the mixture until it is smooth and creamy. Taste the dressing and adjust the seasoning as needed. You want it to be just right, so don’t skip this step! Now it’s time to put everything together. Place the lettuce wedges on serving plates. Make sure they are stable and upright. Drizzle the creamy dressing generously over each wedge. Watch it cascade down the sides; it looks great! Next, scatter the halved cherry tomatoes and slices of red onion on top. For added crunch, sprinkle crispy chickpeas over the wedges. Finally, finish with crumbled blue cheese and some chopped chives for garnish. Your classic wedge salad is now ready to enjoy! For the full recipe, check the recipe section. To achieve the ideal consistency for your dressing, mix sour cream and mayonnaise in equal parts. This gives a rich and creamy texture. If you want it thinner, add a splash of milk or buttermilk. For a twist, use Greek yogurt instead of sour cream. It adds tang and is healthier. For an elegant look, serve each wedge on its own plate. This makes the dish pop! You can also sprinkle extra black pepper on top. Adding a lemon wedge on the side gives a bright touch. Consider using colorful cherry tomatoes or fresh herbs for garnish, like chives or parsley. Wedge salad pairs well with grilled meats, like steak or chicken. It also goes nicely with a crisp white wine or a light beer. For gatherings, consider serving smaller wedges. This way, guests can enjoy a taste without feeling too full. Aim for one wedge per person, or slice them into smaller pieces for sharing. {{image_2}} For a lighter version of the classic wedge salad, try using low-fat dressings. You can mix yogurt with herbs instead of mayo. This keeps the creamy texture but cuts down on fat. You can also add more vegetables to increase fiber and nutrients. Think about adding cucumber, bell peppers, or even radishes for extra crunch and color. To elevate the flavor, consider adding crispy bacon or prosciutto. The salty, savory taste pairs well with the fresh salad. If you want more texture, introduce nuts or seeds. Chopped walnuts or sunflower seeds can add a delightful crunch. They also bring healthy fats and protein to the dish. If you want to switch up the cheese, goat cheese works great in this salad. It has a tangy flavor that adds depth. You might also try feta or Parmesan. Feta gives a briny kick, while Parmesan offers a nutty taste. Each cheese brings its unique flair, so don’t hesitate to experiment! To keep the salad fresh, wrap the wedges tightly in plastic wrap. Place them in an airtight container. This helps maintain moisture and flavor. Store the salad in the fridge for up to three days. For the best taste, eat it soon after making it. For dressing storage, keep it separate from the salad. Use a small jar with a lid. The dressing can last up to a week in the fridge. Before using, give it a good shake to mix any settled ingredients. If you have leftover wedge salad, try a fun twist! Chop the wedges and mix them into a wrap or a grain bowl. This way, you can enjoy the flavors in a new way. You can also blend the leftover salad into a smoothie. It sounds odd, but it can be refreshing. For safety, remember to check the salad before eating it again. If it smells bad or looks strange, toss it out. Always eat leftovers within three to four days to stay safe. A wedge salad lasts about 2 to 3 days in the fridge. After that, the lettuce may wilt. The dressing can separate, making it less tasty. To keep it fresh, store the salad in a sealed container. Keep the dressing separate until you are ready to eat. This way, the lettuce stays crisp and delicious. Yes, you can make the dressing ahead of time. I often prepare it the day before. Store it in a jar or airtight container in the fridge. This allows the flavors to blend well. Just give it a good shake before serving. If it thickens, add a little water or lemon juice to loosen it up. Some common mistakes include using wilted lettuce or overloading the toppings. Always choose fresh, crisp iceberg lettuce. Too many toppings can hide the great taste of the salad. Balance is key. Also, don't forget to season your dressing well. A little salt and pepper can make a big difference. For an amazing salad, follow the [Full Recipe]. The wedge salad is a classic dish with simple, fresh ingredients. You learned how to prepare the lettuce, make the dressing, and assemble everything beautifully. I shared tips on making it your own with add-ons and variations. Finally, I covered how to store and use any leftovers. This salad is easy to customize and fun to serve. Enjoy crisp flavors and a great presentation at your next meal!

Classic Wedge Salad Fresh and Flavorful Delight

If you’re craving a fresh, crunchy delight, the classic wedge salad is your answer. With crisp iceberg lettuce, juicy cherry

To make easy chicken gyros, you will need: - 2 boneless, skinless chicken breasts - 2 tablespoons olive oil - 2 teaspoons dried oregano - 1 teaspoon garlic powder - 1 teaspoon onion powder - 1 teaspoon paprika - Salt and pepper to taste - 4 whole wheat pita breads - 1 cup Greek yogurt - 1 tablespoon lemon juice - 1 cucumber, finely chopped - 1 small red onion, thinly sliced - 1 medium tomato, diced - Fresh parsley, for garnish You will need a few simple tools: - A mixing bowl for the marinade - A grill or skillet for cooking - A knife and cutting board for slicing - A whisk or spoon for mixing the tzatziki sauce - Serving plates for the gyros You can easily swap out some ingredients: - Use chicken thighs instead of breasts for juicier meat. - Replace Greek yogurt with sour cream if needed. - Try using a different herb like thyme instead of oregano. - You can use store-bought tzatziki sauce to save time. - Whole wheat pita can be switched with regular pita or flatbreads. This recipe is all about fresh flavors and quick cooking. You can find the full recipe for easy chicken gyros in the earlier sections. Enjoy! To start, gather your ingredients and grab a bowl. Mix the olive oil, oregano, garlic powder, onion powder, paprika, salt, and pepper. This blend packs your chicken with flavor. Add the chicken breasts to the bowl. Ensure each piece is coated well in the marinade. Cover the bowl and place it in the fridge. Let it marinate for at least 30 minutes. For even more flavor, leave it for up to 2 hours. Next, preheat your grill or skillet over medium-high heat. It should be hot before you add the chicken. Place the marinated chicken on the grill. Cook for about 6 to 7 minutes on each side. Check the internal temperature; it should reach 165°F (75°C). Once cooked, remove the chicken and let it rest for a few minutes. This helps keep it juicy. After resting, slice the chicken into thin strips. While the chicken rests, it’s time for the tzatziki sauce. In a bowl, combine Greek yogurt, lemon juice, and finely chopped cucumber. Mix everything well. Season it with salt and pepper to taste. This sauce adds a cool touch to the gyros. You can adjust the flavors if needed. Now, it's time to build your gyros! Take a whole wheat pita bread and spread a good amount of tzatziki sauce in the center. Add a layer of sliced chicken on top. Then, sprinkle some red onions and diced tomatoes. Finish it with a bit of fresh parsley for color. Roll up the pita around the filling. You can use parchment paper or foil to keep it together. Serve your chicken gyros right away for the best flavor. Enjoy your homemade meal! For the complete recipe, check out the [Full Recipe]. To cook chicken just right, start by using even-sized pieces. This helps them cook evenly. A meat thermometer is a great tool. Aim for 165°F (75°C) for safety. Let the chicken rest after cooking. This keeps it juicy. Slice it thin for better texture in your gyros. Whole wheat pita bread is a healthy choice. It adds fiber and flavor. You can also choose traditional white pita if you prefer. For a gluten-free option, look for gluten-free pita breads. They taste great and hold the filling well. Store-bought or homemade both work well. Spices make your chicken gyros pop! Use dried oregano for a classic taste. Garlic powder adds depth. Paprika gives a nice color and warmth. Feel free to try new spices too. Cumin or coriander can add a unique twist. Just remember to balance flavors for a tasty dish. For the full recipe, check out the Easy Chicken Gyros. {{image_2}} You can swap chicken for beef or tofu. Beef gives a richer taste. For beef, use thin slices of flank steak. Marinate it just like the chicken. Cook until it's tender. Tofu offers a great vegetarian option. Press it to remove water and cut it into strips. Marinate and grill for a tasty bite. Tzatziki can change based on your tastes. You can add herbs like dill or mint for fresh flavors. For a spicy kick, mix in some chopped jalapeños. Want a creamier sauce? Blend in some avocado. Each mix gives a new twist to your gyros. Serve your gyros with crunchy sides. Greek salad pairs well with the meal. Roasted veggies also add a nice touch. For drinks, try a refreshing lemonade or a light beer. These choices enhance your meal's flavor and make it special. For the full recipe, check out Easy Chicken Gyros ! To store leftover gyros, wrap each one in plastic wrap or foil. Place them in an airtight container. This keeps them fresh for up to three days in the fridge. If you have extra chicken or tzatziki, store them separately. This helps maintain texture and flavor. When you want to enjoy your gyros again, reheat them gently. You can use a skillet over low heat. This warms the gyros without making them soggy. Heat the chicken strips until they are warm. If you prefer, you can microwave them for about 30 seconds. Just be careful not to overheat. If you want to save gyros for later, you can freeze them. Wrap each gyro tightly in plastic wrap. Then place them in a freezer-safe bag. They can last up to two months in the freezer. When you’re ready to eat, thaw them overnight in the fridge. Reheat as mentioned above for the best texture. For more details and tasty steps, check the Full Recipe. To make your chicken gyros tastier, add more spices. You can try cumin or coriander. Marinating longer helps too. Let the chicken sit in the marinade for two hours. This adds great flavor to each bite. Also, fresh herbs like dill or mint can enhance the taste. Just sprinkle them on top before serving. Yes, you can use frozen chicken. Just thaw it first in the fridge overnight. Make sure it is fully defrosted before marinating. If you cook frozen chicken, it may not cook evenly. Always check the internal temperature to ensure it's 165°F (75°C) before serving. Chicken gyros pair well with many sides. You can serve them with Greek salad for freshness. Roasted vegetables also make a great side dish. For a lighter option, try a cucumber salad. Adding pita chips or hummus adds a nice crunch too. You can make tzatziki without yogurt by using avocado or silken tofu. Blend either with lemon juice and cucumber. This gives a creamy texture and fresh taste. Season with salt, pepper, and herbs to your liking. Enjoy this tasty twist on a classic sauce. For the full recipe, check out the Easy Chicken Gyros section above. To sum it up, we covered how to make delicious chicken gyros. We discussed key ingredients, essential tools, and smart substitutions. You learned step-by-step instructions for marinating, cooking, and assembling. Tips helped you cook chicken perfectly, pick the best pita, and enhance flavors. Variations opened up options for proteins and sides. Finally, we shared how to store leftovers and answered common questions. So, you're now ready to create tasty gyros that everyone will enjoy!

Easy Chicken Gyros Tasty and Quick Meal Idea

Craving a flavorful meal that you can whip up in no time? You’re in for a treat! My Easy Chicken

Let's dive into the ingredients you'll need for these chocolate-covered strawberry bites. They are simple yet delicious. Here’s the list: - 1 pound fresh strawberries, stems removed - 1 cup dark chocolate chips (or semi-sweet for a sweeter taste) - 1 tablespoon coconut oil (optional) - 1/2 cup crushed nuts (optional) - 1/4 cup shredded coconut (optional) - Sea salt for sprinkling (optional) These ingredients make the perfect combination for a sweet treat. Fresh strawberries bring a juicy burst of flavor. Dark chocolate adds a rich taste that pairs well with fruit. If you want a smoother chocolate, coconut oil is your friend. You can also customize your bites with nuts or coconut for extra crunch. A sprinkle of sea salt can elevate the sweetness, making each bite even better. When you gather these ingredients, you set the stage for a fun and tasty project. The best part? You can easily find these items at your local store. For the full recipe, check out the complete details on how to create these delightful treats. - Rinse strawberries and pat dry. This keeps the chocolate from sliding off. - Prepare baking sheet with parchment paper. This helps with easy cleanup. - Combine chocolate chips and coconut oil in a microwave-safe bowl. Coconut oil makes the chocolate smooth. - Microwave and stir until smooth. Start with 30 seconds, then stir. Repeat until melted. - Dip strawberries in melted chocolate. Let excess chocolate drip off. - Place on baking sheet and add toppings. Try nuts, coconut, or sea salt. - Refrigerate until chocolate hardens. This takes about 30 minutes. For the full recipe, check the section above. Enjoy your tasty treats! To get the best chocolate-covered strawberries, you must dry your strawberries well. Any water left on them can make the chocolate slide right off. After washing them, pat them dry with a paper towel until no water remains. Choosing the right type of chocolate is also key. Dark chocolate gives a nice deep flavor, while semi-sweet chocolate offers a sweeter taste. You can even try milk chocolate for a creamier bite. Each type adds a unique twist to your treat. For smoother chocolate, I suggest adding a little coconut oil. This helps the chocolate melt evenly and makes it easier to coat the strawberries. Just mix one tablespoon of coconut oil with your chocolate chips before melting. Avoid overheating chocolate, as it can burn quickly. Use a microwave-safe bowl and heat the chocolate in 30-second intervals. Stir in between each interval until it’s fully melted. This keeps your chocolate velvety and perfect for dipping. You can take your chocolate-covered strawberries to the next level with toppings. Try crushed nuts, like almonds or hazelnuts, for a crunchy texture. Shredded coconut adds a tropical twist, while a sprinkle of sea salt can balance the sweetness nicely. Experiment with fillings too! Adding a touch of cream cheese or whipped cream inside the strawberries creates a delightful surprise. Each bite will burst with flavor, making your treat even more exciting. {{image_2}} You can choose from dark, milk, or white chocolate. Dark chocolate has a rich taste. Milk chocolate is sweeter and creamier. White chocolate adds a nice light flavor. You can also try flavored chocolate. Think of options like raspberry or orange. These choices can give your bites a fun twist. For toppings, you can use crushed nuts, shredded coconut, or colorful sprinkles. Nuts add crunch and flavor. Coconut gives a tropical taste. Sprinkles make your bites look festive. If you want something special, try caramel or toffee. Drizzling these on top can make your treats even more exciting. Get creative with stuffed strawberries. You can fill them with cheese or whipped cream. Cheese adds a savory touch, while whipped cream is sweet and fluffy. For a burst of flavor, use infusions like vanilla or almond. These fillings can make each bite a surprise. Check out the Full Recipe for more ideas! To keep your chocolate-covered strawberries fresh, use an airtight container. This helps prevent moisture and keeps them from getting mushy. Layer the strawberries carefully with parchment paper between them. This method avoids sticking. Store the container in the refrigerator. A cool, dry place is best for keeping them fresh. You can store chocolate-covered strawberries for about 2 to 3 days in the fridge. After that, they may start to lose flavor and texture. Watch for signs of spoilage, like a slimy feel or discoloration. If they smell bad or look moldy, it's time to toss them. Freezing is a great way to save extras. To freeze chocolate-covered strawberries, place them on a baking sheet. Make sure they are spaced out. Freeze until solid, then transfer them to a freezer bag. This keeps them from clumping together. When you’re ready to eat, take them out and let them thaw in the fridge for the best texture. Enjoy them cold for a refreshing treat! To make chocolate-covered strawberries, follow these simple steps: 1. Rinse the strawberries under cool water, then pat them dry. Make sure they are completely dry. 2. In a microwave-safe bowl, add dark chocolate chips and coconut oil if you want. Microwave for 30 seconds at a time, stirring after each time. It should take about 1-2 minutes to melt the chocolate smoothly. 3. Line a baking sheet with parchment paper for easy cleanup. 4. Dip each strawberry into the melted chocolate. Let the extra chocolate drip off before placing it on the baking sheet. 5. If you like, sprinkle crushed nuts, shredded coconut, or sea salt on the chocolate before it sets. 6. Chill the baking sheet in the fridge for about 30 minutes until the chocolate hardens. 7. Enjoy your tasty bites chilled or at room temperature. This process makes it easy for beginners to create a delicious treat. Yes, you can use different types of chocolate! Here are some options to consider: - Dark chocolate: Rich and less sweet. - Semi-sweet chocolate: A balanced choice, perfect for many people. - Milk chocolate: Creamy and sweet, great for a sweeter taste. - White chocolate: Sweet and rich, perfect for those who love a creamy flavor. Mixing chocolates can also create a unique taste. Try blending two types to find your favorite flavor. The best way to store chocolate-covered strawberries is in an airtight container. Here are some key tips: - Use a container that seals well to keep moisture out. - Place parchment paper between layers if stacking them to avoid sticking. - Refrigerate the container to keep them fresh. These strawberries are best enjoyed within 1-2 days. Keep an eye out for any signs of spoilage, like a change in color or texture. Chocolate-covered strawberries can be a healthy treat! Here are some nutritional points to consider: - Strawberries: Packed with vitamins and antioxidants, they are low in calories. - Dark chocolate: Contains healthy fats and can be good for heart health in moderation. To make them even healthier, use dark chocolate and skip the extra toppings. You can also control sugar by choosing high-quality chocolate. Enjoy them as an occasional treat, keeping balance in mind. For the full recipe, check out the Chocolate-Covered Strawberry Bites recipe above! Chocolate-covered strawberries are a delightful treat that anyone can master. This simple guide covered ingredients, preparation steps, storage, and FAQs. You learned how to choose chocolate and toppings, and even explored fun variations. Enjoy these sweet bites at any occasion, or just for yourself. With practice, you can create chocolate-covered strawberries that impress. Keep experimenting and have fun with flavors and textures. Your next dessert is only a dip away!

Chocolate Covered Strawberry Bites Tasty and Simple Treat

Who doesn’t love a sweet, juicy strawberry covered in rich chocolate? In this post, I’ll share my simple recipe for

To make crispy air fryer sweet potato fries, gather these simple ingredients: - 2 large sweet potatoes, peeled and cut into thin strips - 2 tablespoons olive oil - 1 teaspoon garlic powder - 1 teaspoon paprika - ½ teaspoon cayenne pepper (optional for heat) - Salt and pepper to taste - Fresh parsley, chopped (for garnish) You can add more flavor to your fries with these extras: - 1 teaspoon onion powder - ½ teaspoon cumin - Fresh herbs like rosemary or thyme - A squeeze of lemon juice for brightness To make your cooking easier, use these tools: - Air fryer for perfect crispiness - Large bowl for mixing ingredients - Knife and cutting board for slicing sweet potatoes - Measuring spoons for accuracy - Clean kitchen towel for drying fries Using these ingredients and tools makes preparing air fryer sweet potato fries fun and straightforward. For the full recipe, check the detailed steps above. Enjoy creating delicious treats! - Soaking sweet potatoes: Start by soaking your sweet potato strips in cold water. Let them soak for at least 30 minutes. This step removes excess starch and helps make the fries crispy. - Drying the fries: Once soaked, drain the sweet potatoes. Use a clean kitchen towel to pat them dry. Getting rid of moisture is key for crispiness. - Preheating the air fryer: Preheat your air fryer to 400°F (200°C). This takes about 5 minutes. Preheating helps the fries cook evenly. - Cooking and shaking the basket: Place the dried sweet potato fries in a single layer in the air fryer basket. Avoid overcrowding for best results. Cook them for 15-20 minutes. Shake the basket every 5 minutes to ensure even cooking. Watch them closely towards the end to prevent burning. - Checking for doneness: Once the fries are golden brown and crispy, they're done! Check them to make sure they're cooked through. - Garnishing sweet potato fries: Remove the fries from the air fryer and serve them hot. Garnish with fresh, chopped parsley for a nice touch. Enjoy your crispy and delicious sweet potato fries! For the full recipe details, check out the entire guide. To make your sweet potato fries crispy, soak the strips in cold water for at least 30 minutes. This soaking removes extra starch, leading to a crunchier texture. After soaking, dry the fries well with a clean towel. The ideal thickness for the fries is about 1/4 inch. Thinner fries cook faster and turn crispier. For tasty fries, use garlic powder and paprika. These spices add great flavor. You can also mix cayenne pepper for some heat. Don't be afraid to experiment! Combine different spices like cumin or cinnamon for unique tastes. Try adding herbs like rosemary or thyme for fresh, earthy notes. One big mistake is overcrowding the air fryer. When fries are too close together, they won't cook evenly. Cook in batches if needed. Another common error is not drying the fries after soaking. Moisture on the fries can lead to sogginess. Always ensure they are dry before tossing with oil and spices. {{image_2}} You can easily change the flavor of your sweet potato fries. For a fresh taste, try adding herbs. Rosemary or thyme works well. Mix chopped herbs into the fries after you coat them with oil and spices. This adds a nice twist. If you want a cheesy bite, grate some Parmesan cheese over the fries. Do this right before you finish cooking. The cheese melts and creates a tasty crust. You can even mix in some garlic for a stronger flavor. A great dip makes fries even better. You can try making a simple garlic aioli. Just mix mayonnaise, minced garlic, and lemon juice. It's creamy and flavorful. For a spicy kick, make a sriracha mayo. Combine mayo with sriracha sauce. This dip adds heat to your fries. If you're looking for healthier options, try yogurt dips. Mix plain Greek yogurt with herbs or spices. This adds flavor without extra calories. Making fries for everyone is easy. For gluten-free options, confirm that your seasonings and dips are gluten-free. Most spices are safe. If you're cooking for vegans, replace any dairy with plant-based options. Use vegan mayo for dips. You can also skip cheese or use a vegan substitute. This way, everyone can enjoy your tasty sweet potato fries! To keep your leftover fries fresh, place them in an airtight container. Make sure they cool down first. Then, store them in the fridge for up to three days. This helps maintain their taste and texture. Avoid stacking them too high; this can make them soggy. For the best results, reheat your fries in the air fryer. Set it to 350°F (175°C) and heat for about 5 to 7 minutes. This method keeps them crispy. Avoid using the microwave because it can make them soft. If you want, you can spritz them with a little olive oil before reheating. If you want to freeze your fries, do it right after cooking. Allow them to cool completely, then spread them in a single layer on a baking sheet. Freeze until solid, then transfer them to a freezer bag. They can last up to three months in the freezer. When ready to eat, cook from frozen in the air fryer for about 20-25 minutes at 400°F (200°C) for crispy results. It takes about 15 to 20 minutes to cook sweet potato fries in an air fryer. You want to set the air fryer to 400°F (200°C). Make sure you shake the basket every 5 minutes. This helps the fries cook evenly and become crisp. Keep an eye on them near the end to avoid burning. Yes, you can use frozen sweet potatoes for this recipe. However, they may not get as crispy as fresh ones. If you choose frozen fries, cook them at the same temperature. You may need to add a few extra minutes to the cooking time. Always check that they are heated through and crisp to your liking. If your sweet potato fries turn out soggy, there are a few things you can do. First, make sure to soak the fries before cooking. This helps remove excess starch. If they are still soggy, try cooking them a bit longer in the air fryer. Shaking the basket often can also help. If you need, add a little more oil to help them crisp up. For future fries, ensure they are dry before cooking. For the full recipe, check the instructions above! In this post, we covered the essentials for making tasty air fryer sweet potato fries. We explored the key ingredients and tools needed, the step-by-step cooking method, and tips for perfect crispiness. We also looked at exciting variations and how to store leftovers. Remember, the right soak time and seasonings make a big difference. With practice, you’ll master this fun dish. Enjoying homemade fries will impress your family and friends. Get cooking and savor each bite!

Air Fryer Sweet Potato Fries Crispy and Delicious Treat

Craving a snack that’s both healthy and tasty? Air fryer sweet potato fries are your answer! They’re crispy, flavorful, and

- 1 can (15 oz) chickpeas, drained and rinsed - 2 tablespoons olive oil - 1 teaspoon smoked paprika - 1 teaspoon ground cumin - 1 teaspoon garlic powder - 1/2 teaspoon cayenne pepper (optional, for heat) - Salt and pepper to taste - 6 small corn or flour tortillas - 1 cup shredded red cabbage - 1 avocado, sliced - 1/2 cup fresh cilantro, chopped - 1 lime, cut into wedges - 1/4 cup Greek yogurt or sour cream (for drizzling) You can add more toppings to make your tacos unique. Consider these options: - Sliced jalapeños for extra heat - Diced tomatoes for freshness - Feta cheese for a creamy touch - Hot sauce for a spicy kick You can also try different spices for flavor. Consider: - Chili powder for warmth - Onion powder for depth - Cumin seeds for crunch Crispy chickpea tacos are a tasty choice. Here’s a quick look at their nutrition: - Calories: About 350 per serving - Protein: Around 15 grams - Fiber: Approximately 10 grams Chickpeas are a great source of plant protein. They help you feel full and satisfied. They also aid digestion due to their high fiber content. Plus, they provide important vitamins and minerals, making these tacos a healthy option. For the full recipe, check out the Crispy Chickpea Tacos . Start by preheating your oven to 400°F (200°C). This heat will make the chickpeas crispy and tasty. While the oven heats, gather your ingredients. You need one can of chickpeas, olive oil, and spices like smoked paprika and cumin. Also, get your tortillas, red cabbage, avocado, cilantro, and lime ready. In a medium bowl, pour in the drained and rinsed chickpeas. Add two tablespoons of olive oil. Now, sprinkle in one teaspoon each of smoked paprika, ground cumin, and garlic powder. If you like some heat, add half a teaspoon of cayenne pepper. Finish with salt and pepper to taste. Toss everything well until every chickpea gets coated in those yummy spices. Spread the seasoned chickpeas on a baking sheet in a single layer. This helps them cook evenly. Place the baking sheet in your preheated oven. Bake for 25 to 30 minutes. Stir the chickpeas halfway through. When they turn golden brown and crispy, they are ready. While the chickpeas bake, warm your tortillas. Use a dry skillet over medium heat. Warm each tortilla for about 30 seconds per side. Once the chickpeas are crispy, take a warm tortilla and fill it with a handful of shredded red cabbage. Add a generous portion of those crispy chickpeas on top. Then, add a few slices of avocado and some chopped cilantro. Finally, drizzle Greek yogurt or sour cream on top and squeeze some lime juice over it. Enjoy your tasty, healthy tacos! For the complete recipe, check the Full Recipe. To get crispy chickpeas, start by drying them well. After rinsing, use a clean towel to pat them dry. This step is key. If they are wet, they won’t crisp up. Use a good amount of olive oil. It helps the spices stick and adds flavor. Spread the chickpeas in a single layer on your baking sheet. If they are too close, they will steam instead of roast. Bake them at 400°F for about 25-30 minutes. Stir them halfway through to ensure even crisping. For the best tacos, choose between corn or flour tortillas. Corn tortillas have a nice earthy taste. Flour tortillas are soft and flexible. To warm them, use a dry skillet over medium heat. Place the tortilla in the skillet for about 30 seconds on each side. This makes them soft and easy to fold. You can also wrap them in foil and warm them in the oven for a few minutes. To add more flavor, consider extra toppings. Fresh lime juice brightens the dish. A drizzle of Greek yogurt or sour cream adds creaminess. You can also add diced tomatoes or pickled onions for crunch. Want some heat? Try adding jalapeños or a spicy salsa. For extra herbs, use fresh parsley or dill. These small changes can take your tacos to the next level. For the full recipe, check out the details above. {{image_2}} To make these tacos vegan, you can swap Greek yogurt with a plant-based alternative. Cashew cream or coconut yogurt works well. For gluten-free options, choose corn tortillas or look for gluten-free flour tortillas. These swaps keep the tacos tasty and healthy. While crispy chickpeas are the star of the dish, you can add other plant-based proteins. Black beans or lentils can boost the protein content. You can also try tofu or tempeh for a different texture. Just season them well to match the taco vibe. Want to switch up the taste? Try different spices. Instead of smoked paprika, use chili powder for a smoky kick. Cumin brings warmth, while coriander adds brightness. For sauces, drizzle some chipotle sauce or a spicy salsa over the top. These changes can create a whole new flavor experience. For the full recipe, check out the Crispy Chickpea Tacos section above! To keep your crispy chickpeas and tortillas fresh, store them separately. Place the chickpeas in an airtight container. They stay crunchy this way. For the tortillas, wrap them in plastic wrap or foil. This helps them stay soft and pliable. You can keep both in the fridge for up to three days. If you need longer storage, consider freezing the chickpeas. Just remember to thaw them before reheating. To reheat the chickpeas and maintain their crispness, use an oven or air fryer. Preheat your oven to 375°F (190°C). Spread the chickpeas on a baking sheet and heat for about 5-10 minutes. This helps them regain their crunch. For tortillas, warm them on a dry skillet over medium heat. Just a few seconds on each side will do. This keeps them soft and tasty without drying out. Making these tacos in advance is easy. You can prepare the chickpeas and store them in the fridge for quick meals. Just roast them ahead of time. Also, you can warm the tortillas and keep them in a sealed container. When you're ready to eat, just assemble your tacos. Add toppings like cabbage, avocado, and drizzle with yogurt. This way, you have a healthy meal ready in minutes. For the full recipe, check out the Crispy Chickpea Tacos section. Yes, you can use dry chickpeas! Start by soaking them overnight. This helps them cook faster. The next day, drain and rinse them. Boil the chickpeas in water for about 1 to 1.5 hours. Cook until they are soft but not mushy. Drain and let them cool. Once prepared, you can season and bake them just like the canned ones in the full recipe. If you want to switch up your taco base, here are some fun options: - Lettuce wraps for a low-carb choice - Whole grain wraps for added fiber - Pita bread for a unique twist - Rice paper for a light, fresh option These alternatives keep the tasty filling intact while adding new textures. To kick up the heat, try these tips: - Add more cayenne pepper to the chickpeas. - Mix in chopped jalapeños or serrano peppers. - Drizzle hot sauce over the assembled tacos. - Use spicy yogurt or crema instead of regular yogurt. Each option adds heat without losing the great flavors. Enjoy experimenting! These chickpea tacos are easy to make and full of flavor. You can enjoy crispy, healthy tacos with common ingredients. Remember to season your chickpeas well and explore optional toppings. Consider meal prep for quick meals later. Try different spices and flavors to keep things exciting. With these tips, your tacos will always be a hit. Enjoy experimenting and tailoring them to your taste!

Crispy Chickpea Tacos Flavorful and Healthy Delight

Looking for a tasty and healthy meal? Crispy chickpea tacos are the perfect answer! Made with simple ingredients like canned

To make soft flour tortillas, start with these simple dry items: - 2 cups all-purpose flour - 1/2 teaspoon salt - 1/2 teaspoon baking powder These three ingredients form the base of your tortillas. The flour gives them structure, while the salt adds flavor. Baking powder helps them puff up during cooking, creating that soft texture we love. Next, you'll need these wet ingredients to bring everything together: - 1/4 cup vegetable oil or melted butter - 3/4 cup warm water The oil or butter adds richness and moisture. Warm water helps the dough mix well and makes it easier to knead. This combination helps create that perfect, soft tortilla. You can experiment with a few optional ingredients for added flavor or texture: - Herbs like cilantro or oregano - Spices such as cumin or chili powder These extras can make your tortillas unique and delicious. Feel free to mix in what you love, but remember to keep the base recipe intact for soft, fluffy results. For the full recipe, check out the main recipe section! To make soft flour tortillas, start with the dough. In a large bowl, mix 2 cups of all-purpose flour, 1/2 teaspoon of salt, and 1/2 teaspoon of baking powder. Use a whisk to blend these dry ingredients well. Then, create a well in the center of the mix. Pour in 1/4 cup of vegetable oil or melted butter. Use your fingers or a fork to combine until it becomes crumbly. Next, slowly add in 3/4 cup of warm water. Mix until the dough comes together. Now, knead the dough on a floured surface for about 5 minutes. You want it to be smooth and elastic. Once done, divide the dough into 8 equal balls. Cover them with a clean towel. This helps keep them from drying out. Let the dough rest for at least 15 minutes. After resting, it’s time to roll out the tortillas. Heat a large skillet or griddle over medium-high heat. Take one dough ball and place it on a lightly floured surface. Use a rolling pin to flatten it into a circle about 8 inches wide. Make sure it is thin but not too tearable. If it sticks, add a little more flour to your surface. Now, cook the tortillas in the hot skillet. Carefully place the rolled tortilla onto the skillet. Let it cook for about 30 seconds. You'll see it puff up and change color. Flip it over and cook for another 30 seconds. The goal is to have it lightly browned and soft. Once done, remove it from the skillet and keep it warm under a towel. Repeat this process with the rest of the dough balls. Enjoy your homemade soft flour tortillas! For more details, check out the Full Recipe. To get your tortillas soft, the dough needs proper hydration. Use warm water. This helps the flour absorb moisture. Knead until the dough is smooth. Letting it rest also helps. Cover the dough with a towel to prevent it from drying out. Resting for at least 15 minutes makes a big difference. You can even let it rest longer if you have time. One common mistake is not measuring the flour correctly. Too much flour leads to dry tortillas. When mixing, you should not overwork the dough. This makes it tough instead of soft. Also, be careful with the heat. Cooking on too high a heat can burn the tortillas. They should puff up lightly, not char. Cook your tortillas in a hot skillet or griddle. A dry pan works best for soft tortillas. Do not add oil to the pan. Cook each tortilla for about 30 seconds on each side. Watch for bubbles forming; this shows they cook well. Keep them warm under a towel after cooking. This helps keep them soft and ready to eat! For the complete process, check out the Full Recipe. {{image_2}} You can easily change the taste of your tortillas. Add fresh herbs like cilantro or parsley for a fresh twist. Try spices like cumin or chili powder for a kick. Just mix them into the dry ingredients before adding the wet ones. This small change can make your tortillas stand out. If you want a healthier option, use whole wheat flour. Whole wheat adds more fiber and nutrients. Replace half of the all-purpose flour with whole wheat flour. This change gives a nice nutty flavor and a darker color. The texture might be a bit denser, but it will still taste great. For gluten-free tortillas, use a gluten-free flour blend. Brands like Bob's Red Mill or King Arthur Flour work well. Follow the same steps in the recipe. You may need to adjust the amount of water. Gluten-free dough can be drier, so add more water as needed. Enjoy these tortillas with your favorite fillings without worry! To keep your tortillas fresh for a few days, place them in an airtight container. You can also wrap them in plastic wrap. Store them in the fridge for up to five days. When you're ready to eat, just take out what you need. This helps keep them soft and tasty. If you want to save your tortillas for later, freezing is a great choice. Stack them with parchment paper between each tortilla. Then, place the stack in a freezer bag. Seal it tightly and remove as much air as you can. Your tortillas will stay good for up to three months. When ready to use, thaw them in the fridge overnight. Reheating tortillas is easy. You can warm them in a skillet over medium heat for 20-30 seconds on each side. This brings back their softness. You can also microwave them. Place a damp paper towel over them and heat for about 15-20 seconds. This keeps them moist and ready to enjoy. For more details, be sure to check the Full Recipe. To keep your flour tortillas soft, store them in a warm place. You can use a tortilla warmer or wrap them in a clean towel. This traps steam and keeps them moist. If you have leftovers, place them in a sealed bag. This helps prevent them from drying out. When you reheat them, add a little water to the pan. This adds moisture and makes them soft again. Yes, you can make tortillas ahead of time! After cooking, let them cool fully. Once cool, stack them with parchment paper between each one. Then, wrap the stack in plastic wrap or foil. You can store them in the fridge for up to a week. For longer storage, freeze them. Just remember to separate them with parchment paper to avoid sticking. If you want to swap vegetable oil, use melted butter. This gives a rich flavor. You can also try olive oil for a different taste. Coconut oil works too if you like a hint of sweetness. Each option will still create soft, tasty tortillas. You learned how to make soft, tasty flour tortillas using simple steps and ingredients. We covered the types of flour and wet ingredients to use, plus tips for a perfect texture. Remember, avoiding common mistakes will help you succeed. Variations like adding herbs or using whole wheat are fun to try. For storage, keep tortillas fresh by refrigerating or freezing them. Now, you can enjoy homemade tortillas with any meal. Happy cooking!

Homemade Soft Flour Tortillas Simple and Tasty Recipe

Are you ready to elevate your meal with warm, soft flour tortillas? In my latest blog post, I’ll show you

To make the Spinach Strawberry Salad, you will need the following items: - 5 cups fresh spinach, washed and dried - 2 cups strawberries, hulled and sliced - 1/2 cup crumbled feta cheese - 1/4 cup sliced almonds (toasted) - 1/4 cup red onion, thinly sliced - 1/4 cup olive oil - 2 tablespoons balsamic vinegar - 1 tablespoon honey - Salt and black pepper to taste This salad is not only tasty but also packed with nutrients. Each serving provides: - Calories: 250 - Protein: 6 grams - Carbohydrates: 20 grams - Fiber: 4 grams - Fat: 18 grams - Spinach: Spinach is full of vitamins A, C, and K. It helps with eyesight and boosts the immune system. - Strawberries: These berries are rich in antioxidants. They help fight inflammation and are good for heart health. - Feta Cheese: Feta adds protein and calcium. It also gives a nice creamy texture, enhancing the flavor. - Almonds: Toasted almonds provide healthy fats and fiber. They can lower cholesterol and improve heart health. - Olive Oil: This oil is a healthy fat. It may reduce the risk of heart disease. - Balsamic Vinegar: It adds a sweet and tangy flavor. It may also help with blood sugar control. - Honey: This natural sweetener gives energy and is better than refined sugars. These ingredients not only make a delicious salad but also support a healthy lifestyle. You can find the full recipe for this vibrant dish to enjoy! To start, gather all your ingredients. You need fresh spinach, strawberries, feta cheese, almonds, and red onion. Wash and dry the spinach well. This keeps it crisp. Hull and slice the strawberries. The red onion should be thinly sliced, as this will add a nice bite. In a large mixing bowl, combine the spinach, strawberries, feta, almonds, and red onion. Toss everything gently. This helps mix the flavors without bruising the spinach. Now, let’s make the dressing. In a small bowl, whisk together the olive oil, balsamic vinegar, honey, salt, and black pepper. This simple dressing brings all the ingredients together. Taste it to see if you need more salt or pepper. Adjust it to your liking. Once mixed, drizzle the dressing over the salad. Serve the salad right away. This keeps the spinach fresh and crunchy. You can add extra toppings if you like. Some great options are grilled chicken, walnuts, or avocado. Each adds a unique flavor and texture. Enjoy your Spinach Strawberry Salad as a side or a main dish. Don’t forget to check the Full Recipe for more details! To keep your spinach strawberry salad fresh, store it in a sealed container. Place it in the fridge right after serving. Eat the leftovers within two days for the best taste. Keep the dressing separate until you’re ready to eat. This way, the salad stays crisp. For a great salad texture, mix soft and crunchy ingredients. Fresh spinach offers a pleasant crunch. Add sliced strawberries for sweetness and juiciness. Crumbled feta cheese gives it a creamy touch. To enhance the crunch, toast the almonds before adding them. This contrast makes each bite exciting. Soggy spinach ruins a salad's appeal. To prevent this, dry the spinach well after washing. Use a salad spinner or pat it dry with a towel. When combining ingredients, toss gently. This helps keep the spinach leaves whole and fresh. Serving the salad right away also helps maintain its crispness. For the full recipe, check out the Spinach Strawberry Delight 🥗! {{image_2}} You can change up your salad in many ways. Try adding grilled chicken for protein. Shrimp also works well and adds a nice twist. If you want more crunch, add cucumber slices or bell peppers. For a vegan option, swap feta cheese for avocado or sunflower seeds. You can also use kale instead of spinach for a different texture. This salad shines with fresh fruits. In spring and summer, use ripe peaches or blackberries. In fall, diced apples or pears taste great. In winter, try pomegranate seeds for a burst of flavor. Each fruit adds its own special touch to the dish. Mixing fruits keeps the salad fun and fresh all year. While the honey-balsamic dressing is a favorite, there are other options. A citrus vinaigrette brightens the salad. Just mix fresh orange juice with olive oil and a pinch of salt. You can also try a creamy dressing, like ranch or yogurt-based ones. Experimenting with dressings can make your salad feel new each time. For the full recipe, check out the Spinach Strawberry Delight. To keep your Spinach Strawberry Salad fresh, store it properly. First, keep the salad and dressing separate. This prevents sogginess. Use an airtight container for the salad. Wrap the dressing in a small jar. Store both in the fridge. Fresh spinach lasts about three to five days in the fridge. Strawberries should be used within three days for the best taste. Feta cheese can stay good for up to a week. Toasted almonds last for a month if sealed tight. This salad is best eaten fresh. If you have leftovers, use them within two days. To refresh the salad, add a splash of olive oil or vinegar. Toss gently to mix in the new dressing. This will revive the flavors and keep it tasty. For the full recipe, check out Spinach Strawberry Delight. To make Spinach Strawberry Salad, gather your ingredients. You’ll need fresh spinach, strawberries, feta cheese, almonds, and red onion. Start by washing and drying the spinach. Then, hull and slice the strawberries. Combine spinach, strawberries, feta, almonds, and onion in a large bowl. Next, whisk olive oil, balsamic vinegar, honey, salt, and pepper in a small bowl. Drizzle this dressing over the salad. Toss it gently to coat the ingredients. Serve right away to keep the spinach crisp. This quick method gives you a tasty dish in just 15 minutes. Check out the Full Recipe for more details. Spinach Strawberry Salad pairs well with many dishes. It’s great alongside grilled chicken or fish. You can also serve it with a warm quiche or a light soup. If you want a vegetarian option, try it with roasted veggies or lentils. The sweet strawberries and tangy feta balance nicely with savory mains. While it’s best to serve Spinach Strawberry Salad fresh, you can prep some parts ahead. Wash and slice the spinach and strawberries in advance. Store them separately in the fridge. Make the dressing ahead too, but keep it in a sealed jar. Just mix everything together right before serving. This way, your salad stays fresh and crunchy! This blog post covered the key ingredients, steps, and tips for making a Spinach Strawberry Salad. We explored nutritional facts, health benefits, and how to keep it fresh. The steps for preparation, making the dressing, and serving are simple and easy to follow. Remember, you can customize the salad with seasonal fruits and different dressings. Store leftovers properly to avoid spoilage. With these tips, you can enjoy this delicious and healthy salad any time. Happy salad making!

Spinach Strawberry Salad Refreshing and Healthy Dish

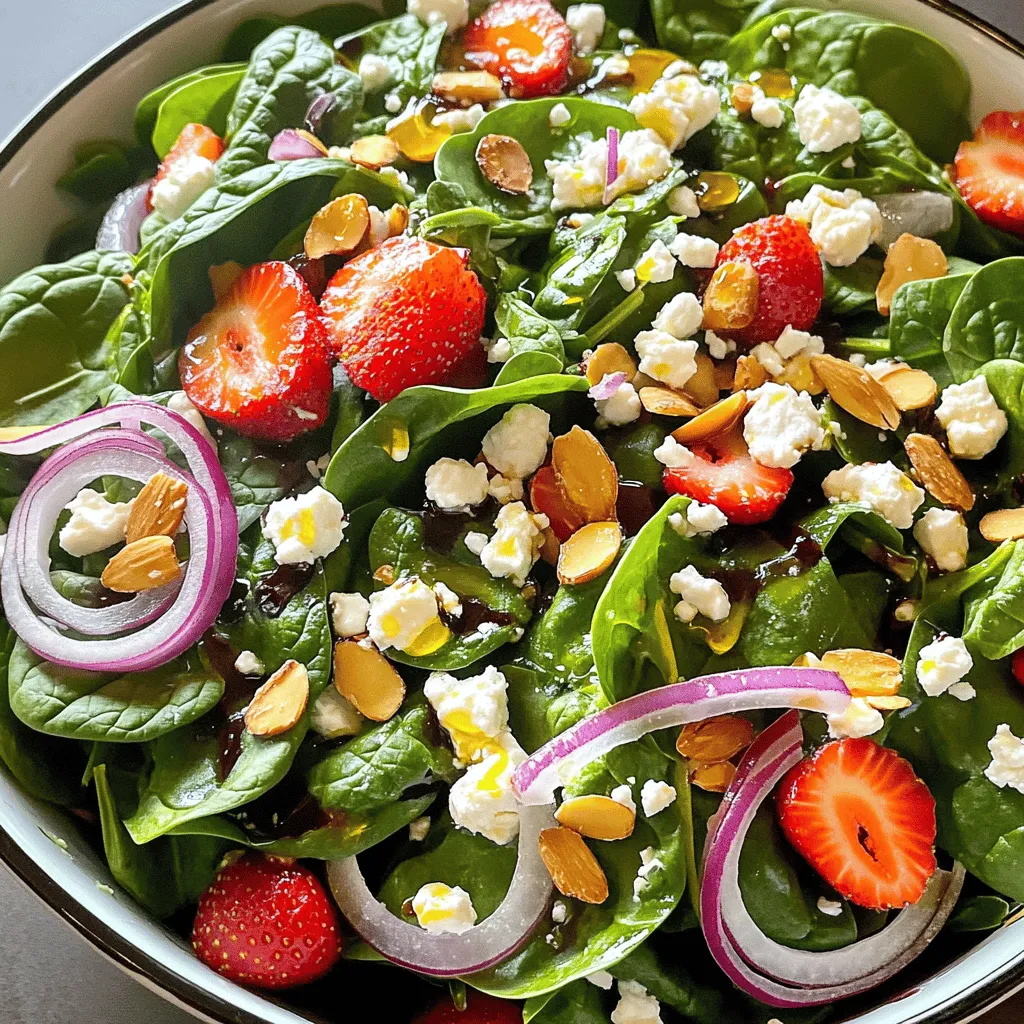
Looking for a light meal that bursts with flavor? This Spinach Strawberry Salad is just that! It combines fresh spinach

Older posts
Newer posts
← Previous Page1 … Page57 Page58 Page59 … Page85 Next →

dsad

© 2026 greenmealmap • Built with GeneratePress

Our Policies

  • Copyright Policy
  • Cookie Policy
  • GDPR Policy
  • Privacy Policy
  • Disclaimer
  • Terms Of Use

More Information

  • Home
  • About
  • Contact
  • Appetizers
  • Dessert
  • Dinner
  • Drinks
©2026, greenmealmap About Back To Top