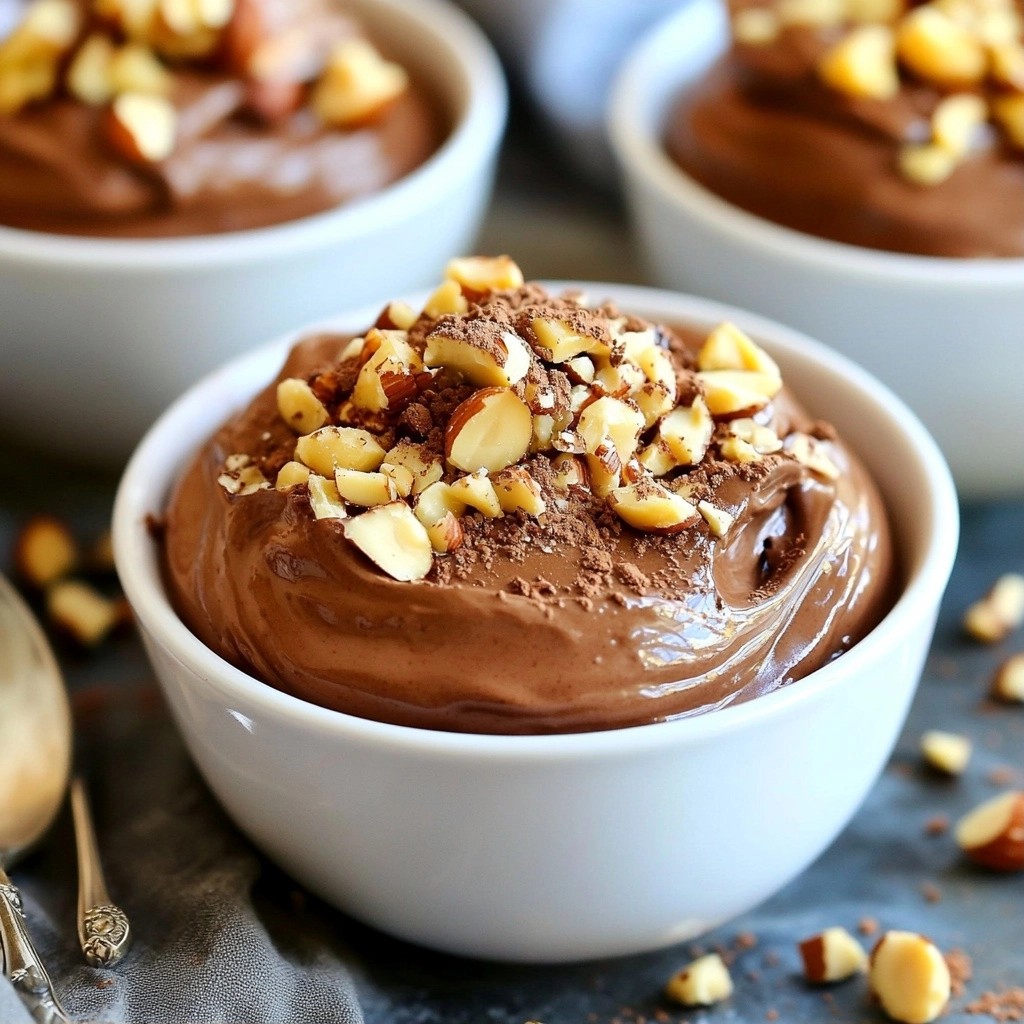
Indulge in the festive spirit with my Rich Christmas Chocolate Hazelnut Mousse Delight! This creamy, dreamy dessert combines smooth dark chocolate and rich hazelnut spread, creating a treat that's perfect for holiday gatherings. In this guide, I’ll walk you through easy steps to bring this showstopper to your table. Get ready to impress your guests and discover tips for the ultimate moussey delight this Christmas!
Why I Love This Recipe
- Decadent Flavor: This chocolate hazelnut mousse is rich and indulgent, making it the perfect festive treat that satisfies any sweet tooth.
- Easy to Prepare: Despite its luxurious taste, this mousse is simple to make and requires minimal ingredients, making it accessible even for novice bakers.
- Make-Ahead Dessert: It can be prepared in advance and stored in the refrigerator, allowing you to enjoy your holiday gatherings without stress.
- Impressive Presentation: With its elegant look and garnished with chopped hazelnuts and cocoa, it’s sure to impress your guests at any holiday celebration.
Ingredients
List of Required Ingredients
- 200g dark chocolate (70% cocoa), chopped
- 100g hazelnut spread (like Nutella)
- 3 large eggs, separated
- 50g granulated sugar
- 1 cup heavy cream, chilled
- 1 teaspoon vanilla extract
- A pinch of sea salt
- Chopped hazelnuts, for garnish
- Cocoa powder or grated chocolate, for dusting
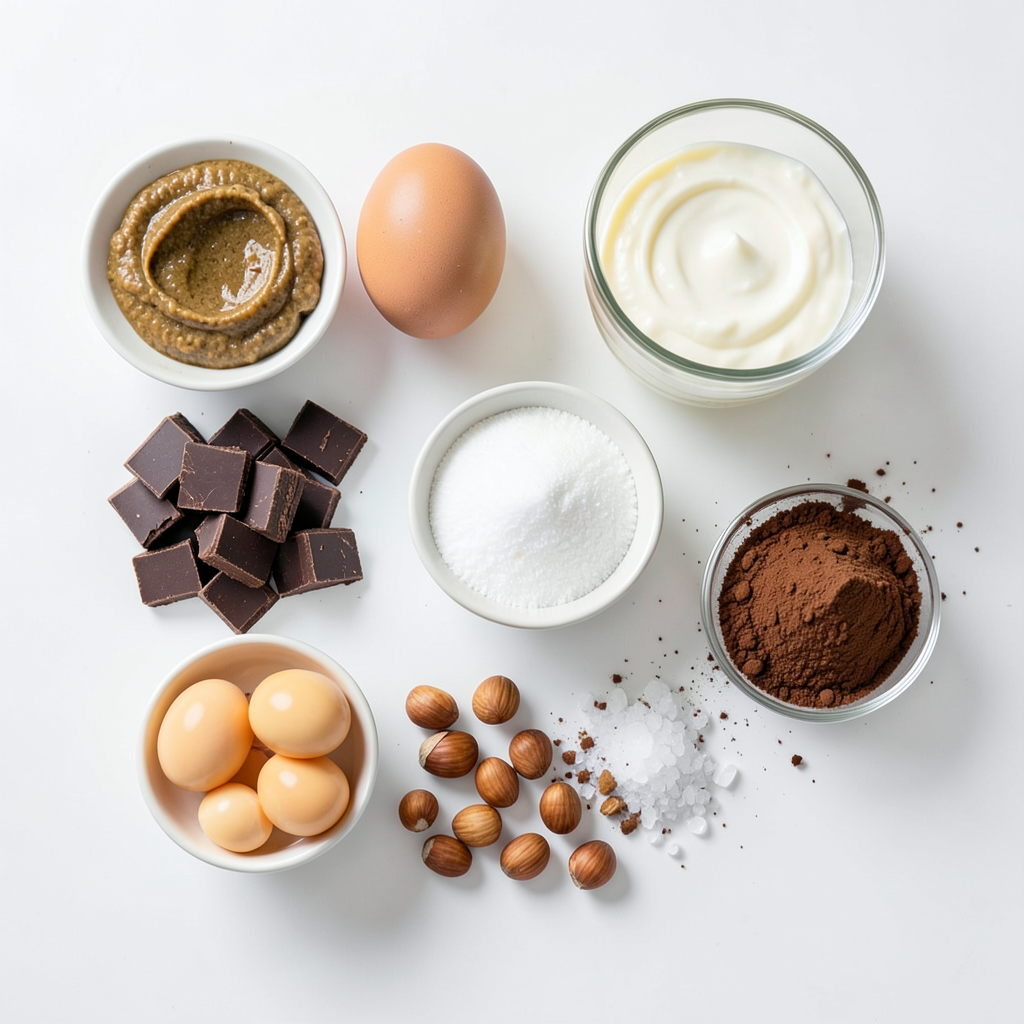
To make my Rich Christmas Chocolate Hazelnut Mousse, gather these simple ingredients. The dark chocolate gives deep flavor. The hazelnut spread adds sweetness and nutty notes. Using large eggs helps create the perfect texture. Granulated sugar sweetens the mousse just right. Heavy cream is key for that light, airy feel. Don't skip the vanilla extract; it adds warmth. A pinch of sea salt balances all the flavors. Finally, you'll need garnishes. Chopped hazelnuts bring crunch, while cocoa powder or grated chocolate adds a lovely finish.
Once you have all these ingredients, you are ready to create a delightful dessert that impresses. Each component plays a role in making this mousse rich and indulgent. Enjoy the process as you prepare this festive treat!
Step-by-Step Instructions
Melting the Chocolate
To start, you need to melt the dark chocolate. Use the double boiler method. Place a heatproof bowl over a pot of simmering water. Make sure the bowl doesn’t touch the water. Stir the chocolate gently until it melts and becomes smooth. Once melted, set it aside to cool slightly. This cooling step is important. It prevents the chocolate from cooking the eggs later.
Preparing the Egg Whites
Next, let's prepare the egg whites. In a clean bowl, add the egg whites and a pinch of sea salt. Use a whisk to whisk them. Whisk until soft peaks form; this takes about a minute. Gradually add the granulated sugar while whisking. Keep whisking until you see stiff peaks. This means the egg whites hold their shape well.
Combining Ingredients
Now, we will mix the ingredients. In a large bowl, combine the egg yolks and hazelnut spread. Stir until they blend well. Then, add the melted chocolate and vanilla extract. Mix well until everything is fully combined. Now, it's time to fold in the egg whites. Start by folding in one-third of the whipped egg whites. This lightens the chocolate mixture. Then, gently fold in the rest of the egg whites. Be careful not to deflate the mixture; this keeps it light and fluffy.
Next, we need to add the heavy cream. In another bowl, whip the cold heavy cream. Whip until you see soft peaks. Now, gently fold the whipped cream into the chocolate mixture. Make sure it is mixed well but still fluffy.
Setting the Mousse
It’s time to set the mousse. Spoon the mixture into serving glasses or small bowls. Refrigerate the mousse for at least 4 hours. This helps it set properly. When ready to serve, you can garnish with chopped hazelnuts. A dusting of cocoa powder or grated chocolate on top adds a nice touch too. Enjoy your rich and creamy dessert!
Tips & Tricks
Perfecting the Mousse Texture
To make a light and airy mousse, you must fold in the egg whites gently. This step adds volume and keeps the mousse soft. If you mix too hard, the air escapes, and your mousse will be dense. Use a spatula to fold the mixture in.
Whipping the cream correctly is also key. Start with cold cream to help it whip up fast. Whip until you see soft peaks. This means the cream holds its shape but is not too stiff. Mix it slowly with the chocolate. This keeps the mousse fluffy and rich.
Presentation Ideas
Choose clear glassware to show off your mousse. Tall glasses or small bowls work great. This lets the layers and textures shine through. You can also use dessert cups for a fancy touch.
For garnishing, sprinkle chopped hazelnuts on top. A dusting of cocoa powder or grated chocolate adds a nice finish. Fresh berries can give a pop of color too. These ideas make your mousse look as good as it tastes.
Substitutions and Alternatives
If you need a dairy-free mousse, use coconut cream instead of heavy cream. Make sure to chill it first for the best results. This will still give you a creamy texture.
For the nut spread, you can try almond or cashew spread. Each will give a different taste but still be delicious. This lets you customize your mousse to fit your needs and preferences.
Pro Tips
- Use Quality Chocolate: The flavor of your mousse largely depends on the chocolate you choose. Opt for high-quality dark chocolate with at least 70% cocoa for a rich taste.
- Room Temperature Eggs: Ensure your eggs are at room temperature for easier separation and better incorporation into the mousse, resulting in a fluffier texture.
- Gentle Folding Technique: When incorporating the whipped egg whites and heavy cream, use a gentle folding technique to maintain the airiness of the mixture, ensuring a light and airy mousse.
- Chill Overnight: For the best flavor and texture, consider chilling the mousse overnight. This allows the flavors to meld together beautifully.
Variations
Flavored Additions
You can enhance your mousse with fun flavors. Adding espresso or coffee creates a rich depth. Simply mix in one or two teaspoons of espresso powder. This gives a warm, bold taste that pairs well with chocolate. You can also add orange zest for a bright note. Use about a teaspoon of fresh zest. It adds a lovely citrus twist that balances the sweetness.
Serving Variations
Get creative with how you serve this mousse. Think about layered desserts. You can alternate layers of mousse with whipped cream or crushed cookies. This adds texture and looks great. Another idea is to turn the mousse into a cake or tart. Pour the mousse into a tart shell and chill it. It transforms into a delightful dessert that impresses guests.
Dietary Adjustments
If you want a gluten-free version, this mousse already fits the bill. No flour is in this recipe, making it safe for those with gluten issues. For a low-sugar option, swap granulated sugar for a sugar substitute. Look for options like erythritol or stevia. These keep the sweetness without the calories. Adjust based on your taste for the best results.
Storage Info
Recommended Storage Methods
To keep your rich Christmas chocolate hazelnut mousse fresh, refrigerate it in an airtight container. This mousse stays good for about 3 days. If you plan to enjoy it later, do not add the garnishes until serving. This keeps the mousse looking nice.
If you have leftovers, use a plastic wrap to cover the mousse. Make sure it touches the surface of the mousse. This step helps prevent it from drying out and forming a skin.
Freezing Options
You can freeze chocolate mousse if you want to store it for longer. To freeze it properly, spoon the mousse into a freezer-safe container. Leave some space at the top for expansion. Seal the container tightly.
When you want to enjoy the mousse, take it out of the freezer. Place it in the fridge to thaw overnight. If you need it quicker, let it sit at room temperature for about 30 minutes. Just remember to stir gently before serving. This helps regain its smooth texture.
FAQs
How do you achieve a creamy texture in mousse?
To get a creamy texture in mousse, the temperature of your ingredients matters. Use room temperature eggs. This helps them mix better. Melt the chocolate gently. A double boiler works great for this. Let the melted chocolate cool slightly before mixing it with other ingredients. When you fold in whipped cream and egg whites, do it gently. This keeps air in the mousse and gives it that light, fluffy texture.
Can I use other types of chocolate?
Yes, you can! Dark chocolate gives a rich flavor, but milk chocolate adds sweetness. If you like sweeter desserts, use milk chocolate. For a unique taste, try white chocolate. It will change the flavor, but it can still be delicious. Just remember to adjust the sugar in your recipe if needed.
What can I use instead of hazelnut spread?
If you don't have hazelnut spread, fear not! You can try almond butter or peanut butter. Each will give a different flavor. Sunflower seed butter is a great nut-free option. You can also make your own nut spread. Just blend roasted nuts with a bit of oil and sweetener until smooth. This way, you can customize the flavor to your liking.
This blog post shared how to create a rich hazelnut chocolate mousse. You learned about the key ingredients and step-by-step instructions. We covered tips for perfecting texture and presentation. You also discovered tasty variations and smart storage options.
Mousse is simple and fun to make. With a few ingredients, you can impress everyone. Enjoy making this dessert, and don’t be afraid to experiment! Your kitchen can now offer a delightful treat that will please anyone!