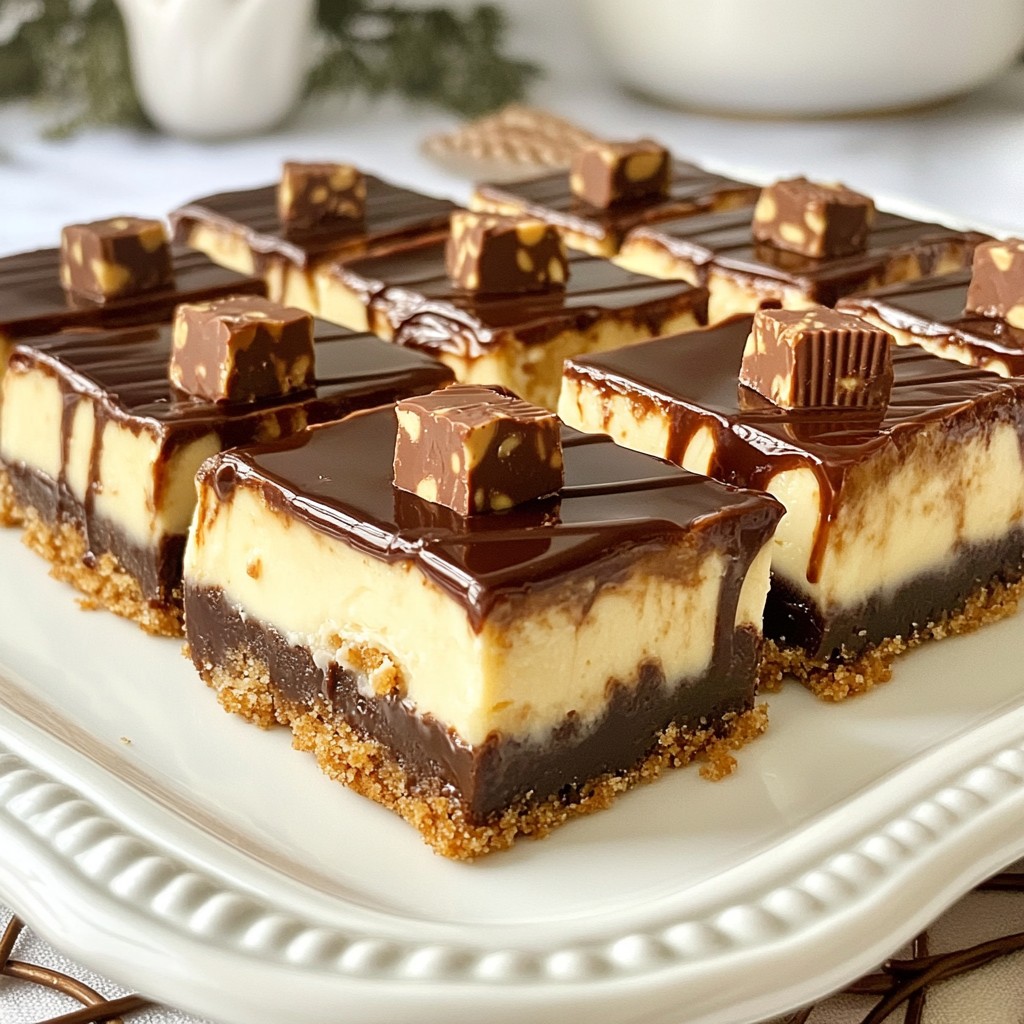
If you crave a dessert that combines the rich taste of peanut butter with the creaminess of cheesecake, you're in for a treat! These Peanut Butter Cup Cheesecake Bars promise to delight your taste buds with each bite. I’ll guide you through the simple steps to create this indulgent dessert. With a mix of classic flavors and textures, these bars will be a hit at any gathering. Let’s dive into the deliciousness!
Why I Love This Recipe
- Decadent Flavor: The combination of creamy peanut butter and rich cheesecake creates a delightful indulgence that satisfies any sweet tooth.
- Easy to Make: This recipe is straightforward and requires minimal hands-on time, making it perfect for both beginners and seasoned bakers.
- Perfect for Sharing: These bars are easy to cut into squares and are great for sharing at parties, gatherings, or potlucks.
- Customizable Topping: You can enhance these bars with chocolate drizzle or extra peanut butter cups, allowing for personal flair and creativity.
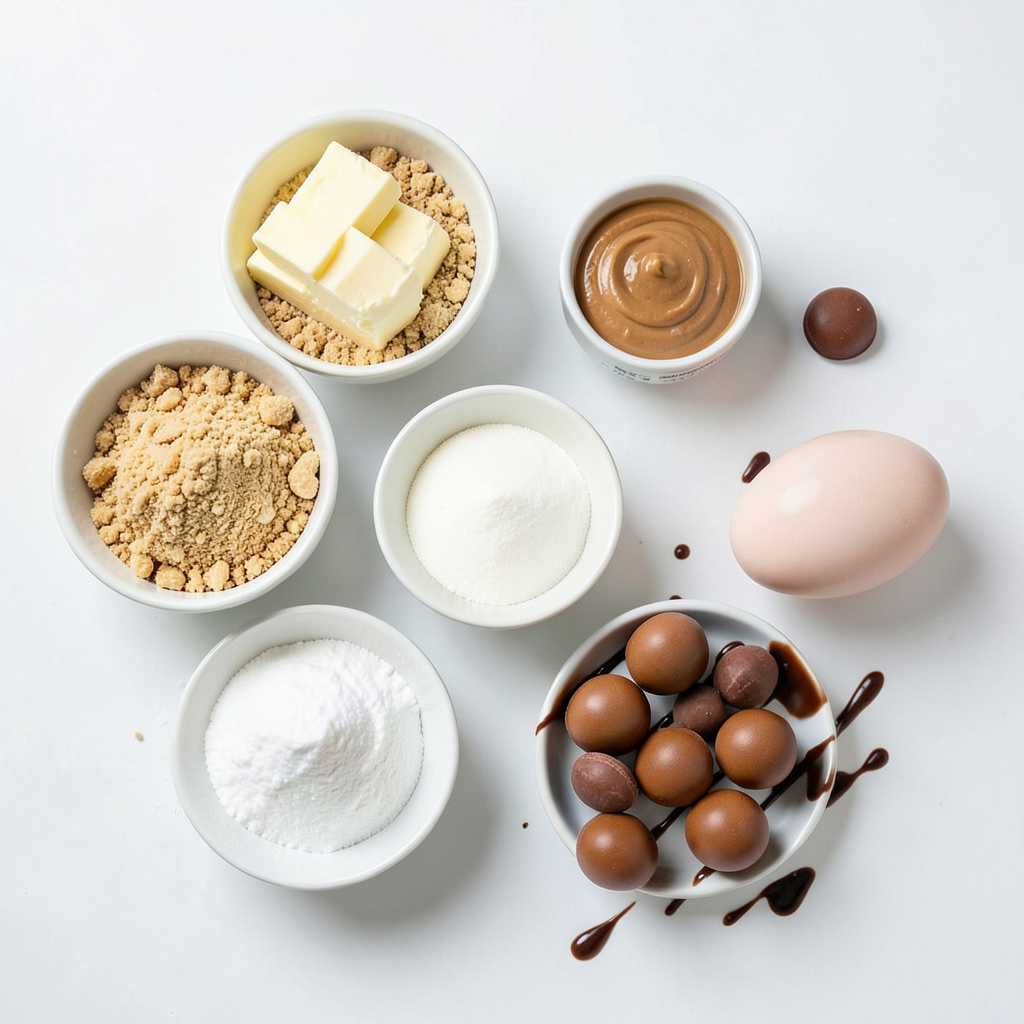
Ingredients
Main Ingredients List
- 1 ½ cups graham cracker crumbs
- ½ cup unsalted butter, melted
- 2 tablespoons granulated sugar
- 16 oz cream cheese, softened
- ¾ cup powdered sugar
- 1 cup creamy peanut butter
- 1 teaspoon vanilla extract
- 3 large eggs
- 1 ½ cups mini peanut butter cups, chopped (plus extra for topping)
- Chocolate drizzle for topping (optional)
Equipment Needed
- 9x13 inch baking dish
- Mixing bowls
- Electric mixer
- Parchment paper
To make tasty Peanut Butter Cup Cheesecake Bars, you need the right ingredients and tools. First, gather your main ingredients. You'll want graham cracker crumbs for the crust. Unsalted butter helps bind it all together. Granulated sugar adds sweetness to the crust.
For the filling, you need cream cheese, powdered sugar, and creamy peanut butter. These ingredients create a rich and smooth mixture. Vanilla extract gives it a nice flavor, while eggs help set the cheesecake. Don't forget the mini peanut butter cups! They bring extra peanut flavor and fun texture.
Next, grab your equipment. A 9x13 inch baking dish works best for this recipe. Mixing bowls will help you combine everything. An electric mixer makes beating the cream cheese easy. Lastly, parchment paper is a must. It helps with easy removal of the bars once baked.
With these ingredients and tools ready, you can create a delightful dessert that everyone will love. Enjoy the process and get ready for some delicious cheesecake bars!
Step-by-Step Instructions
Preparing the Crust
- Preheat the oven to 325°F (160°C).
- In a bowl, mix graham cracker crumbs, melted butter, and granulated sugar.
- Press this mixture firmly into the bottom of a 9x13 inch baking dish.
The crust gives the bars a nice crunch. I love using graham crackers for this recipe. They add a sweet, buttery flavor. Pressing the mixture down well helps it hold together during baking.
Making the Cheesecake Filling
- In a large bowl, beat the cream cheese until smooth.
- Gradually mix in powdered sugar and peanut butter until well combined.
- Add the vanilla extract, then mix in the eggs one at a time.
Cream cheese is the star of the filling. It makes the bars rich and creamy. Beating it until smooth is key. This helps avoid lumps. Mixing in the peanut butter adds a great flavor. I always use creamy peanut butter for a smooth texture.
Assembling and Baking
- Fold in the chopped mini peanut butter cups gently.
- Pour the filling over the cooled crust and smooth the top.
- Bake for 25-30 minutes until the center is set but slightly jiggly.
Adding mini peanut butter cups boosts the flavor. They melt slightly, creating pockets of peanut butter goodness. Smoothing the top ensures even baking. After baking, let the bars cool in the oven for 10 minutes. This helps prevent cracks.
Once cooled, chill the bars for at least four hours. This step helps the flavors meld together. Enjoy the delightful treat!
Tips & Tricks
Achieving the Perfect Cheesecake
How to know when cheesecake is set To check if your cheesecake is set, look for a slight jiggle in the center. The edges should be firm, while the middle remains a bit soft. This means it will firm up nicely as it cools.
Importance of cooling and chilling time Cooling your cheesecake is key. After baking, let it cool to room temp for about 30 minutes. Then, chill it in the fridge for at least four hours. Chilling helps firm up the bars and enhances the flavors.
Tips for smooth filling texture To get a smooth filling, ensure your cream cheese is at room temperature. Beat it well before adding other ingredients. Mixing one egg at a time helps keep the texture smooth. Avoid over-mixing once you add the eggs.
Serving Suggestions
Presentation ideas with chocolate drizzle To make your cheesecake bars stunning, drizzle chocolate on top. Use melted chocolate for a glossy finish. You can also sprinkle crushed peanuts for added crunch and color.
Best pairing options (e.g., whipped cream, coffee) Serve these bars with a dollop of whipped cream on the side. A hot cup of coffee pairs perfectly, enhancing the rich flavors. For an extra treat, add some fresh fruit alongside for a fresh twist.
Pro Tips
- Use Room Temperature Ingredients: Make sure your cream cheese and eggs are at room temperature for a smoother batter and better incorporation.
- Don't Overmix: Once you add the eggs, mix just until incorporated to prevent the cheesecake from cracking.
- Cool Gradually: Allow the cheesecake to cool in the oven with the door slightly ajar for 10 minutes to prevent sudden temperature changes that can cause cracks.
- Chill Overnight: For the best texture and flavor, refrigerate the cheesecake bars overnight before serving.
Variations
Ingredient Substitutions
You can change some ingredients to fit your needs. For a lighter option, use low-fat cream cheese. This swap still gives a creamy texture. You might also try alternative sweeteners. These can cut down on sugar while keeping the taste great.
If you're gluten-free, you can make a crust with ground nuts or gluten-free cookies. Just crush them and mix with melted butter. This way, you can still enjoy the bars without worry.
Flavor Enhancements
Want to change up the flavor? Try using dark or white chocolate. This adds a rich taste and makes the bars even more special. You can mix in other candies or nuts too. Chopped Reese's Pieces or crushed pretzels can add extra crunch.
Feel free to get creative! Tweaking these flavors can make each batch unique and fun.
Storage Info
How to Store Leftovers
To keep your peanut butter cup cheesecake bars fresh, follow these tips:
- Refrigeration: Store the bars in an airtight container. Place parchment paper between layers to prevent sticking. They stay fresh this way for up to one week.
- Freezing: If you want to save some for later, wrap individual squares in plastic wrap. Place them in a freezer-safe container. This method prevents freezer burn and keeps the flavor intact.
When you’re ready to eat them, thaw in the fridge overnight. This keeps the texture creamy and delicious.
Shelf Life
These cheesecake bars last:
- In the fridge: Up to one week. The flavors meld over time, making them even tastier.
- In the freezer: Up to three months. Make sure to label your container with the date for easy tracking.
FAQs
Can I make these cheesecake bars ahead of time?
Yes, you can make these cheesecake bars ahead of time. They taste even better after chilling overnight. Just store them in the fridge, covered, until you are ready to serve. This makes them perfect for parties or special occasions.
How do I prevent cracking in the cheesecake?
To prevent cracking, avoid overmixing the batter. Mix until smooth, but don’t beat too long. Also, bake at a lower temperature and turn off the oven early. Let the bars cool slowly in the oven. This helps keep the texture smooth and creamy.
What can I use instead of mini peanut butter cups?
If you can’t find mini peanut butter cups, use chopped chocolate bars or other candies. You can try Reese's Pieces, chocolate chips, or even chopped nuts. Each option adds its own flavor and texture to the bars.
Can I use a different type of crust for this recipe?
Yes, you can use other crusts if you prefer. Try using crushed cookies like Oreos for a chocolate flavor. You could also use a nut-based crust for a gluten-free option. Just remember to adjust the amount of butter or sugar.
Is it possible to make these gluten-free?
Absolutely! To make these bars gluten-free, use gluten-free graham crackers or a nut-based crust. Keep an eye on the labels for any hidden gluten in the ingredients. This way, everyone can enjoy these tasty treats.
This blog post shared a simple recipe for creamy peanut butter cheesecake bars. We covered the key ingredients, step-by-step instructions, and tips for success. You learned how to achieve the perfect texture and enhance flavors. I also included storage tips for leftovers and answered common questions.
Now, you can create a delicious treat that everyone will love. Dive in and enjoy your baking!