No-Bake S’mores Bars Easy Treat for Everyone

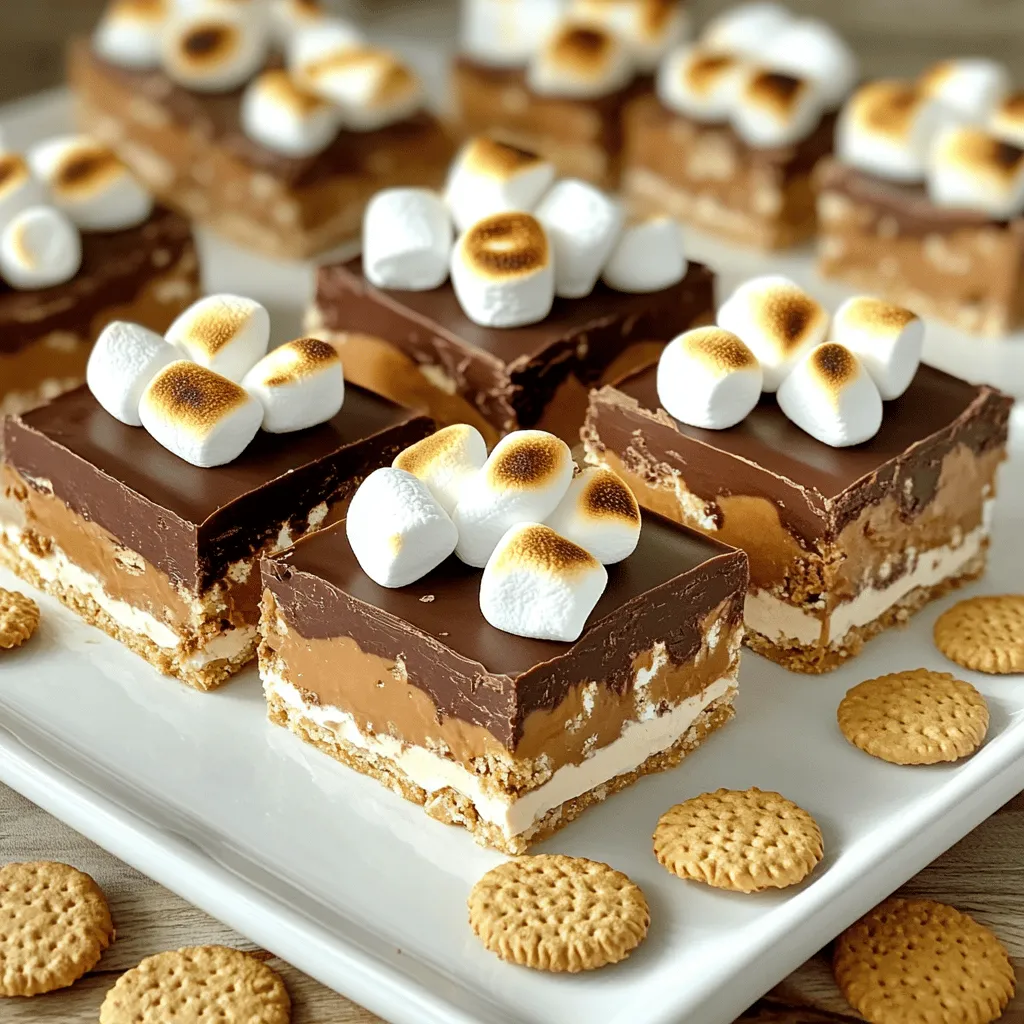
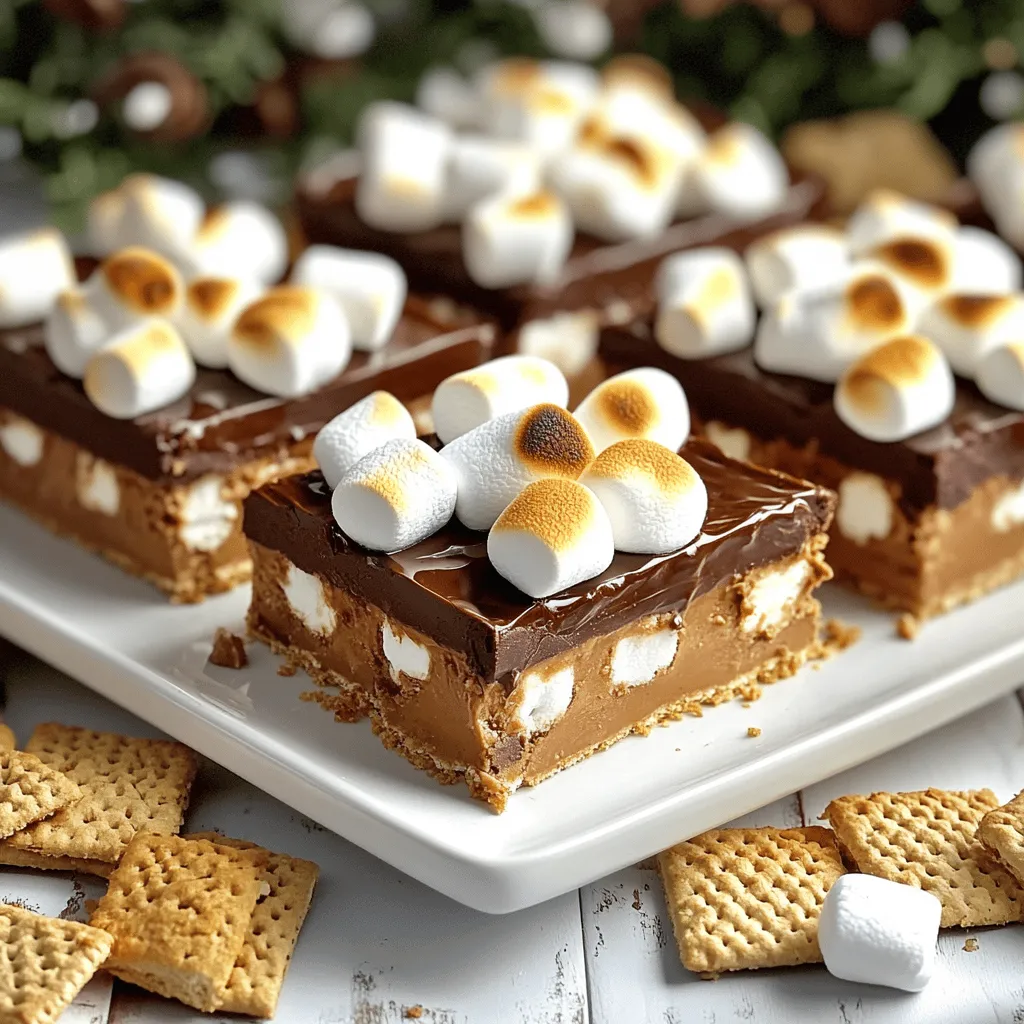
Who doesn’t love a sweet treat that’s easy to make? No-bake s’mores bars are fun, delicious, and perfect for everyone! You can whip up this tasty dessert in no time, with just a few simple ingredients. In this article, I’ll share the best tips and tricks to make your s’mores bars shine. Get ready to impress your friends and family with this quick and yummy dessert!

Ingredients

List of Required Ingredients

To make these No-Bake S’mores Bars, you need:

– 1 ½ cups graham cracker crumbs

– ½ cup unsweetened cocoa powder

– ½ cup powdered sugar

– ½ cup unsalted butter, melted

– 2 cups mini marshmallows

– 1 cup semisweet chocolate chips

– ½ cup creamy peanut butter

– 1 teaspoon vanilla extract

– Pinch of salt

These simple ingredients make a tasty treat everyone loves.

Alternative Ingredient Suggestions

If you want to mix it up, try these ideas:

– Replace graham crackers with gluten-free cookies.

– Use almond or cashew butter instead of peanut butter.

– Try dark chocolate chips for a richer flavor.

– Swap mini marshmallows for larger ones, cut into small pieces.

These changes can offer new tastes while keeping the fun.

Importance of Fresh Ingredients

Fresh ingredients make a big difference in your treats.

Using fresh mini marshmallows gives a soft, fluffy texture. Fresh chocolate chips melt smoothly for a nice layer. Fresh butter adds richness to the crust.

Always check the expiration dates. This small step keeps your bars tasting great!

Step-by-Step Instructions

Preparation Overview

Making No-Bake S’mores Bars is fun and easy. You will need to gather your ingredients first. The prep time is just 20 minutes. Then, let the bars chill in the fridge for 2 hours. This treat serves 16, perfect for sharing.

Detailed Instructions

1. In a large mixing bowl, mix the graham cracker crumbs, cocoa powder, and powdered sugar. Use a whisk to combine them well.

2. Pour in the melted butter. Stir until the dry mix gets moist. It should start to clump together.

3. Firmly press the mixture into the bottom of an 8×8 inch baking dish. Use your hands or a spatula to pack it tightly.

4. In a microwave-safe bowl, combine the chocolate chips and peanut butter. Microwave for 30 seconds at a time. Stir between each interval until smooth.

5. Add the vanilla extract and a pinch of salt to the melted chocolate mixture. Stir well to combine.

6. Pour the chocolate-peanut butter mix over the graham cracker base. Spread it evenly with a spatula.

7. Sprinkle the mini marshmallows on top of the chocolate layer. Press them gently into the chocolate to make them stick.

8. Refrigerate the bars for at least 2 hours. This helps them set well.

9. Once set, lift the bars out of the baking dish. Cut them into squares and serve.

Tips for Easier Preparation

– Use a food processor for the graham cracker crumbs. It saves time and makes a fine mix.

– Keep a bowl of warm water nearby to wash your hands. This helps when you press the mixture into the pan.

– For an easy clean-up, line the baking dish with parchment paper before adding the mix. This will help you lift out the bars later.

For the full recipe, check the section above. Enjoy making these tasty No-Bake S’mores Bars!

Tips & Tricks

How to Achieve the Perfect Texture

To get that ideal texture, press the crust tightly. Use your hands or a spatula. This helps it hold together. For the chocolate layer, melt the chocolate and peanut butter slowly. Stir often to keep it smooth. Don’t rush this step. A creamy, even layer makes the bars great.

Common Mistakes to Avoid

One common mistake is not measuring the ingredients. Use a measuring cup for accuracy. Another mistake is not chilling the bars long enough. They need at least two hours to set. Don’t skip this step or the bars will be too soft. Finally, avoid using too much heat when melting chocolate. It can burn quickly.

Best Tools and Equipment

For this recipe, you need a few basic tools. A large mixing bowl is essential for mixing. Use a spatula for spreading and pressing. A microwave-safe bowl helps melt the chocolate evenly. Have a greased 8×8 inch baking dish ready. Parchment paper can also help lift the bars out easily. These tools make the process smooth and fun!

For the full recipe, see above.

Variations

Flavor Variations

You can change up the flavor of your no-bake s’mores bars with different nut butters. Try almond or cashew butter instead of peanut butter. Each nut butter adds its own taste and texture. You can also swap in Nutella for a rich twist. This chocolate hazelnut spread gives a dreamy flavor that pairs well with marshmallows. Don’t be afraid to mix flavors; creativity is key!

Dietary Considerations

If you need gluten-free options, use gluten-free graham crackers. Many brands offer great substitutes that taste just as good. You can also use coconut flour or almond flour for a unique twist. For a vegan option, swap out the butter for coconut oil and use dairy-free chocolate chips. This way, everyone can enjoy these tasty treats without worry.

Seasonal Additions

You can make your bars fit any season with special ingredients. For fall, add pumpkin spice to the chocolate mixture or sprinkle in some chopped pecans. In winter, mix in crushed candy canes for a minty flavor. For summer, try adding fresh berries or a layer of fruit preserves. These small changes make your no-bake s’mores bars fun and festive!

For the full recipe, check the instructions above and get started!

Storage Info

How to Store No-Bake S’mores Bars

To keep your No-Bake S’mores Bars fresh, place them in an airtight container. This helps prevent them from drying out. You can also wrap them tightly in plastic wrap. Make sure they are fully set before storing.

Freezing Instructions

You can freeze these bars for longer storage. First, cut them into squares. Then, place them in a single layer in a freezer-safe container. You can add parchment paper between layers to prevent sticking. These bars can stay fresh for up to three months in the freezer.

Shelf Life for Best Quality

When stored in the fridge, No-Bake S’mores Bars last about a week. For the best taste and texture, enjoy them within the first few days. If you notice any changes in smell or texture, it’s best to toss them. You can find the full recipe for these delicious bars in the earlier section.

FAQs

How to make No-Bake S’mores Bars step-by-step?

To make No-Bake S’mores Bars, follow these steps:

1. Mix graham cracker crumbs, cocoa powder, and powdered sugar in a bowl.

2. Add melted butter and stir until clumps form.

3. Press this mix into the bottom of a greased 8×8 inch baking dish.

4. In a microwave-safe bowl, melt chocolate chips and peanut butter together.

5. Stir in vanilla extract and a pinch of salt.

6. Spread the chocolate mix over the graham base.

7. Top with mini marshmallows, pressing them gently into the chocolate.

8. Refrigerate for at least 2 hours to set.

9. Lift the bars out and cut them into squares.

For the full recipe, refer to the previous section.

Can I use different types of chocolate?

Yes, you can use different types of chocolate. Milk chocolate, dark chocolate, or even white chocolate work well. Each type gives a unique flavor. Experiment with your favorites to find the best taste for you. Just remember to adjust the sweetness if needed.

What can I substitute for graham crackers?

If you don’t have graham crackers, try digestive biscuits or vanilla wafers. Crushed pretzels can also work for a salty twist. Use whatever you have on hand. Just make sure it crumbles easily, so you can mix it well with other ingredients.

How long do No-Bake S’mores Bars need to set?

No-Bake S’mores Bars need at least 2 hours to set. This time helps the layers firm up and hold together. For best results, leave them in the fridge longer if you can. This makes them easier to cut and enjoy.

Can I make this recipe a day in advance?

Yes, you can make these bars a day in advance. They store well in the fridge. Just cover them tightly to keep them fresh. This makes them great for parties or gatherings, saving you time on the day of the event.

This article covered how to make easy No-Bake S’mores Bars. We looked at the key ingredients and some tasty alternatives. Fresh ingredients make a big difference. I shared step-by-step instructions for making them and tips for smoother prep. You now know how to avoid common mistakes and tools to use. We explored fun flavor variations and how to store your bars.

Now, go ahead and enjoy making these delicious treats! You’ll impress your friends and family.

To make these No-Bake S'mores Bars, you need: - 1 ½ cups graham cracker crumbs - ½ cup unsweetened cocoa powder - ½ cup powdered sugar - ½ cup unsalted butter, melted - 2 cups mini marshmallows - 1 cup semisweet chocolate chips - ½ cup creamy peanut butter - 1 teaspoon vanilla extract - Pinch of salt These simple ingredients make a tasty treat everyone loves. If you want to mix it up, try these ideas: - Replace graham crackers with gluten-free cookies. - Use almond or cashew butter instead of peanut butter. - Try dark chocolate chips for a richer flavor. - Swap mini marshmallows for larger ones, cut into small pieces. These changes can offer new tastes while keeping the fun. Fresh ingredients make a big difference in your treats. Using fresh mini marshmallows gives a soft, fluffy texture. Fresh chocolate chips melt smoothly for a nice layer. Fresh butter adds richness to the crust. Always check the expiration dates. This small step keeps your bars tasting great! Making No-Bake S'mores Bars is fun and easy. You will need to gather your ingredients first. The prep time is just 20 minutes. Then, let the bars chill in the fridge for 2 hours. This treat serves 16, perfect for sharing. 1. In a large mixing bowl, mix the graham cracker crumbs, cocoa powder, and powdered sugar. Use a whisk to combine them well. 2. Pour in the melted butter. Stir until the dry mix gets moist. It should start to clump together. 3. Firmly press the mixture into the bottom of an 8x8 inch baking dish. Use your hands or a spatula to pack it tightly. 4. In a microwave-safe bowl, combine the chocolate chips and peanut butter. Microwave for 30 seconds at a time. Stir between each interval until smooth. 5. Add the vanilla extract and a pinch of salt to the melted chocolate mixture. Stir well to combine. 6. Pour the chocolate-peanut butter mix over the graham cracker base. Spread it evenly with a spatula. 7. Sprinkle the mini marshmallows on top of the chocolate layer. Press them gently into the chocolate to make them stick. 8. Refrigerate the bars for at least 2 hours. This helps them set well. 9. Once set, lift the bars out of the baking dish. Cut them into squares and serve. - Use a food processor for the graham cracker crumbs. It saves time and makes a fine mix. - Keep a bowl of warm water nearby to wash your hands. This helps when you press the mixture into the pan. - For an easy clean-up, line the baking dish with parchment paper before adding the mix. This will help you lift out the bars later. For the full recipe, check the section above. Enjoy making these tasty No-Bake S'mores Bars! To get that ideal texture, press the crust tightly. Use your hands or a spatula. This helps it hold together. For the chocolate layer, melt the chocolate and peanut butter slowly. Stir often to keep it smooth. Don’t rush this step. A creamy, even layer makes the bars great. One common mistake is not measuring the ingredients. Use a measuring cup for accuracy. Another mistake is not chilling the bars long enough. They need at least two hours to set. Don’t skip this step or the bars will be too soft. Finally, avoid using too much heat when melting chocolate. It can burn quickly. For this recipe, you need a few basic tools. A large mixing bowl is essential for mixing. Use a spatula for spreading and pressing. A microwave-safe bowl helps melt the chocolate evenly. Have a greased 8x8 inch baking dish ready. Parchment paper can also help lift the bars out easily. These tools make the process smooth and fun! For the full recipe, see above. {{image_2}} You can change up the flavor of your no-bake s'mores bars with different nut butters. Try almond or cashew butter instead of peanut butter. Each nut butter adds its own taste and texture. You can also swap in Nutella for a rich twist. This chocolate hazelnut spread gives a dreamy flavor that pairs well with marshmallows. Don’t be afraid to mix flavors; creativity is key! If you need gluten-free options, use gluten-free graham crackers. Many brands offer great substitutes that taste just as good. You can also use coconut flour or almond flour for a unique twist. For a vegan option, swap out the butter for coconut oil and use dairy-free chocolate chips. This way, everyone can enjoy these tasty treats without worry. You can make your bars fit any season with special ingredients. For fall, add pumpkin spice to the chocolate mixture or sprinkle in some chopped pecans. In winter, mix in crushed candy canes for a minty flavor. For summer, try adding fresh berries or a layer of fruit preserves. These small changes make your no-bake s'mores bars fun and festive! For the full recipe, check the instructions above and get started! To keep your No-Bake S'mores Bars fresh, place them in an airtight container. This helps prevent them from drying out. You can also wrap them tightly in plastic wrap. Make sure they are fully set before storing. You can freeze these bars for longer storage. First, cut them into squares. Then, place them in a single layer in a freezer-safe container. You can add parchment paper between layers to prevent sticking. These bars can stay fresh for up to three months in the freezer. When stored in the fridge, No-Bake S'mores Bars last about a week. For the best taste and texture, enjoy them within the first few days. If you notice any changes in smell or texture, it’s best to toss them. You can find the full recipe for these delicious bars in the earlier section. To make No-Bake S'mores Bars, follow these steps: 1. Mix graham cracker crumbs, cocoa powder, and powdered sugar in a bowl. 2. Add melted butter and stir until clumps form. 3. Press this mix into the bottom of a greased 8x8 inch baking dish. 4. In a microwave-safe bowl, melt chocolate chips and peanut butter together. 5. Stir in vanilla extract and a pinch of salt. 6. Spread the chocolate mix over the graham base. 7. Top with mini marshmallows, pressing them gently into the chocolate. 8. Refrigerate for at least 2 hours to set. 9. Lift the bars out and cut them into squares. For the full recipe, refer to the previous section. Yes, you can use different types of chocolate. Milk chocolate, dark chocolate, or even white chocolate work well. Each type gives a unique flavor. Experiment with your favorites to find the best taste for you. Just remember to adjust the sweetness if needed. If you don’t have graham crackers, try digestive biscuits or vanilla wafers. Crushed pretzels can also work for a salty twist. Use whatever you have on hand. Just make sure it crumbles easily, so you can mix it well with other ingredients. No-Bake S'mores Bars need at least 2 hours to set. This time helps the layers firm up and hold together. For best results, leave them in the fridge longer if you can. This makes them easier to cut and enjoy. Yes, you can make these bars a day in advance. They store well in the fridge. Just cover them tightly to keep them fresh. This makes them great for parties or gatherings, saving you time on the day of the event. This article covered how to make easy No-Bake S'mores Bars. We looked at the key ingredients and some tasty alternatives. Fresh ingredients make a big difference. I shared step-by-step instructions for making them and tips for smoother prep. You now know how to avoid common mistakes and tools to use. We explored fun flavor variations and how to store your bars. Now, go ahead and enjoy making these delicious treats! You'll impress your friends and family.

No-Bake S'mores Bars

Indulge in the sweetest treat with these No-Bake S'mores Bars! This easy recipe combines graham cracker crumbs, chocolate, creamy peanut butter, and gooey marshmallows for a delicious dessert that's perfect for any occasion. In just 20 minutes of prep time, you can create a delightful treat that everyone will love. Click through to discover how to make this heavenly snack and impress your friends and family!

Ingredients
  

1 ½ cups graham cracker crumbs

½ cup unsweetened cocoa powder

½ cup powdered sugar

½ cup unsalted butter, melted

2 cups mini marshmallows

1 cup semisweet chocolate chips

½ cup creamy peanut butter

1 teaspoon vanilla extract

Pinch of salt

Instructions
 

In a large mixing bowl, combine the graham cracker crumbs, cocoa powder, and powdered sugar. Mix well until evenly combined.

    Pour in the melted butter and stir until the mixture is moistened and starts to clump together.

      Press the mixture firmly into the bottom of a greased 8x8 inch baking dish to form an even layer. Use a spatula or your hands to pack it tightly.

        In a microwave-safe bowl, combine the chocolate chips and peanut butter. Microwave in 30-second intervals, stirring between each, until the mixture is smooth and completely melted.

          Stir in the vanilla extract and a pinch of salt to the melted chocolate mixture.

            Pour the chocolate-peanut butter mixture over the graham cracker base, spreading it evenly with a spatula.

              Sprinkle the mini marshmallows on top of the chocolate layer, pressing them gently into the chocolate.

                Refrigerate the bars for at least 2 hours to set.

                  Once set, lift the bars out of the baking dish using the edges of the parchment paper, if used. Cut into squares.

                    Prep Time: 20 minutes | Total Time: 2 hours 20 minutes | Servings: 16

                      - Presentation Tips: Arrange bars on a platter, drizzling extra melted chocolate on top and garnishing with whole graham crackers and toasted marshmallows for a delightful visual appeal.

                        Leave a Comment

                        Recipe Rating