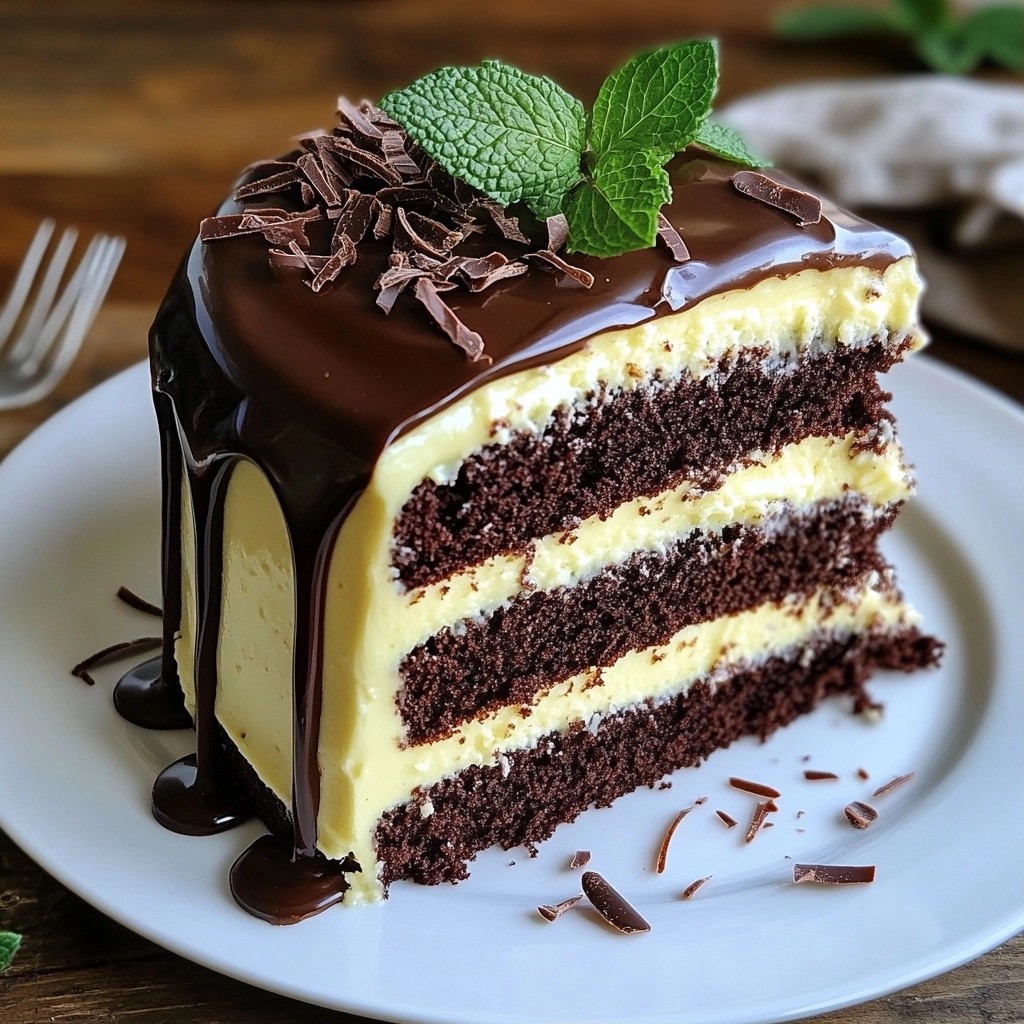
The holidays are the perfect time to indulge, and what could be better than a luscious Chocolate Mint Layer Cake? This cake is rich, moist, and packed with festive flavors that will wow your guests. In this post, I’ll guide you step-by-step through creating this stunning treat, share handy tips, and explore fun variations. Get ready to impress everyone at your holiday gathering with a cake that screams celebration!
Why I Love This Recipe
- Irresistible Flavor: This cake combines rich chocolate with refreshing mint, making it a perfect treat for the holiday season.
- Beautiful Presentation: The layered design and glossy ganache create an eye-catching centerpiece for any festive table.
- Customizable: You can easily adjust the flavors or decorations to match your preferences, making it versatile for various occasions.
- Fun to Make: The process of baking, layering, and decorating is enjoyable, perfect for baking enthusiasts and families alike!
Ingredients
Dry Ingredients
- 2 cups all-purpose flour
- 2 cups granulated sugar
- 3/4 cup unsweetened cocoa powder
- 1 1/2 teaspoons baking powder
- 1 1/2 teaspoons baking soda
- 1 teaspoon salt
Wet Ingredients
- 2 large eggs
- 1 cup whole milk
- 1/2 cup vegetable oil
- 2 teaspoons vanilla extract
- 1 cup boiling water
- 1 cup unsalted butter, softened
- 1/4 cup heavy cream
- 1 teaspoon peppermint extract
- A few drops of green food coloring (optional)
Toppings
- 1/2 cup semi-sweet chocolate chips (for ganache)
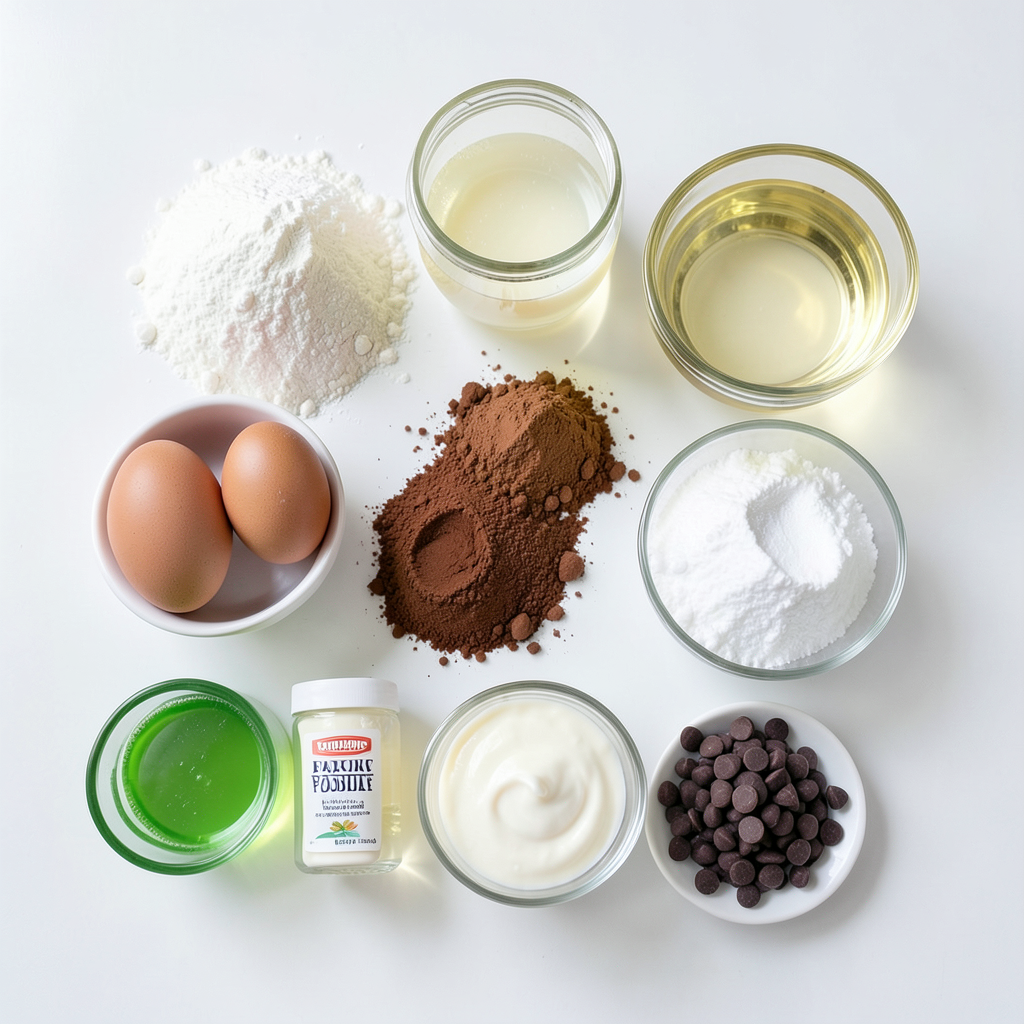
The ingredients for my Decadent Holiday Chocolate Mint Layer Cake create a rich and festive treat.
Dry ingredients are the base of the cake. The all-purpose flour gives it structure. Sugar adds sweetness. Cocoa powder gives that deep chocolate flavor. Baking powder and baking soda help the cake rise. Salt brings out all the flavors.
Wet ingredients add moisture and flavor. Eggs bind everything together. Whole milk makes the cake tender. Vegetable oil keeps it moist. Vanilla extract adds warmth. Boiling water thins the batter and helps it mix well. Softened butter makes the frosting creamy. Heavy cream adds richness. Peppermint extract gives that fresh mint taste. You can add green food coloring for a festive touch.
For toppings, semi-sweet chocolate chips are perfect for making ganache. The ganache adds a shiny finish and a rich chocolate layer.
Gather these ingredients, and you are ready to make a cake that will impress everyone!
Step-by-Step Instructions
Preparation
- Preheat your oven to 350°F (175°C).
- Grease and flour two 9-inch round cake pans. This helps the cake come out easily.
Mixing the Batter
- In a large bowl, combine the dry ingredients. This includes flour, sugar, cocoa powder, baking powder, baking soda, and salt.
- Next, add the eggs, whole milk, vegetable oil, and vanilla extract. Mix until everything is blended well.
- Slowly pour in the boiling water. The batter will be thin, but that’s okay!
Baking the Cake
- Pour the batter evenly into the prepared pans.
- Bake for 30 to 35 minutes. You can check if they’re done by inserting a toothpick; it should come out clean.
- Once baked, let the cakes cool in the pans for 10 minutes. Then, move them to a wire rack to cool completely.
Making the Frosting
- In a mixing bowl, beat the softened butter until it’s creamy. This will be the base for your frosting.
- Gradually mix in the powdered sugar until it’s smooth.
- Add in the heavy cream, peppermint extract, and a few drops of green food coloring if you want. Beat this mix until it’s light and fluffy.
Assembling the Cake
- Once the cakes are cool, place one layer on a serving plate. Spread a thick layer of frosting on top.
- Add the second layer on top of the first. Frost the top and sides of the whole cake.
- To make the ganache, heat the semi-sweet chocolate chips with a splash of heavy cream. Do this in a microwave-safe bowl in 20-second intervals, stirring until it’s smooth.
- Drizzle the ganache over the frosted cake, letting it flow down the sides. You can add chocolate shavings or fresh mint leaves to make it look pretty!
Tips & Tricks
Baking Tips
To ensure even cake layers, start by measuring your ingredients accurately. Use a kitchen scale for the best results. When mixing the batter, blend just until combined. Overmixing can lead to dense cakes. Divide the batter evenly between two greased and floured 9-inch pans. Use a kitchen scale if you want perfect layers.
For testing doneness, insert a toothpick into the center of the cake. If it comes out clean or with a few crumbs, your cake is ready. If there's wet batter, bake for a few more minutes. Remember to let the cakes cool in the pan for ten minutes before transferring them to a wire rack.
Frosting Techniques
Achieving the perfect frost requires a few steps. Start with softened butter for a creamy texture. Gradually mix in the powdered sugar. This keeps the frosting light and fluffy. Add heavy cream and peppermint extract next. For a vibrant green color, use a few drops of green food coloring. Mix until you reach your desired shade. Just be careful not to overdo it!
Presentation Suggestions
Garnishing ideas include chocolate shavings or fresh mint leaves. They add a festive touch to your cake. You can also drizzle some ganache on top for an extra special effect. When serving, cut the cake into even slices. This makes it easy for guests to enjoy. You can also display the cake on a pretty cake stand to impress everyone at your holiday gathering.
Pro Tips
- Use Room Temperature Ingredients: Ensure that your eggs and butter are at room temperature for a smoother batter and better incorporation of ingredients.
- Don’t Overmix the Batter: Mix just until the ingredients are combined to keep the cake light and fluffy; overmixing can lead to a dense texture.
- Cool Cakes Completely: Allow your cakes to cool completely before frosting to prevent melting and ensure a clean finish.
- Customize Your Mint Flavor: Adjust the amount of peppermint extract to your taste; start with less and add more if you prefer a stronger mint flavor.
Variations
Flavor Modifications
You can change the taste of your cake with different extracts. For example, try almond or vanilla extracts. These can add a fun twist to your cake. You can also use extra chocolate mint. Add chocolate chips or mint candies into the batter to boost that minty flavor.
Dietary Adjustments
If you need gluten-free options, use gluten-free flour. It works well in this cake. You can also make it vegan. Swap the eggs for applesauce or flaxseed meal. Use plant milk instead of whole milk, and replace the butter with vegan butter. These changes keep the cake tasty and enjoyable for everyone.
Themed Decorations
Make your cake festive with themed decorations. For holidays, add sprinkles or edible glitter. You can use candy canes or chocolate shavings for a special touch. Customize it for different celebrations by changing the frosting colors. Use red and green for Christmas or pastel colors for spring events. Let your creativity shine!
Storage Info
Short-term Storage
To keep your cake fresh, store it in the fridge. Use an airtight container or cover it with plastic wrap. This keeps moisture in and prevents it from drying out. The cake will stay good in the fridge for up to one week. If you have leftover ganache, store it separately. It can be kept in the fridge for about five days.
Long-term Storage
For long-term storage, freezing is a great option. Wrap each cake layer tightly in plastic wrap. Then, place them in a freezer-safe bag or container. This helps prevent freezer burn. Your cake can stay frozen for up to three months. To thaw, move the cake to the fridge for several hours or overnight. This way, it stays moist and tasty.
Serving Suggestions After Storage
Before serving, you may want to refresh the cake. Let it sit at room temperature for about 30 minutes. This helps bring back its soft texture. You can also add a little frosting on top if needed. For leftovers, try pairing slices with a scoop of vanilla ice cream or a drizzle of chocolate sauce. These options bring out the minty flavor and add extra delight!
FAQs
Can I make this cake ahead of time?
Yes, you can make this cake ahead of time. Bake the layers and let them cool. Wrap each layer in plastic wrap. Store them in the fridge for up to three days. You can also freeze the layers. Just wrap them well. They will stay fresh for about a month. Frost the cake when you are ready to serve. This way, it will taste fresh and delicious.
How do I prevent the cake layers from sticking?
To stop your cake layers from sticking, grease and flour your pans. Use a paper towel to spread a thin layer of vegetable oil or butter on the pans. Then, sprinkle flour evenly over the greased surface. Tap the pans to remove any extra flour. This method helps the cake slide out easily after baking.
What can I use instead of peppermint extract?
If you don’t have peppermint extract, try using vanilla extract. It gives a nice flavor, too. You can also use almond extract for a different twist. For a minty taste, crush fresh mint leaves and mix them into the frosting. Just remember to adjust the quantity based on your taste.
How can I make this cake less sweet?
To make this cake less sweet, cut back on the sugar in the recipe. Use 1 1/2 cups of granulated sugar instead of 2 cups. You can also reduce the powdered sugar in the frosting. Another tip is to add a pinch of salt. This brings out the flavors without adding sweetness. Balancing flavors will keep your cake tasty.
This recipe brings together simple dry and wet ingredients to create a delicious cake. You now know the steps to mix, bake, and frost, plus valuable tips to ensure success. With options for flavors and dietary needs, everyone can enjoy this treat. Store leftovers properly for later enjoyment. With these insights, you can create a cake perfect for any occasion. Enjoy the process, and let your creativity shine in the kitchen!