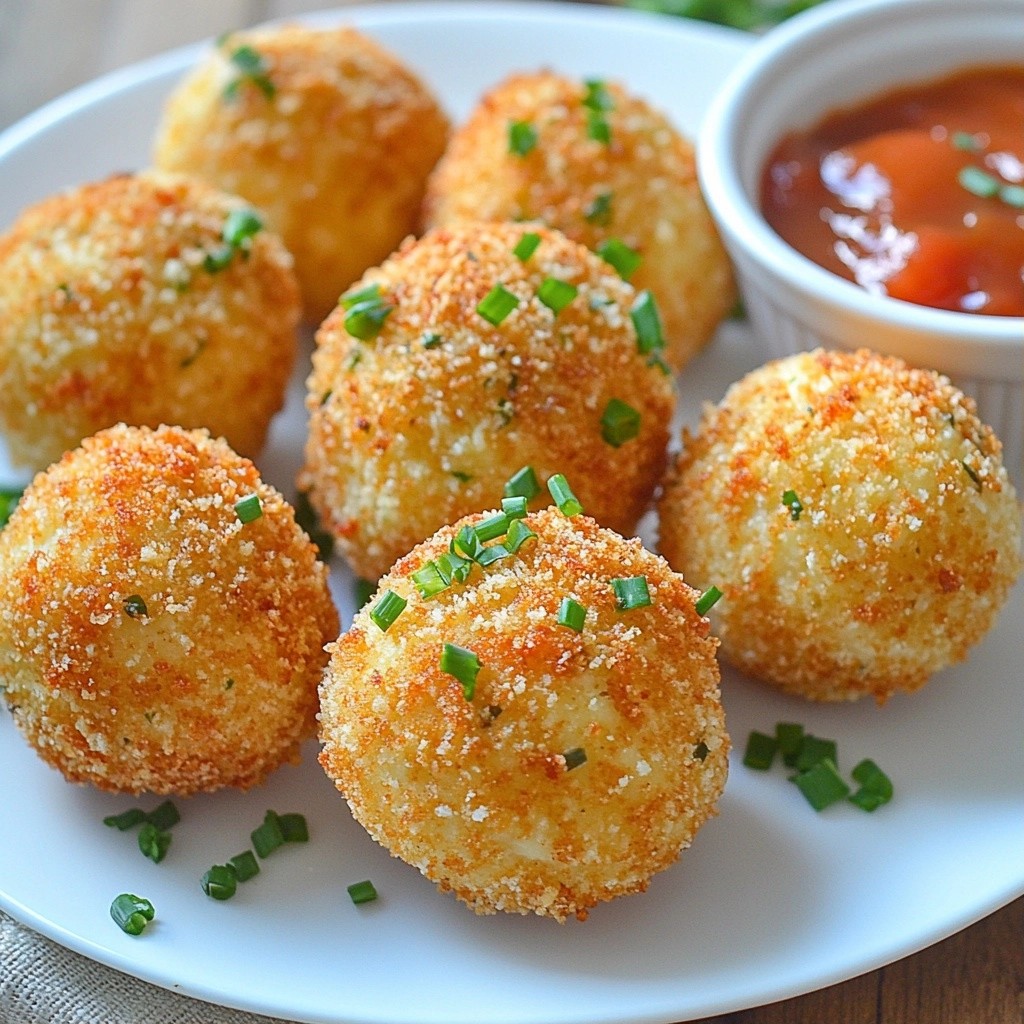
Get ready to impress your guests with crispy Holiday Herb-Crusted Cheese Balls! These delightful bites combine creamy cheese textures with a crunchy herb crust. Perfect for parties or cozy gatherings, you'll love how easy they are to make. Follow my simple recipe and tips to achieve that golden crispiness. Let’s dive into the fun of making delicious cheese balls that everyone will rave about!
Why I Love This Recipe
- Delicious Flavor Combination: The blend of cream cheese, cheddar, and feta creates a rich, creamy filling that is bursting with flavor.
- Festive Presentation: These cheese balls can be beautifully arranged on a platter, making them a perfect addition to any holiday gathering.
- Easy to Make: With just a few simple steps, anyone can whip up these delightful treats in no time.
- Crispy Texture: The panko breadcrumbs provide an irresistible crunch that pairs perfectly with the creamy cheese center.
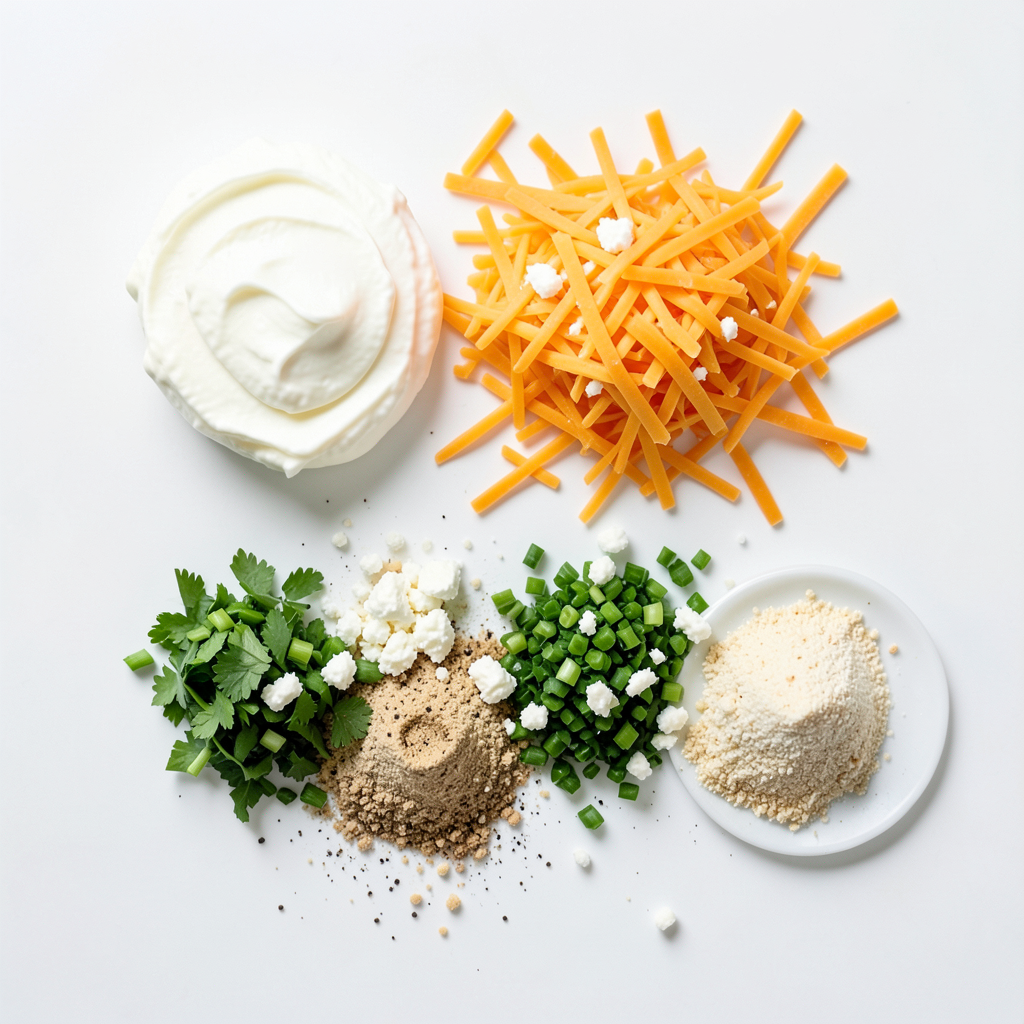
Ingredients
List of Ingredients
- 8 oz cream cheese, softened
- 1 cup shredded sharp cheddar cheese
- 1 cup crumbled feta cheese
- 1/4 cup fresh parsley, finely chopped
- 1/4 cup fresh chives, finely chopped
- 1 teaspoon garlic powder
- 1 teaspoon onion powder
- 1 cup breadcrumbs (preferably panko for extra crispiness)
- 1/2 teaspoon salt
- 1/4 teaspoon black pepper
- 2 tablespoons olive oil (for frying)
Gather these ingredients before you start. Having everything ready makes cooking easy. Use softened cream cheese to blend flavors well. Sharp cheddar gives a strong taste, while feta adds a nice tang. Fresh herbs like parsley and chives bring life to the dish. Garlic and onion powders add depth without being too strong.
Panko breadcrumbs are key for that extra crunch. They make the cheese balls crispy on the outside. Don't forget the salt and pepper; they enhance all the flavors. The olive oil is for frying, giving a golden finish.
This mix creates a balance of creamy and crispy. Enjoy crafting these cheese balls for your next holiday party!
Step-by-Step Instructions
Preparation of Cheese Mixture
Start with 8 oz of softened cream cheese. This makes mixing easy. Next, add 1 cup of shredded sharp cheddar cheese. Then, mix in 1 cup of crumbled feta cheese. This blend adds a nice tang. Now, incorporate herbs and spices. Add 1/4 cup of finely chopped parsley and 1/4 cup of finely chopped chives. They give fresh flavor. Don’t forget to add 1 teaspoon of garlic powder and 1 teaspoon of onion powder. Add 1/2 teaspoon of salt and 1/4 teaspoon of black pepper for taste. Mix everything well until combined.
Forming the Cheese Balls
Now use your hands to shape the mixture into small balls. Aim for about 1 inch in diameter. This size is perfect for snacking. As you form each ball, place them on a plate or baking sheet. This keeps them organized and ready for cooking.
Cooking the Cheese Balls
First, roll each ball in 1 cup of breadcrumbs. Panko works best for extra crunch. Next, heat 2 tablespoons of olive oil in a large skillet over medium heat. Once the oil is hot, add the cheese balls carefully. Avoid overcrowding the pan for even cooking. Cook for about 2-3 minutes per side. Look for a golden brown color for that perfect crispiness. Once done, use a slotted spoon to remove the cheese balls from the skillet. Place them on a paper towel-lined plate to soak up extra oil. Serve hot and enjoy the cheesy, herby goodness!
Tips & Tricks
Achieving the Perfect Texture
To get that perfect crunch, you should use panko breadcrumbs. Panko gives the cheese balls a light and crispy coat. Regular breadcrumbs can be softer. The texture matters!
Always check the oil temperature before frying. If the oil is too cold, the cheese balls will soak up oil and become soggy. Heat the oil on medium until it shimmers. This ensures the cheese balls fry quickly and evenly.
Serving Suggestions
These cheese balls shine when served hot. A creamy dipping sauce makes them even better. Marinara or ranch dressing pair well with the cheesy flavors.
For a festive touch, arrange the cheese balls on a colorful platter. Add a sprinkle of fresh herbs on top. This not only looks great but also adds more flavor.
Dietary Modifications
If you need gluten-free options, use gluten-free breadcrumbs. Many brands offer these now, and they work just as well.
For vegan cheese balls, swap the cream cheese and cheddar for plant-based versions. There are many tasty vegan cheeses available today. You can still enjoy this dish while meeting dietary needs!
Pro Tips
- Use Cold Cheese: For easier handling, chill the cheese mixture in the refrigerator before forming the balls. This helps them hold their shape better while frying.
- Experiment with Herbs: Feel free to mix and match herbs like thyme, rosemary, or dill to customize the flavor profile according to your preferences.
- Panko for Extra Crunch: Using panko breadcrumbs instead of regular breadcrumbs will give your cheese balls an extra crispy texture that's irresistible.
- Make Ahead: Prepare the cheese balls in advance and refrigerate them. Fry just before serving for a hot and crispy appetizer that’s ready in minutes.
Variations
Different Cheese Options
You can try many types of cheese for your cheese balls. I love using cream cheese as a base. It gives a smooth texture. You can switch the cheddar and feta for other cheeses too. Mozzarella is mild and melts well. Goat cheese adds a tangy flavor. Experimenting with different cheeses can make your dish unique.
To add even more flavor, try different seasoning blends. Italian herbs, like oregano or basil, work great. You can also use taco seasoning for a fun twist. Each combination will give your cheese balls a new taste.
Flavor Enhancements
Want some heat? Add jalapeños to the cheese mix. Chop them finely to blend well. They give a spicy kick that many will love. If you prefer a sweeter taste, try sun-dried tomatoes. They add a rich and tangy flavor. Simply chop them and mix them in.
You can use both options for even more fun. The heat from jalapeños and the sweetness of tomatoes make a great combo. Your guests will be impressed!
Serving with Condiments
Dipping sauces can take your cheese balls to the next level. Marinara sauce is a classic choice. It adds a nice, fresh taste. Ranch dressing is another favorite. It is creamy and pairs well with the cheese.
You can also try other fun dips. Honey mustard adds a sweet and tangy flavor. BBQ sauce gives a smoky touch. Experiment with different condiments to find your favorite. Your cheese balls will be a hit at any party!
Storage Info
Storing Leftover Cheese Balls
To keep your cheese balls fresh, store them in an airtight container. This method locks in moisture and flavor. Place a paper towel at the bottom of the container to absorb excess moisture. This helps maintain their crunch. For the best taste, enjoy them within three days.
Reheating Instructions
To reheat and keep the crispiness, use an oven. Preheat it to 350°F (175°C). Place the cheese balls on a baking sheet and heat for about 10 minutes. This method revives their golden crust. You can also air fry them for about 5 minutes.
If you have extra cheese balls, freeze them for later. Arrange them in a single layer on a baking sheet. Freeze them for about an hour, then transfer to a freezer bag. To thaw, leave them in the fridge overnight before reheating.
FAQs
Can I prepare cheese balls in advance?
Yes, you can make cheese balls ahead of time. This helps save time on busy days. After forming the cheese balls, place them on a tray. Cover the tray with plastic wrap and store it in the fridge. You can keep them there for up to 24 hours. When ready to cook, simply roll them in breadcrumbs and fry. This way, your cheese balls will stay fresh and tasty.
What can I use instead of cream cheese?
If you need a cream cheese substitute, try using Greek yogurt. It gives a nice tang and creamy texture. Ricotta cheese is another good option. It is lighter and has a mild flavor. For a vegan choice, use cashew cream or tofu. Blend these until smooth for the right consistency. Each of these will change the flavor a bit, but they work well in this recipe.
How do I ensure my cheese balls don't fall apart while frying?
To keep your cheese balls intact, use cold ingredients. Make sure the cheese mixture is well combined. Form them into tight balls, about one inch wide. The breadcrumbs also play a key role. Roll each ball thoroughly in them to create a sturdy coat. Lastly, don’t overcrowd the pan when frying. This ensures even cooking and prevents them from breaking apart.
This blog post covered the essential ingredients and steps to make delicious cheese balls. We explored the best techniques for frying, achieving the right texture, and serving options. Whether you stick to the original recipe or try fun variations, there's a lot to enjoy. Remember, you can adjust the recipe for different diets and preferences. With these tips, you’ll create a tasty treat that impresses everyone. Enjoy your cheese balls fresh and warm, and have fun experimenting with flavors!