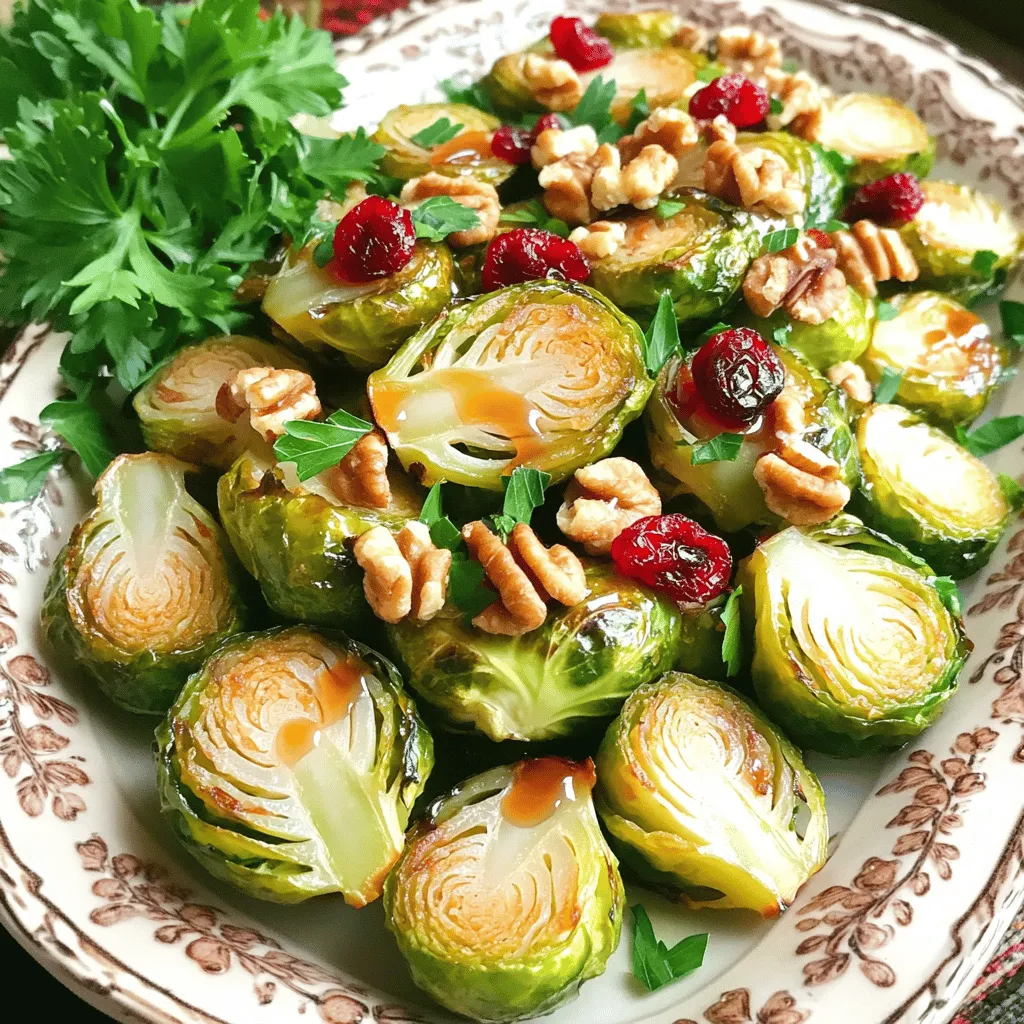
Maple Dijon Roasted Brussels Sprouts Tasty Side Dish
Are you looking for a flavorful side dish that will wow your dinner guests? Look no further! Maple Dijon Roasted
Are you looking for a flavorful side dish that will wow your dinner guests? Look no further! Maple Dijon Roasted
![- 1 ½ cups all-purpose flour - ¾ cup granulated sugar - 1 ½ teaspoons baking powder - ½ teaspoon baking soda - ¼ teaspoon salt - ½ cup unsalted butter, melted - 1 large egg - 1 teaspoon vanilla extract - 1 cup fresh strawberries, hulled and chopped - 2 tablespoons cornstarch - 1 tablespoon lemon juice - ½ cup rolled oats - Chopped nuts (e.g., almonds, pecans) - Other berries (e.g., blueberries, raspberries) - 9x9-inch baking dish - Mixing bowls - Whisk - Wire rack Gather these ingredients before you start. Fresh strawberries are key for flavor. You can mix in nuts or other berries if you want. The equipment is basic, making this recipe easy to follow. I love using a 9x9-inch baking dish for even baking. Mixing bowls and a whisk will help you combine the ingredients smoothly. Once everything is ready, you will create a treat that screams summer joy. You can find the full recipe to guide you step by step. - Preheat your oven to 350°F (175°C). - Grease or line the baking dish with parchment paper. - In a large bowl, whisk together: - 1 ½ cups all-purpose flour - ¾ cup granulated sugar - 1 ½ teaspoons baking powder - ½ teaspoon baking soda - ¼ teaspoon salt - In another bowl, mix: - ½ cup melted unsalted butter - 1 large egg - 1 teaspoon vanilla extract - Stir this into the dry mix until combined. Don't over-mix; it should feel crumbly. - Press this mixture into the bottom of the prepared baking dish to form the crust. - In a small bowl, toss: - 1 cup chopped strawberries - 2 tablespoons cornstarch - 1 tablespoon lemon juice - Spread this strawberry mix evenly over the crust. - Reserve about 1 cup of the dough mixture. Crumble it over the strawberries. - Sprinkle ½ cup rolled oats on top for extra crunch. - Bake for 30-35 minutes until golden brown on top. - Let it cool completely in the pan before slicing into bars. For the complete recipe, check out the Full Recipe. To achieve a crumbly topping, use cold butter. It helps create that perfect texture. Mix until large crumbs form but do not overwork the dough. This keeps the topping from becoming tough. For even strawberry distribution, spread strawberries flat over the crust. This way, every bite has sweet fruit. When serving, presentation matters. Use a wooden board for a rustic touch. Dust your bars lightly with powdered sugar. Add fresh strawberry slices and mint leaves. This gives a bright pop of color. Pair these bars with whipped cream or ice cream for extra delight. The creaminess balances the fruity flavors perfectly. If your crust is too crumbly, try mixing in more melted butter. This will help bind it better. If your filling is too runny, add a bit more cornstarch. This will thicken it as it bakes. Keep these tips in mind for a smooth baking experience. Enjoy making your strawberry shortcake crumble bars! For the full recipe, check out the recipe section above. {{image_2}} You can change the flavor of your bars easily. Add lemon zest for a zesty kick. Almond extract adds a lovely nutty taste. If you want warmth, sprinkle in some cinnamon. These small tweaks can make a big difference. Strawberries are great, but don't stop there! You can swap them for juicy peaches or tart cherries. Mixed berry versions work well too. Just think of the summer fruits you love! If you need gluten-free options, it’s simple. Use gluten-free flour blends in place of all-purpose flour. Almond flour or coconut flour can also work. These swaps keep the bars tasty while meeting your needs. For the best results, always check your labels for gluten-free certifications. For the full recipe and detailed instructions, check out the [Full Recipe]. To keep your Strawberry Shortcake Crumble Bars fresh, store them in an airtight container. This helps prevent them from drying out. Place the container at room temperature, and they will stay good for up to three days. If you plan to keep them longer, freezing is a better option. To freeze these delicious bars, first, let them cool completely. Then, cut them into squares. Wrap each square in plastic wrap or foil. Place the wrapped bars in a freezer-safe bag or container. These bars can last for up to three months in the freezer. When you want to enjoy them, take out how many you need and let them thaw in the fridge overnight. If you like your crumble bars warm, reheating is easy. Preheat your oven to 350°F (175°C). Place the bars on a baking sheet and cover them with foil. Heat for about 10 to 15 minutes. This will help keep the texture nice and soft. Enjoy them warm for the best flavor! Yes, you can make these bars ahead of time. Just prepare them a day or two in advance. Store them in an airtight container at room temperature. This keeps them fresh and tasty. If you want to keep them longer, place them in the fridge. They will last up to a week this way. You can also freeze them for up to three months. Just wrap them tightly in plastic wrap before freezing. Look for a golden brown top when baking. The edges should be slightly crisp, and the strawberries will bubble. You can insert a toothpick in the center. If it comes out clean, your bars are done. Baking usually takes about 30 to 35 minutes. Keep an eye on them in the last few minutes to avoid over-baking. Yes, you can use frozen strawberries for these bars. Thaw them first and drain any extra juice. This helps prevent a soggy crust. Frozen strawberries can be just as tasty as fresh ones. They work well in this recipe, especially when fresh ones are out of season. You’ve learned how to make delicious Strawberry Shortcake Crumble Bars, step by step. We covered key ingredients, equipment, and helpful tips. You can mix in different fruits or flavors to make it your own. Storing and reheating methods keep your bars fresh for longer. Enjoy baking them to share with friends and family. I hope you find joy in each bite you take!](https://greenmealmap.com/wp-content/uploads/2025/07/093f8a4e-bd92-42f0-af1d-f8665159d37c.webp)
Are you ready to dive into a delightful summer treat? Strawberry Shortcake Crumble Bars are the perfect mix of sweet

Are you ready to kickstart your mornings with a nutritious boost? Veggie Loaded Egg Muffins are not only delicious but
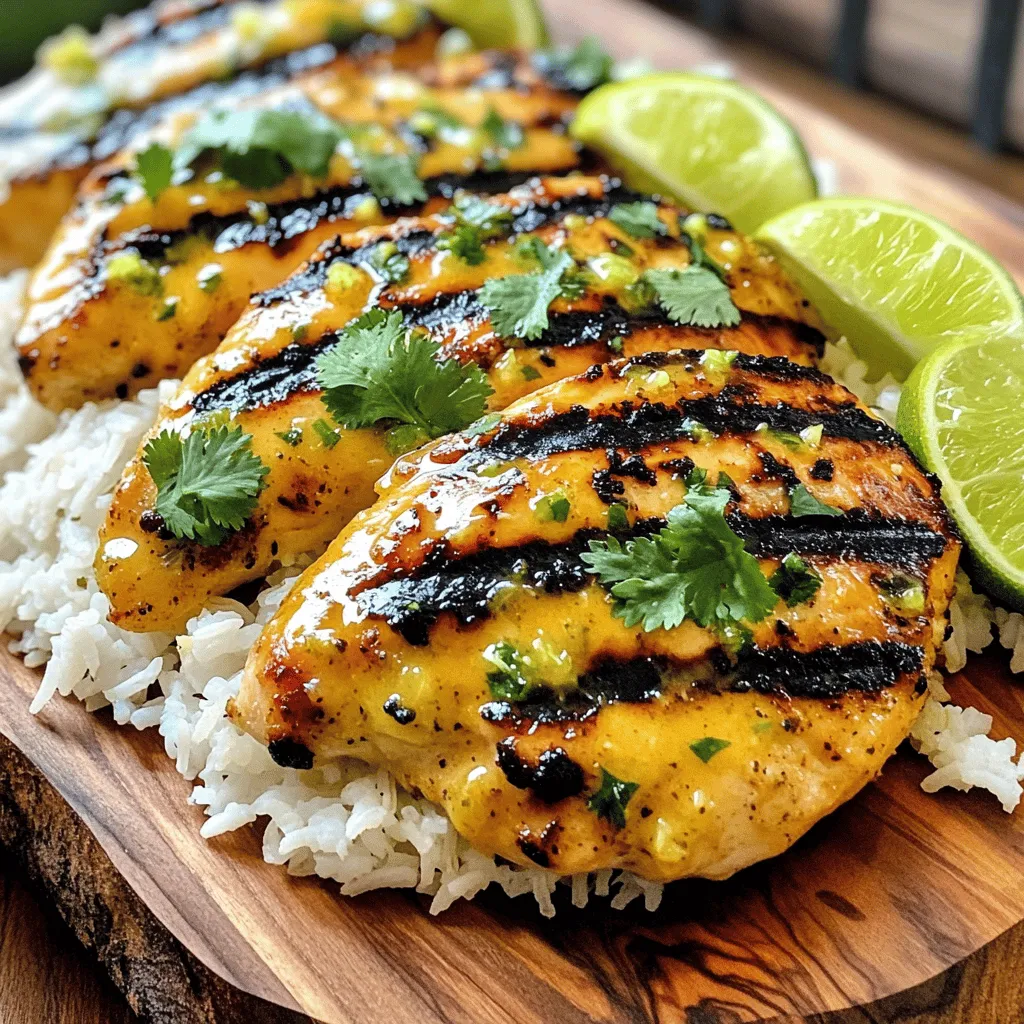
Looking for a dish that screams summer? Coconut Lime Grilled Chicken brings vibrant flavors to your plate. It’s a fun
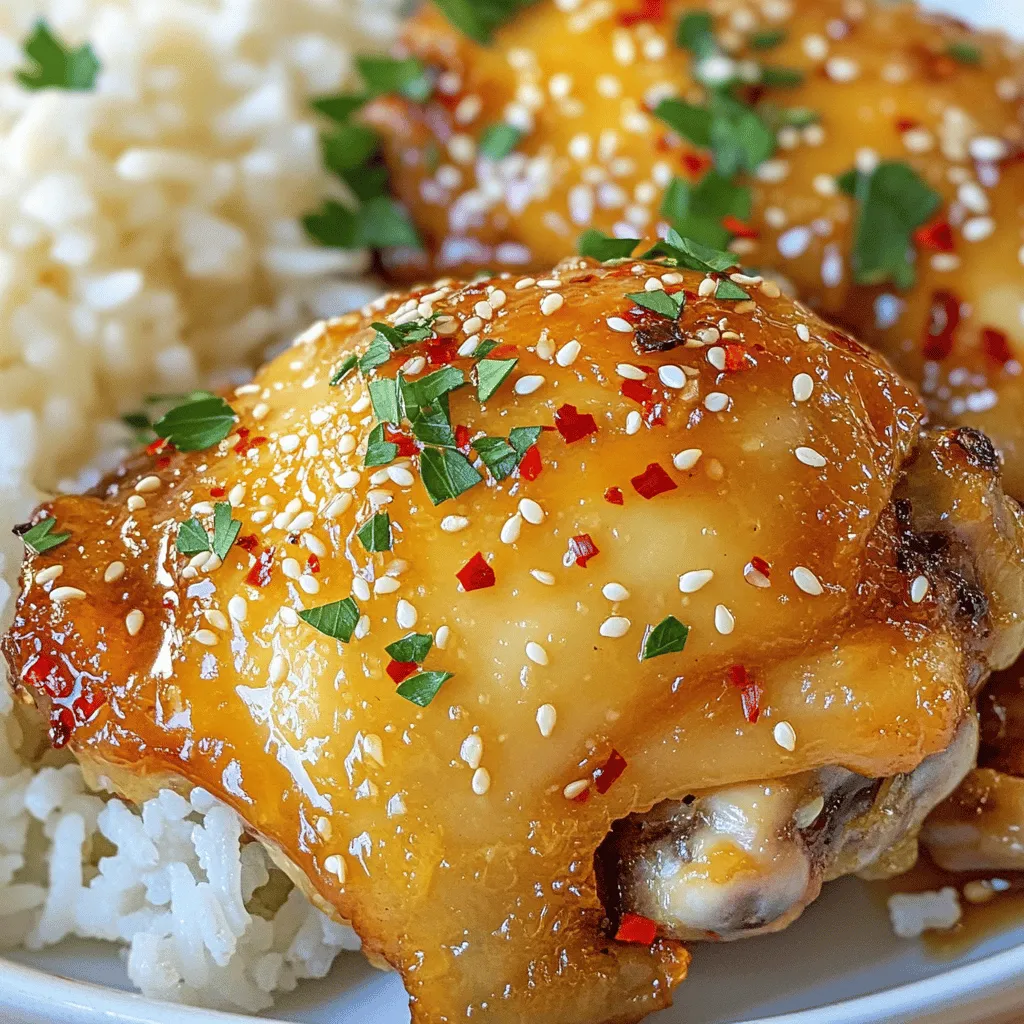
Get ready to spice up your dinner with my Spicy Honey Garlic Chicken Thighs! This flavor-packed dish combines sweet honey
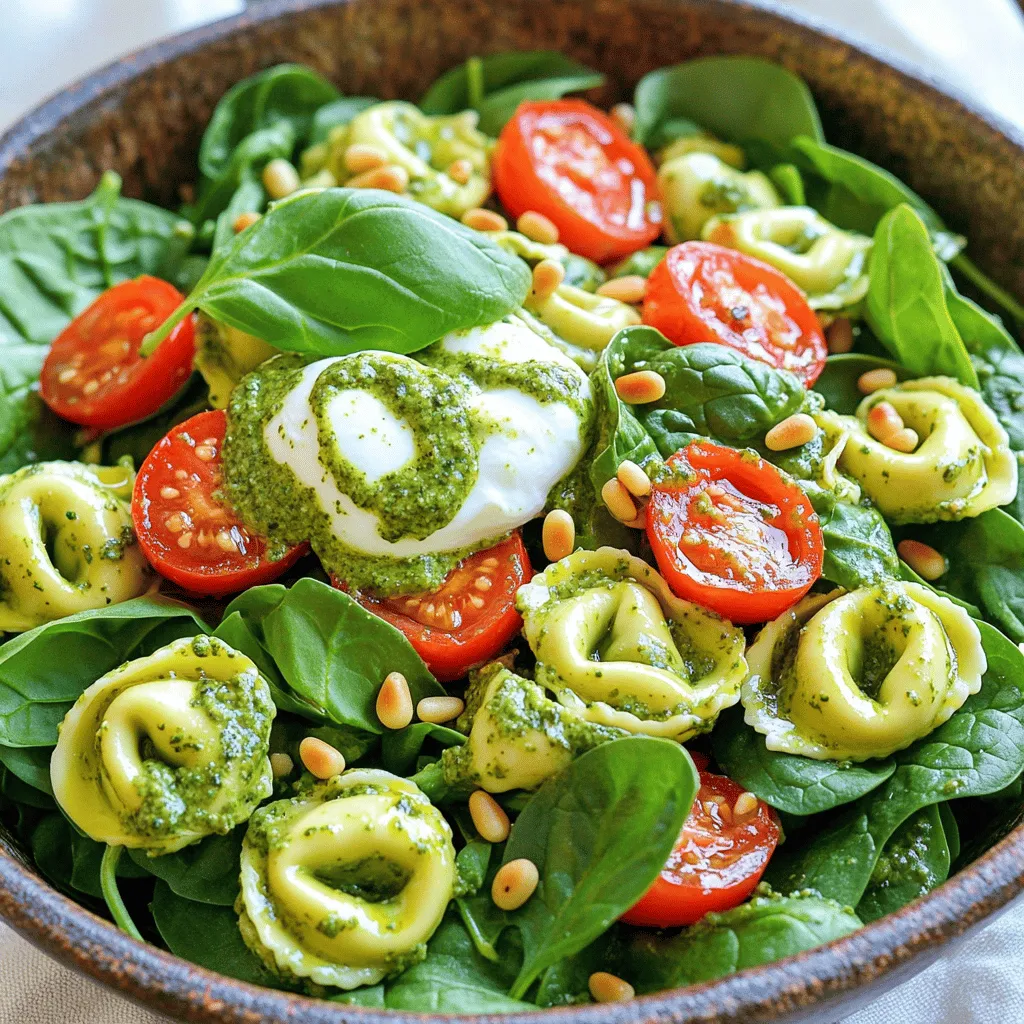
Looking for a fresh and flavorful dish that can brighten your day? I’m excited to share my Creamy Pesto Tortellini
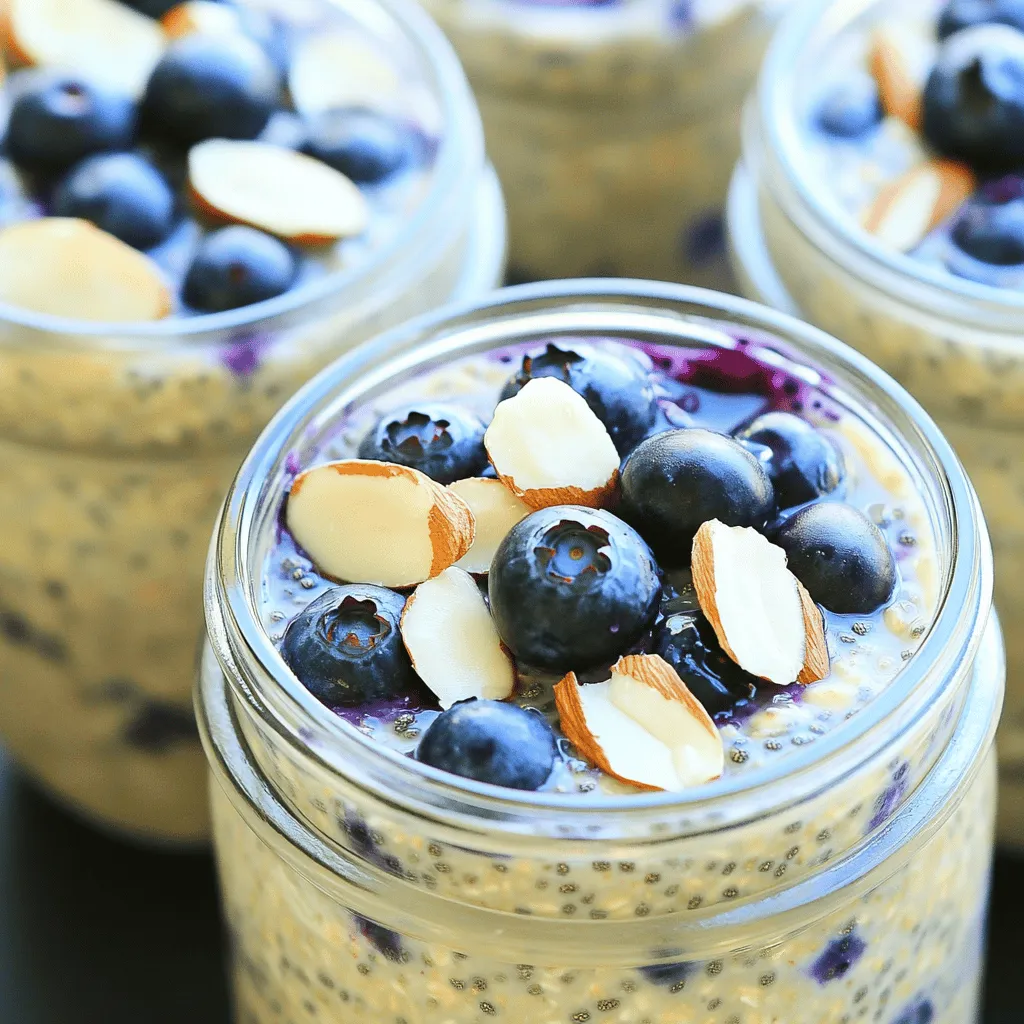
Are you ready for a quick and tasty breakfast? Blueberry Chia Overnight Oats are perfect for busy mornings. With just
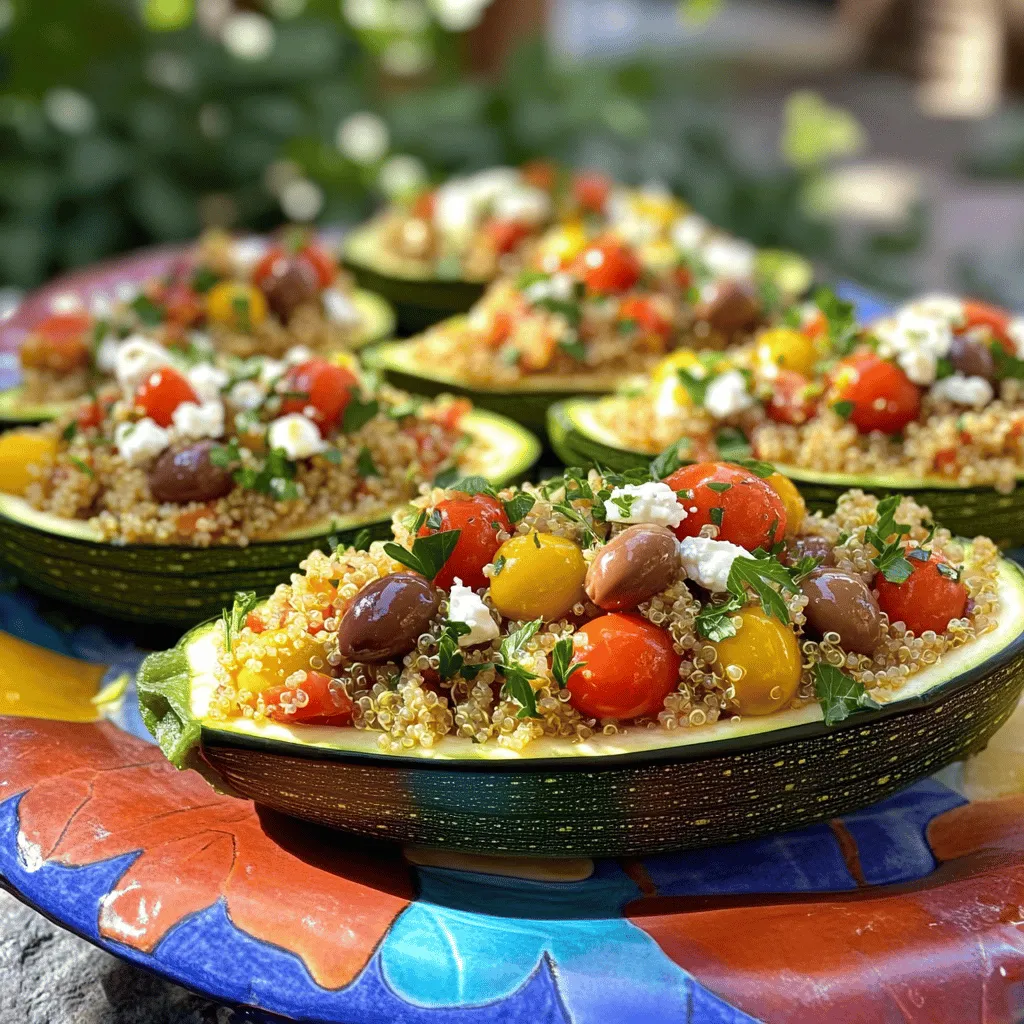
Are you ready to dive into a tasty adventure? These Mediterranean Stuffed Zucchini Boats are not just delicious; they’re easy
![To make chocolate covered banana bites, you need a few key items. Here’s what you’ll need: - 2 ripe bananas - 1 cup dark chocolate chips (or milk chocolate for a sweeter option) - 1 tablespoon coconut oil - Sea salt for sprinkling These ingredients create a delicious treat. The ripe bananas add natural sweetness and creaminess. The chocolate gives that rich flavor we all love. Coconut oil helps the chocolate melt smoothly and coat the bananas well. You can easily enhance your chocolate covered banana bites with some optional ingredients. Consider adding: - 1/4 cup crushed nuts (e.g., almonds, walnuts, or hazelnuts) - Optional: 1/4 teaspoon cinnamon Crushed nuts add a nice crunch and flavor contrast. Cinnamon brings warmth and spice, making your bites even more special. Having the right tools makes cooking easier. Here’s what you will need: - Microwave-safe bowl - Parchment paper - Plate - Fork or toothpick for dipping These items help you prepare and serve the chocolate covered banana bites perfectly. The parchment paper keeps your bites from sticking and makes cleanup a breeze. For the full recipe, check out the details above. Start by peeling the bananas. Ripe bananas work best for sweetness. Slice each banana into 1-inch thick rounds. Use a sharp knife for clean cuts. Place the slices on a plate lined with parchment paper. This step keeps them from sticking. Set the plate aside while you melt the chocolate. Grab a microwave-safe bowl. Add 1 cup of dark chocolate chips and 1 tablespoon of coconut oil. The coconut oil helps the chocolate stay smooth. Heat the bowl in the microwave in 30-second intervals. Stir the chocolate after each interval. Keep going until the chocolate is fully melted and smooth. If you want, add 1/4 teaspoon of cinnamon for extra flavor. Stir it in well. Now it's time to coat the banana slices. Dip each slice into the melted chocolate. Make sure to cover it fully. Tap off any extra chocolate. Place the coated slice back on the parchment paper. While the chocolate is still wet, sprinkle crushed nuts and a pinch of sea salt on top. This adds a nice crunch and flavor. After coating all the slices, put the plate in the freezer. Let them chill for about 30 minutes until the chocolate is firm. You can enjoy them right away or store them in an airtight container. For the full recipe, check below. To coat your banana slices well, start with good chocolate. Dark chocolate chips melt nicely, but milk chocolate works too. Mix in coconut oil for a smooth finish. Heat your chocolate in short bursts. Stir after each interval until it’s melted. Dip each banana slice fully, then tap off any extra chocolate. This step keeps your bites neat and tasty. Slicing bananas is simple but important. Use ripe bananas for sweetness. Cut them into 1-inch thick rounds. This size gives a nice bite. Make sure your knife is sharp to avoid squishing the banana. Lay the slices on a plate with parchment paper. This helps prevent sticking and makes cleanup easier. Cleaning up after making these treats should be quick. Use a bowl for melting chocolate; it keeps things tidy. Wipe up spills right away to avoid sticky spots. Place utensils in soapy water after you use them. Parchment paper makes it easy to lift the bites without mess. Enjoy your treats without a messy kitchen! For the full recipe, check the reference above. {{image_2}} You can choose many types of chocolate for your bites. Dark chocolate offers a rich taste. It pairs well with the sweet banana. Milk chocolate gives a creamy, sweet flavor. It is a favorite for kids. White chocolate adds a milder, sweeter touch. For a twist, try using flavored chocolate. Mint or orange flavors can add fun. Adding flavor can make these bites unique. A sprinkle of cinnamon adds warmth and spice. Vanilla extract gives a lovely aroma and taste. You can mix these flavors into the chocolate. Just add about 1/4 teaspoon to the melted chocolate. This small change can make a big difference. Custom toppings can take your bites to the next level. Crushed nuts add crunch and texture. Almonds, walnuts, or hazelnuts work great. Coconut flakes bring a tropical twist. You can also try seeds, like chia or hemp. These add nutrition and a fun look. Just sprinkle them on before the chocolate sets. Each bite will be a surprise! For more ideas, check the full recipe. To keep your chocolate covered banana bites fresh, use an airtight container. Place a piece of parchment paper between layers to prevent sticking. Store the container in the refrigerator. This method helps maintain their flavor and texture. In the refrigerator, these bites stay good for about 5 days. If you want to keep them longer, freeze them. In the freezer, they can last for up to 2 months. Just make sure to wrap them well to avoid freezer burn. You don’t need to reheat chocolate covered banana bites. They taste great straight from the fridge or freezer. For a fun twist, serve them with a drizzle of warm chocolate sauce or a sprinkle of fresh fruit. This can add extra flavor and color to your treat. Enjoy them as a quick snack or a sweet dessert! For the full recipe, check out the detailed instructions. Yes, you can use frozen bananas. They will work well. Just let them thaw slightly before slicing. This helps with the chocolate coating. Keep in mind that frozen bananas can be softer. This may change the texture a bit. If you like a creamier bite, go for it! Dark chocolate is my favorite for melting. It has great flavor and richness. Milk chocolate is also a good choice if you want it sweeter. Use chocolate chips for easy melting. They melt well and coat the bananas nicely. You can also try white chocolate for a unique twist. To make this recipe vegan, use dairy-free chocolate. Look for brands that are labeled vegan. You can also skip the coconut oil if you want. The chocolate will still melt without it. Just make sure to read labels for any other ingredients you use. Enjoy your vegan chocolate-covered banana bites! For the full recipe and detailed instructions, check out the [Full Recipe]. You learned how to make chocolate covered banana bites with simple steps. We covered essential ingredients and equipment, plus tips for perfecting your treats. You also discovered fun variations to try and how to store your bites properly. These tasty treats are easy to customize and fun to share. Enjoy making them for yourself or a special gathering. You'll impress everyone with your skills!](https://greenmealmap.com/wp-content/uploads/2025/07/579a207e-b870-4cc0-93fe-08ae322c959b.webp)
Are you ready to treat yourself to an easy, tasty delight? Chocolate Covered Banana Bites are a simple way to
![To make the best classic beef chili, you will need: - 1 lb (450g) ground beef - 1 medium onion, diced - 2 cloves garlic, minced - 1 bell pepper (red or green), chopped - 1 can (14 oz) diced tomatoes - 1 can (15 oz) kidney beans, drained and rinsed - 2 tablespoons tomato paste - 1 tablespoon chili powder - 1 teaspoon cumin - 1 teaspoon smoked paprika - 1 teaspoon oregano - Salt and pepper to taste - 1 tablespoon olive oil - 1 cup beef broth These ingredients come together to create a hearty and flavorful dish. Each one adds its own taste and depth to the chili. The ground beef gives it a rich base, while the beans add texture. The spices truly bring this dish to life. Toppings can elevate your chili. Consider these options: - Sour cream - Shredded cheese - Chopped green onions These toppings add creaminess, zest, and crunch. You can mix and match based on your taste. You might need to adjust ingredients for dietary needs. Here are some ideas: - Swap ground beef with ground turkey or lentils for a lighter option. - Use vegetable broth instead of beef broth for a vegetarian chili. - Try black beans instead of kidney beans for different flavors. These substitutions make the chili more inclusive for everyone. You can enjoy a delicious bowl no matter your dietary needs. If you want the full recipe, check it out here: [Full Recipe]. To start, gather all your ingredients. This makes cooking easier and faster. You will need: - 1 lb (450g) ground beef - 1 medium onion, diced - 2 cloves garlic, minced - 1 bell pepper (red or green), chopped - 1 can (14 oz) diced tomatoes - 1 can (15 oz) kidney beans, drained and rinsed - 2 tablespoons tomato paste - 1 tablespoon chili powder - 1 teaspoon cumin - 1 teaspoon smoked paprika - 1 teaspoon oregano - Salt and pepper to taste - 1 tablespoon olive oil - 1 cup beef broth - Optional toppings: sour cream, shredded cheese, chopped green onions Now, chop the onion and bell pepper. Mince the garlic. This helps to release their flavors. Next, heat the olive oil in a large pot or Dutch oven over medium-high heat. Once hot, add the diced onion and bell pepper. Sauté them for about 5 minutes until they soften. After that, stir in the minced garlic. Cook for another minute. You want to smell the garlic but not burn it. Then, add the ground beef to the pot. Break it apart with a spatula. Cook until it turns brown, about 5 to 7 minutes. If there is excess fat, drain it. Now, sprinkle in the chili powder, cumin, smoked paprika, oregano, salt, and pepper. Mix well to coat the beef and vegetables. Next, stir in the tomato paste, diced tomatoes (along with their juice), kidney beans, and beef broth. This will create a thick and hearty base. Bring the mixture to a simmer. Once it simmers, reduce the heat to low and cover the pot. Let it cook for at least 30 to 40 minutes. Stir occasionally to keep it from sticking. This allows all the flavors to blend together. Before serving, taste the chili. Adjust the seasoning if needed. Enjoy your hearty classic beef chili with your favorite toppings. For the full recipe, you can refer to the earlier sections. To make your beef chili taste even better, try these tips: - Use fresh spices. Fresh chili powder and cumin give a stronger flavor. - Add a splash of beer or wine to deepen the taste. - Include a teaspoon of cocoa powder for a rich finish. - A dash of hot sauce can add heat and zing. - Let the chili simmer longer to mix the flavors well. Here are some common mistakes when making chili: - Don’t rush the browning of the beef. This adds deep flavor. - Avoid using too much liquid. It can make the chili too soupy. - Don’t forget to taste as you cook. Adjust salt and spice as needed. - Skip the canned beans if you want a smoother texture. Go for dried beans instead. - Don’t skip the resting time. Letting the chili sit helps the flavors meld. These tools will help you make the best chili: - A large pot or Dutch oven is perfect for even cooking. - A wooden spoon helps you stir without scratching your pot. - Use a sharp knife for chopping onions and peppers. - A can opener makes it easy to open your diced tomatoes and beans. - A ladle is great for serving your chili into bowls. For the full recipe, check out the entire section on Classic Beef Chili. {{image_2}} You can make a great chili without meat. Use lentils or mushrooms instead of beef. Lentils add protein and a nice texture. Mushrooms bring a savory, umami flavor. You can also use black beans or chickpeas. These options keep the dish hearty and filling. Use vegetable broth instead of beef broth. You can find many great recipes online for vegetarian versions. You can control the spice level in your chili. If you like it hot, add jalapeños or cayenne pepper. For a milder chili, skip the spicy peppers. You can use sweet bell peppers for flavor without heat. Adjust the chili powder to make it less spicy too. Always taste as you go to find your perfect balance. Mix in unique ingredients to make your chili stand out. Try adding corn for sweetness and texture. A splash of beer can deepen the flavor, too. Want a smoky taste? Add chipotle peppers in adobo sauce. Fresh herbs like cilantro or parsley can add freshness. You can also add a bit of dark chocolate for richness. Experiment with your favorite flavors to create something special. For the full recipe, check out the Hearty Classic Beef Chili. After enjoying your hearty classic beef chili, let it cool. Place leftovers in an airtight container. Store it in the fridge for up to four days. Make sure to label the container with the date. This helps you track how long it has been stored. You can freeze classic beef chili if you want to save some for later. Use a freezer-safe container or a heavy-duty freezer bag. Leave some space at the top to allow for expansion. It can last for about three months in the freezer. When you're ready to eat, just thaw it in the fridge overnight. To reheat leftovers, choose your method. You can use a pot on the stove or a microwave. If using the stove, heat on medium-low, stirring often. This helps it heat evenly. If using a microwave, place in a microwave-safe bowl and cover it loosely. Heat in short intervals, stirring in between, until hot. Always check if it's heated throughout before serving. For the best taste, enjoy your chili warm with fresh toppings. Classic Beef Chili lasts about 3 to 4 days in the fridge. Store it in an airtight container. Make sure it cools down before you put it away. This helps keep the flavors fresh. If you want to keep it longer, consider freezing it. Yes, you can make Classic Beef Chili in a slow cooker. Brown the beef, onion, and garlic first. Then, add all the other ingredients to the slow cooker. Cook on low for 6 to 8 hours or on high for 3 to 4 hours. This method makes the chili rich and tasty. You can serve Classic Beef Chili with several tasty sides. Here are some ideas: - Crusty bread or rolls for dipping - Tortilla chips for crunch - Rice for a filling option - A simple green salad for freshness - Toppings like sour cream, shredded cheese, and green onions add flavor and fun. For the full recipe, check out the details above! We covered a lot about making classic beef chili. You learned the ingredients you need, including options for toppings and swaps for diets. I shared clear steps to prepare and cook your chili. We also explored tips to boost flavor and avoid mistakes. Don't forget to store leftovers properly and try variations to keep it fresh. Classic beef chili is versatile, and you can adapt it however you like. Enjoy the process and your delicious chili!](https://greenmealmap.com/wp-content/uploads/2025/07/29eaba2d-7d18-468a-baa0-e1586d2a70c4.webp)
Get ready to warm up your dinner table with my Classic Beef Chili recipe! This hearty and flavorful dish packs
