![To make these no bake peanut butter chocolate bars, you need just a few simple ingredients. Each one plays a key role in creating a tasty treat. Here’s what you’ll need: - 1 cup natural peanut butter - 1/2 cup honey or maple syrup - 2 cups rolled oats - 1/2 cup chocolate chips (dark or semi-sweet) - 1/4 cup chia seeds (optional for added nutrition) - 1/2 teaspoon vanilla extract - Pinch of salt Natural peanut butter gives a rich taste and creamy texture. Honey or maple syrup adds sweetness and helps bind the mix. Rolled oats provide a hearty base and a chewy bite. Chocolate chips make every bar a little more decadent. Chia seeds boost nutrition but are totally optional. Vanilla adds warmth, while salt enhances all the flavors. Using these ingredients, you can whip up a batch quickly. I love how easy it is to find them in any kitchen. For the full recipe, check out the cooking steps I’ve laid out! 1. Combining peanut butter and sweetener: Start by taking a large mixing bowl. Add 1 cup of natural peanut butter. Then, add either 1/2 cup of honey or maple syrup. Mix these two until the mixture is smooth and creamy. This step is key. A good mix ensures the flavors blend well. 2. Mixing in other ingredients: Next, add 1/2 teaspoon of vanilla extract and a pinch of salt. Stir these in well. Then, gradually fold in 2 cups of rolled oats. If you want, you can add 1/4 cup of chia seeds for more nutrition. Finally, toss in 1/2 cup of chocolate chips. Mix until all the ingredients are combined. You want everything to be evenly spread out. 3. Preparing the baking dish: Take an 8-inch square baking dish. Line it with parchment paper, leaving some extra paper hanging over the sides. This will help you lift the bars out later. Pour your mixture into this dish. Spread it out evenly. Use a spatula to pack it down firmly. This helps the bars hold their shape. 1. Refrigeration time: Place the baking dish in the fridge. Let it chill for about 1-2 hours. This time helps the bars firm up. The longer you chill, the easier it will be to slice. 2. Slicing the bars: Once chilled, carefully lift the mixture out of the dish using the parchment paper. Place it on a cutting board. Use a sharp knife to cut it into bars. You can choose the size you like best. 3. Presentation tips: For a fun look, serve these bars wrapped in parchment paper. This gives a homemade touch. You can also stack them on a plate. Drizzle some melted chocolate on top for a fancy finish. Enjoy your delicious no bake peanut butter chocolate bars! To get the right texture, start with the peanut butter. Use natural peanut butter without added sugars or oils. It should be creamy but not too runny. If it’s too thick, the bars may be hard to mix. Next, let’s talk about chilling time. After you mix your ingredients, chill the mixture for at least 1-2 hours. This step is key. Chilling helps the bars firm up. If you skip this, the bars may fall apart when you cut them. You can make your bars even better by adding spices or extracts. A touch of cinnamon or a hint of nutmeg can add warmth. A few drops of almond extract can also bring a nice twist. Consider trying different types of chocolate too. Dark chocolate brings rich flavor, while semi-sweet chocolate offers a balanced taste. You might even mix in white chocolate for a fun effect. Get creative and find the flavor that makes your taste buds happy! For the full recipe, check out the recipe section. {{image_2}} If you have nut allergies, you can still enjoy this treat. Just swap out the peanut butter for sunflower seed butter. This change keeps the bars creamy and tasty. Sunflower seed butter has a similar texture to peanut butter. It will still mix well with honey or maple syrup. Plus, it adds a unique flavor. Want a vegan treat? Simply use maple syrup instead of honey. For chocolate, pick dairy-free chocolate chips. These swaps make the bars plant-based and still delicious. You won’t lose any flavor or texture. The maple syrup gives a nice, sweet taste. If you need gluten-free bars, it’s easy! Just choose certified gluten-free oats. Many brands offer oats that are safe for gluten-free diets. This way, you can enjoy this sweet snack without worry. The bars will still hold together well and taste amazing. For the full recipe, check out the [Full Recipe]. To keep your no bake peanut butter chocolate bars fresh, store them in an airtight container. This helps prevent them from drying out or absorbing other smells from your fridge. You can place parchment paper between layers if stacking them. You can refrigerate these bars for short-term storage. They stay good for about a week this way. If you want to keep them longer, freeze them. Just wrap each bar tightly in plastic wrap before placing them in a freezer-safe bag. This keeps them fresh for up to three months. These delicious bars will last about a week in the fridge if stored properly. In the freezer, they last up to three months. Keep an eye out for signs of spoilage. If you see mold, or if they smell off, it's best to toss them out. Also, if the texture changes and they feel overly dry or hard, it's time to say goodbye. For the full recipe, check out the details shared earlier! To make these bars, start by mixing peanut butter and honey in a bowl. The mix should be smooth and creamy. Next, stir in the vanilla extract and a pinch of salt. Then, fold in the rolled oats, chocolate chips, and chia seeds. This step is key for flavor and texture. Line an 8-inch baking dish with parchment paper for easy removal. Pour the mixture into the dish and pack it down firmly. Chill it in the fridge for 1-2 hours until set. After chilling, cut the bars into pieces. Enjoy your tasty treat! Yes, you can use different sweeteners. Maple syrup is a great option if you want a vegan choice. You can also try agave nectar for a milder taste. If you prefer a sugar substitute, stevia or monk fruit sweetener works well too. Just make sure to adjust the amount based on sweetness level. Each sweetener can change the taste a bit, but they all work with the recipe. You can tell when the bars are ready by checking their firmness. They should be firm to the touch but still slightly soft. If they hold their shape when you cut them, they're good to go. The bars need to chill for at least 1-2 hours. If they feel too soft, give them more time in the fridge. Once set, they will be easy to slice and enjoy! These no-bake peanut butter chocolate bars offer a quick and tasty treat. We covered simple ingredients like natural peanut butter and oats, plus easy steps for making and chilling. You can customize with nut-free, vegan, or gluten-free options. Storing them right keeps them fresh longer. Enjoy experimenting with flavors. With these tips, you’ll create something delicious. Happy cooking!](https://greenmealmap.com/wp-content/uploads/2025/07/fcbd85d9-bc7c-44f7-8551-2b7e8bf157af-768x768.webp)
Craving a sweet treat that’s both easy to make and delicious? You’ll love these No Bake Peanut Butter Chocolate Bars! With just a handful of simple ingredients, you can whip up a satisfying snack in minutes—no oven required. Whether you’re a busy parent or just looking for a quick sweet fix, these bars are sure to become a favorite. Let’s dive into the fun and tasty world of no-bake treats!
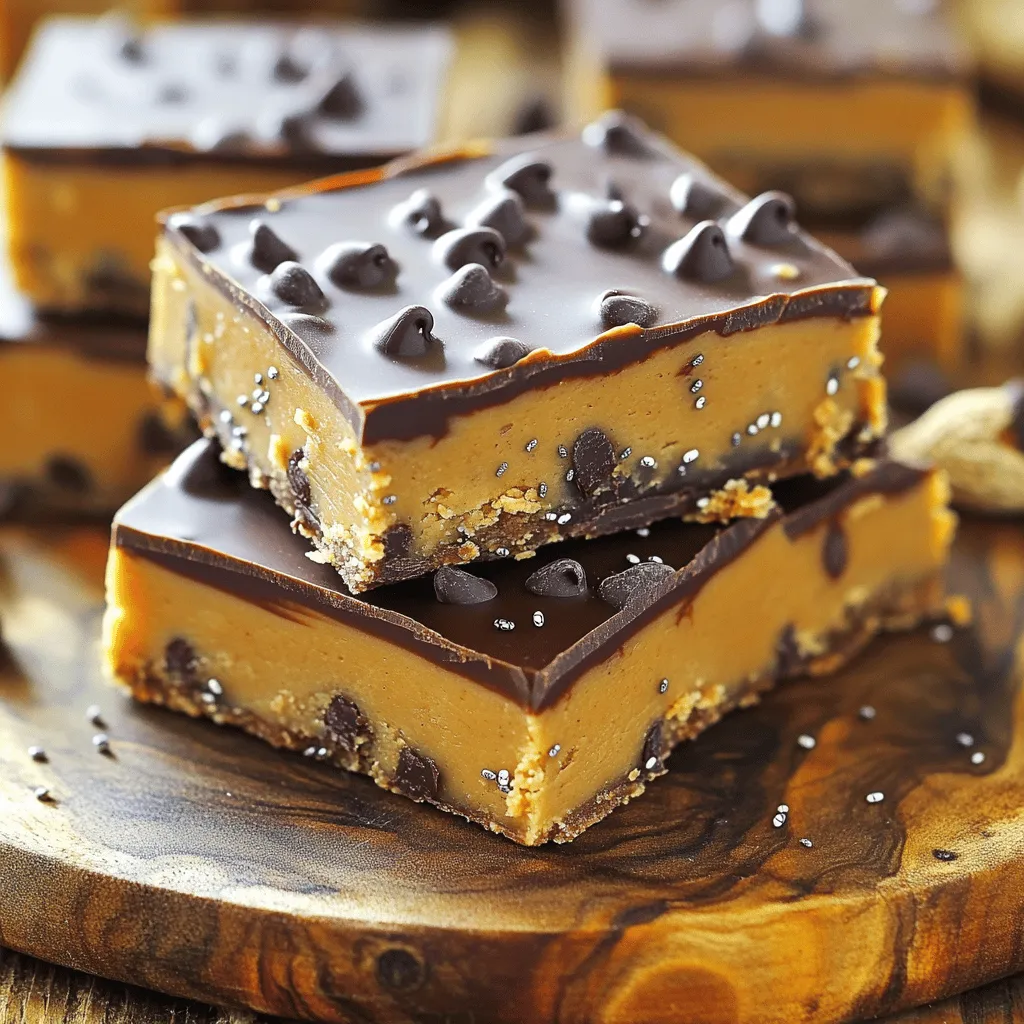
Ingredients
To make these no bake peanut butter chocolate bars, you need just a few simple ingredients. Each one plays a key role in creating a tasty treat. Here’s what you’ll need:
– 1 cup natural peanut butter
– 1/2 cup honey or maple syrup
– 2 cups rolled oats
– 1/2 cup chocolate chips (dark or semi-sweet)
– 1/4 cup chia seeds (optional for added nutrition)
– 1/2 teaspoon vanilla extract
– Pinch of salt
Natural peanut butter gives a rich taste and creamy texture. Honey or maple syrup adds sweetness and helps bind the mix. Rolled oats provide a hearty base and a chewy bite. Chocolate chips make every bar a little more decadent. Chia seeds boost nutrition but are totally optional. Vanilla adds warmth, while salt enhances all the flavors.
Using these ingredients, you can whip up a batch quickly. I love how easy it is to find them in any kitchen.
Step-by-Step Instructions
Preparation Steps
1. Combining peanut butter and sweetener: Start by taking a large mixing bowl. Add 1 cup of natural peanut butter. Then, add either 1/2 cup of honey or maple syrup. Mix these two until the mixture is smooth and creamy. This step is key. A good mix ensures the flavors blend well.
2. Mixing in other ingredients: Next, add 1/2 teaspoon of vanilla extract and a pinch of salt. Stir these in well. Then, gradually fold in 2 cups of rolled oats. If you want, you can add 1/4 cup of chia seeds for more nutrition. Finally, toss in 1/2 cup of chocolate chips. Mix until all the ingredients are combined. You want everything to be evenly spread out.
3. Preparing the baking dish: Take an 8-inch square baking dish. Line it with parchment paper, leaving some extra paper hanging over the sides. This will help you lift the bars out later. Pour your mixture into this dish. Spread it out evenly. Use a spatula to pack it down firmly. This helps the bars hold their shape.
Chilling and Cutting
1. Refrigeration time: Place the baking dish in the fridge. Let it chill for about 1-2 hours. This time helps the bars firm up. The longer you chill, the easier it will be to slice.
2. Slicing the bars: Once chilled, carefully lift the mixture out of the dish using the parchment paper. Place it on a cutting board. Use a sharp knife to cut it into bars. You can choose the size you like best.
3. Presentation tips: For a fun look, serve these bars wrapped in parchment paper. This gives a homemade touch. You can also stack them on a plate. Drizzle some melted chocolate on top for a fancy finish. Enjoy your delicious no bake peanut butter chocolate bars!
Tips & Tricks
Perfecting the Texture
To get the right texture, start with the peanut butter. Use natural peanut butter without added sugars or oils. It should be creamy but not too runny. If it’s too thick, the bars may be hard to mix.
Next, let’s talk about chilling time. After you mix your ingredients, chill the mixture for at least 1-2 hours. This step is key. Chilling helps the bars firm up. If you skip this, the bars may fall apart when you cut them.
Flavor Enhancements
You can make your bars even better by adding spices or extracts. A touch of cinnamon or a hint of nutmeg can add warmth. A few drops of almond extract can also bring a nice twist.
Consider trying different types of chocolate too. Dark chocolate brings rich flavor, while semi-sweet chocolate offers a balanced taste. You might even mix in white chocolate for a fun effect. Get creative and find the flavor that makes your taste buds happy!
Variations
Nut-Free Version
If you have nut allergies, you can still enjoy this treat. Just swap out the peanut butter for sunflower seed butter. This change keeps the bars creamy and tasty. Sunflower seed butter has a similar texture to peanut butter. It will still mix well with honey or maple syrup. Plus, it adds a unique flavor.
Vegan Options
Want a vegan treat? Simply use maple syrup instead of honey. For chocolate, pick dairy-free chocolate chips. These swaps make the bars plant-based and still delicious. You won’t lose any flavor or texture. The maple syrup gives a nice, sweet taste.
Gluten-Free Adaptations
If you need gluten-free bars, it’s easy! Just choose certified gluten-free oats. Many brands offer oats that are safe for gluten-free diets. This way, you can enjoy this sweet snack without worry. The bars will still hold together well and taste amazing.
Storage Info
Best Storage Practices
To keep your no bake peanut butter chocolate bars fresh, store them in an airtight container. This helps prevent them from drying out or absorbing other smells from your fridge. You can place parchment paper between layers if stacking them.
You can refrigerate these bars for short-term storage. They stay good for about a week this way. If you want to keep them longer, freeze them. Just wrap each bar tightly in plastic wrap before placing them in a freezer-safe bag. This keeps them fresh for up to three months.
Shelf Life
These delicious bars will last about a week in the fridge if stored properly. In the freezer, they last up to three months.
Keep an eye out for signs of spoilage. If you see mold, or if they smell off, it’s best to toss them out. Also, if the texture changes and they feel overly dry or hard, it’s time to say goodbye.
FAQs
How to make no bake peanut butter chocolate bars?
To make these bars, start by mixing peanut butter and honey in a bowl. The mix should be smooth and creamy. Next, stir in the vanilla extract and a pinch of salt. Then, fold in the rolled oats, chocolate chips, and chia seeds. This step is key for flavor and texture. Line an 8-inch baking dish with parchment paper for easy removal. Pour the mixture into the dish and pack it down firmly. Chill it in the fridge for 1-2 hours until set. After chilling, cut the bars into pieces. Enjoy your tasty treat!
Can I use different sweeteners?
Yes, you can use different sweeteners. Maple syrup is a great option if you want a vegan choice. You can also try agave nectar for a milder taste. If you prefer a sugar substitute, stevia or monk fruit sweetener works well too. Just make sure to adjust the amount based on sweetness level. Each sweetener can change the taste a bit, but they all work with the recipe.
How do I know when the bars are ready to eat?
You can tell when the bars are ready by checking their firmness. They should be firm to the touch but still slightly soft. If they hold their shape when you cut them, they’re good to go. The bars need to chill for at least 1-2 hours. If they feel too soft, give them more time in the fridge. Once set, they will be easy to slice and enjoy!
These no-bake peanut butter chocolate bars offer a quick and tasty treat. We covered simple ingredients like natural peanut butter and oats, plus easy steps for making and chilling. You can customize with nut-free, vegan, or gluten-free options. Storing them right keeps them fresh longer. Enjoy experimenting with flavors. With these tips, you’ll create something delicious. Happy cooking!
![To make these no bake peanut butter chocolate bars, you need just a few simple ingredients. Each one plays a key role in creating a tasty treat. Here’s what you’ll need: - 1 cup natural peanut butter - 1/2 cup honey or maple syrup - 2 cups rolled oats - 1/2 cup chocolate chips (dark or semi-sweet) - 1/4 cup chia seeds (optional for added nutrition) - 1/2 teaspoon vanilla extract - Pinch of salt Natural peanut butter gives a rich taste and creamy texture. Honey or maple syrup adds sweetness and helps bind the mix. Rolled oats provide a hearty base and a chewy bite. Chocolate chips make every bar a little more decadent. Chia seeds boost nutrition but are totally optional. Vanilla adds warmth, while salt enhances all the flavors. Using these ingredients, you can whip up a batch quickly. I love how easy it is to find them in any kitchen. For the full recipe, check out the cooking steps I’ve laid out! 1. Combining peanut butter and sweetener: Start by taking a large mixing bowl. Add 1 cup of natural peanut butter. Then, add either 1/2 cup of honey or maple syrup. Mix these two until the mixture is smooth and creamy. This step is key. A good mix ensures the flavors blend well. 2. Mixing in other ingredients: Next, add 1/2 teaspoon of vanilla extract and a pinch of salt. Stir these in well. Then, gradually fold in 2 cups of rolled oats. If you want, you can add 1/4 cup of chia seeds for more nutrition. Finally, toss in 1/2 cup of chocolate chips. Mix until all the ingredients are combined. You want everything to be evenly spread out. 3. Preparing the baking dish: Take an 8-inch square baking dish. Line it with parchment paper, leaving some extra paper hanging over the sides. This will help you lift the bars out later. Pour your mixture into this dish. Spread it out evenly. Use a spatula to pack it down firmly. This helps the bars hold their shape. 1. Refrigeration time: Place the baking dish in the fridge. Let it chill for about 1-2 hours. This time helps the bars firm up. The longer you chill, the easier it will be to slice. 2. Slicing the bars: Once chilled, carefully lift the mixture out of the dish using the parchment paper. Place it on a cutting board. Use a sharp knife to cut it into bars. You can choose the size you like best. 3. Presentation tips: For a fun look, serve these bars wrapped in parchment paper. This gives a homemade touch. You can also stack them on a plate. Drizzle some melted chocolate on top for a fancy finish. Enjoy your delicious no bake peanut butter chocolate bars! To get the right texture, start with the peanut butter. Use natural peanut butter without added sugars or oils. It should be creamy but not too runny. If it’s too thick, the bars may be hard to mix. Next, let’s talk about chilling time. After you mix your ingredients, chill the mixture for at least 1-2 hours. This step is key. Chilling helps the bars firm up. If you skip this, the bars may fall apart when you cut them. You can make your bars even better by adding spices or extracts. A touch of cinnamon or a hint of nutmeg can add warmth. A few drops of almond extract can also bring a nice twist. Consider trying different types of chocolate too. Dark chocolate brings rich flavor, while semi-sweet chocolate offers a balanced taste. You might even mix in white chocolate for a fun effect. Get creative and find the flavor that makes your taste buds happy! For the full recipe, check out the recipe section. {{image_2}} If you have nut allergies, you can still enjoy this treat. Just swap out the peanut butter for sunflower seed butter. This change keeps the bars creamy and tasty. Sunflower seed butter has a similar texture to peanut butter. It will still mix well with honey or maple syrup. Plus, it adds a unique flavor. Want a vegan treat? Simply use maple syrup instead of honey. For chocolate, pick dairy-free chocolate chips. These swaps make the bars plant-based and still delicious. You won’t lose any flavor or texture. The maple syrup gives a nice, sweet taste. If you need gluten-free bars, it’s easy! Just choose certified gluten-free oats. Many brands offer oats that are safe for gluten-free diets. This way, you can enjoy this sweet snack without worry. The bars will still hold together well and taste amazing. For the full recipe, check out the [Full Recipe]. To keep your no bake peanut butter chocolate bars fresh, store them in an airtight container. This helps prevent them from drying out or absorbing other smells from your fridge. You can place parchment paper between layers if stacking them. You can refrigerate these bars for short-term storage. They stay good for about a week this way. If you want to keep them longer, freeze them. Just wrap each bar tightly in plastic wrap before placing them in a freezer-safe bag. This keeps them fresh for up to three months. These delicious bars will last about a week in the fridge if stored properly. In the freezer, they last up to three months. Keep an eye out for signs of spoilage. If you see mold, or if they smell off, it's best to toss them out. Also, if the texture changes and they feel overly dry or hard, it's time to say goodbye. For the full recipe, check out the details shared earlier! To make these bars, start by mixing peanut butter and honey in a bowl. The mix should be smooth and creamy. Next, stir in the vanilla extract and a pinch of salt. Then, fold in the rolled oats, chocolate chips, and chia seeds. This step is key for flavor and texture. Line an 8-inch baking dish with parchment paper for easy removal. Pour the mixture into the dish and pack it down firmly. Chill it in the fridge for 1-2 hours until set. After chilling, cut the bars into pieces. Enjoy your tasty treat! Yes, you can use different sweeteners. Maple syrup is a great option if you want a vegan choice. You can also try agave nectar for a milder taste. If you prefer a sugar substitute, stevia or monk fruit sweetener works well too. Just make sure to adjust the amount based on sweetness level. Each sweetener can change the taste a bit, but they all work with the recipe. You can tell when the bars are ready by checking their firmness. They should be firm to the touch but still slightly soft. If they hold their shape when you cut them, they're good to go. The bars need to chill for at least 1-2 hours. If they feel too soft, give them more time in the fridge. Once set, they will be easy to slice and enjoy! These no-bake peanut butter chocolate bars offer a quick and tasty treat. We covered simple ingredients like natural peanut butter and oats, plus easy steps for making and chilling. You can customize with nut-free, vegan, or gluten-free options. Storing them right keeps them fresh longer. Enjoy experimenting with flavors. With these tips, you’ll create something delicious. Happy cooking!](https://greenmealmap.com/wp-content/uploads/2025/07/fcbd85d9-bc7c-44f7-8551-2b7e8bf157af-250x250.webp)
