Looking for a simple yet delicious dessert? You’ll love this Strawberry Cheesecake Dump Cake! This treat combines the creamy goodness of cheesecake with sweet strawberries, all in one easy recipe. I’ll guide you through selecting the freshest strawberries and sharing tips on how to make this dessert a hit at your next gathering. Ready to impress your friends and family? Let’s get baking!
Ingredients
List of Ingredients for Strawberry Cheesecake Dump Cake
To make this wonderful dessert, gather these simple ingredients:
– 2 cups fresh strawberries, hulled and sliced
– 1 cup cream cheese, softened
– 1 cup sugar, divided
– 1 teaspoon vanilla extract
– 1 cup all-purpose flour
– 1 cup milk
– 1/2 cup butter, melted
– 2 teaspoons baking powder
– 1/4 teaspoon salt
– Whipped cream, for serving (optional)
– Fresh mint leaves, for garnish (optional)
Tips for Selecting Fresh Strawberries
When choosing strawberries, look for bright red color. They should be firm and plump. Avoid berries with green or white spots. Smell the strawberries, too; ripe ones have a sweet scent. Check for any signs of mold or bruising. Fresh strawberries taste best in this dish.
Suggested Alternatives for Cream Cheese
If you want a change from cream cheese, try using mascarpone. It gives a similar texture and taste. Greek yogurt is another option, offering a lighter feel. You can also use ricotta for a different flavor. Just make sure to adjust sugar levels if you switch.
Step-by-Step Instructions
How to Prepare Your Oven and Baking Dish
First, set your oven to 350°F (175°C). This is the perfect heat for baking the cake. Grease a 9×13 inch baking dish with butter or cooking spray. This will help the cake come out easily. You don’t want it to stick!
Detailed Steps for Assembling the Cake Layers
1. In a bowl, combine the sliced strawberries with 1/4 cup of sugar. Toss them gently and let them sit for about 10 minutes. This helps the strawberries release their sweet juices.
2. In another bowl, beat 1 cup of softened cream cheese with 3/4 cup of sugar and 1 teaspoon of vanilla. Mix until it’s smooth and creamy. This will be your rich cream cheese layer.
3. In a large mixing bowl, mix the dry ingredients. Combine 1 cup of flour, 2 teaspoons of baking powder, and 1/4 teaspoon of salt.
4. Add 1/2 cup of melted butter and 1 cup of milk to the dry mix. Stir until just combined. Don’t overmix!
5. Pour the cake batter into the greased dish. Spread it out evenly. Next, spoon dollops of the cream cheese mixture over the batter.
6. Finally, add the sugared strawberries on top. Do not mix; just layer everything nicely.
Baking Time and Temperature Settings
Now, place your dish in the preheated oven. Bake for 45 to 55 minutes. Check if it’s done by inserting a toothpick in the center. If it comes out clean, your cake is ready!
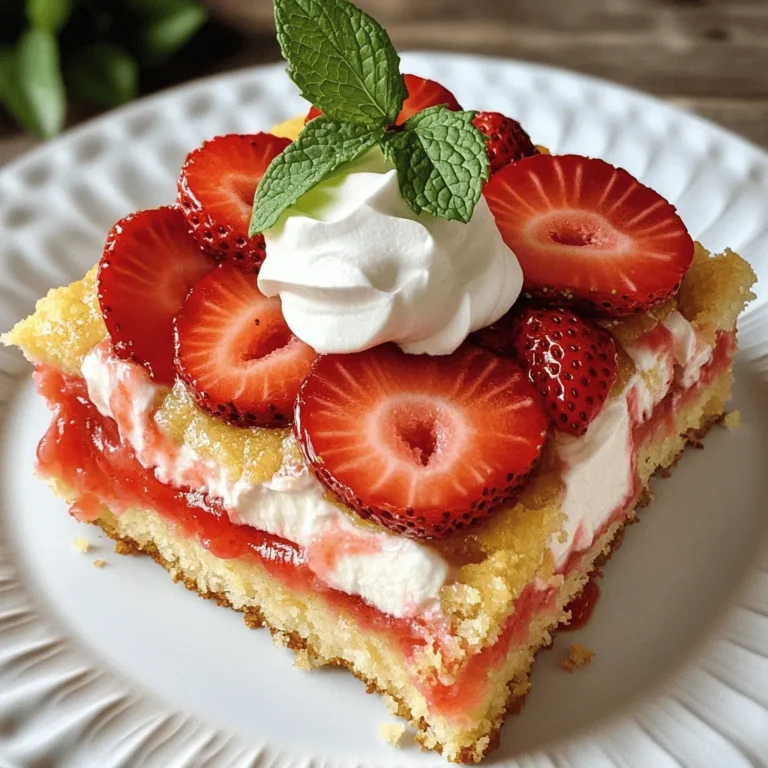
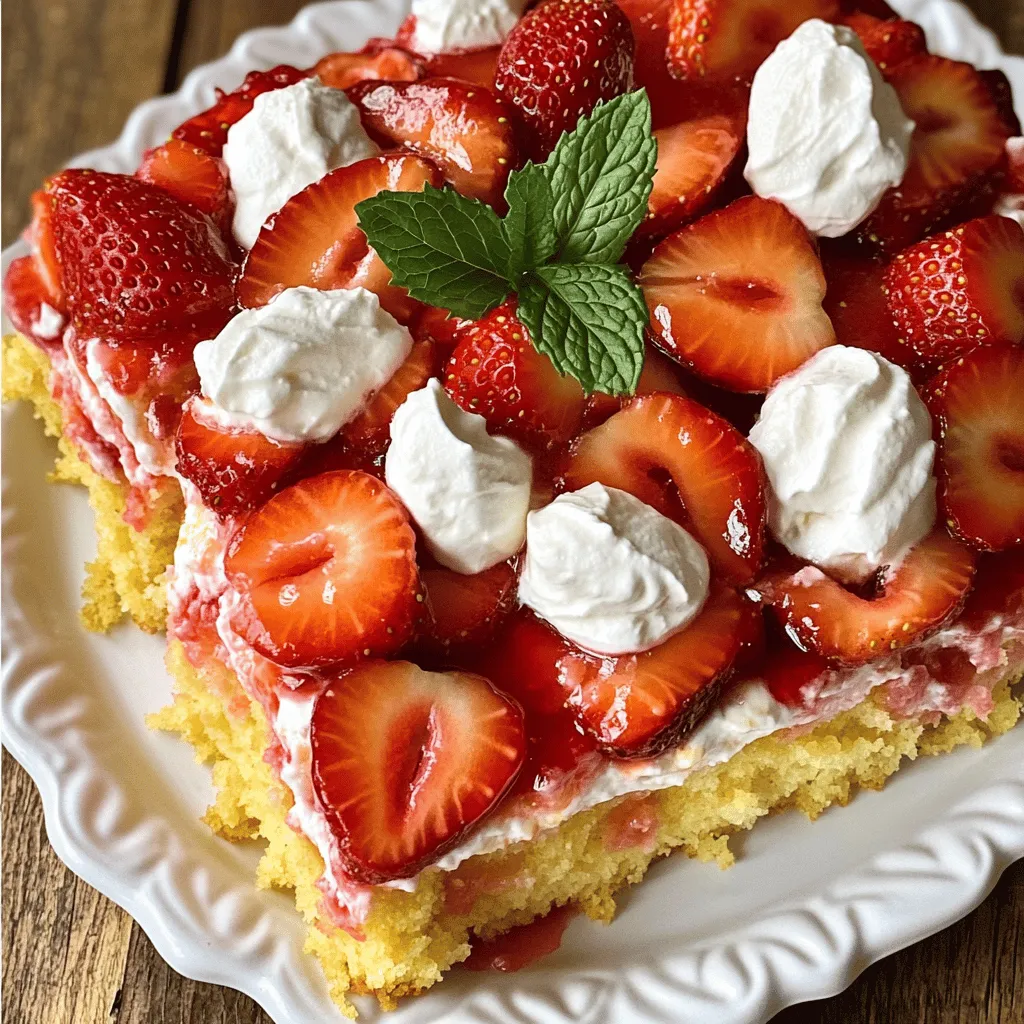
Let it cool slightly after baking. You can serve it warm or at room temperature. Top it with whipped cream and fresh mint if you like. Enjoy your delightful dessert!
Tips & Tricks
Best Practices for Achieving a Creamy Cream Cheese Layer
To get a smooth cream cheese layer, start with softened cream cheese. I let it sit out for about 30 minutes before mixing. This helps it blend well. Use a hand mixer or stand mixer for the best results. Beat it with sugar and vanilla until it is creamy. Make sure there are no lumps. If you prefer a lighter mix, add a splash of milk.
How to Prevent the Dump Cake from Sticking
Greasing your baking dish is key to a clean release. I use spray oil or butter to coat the dish well. You can also line the dish with parchment paper for extra safety. If the cake does stick, run a knife around the edges to loosen it. Then, gently lift it out with a spatula.
Serving Suggestions for Enhancing Flavor
For a tasty twist, serve the dump cake with whipped cream. It adds a light, fluffy texture. Fresh mint leaves make a nice garnish. They add color and a refreshing taste. You might also try drizzling some chocolate or caramel sauce on top for extra flavor. If you love nuts, sprinkle some chopped almonds or walnuts for crunch.
Variations
Gluten-Free Options for the Cake Base
You can easily make this dessert gluten-free. Use gluten-free all-purpose flour instead of regular flour. Look for brands that contain xanthan gum. This will help bind the cake. The texture will still be soft and tasty.
Alternative Fruit Combinations
If you want a twist, try different fruits. Blueberries, raspberries, or peaches work well. Each fruit brings its own flavor. Mix and match to find your favorite. Just remember to adjust the sugar based on the fruit’s sweetness.
Adjusting Flavor Profiles with Extracts
You can change the flavor by using different extracts. Almond or lemon extract adds a nice touch. Just use a half teaspoon to start. This small change can make a big impact on taste. Have fun experimenting with your favorite flavors.
Storage Info
Best Practices for Refrigerating Leftovers
Store any leftover strawberry cheesecake dump cake in an airtight container. This keeps it fresh for days. Let the cake cool completely before covering it. Place it in the fridge within two hours of baking. The cool air helps to prevent sogginess. Enjoy the cake within three to four days for the best taste.
How to Reheat the Dump Cake Properly
To reheat, preheat your oven to 350°F (175°C). Cut a slice of the cake and place it on a baking sheet. Heat for about 10 to 15 minutes. This warms the cake without drying it out. You can also use a microwave. Heat for 30 seconds to one minute, checking often. Serve warm for the best flavor.
Freezing Instructions for Extended Storage
If you want to freeze the dump cake, let it cool completely first. Wrap it tightly in plastic wrap. Then, place it in a freezer-safe container or bag. This helps to prevent freezer burn. It can last for up to three months in the freezer. To enjoy, thaw it in the fridge overnight. Reheat it as mentioned above before serving.
FAQs
Can I make Strawberry Cheesecake Dump Cake in advance?
Yes, you can make it ahead of time. I suggest baking it the day before. Let it cool and store it covered in the fridge. This allows the flavors to blend well. When you’re ready to serve, warm it in the oven for a few minutes. It tastes great warm!
What is the best way to serve this dessert?
Serving this dessert is easy. I love to serve it warm with a dollop of whipped cream. You can add fresh mint leaves on top for a nice touch. Some people enjoy it with a scoop of vanilla ice cream. The choice is yours!
Can I use frozen strawberries instead of fresh?
Yes, you can use frozen strawberries. Just thaw them and drain excess juice before using. The flavor will still be delicious! However, fresh strawberries provide a brighter taste and better texture. If you choose frozen, make sure to adjust the sugar to taste.
This post covered how to make a delicious Strawberry Cheesecake Dump Cake. We talked about the right ingredients, tips for selecting fresh fruit, and alternative options for cream cheese. I shared step-by-step instructions for preparing and baking your cake. You also learned serving ideas and handy storage tips.
Make this cake your own using different fruits or flavors. Enjoy tasty moments with family and friends!

