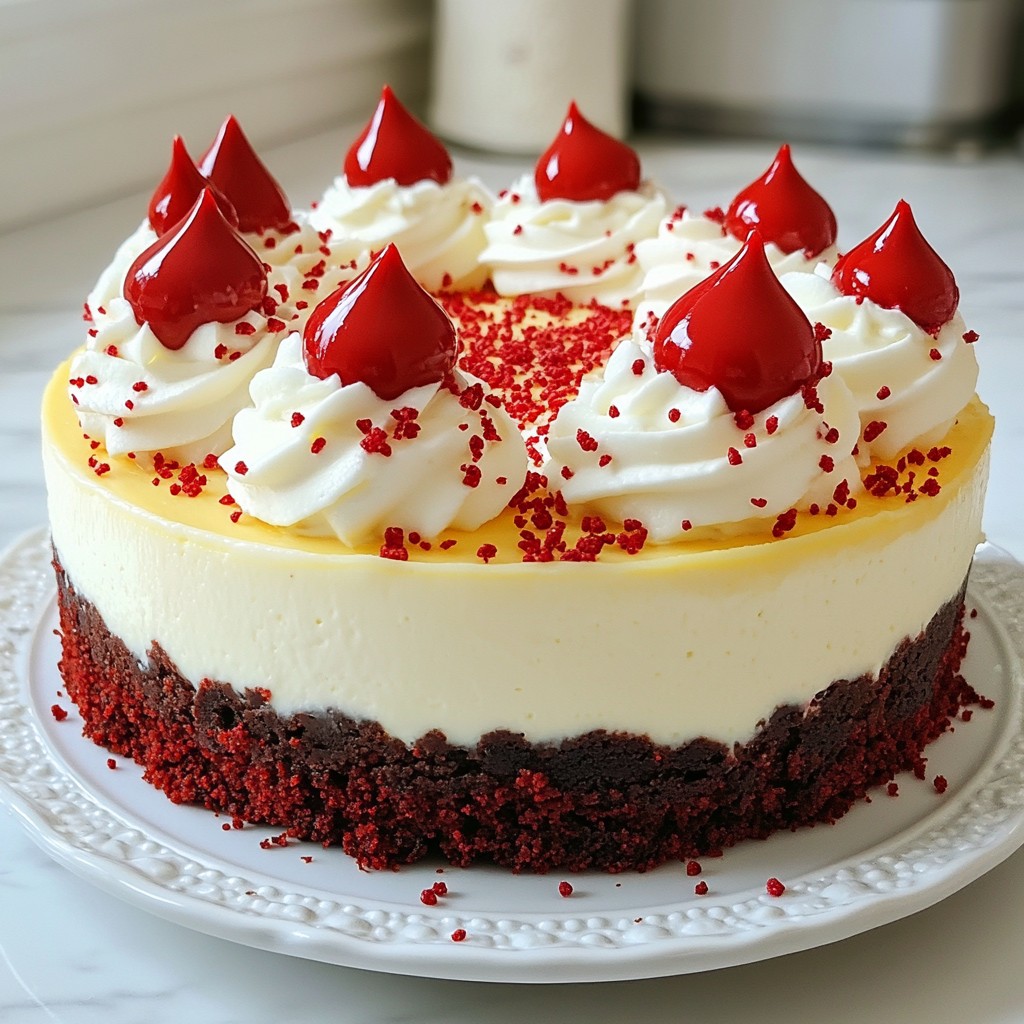
Get ready to impress this holiday season with my Velvety Holiday Red Velvet Cheesecake Delight! This rich, creamy dessert combines classic red velvet cake with smooth cheesecake, creating a festive treat everyone will love. In this post, I’ll guide you through the easy steps, share tips for perfecting your texture, and reveal tasty variations. Let's dive into the deliciousness that will make your holiday gatherings unforgettable!
Why I Love This Recipe
- Decadent Flavor: The rich combination of cream cheese and red velvet creates an indulgent dessert that’s perfect for holiday celebrations.
- Festive Appearance: The vibrant red color and creamy white topping make this cheesecake a stunning centerpiece for any holiday table.
- Easy to Make: With straightforward steps and common ingredients, this recipe is accessible even for beginner bakers.
- Customizable: You can easily tweak the flavors or garnishes to suit your preferences, making it a versatile dessert choice.
Ingredients
Complete List of Ingredients
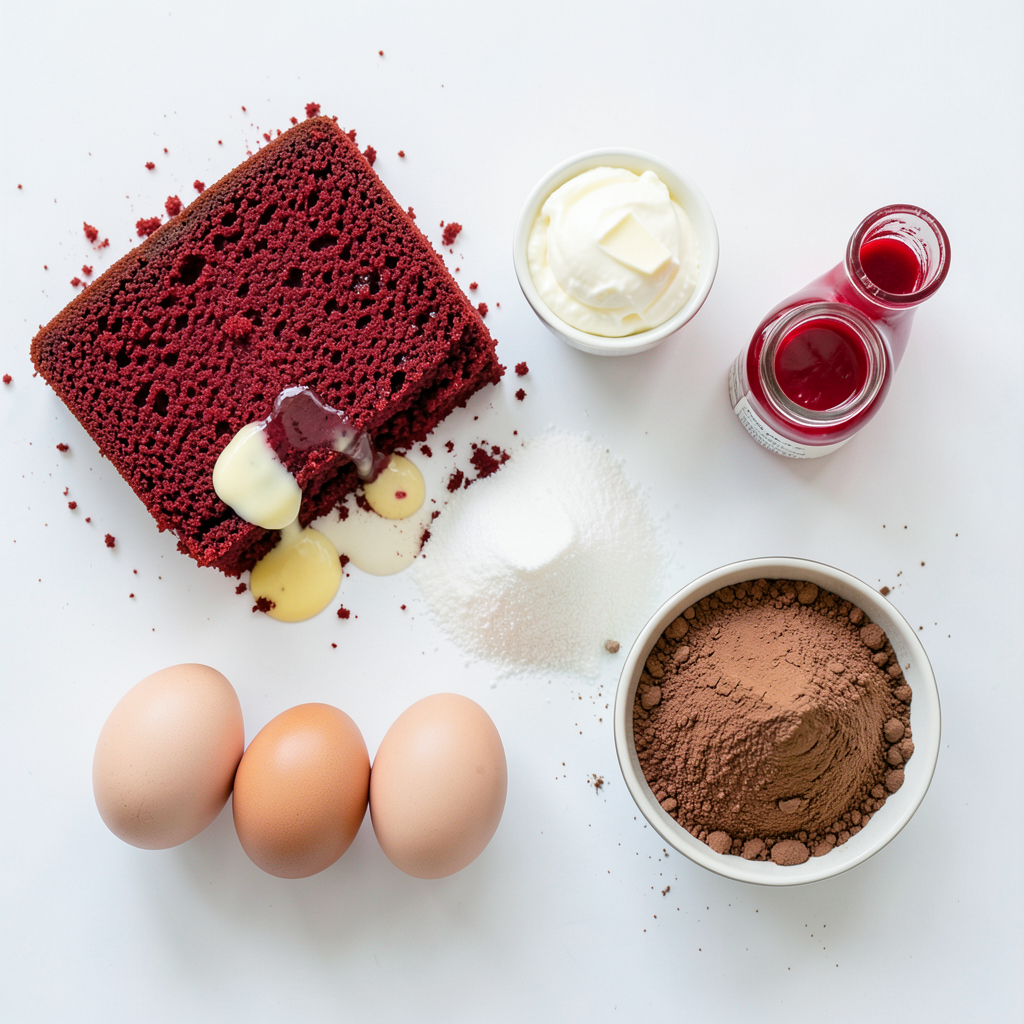
To make this velvety holiday red velvet cheesecake, you will need:
- 1 ½ cups crushed red velvet cake (store-bought or homemade)
- ½ cup unsalted butter, melted
- 3 (8 oz) packages cream cheese, softened
- 1 cup granulated sugar
- 3 large eggs
- 2 teaspoons vanilla extract
- 1 cup sour cream
- 1 tablespoon all-purpose flour
- 1 teaspoon cocoa powder
- Red gel food coloring (to achieve desired color)
- Whipped cream (for garnish)
- Chocolate shavings or red sprinkles (for garnish)
Optional Garnishes for Presentation
Garnishing adds charm to your cheesecake. Here are some fun options:
- Dollops of whipped cream for height and creaminess.
- Chocolate shavings for a rich touch.
- Red sprinkles for a festive pop of color.
- Fresh berries for a fruity contrast.
Ingredient Substitutions
If you need to swap ingredients, here are some ideas:
- Use margarine instead of unsalted butter.
- Try Greek yogurt in place of sour cream.
- For a lighter option, use low-fat cream cheese.
- You can replace eggs with flax eggs (1 tablespoon ground flaxseed + 3 tablespoons water per egg).
- Any red food coloring can work if you don't have gel.
These swaps will keep the spirit of the recipe while catering to your needs.
Step-by-Step Instructions
Preparing the Red Velvet Crust
To start, let's make the crust. In a mixing bowl, combine 1 ½ cups of crushed red velvet cake with ½ cup of melted butter. Mix until it looks like wet sand. This is the base for our cheesecake. Press the mixture firmly into the bottom of a 9-inch springform pan. Make sure it's even. Bake the crust at 350°F (175°C) for 10 minutes. Once done, let it cool completely.
Making the Cheesecake Filling
Now we move on to the cheesecake filling. In a large bowl, beat 3 packages of softened cream cheese using an electric mixer. Mix until it is smooth and creamy. Slowly mix in 1 cup of granulated sugar until combined. Next, add 3 large eggs one at a time. Mix well after each egg. Scrape down the sides of the bowl to ensure even mixing.
Next, add 2 teaspoons of vanilla extract, 1 cup of sour cream, 1 tablespoon of all-purpose flour, and 1 teaspoon of cocoa powder. For color, add a few drops of red gel food coloring. Mix again until the filling is smooth and the color is even.
Baking and Cooling the Cheesecake
Pour the cheesecake filling onto the cooled red velvet crust. Smooth the top with a spatula to make it nice and even. Bake the cheesecake in a preheated oven at 325°F (160°C) for 45 to 55 minutes. It should be just set with a slight jiggle in the center when done.
Once baked, turn off the oven and crack the door open. Let the cheesecake cool in the oven for 1 hour. After that, cover it and refrigerate for at least 4 hours, or overnight for the best taste.
When ready to serve, carefully run a knife around the edges and release the springform pan. Garnish with whipped cream and sprinkle with chocolate shavings or red sprinkles for a festive touch. Enjoy your velvety holiday treat!
Tips & Tricks
How to Achieve the Perfect Texture
To get that smooth and creamy cheesecake, use softened cream cheese. If it’s cold, the mix won’t blend well. Always beat it until smooth before adding other items. Mixing the eggs one by one helps keep the texture light. Don’t overmix once you add the sour cream and flour. Just blend until smooth.
Common Mistakes to Avoid
One common mistake is skipping the cooling step. Letting the cheesecake cool in the oven helps set the texture. If you open the oven too soon, the cheesecake might crack. Also, be careful with the baking time. Overbaking can make it dry. Aim for a slight jiggle in the center when done.
Best Practices for Decorating
When it comes to decoration, less is often more. A simple dollop of whipped cream on top adds a nice touch. Use a spatula to smooth the top before chilling. For a pop of color, add red sprinkles or chocolate shavings. They not only look great but also add flavor. Make sure to garnish just before serving for the best look.
Pro Tips
- Use Room Temperature Ingredients: Ensure that your cream cheese and eggs are at room temperature for a smoother batter. This will help the ingredients combine more easily and create a creamier cheesecake.
- Don't Overmix: Once you add the eggs, mix just until incorporated. Overmixing can introduce too much air, which may cause cracks in your cheesecake.
- Water Bath for Even Baking: Consider baking your cheesecake in a water bath to help maintain moisture and prevent cracking. Wrap the bottom of your springform pan in foil and place it in a larger pan filled with hot water.
- Chill Overnight: For the best flavor and texture, let your cheesecake chill in the refrigerator overnight. This allows the flavors to meld and results in a firmer cheesecake.
Variations
Seasonal Flavor Additions
You can change up the flavor of your red velvet cheesecake for the holidays. Add 1 teaspoon of peppermint extract for a fresh taste. For a warm, cozy vibe, mix in 1 teaspoon of cinnamon. If you like fruit, try folding in some pureed pumpkin or cranberry. This adds a festive flair and a pop of color.
Alternative Crust Options
While red velvet cake crust is delicious, you can switch it up. For a chocolatey twist, use crushed Oreo cookies mixed with melted butter. If you want a lighter option, try a graham cracker crust. Just crush the crackers and mix them with melted butter. Press this mixture into your springform pan for a tasty base.
Different Toppings and Garnishes
Toppings can make a big difference in presentation. Besides whipped cream, you can use fresh berries or mint leaves. For a chocolatey treat, add chocolate shavings or drizzle melted chocolate on top. If you want something festive, sprinkle colored sugar or red sprinkles to match the holiday theme. These touches will impress your guests and elevate your cheesecake!
Storage Information
How to Properly Store the Cheesecake
To keep your Velvety Holiday Red Velvet Cheesecake fresh, start by letting it cool completely. Once cool, cover it well with plastic wrap or aluminum foil. This prevents air from drying it out and keeps it moist. If you have a springform pan, you can keep it in there for easier storage.
Shelf Life in the Refrigerator
When stored properly in the fridge, your cheesecake lasts about 5 to 7 days. It’s best to eat it within this time for the best taste and texture. Always check for any signs of spoilage, like an off smell or unusual texture. These signs mean it’s time to let it go.
Freezing the Cheesecake for Later
You can freeze your cheesecake for longer storage. First, let it cool and wrap it tightly in plastic wrap. Then, place it in a freezer-safe container or a heavy-duty freezer bag. This keeps it safe from freezer burn. Your cheesecake can last up to 3 months in the freezer. To enjoy it later, thaw it in the fridge overnight. Avoid thawing at room temperature to keep its texture smooth.
FAQs
Can I make this cheesecake ahead of time?
Yes, you can make this cheesecake a day or two ahead. This allows the flavors to blend and the texture to set perfectly. After baking, cool it and chill it in the fridge. This cheesecake tastes even better after a night in the cold. Just remember to garnish it just before serving.
What can I use instead of cream cheese?
If you need a substitute for cream cheese, try ricotta or mascarpone cheese. They both have a rich, creamy texture. You can also use Greek yogurt for a lighter version. Just make sure to adjust the sugar, as these alternatives may change the sweetness.
How do I know when the cheesecake is done baking?
Check the cheesecake at 45 minutes. It should be set around the edges but still have a slight jiggle in the center. This jiggle means it will firm up as it cools. If it looks too wobbly, bake for another five to ten minutes and check again.
In this article, we covered how to make a red velvet cheesecake, including ingredients, steps, and tips. You learned about ingredient substitutions and optional garnishes for flair. I shared common mistakes and how to avoid them for perfect results. Remember to follow storage tips to keep your cheesecake fresh. Experiment with flavors and toppings to make it your own. Enjoy creating this treat, and have fun in the kitchen!