Skip to content
DisclaimerTerms Of UseGDPR PolicyCookie Policy

greenmealmap

  • Home
  • Drinks
  • Appetizers
  • Dinner
  • Dessert
  • About
  • Contact
  • Privacy Policy
DisclaimerTerms Of UseGDPR PolicyCookie Policy

NO-ING-IMG

To make Pumpkin Cheesecake Ice Cream, gather these simple items: - 1 cup cream cheese, softened - 1 cup pumpkin puree - 1 cup heavy cream - 1 cup sweetened condensed milk - 1 teaspoon vanilla extract - 1 teaspoon ground cinnamon - 1/2 teaspoon ground nutmeg - 1/4 teaspoon ground ginger - 1/4 teaspoon salt - 1/2 cup graham cracker crumbs You can swap some ingredients for different flavors or diets: - Use Greek yogurt instead of cream cheese for a tangy twist. - Almond milk or coconut cream can replace heavy cream for a lighter option. - Maple syrup can work in place of sweetened condensed milk for a natural sweetener. - Try pumpkin spice instead of cinnamon, nutmeg, and ginger for a quick mix. Choosing the best ingredients makes a big difference: - For cream cheese, pick a brand you trust. It should be smooth and spreadable. - Look for bright orange pumpkin puree; it should have a thick, creamy texture. - Heavy cream needs to be fresh; check the date on the carton before buying. - For spices, look for whole or fresh ground options, as they pack more flavor. - Select graham crackers that are crisp and not stale for the best crunch in your ice cream. 1. Start with a large bowl. Beat the softened cream cheese until it is smooth and creamy. 2. Add the pumpkin puree. Mix it in well, making sure it blends completely. 3. Pour in the heavy cream and sweetened condensed milk. Mix until everything is creamy and smooth. 4. Stir in the vanilla extract, cinnamon, nutmeg, ginger, and salt. Make sure these spices are even throughout the mix. 5. Gently fold in the graham cracker crumbs. Be careful not to overmix; you want some texture. 6. If you have an ice cream maker, transfer the mixture and churn it as per the machine’s instructions. Look for a soft-serve texture. 7. No ice cream maker? No problem! Just pour the mix into a freezer-safe container. Cover it tightly and freeze for about 2 hours. After an hour, take it out and stir it well with a fork. This helps break up ice crystals. Then return it to the freezer. 8. For the best results, freeze until the ice cream is fully set. This usually takes about 4 to 6 hours. Once ready, scoop and serve it in bowls or cones. - Large mixing bowl - Hand mixer or whisk - Ice cream maker (optional) - Freezer-safe container with a tight lid - Fork for stirring (if not using an ice cream maker) - Don't skip softening the cream cheese. It must be soft for easy mixing. - Be careful not to overmix the graham cracker crumbs. This keeps them crunchy and tasty. - If using an ice cream maker, follow the instructions closely. This will give you the best texture. - Forgetting to stir the mixture while freezing can lead to ice crystals. Always remember to stir after an hour if not using a machine. To make your ice cream super creamy, use full-fat ingredients. I prefer heavy cream and cream cheese. These give a rich and smooth base. If you can, chill all your mixing bowls and tools before you start. This helps keep the mixture cool while you work. When you mix, blend the cream cheese until smooth. This step is key. If it’s lumpy, it will affect the texture. Want to kick up the flavor? Try adding a pinch of allspice or cloves. These spices add warmth and depth. You can also mix in some maple syrup for added sweetness. If you love chocolate, fold in mini chocolate chips or chunks of dark chocolate. They add a nice surprise in every bite. For the best taste, serve your ice cream just a bit softer than frozen. Wait a few minutes after taking it out of the freezer. This makes it easier to scoop. When you serve, top it with a dollop of whipped cream. Sprinkle extra graham cracker crumbs on top for a fun crunch. You can even add a drizzle of caramel sauce for extra flair. {{image_2}} You can make a dairy-free version of pumpkin cheesecake ice cream. Use vegan cream cheese and coconut milk. Replace sweetened condensed milk with a dairy-free alternative. This way, you keep the creamy texture and delicious taste. You won’t miss the dairy at all. Add fun flavors to your ice cream for a twist. Try chocolate chips or caramel swirls. Chopped nuts like pecans or walnuts add a nice crunch. You can also mix in candies, like crushed Oreos or toffee bits. These options make your ice cream even more special and fun. You can use the base recipe for more than just ice cream. Make pumpkin cheesecake bars by pouring the mixture into a baking dish. Bake it until set and chill before cutting into squares. You can also create a pumpkin cheesecake dip. Just serve the creamy mix with graham crackers or fruit. These ideas allow you to enjoy the rich and creamy flavor in new ways. To keep your pumpkin cheesecake ice cream fresh, store it in an airtight container. This helps prevent ice crystals from forming. Use a container that fits the amount of ice cream. Leave little space at the top to allow for expansion. For best results, use a metal or glass container. These materials help keep the ice cream cold. Keep ice cream in the coldest part of your freezer. Avoid placing it in the door, where temperatures vary. When serving, use a clean scoop each time. This stops bacteria from getting into the ice cream. If you notice ice crystals on top, it may still be good. Just mix it in before serving. If your ice cream has a strange smell or color, it is best to toss it. Also, if it has a grainy texture, it may have spoiled. Always check for signs of freezer burn, like dry patches. For safe disposal, seal it in a bag to avoid mess. You can still enjoy this treat without fancy tools. After mixing your ingredients, pour the mixture into a freezer-safe container. Cover it tightly. Freeze it for about 2 hours. Every hour, take it out and stir it with a fork. This helps break up ice crystals. After 4-6 hours, your ice cream will be ready to scoop! Both options are great! Canned pumpkin is easy and smooth. It also saves time. Fresh pumpkin puree offers a richer flavor. If you choose fresh, cook and blend the pumpkin until smooth. Either way, you get a tasty result in your ice cream. Homemade ice cream stays good for about 2-3 weeks in the freezer. Keep it in a tightly sealed container. This helps prevent ice crystals from forming. After a few weeks, the texture might change. It may become icy, but it will still taste good! This guide helps you make delicious pumpkin cheesecake ice cream. We covered key ingredients and how to choose fresh ones. You learned step-by-step instructions and tips to get it right. I shared tricks for a creamy texture and ways to enhance flavor. Plus, we looked at variations like dairy-free options and alternative desserts. Lastly, I addressed storage best practices and FAQs. With this knowledge, you are ready to enjoy and share your tasty creation!

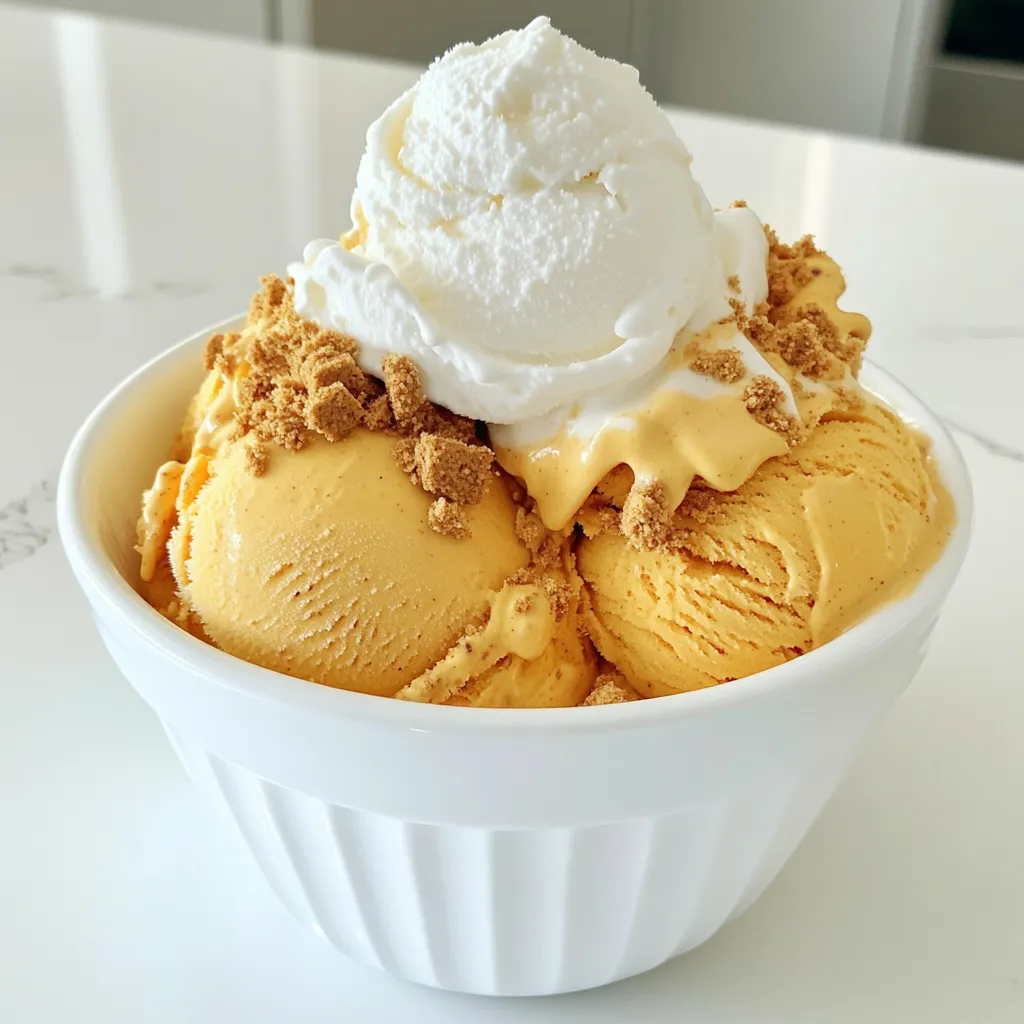
Pumpkin Cheesecake Ice Cream Rich and Creamy Delight

Dive into the creamy goodness of Pumpkin Cheesecake Ice Cream! This rich treat blends the flavors of fall with a

- 1 cup cottage cheese - 1/2 cup creamy peanut butter - 1/4 cup maple syrup (or honey) - 1 teaspoon vanilla extract - 1/4 teaspoon salt - 1/4 cup milk (or almond milk) - 1/4 cup dark chocolate chips (optional garnish) - Chopped peanuts (optional garnish) You will need simple, fresh ingredients for this mousse. Start with cottage cheese. It gives our mousse a creamy base. The creamy peanut butter adds rich flavor and texture. Maple syrup or honey brings the right amount of sweetness. A dash of vanilla extract enhances all the flavors. The salt helps balance the sweetness. For a smoother mousse, use milk or almond milk. The almond milk is great if you want a dairy-free option. Lastly, the dark chocolate chips and chopped peanuts are for garnish. They add crunch and a nice look. Each ingredient plays a key role in making this mousse a rich and creamy delight. - Step 1: Blending Ingredients Start by gathering all your ingredients. In a blender or food processor, add the cottage cheese, creamy peanut butter, maple syrup, vanilla extract, and salt. Blend these on high. Make sure to scrape down the sides so everything mixes well. - Step 2: Achieving the Right Consistency After blending, slowly add in the milk. Blend again until the mousse is light and creamy. If you like your mousse thinner, add a bit more milk. It should feel fluffy and smooth. - Step 3: Taste and Adjust Sweetness Give your mousse a taste. If you want it sweeter, add more maple syrup. Blend briefly to mix in the syrup. This step lets you customize your mousse just how you like it! - Step 4: Chilling the Mousse Once blended, transfer the mousse into bowls or cups. Place them in the fridge for at least 30 minutes. Chilling helps the mousse set and lets the flavors mix nicely. - Step 5: Serving Suggestions When ready to serve, consider adding some dark chocolate chips or chopped peanuts on top. This adds extra flavor and a nice crunch. For a fun twist, serve the mousse in parfait glasses and layer it with crushed graham crackers at the bottom. - Ensure Smooth Texture: Use a blender for the best results. Blend until the mixture is creamy. Scrape down the sides often. This helps mix everything well. - Adjusting Sweetness and Consistency: Taste the mousse after blending. If you want it sweeter, add more maple syrup. If the mousse is too thick, add a little more milk. Blend again until smooth. - Best Practices for Chilling: Chill the mousse for at least 30 minutes. This allows flavors to mix well. Use bowls or cups that are easy to stack in your fridge. - Serving in Parfait Glasses: For a fancy touch, serve the mousse in parfait glasses. This makes it look special and inviting. - Layering with Crushed Graham Crackers: Add crushed graham crackers at the bottom. This gives a nice crunch and flavor. It’s a fun way to change the texture. - Garnishing Suggestions: Top with dark chocolate chips or chopped peanuts. This adds texture and makes the dish look pretty. You can also sprinkle cocoa powder for more visual appeal. {{image_2}} Honey vs. Maple Syrup You can sweeten your mousse with honey or maple syrup. Honey gives a rich flavor. It adds a nice touch if you like floral notes. Maple syrup, on the other hand, has a warm, earthy taste. Both options work well, so choose what you love most. Sugar-Free Options If you want a sugar-free mousse, try using a sugar substitute. Stevia or erythritol can do the trick. They add sweetness without the calories from sugar. Just be sure to adjust the amount you use. Start small and taste as you go. This way, you can find the right balance. Using Almond Milk For a dairy-free mousse, swap regular milk with almond milk. This nutty milk keeps the mousse light and creamy. It also blends well with the peanut butter. Use unsweetened almond milk to control the sweetness of your dessert. Plant-Based Peanut Butters You can also use plant-based peanut butters. Some brands are made from nuts only. They offer great flavor and are perfect for vegan diets. Look for options that have no added sugar. This way, you keep your mousse healthy and delicious. These variations let you customize the mousse to fit your taste and dietary needs. Enjoy the joy of creating your own unique version! - Best Practices for Refrigeration: Store the mousse in an airtight container. This keeps it fresh and tasty. Place it in the fridge right after serving. It is best to eat it within a few days. - Freezing Recommendations: You can freeze this mousse if you have leftovers. Use a freezer-safe container. Just remember, the texture may change a bit after thawing. To enjoy later, let it thaw in the fridge overnight. - Duration in the Refrigerator: The mousse lasts about 3 to 5 days in the fridge. After that, it may not taste as good. - Signs of Spoilage: Look for any off smells or changes in color. If it seems watery, it might be time to toss it. Always trust your senses when checking food freshness. Can I use Greek yogurt instead of cottage cheese? Yes, you can use Greek yogurt. It makes the mousse smooth and creamy. Greek yogurt adds a tangy flavor, which can be nice. Just make sure to choose plain Greek yogurt for the best results. How can I make it sugar-free? To make the mousse sugar-free, swap maple syrup for a sugar-free sweetener. You can use stevia or erythritol. Start with a small amount and adjust to taste. This keeps it delicious without the sugar. What are the best toppings for this mousse? Some great toppings include: - Dark chocolate chips - Chopped peanuts - Sliced bananas - Shredded coconut - A drizzle of honey (if you want some sweetness) Feel free to mix and match for fun flavors. Can this mousse be made in advance? Yes, this mousse can be made ahead of time. It keeps well in the fridge for up to three days. Just cover it tightly with plastic wrap or store it in an airtight container. This makes it a perfect treat for busy days. This blog post explored a tasty and easy peanut butter cottage cheese mousse. We covered the ingredients you'll need, step-by-step instructions, and helpful tips to make it perfect. Variations let you adjust sweetness, and we shared storage tips to keep your mousse fresh. In the end, you can create a delicious treat to enjoy anytime. I hope you feel inspired to try this recipe. Enjoy making it your own with your favorite flavors!

Peanut Butter Cottage Cheese Mousse Rich and Creamy Delight

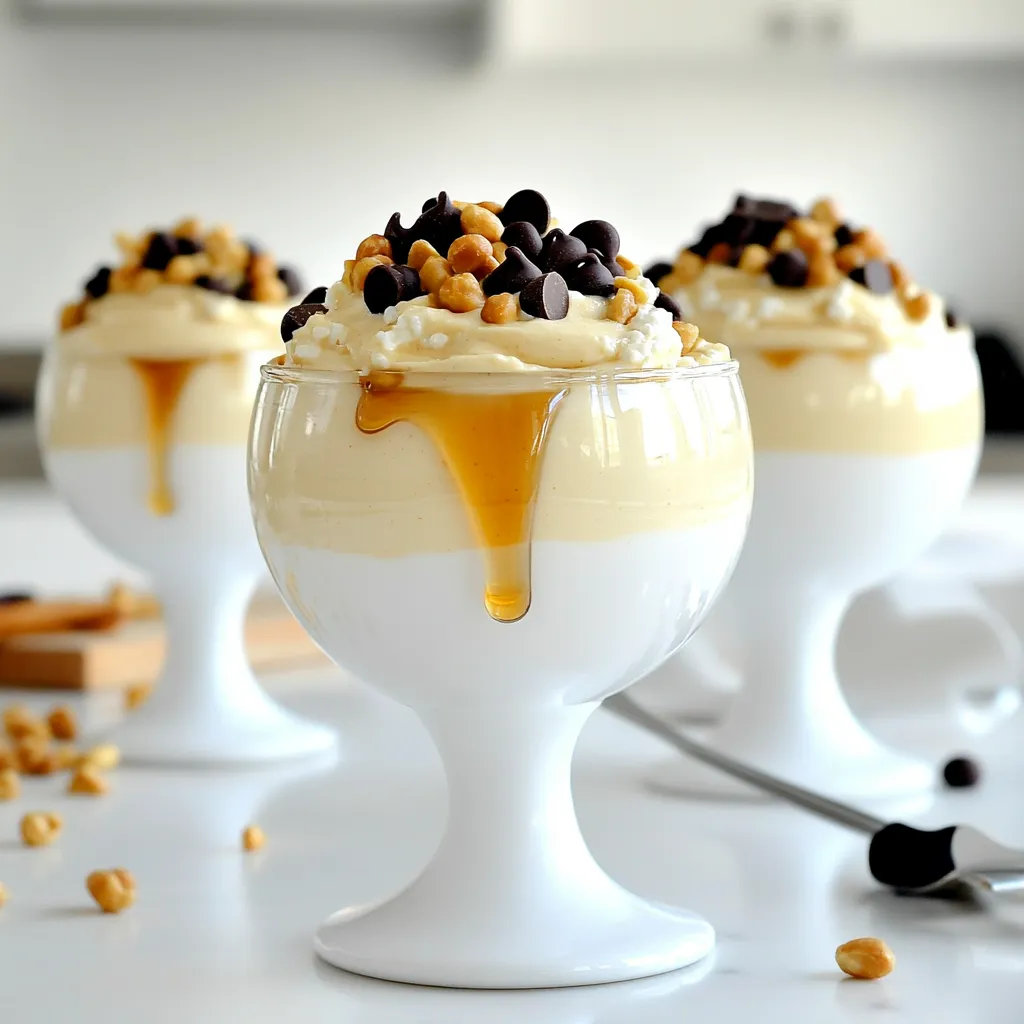
Are you ready to indulge in a rich and creamy peanut butter treat? This Peanut Butter Cottage Cheese Mousse is

To make crispy air fryer onion rings, gather these key items: - 2 large onions, sliced into ¼ inch thick rings - 1 cup all-purpose flour - 2 large eggs - 1 cup breadcrumbs (panko for extra crunch) - 1 teaspoon garlic powder - 1 teaspoon paprika - Salt and pepper to taste - Cooking spray These ingredients create a great balance of flavor and texture. The onions add sweetness, while the spices bring warmth and zest. For the zesty garlic dip, you need: - ½ cup Greek yogurt - 1 tablespoon mayonnaise - 2 cloves garlic, minced - 1 teaspoon lemon juice - Salt to taste This dip pairs well with the crispy onion rings. Greek yogurt gives it a creamy base, while garlic provides a punch. Feel free to customize your onion rings and dip with these extras: - Add cayenne pepper for heat - Sprinkle fresh herbs like parsley or chives - Use different cheeses in the dip, like feta These optional ingredients can elevate your dish and make it unique. Experimenting with flavors can lead to exciting new tastes! First, preheat your air fryer to 375°F (190°C) for about 5 minutes. This step is key for crispy onion rings. A hot air fryer cooks them evenly and quickly. Next, peel and slice the onions into ¼-inch thick rings. Separate each ring carefully. Now, set up a three-bowl breading station. In the first bowl, mix flour with salt and pepper. In the second bowl, beat the two eggs. In the last bowl, combine breadcrumbs, garlic powder, paprika, and a pinch of salt. For each onion ring, dip it in the flour mix first. Then, coat it in the egg, letting any excess drip off. Finally, roll it in the breadcrumb mix. Make sure each ring is fully covered. This ensures maximum crunch when cooked. While the onion rings are ready to fry, prepare the garlic dip. In a bowl, mix together the Greek yogurt, mayonnaise, minced garlic, lemon juice, and a pinch of salt. Stir well until combined. Taste and adjust seasoning if needed. This dip adds flavor and creaminess to your crispy rings. Now, place the coated onion rings in a single layer in the air fryer basket. Lightly spray the tops with cooking spray. This will help them crisp up nicely. Cook the onion rings for 10-12 minutes. Flip them halfway through to ensure they get golden brown on both sides. Once they are crispy and done, let them cool slightly before serving. To get crunchy onion rings, follow these steps. Use fresh onions, as old ones may not crisp well. Slice your onions into ¼-inch thick rings. This size helps them cook evenly. Make sure each ring is coated fully in flour, egg, and breadcrumbs. A complete coating locks in crunch. Lightly spray cooking spray on top before air frying. This adds extra crunch. For a tasty garlic dip, combine Greek yogurt and mayonnaise. This mix gives a creamy texture. Add minced garlic and lemon juice for flavor. Adjust salt to your taste. Mix well until smooth. Let the dip sit in the fridge for a bit. This waiting time lets the flavors blend nicely. You’ll love the zesty kick. Serve the crispy onion rings on a large platter. Place the garlic dip in a small bowl for easy access. Garnish with fresh parsley or chives for color. This makes your dish look more inviting. You can also add a few lemon wedges on the side. They add freshness and flavor as well. Enjoy your meal with friends and family! {{image_2}} To make spicy onion rings, add heat to your coating. Mix in some cayenne pepper or chili powder with the breadcrumbs. Start with a small amount. You can always add more if you like it hotter. This extra spice gives your onion rings a nice kick. Serve them with the garlic dip to cool it down. For cheesy onion rings, mix some grated cheese into your breadcrumb mixture. Parmesan or cheddar works well. Coat your onion rings as usual. The cheese will melt and create a delicious layer. This adds flavor and a fun twist to the classic recipe. Your friends will love this cheesy version! If you want a lighter dip, swap Greek yogurt for low-fat yogurt. You can also replace mayonnaise with more yogurt or avocado. This keeps the creamy texture but cuts down on calories. Add fresh herbs like dill or chives for extra flavor. These changes make the dip healthier without losing taste. To keep your leftover onion rings fresh, place them in an airtight container. Make sure they are fully cooled before sealing. Store them in the fridge for up to three days. If you want to keep them longer, you can freeze them. Just place the cooled rings in a freezer-safe bag. They can last up to two months in the freezer. When you are ready to eat your leftovers, the air fryer is the best way to reheat them. Preheat your air fryer to 350°F (175°C). Place the onion rings in a single layer in the basket. Heat for about 5-7 minutes, flipping halfway through. This way, they will become crispy again. You can also use an oven. Just set it to 375°F (190°C) and bake for about 10 minutes. For the garlic dip, store it in an airtight container in the fridge. It will stay good for up to five days. Make sure to stir it well before serving again. If you notice it has become too thick, mix in a little water or lemon juice. This will help restore its creamy texture. You can make onion rings without breadcrumbs by using a batter. Mix flour, cornstarch, and spices. Dip the onion rings into the batter. Then, air fry them as usual. This method gives you a tasty, crispy texture. Yes, you can use different onions. Sweet onions like Vidalia add a nice flavor. Yellow onions are great for a classic taste. Red onions offer a bold look and taste. Each type gives a unique twist to your rings. If you want to skip Greek yogurt, try sour cream. Cream cheese works too but mix it with a bit of milk. This makes it smoother. You can also use regular plain yogurt for a lighter dip. To keep your onion rings crispy, ensure they are coated well. Use the three-step breading station: flour, egg, and breadcrumbs. Avoid overcrowding in the air fryer. This allows air to circulate, making them crispier. Yes, you can make onion rings ahead of time. Prepare and coat them, then freeze before cooking. When ready, cook them from frozen. Just add a few extra minutes to the cooking time for best results. We covered how to make tasty air fryer onion rings and a delicious garlic dip. With simple steps, you’ll have a snack anyone will love. Remember, crispy rings start with the right prep. Try the spicy or cheesy variations for fun twists. Storing and reheating tips help keep your snack fresh. Keep experimenting and find your favorite ways to enjoy onion rings! Happy cooking!

Crispy Air Fryer Onion Rings with Garlic Dip Recipe

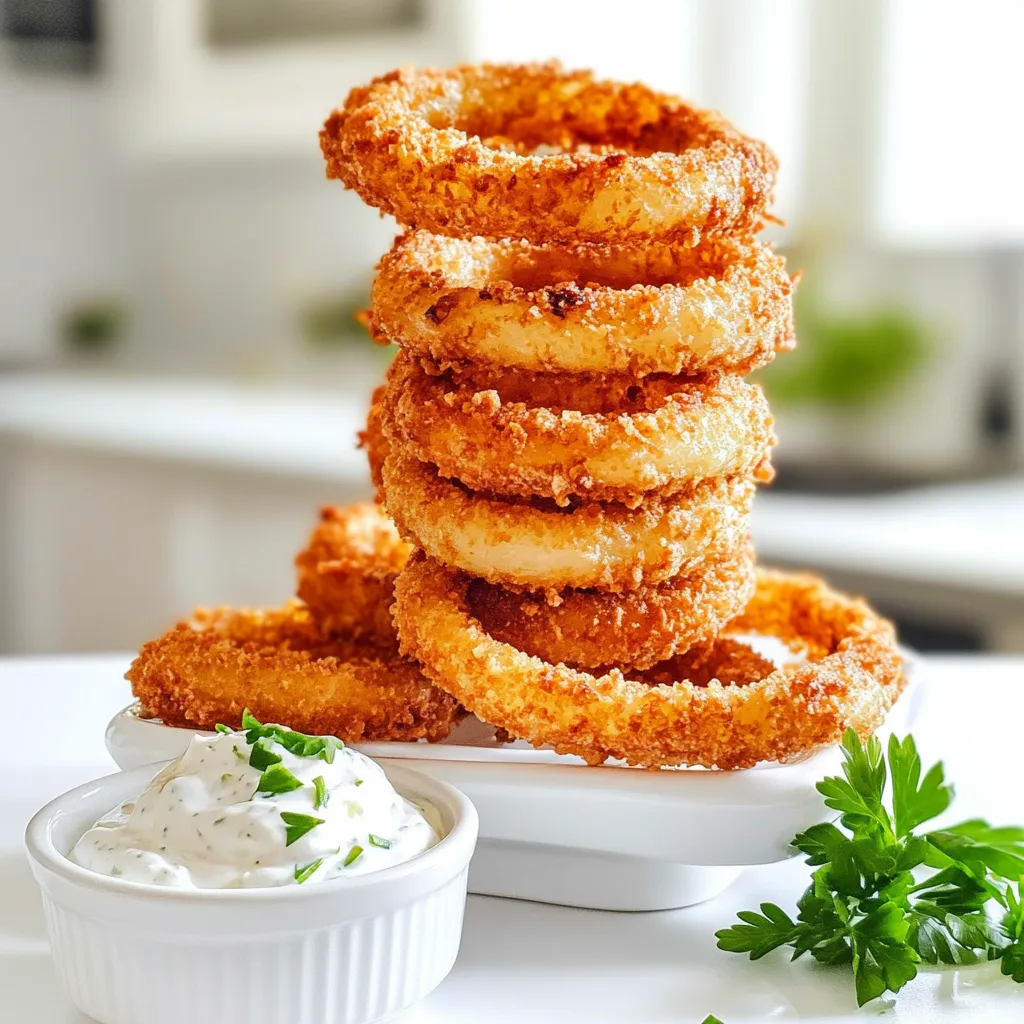
Imagine biting into a golden, crispy onion ring that’s perfectly seasoned, dipped in smooth garlic goodness. In this post, I’ll

- 1 pound Italian sausage, casings removed - 1 large onion, diced - 3 cloves garlic, minced - 4 large potatoes, thinly sliced - 1 cup kale, chopped The heart of this soup is the Italian sausage. It brings a rich flavor that blends well with other ingredients. I love using fresh sausage for the best taste. Next, we have onion and garlic. They add depth and aroma. The potatoes give the soup a nice body. I recommend slicing them thin for quicker cooking. Kale adds a pop of color and nutrients. You can also use spinach if it's your preference. - 1/2 cup heavy cream - 4 cups chicken broth Heavy cream makes this soup creamy and rich. It adds a luxurious texture that feels comforting. Chicken broth is the base of our soup. It provides the necessary flavor and moisture. You can use homemade broth or store-bought. Just ensure it’s low-sodium for better control over salt levels. - 1 teaspoon Italian seasoning - 1 tablespoon olive oil - Salt, pepper, and red pepper flakes Seasoning is key to flavor. Italian seasoning adds a blend of herbs that brighten the soup. Olive oil is perfect for cooking the sausage and aromatics. It enhances the overall taste. Salt and pepper balance the flavors. Red pepper flakes are optional but add a nice kick. If you like heat, don't skip them! Start by cooking the Italian sausage in a skillet. Heat one tablespoon of olive oil over medium heat. Once hot, crumble the sausage into the pan. Cook until it turns brown, which takes about 5 to 7 minutes. Use a slotted spoon to transfer the cooked sausage into your slow cooker. This step gives your soup a rich flavor base. In the same skillet, add the diced onion. Sauté it until it turns soft and clear, about 5 minutes. Next, add the minced garlic and cook for one more minute. This step boosts the aroma! Once done, transfer the onion and garlic mix to the slow cooker. This adds depth to your soup. Pour the chicken broth into the slow cooker. Then, add the thinly sliced potatoes. Stir everything together to mix well. Now, sprinkle in the Italian seasoning, salt, and pepper. If you like some heat, toss in red pepper flakes. This will enhance the flavor and make it exciting! Cover the slow cooker and choose your cooking time. You can cook on low for 6 to 8 hours or on high for 3 to 4 hours. Check the potatoes for tenderness near the end of cooking. They should be soft enough to pierce with a fork. This ensures your soup has the right texture. About 30 minutes before serving, stir in the chopped kale and heavy cream. Mixing these in at the end gives the soup a creamy finish. Let it heat through. Before serving, taste the soup to see if it needs more salt or pepper. This final touch ensures a delicious outcome! To make your soup creamy, use heavy cream. This adds richness and a velvety texture. If you want to adjust the soup's thickness, add more broth or cream. Start with a little, then mix and taste. You can always add more! Fresh herbs bring bright flavors. You can use basil or parsley. They add freshness that dried herbs lack. If you prefer dried herbs, add them early in cooking. Spices can also boost flavor. Try adding more Italian seasoning or a pinch of red pepper flakes for heat. Mix them in during cooking for the best taste. Serve this soup with crusty bread. It complements the soup well and soaks up the broth. For a pretty presentation, use bowls with extra kale on top. A sprinkle of red pepper flakes will add color. You can also add a drizzle of olive oil for shine. Enjoy your warm, cozy bowl of soup! {{image_2}} For the Italian sausage, you can use ground turkey or chicken. This change cuts fat while keeping flavor. If you want a plant-based option, use lentils or a veggie sausage. Both options taste great in the soup. For greens, kale is classic, but you can try spinach or Swiss chard. Each green adds its own taste and health benefits. Spinach is softer, while Swiss chard has a slight sweetness. To boost flavor, add more spices like oregano or basil. You can also toss in vegetables like carrots or celery for extra texture. This soup is flexible, so feel free to experiment! If you want a vegetarian or vegan option, skip the meat and use vegetable broth. Add chickpeas for protein and richness. You can also use coconut cream instead of heavy cream for a creamy finish. Using seasonal ingredients makes this soup even better. In fall, try adding pumpkin or butternut squash. In summer, you can use fresh tomatoes for a lighter taste. On hot days, consider making a chilled version. Blend the soup and chill it for a refreshing treat. This way, you can enjoy the same great flavors in a new way! To store your leftover creamy Zuppa Toscana, let it cool first. Place it in airtight containers. These keep the soup fresh. I recommend glass or plastic containers that seal tightly. Make sure to label them with the date. You can freeze portions for later use. Use freezer-safe containers or bags. Leave some space in the bag for expansion. To thaw, place it in the fridge overnight. Reheat on the stove over low heat, stirring often. You can also microwave it, but check the heat to avoid hot spots. In the fridge, your soup lasts about 3 to 4 days. If you freeze it, it can last up to 3 months. Watch for signs of spoilage. If it smells sour or has a strange color, discard it. Always trust your senses when it comes to food safety. Yes, you can! Ground turkey or chicken work well as a lighter choice. If you love beef, try ground beef for a twist. You can also use plant-based sausage for a vegetarian version. Just remember to adjust the seasoning to keep the flavor rich. If you want to swap kale, try spinach or Swiss chard. Both greens cook quickly and add good flavor. You can also use collard greens for a heartier option. Just chop them into smaller pieces so they blend well in the soup. On low, cook the soup for 6 to 8 hours. This will make the potatoes very tender. If you’re in a hurry, set the slow cooker on high. It will take about 3 to 4 hours. Just check that the potatoes are soft before serving. Yes, this soup can be gluten-free! The main ingredients are naturally gluten-free. Just make sure to use gluten-free sausage and broth. Always check the labels to avoid hidden gluten. Absolutely! This soup tastes even better the next day. Make it a day before and store it in the fridge. When you're ready, just reheat on the stove or in the slow cooker. Keep it covered to stay warm and tasty. This blog post explained how to make Slow Cooker Creamy Zuppa Toscana Soup. We covered the main ingredients like Italian sausage, onions, potatoes, and kale. I detailed each step from preparation to serving. I also shared tips for creamy consistency and flavor adjustments. In the end, this soup is perfect for any season. Experiment with variations to make it your own. With easy storage and reheating tips, you can enjoy your soup anytime. Make it, share it, and savor every bite!

Slow Cooker Creamy Zuppa Toscana Soup Delight

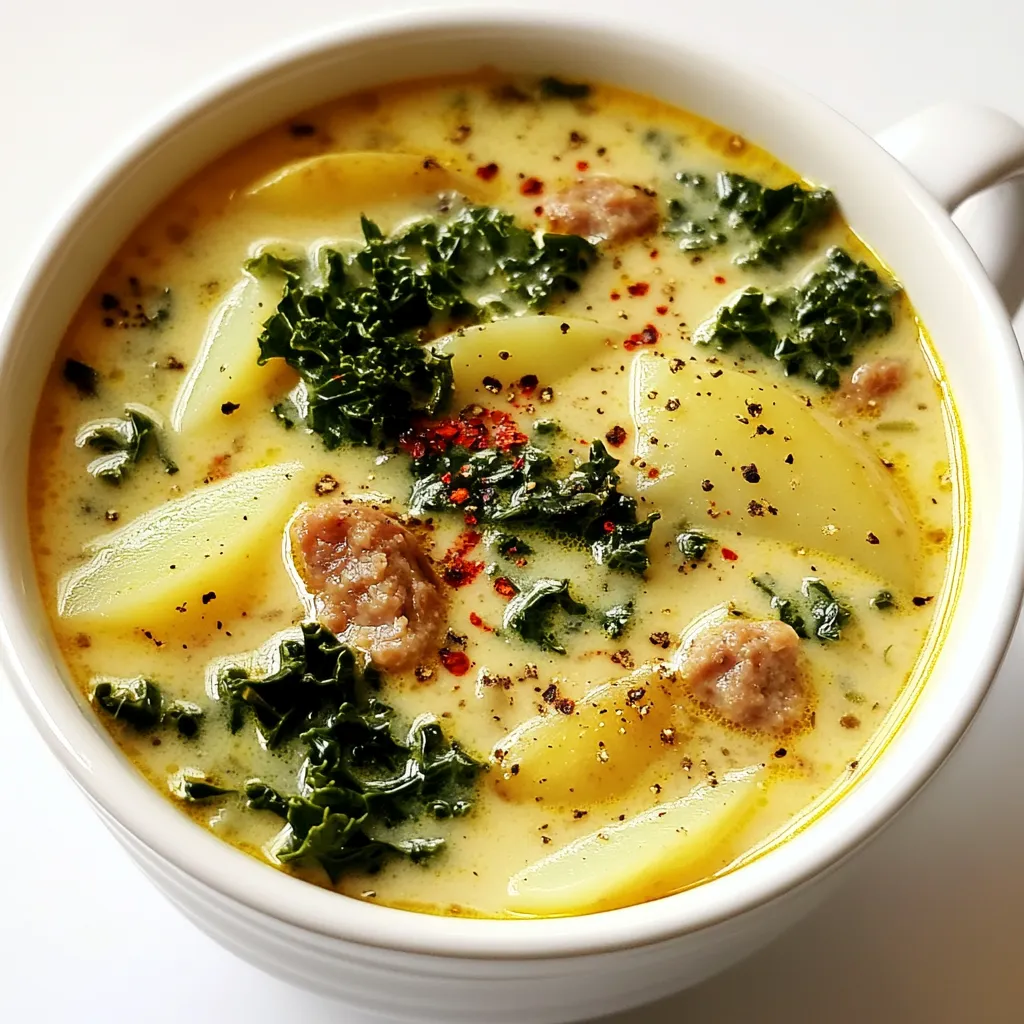
If you’re craving a warm, hearty bowl of soup, look no further than my Slow Cooker Creamy Zuppa Toscana! This

To make these savory herb and cheddar scones, you need: - 2 cups all-purpose flour - 1 tablespoon baking powder - 1/2 teaspoon salt - 1/4 teaspoon black pepper - 1/2 cup cold unsalted butter, cubed - 1 cup sharp cheddar cheese, shredded - 1 tablespoon fresh rosemary, finely chopped (or 1 teaspoon dried rosemary) - 1 tablespoon fresh chives, finely chopped - 1 tablespoon fresh parsley, finely chopped - 3/4 cup buttermilk - 1 egg, beaten (for egg wash) You can swap some ingredients if needed. For flour, use whole wheat for added fiber. If you lack buttermilk, mix milk with a splash of vinegar or lemon juice. You can replace sharp cheddar with any cheese you like, such as gouda or pepper jack. If you can’t find fresh herbs, dried ones work too, but use less. For butter, coconut oil or margarine can also be used. Fresh herbs make a big difference in flavor. They add brightness and depth to your scones. Rosemary, chives, and parsley bring unique tastes. Fresh herbs also enhance the aroma while baking. Always try to use fresh herbs when you can. They elevate the dish from good to great. To start, gather your ingredients. You will need flour, baking powder, salt, black pepper, butter, cheddar cheese, and fresh herbs. Preheat your oven to 400°F (200°C). Line a baking sheet with parchment paper. In a large bowl, combine flour, baking powder, salt, and black pepper. Whisk these dry ingredients well. Next, add the cold, cubed butter. Use a pastry cutter or your fingers. Work the butter into the flour until it looks like coarse crumbs. This step is key for flaky scones. Then, fold in the shredded cheddar cheese and chopped herbs. Mix gently so the cheese and herbs spread evenly. Make a well in the center and pour in the buttermilk. Stir the mixture gently until it just holds together. Be careful not to overwork the dough. It’s okay if it looks a bit rough. Turn the dough out onto a floured surface. Knead it softly a few times until it holds together. Pat it into a circle that is about one inch thick. Now, it's time to shape your scones. Use a sharp knife or a bench scraper to cut the dough into 8 wedges. This shape gives you that classic scone look. Place the wedges on the prepared baking sheet. Make sure to space them apart a little. This allows them to bake evenly. Before baking, brush the tops of the scones with a beaten egg. This gives them a nice golden color. Bake the scones in your preheated oven for 15 to 20 minutes. They should turn golden brown. To check for doneness, insert a toothpick in the center. It should come out clean. Once baked, remove them from the oven and let them cool slightly on a wire rack. This cooling step keeps them from getting soggy. Enjoy your warm, savory herb and cheddar scones! To get the best texture, use cold butter. Cold butter creates layers in the scones. Cut it into small cubes and work it into the flour. You want it to look like coarse crumbs. Don’t overmix the dough; it should be barely combined. This helps keep the scones light and flaky. To keep your scones fluffy, use fresh baking powder. Baking powder helps them rise as they bake. Also, make sure you don’t knead the dough too much. Gentle handling is key. When shaping, pat the dough instead of rolling it out. This keeps air pockets that make the scones light. These savory scones shine when served warm. Try spreading a little butter on top. You can also drizzle some honey for a sweet touch. Pair them with a bowl of soup for a nice lunch. For a fun twist, serve with cream cheese mixed with herbs. This adds flavor and makes the scones even better. {{image_2}} You can switch out cheddar for other cheeses. Try sharp gouda for a nutty taste. Feta adds a tangy twist that works well with herbs. Parmesan gives a salty crunch. Each cheese changes the flavor. Mix and match for fun! Herbs bring freshness to your scones. In spring, use fresh dill or basil. In summer, try parsley or tarragon. Fall is great for sage or thyme. In winter, rosemary shines bright. Pick herbs based on what you like. This keeps your scones exciting! Want to add more? Crumbled bacon gives a savory kick. Dice up cooked vegetables like spinach or bell peppers for color. Cheese, herbs, and extras blend well. This makes each scone unique. Explore different combinations to find your favorite mix! To keep your savory herb and cheddar scones fresh, store them in an airtight container. This helps lock in moisture and flavor. Place a piece of wax paper between layers if stacking. Store them at room temperature for up to two days. If you want to keep them longer, consider freezing. To freeze your scones, let them cool completely after baking. Wrap each scone tightly in plastic wrap. Then, place them in a freezer-safe bag or container. Label the bag with the date. You can freeze them for up to three months. This way, you can enjoy scones anytime! When you’re ready to eat the frozen scones, remove them from the freezer. Unwrap them and place them on a baking sheet. Preheat your oven to 350°F (175°C). Warm them for about 10-15 minutes or until heated through. You can also use a microwave for a quick reheat, but they may not be as crispy. Enjoy your fresh-tasting scones! You can make scones without buttermilk by using milk and vinegar. Mix 3/4 cup of milk with 1 tablespoon of vinegar. Let it sit for 5-10 minutes until it thickens. This creates a sour milk that works like buttermilk. You can also use yogurt or sour cream thinned with water for a similar effect. This keeps your scones moist and tender. Yes, you can use whole wheat flour in your scones. It adds a nutty flavor and makes them heartier. However, whole wheat flour absorbs more liquid than all-purpose flour. Use about 3/4 cup of whole wheat flour and 1/4 cup of all-purpose flour for best results. This mix keeps your scones light while adding nutrition. Savory herb and cheddar scones pair well with many dishes. Serve them warm with a pat of butter for a simple treat. They also go great with soups, like tomato or chicken noodle. Add a fresh salad for a light meal. For a special touch, drizzle honey on top or serve with a cheese platter. Enjoy them however you like! By using fresh ingredients, you can create delicious scones. We discussed essential ingredients and tasty swaps. I shared tips to make your scones fluffy and light. You learned about variations like different cheeses and herbs. Plus, storing scones keeps them fresh longer, and reheating is easy. Remember, baking is fun and takes practice. Enjoy your time making scones and share them with friends. Let your creativity shine in the kitchen!

Savory Herb and Cheddar Scones Easy Baking Guide

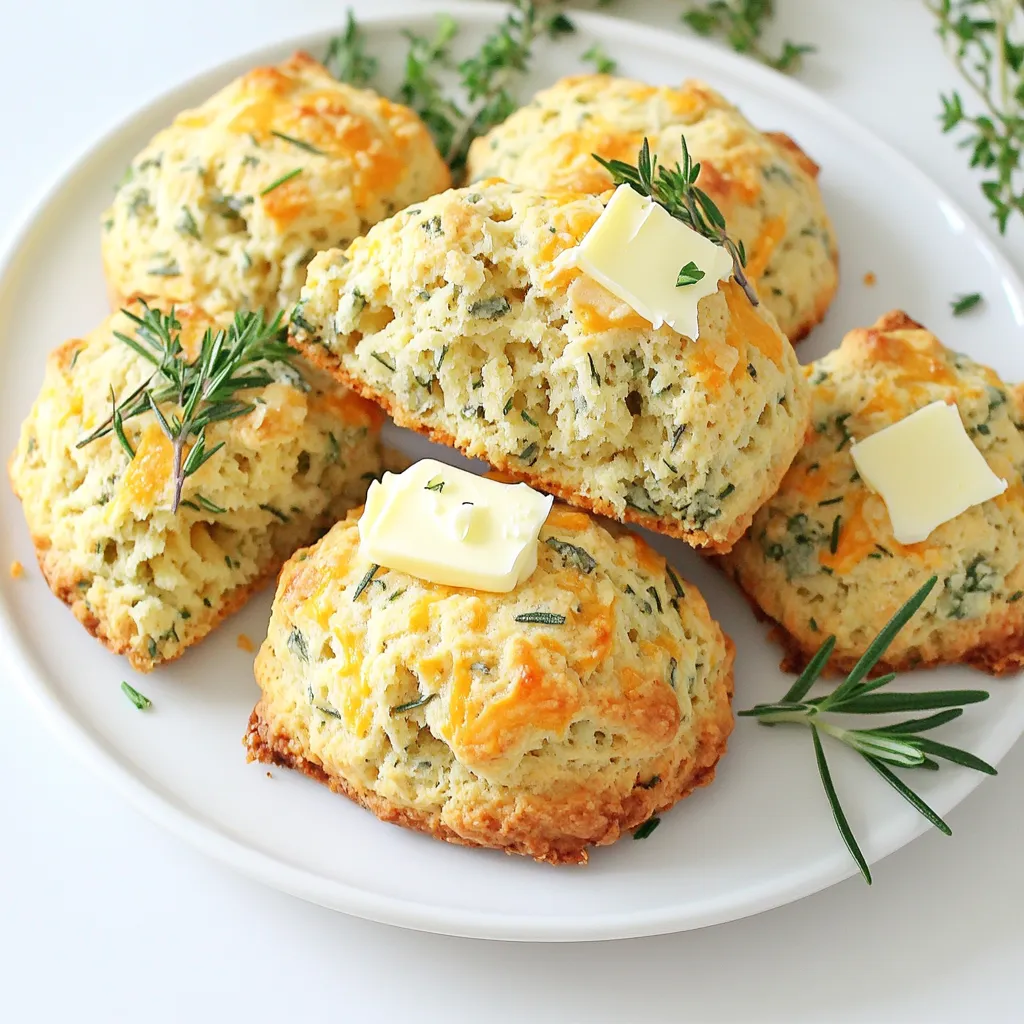
Are you ready to bake delicious savory herb and cheddar scones? You’ll love how easy and fun this recipe is!

You can pick any chicken sausage you like. I enjoy three main types: apple, spinach, or garlic-herb. Each type adds a unique taste to the dish. Apple sausage gives a sweet touch. Spinach is fresh, while garlic-herb adds a savory flavor. Feel free to mix and match. This lets you create your own special twist. The veggies in this recipe make it colorful and tasty. I use two large sweet potatoes, diced into 1-inch cubes. They add a nice sweetness. I also like to include both red and yellow bell peppers for crunch and sweetness. The red onion is key, too. It gives a rich taste when roasted. You can also add other vegetables if you want. Broccoli or carrots work well too. The magic of this dish comes from the seasonings. I use olive oil to help the veggies roast well. Salt and pepper bring out the natural flavors. Garlic powder gives a nice aroma, while paprika adds warmth. The star of the show is the glaze made of Dijon mustard and maple syrup. This mix adds a sweet and tangy flavor that complements the sausage perfectly. Don’t forget the fresh parsley on top! It adds color and a hint of freshness to the dish. First, you need to heat your oven to 425°F (220°C). This high heat helps to cook everything fast. Next, grab a large baking sheet and line it with parchment paper. This makes cleanup easy and keeps your food from sticking. In a big bowl, toss together the diced sweet potatoes, sliced red and yellow bell peppers, and onion wedges. These veggies add color and flavor to your dish. Drizzle 2 tablespoons of olive oil over them. Then, sprinkle in salt, pepper, garlic powder, and paprika. Toss the veggies well to coat them evenly with the oil and spices. This step makes sure every bite is tasty. In a small bowl, whisk together 3 tablespoons of Dijon mustard and 2 tablespoons of maple syrup. This glaze gives the chicken sausage a sweet and tangy flavor. Place the sliced chicken sausage on the other half of the baking sheet. Brush half of the glaze over the sausage. Now, spread the veggie mix on one side and the sausage on the other. Bake everything for 20 minutes. Open the oven and stir the veggies. Brush the remaining glaze over the sausage and veggies. Bake for another 10-15 minutes until the sausage is browned and the sweet potatoes are soft. Enjoy the aroma as it fills your kitchen! When you cut vegetables, size matters. For this dish, I like to dice sweet potatoes into 1-inch cubes. This size helps them cook evenly. Slice bell peppers thinly. This way, they cook faster and blend well with sausage. Use a sharp knife for safety and ease. A cutting board with a damp cloth underneath keeps it steady. Always cut away from your body to avoid accidents. Browning adds flavor and texture. To get that perfect golden look, don’t crowd the pan. Spread the sausage and veggies out in a single layer. This allows heat to circulate. Brush the sausage with the maple Dijon glaze halfway through cooking. This will caramelize nicely and enhance the flavor. Bake at 425°F (220°C) for best results. Keep an eye on things during the last few minutes. This bake is great on its own. For a complete meal, serve it with a side salad. A fresh green salad pairs well. You can also add a grain like quinoa or brown rice. This adds heartiness and fiber. If you want a drink, try sparkling water with a splash of lemon. It’s refreshing and balances the meal. Enjoy your dish with family or friends for a fun dinner night! {{image_2}} You can switch up the chicken sausage for different flavors. Try apple sausage for a sweet twist. If you like a kick, use spicy Italian sausage. Garlic-herb sausage adds a nice savory touch. Each option brings its own flavor to the dish. For a vegetarian dish, swap the sausage for plant-based versions. Look for veggie sausages made from beans or lentils. These options keep the protein high while adding unique flavors. You can also use marinated tofu or tempeh for a hearty bite. Feel free to mix in your favorite veggies. Broccoli, zucchini, or carrots work well in this dish. You can also use Brussels sprouts or asparagus for a seasonal touch. Just remember to cut them to the same size for even cooking. Each combination brings new tastes and colors to your plate. After you finish your meal, let any leftovers cool down. Place the chicken sausage bake in an airtight container. It will stay fresh in the fridge for up to four days. Be sure to store the vegetables and sausage together. This helps keep the flavors intact. If you want to save some for later, freezing works great. First, let the dish cool completely. Then, divide it into smaller portions. Use freezer-safe containers or bags to store them. You can freeze the dish for up to three months. When you’re ready to eat, just thaw it overnight in the fridge. To reheat, I recommend using the oven. Preheat it to 350°F (175°C). Spread the leftovers on a baking sheet. Bake for about 15-20 minutes or until hot. This method helps keep the sausage crispy and the veggies tender. You can also microwave it, but the oven gives better results. Enjoy your tasty meal again! Yes, you can prepare this dish ahead of time. You can chop the vegetables and mix the glaze a day before. Store them in the fridge until you're ready to bake. This helps save time on busy days. Just remember to bake it fresh for the best taste. If you don’t have Dijon mustard, use yellow mustard or honey mustard instead. These options give a nice flavor too. You can also mix equal parts of ground mustard and vinegar for a quick fix. Each choice gives a unique taste to your dish. To check if the chicken sausage is done, look for a golden-brown color. The internal temperature should reach 165°F (75°C). You can use a meat thermometer for this check. The sweet potatoes should be tender when pierced with a fork. If both are ready, your dish is good to go! In this blog post, we explored delicious chicken sausage recipes. We covered great variations, including vegetables and seasonings. I shared step-by-step instructions for easy cooking and tips for perfect results. We also discussed storage and reheating to keep your meals fresh. Cooking can be fun and simple. Try different flavors and share your meals. Enjoy the process and your tasty dishes!

Sheet-Pan Maple Dijon Chicken Sausage Bake Delight

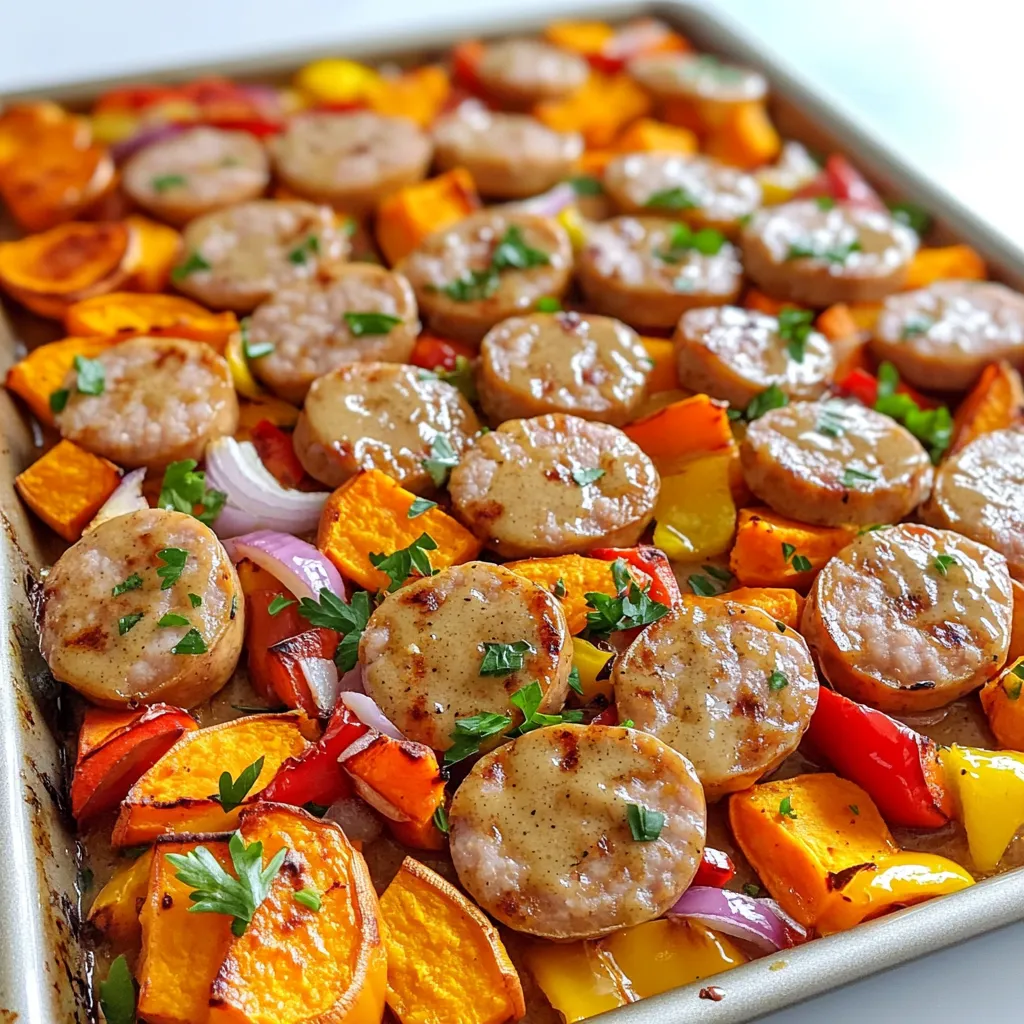
Are you ready for a meal that’s simple, tasty, and full of flavor? This Sheet-Pan Maple Dijon Chicken Sausage Bake

- 1 lb chicken tenders - 1 cup buttermilk - 1 cup all-purpose flour - 1 cup panko breadcrumbs - 1 teaspoon garlic powder - 1 teaspoon onion powder - 1 teaspoon smoked paprika - 1 teaspoon salt - ½ teaspoon black pepper - ½ cup buffalo sauce (mild or spicy, based on preference) To make great Air Fryer Crispy Buffalo Chicken Tenders, you need fresh, quality ingredients. The chicken tenders are the star here; they give you that juicy bite. Buttermilk is key for a tasty marinade. It tenderizes the chicken and adds flavor. For the breading, all-purpose flour and panko breadcrumbs join forces. The flour helps the coating stick, while panko gives that crispy crunch. You can’t forget the spices! Garlic powder, onion powder, smoked paprika, salt, and black pepper add layers of flavor. Finally, choose your buffalo sauce. You can go for mild if you want a hint of heat. Or, pick spicy for a kick! The sauce is what makes these tenders pop. Mix and match based on your taste. Each ingredient plays its part in making this dish a hit. Start by mixing the buttermilk with spices. In a bowl, whisk together 1 cup of buttermilk, 1 teaspoon of garlic powder, 1 teaspoon of onion powder, 1 teaspoon of smoked paprika, 1 teaspoon of salt, and ½ teaspoon of black pepper. This mix adds great flavor to the chicken. Next, marinate the chicken tenders. Place 1 pound of chicken tenders in the buttermilk mix, making sure they are fully submerged. Cover the bowl and refrigerate for at least 1 hour. For the best taste, marinate overnight. This allows the chicken to soak in all the delicious flavors. Now it’s time to set up your breading station. Use two bowls: one for the all-purpose flour and another for 1 cup of panko breadcrumbs. The flour helps the breadcrumbs stick better. Grab each chicken tender, coat it in flour first, then dip it back into the buttermilk, and finally coat it in panko. Press the breadcrumbs on gently. Before cooking, preheat the air fryer to 400°F (200°C) for about 5 minutes. Arrange the breaded chicken tenders in a single layer in the air fryer basket. Lightly spray them with cooking spray. This step is vital for crispy tenders. Cook for 10 to 12 minutes, flipping halfway. The chicken should be golden brown and reach an internal temperature of 165°F (74°C). After cooking, toss the chicken tenders in a clean bowl with ½ cup of buffalo sauce. Make sure each tender gets coated evenly. Serve them hot, and enjoy the spicy, crispy goodness! For a great presentation, serve with celery and carrot sticks, plus a side of ranch or blue cheese dressing for dipping. To get the crispiest chicken tenders, use cooking spray. This helps create a golden crust. Panko breadcrumbs are key too. They are lighter and crispier than regular breadcrumbs. Make sure to press the breadcrumbs onto the chicken to help them stick. This will give you a crunch that you will love. You can use mild or spicy buffalo sauce based on your taste. If you want a twist, try adding honey for sweetness. You can also mix in garlic powder for extra flavor. Don’t be afraid to experiment. Each sauce choice can change the whole dish. Serve your chicken tenders with creamy dips like ranch or blue cheese. Pair them with crunchy celery and carrot sticks for a fresh touch. Drizzle extra buffalo sauce on top for those who love spice. This adds color and flavor to the plate. Try these ideas to make your meal even better. {{image_2}} You can swap chicken tenders for chicken breasts. Cut them into strips for even cooking. If you want something different, try turkey or pork. Both work well and taste great with buffalo sauce. If you need a gluten-free dish, use gluten-free flour and breadcrumbs. They will replace the all-purpose flour and panko. Check labels to ensure that all your ingredients are gluten-free. This way, everyone can enjoy the meal. You can change the spices to create new flavors. For a spicy kick, add cayenne pepper or chili powder. If you like a sweeter taste, mix in honey with the buffalo sauce. You can even try different sauces like BBQ or teriyaki for a fun twist. Store your leftover chicken tenders in an airtight container. Make sure they are cool before sealing. Place them in the fridge. They will stay fresh for about three days. If you want to keep them longer, consider freezing. To reheat, use your air fryer for the best results. Preheat it to 375°F (190°C). Place the chicken tenders in a single layer. Heat for about 5-7 minutes. This helps maintain the crispy texture. Avoid using the microwave, as it can make the tenders soggy. To freeze, let the cooked chicken tenders cool completely. Then, place them in a freezer-safe bag. Remove as much air as possible. They can be frozen for up to three months. When ready to eat, thaw them in the fridge overnight. Reheat in the air fryer for that perfect crunch. You should marinate the chicken tenders for at least 1 hour. If you want more flavor, marinate them overnight. This time allows the spices to soak in, making the chicken tender and tasty. Yes, you can use frozen chicken tenders. However, you must adjust the cooking time. Cook them for about 15-18 minutes at 400°F. Ensure they reach an internal temperature of 165°F. Many sauces go well with buffalo chicken tenders. Here are some favorites: - Ranch dressing - Blue cheese dressing - Honey mustard - BBQ sauce These sauces balance spicy flavors and add creamy or sweet notes. Yes, you can air fry chicken tenders without breading. Simply marinate the chicken as you normally would. Then, place the marinated chicken directly in the air fryer. Cook at 400°F for about 10-12 minutes. This method keeps the chicken juicy and flavorful. You now have all you need to make delicious buffalo chicken tenders. Start with juicy chicken marinated in buttermilk and spices. Then, coat them in a crunchy mix of flour and panko before air frying. Don't forget to toss them in your favorite buffalo sauce for the perfect flavor. Experiment with different proteins and spices to find what you love best. Remember to store any extras properly to keep them fresh. Enjoy each bite of your tasty creation!

Air Fryer Crispy Buffalo Chicken Tenders Delight

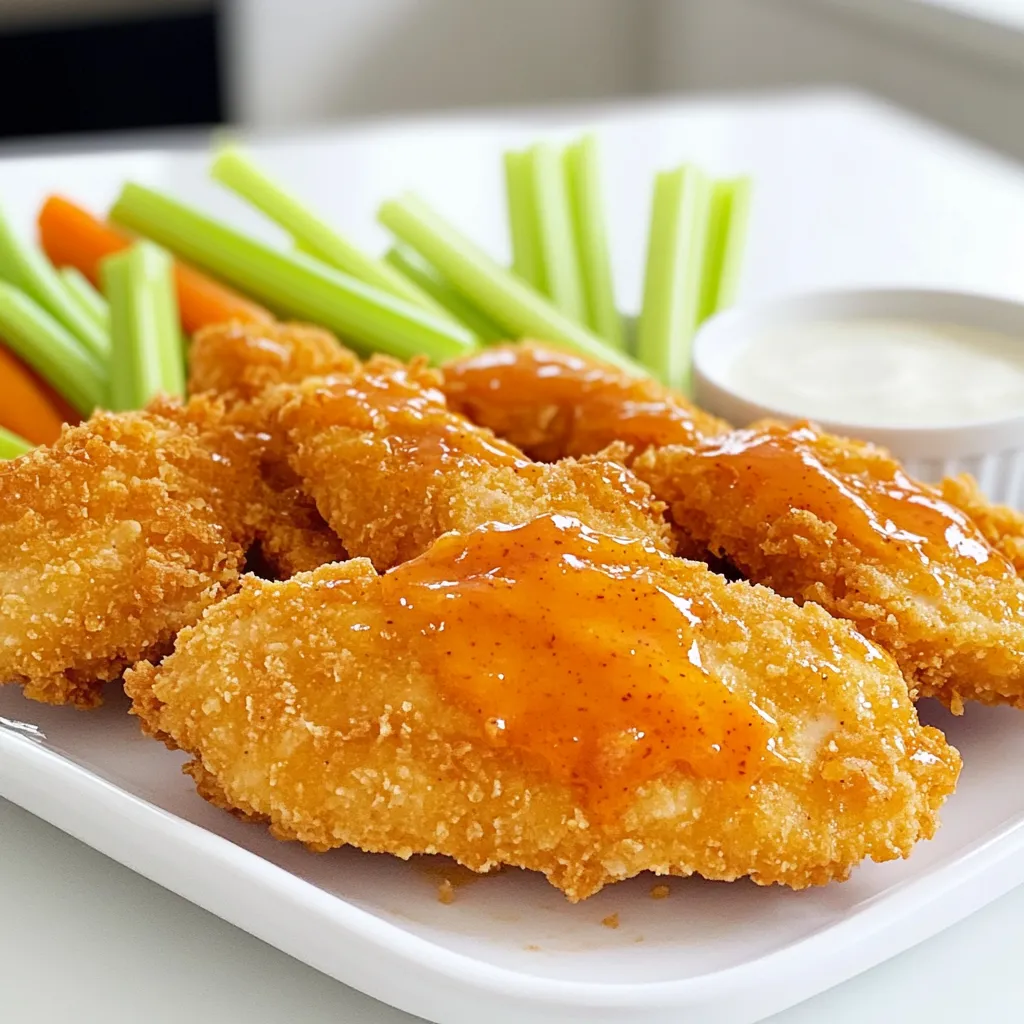
Are you ready to whip up a tasty treat that will wow your guests? My Air Fryer Crispy Buffalo Chicken

To make One-Pan Creamy Garlic Spinach Tortellini, you need a few simple items. Here’s what you'll gather: - 9 oz (250g) cheese tortellini (fresh or frozen) - 2 tablespoons olive oil - 5 cloves garlic, minced - 4 cups fresh spinach, roughly chopped - 1 cup heavy cream - 1 cup vegetable broth - 1/2 cup grated Parmesan cheese - 1 teaspoon Italian seasoning - Salt and pepper to taste - Optional: Red pepper flakes for heat - Fresh basil or parsley for garnish These ingredients blend to create a rich and tasty dish. The cheese tortellini serves as the base, while garlic brings out great flavor. The fresh spinach adds color and nutrients. Heavy cream and vegetable broth make the sauce creamy and dreamy. Parmesan cheese thickens the sauce and makes it cheesy. Italian seasoning adds a touch of herbs, while salt and pepper enhance all the flavors. For a little kick, consider adding red pepper flakes. Lastly, fresh basil or parsley makes the dish look lovely and adds a fresh taste. With these ingredients, you can create a one-pan meal that is both delicious and quick to prepare. 1. First, heat 2 tablespoons of olive oil in a large skillet over medium heat. This oil adds flavor and helps cook the garlic. 2. Next, add 5 cloves of minced garlic to the hot oil. Sauté for about 1-2 minutes. You want the garlic fragrant but not browned. If it browns, it will taste bitter. 3. Now, add 4 cups of roughly chopped fresh spinach to the pan. Stir it often until it wilts down. This takes about 3-4 minutes. The spinach shrinks a lot, so don’t worry if it looks like too much at first. 1. Pour in 1 cup of heavy cream and 1 cup of vegetable broth. Stir the mixture until everything is well combined. 2. Bring the sauce to a gentle simmer. You want to see small bubbles but not a rolling boil. This helps blend the flavors. 1. Add 9 ounces of cheese tortellini and 1 teaspoon of Italian seasoning to the simmering sauce. Stir to coat the tortellini with the sauce. 2. Cook for about 5-7 minutes, stirring occasionally. You want the tortellini to be tender and heated through. 3. Once the tortellini is cooked, stir in 1/2 cup of grated Parmesan cheese. Season with salt, pepper, and optional red pepper flakes for heat. 4. Cook for an additional 2 minutes. This thickens the sauce slightly. 5. Remove the pan from heat. Garnish with fresh basil or parsley before serving for a nice touch. Enjoy your meal! - Best tortellini types: I recommend using cheese tortellini, fresh or frozen. They hold up well in the sauce and bring great flavor. Fresh tortellini cooks faster, while frozen may need extra time. Always check the package for timing. - Cooking time adjustments: When cooking tortellini, follow the package instructions. It usually takes about 5-7 minutes in the sauce. If you use fresh, check for doneness earlier. You want them tender but not mushy. - Adding red pepper flakes for heat: If you like some spice, add red pepper flakes. Start with a pinch and taste. You can always add more. Just remember, a little goes a long way. - Alternative cheese options: Parmesan cheese is great, but you can switch it up. Try using pecorino or even a creamy goat cheese. Each adds a unique twist to the dish. Mix and match to find your favorite! {{image_2}} You can change greens in this recipe. Kale, arugula, or Swiss chard work well. They add different flavors and nutrients. You can also mix in some peas for a burst of sweetness. For cream, you have options too. Use coconut cream for a dairy-free version. Cashew cream is a great choice if you want a nutty taste. You can even use Greek yogurt for a tangy twist. If you need gluten-free options, look for gluten-free tortellini. Many brands offer tasty choices made from rice or chickpeas. Always check the package for gluten-free labels. For vegan modifications, skip the cheese and cream. Use a plant-based cream and nutritional yeast for a cheesy flavor. This way, you keep all the taste without dairy. You can still enjoy delicious One-Pan Creamy Garlic Spinach Tortellini! Store any leftover creamy tortellini in a glass or plastic container. Make sure the lid seals tightly. If you have a lot, divide it into smaller portions. This way, it stays fresh longer. Keep the container in the fridge. It will last up to three days. To reheat, use a microwave or a pan on low heat. If using a microwave, put the tortellini in a bowl. Add a splash of cream or broth to keep it moist. Heat for one to two minutes. Stir halfway through to heat evenly. If using a pan, add the tortellini and a little cream. Heat gently, stirring often. This helps keep the sauce creamy and prevents it from drying out. Enjoy your delicious leftovers just like the first time! Can I use frozen tortellini? Yes, you can use frozen tortellini. Just add them straight to the pan. They will cook well in the sauce. You may need to add an extra minute or two for cooking time. How do I thicken the sauce? To thicken the sauce, let it simmer longer. You can also add a little more Parmesan cheese. If you want it thicker, use less broth. What can I serve with One-Pan Creamy Garlic Spinach Tortellini? This dish pairs well with garlic bread or a fresh salad. You can also serve it with roasted vegetables for extra flavor. Can I use other types of pasta? Yes, you can use other pasta shapes. Just adjust the cooking time based on the pasta type. Smaller shapes may cook faster than tortellini. How long will leftovers last? Leftovers can last in the fridge for 3 to 4 days. Store them in an airtight container to keep them fresh. Reheat gently on the stove or in the microwave. In this post, I shared how to make creamy garlic spinach tortellini. We covered all the ingredients, from cheese tortellini to olive oil and spinach. You now have step-by-step instructions for preparation, sauce, and cooking. I also shared tips for perfecting the dish and offered variations to suit different diets. Finally, I included storage tips for leftovers. With these easy methods, you can enjoy a delicious meal anytime.

One-Pan Creamy Garlic Spinach Tortellini Delight

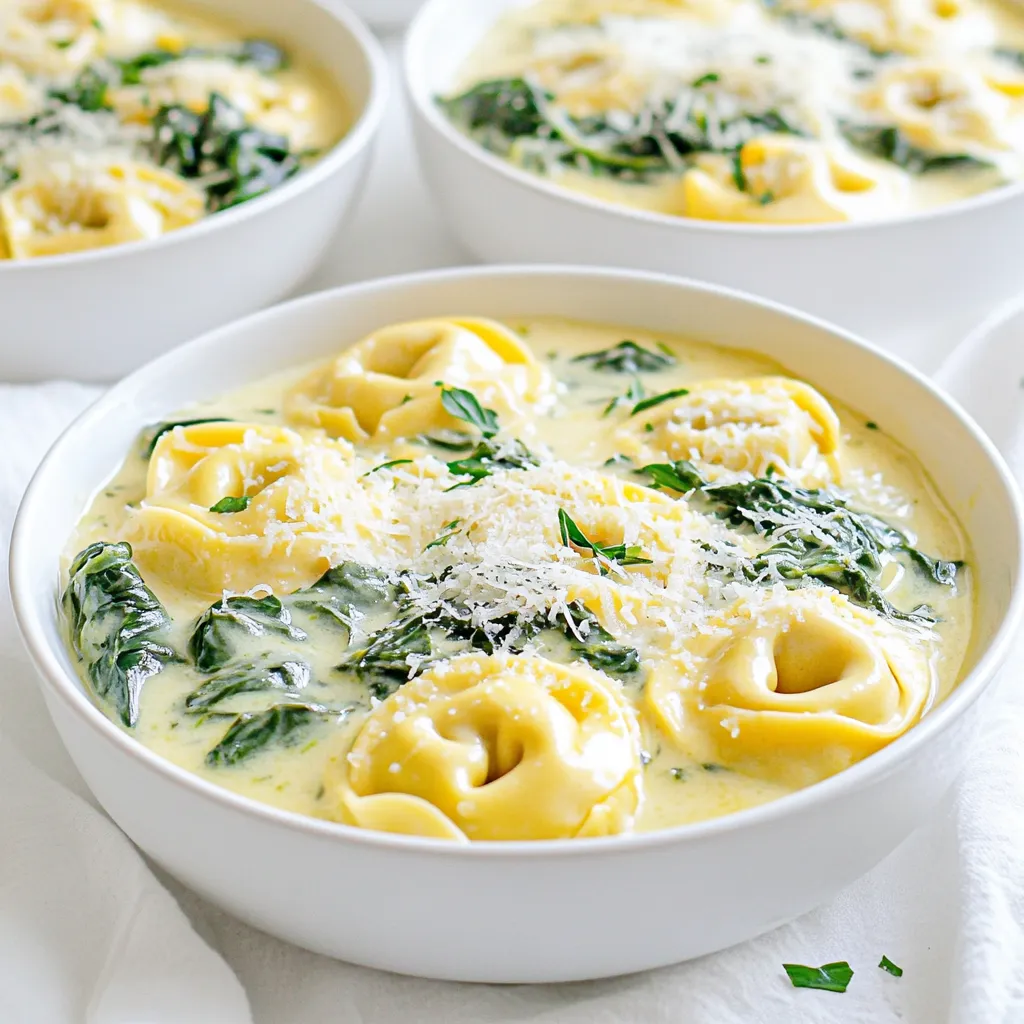
Welcome to your new favorite meal: One-Pan Creamy Garlic Spinach Tortellini Delight! This dish combines cheese tortellini, fresh spinach, and

Let's dive into what you need for this Warm Spiced Cranberry Apple Sangria. Each ingredient plays a key role in creating that cozy, warm flavor. - Cranberry juice: You need 4 cups. This gives the drink its tartness. - Apple cider: Use 2 cups. It adds a sweet and fruity touch. - Sparkling water: One cup adds a nice fizz at the end. - Fresh fruits: Slice 1 orange and 1 apple, and use 1 cup of fresh cranberries. They make the drink colorful and fresh. - Spices: You need 1 tablespoon of grated ginger, 2 cinnamon sticks, 4 whole cloves, and 2 star anise. These spices bring warmth and depth of flavor. - Sweeteners: Honey or maple syrup is optional. Add it to taste if you like it sweeter. - Garnishes: Fresh mint leaves add a pop of color and freshness. These ingredients come together to create a delightful drink that warms you from the inside out. Each sip is a blend of sweet, tart, and spicy notes that will keep you coming back for more. - Start by combining 4 cups of cranberry juice and 2 cups of apple cider in a large pot. - Add 1 tablespoon of grated fresh ginger. This gives a nice kick. - Toss in 2 cinnamon sticks, 4 whole cloves, and 2 star anise for warmth. - Heat the pot on medium heat until it starts to simmer. - Do not let it boil. Boiling can ruin the great taste of spices. - Once it simmers, turn the heat to low. - Add 1 sliced orange, 1 sliced apple, and 1 cup of fresh cranberries. - Stir gently to mix the fruits in well. - Let it steep for about 10 to 15 minutes. This lets the flavors mix. - If you like it sweet, add honey or maple syrup to taste. - Before serving, stir in 1 cup of sparkling water. This adds a refreshing fizz. - Strain the sangria into mugs or heatproof glasses. You can discard the spices and fruit pieces if you want. - Garnish each serving with a sprig of fresh mint. This adds color and flavor. - Simmer the sangria gently. Simmering helps the flavors develop well. - Avoid boiling. Boiling can make the drink taste harsh. Choosing the right spices is key for this sangria. I use cinnamon, ginger, cloves, and star anise. Each spice brings warmth and depth. Cinnamon gives a sweet touch. Ginger adds a nice kick. Cloves provide a rich, warm note. Star anise offers a unique flavor that lifts the drink. Sweeteners also play a role in balancing flavors. I often use honey or maple syrup. Both options add natural sweetness. Adjust the amount to your taste. Start with a little and add more if needed. This way, you can control the sweetness level. Best mugs or glasses to use are heatproof ones. They keep the sangria warm longer. I love using clear mugs. They show off the lovely colors of the drink. This makes it even more inviting. Pairing food with the sangria can enhance your experience. I recommend serving it with cheese platters or roasted nuts. These snacks complement the drink's spices. You can also serve it with warm pastries. They create a cozy, festive vibe. {{image_2}} You can easily make this drink without alcohol. Replace the apple cider with more cranberry juice. This keeps the flavor bright and fruity. For a kid-friendly version, use sparkling grape juice instead of sparkling water. This makes it bubbly and fun for everyone. Change up the fruits based on what is in season. In the fall, add slices of pear or pomegranate seeds. In the winter, try adding slices of citrus like lemon or lime. You can also mix in spices like nutmeg or allspice for a different taste. You can serve this sangria warm or cold. Warm is cozy, perfect for chilly nights. Serve it hot in mugs, and add a cinnamon stick for fun. If you want it cold, chill the mix in the fridge. Then serve it over ice with fresh fruit slices. Each style brings its own charm to the drink! To keep your Warm Spiced Cranberry Apple Sangria fresh, use airtight containers. Glass jars work well. They do not absorb flavors. Make sure to let the sangria cool before sealing. Store in the fridge for up to three days. This keeps the flavors bright and tasty. To reheat the sangria safely, pour it into a pot. Heat on low. Stir gently to mix the flavors. Avoid boiling, as it can ruin the taste. Warm it until it's nice and cozy, then serve again. Enjoy the warm, spiced flavors just as you did first! Yes, you can make this sangria ahead of time. Just prepare the sangria, let it cool, and store it in the fridge. When you are ready to serve, reheat it gently on the stove. This will keep the flavors fresh. If you want a change, try pomegranate juice or cherry juice. Both options give a nice flavor. You can mix them with apple juice for a tasty blend. Absolutely! You can skip the alcohol by only using cranberry juice and apple cider. This way, you keep all the yummy flavors without any alcohol. You can store it for up to three days in the fridge. After that, the fruits may lose their freshness. Always check the smell and taste before serving. Yes, dried fruits like raisins or dried cranberries work well. You can also use ground spices if you don’t have whole ones. Just remember to adjust the amounts to suit your taste. This blog post covered all you need for a warm spiced cranberry apple sangria. We explored the important ingredients, step-by-step instructions, and helpful tips. You learned how to enhance the flavor, serve it well, and enjoy variations. Storing and reheating tips ensure your sangria stays fresh. In summary, this drink is not just tasty; it’s easy to make and adjust. Enjoying it with family or friends will make any gathering special. Don’t hesitate to experiment with flavors and ingredients. Happy sipping!

Warm Spiced Cranberry Apple Sangria Refreshing Treat

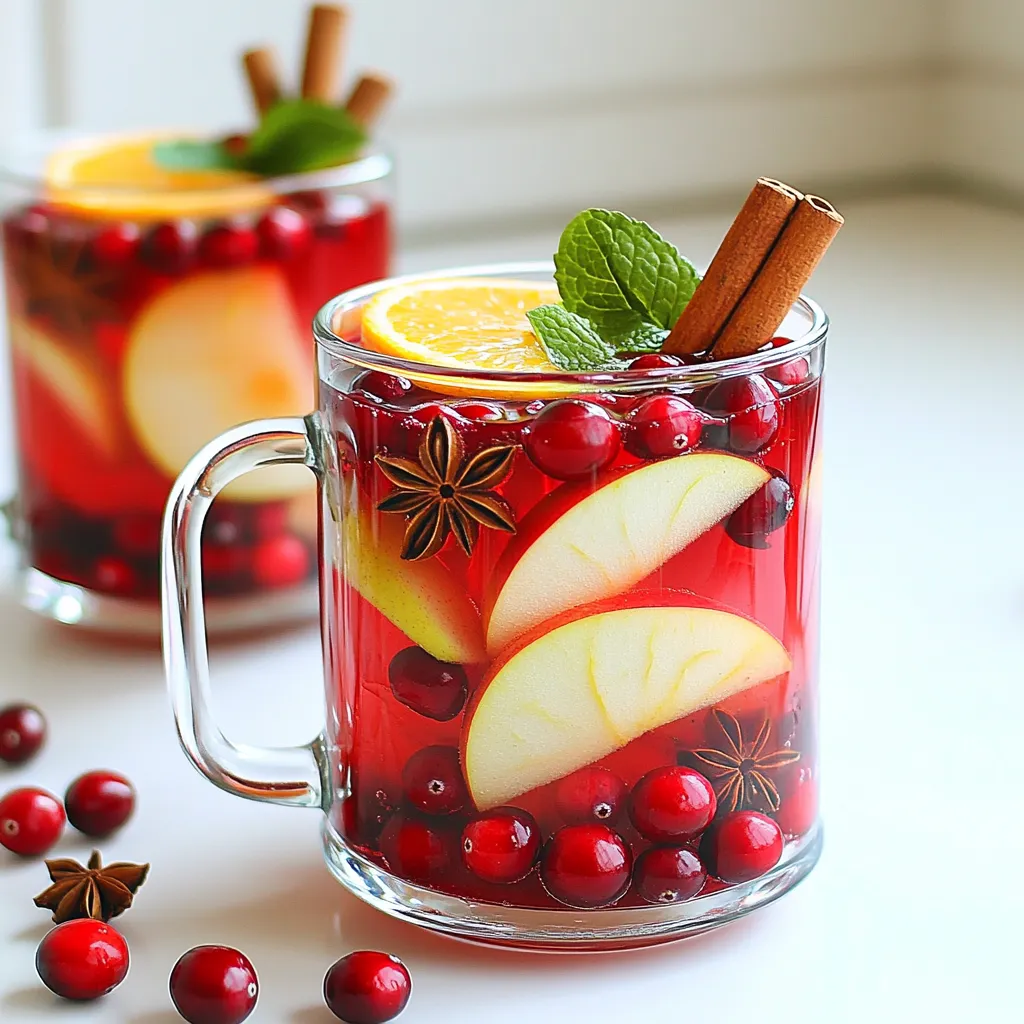
Looking for a cozy drink that warms your heart? It’s time to try my Warm Spiced Cranberry Apple Sangria! This

To make No-Bake Pumpkin Chocolate Oatmeal Squares, gather these ingredients: - 1 cup rolled oats - 1/2 cup canned pumpkin puree - 1/4 cup almond butter (or any nut butter) - 1/4 cup honey or maple syrup - 1/3 cup cocoa powder - 1/2 teaspoon ground cinnamon - 1/4 teaspoon nutmeg - 1/4 cup mini chocolate chips (plus more for topping) - Pinch of salt - Optional: chopped nuts or seeds for added crunch These ingredients blend together to form a tasty treat. The rolled oats give a nice base, while the pumpkin adds moisture and flavor. The nut butter binds everything, and the cocoa powder provides a rich chocolate taste. If you don't have almond butter, you can use any nut butter you like. Peanut butter works well too. For sweeteners, honey is great, but maple syrup is a good alternative. If you want something lower in sugar, try using agave syrup or a sugar substitute like stevia. These swaps keep the squares delicious while catering to your taste and dietary needs. Want to jazz up your squares? You can add chopped nuts like walnuts or pecans. Seeds like chia or flaxseed also work well. These add a nice crunch and extra nutrients. You might even add dried fruit like cranberries or raisins for sweetness and chew. Feel free to get creative! Each add-in can change the squares to suit your flavor preferences. Start by taking a large mixing bowl. Add 1 cup of rolled oats. Next, pour in 1/2 cup of canned pumpkin puree. Add 1/4 cup of almond butter, or your favorite nut butter. Then, mix in 1/4 cup of honey or maple syrup. Stir everything well until it forms a smooth paste. You want it to blend nicely. Now, it’s time to add the dry ingredients. Sift in 1/3 cup of cocoa powder. Next, add a 1/2 teaspoon of ground cinnamon and 1/4 teaspoon of nutmeg. Don't forget a pinch of salt to balance the flavors. Mix well until you see no dry spots. Everything should be combined nicely. Get an 8x8 inch square baking pan. Line it with parchment paper, leaving some paper hanging over the edges. This makes it easy to lift out later. Pour your mixture into the pan. Use a spatula or your hands to press it down. Make sure it’s packed tightly and even. This step is key for the right texture. Once your mixture is pressed down, place the pan in the fridge. Let it chill for at least 2 hours. This helps the squares firm up. You can also leave them longer if you want. After chilling, they will cut into neat squares easily. Enjoy your delicious treat! To get that perfect texture, follow a few key steps. First, use rolled oats. They give a chewy bite that works well with the creamy pumpkin. When mixing, make sure everything joins together well. Press the mixture firmly into the pan. This helps your squares hold their shape. You want them compact. If the mix feels too dry, add a bit more almond butter or honey. This will help bind it better. For storing, keep your squares in an airtight container. They stay fresh in the fridge for up to a week. When serving, cut them into squares. You can top them with extra chocolate chips or nuts for a nice touch. These are great as a quick snack or dessert. You can even pack them for lunch! These squares are easy to make ahead. You can whip them up a day or two before you need them. Just follow the steps and chill them as directed. After they set, cut them into squares. Store them in the fridge until you are ready to serve. This way, you have a tasty treat ready to go whenever you want! {{image_2}} You can easily change the flavors in your pumpkin chocolate oatmeal squares. Try using different spices. For example, add ginger or allspice for a warm kick. If you want a nutty taste, swap almond butter for peanut or cashew butter. Each nut butter brings its own unique flavor. This simple switch can change the whole vibe of your squares. Making these squares gluten-free is simple. Use certified gluten-free oats instead of regular rolled oats. For a vegan option, replace honey with maple syrup. This keeps the sweet flavor while staying plant-based. These swaps ensure everyone can enjoy this treat without worry. Toppings can make your squares even more fun. After cutting them, sprinkle extra mini chocolate chips on top. You can also add chopped nuts for a crunchy texture. Try using shredded coconut or a drizzle of nut butter for a rich finish. These toppings not only look great but also add new flavors and textures. To keep your No-Bake Pumpkin Chocolate Oatmeal Squares fresh, store them in the fridge. Place the squares in an airtight container. This helps maintain their taste and texture. You can layer parchment paper between the squares to prevent sticking. Make sure to consume them within a week for the best flavor. You can freeze these squares for longer storage. First, cut them into individual squares. Wrap each square tightly in plastic wrap. Then, place them in a freezer-safe bag or container. They can last up to three months in the freezer. When you're ready to enjoy, simply take a square out and let it thaw in the fridge overnight. You can also leave it at room temperature for about 30 minutes. These squares have a solid shelf life. In the fridge, they last about 5 to 7 days. If you freeze them, they can stay good for about three months. Always check for any changes in smell or texture before enjoying them. Proper storage ensures you get the best taste for each bite. Yes, you can use fresh pumpkin. Just make sure to cook it first. Roast or steam fresh pumpkin until soft. Then, puree it until smooth. This gives you a fresh flavor, but canned pumpkin is easier. These squares last about one week in the fridge. Store them in an airtight container. This keeps them fresh and tasty. You can also freeze them for longer storage. Absolutely! You can swap almond butter for sunflower seed butter. This keeps the squares nut-free and delicious. Make sure to check for any nut traces in other ingredients. If your mixture is too dry, add a bit more honey or pumpkin. Mix well until it holds together. If it’s too wet, add more oats and cocoa powder. You want a thick, moldable consistency. This blog covered all you need for making tasty squares. We discussed key ingredients, including substitutions and add-ins for extra flavor. I shared step-by-step instructions to guide your process. You learned tips to improve texture and how to store and serve your squares. In the end, feel free to experiment with flavors and make it your own. Enjoy making these snacks!

No-Bake Pumpkin Chocolate Oatmeal Squares Delight

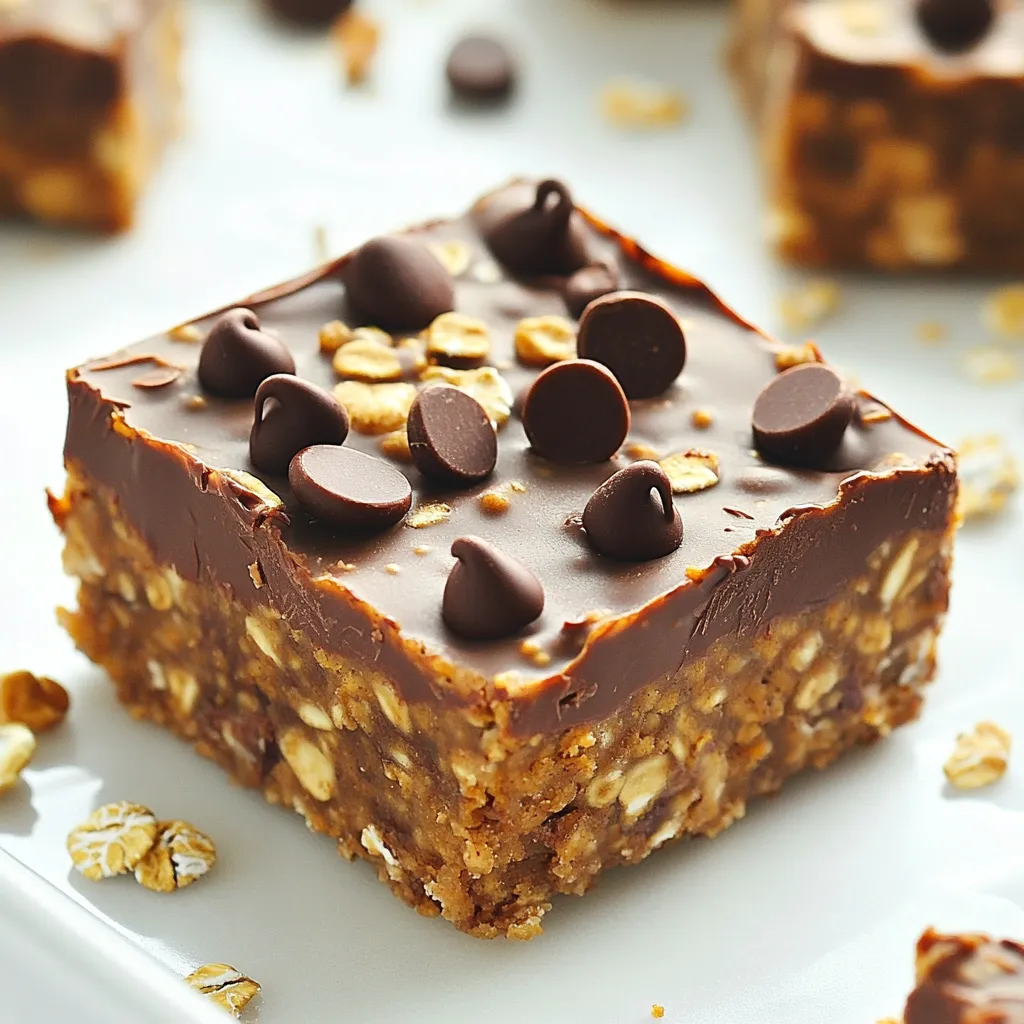
Are you ready for a treat that’s easy and delicious? My No-Bake Pumpkin Chocolate Oatmeal Squares combine rich chocolate, creamy

Older posts
Newer posts
← Previous Page1 … Page7 Page8 Page9 … Page85 Next →

dsad

© 2026 greenmealmap • Built with GeneratePress

Our Policies

  • Copyright Policy
  • Cookie Policy
  • GDPR Policy
  • Privacy Policy
  • Disclaimer
  • Terms Of Use

More Information

  • Home
  • About
  • Contact
  • Appetizers
  • Dessert
  • Dinner
  • Drinks
©2026, greenmealmap About Back To Top