![To make a tasty Peach Oat Crisp, you'll need these simple ingredients: - Ripe Peaches - Sweeteners and Flavorings - Topping Ingredients You need four ripe peaches. Make sure they are soft and fragrant. These peaches will be the star of your crisp. - 2 tablespoons lemon juice: This adds a nice zing to the peaches. - 1/2 cup brown sugar: This gives sweetness and a deep flavor. - 1 teaspoon vanilla extract: This enhances the overall taste. - 1 teaspoon cinnamon: A warm spice that pairs well with peaches. - 1 cup rolled oats: These add a chewy texture. - 1/2 cup all-purpose flour: This helps bind the topping. - 1/2 cup chopped nuts: Pecans or almonds work great for crunch. - 1/2 cup cold unsalted butter: This makes the topping rich and buttery. - 1/4 teaspoon salt: A pinch of salt balances the sweetness. These ingredients make the Peach Oat Crisp both easy and delicious. You can find the full recipe further in the article to guide you through the steps! Slicing and Seasoning Start with four ripe peaches. Peel and slice them into thin pieces. Place the slices in a large bowl. Add two tablespoons of lemon juice to keep them fresh. Mix in 1/4 cup of brown sugar, one teaspoon of vanilla extract, and one teaspoon of cinnamon. Toss everything gently. This mix brings out the peach flavor and adds sweetness. Preparing the Baking Dish Grease a 9x9 inch baking dish with butter. Spread the seasoned peach mixture evenly in the dish. Make sure the peaches cover the bottom well. Mixing Dry Ingredients In another bowl, combine one cup of rolled oats, half a cup of all-purpose flour, and half a cup of chopped nuts. You can use pecans or almonds here. Add the remaining 1/4 cup of brown sugar and 1/4 teaspoon of salt. Stir these ingredients together until they mix well. Incorporating Cold Butter Next, take half a cup of cold unsalted butter, cubed. Add the butter to the oat mixture. Using a pastry cutter or your fingers, mix until it looks like coarse crumbs. This makes the topping crunchy and delicious. Temperature and Timing Preheat your oven to 350°F (175°C). Sprinkle the oat topping evenly over the peach layer in the baking dish. Bake for 35-40 minutes. Keep an eye on it until the topping is golden brown and the peaches bubble. Tips for Achieving a Perfect Crisp Let the Peach Oat Crisp cool for a few minutes before serving. This helps the filling set up. Serve it warm, topped with a scoop of vanilla ice cream or whipped cream. For a nice touch, add a sprig of mint on top. Enjoy the sweet, fruity goodness! Signs of Ripeness To pick ripe peaches, look for a few signs. First, the skin should be a warm yellow or golden color. A slight blush is normal. Next, gently press the peach; it should feel soft but not mushy. A sweet smell means they are ripe and ready to eat. If the peach is hard, let it sit at room temperature for a few days. Alternative Peach Varieties If you want to try different flavors, go for other peach types. Yellow peaches are sweet and juicy. White peaches have a milder taste. Donut peaches are small and flat, perfect for a unique twist in your crisp. Achieving Optimal Texture For a great texture, ensure the topping is crumbly. Mix the oats, flour, and nuts well. When adding the cold butter, use your fingers or a pastry cutter. This keeps it from melting too fast. You want the mix to look like coarse crumbs. A good topping should be crunchy and slightly golden after baking. Adding Flavor Enhancements Want to make your crisp even better? Try adding spices like nutmeg or ginger. You can also mix in some lemon zest for a bright flavor. If you like a nutty taste, use different nuts in your topping. Pecans or almonds add a nice crunch. For a sweet twist, consider tossing in some dried fruit like cranberries or raisins. These small changes will make your Peach Oat Crisp shine. Check out the [Full Recipe] for all the details on making this dessert! {{image_2}} For a gluten-free version, you can make simple ingredient swaps. Use gluten-free oats instead of regular oats. This small change keeps the dish safe for those with gluten issues. Ingredient Substitutions - Oats: Choose certified gluten-free rolled oats. - Sugar: Use coconut sugar or agave syrup for sweetness. - Nuts: Pecans or almonds are naturally gluten-free. Flour Alternatives Instead of all-purpose flour, try using almond flour or coconut flour. These options provide a different texture but still taste great. To make this crisp vegan, you’ll focus on dairy and egg replacements. This way, everyone can enjoy it. Dairy-Free Options Replace the butter with coconut oil or vegan butter. These options melt well and keep the topping crisp. Egg Replacement Suggestions You won’t need eggs for this recipe. The oats and fruits hold everything together nicely. You can change this recipe based on the fruits available. This keeps your dessert fresh and exciting through the seasons. Adding Other Fruits Mix in berries, apples, or pears with the peaches. This adds new flavors and textures to your dish. Flavor Infusions Try adding spices like nutmeg or ginger for a warm twist. You can also use extracts like almond or lemon for extra flavor. For the complete guide, check out the Full Recipe. Short-term Storage You can store leftover Peach Oat Crisp in the fridge. Place it in an airtight container. It will stay fresh for up to three days. If you want to keep it longer, freeze it. Just make sure it cools down first. Wrap it well in plastic wrap or aluminum foil. It helps to keep out moisture and air. Long-term Freezing Options For long-term storage, Peach Oat Crisp can stay in the freezer for up to three months. Use a freezer-safe container or a heavy-duty freezer bag. Label the bag with the date you made it. This way, you’ll know when to eat it. When you're ready to enjoy, just thaw it overnight in the fridge. Best Methods for Reheating To reheat Peach Oat Crisp, the oven works best. Preheat your oven to 350°F (175°C). Place the crisp in an oven-safe dish and cover it with foil. Heat it for about 15-20 minutes. This keeps the topping crunchy and the peaches warm. Tips to Maintain Crispiness For extra crispiness, remove the foil for the last five minutes of heating. You can also use an air fryer. Set it to 350°F (175°C) and heat for about 10 minutes. This method gives a nice crunchy top. Enjoy your warm Peach Oat Crisp just like when it was fresh! You can prepare the Peach Oat Crisp a day in advance. Slice and mix the peaches with lemon juice and spices. Place the peach mixture in the baking dish. Then, prepare the oat topping, but do not bake. Cover the dish and store it in the fridge. When you're ready, bake it as directed. This keeps the crisp fresh. Yes, you can use canned peaches. Drain the liquid well before mixing them with lemon juice and spices. Canned peaches are soft, so reduce the baking time. Check for bubbling around the edges to know when it’s done. Fresh peaches give a better texture, but canned peaches work in a pinch. A serving of Peach Oat Crisp has about 250 to 300 calories. This number may change based on the toppings you use. Adding ice cream or whipped cream will increase the calorie count. For a lighter option, serve it plain or with yogurt. Peach Oat Crisp lasts about 3 to 4 days in the fridge. Store it in an airtight container to keep it fresh. The topping may soften over time, but the flavors will still be great. Reheat it in the oven for a few minutes to restore some crispiness. You can serve Peach Oat Crisp warm or cold. Top it with vanilla ice cream or whipped cream for a treat. A sprinkle of cinnamon adds extra warmth. Fresh mint leaves also make a lovely garnish. Pair it with coffee or tea for a cozy dessert experience. Check out the full recipe for Peach Oat Crisp Delight to try this easy dessert! In this blog post, we covered how to make a delicious Peach Oat Crisp. You learned about the needed ingredients, clear step-by-step instructions, and helpful tips to perfect your dish. We also explored tasty variations, like gluten-free and vegan options. Now you can enjoy a warm, fruity dessert anytime. Remember to use ripe peaches for the best taste. Happy baking!](https://greenmealmap.com/wp-content/uploads/2025/06/073b081b-c3e3-49b6-a8e8-d84dc851b5d9.webp)
Peach Oat Crisp Easy and Delicious Dessert Recipe
Want a dessert that’s easy to make and super tasty? Look no further! Peach Oat Crisp combines sweet, ripe peaches
Want a dessert that’s easy to make and super tasty? Look no further! Peach Oat Crisp combines sweet, ripe peaches

If you want to impress your family and friends, these Zucchini Lemon Muffins are the way to go! With their
![- 2 large cucumbers - 1 cup cream cheese (or dairy-free alternative) - 1/4 cup fresh dill, chopped - 1/2 cup roasted red peppers, sliced - 1/2 cup shredded carrots - 1/4 cup feta cheese, crumbled (optional) - Salt and pepper to taste - Optional: 1 tablespoon lemon juice for added zest To make the best no bake cucumber wraps, you need fresh and simple ingredients. Start with two large cucumbers. They should be firm and straight. The cream cheese adds a nice creamy base. You can use a dairy-free option if needed. Fresh dill brings a burst of flavor. It pairs well with cucumbers. Next, gather your fillings. Roasted red peppers add a sweet taste and a pop of color. Shredded carrots bring crunch and nutrition. Feta cheese is optional but adds a salty kick. Don't forget to season with salt and pepper. If you want a tangy twist, add lemon juice. This simple blend makes your wraps taste fresh and delightful. For the full recipe, check the details above. Each ingredient plays a key role in creating these tasty no bake cucumber wraps. - First, wash your cucumbers. - Cut off the ends. - Slice each cucumber in half, lengthwise. - Use a spoon to scoop out the seeds gently. This makes space for the filling. - In a bowl, combine cream cheese and chopped dill. - If you want more flavor, add lemon juice. - Mix everything until it’s smooth. - Season with salt and pepper to taste. - Spread the cream cheese mixture inside each cucumber half. - Layer roasted red peppers, shredded carrots, and feta cheese on top. - Carefully wrap each cucumber half around the filling. - If needed, use toothpicks to hold them together. - Cut the wraps into bite-sized pieces. These no bake cucumber wraps are simple yet tasty. They are perfect for a quick snack or a light meal. For the full recipe, check out the earlier section. Enjoy your fresh and crunchy bites! Choosing the right cucumbers is key. Look for firm cucumbers with smooth skin. Smaller cucumbers work best for wraps. They are easier to handle and have fewer seeds. If you use larger cucumbers, they may be watery or too thick. To scoop out cucumber seeds, cut the cucumber in half lengthwise. Use a small spoon to gently remove the seeds. Be careful not to scoop out too much flesh. You want a nice hollow space for filling. Presentation matters for these wraps. Serve them on a bright platter. Add fresh herbs like dill or parsley to enhance the look. Arrange the wraps neatly for a clean display. You can drizzle olive oil on top for extra flavor. Garnishes can add flair. Consider a sprinkle of crumbled feta cheese or chopped nuts. These add taste and crunch. You can also use lemon wedges on the side for a zesty touch. For lighter options, swap cream cheese for Greek yogurt. This adds protein while cutting calories. You can also use hummus for a tasty vegan choice. It pairs well with fresh veggies. Cucumbers bring many health benefits. They are low in calories and high in water. This keeps you hydrated. They also provide vitamins like K and C. Fresh ingredients like carrots and peppers add fiber and nutrients, making these wraps a smart snack choice. {{image_2}} You can easily customize your cucumber wraps with other veggies. Add bell peppers for a sweet crunch. Spinach gives a nice color and fresh taste. If you want a creamy touch, mix in avocado. It brings a rich texture and healthy fats to your wraps. For a protein boost, try adding turkey or chicken slices. These meats complement the fresh flavors well. If you prefer plant-based options, hummus or bean spreads work great too. They provide protein and add a nice creaminess. Make your wraps even more exciting with herbs and spices. Fresh basil or cilantro can bring a unique twist. You can also experiment with flavored cream cheeses. Options like chive or garlic cream cheese can elevate the taste and make each bite special. For the complete recipe, check out the [Full Recipe]. To store leftovers, wrap them in plastic or place them in an airtight container. Keep the wraps in the refrigerator. This method helps maintain freshness and crunch. It’s best to eat them within two days for the best taste. Cucumber wraps do not freeze well. Freezing can make the cucumbers mushy. If you want to prep ahead, fill the cucumbers just before serving. Store the cut cucumbers and filling separately. This keeps flavor and texture intact. In the fridge, the wraps can last up to two days. Check for wilting or a slimy feel. These signs mean they are no longer good to eat. Always trust your senses when it comes to food safety. For the full recipe, check the above section. To make No Bake Cucumber Wraps, follow these steps: 1. Prepare the Cucumbers: Wash two large cucumbers. Cut off the ends and slice them in half lengthwise. Scoop out the seeds gently with a spoon. This creates space for the filling. 2. Make the Filling: In a bowl, mix one cup of cream cheese with 1/4 cup of chopped fresh dill. If you want some zing, add 1 tablespoon of lemon juice. Stir until smooth. Season with salt and pepper. 3. Fill the Cucumbers: Spread the cream cheese mixture evenly inside each cucumber half. 4. Add Fillings: Layer 1/2 cup of sliced roasted red peppers, 1/2 cup of shredded carrots, and if you like, 1/4 cup of crumbled feta cheese. 5. Wrap Them Up: Carefully fold each cucumber half around the filling. If needed, use toothpicks to hold them together. 6. Cut and Serve: Slice the wraps into bite-sized pieces. These wraps take only 15 minutes to make and are a fresh delight. For the full recipe, check the details provided earlier. If you need a dairy-free option, here are some great substitutes for cream cheese: - Tofu: Silken tofu works well. Blend it until smooth. - Cashew Cream: Soak cashews in water, then blend them with lemon juice and a bit of salt. - Hummus: A flavorful option that adds a unique taste. - Avocado: Mash ripe avocado for a creamy texture without dairy. Each option gives a different taste, so feel free to experiment! Yes, you can make No Bake Cucumber Wraps ahead of time. Here are some tips: - Prep the Ingredients: You can prepare the filling and wash the cucumbers a few hours before serving. Keep them separate until it's time to eat. - Store Properly: Wrap the filled cucumbers in plastic wrap. Place them in an airtight container in the fridge. - Use Soon: For the best flavor and texture, try to eat them within 24 hours. This way, you can enjoy a quick and healthy snack anytime! No bake cucumber wraps are simple to make and so tasty. You need fresh cucumbers, cream cheese, and dill, along with other colorful fillings. Following the easy steps, you can create a dish that fits any meal. Use our tips for better prep and serving ideas. You can customize the wraps by adding different veggies or proteins. Keep leftovers fresh and enjoy them later. These wraps are healthy and fun to eat. Try them out and impress your family and friends!](https://greenmealmap.com/wp-content/uploads/2025/06/91629070-67a2-446b-906d-6d19f008e68c.webp)
Looking for a quick, healthy snack that’s bursting with flavor? No Bake Cucumber Wraps are your new best friend! They
![- 1 cup plain yogurt (Greek or regular) - 1 cup all-purpose flour - 1/2 cup sugar - 1/2 cup vegetable oil - 2 large eggs To make the cake, you need these main ingredients. They form the base of the batter. The yogurt keeps the cake moist. It also adds a slight tang that pairs well with peaches. The flour gives the cake structure. Sugar adds sweetness, while oil helps it stay tender. The eggs bind everything together. - 1 tsp vanilla extract - Zest of 1 lemon For flavor, vanilla extract is a must. It adds warmth and depth. Zest from the lemon brightens the cake. It gives a fresh, citrusy note that lifts the peach flavor. Both of these ingredients make the cake taste special. - 2 ripe peaches, peeled and diced - Powdered sugar for dusting Peaches are the star of this cake. Their sweetness and juiciness shine through. You can add them to the batter for bursts of flavor. Dusting the cake with powdered sugar gives it a pretty finish. It also adds a touch of sweetness on top. If you want the full experience, check out the Full Recipe. 1. Preheat the oven and prepare the cake pan: Set your oven to 350°F (175°C). Grease a 9-inch round cake pan. You can also line it with parchment paper for easy removal. 2. Mix wet ingredients thoroughly: In a large bowl, combine 1 cup of yogurt, 1/2 cup of sugar, and 1/2 cup of vegetable oil. Whisk until smooth. Next, add 2 large eggs, 1 tsp of vanilla extract, and the zest of 1 lemon. Keep whisking until it all blends well. 1. Sift and mix dry ingredients with wet mixture: In another bowl, mix 1 cup of flour, 1 tsp of baking powder, 1/2 tsp of baking soda, and 1/4 tsp of salt. Gradually sift this into the wet mixture. Use a spatula to fold gently. Be careful not to overmix. 2. Fold in the peaches: Take 2 diced peaches and gently fold them into the batter. Make sure the peaches spread evenly throughout. 1. Pour batter into the pan and bake: Pour the batter into the prepared pan. Smooth the top with a spatula. Place the pan in your preheated oven. Bake for 30-35 minutes. Check with a toothpick; it should come out clean. 2. Cool and serve: After baking, let the cake cool in the pan for 10 minutes. Then, transfer it to a wire rack to cool completely. Dust with powdered sugar if you like, and slice it to serve. Enjoy your Peach Yogurt Cake! For the complete recipe with all details, check out the Full Recipe. To make your Peach Yogurt Cake just right, avoid overmixing the batter. When you mix too much, the cake can turn out dense. You want it light and fluffy. Fold the ingredients gently until they come together. This helps keep air in the batter. To ensure even baking, check your oven’s temperature with a thermometer. Ovens can be off by a few degrees. Place the cake in the center of the oven for balanced heat. Rotate the cake halfway through baking. This helps it rise evenly and bake perfectly. For a lovely finish, serve slices of cake with whipped cream and fresh peach slices. This adds color and flavor. You can also sprinkle some powdered sugar on top for a sweet touch. Enjoy this cake best when it's fresh. It’s perfect for dessert after dinner or as a midday treat. Pair it with a cup of tea or coffee for a delightful break. If you want to boost the flavor, think about adding spices. A pinch of cinnamon or nutmeg can add warmth and depth. Just a little goes a long way. Mix these spices into your flour before combining it with the wet ingredients. This will spread the flavor evenly throughout the cake. For the full recipe, click here: [Full Recipe]. {{image_2}} You can swap plain yogurt for different types. If you want a dairy-free option, use coconut yogurt. It adds a nice flavor and keeps the cake moist. For flour, you might try whole wheat flour. This switch gives the cake extra fiber and a nutty taste. Peaches are great, but you can use other fruits too. Berries like blueberries or strawberries work well. Apples or pears add sweetness and moisture. You can also mix in nuts like walnuts or almonds. They add crunch and flavor. Want to make a vegan version? Replace eggs with flaxseed meal or applesauce. For gluten-free options, use almond flour or a gluten-free baking blend. These tweaks help everyone enjoy the cake while sticking to their diets. For the full recipe, check the earlier sections. To keep your Peach Yogurt Cake fresh, you can store it at room temperature for a short time. Just place it in an airtight container. This works best if you plan to eat it within two days. If you want to save it longer, refrigerate the leftovers. Wrap the cake tightly with plastic wrap or foil before placing it in the fridge. This helps prevent it from drying out. If you want to save the cake for a month, freezing is a great option. First, let the cake cool completely. Then, wrap it tightly in plastic wrap. After that, use aluminum foil for extra protection. Label it with the date before placing it in the freezer. When you're ready to eat, thaw the cake in the fridge overnight. To reheat, warm slices in the microwave for about 15 seconds. This will bring back its soft texture. The Peach Yogurt Cake can last up to five days in the fridge. Just remember to check for any signs of spoilage, like mold or off smells. For the best taste, eat the cake within three days. If you freeze it, it can stay fresh for about a month. Always ensure proper wrapping to maintain its flavor and moisture. Enjoy your cake at its best! You can find the full recipe above for reference. You can replace eggs in this cake. Use a 1/4 cup of unsweetened applesauce for each egg. Another option is to mix 1 tablespoon of flaxseed meal with 3 tablespoons of water. Let it sit for a few minutes to thicken. Both options keep the cake moist and tasty. Yes, you can use frozen peaches. Just remember to thaw them first. Drain any excess juice. Frozen peaches may not be as firm as fresh ones. They can add extra moisture to the cake. That’s okay, just adjust your baking time slightly. Keep an eye on the cake as it bakes. Serve this cake warm or at room temperature. For a lovely touch, add fresh peach slices on the side. A dollop of whipped cream makes it even better. You can also dust the top with powdered sugar for a sweet finish. Each slice looks and tastes amazing! Check out the Full Recipe for more details. Peach Yogurt Cake is easy to make with simple ingredients like yogurt, flour, and eggs. We learned how to prepare, bake, and serve this delicious dessert. You can add fresh peaches and try different fruits too. Remember to store your cake well, so it stays fresh. Baking this cake will bring joy to your kitchen and delight your taste buds. Enjoy the flavors and share this treat with friends and family.](https://greenmealmap.com/wp-content/uploads/2025/06/5a5a55de-9bbc-4ee0-aca4-2e20a5ce5810.webp)
Looking for a delicious and easy dessert? This Peach Yogurt Cake is your answer! With simple ingredients like yogurt and
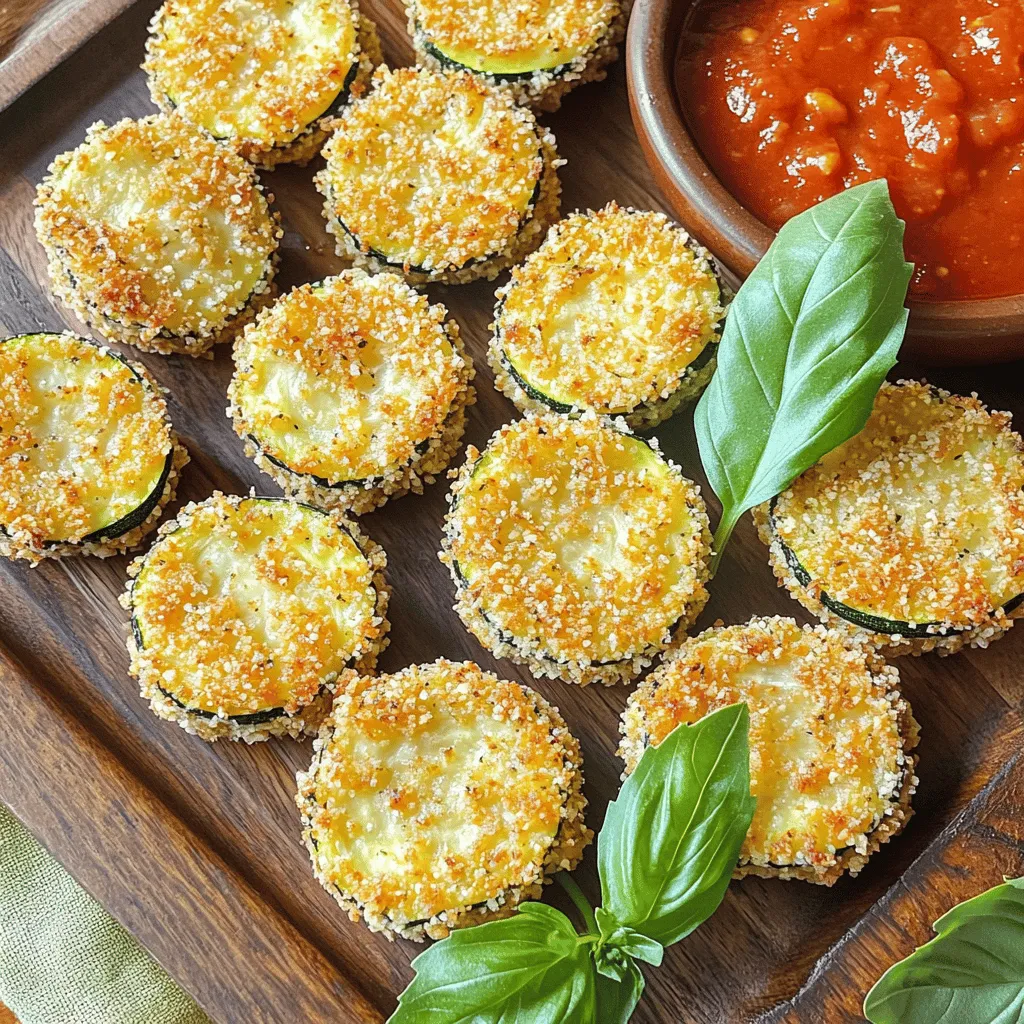
Looking for a tasty snack that’s both crispy and healthy? Zucchini Parmesan Bites are your answer! These little delights are
![To make a vibrant Cucumber Peach Salsa, gather these simple ingredients: - 1 large cucumber, diced - 2 ripe peaches, diced - 1 small red onion, finely chopped - 1 jalapeño, deseeded and minced - 1/4 cup fresh cilantro, chopped - 2 tablespoons lime juice - 1 tablespoon honey (or agave syrup for a vegan option) - Salt and pepper to taste This mix of fresh produce gives the salsa its bright colors and tasty flavors. Choosing fresh cucumbers and peaches is key. Here are some tips: - Cucumber: Look for firm cucumbers with smooth skin. Avoid any with soft spots. - Peaches: Select peaches that are slightly soft to the touch. Their skin should have a rich color. Choosing ripe fruits makes the salsa taste better. It’s all about freshness! You can switch up the ingredients for fun twists. Here are some ideas: - Tomatoes: Swap in diced tomatoes for added juiciness. - Herbs: Try using basil or mint instead of cilantro for a different flavor. - Fruits: Add mango or pineapple for a sweeter salsa. These changes keep the dish exciting and let you explore new flavors. For the full recipe, check out the detailed steps above. To make cucumber peach salsa, you start with fresh ingredients. Here’s how: 1. Dice the cucumber: Take one large cucumber and chop it into small pieces. 2. Prepare the peaches: Use two ripe peaches and dice them similarly. 3. Chop the onion: Take a small red onion and finely chop it. 4. Mince the jalapeño: Deseed one jalapeño and mince it finely for some heat. 5. Chop the cilantro: Grab 1/4 cup of fresh cilantro and chop it up for flavor. 6. Mix in a bowl: In a large mixing bowl, combine all these ingredients. Mixing is key to great salsa. Here are some tips: - Whisk the dressing: In a small bowl, whisk together two tablespoons of lime juice and one tablespoon of honey. - Pour over the salsa: Drizzle this mixture over the chopped ingredients in the bowl. - Toss gently: Use a spoon to mix everything carefully. You want to blend the flavors without smashing the ingredients. - Let it rest: Allow the salsa to sit for at least 15 minutes. This helps the flavors meld together. Garnishing can make your salsa look even better. Try these ideas: - Use a beautiful bowl: Serve your salsa in a white bowl to highlight the colors. - Add cilantro on top: Place a sprig of cilantro on top for a fresh touch. - Pair with chips or meat: Serve it with tortilla chips or use it as a topping on grilled chicken or fish. For the full recipe, check out the [Full Recipe]. Enjoy your fresh and vibrant cucumber peach salsa! To boost the taste of your cucumber peach salsa, think about layering flavors. Use fresh lime juice for a bright kick. Add more herbs, like mint or basil, for depth. A pinch of sugar can balance tartness, while a dash of vinegar can add zing. Experiment with spices too. A sprinkle of cumin or smoked paprika can bring warmth. Each bite should excite your taste buds and feel balanced. Keep your salsa fresh by storing it in an airtight container. Place it in the fridge right after you make it. This helps preserve the bright colors and flavors. For best taste, eat it within three days. If you notice any liquid forming, just drain it before serving. If you want to save it longer, consider freezing. However, the texture may change when thawed. When making cucumber peach salsa, avoid using overripe fruits. They can make the salsa mushy. Also, don’t skip the lime juice; it adds vital acidity. Make sure to chop all ingredients evenly for a better mix. Lastly, let the salsa sit for at least 15 minutes. This step allows the flavors to meld well. It makes a big difference in taste! For the full recipe, check the section above. {{image_2}} If you want more heat, try adding different peppers. You can use a serrano for a sharper kick. A habanero gives a fruity spice but be careful; it's hot! Start with a small amount and taste as you go. This way, you control the spice level. Mixing in peppers adds depth and excitement to your cucumber peach salsa. You can also mix in other fruits for a sweeter salsa. Mango adds a tropical flair. Pineapple brings a juicy burst. Try adding diced strawberries or even kiwi for fun colors and tastes. Each fruit changes the flavor and makes it unique. Just remember to keep the balance with the cucumber and peach. Different cuisines inspire creative twists on this salsa. For a Mexican flair, add some diced avocado and a sprinkle of chili powder. If you're feeling Mediterranean, toss in some feta cheese and olives. These twists make the salsa special. They reflect the flavors of the world and your taste. Each version tells a story and brings new joy to your meals. For the full recipe, check out the detailed steps and tips for making this delightful dish. To keep your cucumber peach salsa fresh, store it in an airtight container. Place the salsa in the fridge right after making it. This helps maintain its crispness and flavor. It's best to enjoy your salsa within a few days to get the most taste. If you see any moisture, drain it off before serving. Freezing cucumber peach salsa is not ideal. The texture of cucumbers and peaches changes when frozen. They may become mushy when thawed. If you want to save some salsa, consider freezing only the peach part. This way, you can use the frozen peaches later in smoothies or other dishes. When stored in the fridge, cucumber peach salsa lasts about 3 to 5 days. After that, the flavors may fade, and the salsa can get watery. Always check for off smells or changes in color before eating. If you're unsure, it's safer to toss it out. For the best taste, enjoy it fresh! Cucumber peach salsa is packed with vitamins. Cucumbers are low in calories and high in water. They help keep you hydrated. Peaches add fiber, which aids digestion. They also contain vitamins A and C, great for your skin. This salsa is fresh and light, making it a healthy choice for snacks or meals. Yes, you can make cucumber peach salsa ahead of time. It tastes even better after sitting for a while. Just cover it and store it in the fridge. Aim to let it sit for at least 15 minutes. This lets the flavors mix well. But for best taste, use it within a day or two. Cucumber peach salsa goes well with many dishes. Serve it with grilled chicken or fish for a fresh twist. It also tastes great on tacos or nachos. Try it as a topping for burgers or sandwiches. You can even enjoy it with simple tortilla chips. This salsa makes every dish brighter and more fun. For the full recipe, check out the earlier section. Cucumber peach salsa is fresh and easy to make. We explored key ingredients, from selecting the best cucumbers and peaches to variations that spice up your dish. I shared tips on preparation, mixing flavors, and garnishing. Remember to store your salsa properly for maximum freshness. Try adding unique fruits or spices to create your own twist. This fun dish complements many meals and keeps well. Enjoy making it, and let your taste buds guide you!](https://greenmealmap.com/wp-content/uploads/2025/06/9f775904-517a-4012-9636-859874e4f053.webp)
Looking for a fresh and tasty twist to elevate your meals? This Cucumber Peach Salsa is the answer! Packed with
![- 1 cup arborio rice - 4 cups whole milk - 1 cup fresh peaches, diced The main ingredients create the base of the pudding. Arborio rice gives a creamy texture. Whole milk enriches the flavor and adds creaminess. Fresh peaches bring sweetness and a lovely fruity taste. - 1/2 cup sugar (adjust to taste) - 1 teaspoon vanilla extract - 1/2 teaspoon ground cinnamon - Pinch of salt Sweeteners and spices enhance the pudding. Sugar balances the flavors, while vanilla adds warmth. Ground cinnamon gives a hint of spice. The pinch of salt boosts all the flavors. - 2 tablespoons butter - Fresh peach slices and mint leaves for garnish Butter adds a silky smoothness to the dish. Garnishing with fresh peach slices makes it look pretty. Mint leaves add a pop of color and freshness. Check the [Full Recipe] for more details on making this delicious dessert. Rinsing the arborio rice is key. Do this under cold water. Keep rinsing until the water runs clear. This step removes excess starch. It helps the rice become creamy, not sticky. In a medium saucepan, combine the rinsed rice, whole milk, sugar, and a pinch of salt. Stir well to mix everything. Next, bring the mixture to a simmer over medium heat. Stir occasionally to prevent sticking. Once it simmers, reduce the heat to low. Cook uncovered for about 20 to 25 minutes. Stir frequently. You want the rice to be tender and the mix to thicken into a creamy texture. Now, stir in the vanilla extract, ground cinnamon, and butter. Mix until everything is well blended. Next, fold in the diced peaches gently. Reserve a few peach pieces for garnish if you like. Cook for just 2 to 3 more minutes. This softens the peaches without losing their texture. When done, remove the pudding from heat. Let it cool for a few minutes. The pudding will thicken more as it cools. Enjoy it warm or chilled. For extra flair, top with fresh peach slices and mint leaves. For the complete recipe, check out the Full Recipe. To make your peach rice pudding creamy, stir the mixture often. This helps the rice cook evenly and prevents it from sticking. Cook for about 20-25 minutes on low heat. You want the rice to be soft and the pudding to thicken. Choose ripe, fresh peaches for the best flavor. Yellow or white peaches work well. Look for peaches that are slightly soft when you press gently. This means they are ripe and sweet. If they feel hard, let them sit at room temperature for a few days before use. For a lovely touch, add fresh peach slices on top. You can also sprinkle some mint leaves for color. Serve your pudding warm for a cozy treat or chill it in the fridge for a refreshing dessert. Both ways taste great! For more details, check the Full Recipe. {{image_2}} You can change up the fruit in this rice pudding. If you don’t have peaches, try mango or blueberries. These fruits also add a sweet taste and bright color. You can use ripe bananas or strawberries for a twist. Just remember to adjust the cooking time slightly. Softer fruits may need less time to cook. Adding spices can make your pudding even better. Try nutmeg or cardamom for a warm touch. These spices blend well with the creamy rice. You can also swap sugar for honey or maple syrup. They add a different sweetness and a hint of flavor. Just taste as you go! If you need a dairy-free option, use almond or coconut milk. Both will make the pudding creamy and rich. You can also reduce sugar for a healthier treat. Try using less sugar or a natural sweetener. This way, you can enjoy the dessert without the extra sugar. To store leftover peach rice pudding, place it in an airtight container. Make sure to let it cool down first. This keeps the pudding creamy and fresh. Store it in the fridge for up to four days. If you find the pudding too thick after refrigerating, add a splash of milk when you serve it. If you want to freeze peach rice pudding, use a freezer-safe container. Leave some space at the top for expansion. It can stay in the freezer for up to three months. When ready to eat, thaw it overnight in the fridge. Reheat it on the stove or in the microwave. If it seems dry, stir in a little milk to get the right texture. Peach rice pudding lasts about four days in the fridge. In the freezer, it stays good for about three months. To enjoy it at its best, eat it within these time frames. Keeping track of the storage time helps you enjoy this creamy, comforting delight at its peak freshness. Yes, you can use canned peaches. They are sweet and soft, which makes them easy to mix in. However, fresh peaches have a better flavor and texture. If you choose canned, rinse them well to remove syrup. This will help reduce extra sweetness. Use them in the same way as fresh peaches in the recipe. The rice pudding is done when it is creamy and thick. Check the rice; it should be soft and tender. The mixture should coat the back of a spoon. Stir often to avoid sticking. If it looks too runny, cook it a little longer. Remember, it will thicken as it cools. Yes, you can make peach rice pudding ahead of time. Prepare it a day in advance and store it in the fridge. Just let it cool before you cover it. When ready to serve, you can warm it up or serve it cold. Add fresh peach slices and mint just before serving for a tasty touch. Check the [Full Recipe] for more details. You now know how to make a delicious peach rice pudding. We covered the key ingredients, step-by-step cooking instructions, and helpful tips. You learned about variations and how to store leftovers. Remember, the right peaches and cooking time are key for the perfect dish. Enjoy your creamy treat with fresh garnishes. This pudding is easy to make and fun to share. Get creative with flavors and toppings. Whether warm or chilled, this dessert is sure to please everyone. Happy cooking!](https://greenmealmap.com/wp-content/uploads/2025/06/fd441798-97b6-493c-b3c7-dd22d696b2b6.webp)
Craving a sweet, creamy treat? Peach Rice Pudding is your answer! With plump peaches, rich milk, and a touch of
 for more details on how to combine these ingredients. Each element works together to make muffins tasty and fun! 1. Preheating the oven and preparing the muffin tin First, preheat your oven to 350°F (175°C). This warms the oven for even baking. Next, get a 12-cup muffin tin. Line it with paper liners or spray it with non-stick spray. This helps the muffins release easily after baking. 2. Combining zucchini and apple In a large bowl, combine 1 cup of grated zucchini and 1 cup of grated apple. Make sure to squeeze the zucchini dry before adding it. This step keeps the muffins from getting soggy. Set this mixture aside to let the flavors blend. 3. Mixing dry and wet ingredients In another bowl, whisk together the dry ingredients. You’ll need 1 cup of all-purpose flour, 1/2 cup of whole wheat flour, 1/2 cup of brown sugar, 1/4 cup of granulated sugar, 1 tsp of baking soda, 1/2 tsp of baking powder, 1/2 tsp of cinnamon, 1/4 tsp of nutmeg, and 1/4 tsp of salt. In a separate bowl, beat 2 large eggs. Add 1/3 cup of vegetable oil and 1 tsp of vanilla extract. Mix until smooth. Now, pour the wet mixture into the dry ingredients. Stir gently until just combined. Avoid over-mixing. This keeps the muffins light and fluffy. 4. Filling the muffin tin and baking time Now, fold in your zucchini and apple mixture. If you like, add 1/2 cup of chopped walnuts and 1/4 cup of raisins for extra flavor. Spoon the batter into the prepared muffin tin, filling each cup about 2/3 full. Bake for 15 to 20 minutes. Keep an eye on them as they bake. 5. Testing for doneness To check if the muffins are done, insert a toothpick into the center of one muffin. If it comes out clean, they are ready. If it has batter on it, bake for another few minutes. 6. Cooling the muffins Once baked, let the muffins cool in the tin for about 5 minutes. Then, transfer them to a wire rack to cool completely. This step allows the muffins to set and keeps them from getting soggy. For the full recipe, check out the details above. To ensure your muffins are fluffy, focus on mixing gently. Over-mixing can create tough muffins. Combine dry and wet ingredients until just mixed. This keeps air in the batter, leading to a light texture. Common mistakes to avoid include not squeezing the zucchini dry. Excess moisture can make your muffins soggy. Also, don’t skip the baking powder or baking soda. These ingredients help your muffins rise. For best storage methods, let the muffins cool completely. Then store them in an airtight container. This keeps them fresh for up to three days at room temperature. You can also refrigerate them to extend freshness. If you want sugar alternatives, consider using maple syrup or honey. These natural sweeteners can add a unique flavor. For gluten-free options, try almond flour or a gluten-free baking mix. Adding additional mix-ins can enhance your muffins. Consider dark chocolate chips, chopped dried fruit, or seeds. These can add flavor and texture. Just be sure not to overfill the batter. Check out the Full Recipe for more details! {{image_2}} You can make zucchini apple muffins even more fun! Try adding different spices. A pinch of ginger or cloves can bring warmth. You can also add vanilla or almond extract for a sweet touch. Switch up the nuts too! Walnuts add crunch, but pecans or almonds work well too. Feel adventurous? Try adding dried fruits like cranberries or apricots for extra flavor. You can even use fresh berries if you prefer a fruity twist. For a savory muffin, consider adding cheese or herbs. Shredded cheese adds richness. Herbs like rosemary or thyme can give a nice savory touch. This makes your muffins unique and interesting. If you need a vegan version, there are easy swaps. Use flaxseed meal mixed with water instead of eggs. This mix binds well. For dairy, substitute yogurt or milk with almond or soy milk. Both work perfectly in this recipe. Want to cut sugar? You can use mashed bananas or applesauce instead of sugar. These natural sweeteners keep muffins moist. They also add a hint of flavor. You can even try using a sugar substitute if you prefer. No matter how you twist it, these variations let you enjoy zucchini apple muffins your way! For the full recipe, check out the [Full Recipe]. To store your zucchini apple muffins, first let them cool down. Place them in an airtight container. This helps keep them fresh. You can keep them at room temperature for up to three days. If you want them to last longer, refrigerate them. Just remember, refrigeration can change the texture a bit. If you want to store muffins for a long time, freezing is a great option. Wrap each muffin tightly in plastic wrap. Then, place them in a freezer bag. Make sure to remove as much air as possible. They can last up to three months in the freezer. When you're ready to eat one, just take it out and let it thaw. To reheat your muffins, the best method is using the oven. Preheat your oven to 350°F (175°C). Place the muffins on a baking sheet and heat for about 5 to 8 minutes. This keeps them warm and fresh. You can also use a microwave. Just heat for 10 to 15 seconds. This method is quicker but may not keep the texture as nice. For serving leftover muffins, try spreading a little butter or cream cheese on top. You can also enjoy them plain. Pair them with a hot drink like tea or coffee for a cozy snack. If you want a fun twist, add a sprinkle of cinnamon sugar on top before serving. To make zucchini apple muffins healthy, you can use whole wheat flour instead of all-purpose flour. Whole wheat flour adds fiber and nutrients. You can also reduce the sugar by using less brown sugar or granulated sugar. Try adding more grated zucchini and apple for natural sweetness. You might also use applesauce instead of some oil, which cuts down on fat while keeping moisture. Yes, you can make these muffins ahead of time. They store well for a few days at room temperature. Just keep them in an airtight container. You can also freeze them if you want to save them for later. Wrap each muffin in plastic wrap, then place in a freezer bag. When you want one, just thaw it at room temperature or warm it in the microwave. The best way to shred zucchini and apple is to use a box grater or a food processor. For zucchini, cut off the ends and grate it with the skin on. Make sure to squeeze out excess moisture with a clean cloth or paper towel. For apple, peel it first, then grate it. This keeps the flavor bright and fresh without the bitterness of the skin. For the full recipe, check out the details above! In this post, we covered how to make tasty zucchini apple muffins. We discussed ingredients, preparation steps, and baking instructions. You learned tips for fluffy muffins and ingredient swaps. I shared variations, storage info, and answered common questions. In the end, you can enjoy fresh muffins that fit your diet. Baking can be fun and easy with the right guidance. Now, it's time for you to try this recipe and enjoy your delicious creations. Happy baking!](https://greenmealmap.com/wp-content/uploads/2025/06/368209a2-d6f1-4edb-9068-0493c97a7352.webp)
Welcome to my easy and tasty recipe for Zucchini Apple Muffins! These muffins are a perfect blend of sweet and

Craving a delicious snack that’s fun to make? You’re in the right place! This simple homemade soft pretzel recipe will
![- 1 lb boneless, skinless chicken thighs - 3 tablespoons olive oil - 2 teaspoons dried oregano - 2 garlic cloves, minced - Juice of 1 lemon - 1 teaspoon ground cumin - Salt and pepper to taste - 4 pita breads - 1 cup Greek yogurt - 1 cucumber, diced - 1 cup cherry tomatoes, halved - 1 small red onion, thinly sliced - Fresh parsley, chopped (for garnish) You need these fresh ingredients to make classic chicken gyros. The chicken thighs give a juicy base. Olive oil adds richness while oregano brings a lovely herb flavor. Garlic gives a punch, and lemon juice brightens everything up. The cumin adds a warm note that ties the dish together. For the toppings, Greek yogurt serves as a creamy sauce. Cucumbers keep it cool and crunchy. Cherry tomatoes add a sweet burst, and red onion gives a nice bite. Fresh parsley not only looks good but adds a fresh taste. Each serving of this meal is about 400 calories. It contains approximately: - Protein: 25g - Carbohydrates: 40g - Fats: 15g This information helps you understand what you eat. Chicken offers good protein, while pita gives you carbs for energy. - Grill or skillet - Mixing bowl - Knife & cutting board Using the right tools makes cooking easier. A grill adds a smoky flavor, while a skillet works well if you don’t have a grill. A mixing bowl helps you blend the marinade evenly, and a knife and cutting board make prep smooth. For the full recipe, make sure to check out the specific cooking steps. Enjoy your gyros night! Start by making a tasty marinade. In a bowl, mix together: - 3 tablespoons olive oil - 2 teaspoons dried oregano - 2 minced garlic cloves - Juice of 1 lemon - 1 teaspoon ground cumin - Salt and pepper to taste Once mixed, add 1 pound of boneless, skinless chicken thighs. Make sure each piece is well coated. Cover the bowl and refrigerate the chicken for at least 1 hour. For more flavor, marinate overnight. Before cooking, preheat your grill or skillet to medium-high heat. Remove the chicken from the marinade. Cook each thigh for about 6-7 minutes per side. You want them golden brown and fully cooked. After cooking, let the chicken rest for 5 minutes. This helps keep it juicy. Slice the chicken into strips after it rests. While the chicken rests, make the tzatziki sauce. In a bowl, combine: - 1 cup Greek yogurt - 1 diced cucumber - A pinch of salt - A squeeze of lemon Mix well. Next, warm the 4 pita breads. You can do this on the grill or in a skillet for about 1-2 minutes on each side. This makes them soft and pliable. Now it’s time to put it all together. Take a pita and place the sliced chicken in the center. Add a generous spoonful of tzatziki sauce. Then, top with halved cherry tomatoes, thinly sliced red onion, and a sprinkle of chopped fresh parsley. Fold the pita over the filling and enjoy your delicious gyros. For the full recipe, check out the earlier section. To get the best grilled chicken, keep a few key things in mind. First, heat your grill to medium-high. This helps achieve nice grill marks and locks in moisture. Aim for about 400°F. To check for doneness, use a meat thermometer. Chicken should reach 165°F in the thickest part. If you don’t have a thermometer, cut into the chicken. The juices should run clear, not pink. Let your chicken rest for 5 minutes after cooking. This keeps it juicy and flavorful. Tzatziki is a key part of gyros. You can add fresh herbs like dill or mint for extra flavor. These herbs brighten up the sauce and add depth. If you want a creamier texture, try using full-fat yogurt. Greek yogurt is great, but you can also use plain yogurt. Each type brings a different touch to your tzatziki. You can even mix in some garlic for a bolder taste. Just remember to balance the flavors for the best result. When serving your chicken gyros, consider pairing them with sides. Greek salad is a classic. Its freshness complements the spices in the gyros. Crispy fries also work well, adding crunch to your meal. For garnishing, fresh parsley or feta cheese adds a nice touch. You can sprinkle these on top for color and taste. Feel free to experiment with different sides and toppings to find your perfect combination. {{image_2}} You can swap chicken for lamb or beef. Each meat brings its own taste. Lamb offers a rich flavor that pairs well with the spices. Beef gives a hearty bite, making it filling. For a vegetarian option, try grilled vegetables. Bell peppers, zucchini, and mushrooms work great. They absorb flavors well and add a nice texture. You don't have to stick with pita bread. Flatbreads also make a tasty base. If you're gluten-free, look for gluten-free pita. You can also make homemade pita bread. It’s simple and fun! Just mix flour, water, yeast, and salt. Cook them on a hot skillet for a fresh taste. Want to spice things up? Add smoked paprika or cayenne pepper. These spices give a warm kick to your gyros. You can also play with sauces. Try sriracha for heat or a garlic sauce for creaminess. These small changes can make a big difference in flavor. For the full recipe, check out the Classic Chicken Gyros section. To keep your chicken gyros fresh, refrigerate any leftovers right away. Place them in an airtight container. This helps keep the flavors intact. Leftovers can last in the fridge for about 3 to 4 days. It's best to eat them within this time frame for the best taste. If you want to save some gyros for later, freezing is a great option. Wrap the chicken tightly in plastic wrap or foil. You can also freeze the tzatziki sauce in a separate container. Frozen chicken can last for up to three months. When you're ready to eat, thaw it in the fridge overnight. Reheat the chicken in a skillet until it's hot throughout. For the tzatziki, just stir it well before serving. To make busy nights easier, prep your chicken and tzatziki in advance. Marinate the chicken a day before cooking. This adds more flavor and saves time. You can also make the tzatziki a day ahead, too. For quick meals, serve the chicken with pita and fresh veggies. You can even pack them for lunch! Check out the [Full Recipe] for more ideas on how to enjoy your gyros. To make Classic Chicken Gyros, follow these simple steps: 1. Prepare the Marinade: In a bowl, mix olive oil, oregano, garlic, lemon juice, cumin, salt, and pepper. This gives the chicken great flavor. 2. Marinate the Chicken: Coat the chicken thighs in the marinade. Cover and chill for at least one hour. For more flavor, marinate overnight. 3. Cook the Chicken: Heat your grill or skillet over medium-high heat. Cook the chicken for 6-7 minutes on each side until golden brown and fully cooked. 4. Rest and Slice: Let the chicken rest for five minutes. Then, slice it into strips. 5. Make Tzatziki Sauce: Mix Greek yogurt, diced cucumber, salt, and a squeeze of lemon. 6. Warm the Pita: Heat the pita bread for 1-2 minutes on each side. 7. Assemble the Gyros: Place sliced chicken in the pita. Add tzatziki, cherry tomatoes, red onion, and parsley. 8. Serve and Enjoy: Fold the pita and serve right away. Yes, you can use various meats for gyros. Here are some options: - Lamb: A classic choice, it adds rich flavor. - Beef: Use thinly sliced beef for a hearty version. - Pork: This works well with the same marinade. - Vegetarian: Try grilled vegetables or falafel for a meatless option. Each option can give a unique twist to your gyros! Pair your Chicken Gyros with these tasty sides: - Greek Salad: Fresh veggies and feta cheese complement the gyros. - Fries: Crispy fries add a satisfying crunch. - Rice Pilaf: A flavorful rice dish pairs well. - Chips and Dip: Serve with hummus or a yogurt dip for fun. These sides enhance your meal and bring balance to the flavors. Making tzatziki sauce is simple! Here’s what you need: - Ingredients: - 1 cup Greek yogurt - 1 cucumber, diced - Salt to taste - Juice of half a lemon Steps: 1. Combine: Mix Greek yogurt and diced cucumber in a bowl. 2. Season: Add salt and lemon juice. 3. Chill: Let it sit in the fridge for at least 30 minutes before serving. This sauce is cool and creamy, perfect for gyros! Chicken Gyros has Greek roots. The word "gyros" means "turn" in Greek. It refers to how meat cooks on a vertical spit. Traditionally, it uses pork or lamb. However, chicken became popular for its leaner taste. Gyros has cultural significance, often served at festivals or family gatherings. It represents the heart of Greek street food, loved by many around the world. You now have the tools to make delicious Chicken Gyros at home. Start with quality ingredients like chicken thighs and fresh veggies. Follow the simple steps for marinating, cooking, and assembling your gyros. Remember, you can customize them with different proteins and toppings. Whether you're meal prepping or serving at a gathering, these gyros please everyone. Enjoy the flavors and the fun of cooking this classic dish!](https://greenmealmap.com/wp-content/uploads/2025/06/b58bc1f1-f5a8-4df6-a1f0-f6953f96742c.webp)
Craving a delicious meal that’s both easy and flavorful? Let me guide you through my Classic Chicken Gyros recipe. With
