Skip to content
DisclaimerTerms Of UseGDPR PolicyCookie Policy

greenmealmap

  • Home
  • Drinks
  • Appetizers
  • Dinner
  • Dessert
  • About
  • Contact
  • Privacy Policy
DisclaimerTerms Of UseGDPR PolicyCookie Policy

NO-ING-IMG

To make this easy taco soup, you need some key ingredients. Here is a list: - 1 pound ground turkey or beef - 1 can (15 oz) black beans, rinsed and drained - 1 can (15 oz) kidney beans, rinsed and drained - 1 can (15 oz) corn, drained - 1 can (14.5 oz) diced tomatoes with green chilies - 1 packet taco seasoning - 1 medium onion, chopped - 2 cloves garlic, minced - 4 cups chicken or vegetable broth - 1 tablespoon olive oil - Salt and pepper to taste These ingredients create a hearty base for your soup. The ground meat gives it protein. The beans add fiber and texture. The diced tomatoes with green chilies bring a nice kick. Toppings can take your taco soup to the next level. Here are some great options: - Shredded cheese - Sour cream - Sliced jalapeños - Fresh cilantro - Lime wedges Adding these toppings makes each bowl fun and tasty. You can mix and match based on your taste. A squeeze of lime can brighten up the flavors. You can customize the soup to fit your needs. Here are some substitutes: - Use ground chicken or plant-based meat for a lighter option. - Swap black beans for pinto beans or lentils for variety. - Use vegetable broth for a vegan version. These swaps keep the soup delicious while catering to different diets. You can enjoy all the flavors without missing out. For the full recipe, check below. To start, gather all your ingredients. You will need: - 1 pound ground turkey or beef - 1 can (15 oz) black beans, rinsed and drained - 1 can (15 oz) kidney beans, rinsed and drained - 1 can (15 oz) corn, drained - 1 can (14.5 oz) diced tomatoes with green chilies - 1 packet taco seasoning - 1 medium onion, chopped - 2 cloves garlic, minced - 4 cups chicken or vegetable broth - 1 tablespoon olive oil - Salt and pepper to taste - Optional toppings: shredded cheese, sour cream, sliced jalapeños, fresh cilantro, lime wedges Chop the onion and mince the garlic. Rinse and drain the beans and corn. This prep will make cooking easier. First, heat the olive oil in a large pot over medium heat. Add the chopped onion and minced garlic. Sauté until the onion looks clear, about 3 to 4 minutes. Then, add the ground turkey or beef. Cook until the meat turns brown. If you see extra fat, drain it out. Next, stir in the taco seasoning. Make sure the meat is covered well. Let it cook for 2 more minutes to blend the flavors. Now, pour in the chicken or vegetable broth. Add the black beans, kidney beans, corn, and diced tomatoes with green chilies. Bring everything to a boil. After it boils, reduce the heat to low. Let it simmer for 20 to 25 minutes. Stir it occasionally to keep it from sticking. Taste it and add salt and pepper if you want more flavor. Once your taco soup is ready, serve it hot. Set up a toppings bar with options like shredded cheese, sour cream, sliced jalapeños, fresh cilantro, and lime wedges. Let everyone build their own bowl. This way, each person can make it just how they like. Enjoy your meal! For more details, check the Full Recipe. To make your taco soup burst with flavor, start with fresh ingredients. Use ripe tomatoes and fresh herbs like cilantro. Sauté the onion and garlic until soft; this builds a strong base. Cook the meat well with the taco seasoning. This step helps release oils that enhance taste. Don’t rush the simmering process; let the flavors blend for at least 20 minutes. To cut prep time, use canned beans and corn. They save you from soaking and cooking dried beans. Chop the onion and garlic while your meat cooks. This multitasking helps speed things up. You can also use pre-chopped veggies from the store. This option saves even more time. Lastly, keep your ingredients organized and ready to go. For a creamy texture, blend a portion of the soup before serving. You can also add a splash of cream or sour cream for richness. If you prefer a thicker soup, let it simmer longer to reduce the liquid. Adjust the number of beans based on your desired texture. More beans make it heartier, while fewer keep it lighter. For the full recipe, check out the [Full Recipe]. {{image_2}} You can make a tasty vegetarian taco soup. Start with the same base. Replace the meat with extra beans or lentils. Black beans and kidney beans add texture and protein. You can also use diced zucchini or bell pepper for more veggies. Instead of chicken broth, use vegetable broth to keep it plant-based. Add your favorite spices to boost the flavor. If you like heat, make a spicy taco soup. Use spicy taco seasoning instead of the regular kind. You can add diced jalapeños or a few dashes of hot sauce. For more depth, toss in some chipotle peppers. These give a smoky flavor and extra spice. Adjust the heat to your liking, so everyone enjoys it. To make taco soup kid-friendly, keep it mild. Use the regular taco seasoning and skip the spicy peppers. You can add sweet corn and diced carrots for sweetness. Serve it with fun toppings like cheese and tortilla chips. Kids love to add their own toppings. This makes them feel involved and excited about their meal. For the full recipe, check out the ingredients and instructions provided above! To keep taco soup fresh, store it in an airtight container. Let it cool before sealing. Place it in the fridge within two hours of cooking. This helps prevent bacteria growth. Taco soup stays good for about three to four days. When reheating, use a pot on the stove for best results. Heat over medium-low heat, stirring often. This helps keep the soup creamy and flavorful. You can also use a microwave. Heat in short bursts, stirring in between. Make sure it's hot all the way through. If you want to save taco soup for later, freezing is a great option. Pour cooled soup into a freezer-safe container. Leave some space at the top for expansion. Seal it tightly and label with the date. Taco soup can last up to three months in the freezer. When ready to eat, thaw it in the fridge overnight before reheating. For the full recipe, check out the cooking steps above. Easy Taco Soup lasts about 3 to 4 days in the fridge. Make sure to store it in a sealed container. This keeps it fresh and safe to eat. When you reheat it, check for any signs of spoilage. If it smells off or looks strange, it's best to toss it. Yes, you can make Easy Taco Soup in a slow cooker! Start by browning the meat in a pan. Then, add all ingredients to your slow cooker. Set it on low for 6 to 8 hours or high for 3 to 4 hours. This method makes the flavors blend well. You can enjoy a warm bowl of soup with little effort. To boost the protein in Taco Soup, try adding cooked chicken or turkey. You can also use beans like pinto or black beans. If you want, add some cooked quinoa or lentils. These options keep the meal healthy and filling. Feel free to get creative with your protein choices! In this blog post, we explored how to make easy taco soup. We covered key ingredients, steps for cooking, and tips to boost flavor. You learned about variations for different diets and how to store leftovers. This recipe makes cooking simple and fun. Enjoy using your creativity with toppings and spices. Taco soup is not just a meal; it’s an experience. Try it, and you’ll appreciate how it satisfies your taste buds. Happy cooking!

Easy Taco Soup Flavorful and Quick to Make

Are you craving a quick and tasty meal? This Easy Taco Soup is your answer! Packed with bold flavors and

- 6 ripe peaches for optimal sweetness - 1 tablespoon lemon juice for brightness Using ripe peaches is key. They should feel soft but not mushy. The lemon juice adds a nice zing. It helps to brighten the flavors and keeps the peaches fresh. - 1 cup rolled oats for texture - 1/2 cup all-purpose flour for structure - 1/2 cup brown sugar for sweetness - 1/4 cup granulated sugar for balance - Spices: 1 teaspoon cinnamon, 1/2 teaspoon nutmeg, 1/4 teaspoon salt Rolled oats give a lovely crunch. The flour helps hold everything together. Brown sugar brings rich sweetness, while granulated sugar balances it out. Cinnamon and nutmeg add warmth to the dish. The salt enhances all the flavors. - 1/2 cup unsalted butter for richness - 1/2 cup chopped walnuts (optional) for crunch Melted butter makes the topping rich and helps it crisp up. If you like nuts, walnuts add a nice crunch and flavor. You can leave them out if you prefer a nut-free option. For the full recipe, check out [Full Recipe]. 1. Preheat your oven to 350°F (175°C). This is key for even baking. 2. In a large bowl, toss the sliced peaches with the lemon juice. The juice brightens the flavor and keeps the peaches fresh. 1. In another large bowl, combine the rolled oats, all-purpose flour, brown sugar, granulated sugar, cinnamon, nutmeg, and salt. Stir well to mix everything. 2. Pour the melted butter into the dry mixture. Stir until it becomes crumbly. If you like, add the chopped walnuts for extra crunch. 1. Grease a 9-inch square baking dish. Layer the sliced peaches evenly across the bottom. 2. Sprinkle the crisp topping generously over the peaches, covering them completely. 3. Bake in the preheated oven for 30-35 minutes. Look for a golden brown top and bubbly peaches. This simple process leads to a delightful peach crisp. Enjoy the warm aroma as it bakes! Check out the Full Recipe for more details. To make a great peach crisp, start with ripe peaches. Look for peaches that are soft to the touch and fragrant. These will give you the best flavor. If peaches are hard, they might not taste sweet. You can also let them ripen for a few days at room temperature. Next, adjust the sugar levels to match the sweetness of your peaches. If your peaches are very sweet, use less sugar. For peaches that are not as sweet, add a bit more sugar. This balance makes a big difference in taste. The best way to serve classic peach crisp is warm from the oven. A scoop of vanilla ice cream on top adds a creamy touch. If you want to be fancy, drizzle caramel sauce over it. This makes the dessert even richer and more delightful. You can also serve it with whipped cream. The fluffy cream balances the warm, sweet peaches. It’s a simple yet tasty way to enjoy your crisp. For an easy bake, you need a few essential kitchen tools. A sharp knife helps you slice the peaches quickly. A large mixing bowl is great for combining your ingredients. You'll also want a good measuring cup for accuracy. A high-quality baking dish is very important. It ensures even cooking and helps the crisp turn golden brown. A 9-inch square dish works perfectly for this recipe. Investing in good tools makes the cooking process smoother and more enjoyable. For the full recipe, check out the Peachy Paradise Crisp! {{image_2}} You can use different fruits in your crisp. Apples, strawberries, and blueberries make great choices. Each fruit adds its own taste. Mixing fruits can create unique flavors. For example, combine peaches with berries for a sweet-tart treat. This gives your crisp a fresh twist! You can make this recipe fit special diets. For a gluten-free option, use almond flour or oat flour instead of all-purpose flour. You can also make it vegan. Replace the butter with coconut oil or vegan butter. Use maple syrup or coconut sugar instead of regular sugar. These swaps keep the flavor while meeting your needs. Want to spice things up? Add ginger or cardamom for warmth. These spices enhance the sweetness of the peaches. You can also try adding extracts like vanilla or almond. A splash of vanilla can make your crisp even more fragrant and delicious. These little changes can make a big difference in taste. For the full recipe, check out Peachy Paradise Crisp. To keep your peach crisp fresh, store it in an airtight container. This will help prevent it from drying out. You can keep it at room temperature for up to two days. If you want to store it longer, place it in the fridge. The crisp will last in the fridge for about five days. When reheating your peach crisp, you want to restore its crispiness. Preheat your oven to 350°F (175°C). Place the crisp in an oven-safe dish. Cover it loosely with foil to prevent burning. Heat for about 10-15 minutes. This will help keep the topping crunchy. Avoid using the microwave, as it can make the crisp soggy. You can freeze peach crisp before or after baking. To freeze before baking, assemble the crisp but do not bake it. Wrap it tightly in plastic wrap and then foil. It can stay in the freezer for up to three months. If you freeze it after baking, let it cool first. Then, store it in a similar way. When you are ready to bake a frozen crisp, thaw it in the fridge overnight. For reheating, place it in a preheated oven at 350°F (175°C) for about 30 minutes. This will ensure it warms through evenly. Enjoy your peach crisp straight from the oven! [Full Recipe] What to do if peaches are not ripe? If your peaches are not ripe, you can still use them. Place them in a paper bag at room temperature. This will help them ripen faster. Check them daily, and once they feel soft, they are ready to use. You can also cook them a bit longer in the oven to soften them up. Can I use frozen peaches for this recipe? Yes, you can use frozen peaches! Just thaw them first and drain any excess liquid. This helps to keep your crisp from becoming too soggy. Frozen peaches can be just as tasty as fresh ones, especially when they are in season. What is the best way to peel peaches? The best way to peel peaches is to blanch them. Boil water and drop the peaches in for about 30 seconds. Then, move them to an ice bath. The skins will slip off easily. This method saves time and keeps the fruit intact for your crisp. Can I substitute brown sugar with other sugars? You can substitute brown sugar with granulated sugar or coconut sugar. However, brown sugar gives a deeper flavor. If you want the same taste, mix granulated sugar with a bit of molasses. This will mimic the rich taste of brown sugar. Is this dessert healthy? Peach crisp can be a healthier dessert option. Peaches are high in vitamins and fiber. The oats add whole grains, too. To make it even better, serve it with yogurt instead of ice cream. This adds protein and cuts down on added sugars. How can I reduce the sugar content without compromising taste? You can reduce the sugar by using less granulated and brown sugar. Try using mashed bananas or unsweetened applesauce instead. These will add sweetness without adding too much sugar. Adjust the spices to enhance the flavor without the extra sugar. In this blog post, we explored how to make a delicious peach crisp. We discussed the right fresh and dry ingredients, preparation steps, and baking tips. You learned how to achieve the perfect crisp, serve it well, and even modify the recipe. Keep these ideas in mind: fresh peaches and the right tools make all the difference. Enjoy the process and feel free to experiment with flavors. Your kitchen will smell amazing, and you’ll create a treat everyone loves. Happy baking!

Classic Peach Crisp Delightful and Easy Dessert Recipe

Are you ready to whip up a dessert that brings joy and comfort? Classic Peach Crisp is the recipe you

- 1 lb ground beef or turkey - 1 medium onion, chopped - 2 cloves garlic, minced - 1 bell pepper, diced (any color) - 2 cups beef broth - 1 can (14.5 oz) diced tomatoes (with juices) - 2 cups elbow macaroni - 2 tablespoons tomato paste The main ingredients create a rich base for your goulash. Ground beef or turkey gives the dish its heartiness. The onion and garlic add depth and flavor. Bell pepper brings a sweet crunch. - 2 teaspoons paprika - 1 teaspoon dried oregano - 1 teaspoon dried basil - Salt and pepper to taste Spices transform your dish into something special. Paprika adds warmth and a hint of sweetness. Oregano and basil introduce an earthy element. Adjust salt and pepper to suit your taste. - 1 cup shredded cheddar cheese - Fresh parsley for garnish Optional add-ins can elevate your meal. Cheese makes it creamy and rich, while parsley adds a fresh touch. You can mix and match flavors to your liking. For the full recipe, check out the detailed instructions! First, you need to brown the ground beef or turkey. Use a large pot or Dutch oven for this. Heat it over medium heat. Add the meat and break it apart with a spoon. Cook it for 5 to 7 minutes until it's no longer pink. Drain any excess fat if necessary. This step gives your goulash a rich flavor. Next, it's time to add the vegetables. Toss in the chopped onion and minced garlic. Sauté them for 2 to 3 minutes. You want the onion to look translucent. Then, add the diced bell pepper and cook for another 2 minutes. This softens the pepper and adds sweetness to your dish. Now, let's mix in the other ingredients. Pour in the beef broth and the can of diced tomatoes, including their juices. Then add the elbow macaroni, tomato paste, paprika, oregano, basil, salt, and pepper. Stir everything well to combine. This mixture creates a hearty base for your goulash. Cover the pot and bring the mixture to a boil. After that, reduce the heat to low. Let it simmer for 15 to 20 minutes. Stir occasionally to prevent sticking. You want the pasta to cook al dente, which means it should be tender but still firm. This adds the right texture to your goulash. Finally, stir in the shredded cheddar cheese if you want it extra creamy. Mix until the cheese melts and blends well. Taste your goulash and adjust the seasoning if necessary. This is where you make it just right for your taste buds. Enjoy this easy one pot goulash! You can find the Full Recipe for more detailed steps. To ensure your pasta doesn’t overcook, keep an eye on the time. Elbow macaroni cooks quickly. I recommend stirring it every few minutes as it simmers. This helps it cook evenly. Check for doneness after about 15 minutes. The pasta should be firm but tender. You can boost the flavor of your goulash with extra spices. Consider adding a pinch of cayenne for heat. A splash of Worcestershire sauce can add depth. You might also try a teaspoon of Italian seasoning for a twist. Fresh herbs like thyme or rosemary can also brighten the dish. Don’t forget to taste as you go! Goulash pairs well with simple sides. A fresh green salad works perfectly to balance the richness. You can also serve it with crusty bread to soak up the sauce. For a fun twist, offer some garlic bread on the side. Top your goulash with fresh parsley for a pop of color and taste. Enjoy your meal! {{image_2}} You can switch up the protein in this goulash. Ground chicken is a great choice. It gives a lighter flavor. You can also try plant-based options. Crumbled tofu or lentils work well. They add protein without meat. These swaps keep the dish tasty and satisfying. Adding more veggies makes this dish even better. Zucchini is a fun choice. It cooks quickly and adds great texture. Corn also brings sweetness and color. You can toss in spinach for some greens. Don't be shy about using what you have. Extra veggies make it colorful and healthy. If you're looking for a lighter meal, reduce the sodium. Use low-sodium beef broth instead. Whole grain pasta is another smart swap. It adds fiber and nutrients. You can also skip the cheese if you'd like. These small changes keep the dish delicious and healthy. For the full recipe, check out the earlier section. To store leftovers in the fridge, let the goulash cool. Use an airtight container. This keeps it fresh. You can keep it in the fridge for up to three days. When you’re ready to eat, just take it out and reheat. Freezing goulash is easy. First, let it cool completely. Then, place it in a freezer-safe container. Leave some space at the top for expansion. You can freeze it for up to three months. When you want to enjoy it again, just thaw it in the fridge overnight. To reheat goulash, use a pot on low heat. Stir it often to prevent sticking. You can also use a microwave. Heat in short bursts, stirring in between. This helps keep the texture nice. If it seems dry, add a splash of broth or water. Enjoy your goulash just like when it was fresh! Yes, you can prepare this dish in advance. Cook the goulash and let it cool. Store it in an airtight container in the fridge. It will stay fresh for up to three days. When ready to eat, reheat it on the stove or in the microwave. This makes it great for busy weeknights. If you do not have elbow macaroni, try other pasta types. Penne, fusilli, or shells work well. Choose any pasta you like. Just make sure to adjust the cooking time based on the pasta type. To make this recipe vegetarian, swap the ground beef or turkey for plant-based meat. You can also use lentils or mushrooms for a hearty texture. Use vegetable broth instead of beef broth. This keeps all the rich flavors while being meat-free. The total cooking time is around 30 minutes. You need 10 minutes to prep the ingredients. Then, cook everything for about 20 minutes. This quick time makes it perfect for a weeknight meal. Absolutely! You can add more vegetables to boost nutrition. Try diced zucchini, corn, or carrots. Spinach is a great addition too. Just add them when you mix in the broth and tomatoes. This way, they cook well and blend with the flavors. In this article, we explored how to make goulash, focusing on key ingredients and steps. We discussed main ingredients like ground beef, onions, and elbow macaroni. Plus, we shared tips for perfect texture and flavor. In conclusion, you can easily customize goulash to fit your taste. Try different proteins and add veggies for a healthier dish. With proper storage, you can enjoy leftovers too. Now, you have a simple guide to make this comforting meal anytime.

Easy One Pot Goulash Simple and Flavorful Recipe

Are you looking for a quick and tasty dinner? My Easy One Pot Goulash recipe is perfect for busy nights.

- 2 cups all-purpose flour - 1/4 cup granulated sugar - 1 packet (2 1/4 tsp) instant yeast - 1/2 teaspoon salt - 1/2 cup whole milk, warmed - 1/4 cup unsalted butter, melted - 1 large egg - 1 teaspoon vanilla extract - 1/2 cup brown sugar - 1/4 cup unsalted butter, softened - 1 cup pecans, chopped - 1 teaspoon cinnamon - 1/4 cup maple syrup When measuring flour, spoon it into the cup. Then level it off. Avoid packing it down. Use a liquid measuring cup for milk. Fill it to the desired line without spilling. For sticky ingredients like syrup, spray the measuring cup with cooking spray first. This helps them slide out easily. You can swap all-purpose flour for whole wheat flour. This gives a nutty flavor. If you want a dairy-free option, use almond milk instead of whole milk. Coconut oil can replace butter for a vegan twist. For nuts, try walnuts or hazelnuts if you don’t have pecans. Mixing Dry Ingredients First, gather your dry ingredients. In a large bowl, mix: - 2 cups all-purpose flour - 1/4 cup granulated sugar - 1 packet (2 1/4 tsp) instant yeast - 1/2 teaspoon salt This mix helps the dough rise and adds flavor. Make sure to combine well. Mixing Wet Ingredients In a separate bowl, whisk together: - 1/2 cup whole milk, warmed - 1/4 cup unsalted butter, melted - 1 large egg - 1 teaspoon vanilla extract Whisk until smooth. This adds richness to your sticky buns. Combining Ingredients Now, pour the wet mix into the dry mix. Stir until a soft dough forms. The dough should come together nicely. Next, knead the dough on a floured surface for about 5 minutes. Aim for a smooth and elastic texture. Place the dough in a greased bowl. Cover it with a damp cloth. Let it rise in a warm spot for about 1 hour. It should double in size. This step is vital for fluffy buns. While the dough rises, let's make the topping. In a saucepan, melt: - 1/4 cup unsalted butter - 1/2 cup brown sugar Do this over low heat. Stir until the sugar dissolves. Remove from heat and mix in: - 1/4 cup maple syrup - 1 cup pecans, chopped Pour this mixture into a greased 9-inch round cake pan. Spread it evenly. This topping will create a sweet, gooey layer for your sticky buns. For the full recipe, check the detailed instructions above. To make the best sticky buns, focus on the dough. Start with the right flour. All-purpose flour works great for a soft texture. Mix dry ingredients well before adding wet ones. This helps the yeast activate properly. When kneading, use a floured surface. Knead for about five minutes. The dough should feel smooth and elastic. If it seems sticky, sprinkle a little more flour. Baking is key to fluffy rolls. Preheat your oven to 350°F (175°C) first. Make sure the dough rises enough before baking. It should double in size. For even baking, space the rolls apart in the pan. This allows heat to circulate. Bake until golden brown, about 25 to 30 minutes. Keep an eye on them to avoid burning. - Serving Suggestions Serve the sticky buns warm. This will enhance their gooey texture. Drizzle any leftover caramel pecan mixture on top. It adds flavor and looks great. - Garnishing Ideas Garnish with extra chopped pecans for crunch. A light dusting of powdered sugar adds elegance. You can even serve with a side of whipped cream. This makes each bite feel special. For the complete experience, check the Full Recipe for Caramel Pecan Sticky Buns. {{image_2}} If you want to mix things up, try using different nuts. Walnuts work well in this recipe. They add a nice crunch and a warm flavor. Almonds are another great choice. They give a sweet, nutty taste that pairs nicely with caramel. Just make sure to chop them up like you would with pecans. This way, every bite is full of yummy goodness. Consider adding dried fruits to your sticky buns. Raisins or cranberries can boost flavor and sweetness. If you want a tropical twist, go for dried pineapple or mango. Just sprinkle them on the dough before you roll it up. The fruit will plump up while baking, adding a burst of flavor. You can also try different glazes to top your sticky buns. A cream cheese glaze adds a rich, tangy taste. A simple glaze made from powdered sugar and milk will sweeten the deal. Drizzle it over the buns once they cool a bit. This adds a nice touch and makes them even more delightful. For those who need gluten-free options, you can still enjoy these sticky buns. Use a gluten-free all-purpose flour blend instead of regular flour. Make sure it contains xanthan gum for better texture. The rest of the recipe stays the same. You’ll create a tasty treat that everyone can enjoy. For the complete recipe, check the Full Recipe section. To store leftover sticky buns, place them in an airtight container. This keeps them fresh. You can also wrap them tightly in plastic wrap. Make sure to cool them to room temperature first. Storing them this way helps keep their soft texture. You can freeze sticky buns for later. Wrap each bun in plastic wrap, then place them in a freezer bag. Label the bag with the date. To reheat, thaw them in the fridge overnight. Then, warm them in the oven at 350°F (175°C) for about 10-15 minutes. This brings back their gooey goodness. When stored properly, sticky buns last about 3 days at room temperature. If you put them in the fridge, they can last up to a week. Freezing extends their life to about 3 months. Enjoy your delicious treats anytime! Caramel Pecan Sticky Buns stay fresh for about 2 to 3 days at room temperature. Store them in an airtight container to keep them soft. You can also put them in the fridge for up to a week. Just remember, refrigeration can change the texture a bit. Yes, you can prepare the dough the night before. After mixing, cover it and let it rise in the fridge. The next morning, take it out, let it warm up, and shape it. This way, you save time and still have fresh buns. To reheat sticky buns, place them in a microwave for about 10 to 15 seconds. This warms them up nicely without drying them out. If you want a crispy edge, pop them in the oven at 350°F (175°C) for about 5 to 10 minutes. You can use active dry yeast, but you will need to activate it first. Mix it with warm milk and a bit of sugar. Let it sit for about 5 to 10 minutes until it bubbles. Then, mix it into your dough as you would with instant yeast. For the full recipe, check out the detailed steps and ingredients listed above. You will enjoy every bite of these sweet, sticky buns! You’ve learned the key ingredients and steps to make delicious Caramel Pecan Sticky Buns. From mixing the dough to perfecting the topping, each part matters for the best result. Remember to experiment with flavors and ways to store leftovers. These tips will make your baking easier and tastier. I hope you feel excited to create your own version of these sweet treats. Enjoy sharing them with friends and family!

Caramel Pecan Sticky Buns Irresistible Breakfast Treat

Waking up to the sweet smell of Caramel Pecan Sticky Buns is a dream come true. These warm, gooey treats

- Fresh broccoli florets - Cooked white or brown rice - Shredded sharp cheddar cheese - Cream of mushroom soup - Milk - Diced onion - Garlic powder - Black pepper - Salt - Crushed buttery crackers - Melted butter Choosing the right ingredients matters a lot. Fresh broccoli florets give the best taste. Look for bright green color and firm stems. They should feel crisp and not wilted. When it comes to the cream of mushroom soup, you can go homemade or store-bought. Homemade soup tastes richer, but store-bought is convenient. If you want to save time, grab a can. Just check the label for quality. If you need gluten-free options, crushed gluten-free crackers work well. For a lighter dish, use low-fat cheese or milk. Remember, the right ingredients make a big difference in flavor and texture. For the full recipe, check the previous section. It has all the detailed steps for making this tasty dish. 1. Preheat oven and blanch broccoli: First, set your oven to 350°F (175°C). Next, boil water in a large pot. Add 4 cups of fresh broccoli florets and blanch them for 3 minutes. Drain the broccoli and set it aside. 2. Mixing the casserole ingredients: In a mixing bowl, combine 1 cup of cream of mushroom soup with 1/2 cup of milk. Whisk until smooth. Add in 2 cups of cooked white or brown rice, 1 cup of shredded sharp cheddar cheese, 1/2 cup of diced onion, 1/2 teaspoon of garlic powder, 1/2 teaspoon of black pepper, and 1/4 teaspoon of salt. Stir everything until it is well mixed. 3. Incorporating the broccoli: Gently fold in the blanched broccoli florets into the cheese mixture. Make sure all the broccoli is coated well. 1. Transferring mixture to the baking dish: Grease a 9x13 inch baking dish. Pour the broccoli mixture into the dish, spreading it evenly. 2. Preparing the crumb topping: In a separate bowl, mix 1 cup of crushed buttery crackers with 2 tablespoons of melted butter. Stir until the crumbs are fully coated. 3. Baking time and temperature: Sprinkle the cracker topping over the broccoli mixture. Bake in the preheated oven for 25-30 minutes. It is ready when bubbly and golden brown. 1. How to serve and garnish: Let the casserole cool for a few minutes before serving. You can garnish with a sprinkle of fresh herbs if you like. 2. Ideal side dishes to pair with casserole: This cheesy broccoli casserole pairs well with a light salad or roasted chicken. Enjoy it as a comforting side dish or a main meal. For the full recipe, check out the detailed steps and tips to make this dish a success. To make your casserole perfect, follow these tips: - Ensuring even cooking: Cut your broccoli into uniform pieces. This helps them cook at the same rate. Blanching the broccoli before baking will also ensure it cooks evenly. - Achieving the best cheese melt: Use freshly shredded cheese. Packaged cheese often has anti-caking agents that can affect melting. Combine your cheese with the warm casserole mix for the best results. - Cooling tips before serving: Let the casserole sit for about five minutes after baking. This helps it set and makes serving easier. Sometimes, things don't go as planned. Here’s how to fix common problems: - Casserole too dry solutions: If your casserole is dry, add a splash of milk or broth before serving. This adds moisture and flavor. You can also cover it with foil while baking to keep moisture in. - Fixing overcooked vegetables: If your veggies are too soft, reduce the baking time next time. You want them tender but still with a little crunch. Want to make your casserole even tastier? Try these ideas: - Suggested herbs and spices to add: Fresh thyme or rosemary adds a nice touch. A pinch of red pepper flakes can also bring heat. - Alternative cheeses for different flavors: Swap cheddar for mozzarella or gouda for a unique taste. Each cheese can change the flavor profile of your casserole. For a full recipe, check out the Full Recipe section. {{image_2}} You can change the vegetables in your casserole. Broccoli works great, but cauliflower or carrots also taste good. These veggies add different textures and flavors. If you want a new base, try using quinoa or couscous. Both grains cook quickly and mix well with cheese. To make this dish vegan, use dairy-free cheese. Many brands offer tasty options that melt well. Instead of cream of mushroom soup, look for plant-based soups. These swaps keep the dish creamy and delicious without dairy. Add spices to give your casserole an international flair. For example, try adding cumin for a warm touch or chili powder for some heat. You can also include ingredients from different cultures. Think sun-dried tomatoes for a Mediterranean twist or black beans for a Latin flavor. These changes can make your casserole truly unique and exciting. For the full recipe, check out the detailed instructions above. To keep your cheesy broccoli casserole fresh, store it in an airtight container. Let it cool to room temperature before sealing it. This way, it won’t trap moisture. Place it in the fridge if you plan to eat it within a few days. For long-term storage, freezing is a great option. Just wrap the casserole tightly in plastic wrap and foil. This prevents freezer burn. Reheating is easy! For best results, use an oven. Preheat to 350°F (175°C). Place the casserole in a baking dish. Cover it with foil to keep it moist. Heat for about 20 minutes. If you need a quicker option, you can use the microwave. Heat in short bursts, stirring in between. This helps keep the texture nice. In the fridge, your casserole can last up to four days. If you freeze it, it can last for three months. Always check for signs of spoilage before eating. Look for changes in color or smell. If it seems off, throw it away. Enjoy your delicious dish! For the full recipe, check out Cheesy Broccoli Bliss Casserole. Can I prepare Cheesy Broccoli Casserole ahead of time? Yes, you can prepare this casserole ahead of time. Mix all the ingredients and store them in the fridge. Just bake it when you are ready to serve. This saves time and lets flavors blend well. What can I use instead of rice? If you want a change, you can use quinoa or couscous instead of rice. Both options work well and add a different taste. You can also try pasta for a fun twist. Is this recipe suitable for meal prep? Absolutely! This casserole is great for meal prep. You can make a big batch and portion it out for the week. It reheats well, making it a quick meal option. Caloric breakdown per serving One serving of Cheesy Broccoli Casserole has about 300 calories. This can vary based on the cheese and rice you use. It packs a good amount of flavor without too many calories. Nutritional benefits of broccoli and cheese Broccoli is full of vitamins C and K. It also has fiber, which is great for digestion. Cheese adds protein and calcium, helping your bones stay strong. Together, they make a tasty and healthy meal. Do I need to steam the broccoli first? You do not need to steam the broccoli. Blanching it in boiling water for three minutes is enough. This keeps the broccoli bright and tender but still crisp. Can I substitute different cooking methods (stovetop, slow cooker)? Yes, you can use a slow cooker for this dish. Just mix all the ingredients and cook on low for about 4 hours. If you prefer the stovetop, cook the mixture in a pot, then transfer to a baking dish to finish. For the full recipe, check out the Cheesy Broccoli Bliss Casserole above. In this post, we explored the ingredients and steps to make a Cheesy Broccoli Casserole. You learned about ingredient selection, baking techniques, and how to serve it right. I shared tips for troubleshooting common issues and enhancing the dish's flavor. No matter how you choose to make this casserole, it is a tasty meal that fits many diets. Your kitchen can be the place for delicious family meals. Enjoy experimenting with this recipe!

Cheesy Broccoli Casserole Easy and Flavorful Dish

Are you ready to whip up a delicious, Cheesy Broccoli Casserole that everyone will love? I’m sharing my easy recipe

To make roasted garlic mashed potatoes, you need just a few key items: - 2 pounds Yukon Gold potatoes, peeled and chopped - 1 whole head of garlic - ½ cup unsalted butter, room temperature - ¾ cup heavy cream - Salt to taste - Freshly cracked black pepper to taste These ingredients create a rich and creamy base. Yukon Gold potatoes give a buttery texture. The butter and cream add extra richness. Roasting the garlic brings out its sweet and mellow flavor. You can enhance your mashed potatoes even more with these optional items: - 2 tablespoons fresh chives, finely chopped - ¼ cup grated Parmesan cheese Chives add a fresh burst of flavor. Parmesan cheese gives a lovely umami note. You can mix and match based on your taste. If you want to change things up, here are some substitutes: - Swap Yukon Gold potatoes for Russet potatoes for a fluffier mash. - Use olive oil instead of butter for a lighter version. - Replace heavy cream with milk for a lower-fat option. These alternatives let you customize your dish while keeping it tasty. Feel free to experiment with flavors and textures. For the full recipe, check out the Garlic Lovers' Dream Mashed Potatoes. To start, preheat your oven to 400°F (200°C). Take a whole head of garlic and cut off the top. This lets the heat in. Drizzle some olive oil on the cut part. Wrap the garlic in aluminum foil. Place it in the oven for about 30-35 minutes. The garlic should be soft and golden brown when done. Let it cool a bit. Then, squeeze the cloves out of their skins into a small bowl. Mash them with a fork until smooth. This will add a rich flavor to your potatoes. While the garlic roasts, take 2 pounds of Yukon Gold potatoes. Peel and chop them into even pieces. Place the chopped potatoes in a large pot. Fill the pot with salted water and bring it to a boil. Cook the potatoes for about 15-20 minutes. They should be fork-tender when ready. Drain the potatoes well and return them to the pot to keep them warm. Now it's time to make your mashed potatoes creamy. Add ½ cup of room-temperature butter to the potatoes. Then, mix in the roasted garlic you prepared earlier. Pour in ¾ cup of heavy cream. Add salt and freshly cracked black pepper to taste. If you like, you can also mix in ¼ cup of grated Parmesan cheese for extra flavor. Use a potato masher to blend everything together until it's smooth and fluffy. Finally, fold in 2 tablespoons of finely chopped fresh chives for a burst of fresh flavor. Adjust the seasoning if needed. Serve your roasted garlic mashed potatoes warm and enjoy this rich and creamy delight. For the full recipe, check the details above. To get creamy and smooth mashed potatoes, use Yukon Gold potatoes. They have a great texture. After cooking, mash the potatoes while they are hot. This helps avoid lumps. Use a potato masher or a ricer for the best results. Adding butter and cream while mashing makes it rich and smooth. Mix until you reach your desired texture. You can prepare these mashed potatoes ahead of time. Cook and mash the potatoes as usual. After that, let them cool. Store them in an airtight container in the fridge for up to two days. When ready to serve, reheat gently on low heat. Add a splash of cream to keep them creamy. Stir well before serving. Having the right tools makes cooking easier. Here’s what I recommend for making roasted garlic mashed potatoes: - A large pot for boiling potatoes - A good potato masher or ricer - A roasting pan for the garlic - Aluminum foil for wrapping the garlic - A mixing bowl for combining the ingredients Using these tools will help you create perfect mashed potatoes every time. For the full recipe, check out the Garlic Lovers' Dream Mashed Potatoes. {{image_2}} You can easily make vegan roasted garlic mashed potatoes. Swap out the butter and cream. Use a plant-based butter and almond or soy milk instead. These changes keep the creamy texture while adding the rich garlic flavor. For gluten-free roasted garlic mashed potatoes, simply use the standard recipe. All the main ingredients are naturally gluten-free. Just ensure any added toppings, like cheese, are also gluten-free. This way, everyone can enjoy a tasty side dish. You can get creative with flavors! Add fresh herbs like rosemary or thyme for a fragrant twist. Mixing in different cheeses, like goat cheese or cheddar, can elevate the taste. Each addition gives a new layer of flavor to your mashed potatoes. Try these variations to find your favorite. For the full recipe, check out the Garlic Lovers' Dream Mashed Potatoes. To keep your roasted garlic mashed potatoes fresh, store them in an airtight container. Make sure the potatoes cool to room temperature first. Then, place them in the fridge. They will last for up to three days. Label the container with the date to remember when you made them. When you are ready to eat the leftovers, reheat them gently. Use a microwave-safe bowl and cover it with a damp paper towel to keep moisture in. Heat in short bursts, stirring in between, until warm. You can also reheat on the stove. Add a splash of heavy cream or milk to keep them creamy. Stir often to avoid sticking. If you want to store them longer, freezing is a great option. First, let the mashed potatoes cool completely. Then, place them in a freezer-safe container or bag. Leave some space for expansion. They can be frozen for up to two months. To thaw, place them in the fridge overnight before reheating. For the full recipe, check back for more delicious details! Yukon Gold potatoes are my favorite. They are creamy and buttery. Their natural sweetness shines through in every bite. Russet potatoes are also great, but they can be a bit dry. For the best flavor and texture, stick with Yukon Gold. Yes, you can use jarred roasted garlic. It saves time and still adds flavor. However, fresh garlic gives a brighter taste. If you want the best flavor, I suggest roasting your own garlic. It’s easy and makes a big difference. To reheat, place the mashed potatoes in a pot. Add a little milk or cream for moisture. Warm them on low heat and stir often. You can also use the microwave. Cover the dish to keep steam in. This keeps your potatoes creamy and delicious. These mashed potatoes go well with many dishes. They are perfect with roasted meats, like chicken or beef. Try them with grilled vegetables for a nice touch. They also make a great side for a rich sauce or gravy. For the complete recipe, check out the Garlic Lovers' Dream Mashed Potatoes. You’ll find all the steps and tips to create this rich and creamy delight. In this post, we explored how to make roasted garlic mashed potatoes. We looked at key ingredients and their substitutions. I shared step-by-step instructions, plus tips for the perfect texture. You learned how to make this dish vegan and gluten-free, too. These mashed potatoes are not just a side; they can elevate any meal. Enjoy experimenting with flavors and sharing them with your loved ones. With practice, you'll master this delicious comfort food.

Roasted Garlic Mashed Potatoes Rich and Creamy Delight

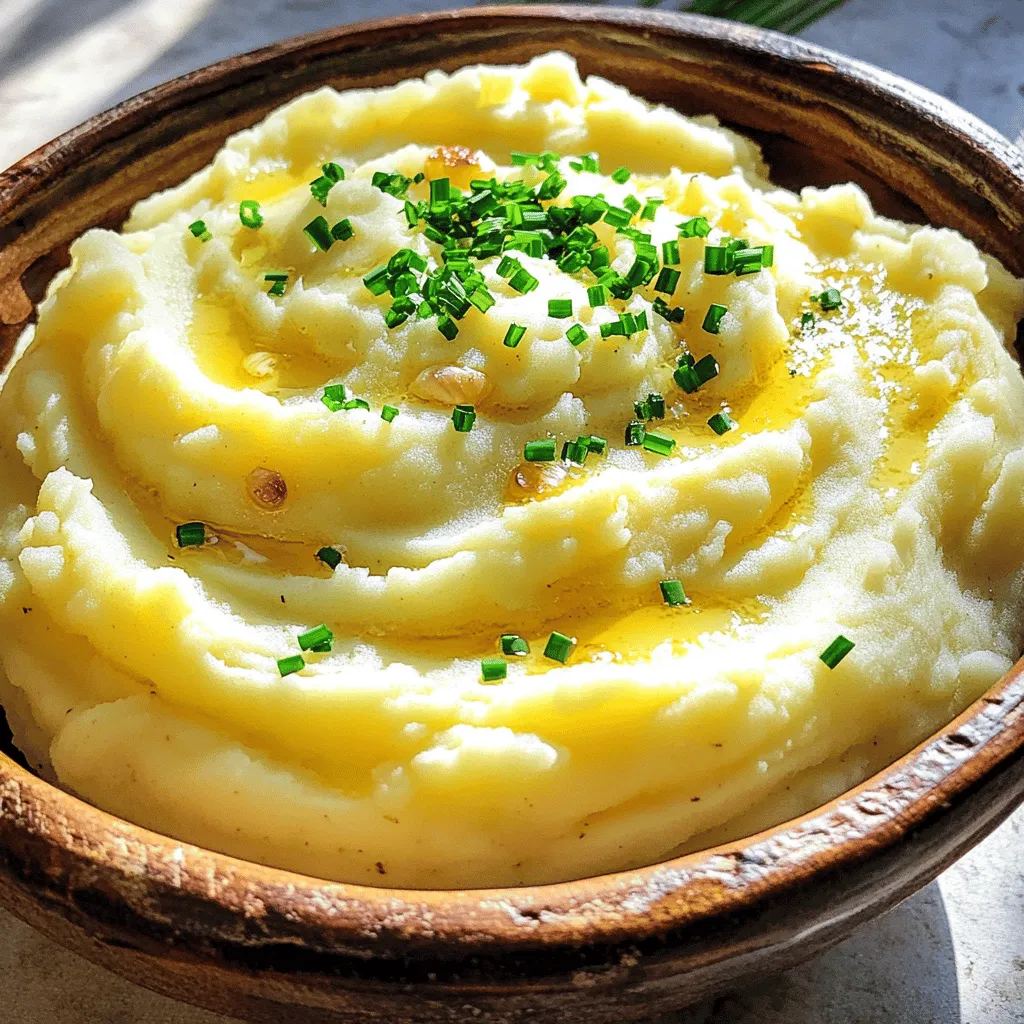
If you crave the ultimate comfort food, look no further! My Roasted Garlic Mashed Potatoes are rich and creamy, packed

- 1 ½ cups whole wheat flour - ½ cup all-purpose flour - ½ cup brown sugar, packed - 1 teaspoon baking powder - ½ teaspoon baking soda - ¼ teaspoon salt - ½ teaspoon cinnamon - ½ cup unsalted butter, softened - ¼ cup honey - 1 teaspoon vanilla extract - 3-4 tablespoons milk (as needed) Gathering the right ingredients is the first step to making perfect homemade graham crackers. Whole wheat flour gives them their signature taste and texture. All-purpose flour adds a lightness that balances well. Brown sugar adds sweetness and moisture. Baking powder and baking soda help the crackers rise slightly. Salt enhances all the flavors, while cinnamon adds warmth. Softened butter makes the dough rich and tender. Honey brings a natural sweetness and helps bind the dough. Lastly, vanilla extract adds depth to the flavor. - Mixing bowls - Rolling pin - Baking sheet - Parchment paper - Fork Having the right tools makes the process easy. You will need mixing bowls to combine your ingredients. A rolling pin helps flatten the dough to the right thickness. A baking sheet lined with parchment paper prevents sticking. Finally, a fork is essential for pricking the crackers before baking. With these ingredients and tools, you are all set to create your own homemade graham crackers. For the full recipe, check out the detailed instructions in the next section! - Step 1: Combine dry ingredients First, grab a large mixing bowl. In it, whisk together 1 ½ cups of whole wheat flour, ½ cup of all-purpose flour, ½ cup of packed brown sugar, 1 teaspoon of baking powder, ½ teaspoon of baking soda, ¼ teaspoon of salt, and ½ teaspoon of cinnamon. Mix these until they blend well. - Step 2: Cream the butter and wet ingredients In another bowl, cream ½ cup of softened unsalted butter. Add ¼ cup of honey and 1 teaspoon of vanilla extract. Mix these until the mixture is smooth and fluffy. This step is key for flavor. - Step 3: Forming the dough Gradually add the dry ingredients to the butter mixture. Mix until it becomes crumbly. Then add 3-4 tablespoons of milk, one tablespoon at a time. Keep mixing until the dough comes together but isn’t sticky. Divide the dough into two portions and wrap each in plastic. Refrigerate for at least 30 minutes. This helps the dough firm up. - Step 4: Rolling out the dough Once chilled, take one portion of dough from the fridge. On a floured surface, roll it out to about 1/8 inch thick. Make sure it’s even for best results. - Step 5: Cutting into shapes Use a knife or cookie cutter to cut the rolled dough into your desired shapes, like squares or rectangles. This is where you can get creative! - Step 6: Preparing for baking Place the cut crackers onto a baking sheet lined with parchment paper. Use a fork to prick them lightly. This step keeps them from puffing up while baking. - Step 7: Preheat the oven Preheat your oven to 350°F (175°C). This ensures even baking and helps develop a nice golden color. - Step 8: Bake and cool down Bake the crackers for 12-15 minutes. Look for edges that are golden and crackers that feel firm. Once done, let them cool on a wire rack. This step is crucial for getting that perfect crunch. - Using the right type of flour: Whole wheat flour gives your graham crackers a nutty taste. This flour also adds a nice chewiness. All-purpose flour balances it well, making the texture just right. The mix of both creates a perfect bite. - The importance of chilling the dough: Chilling the dough is key. This step makes it easier to roll out. It also helps the crackers hold their shape while baking. Aim for at least 30 minutes in the fridge. This small wait will pay off with great texture! - Adding spices: Want to spice things up? Try adding a pinch of nutmeg or ginger. These spices can add warmth and depth to your crackers. Just a sprinkle can transform the flavor! - Incorporating chocolate or nuts: For a decadent twist, fold in some chocolate chips or chopped nuts. Chocolate adds sweetness and richness, while nuts add crunch. These additions make your graham crackers even more special. - Not overworking the dough: Be careful when mixing. Overworking the dough can make your crackers tough. Mix just until combined for a light and crunchy result. - Correct oven temperature: Always preheat your oven to 350°F. An accurate temperature ensures even baking. If it’s too hot, your crackers may burn. If too cool, they won’t crisp up well. Keep an eye on them while they bake. {{image_2}} You can make healthy graham crackers too! For a gluten-free version, use almond flour or a gluten-free flour blend. This keeps the taste while catering to those with gluten issues. For sugar-free options, try using stevia or monk fruit sweetener. These alternatives keep your crackers sweet without the added sugar. Want to switch things up? Try chocolate graham crackers! Just mix in cocoa powder with the dry ingredients. You can also add chocolate chips for a double chocolate treat. Another fun flavor is cinnamon raisin. Add raisins and a bit more cinnamon to the dough for a flavorful twist. Graham crackers shine with s'mores. Just add roasted marshmallows and chocolate between two pieces. You can also use these crackers as a base for desserts. They make a great crust for cheesecakes or pie. Just crush them up and mix them with melted butter for a simple crust. For the full recipe, check out the original instructions above. To store your homemade graham crackers, use airtight containers. This keeps them fresh and crunchy. Make sure the crackers cool completely before sealing them. You can also freeze them for longer storage. Wrap them tightly in plastic wrap, then place them in a freezer bag. This helps prevent freezer burn. At room temperature, your homemade graham crackers last about a week. Keep them in a cool, dry place. If you freeze them, they can last for up to three months. Just remember to label your bags with the date. If your crackers become stale, you can bring back their crunch. Preheat your oven to 350°F (175°C). Place the stale crackers on a baking sheet. Bake them for about 5 minutes. Check them often to avoid burning. Let them cool before enjoying again. They should taste fresh and crisp! To make homemade graham crackers, follow these steps: 1. Combine dry ingredients: In a large bowl, mix whole wheat flour, all-purpose flour, brown sugar, baking powder, baking soda, salt, and cinnamon. 2. Cream the butter: In another bowl, beat softened butter, honey, and vanilla until smooth. 3. Mix together: Gradually add the dry mix to the butter mix until crumbly. 4. Form the dough: Add milk one tablespoon at a time until the dough is just right. 5. Chill the dough: Split it in two, wrap in plastic, and chill for 30 minutes. 6. Roll out the dough: On a floured surface, roll each part to 1/8 inch thick. 7. Cut shapes: Use a knife or cookie cutter to cut into squares or rectangles. 8. Bake: Place on a baking sheet, prick with a fork, and bake at 350°F for 12-15 minutes until golden. 9. Cool: Let them cool on a wire rack. For the full recipe, check the details provided above. Homemade graham crackers are great for many uses. They make a perfect snack on their own. You can also use them for: - S'mores: Pair them with chocolate and marshmallows over a campfire. - Dessert crusts: Crush them for cheesecake or pie crusts. - Toppings: Crumble over yogurt or ice cream for a nice crunch. - Sweet treats: Spread nut butter or cream cheese on top for a tasty bite. Yes, you can freeze homemade graham crackers. Here are some tips: - Cool completely: Allow them to cool before freezing. - Use airtight containers: Store them in a freezer-safe bag or container to keep them fresh. - Label and date: Write the date on the bag for easy tracking. - Freeze for up to three months: They stay good in the freezer for a while. Graham crackers have an interesting past. They were created in the early 19th century by Sylvester Graham, a dietary reformer. He believed in healthy eating and created these crackers as a wholesome snack. Made from whole wheat flour, they were part of a healthy diet. Today, they are enjoyed worldwide, often in desserts and snacks. In this post, we explored the journey of making homemade graham crackers. We covered ingredients, tools, and step-by-step instructions. We also discussed tips for perfect texture and flavor variations. Lastly, we outlined storage methods and answered common questions. Creating graham crackers at home is fun and rewarding. You can customize them to your taste. Enjoy experimenting with flavors and share your tasty treats! Happy baking!

Homemade Graham Crackers Easy and Delicious Recipe

Are you ready to create homemade graham crackers that are both simple and tasty? This easy recipe promises to delight

- 3 cups all-purpose flour - 2 ¼ teaspoons instant yeast - 1 teaspoon sugar - 1 teaspoon salt - 1 cup warm water - 4 tablespoons unsalted butter - 4 cloves garlic - Fresh herbs: parsley, rosemary, thyme - ½ teaspoon black pepper - Additional seasoning options for customization Gathering the right ingredients is key. For the main part, you need three cups of all-purpose flour. This flour gives the bread its lovely texture. You also need 2 ¼ teaspoons of instant yeast. This yeast helps the dough rise. Remember, one packet is about this amount. Add one teaspoon of sugar to feed the yeast. A teaspoon of salt is important for taste. Lastly, use one cup of warm water to activate the yeast. Warm water should be about 110°F. Now, let’s talk about flavor. You will want four tablespoons of unsalted butter. This makes the bread rich and tasty. Four cloves of garlic bring a strong and savory flavor. Fresh herbs, like parsley, rosemary, and thyme, add freshness. You can mix and match these herbs based on your taste. For seasoning, half a teaspoon of black pepper adds a nice kick. You can also get creative with other spices. Think about adding red pepper flakes or even some cheese for extra flavor. With these ingredients, you are set to make delicious Garlic Herb Pull Apart Bread. For the complete recipe, check the Full Recipe link. First, gather your ingredients. In a large mixing bowl, mix 1 cup of warm water, 1 teaspoon of sugar, and 2 ¼ teaspoons of instant yeast. Let it sit for about 5 minutes. You want it to get frothy. This means the yeast is ready to work! Next, add 3 cups of all-purpose flour, 1 teaspoon of salt, and 4 tablespoons of melted butter to the yeast mix. Stir until a dough begins to form. It will look a bit shaggy but that’s okay. Now, it’s time to knead! Transfer the dough to a floured surface. Knead it for about 5 to 7 minutes. You want the dough to be smooth and elastic. If it sticks to your hands, just sprinkle a bit more flour. After kneading, place the dough in a greased bowl. Cover it with a kitchen towel. Let it rise in a warm area for about 1 hour or until it doubles in size. This step is key for soft bread! Once the dough has risen, punch it down gently. Turn it out onto a floured surface. Divide the dough into 24 small balls. Each ball should be about the size of a golf ball. In a small bowl, mix 4 cloves of minced garlic, 2 tablespoons of chopped parsley, 1 tablespoon of chopped rosemary, 1 tablespoon of chopped thyme, and ½ teaspoon of black pepper. Add the remaining 2 tablespoons of melted butter to this mix. Now, dip each dough ball in the garlic herb mixture. Make sure each ball gets well-coated. Stack them in a greased bundt or loaf pan, layering them as you go. Cover the pan again with a towel and let it rise for another 30 minutes while you preheat the oven to 375°F (190°C). You’re almost there! Once the dough has risen, bake for 25 to 30 minutes until golden brown. Enjoy the warm, savory aroma filling your kitchen! - Achieving the perfect rise For a great rise, use warm water. The water should be about 110°F. It activates the yeast well. Make sure to let the dough rise in a warm, draft-free spot. Covering the bowl with a towel helps keep it warm. - Ensuring an even bake Preheat your oven to 375°F. This step is key for even baking. Use a dark pan for a lovely, golden color. If the top browns too fast, cover it loosely with foil. This keeps the bread soft while it finishes baking. - Best ways to present Garlic Herb Pull Apart Bread Serve the bread on a wooden board. This gives it a rustic look. You can place a small bowl of olive oil and balsamic vinegar next to it. This way, guests can dunk their pieces right in. - Suggested dips and accompaniments Try serving it with a garlic aioli or a creamy herb dip. These pair nicely with the bread's flavors. You can also add a light salad for a fresh contrast. - Dough that doesn't rise If your dough does not rise, the yeast might be old. Always check the expiration date. Also, make sure the water temperature is correct. Too hot can kill the yeast. - Overbaking tips To avoid overbaking, keep an eye on the bread. It should be golden brown. If you poke it, it should feel firm but springy. An instant-read thermometer can help too. The center should reach about 190°F. For more details on how to make this delicious Garlic Herb Pull Apart Bread, check out the Full Recipe! {{image_2}} You can make this bread even tastier with a few simple changes. Adding cheese can create a rich flavor. Mozzarella or cheddar works well. You can also try mixing in different herbs. Basil, oregano, or thyme can add new tastes. Another fun option is to add sun-dried tomatoes. They bring a sweet and tangy flavor. Just chop them up and mix them in with your garlic herb blend. You can really get creative here and use what you love! If you need gluten-free bread, you can use a gluten-free flour mix. Look for a blend that works for baking. It will help you get the right texture. Make sure to add a bit of extra yeast for a good rise. For a vegan option, swap out the butter for coconut oil or a plant-based butter. This keeps the bread moist and adds flavor. You can also use almond milk instead of regular milk if you want a richer taste. This pull apart bread is so versatile! You can use it to make sandwiches. Just pull apart the pieces and fill them with your favorite meats or veggies. It also makes a great side for any meal. Serve it with soups or salads. Dip it in olive oil or balsamic vinegar for a tasty twist. This bread is not just a treat; it can be part of your meal! For the full recipe, visit the [Full Recipe]. To keep your garlic herb pull apart bread fresh, store it properly. Wrap the leftover bread in plastic wrap or foil. This helps keep moisture in and prevents it from getting stale. You can also place it in an airtight container. If you want to keep it longer, put it in the fridge. Just remember that cold air can dry it out. So, wrap it well to keep its soft texture. When you're ready to enjoy your bread again, reheating is key. For the best texture, use the oven. Preheat it to 350°F (175°C). Place the bread on a baking sheet and cover it with foil. Heat for about 10-15 minutes. This keeps it warm and crusty. You can use the microwave, too, but be careful. It can make the bread chewy if you heat it too long. Heat it in short bursts of 15 seconds until warm. At room temperature, your garlic herb pull apart bread lasts about 2 to 3 days. Keep it in a cool, dry place away from direct sunlight. If you want to store it longer, consider freezing. Wrap it tightly in plastic wrap and then in foil. It can last up to 3 months in the freezer. When you’re ready to eat it, just thaw it overnight in the fridge. Then, reheat it as mentioned above for great taste. For the full recipe, check out the main section. Yes, you can prepare the dough in advance. After you mix and knead the dough, let it rise as usual. Then, you can shape it into balls and layer them in the pan. Cover the pan tightly with plastic wrap. You can keep it in the fridge overnight. The next day, let it rise for about 30 minutes before baking. This saves time and makes for a quick bake. Yes, you can freeze the dough. After you shape the dough into balls, place them in a single layer on a baking sheet. Freeze the balls until hard, then transfer them to a freezer bag. When you want to bake, take out the desired amount and let them thaw in the fridge overnight. Once thawed, allow them to rise for 30 minutes before baking. This method keeps the bread fresh and tasty. This bread pairs well with many dishes. Here are some great options: - Soups like tomato or minestrone - Salads, especially Caesar or mixed greens - Pasta, especially with garlic or cream sauces - A small bowl of olive oil and balsamic vinegar for dipping - Grilled meats or roasted veggies Check the bread at the end of the baking time. It should be golden brown on top. You can touch it lightly; it should feel firm and spring back. If it sounds hollow when tapped, it is ready. If it is still soft, bake for a few more minutes. These tests help ensure your bread is perfectly baked. Making Garlic Herb Pull Apart Bread is easy and fun. You start with simple ingredients like flour and yeast, then mix in flavor with garlic and herbs. After preparing the dough, it's all about proper kneading and rising. I shared tips for baking it just right and ideas for serving. Don't forget the variations to suit your taste! Store leftovers appropriately to enjoy later. With this guide, you can master this delicious bread and impress anyone you serve it to. Enjoy the process and get creative in your kitchen!

Garlic Herb Pull Apart Bread Easy and Flavorful Recipe

If you’re seeking a cozy, delicious treat that will impress anyone, you’ve found it! My Garlic Herb Pull Apart Bread

- 1 medium butternut squash, peeled and cubed - 3 tablespoons honey - 2 tablespoons olive oil - 4 cloves garlic, minced - 1 teaspoon ground cinnamon - 1/2 teaspoon ground nutmeg - Salt and pepper to taste - Fresh parsley, chopped You will need a few simple items to make this honey garlic roasted butternut squash. First, pick a good medium-sized butternut squash. Peel it, and then cube it into bite-sized pieces. This helps it cook evenly. Next, grab some honey. Three tablespoons will give your squash a sweet glaze that pairs perfectly with the garlic. You will also need two tablespoons of olive oil. This oil adds richness and helps with cooking. Don't forget garlic! Four cloves, minced, bring a lovely depth of flavor. For spices, use one teaspoon of ground cinnamon and half a teaspoon of ground nutmeg. These spices add warmth and aroma to your dish. Finally, add salt and pepper to taste. These will help balance the sweetness. For garnish, fresh parsley adds a pop of color and brightness. It makes your dish look beautiful and fresh. {{ingredient_image_1}} - Preheat oven to 400°F (200°C). - Line a baking sheet with parchment paper. First, turning on the oven helps it get hot. Parchment paper keeps the squash from sticking. It also makes clean-up easy. - Mix butternut squash with honey and seasonings. In a big bowl, add the cubed squash. Pour in the honey and olive oil. Then, add the minced garlic, cinnamon, nutmeg, salt, and pepper. Mix it all well. Make sure every piece of squash is coated. This step adds flavor and sweetness. - Spread on baking sheet and roast. - Stir halfway for even cooking. After mixing, spread the squash on the baking sheet. Make sure to lay it out in one layer. This helps it roast evenly. Place it in the oven and roast for about 25-30 minutes. Halfway through, stir the squash. This helps it get that nice golden-brown color. When it’s soft and caramelized, it’s ready to eat. To roast butternut squash perfectly, set your oven to 400°F (200°C). This temperature helps the squash caramelize well. Roast for 25-30 minutes. Stir halfway through cooking for even browning. You know it's done when the squash is soft and golden brown. A fork should glide easily through the cubes. For extra flavor, try adding spices like paprika or ginger. These spices bring a nice kick. If you want it sweeter, add more honey, but do it in small amounts. Taste as you go, and adjust until it’s just right for you. Serve your roasted butternut squash in a shallow bowl. This makes it look bright and inviting. Drizzle any leftover honey mixture on top for a shiny finish. Add a sprinkle of fresh parsley for color and freshness. It will catch the eye and make your dish pop! Pro Tips Choosing the Right Squash: Select a butternut squash that feels heavy for its size and has a smooth, blemish-free skin for the best flavor and texture. Honey Alternatives: If you prefer a different sweetener, maple syrup or agave nectar can be used as a substitute for honey, providing a unique twist to the dish. Enhancing Flavor: For an extra depth of flavor, consider adding a pinch of cayenne pepper or smoked paprika to the seasoning mix. Storage Tips: Leftover roasted butternut squash can be stored in an airtight container in the fridge for up to 4 days, making it a great option for meal prep. {{image_2}} You can change the sweet taste by using maple syrup. Maple syrup gives a rich flavor. Just swap out honey for the same amount of syrup. Another option is agave nectar. Agave is sweeter than honey, so use less. Start with two tablespoons and adjust to your liking. Mix in other veggies for a colorful dish. Carrots or Brussels sprouts pair well with butternut squash. They add great texture and flavor. For fall, consider adding sweet potatoes or parsnips. These seasonal veggies enhance the dish's warmth and comfort. To make this dish vegan, replace honey with a plant-based sweetener. Maple syrup or agave nectar works well. For a creamy touch, try coconut cream instead of any dairy. This keeps the dish rich while staying true to vegan ideals. To store your honey garlic roasted butternut squash, let it cool first. Place the squash in an airtight container. This keeps it fresh and safe. You can keep it in the fridge for up to four days. If you want to enjoy it later, this method works great. When it's time to reheat, use your oven or a microwave. For the oven, preheat it to 350°F (175°C). Spread the squash on a baking sheet. Heat it for about 10-15 minutes. This will keep the squash crispy and tasty. If you use a microwave, warm it in short bursts. Stir in between to keep the flavor strong. Yes, you can freeze the roasted squash! To do this, let it cool fully. Place it in a freezer-safe bag or container. Make sure to remove as much air as possible. You can freeze it for up to three months. When you want to use it, thaw in the fridge overnight before reheating. This way, the taste stays fresh and delicious. Roasted butternut squash lasts about 3 to 5 days in the fridge. Make sure to store it in an airtight container. This keeps it fresh and tasty. If you notice any signs of spoilage, like mold or a bad smell, throw it away. Enjoy it within this time for the best flavor and texture. Yes, you can use frozen butternut squash! It works well in many recipes. Just make sure to thaw it first. If you skip thawing, the squash may not roast properly. The texture may change a little, but it still tastes delicious. Be sure to adjust your cooking time, as frozen squash may need a bit longer. Butternut squash is full of great nutrients. It is low in calories and high in fiber. This helps with digestion and keeps you full. It is also rich in vitamins A and C. These vitamins boost your immune system and promote healthy skin. Additionally, butternut squash has antioxidants that protect your body from damage. Enjoying it in this recipe is a tasty way to add nutrients to your diet! In this post, we explored how to roast butternut squash perfectly. We covered the essential ingredients, including honey and garlic. You learned step-by-step instructions for prepping and baking. Tips on flavor, presentation, and variations helped you enhance your dish. Lastly, I provided storage tips to keep leftovers fresh. Roasted butternut squash is tasty and healthy. Try these ideas to create your own delicious treats. Enjoy your cooking journey!

Honey Garlic Roasted Butternut Squash Delight Recipe

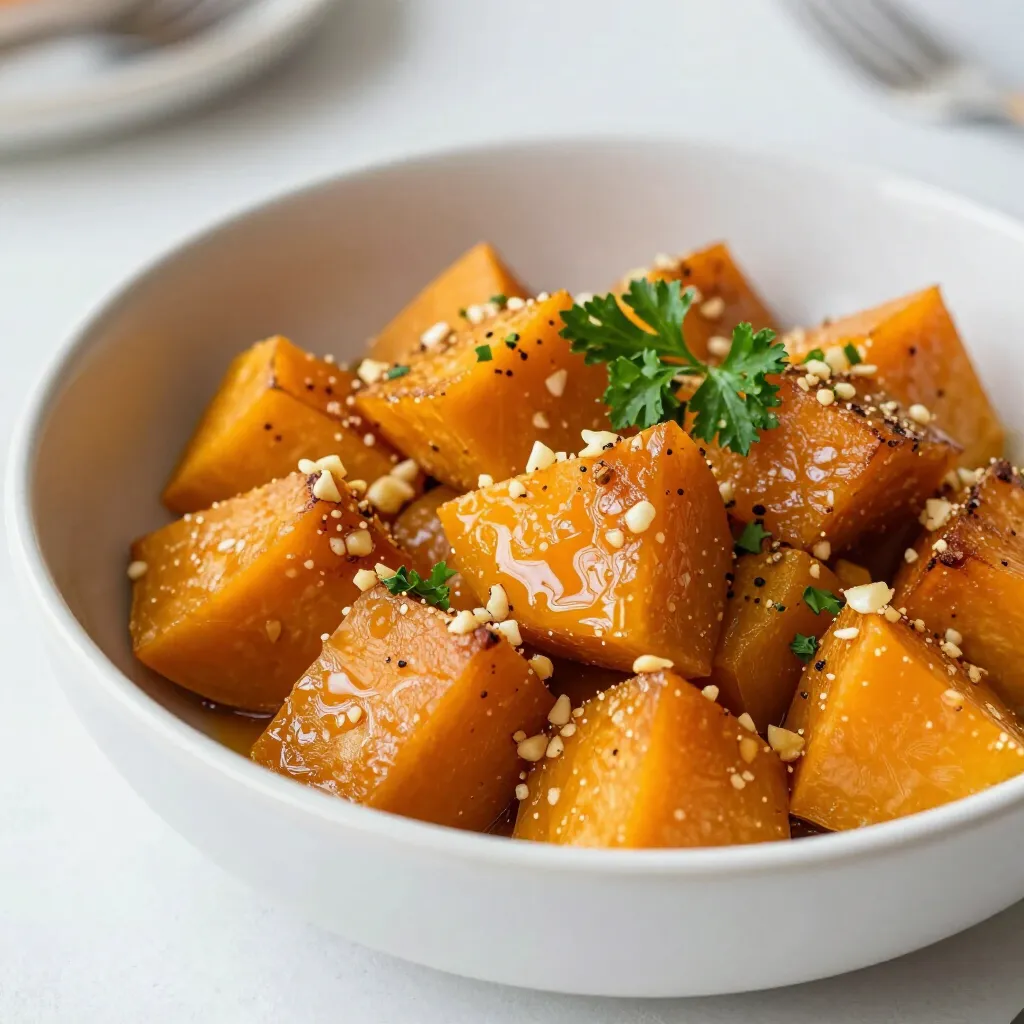
Get ready to indulge in the sweet and savory flavors of my Honey Garlic Roasted Butternut Squash Delight! This easy

- 1 medium cucumber, peeled and diced - 1 cup fresh mint leaves, tightly packed - 1 ripe banana - 1 cup plain Greek yogurt (or dairy-free alternative) - 1 cup coconut water (or regular water) - 1 tablespoon honey or maple syrup (optional) - Juice of 1 lime - Ice cubes (optional) Let’s dive into what makes this smoothie so refreshing. Each ingredient plays a vital role in taste and health. This smoothie has about 200-250 calories per serving. It offers around 10 grams of protein and 40 grams of carbohydrates. The fat content is low, about 5 grams. You also get a good amount of vitamins A and C from the cucumber and mint. Greek yogurt adds calcium and probiotics for gut health. - Cucumber: It hydrates your body and is low in calories. It helps with skin health too. - Mint: This herb aids digestion and gives a fresh taste. It can help with headaches as well. - Greek yogurt: Packed with protein, it supports muscle health. It also contains probiotics, which are great for your gut. These ingredients make this Cucumber Mint Smoothie not just tasty but also a smart choice for your health. For the full recipe, check out the detailed steps to make this refreshing drink. First, gather your ingredients. You will need: - 1 medium cucumber, peeled and diced - 1 cup fresh mint leaves, tightly packed - 1 ripe banana - 1 cup plain Greek yogurt (or dairy-free alternative) - 1 cup coconut water (or regular water) - 1 tablespoon honey or maple syrup (optional) - Juice of 1 lime - Ice cubes (optional, for a colder smoothie) To prepare, start by peeling and dicing the cucumber. Chop the ripe banana into small pieces. Squeeze the lime juice into a bowl and remove any seeds. This step ensures a smooth drink. For efficient chopping, always use a sharp knife. Slice the cucumber in half lengthwise, then cut into half-moons. This method saves time and makes the pieces even. Now, let’s blend! Begin by adding the cucumber to the blender first. Next, add the mint leaves, banana, Greek yogurt, coconut water, lime juice, and honey or maple syrup if you like it sweet. The order matters; wetter ingredients should be at the bottom. Blend on high speed for about 30 seconds. You want everything to mix well and become creamy. If you want a colder drink, toss in some ice cubes. Blend again until smooth. Pour your refreshing smoothie into tall glasses. For a beautiful touch, garnish each glass with a sprig of mint or a thin cucumber slice on the rim. This makes your drink look fancy and inviting. Enjoy your Cucumber Mint Smoothie right away for the best taste! Check the [Full Recipe] for more details. To make your cucumber mint smoothie creamier, choose yogurt wisely. I recommend plain Greek yogurt. It adds richness and tang to your drink. If you prefer a dairy-free option, use coconut yogurt. It still gives a nice texture but with a hint of coconut flavor. You can customize the sweetness of your smoothie. Add honey or maple syrup if you like it sweet. Start with one tablespoon and taste it. If you want more sweetness, add a little more. For an extra kick, try adding a pinch of ginger. It pairs well with cucumber and mint. Serve your smoothie in a tall glass for a refreshing drink. If you want a fun twist, use a bowl. Top it with granola or sliced fruits for added texture. Pair it with a light salad or some whole-grain toast for a healthy meal. This way, you enjoy a complete and balanced experience. {{image_2}} You can change the flavor of your Cucumber Mint Smoothie easily. Adding fruits like pineapple or spinach can bring new tastes. Pineapple adds sweetness and a tropical vibe. Spinach gives a nice green boost and extra nutrients. You can even mix in herbs like basil. Basil pairs well with the mint, creating a unique twist. Just blend them in with the other ingredients for a fresh taste. The liquid base can shape your smoothie’s flavor. While coconut water gives a nice touch, you can swap it out. Try using fresh juice like orange or apple juice for a sweeter option. Nut milk, like almond or cashew, can make the smoothie creamier. These options change the texture and taste, making it fun to experiment. You can transform your smoothie into a smoothie bowl. This makes it more fun to eat and adds texture. Pour your blended smoothie into a bowl instead of a glass. Top it with granola or seeds for a crunchy bite. Chia seeds or pumpkin seeds add healthy fats and protein. Sliced fruit on top can make it look pretty and inviting. Enjoying your smoothie this way adds a new experience! To keep your cucumber mint smoothie fresh, store it in the refrigerator right away. Use an airtight container to prevent air from getting in. This helps maintain the flavor and texture. A glass jar works well for this purpose. If you have a blender jar with a lid, that can work too. You can freeze the smoothie for later use. Pour it into ice cube trays or freezer-safe bags. This makes it easy to blend later into a refreshing drink. When you are ready to enjoy it, thaw it in the fridge overnight. You can also let it sit at room temperature for about 30 minutes. Your smoothie can last up to two days in the fridge. After that, the taste may change. Look for signs of spoilage, such as a sour smell or changes in color. If it looks or smells off, it’s best to throw it away. Enjoy your healthy drink while it’s fresh! To make a Cucumber Mint Smoothie, follow these steps: 1. Peel and dice the cucumber. 2. Chop the ripe banana. 3. Squeeze the juice from one lime. 4. Place all ingredients in a blender. 5. Blend until smooth and creamy. 6. Adjust sweetness as needed. 7. Pour into glasses and enjoy! This process takes about 10 minutes. You can find the full recipe [here](#). Yes, you can use frozen ingredients. Frozen fruit can make your smoothie colder and thicker. However, it may change the taste slightly. Fresh ingredients offer brighter flavors. If you prefer a refreshing drink, I suggest using fresh mint and cucumber. Yes, this smoothie is great for weight loss. It has low calories and high nutrients. Cucumber is hydrating and low in calories, while mint aids digestion. Greek yogurt adds protein, which helps you feel full. This combination makes it a smart choice for weight management. You can make this smoothie in advance. I recommend storing it in the fridge for up to 24 hours. To keep it fresh, use an airtight container. If you want to prepare it longer ahead of time, consider freezing it. Just blend it again after thawing for a refreshing drink. In this blog post, we covered how to make a refreshing Cucumber Mint Smoothie using fresh ingredients like cucumber, mint, and Greek yogurt. I shared tips for blending, serving, and storing your smoothie. You can customize flavors and make it even creamier. Enjoy this healthy drink whenever you want a cool, tasty boost. It’s simple to make and packed with nutrients. Try it today and feel the difference!

Cucumber Mint Smoothie Refreshing and Healthy Drink

Looking for a refreshing drink that’s also healthy? The Cucumber Mint Smoothie is your answer! With its cool cucumber, vibrant

Older posts
Newer posts
← Previous Page1 … Page76 Page77 Page78 … Page85 Next →

dsad

© 2026 greenmealmap • Built with GeneratePress

Our Policies

  • Copyright Policy
  • Cookie Policy
  • GDPR Policy
  • Privacy Policy
  • Disclaimer
  • Terms Of Use

More Information

  • Home
  • About
  • Contact
  • Appetizers
  • Dessert
  • Dinner
  • Drinks
©2026, greenmealmap About Back To Top