Skip to content
DisclaimerTerms Of UseGDPR PolicyCookie Policy

greenmealmap

  • Home
  • Drinks
  • Appetizers
  • Dinner
  • Dessert
  • About
  • Contact
  • Privacy Policy
DisclaimerTerms Of UseGDPR PolicyCookie Policy

NO-ING-IMG

To make your Peanut Butter Banana Smoothie, gather these simple items: - 1 large ripe banana - 2 tablespoons creamy peanut butter - 1 cup unsweetened almond milk (or any milk of your choice) - 1 tablespoon honey or maple syrup (adjust to taste) - 1/2 teaspoon vanilla extract - 1/4 teaspoon ground cinnamon (optional) - 1/2 cup ice cubes (optional for a thicker smoothie) - Chia seeds or crushed nuts for garnish (optional) You can swap some ingredients to fit your taste or diet: - Use different nut butters like almond or cashew. - Try coconut milk for a richer flavor. - Substitute agave syrup for honey. - Add spinach for extra nutrients without changing the taste. This smoothie offers a tasty blend of nutrients: - Calories: About 350 - Protein: 10 grams - Carbohydrates: 45 grams - Fats: 16 grams - Fiber: 5 grams - Sugar: 18 grams (naturally from banana and honey) This combination of ingredients makes a filling and healthy drink. Enjoy the rich taste of peanut butter mixed with the sweetness of banana! {{ingredient_image_1}} 1. Start by peeling the banana. Break it into small chunks. Place the banana in your blender. 2. Add two tablespoons of creamy peanut butter. This gives the smoothie its rich flavor. 3. Pour in one cup of unsweetened almond milk. You can use any milk you like. 4. Add one tablespoon of honey or maple syrup to sweeten it. Adjust this to your taste. 5. Mix in half a teaspoon of vanilla extract for a lovely flavor boost. 6. If you like, add a quarter teaspoon of ground cinnamon. This adds warmth and spice. 7. If you want a thicker drink, toss in half a cup of ice cubes. - Place the lid on the blender tightly. Blend on high speed for about 30 seconds. - Stop and scrape the sides if needed. This helps blend everything evenly. - Blend until the mixture is smooth and creamy. You want it to feel rich and thick. - If your smoothie is too thin, add more ice cubes or a bit more banana. - Blend again until it reaches the thickness you want. - You can taste it and add more sweetener if needed. Adjust it to your liking. When picking bananas, look for a large, ripe one. It should be yellow with a few brown spots. These spots mean the banana is sweet. Avoid bananas that are too green or too brown. Green bananas taste starchy and may not blend well. Brown bananas are overripe and can taste mushy. Choose ripe ones for the best flavor. You can make your smoothie even better. Try adding a scoop of protein powder for extra energy. A handful of spinach boosts nutrients without changing the taste much. You can swap peanut butter for almond or cashew butter. This adds a new flavor twist. Sprinkle some chia seeds or crushed nuts on top for crunch. These extras not only taste good but also make your smoothie more filling. If you have leftover smoothie, store it in the fridge. Use an airtight container to keep it fresh. It will last for about one day. When you drink it later, give it a good shake or stir. If you want to save it longer, pour it into an ice cube tray. Freeze the cubes. You can add them to future smoothies for a quick chill. Pro Tips Choose the Right Banana: Use a large, ripe banana for maximum sweetness and creaminess in your smoothie. Peanut Butter Variations: Experiment with different types of peanut butter, like crunchy or flavored varieties, for a unique twist. Chill Your Ingredients: For a colder smoothie, freeze your banana beforehand or use frozen almond milk. Garnish for Texture: Adding chia seeds or crushed nuts not only enhances the flavor but also provides extra nutrients and a satisfying crunch. {{image_2}} You can boost your smoothie by adding protein powder. A scoop of vanilla or chocolate protein works great. This addition makes your drink more filling. It also gives you a protein kick. This is helpful if you need extra energy after a workout. Simply blend the powder with the other ingredients. Want to sneak in some greens? Toss in a handful of spinach or kale. These greens blend well and add nutrients without changing the taste. Spinach is mild, so it won’t overpower the banana flavor. Kale adds a bit more texture but still works nicely. You’ll get added vitamins, and it keeps the smoothie creamy. You can try different nut butters for a fun twist. Almond butter or cashew butter can change the flavor. They both blend smoothly and add healthy fats. Each nut butter gives a unique taste. You can even mix them! This keeps your smoothie exciting and lets you find your favorite. You can store your peanut butter banana smoothie in an airtight container. Use a glass jar or a plastic container with a tight lid. Make sure to fill it to the top to limit air exposure. This helps keep it fresh. Store it in the fridge for up to 24 hours. The smoothie may separate after sitting. Just shake or stir it before drinking. If you want to keep your smoothie longer, freezing is a great option. Pour the smoothie into ice cube trays or freezer-safe bags. Fill the trays about three-quarters full to allow for expansion. Freeze until solid. You can use these frozen cubes in future smoothies or thaw them in the fridge overnight. This way, you can enjoy a quick and healthy snack anytime. Smoothies are best when fresh, but if you need to reheat one, do so gently. Pour the smoothie into a pot and warm it on low heat. Stir often to prevent it from burning. You can also use a microwave. Heat in short bursts and stir in between. Never bring it to a boil. Enjoy your creamy treat while it’s warm! Yes, you can use any milk you like. Almond milk is great, but you can also try soy, oat, or regular dairy milk. Each type adds a unique flavor. If you're watching calories, choose unsweetened options. This way, you keep the smoothie healthy and tasty. Yes, this smoothie is vegan-friendly! Just use plant-based milk like almond or oat milk. For sweetness, use maple syrup instead of honey. This keeps it vegan. Enjoy the creamy texture and yummy flavors without any animal products. Peanut butter is high in protein and healthy fats. It helps keep you full longer. Bananas provide potassium and fiber, which are good for your heart and digestion. Together, they make a balanced snack. This smoothie is not just tasty; it also fuels your body with nutrients. We've covered how to make a delicious peanut butter banana smoothie, from ingredients to storage tips. You now know what to use and how to create a creamy texture. Remember to try adding greens or protein for a health boost. With the right ingredients and a bit of creativity, your smoothies can be both tasty and nutritious. Enjoy exploring different flavors and methods to find your perfect blend. Your smoothie journey starts now!

Peanut Butter Banana Smoothie Easy Creamy Recipe

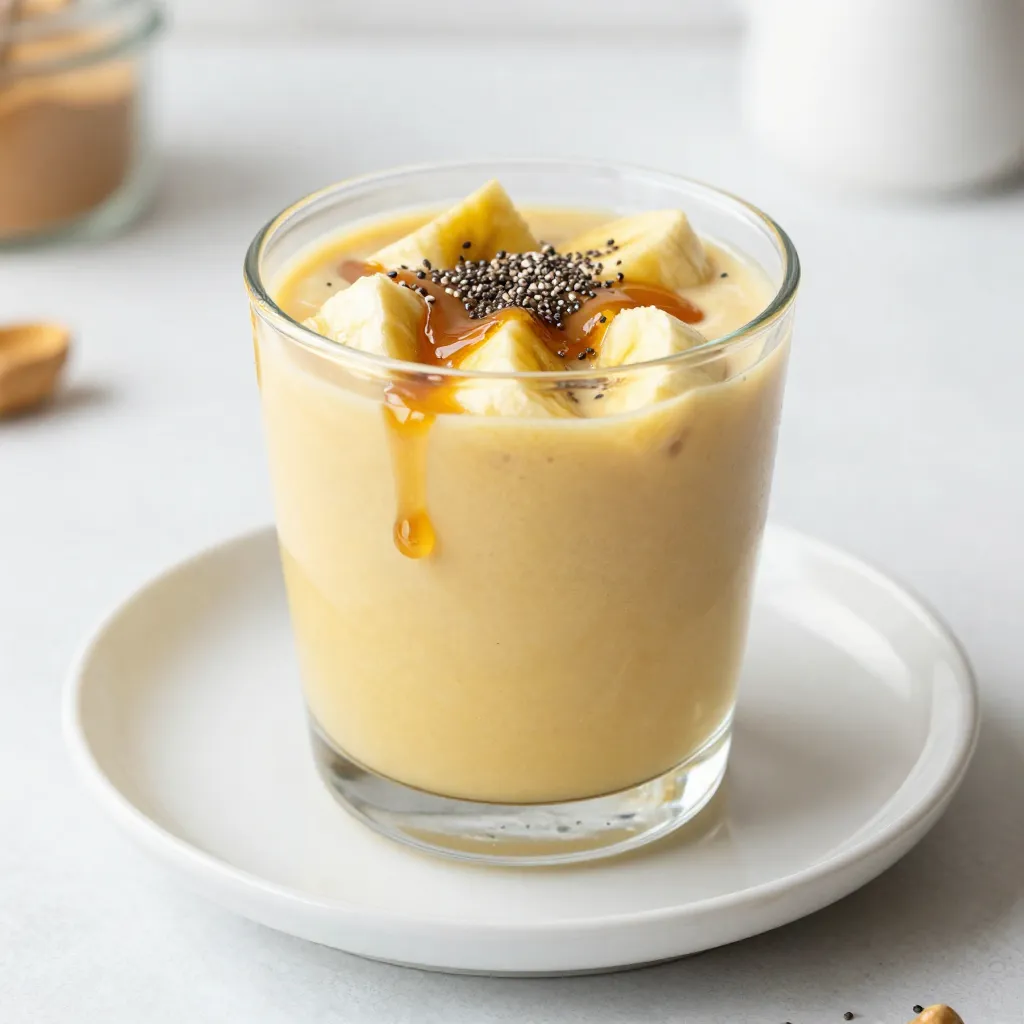
If you love a creamy, tasty snack, this Peanut Butter Banana Smoothie is for you! I’ll show you how to

- 1 lb ground chicken - 1 red bell pepper, finely chopped - 1 small carrot, grated - 3 green onions, chopped - 1 clove garlic, minced - 1 tablespoon ginger, minced - 2 tablespoons soy sauce (or tamari for gluten-free) - 1 tablespoon hoisin sauce - 1 tablespoon sesame oil - 1 teaspoon rice vinegar - Salt and pepper to taste - 1 head of butter lettuce or iceberg lettuce (for wrapping) - Sesame seeds for garnish - Optional: Sriracha for heat When I make these wraps, I love the blend of fresh flavors. The ground chicken serves as a healthy base. It cooks quickly and absorbs the sauces well. Red bell pepper adds a nice crunch and sweetness. Carrots offer some color and nutrition. Green onions give a mild kick that brightens the dish. Garlic and ginger bring warmth and depth. This mix creates a tasty filling full of texture. The sauces are key to the flavor. Soy sauce gives saltiness, while hoisin adds a sweet touch. Sesame oil brings a nutty taste. Rice vinegar adds tang, which balances the rich flavors. The lettuce acts as a vessel. It should be crisp and fresh. Butter lettuce is soft and easy to fold. Iceberg offers more crunch. Both work great for wrapping the filling. - Calories: About 250 per serving - Protein: 30g - Carbohydrates: 10g - Fat: 12g These wraps are low in calories but high in protein. Ground chicken is a lean source. The vegetables add fiber and vitamins. Each serving provides essential nutrients without excess calories. You’ll find vitamins A and C in the red bell pepper and carrot. They support your immune system and skin health. Plus, the green onions add vitamin K, which is good for bone health. Overall, these wraps are a nutritious choice for any meal. They are filling and full of flavor. For the full recipe, check below. Cooking the chicken First, heat sesame oil in a large skillet over medium heat. Add minced garlic and ginger, cooking them for about 30 seconds. This brings out their great flavor. Next, add the ground chicken. Break it apart with a wooden spoon. Cook it until browned, about 5 to 7 minutes. Make sure it's fully cooked before moving on. Sautéing the vegetables After the chicken is cooked, stir in the red bell pepper, grated carrot, and chopped green onions. Sauté these for 3 to 4 minutes. You want the veggies tender but not mushy. This step adds crunch and color to your dish. Combining sauces In a small bowl, mix soy sauce, hoisin sauce, rice vinegar, and a pinch of salt and pepper. Once the veggies are tender, pour this sauce over the chicken mixture. Stir well to coat everything evenly. Cook for an additional 2 minutes to let the flavors blend. Remove from heat and cool slightly. Preparing lettuce leaves Carefully separate the lettuce leaves. Butter or iceberg lettuce works best for wraps. Rinse them under cold water and pat them dry with a paper towel. This keeps the leaves crisp and fresh for your wraps. Filling the wraps Spoon the chicken mixture into the center of each lettuce leaf. Fold the leaves around the filling. You can make them as tight or loose as you like. If you want some heat, drizzle a bit of Sriracha on top. Presentation tips Arrange the filled wraps on a plate. Sprinkle sesame seeds on top for a nice touch. You can also serve extra Sriracha on the side for those who like it spicy. This makes the dish look colorful and tasty. For the full recipe, check out the complete guide to making these wraps. To make Healthy Chicken Lettuce Wraps truly shine, I love using fresh herbs. Chopped cilantro or mint adds a bright taste. You can mix them into the chicken filling or sprinkle them on top. Fresh herbs boost flavor without many calories. Adjust the spice levels to match your taste. If you want a kick, add Sriracha or crushed red pepper. For a milder option, skip the heat or use less. Find what feels right for you. You can always start small and add more. When it comes to cooking, both a skillet and a wok work well. A skillet is great for even cooking and easy stirring. A wok is perfect for high heat and quick cooking. Choose what you have and feel comfortable with. If you plan to meal prep, cook a larger batch of the filling. Store it in airtight containers in the fridge. This makes it quick to assemble wraps during busy days. You can also freeze the filling for later meals. Just remember to let it cool before storing. For the full recipe, check out the sections above. You'll love how easy and tasty these wraps can be! {{image_2}} You can switch up the protein in these wraps. Ground turkey works well and tastes great. If you prefer a plant-based option, try tofu instead. Just crumble it and cook it like the chicken. Feel free to add more veggies too. Shredded cabbage or diced mushrooms can add fun textures. You can even toss in water chestnuts for a nice crunch. If you need gluten-free options, use tamari instead of soy sauce. This small swap keeps the flavor while making it safe for those with gluten issues. For those on a low-carb or keto diet, you can skip the hoisin sauce. Instead, use extra soy sauce and a bit of sweetener, like stevia. This keeps the taste bold without the carbs. Enjoy your Healthy Chicken Lettuce Wraps in a way that suits your needs! Check out the Full Recipe for more details. To store leftover chicken lettuce wraps, let them cool first. Place the wraps in an airtight container. If you have extra filling, keep it separate from the lettuce. This helps the lettuce stay crisp. Use glass or BPA-free plastic containers for storage. These containers keep food fresh for a longer time. When you want to enjoy your wraps again, keep them crisp. Avoid microwaving them as this can make the lettuce soggy. Instead, reheat the filling in a skillet over low heat. Stir it gently until warmed through, about 5 minutes. For best results, serve the warm filling in fresh lettuce leaves. Enjoy the crunch and flavor of your Healthy Chicken Lettuce Wraps just like when you first made them. For the full recipe, check the earlier section. How to make Healthy Chicken Lettuce Wraps? To make these wraps, first, cook ground chicken in a skillet. Use sesame oil to add flavor. Cook garlic and ginger until fragrant. Then, mix in red bell pepper, carrot, and green onions. After the veggies soften, add soy sauce, hoisin sauce, and rice vinegar. Stir it all together and cook for a couple more minutes. Finally, spoon the mixture into lettuce leaves and add sesame seeds on top. For the full recipe, check out the complete guide. Can I make them ahead of time? Yes, you can prepare the chicken filling ahead of time. Cook it and let it cool. Store it in the fridge for up to three days. When ready to eat, just warm it up and serve with fresh lettuce leaves. What can I serve with lettuce wraps? Serve these wraps with a side of rice or quinoa. Fresh veggies like cucumber or carrot sticks add crunch. You can also pair them with a light dipping sauce or a salad for a full meal. What to do if the wraps are soggy? If your wraps are soggy, try using crispier lettuce. Butter or iceberg lettuce works well. Also, avoid overcooking the filling. If the filling is too wet, drain any excess liquid before filling the leaves. How to make the filling less dry? To keep the filling moist, add a bit more sauce. Soy sauce or hoisin sauce can help. You can also mix in a little water or chicken broth while cooking. This will keep your filling juicy and tasty. Healthy chicken lettuce wraps are easy and fun to make. You can create tasty flavors using simple ingredients like ground chicken, fresh veggies, and savory sauces. We've covered preparation steps, tips for flavor, and even storage info. You can customize these wraps to fit your diet or use what you have at home. Enjoying this dish can lead to tasty meals without guilt. Remember, the key is to focus on fresh ingredients for the best taste!

Healthy Chicken Lettuce Wraps Quick and Flavorful Meal

Are you ready to spice up your dinner routine? These Healthy Chicken Lettuce Wraps are quick, easy, and full of

To make simple shrimp tacos, you need the following: - 1 pound shrimp, peeled and deveined - 1 tablespoon olive oil - 1 teaspoon chili powder - 1 teaspoon cumin - 1/2 teaspoon garlic powder - Salt and pepper to taste - 8 small corn tortillas - 1 cup cabbage, shredded - 1/2 cup cherry tomatoes, halved - 1/4 cup fresh cilantro, chopped - 1 avocado - 2 tablespoons Greek yogurt - 1 tablespoon lime juice - Additional lime wedges for serving These ingredients create a fresh and tasty meal. They work well together and bring out the best flavors in shrimp. You can easily swap some ingredients if you have dietary needs. Here are some ideas: - Use vegetable oil instead of olive oil for frying. - Try a different protein, like chicken or tofu, for a filling meal. - Use gluten-free tortillas if you need to avoid gluten. - Replace Greek yogurt with a dairy-free option, like coconut yogurt. These substitutions help you enjoy shrimp tacos no matter your diet. When you buy shrimp, look for these signs of freshness: - The shrimp should smell like the ocean, not fishy. - Fresh shrimp should be firm and not mushy. - Look for a shiny and translucent appearance. - If buying frozen shrimp, check the package for a clean seal. Choosing the right shrimp makes your tacos taste better and ensures a great meal. For the complete recipe, check out the Full Recipe. To start, get your shrimp ready. You need one pound of shrimp, peeled and deveined. In a bowl, mix the shrimp with one tablespoon of olive oil. Add one teaspoon of chili powder, one teaspoon of cumin, and half a teaspoon of garlic powder. Don’t forget salt and pepper to taste! Toss everything together until the shrimp are well coated in the spices. This step adds great flavor to your tacos. Next, heat a large skillet over medium-high heat. Once the skillet is hot, add your seasoned shrimp. Cook them for about two to three minutes on each side. You want them to turn pink and be cooked through. When they’re done, remove them from the heat. This step keeps your shrimp juicy and tasty. Now it’s time to build your tacos! Start by warming eight small corn tortillas. You can do this on a dry skillet or even over a flame for a few seconds. Once they are warm, place a few shrimp on each tortilla. Top them with one cup of shredded cabbage and half a cup of halved cherry tomatoes. For a creamy touch, drizzle your avocado cream on top. To finish, add some fresh cilantro. Serve with extra lime wedges for that zesty kick. Enjoy your delicious shrimp tacos! For great shrimp tacos, seasoning is key. I love using chili powder and cumin. These spices add warmth and depth. You can also mix in paprika for a smoky taste. If you like heat, try cayenne pepper. Just a pinch brings the spice alive! Salt and pepper balance the other flavors. Feel free to adjust based on your taste. Experiment with different blends until you find your favorite! The avocado cream adds a rich touch to your tacos. To make it smooth, use ripe avocados. Combine the avocado with Greek yogurt and lime juice. This mix gives you creaminess and tang. Blend it well until it's silky. If you prefer a bit of spice, add jalapeño. You can also mix in some garlic for extra flavor. This cream is easy to make and takes just a few minutes. Shrimp tacos shine with fresh sides. I recommend serving them with lime wedges. Fresh lime juice boosts the flavors. You can also add a side of black beans. They pair well and add protein. A simple salad with corn and tomatoes works too. If you want something crunchy, try tortilla chips. They add a nice texture. For a fun twist, serve your tacos with salsa or pickled onions. These add color and taste! For the full recipe, check the link above. {{image_2}} If you love heat, try adding more spice. Use chipotle powder instead of chili powder. This gives your shrimp a smoky kick. You can also mix in some diced jalapeños while cooking. For extra spice, drizzle hot sauce on top before serving. These changes will make your tacos stand out! Want a meat-free option? Try using grilled veggies or black beans instead of shrimp. For a hearty choice, use diced sweet potatoes. Season them with the same spices for a fun twist. If you want a vegan creamy topping, mash avocado with lime juice and salt. This will keep your tacos fresh and tasty. Toppings can change your taco game. Try adding mango salsa for a sweet touch. Pineapple chunks also add a tropical flair. You can also use pickled red onions for a tangy bite. Don’t forget about cheese! Crumbled feta or cotija adds a nice creaminess. Experiment with different toppings to find your favorite mix. For the full recipe, check out the Zesty Shrimp Tacos with Avocado Cream. Leftover shrimp tacos are easy to store. First, let them cool down. Place the tacos in a container. You can separate the shrimp and toppings if you prefer. Use plastic wrap or a lid to seal the container. Store it in the fridge for up to two days. To reheat your shrimp tacos, use a skillet. Heat it over medium heat. Add the tacos and cook for about 2-3 minutes on each side. This warms the shrimp and keeps the tortillas crispy. You can also use a microwave. Place the tacos on a plate and cover them with a damp paper towel. Heat for about 30-45 seconds. You can freeze shrimp for later use. First, make sure the shrimp are fresh. Place them in a freezer bag. Squeeze out all the air before sealing. You can freeze them for up to three months. When you’re ready to cook, thaw the shrimp overnight in the fridge. This keeps them safe and tasty. For a complete guide, check the Full Recipe and enjoy your shrimp tacos! The best way to thaw frozen shrimp is in cold water. Place the shrimp in a bowl or a zip-top bag. Then, fill the bowl with cold water. Change the water every 15 minutes. This method takes about 30 minutes. You can also thaw shrimp overnight in the fridge. Avoid using hot water, as it can cook the shrimp. Yes, you can use other seafood for tacos. Fish like tilapia or cod works well. You can also try scallops or crab. Each type adds its unique flavor. Shrimp tacos are quick, but other seafood can be just as fast. Feel free to experiment with your favorites. Shrimp are low in calories and high in protein. A 3-ounce serving has about 20 grams of protein. They are also a good source of omega-3 fatty acids. These acids support heart health. Shrimp contain vitamins like B12 and minerals like selenium. These nutrients help your body function well. Enjoy shrimp tacos knowing they are tasty and healthy! You've learned how to make simple shrimp tacos, from choosing fresh shrimp to assembling your dish. We covered tips on seasoning, making avocado cream, and serving suggestions. Plus, you discovered tasty variations and storage tips for leftovers. These tacos are easy, fun, and delicious. I hope you’re excited to try them. Enjoy creating your own special twist!

Simple Shrimp Tacos Flavorful and Quick Recipe

Craving a quick and tasty meal? I’ve got you covered with my Simple Shrimp Tacos recipe! These tacos are not

To make classic chicken quesadillas, gather the following ingredients: - 2 cups cooked chicken, shredded - 1 cup shredded cheddar cheese - 1 cup shredded Monterey Jack cheese - 1/2 cup bell peppers, diced (any color) - 1/2 cup red onion, finely chopped - 2 tablespoons fresh cilantro, chopped - 1 teaspoon taco seasoning - 4 large flour tortillas - 2 tablespoons olive oil - Salt and pepper to taste You can add these ingredients for more taste: - 1/2 cup corn, canned or fresh - 1/4 cup black beans, rinsed - Sliced jalapeños for heat - Avocado or guacamole for creaminess - A squeeze of fresh lime juice For this recipe, you will need: - A large skillet or frying pan - A spatula for flipping - A mixing bowl for combining the filling - A cutting board and knife for prep - A cheese grater if you buy block cheese Gathering these ingredients and tools makes cooking easier. With everything ready, you can focus on creating delicious quesadillas. For the full details on how to cook these tasty treats, check the Full Recipe. To make delicious classic chicken quesadillas, start by gathering your ingredients. You will need: - 2 cups cooked chicken, shredded - 1 cup shredded cheddar cheese - 1 cup shredded Monterey Jack cheese - 1/2 cup bell peppers, diced (any color) - 1/2 cup red onion, finely chopped - 2 tablespoons fresh cilantro, chopped - 1 teaspoon taco seasoning - 4 large flour tortillas - 2 tablespoons olive oil - Salt and pepper to taste In a mixing bowl, combine the shredded chicken, diced bell peppers, chopped red onion, cilantro, taco seasoning, and a pinch of salt and pepper. Mix until all ingredients are well mixed and coated with the seasoning. This mix gives great flavor to the chicken. Now it’s time to cook! Heat 1 tablespoon of olive oil in a skillet over medium heat. Place one flour tortilla in the skillet. Sprinkle 1/4 cup of cheddar cheese and 1/4 cup of Monterey Jack cheese on half of the tortilla. Next, add a generous portion of the chicken mixture on top of the cheese. Fold the tortilla in half. Press gently with a spatula to hold the filling inside. Cook for about 3-4 minutes on one side or until it turns golden brown. Carefully flip the quesadilla and cook the other side for another 3-4 minutes. You want the cheese to melt and the tortilla to be crispy. Once cooked, remove the quesadilla from the skillet. Let it cool on a cutting board for a minute. Slice it into wedges for easy serving. Repeat this process with the remaining tortillas, using the rest of the olive oil and filling ingredients. Serve warm with salsa, sour cream, or guacamole on the side. Enjoy your tasty classic chicken quesadillas! For complete details, refer to the Full Recipe. To make a crispy quesadilla, use the right heat. A medium heat works best. Too high, and your tortilla may burn before the cheese melts. Use enough oil to coat the pan. This helps the tortilla get that golden color. Flip carefully to keep the filling intact. Let it cook fully on both sides. The cheese should be gooey and the tortilla crispy. One common mistake is overfilling your quesadilla. This can lead to spills and soggy tortillas. Always leave a little space at the edges. Another mistake is not letting your pan heat up. Always preheat your skillet. Lastly, don’t rush the cooking time. Give it a few extra minutes if needed. This will ensure your quesadilla is perfect. Serve your quesadillas with fresh salsa, sour cream, or guacamole. These dips add flavor and moisture. If you like spice, try adding jalapeños or hot sauce. Fresh herbs like cilantro elevate the taste. You can also add a side salad for a fresh crunch. For a fun twist, try serving with a fruit salsa for sweetness. Enjoy your meal with friends or family for a great time! {{image_2}} You can make tasty vegetarian quesadillas by swapping out chicken. Use black beans or cooked lentils. Add mushrooms, spinach, or zucchini for extra flavor and nutrition. Try using a mix of cheeses like mozzarella and feta for a creamy texture. Fresh herbs like basil or parsley can add a fresh twist. If you need to avoid cheese or meat, use vegan cheese or tofu. Nutritional yeast can add a cheesy flavor without dairy. For meat, consider grilled vegetables or tempeh. These options keep the quesadilla hearty and satisfying while catering to different diets. To spice up your chicken quesadilla, add jalapeños or a dash of hot sauce to the filling. Mix diced green chilies into the chicken for more heat. You can also sprinkle chili powder or cayenne pepper in the taco seasoning. This will give your quesadilla a nice kick. For this spicy version, you might want to serve it with cooling sides like sour cream or avocado. If you want to explore more details, check the Full Recipe to create your perfect quesadilla! Store leftover quesadillas in an airtight container. This keeps them fresh for 3 days. If you can, let them cool first. This prevents sogginess. You can also wrap each quesadilla in foil or plastic wrap. This method helps keep the taste and texture. To reheat quesadillas, use a skillet or oven. Avoid the microwave if you can. A skillet warms them up nicely. Heat it on medium-low. Cook each side for 2 to 3 minutes. This makes them crispy again. If using the oven, preheat to 350°F. Bake for 10-15 minutes until hot. You can freeze quesadillas for easy meals later. Wrap them tightly in plastic wrap first. Then, place them in a freezer bag. You can store them for up to 3 months. When ready to eat, thaw them overnight in the fridge. Reheat as described above for best results. I find that cooked, shredded chicken works best for quesadillas. You can use rotisserie chicken for ease. It adds a great flavor and saves time. You can also use grilled or pan-seared chicken. Just ensure it is cooked and tender for easy shredding. Yes, you can! Baking quesadillas is a great option. Preheat your oven to 400°F (200°C). Place the filled tortillas on a baking sheet. Bake for about 10-15 minutes until crispy. Keep an eye on them to avoid burning. This method is great for making several at once. To prep in advance, fill your tortillas and place them in a single layer. Wrap them in plastic wrap and store them in the fridge. You can also freeze them for longer storage. When ready to eat, just cook them directly from the freezer. It makes meal time easy and quick. For the full recipe, check the above section. We covered the essential ingredients and tools for tasty quesadillas. You learned step-by-step methods to prepare and serve them perfectly. I shared tips to make them crispy, avoid common mistakes, and suggested ways to enjoy variations. Plus, we discussed how to store, reheat, and freeze leftovers effectively. Making quesadillas can be fun and rewarding. With practice, you’ll create your favorite meals easily. Enjoy making and sharing them with others!

Classic Chicken Quesadillas Flavorful Easy Recipe

If you crave a quick, tasty meal, classic chicken quesadillas are your answer. In this easy recipe, I’ll guide you

- 3 ripe avocados - 1 small red onion, finely chopped - 1 medium tomato, diced - 1-2 jalapeños, seeded and minced - 2 cloves garlic, minced - Juice of 2 limes - 1/4 cup fresh cilantro, chopped - Salt and pepper to taste - Optional: 1/4 teaspoon cumin To make great guacamole, you need the right ingredients. I recommend using ripe avocados. They should feel soft when you press them gently. If they are hard, they are not ready yet. - Checking color and firmness: Look for dark green or black skin. Press gently; it should yield slightly. - How to tell if an avocado is ripe: If the stem comes off easily and is green underneath, it’s ripe. - Storing avocados for optimal ripeness: If you have hard avocados, leave them on the counter. Once they ripen, store them in the fridge to keep them fresh longer. These tips help you pick the best avocados for your easy guacamole recipe. Enjoy making this creamy delight! Don't forget to check the Full Recipe for all the details. To start, cut the avocados in half. Use a knife to carefully slice around the pit. Once you reach the pit, twist to separate the halves. Remove the pit with a spoon or knife. Then, scoop the green flesh into a medium mixing bowl. Make sure to get all the good stuff! Now it's time to mash! You can use a fork or a potato masher. If you want it creamy, mash until smooth. For a chunkier guacamole, leave some bits. This gives a nice texture. Keep mashing until you reach your desired creaminess. Next, let's add flavor! Toss in the chopped red onion, diced tomato, minced jalapeños, and minced garlic. These ingredients bring freshness and crunch. Squeeze the juice of two limes over the mix. Lime adds a bright taste and keeps the guacamole green. Finally, sprinkle with chopped cilantro, salt, and pepper. If you like, add cumin for an extra kick. Gently mix everything together. Be careful not to over-mash; we want a great texture! Taste your guacamole and adjust if needed. More lime? A little extra salt? It’s up to you! Enjoy your delicious guacamole with tortilla chips or on tacos. For the full recipe, check the recipe link. To get creamy guacamole, don't over-mash the avocados. Start with a fork or potato masher. Mash gently until you see small lumps. This helps keep the texture nice. For chunkiness, mix in diced tomatoes and onions last. This way, you keep their shape and add a nice bite to your guacamole. Want a kick? Add jalapeños! Seed and mince one or two, depending on your spice level. If you like it mild, just use one. For a warm, earthy taste, try adding 1/4 teaspoon of cumin. This gives your guacamole a unique twist. Mix these extras in after you combine the main ingredients. Serve your guacamole in a bright bowl. It looks more inviting. Add a few whole cilantro leaves on top. This adds color and freshness. Place lime wedges on the side for a nice touch. This way, guests can squeeze more lime over their serving. Enjoy your guacamole with crispy tortilla chips or use it as a tasty topping for tacos. For the full recipe, check out the Creamy Avocado Fiesta Guacamole. {{image_2}} You can easily change the taste of guacamole. Adding fruit like pineapple or mango gives it a sweet twist. Just chop the fruit and mix it in. It adds a fresh flavor that many love. For those who like spicy food, add more chilies. You can adjust the heat by using more or fewer jalapeños. This way, you make guacamole that suits your taste. Guacamole is naturally vegan and gluten-free. This makes it a great option for many diets. If you are watching your sodium, you can cut back on salt. Use fresh lime juice for flavor instead. If you want, you can also use salt substitutes. This way, you can enjoy guacamole without worrying. Guacamole pairs well with many dishes. It goes perfectly with tortilla chips for a snack. Try it as a topping on tacos for added creaminess. You can also add it to salads for a fresh taste. It brightens up any meal. For the best experience, serve guacamole in a colorful bowl. Garnish with whole cilantro leaves and lime wedges. This makes your dish look even more inviting. Check out the Full Recipe for more details! To keep your guacamole fresh, store it in an airtight container. Press plastic wrap directly onto the surface before sealing. This method limits air exposure, helping to slow browning. Place the container in the fridge right after making it. Fresh guacamole tastes best within two days. If you plan to keep it longer, consider freezing it. Freezing guacamole is easy. First, prepare your guacamole according to the Full Recipe. Then, spoon it into a freezer-safe container, leaving space at the top for expansion. Seal the container tightly. Label it with the date. When you want to use it, thaw the guacamole in the fridge overnight. Stir well before serving to restore its creamy texture. Check your guacamole for signs of spoilage. If it turns brown, it may still be safe, but the taste changes. If you see mold or smell anything off, it’s best to toss it. Always trust your senses. If it doesn’t look or smell fresh, don’t eat it. Enjoy your guacamole at its best! To keep guacamole bright and green, limit air exposure. Here are some tips: - Add lime juice right after making it. The acid helps slow browning. - Cover the guacamole with plastic wrap. Press the wrap directly onto the surface. - Store it in an airtight container. This helps keep air out. - If you have extra pits, place them in the guacamole. They can help too. Yes, you can prepare guacamole in advance. Here are some suggestions: - Make it a few hours before serving. This gives it time to chill. - To keep it fresh, use lime juice and cover it tightly. - If you need to make it a day ahead, follow the same tips to prevent browning. Guacamole pairs well with many snacks and meals. Here are some ideas: - Tortilla chips are a classic choice. They add crunch to the creamy guacamole. - Use it as a topping for tacos or burritos for extra flavor. - Serve it alongside fresh veggies like carrots and bell peppers. - Spread it on sandwiches or wraps for a tasty twist. - Add it to salads for a creamy dressing. For the full recipe, check out my Creamy Avocado Fiesta Guacamole. You now have all the tools to make delicious guacamole. You learned about the key ingredients, how to pick ripe avocados, and steps to prepare and combine them. Remember to mix carefully for the right texture. Explore different flavors and adjust to your taste. With the right storage tips, your guacamole can stay fresh. Enjoy this tasty dip with your favorite snacks or meals. Get ready to impress friends and family with your homemade guacamole!

Easy Guacamole Recipe Simple and Creamy Delight

Are you ready to whip up a creamy, zesty guacamole in minutes? This easy guacamole recipe is packed with flavor

To make delicious oven-baked lemon salmon, you need fresh and simple ingredients. Here’s what you will need: - 2 salmon fillets (about 6 oz each) - 2 tablespoons olive oil - 1 lemon (zested and juiced) - 3 cloves garlic, minced - 1 teaspoon dried oregano - 1 teaspoon dried thyme - Salt and pepper to taste - Fresh parsley, chopped (for garnish) These ingredients work together to create a bright and zesty dish. The salmon is rich in omega-3 fatty acids, making it both tasty and healthy. You don’t need much to cook this dish. Here are the tools I recommend: - A baking sheet - Parchment paper - A small bowl for mixing - A whisk or fork - A sharp knife for mincing garlic Using these items makes the cooking process easy and fun. Plus, the parchment paper helps with cleanup. This oven-baked lemon salmon recipe serves two. Here is a quick look at the nutrition: - Calories: Approximately 350 per serving - Protein: 34 grams - Fat: 20 grams - Carbohydrates: 2 grams This dish is packed with protein and healthy fats. It’s a great choice for a balanced meal. For the full recipe, check out the instructions above. Start by rinsing the salmon fillets under cool water. Pat them dry with paper towels. This step helps the marinade stick better. Place the fillets skin-side down on a lined baking sheet. This makes cleanup a breeze and keeps the skin crisp. In a small bowl, combine 2 tablespoons of olive oil, the zest and juice of one lemon, 3 minced garlic cloves, 1 teaspoon each of dried oregano and thyme, and salt and pepper. Whisk everything together until it blends well. This marinade brings a fresh and zesty flavor to the salmon. Preheat your oven to 400°F (200°C). Once it’s hot, brush the lemon-garlic mixture over the salmon fillets. Make sure each piece is well coated. Bake the salmon for about 12 to 15 minutes. It’s ready when it flakes easily with a fork and is opaque in the center. After baking, let it rest for a minute. Finish by garnishing with chopped fresh parsley. Enjoy your Oven-Baked Lemon Salmon! For the full recipe, check out the detailed instructions above. When picking salmon, look for bright, firm fillets. Fresh salmon has a shiny look. The color can vary from pink to deep red. Wild-caught salmon often tastes better than farmed. Ask your fishmonger for recommendations. If you prefer sustainability, check for eco-friendly certifications. To achieve that perfect flakiness, do not overcook the salmon. Bake it until it is just opaque. Usually, this takes about 12-15 minutes at 400°F. You can test it by gently poking it with a fork. If it flakes easily, it is ready. Let it rest a minute after baking. This helps keep it moist. While the lemon and garlic mix is great, you can add more flavor. Try fresh herbs like dill or basil for a twist. A sprinkle of red pepper flakes gives it a nice kick. You can also add thin slices of lemon on top for extra zest. For a touch of sweetness, consider a drizzle of honey. Check out the Full Recipe for more ideas on flavor combinations. {{image_2}} You can add fresh herbs to make your lemon salmon even more tasty. Try using dill, basil, or cilantro. Just chop them finely and mix them into your lemon-garlic marinade. The fresh herbs will give your salmon a bright and zesty flavor that dances on your tongue. You’ll love how this twist enhances each bite. Want to make it a full meal? Add vegetables right on the baking sheet! Think asparagus, zucchini, or bell peppers. Cut them into bite-sized pieces and toss them with olive oil and seasoning. Place them around the salmon on the same pan. This way, you get a colorful dish with a mix of flavors. Plus, clean-up is a breeze with just one pan to wash! Love a kick? Add some heat to your lemon salmon! Mix in red pepper flakes or sriracha to the marinade. These spicy additions will give your dish a bold flavor. Adjust the amount based on how spicy you want it. This twist is perfect for those who enjoy a little fire in their food. You can easily turn your simple lemon salmon into a spicy delight. After enjoying your oven-baked lemon salmon, store any leftovers in an airtight container. This keeps the flavors fresh and prevents the salmon from drying out. Place the container in the fridge. It will stay good for up to three days. For best taste, eat it within this time. When you want to reheat your salmon, do it gently. Preheat your oven to 350°F (175°C). Place the salmon on a baking sheet. Cover it with foil to keep it moist. Heat for about 10 minutes or until warm. This method helps keep the salmon flaky and tasty. You can also use a microwave, but be careful. Heat it in short bursts, checking often so it doesn’t dry out. If you can’t eat it all right away, freezing is a great option. Let the salmon cool completely first. Wrap each piece tightly in plastic wrap. Then, place them in a freezer-safe bag. Squeeze out as much air as you can. Label the bag with the date. Frozen salmon is best used within three months. When you’re ready to eat it, thaw it in the fridge overnight. After that, reheat as mentioned above for the best taste. You can find the full recipe for this dish above. You should bake salmon for 12 to 15 minutes at 400°F. The fish will be done when it flakes easily with a fork. Check the thickest part of the fillet. It should be opaque and no longer translucent. If you overbake, it can dry out, so keep an eye on it. Yes, you can use bottled lemon juice in a pinch. However, fresh lemon gives a brighter taste. The zest from fresh lemon adds a burst of flavor too. If you choose bottled juice, use about two tablespoons as a substitute. Yes, oven-baked salmon is very healthy. Salmon is rich in omega-3 fatty acids. These fats help your heart and brain. It is also high in protein and vitamins D and B12. Using olive oil and fresh herbs makes it even better for you. You can use wild-caught or farmed salmon. Wild-caught salmon has a richer flavor. It’s also more sustainable. Farmed salmon is often more affordable and widely available. Both types work well in this recipe. Absolutely! You can add asparagus, broccoli, or bell peppers. Just cut them into even pieces. Place them around the salmon on the baking sheet. They will roast perfectly alongside the fish. The best way to check is by using a fork. Gently pierce the thickest part of the fillet. If it flakes easily and is opaque, it’s done. You can also use a food thermometer. Aim for an internal temperature of 145°F. You can serve it with rice, quinoa, or a fresh salad. Roasted potatoes also pair well. For a light side, try steamed veggies or a simple cucumber salad. Yes, you can reheat leftover salmon. Use the oven at a low temperature to keep it juicy. Place it in a dish and cover it with foil. Heat for about 10 minutes, checking often. You can store leftover salmon in the fridge for about 3 days. Make sure to keep it in an airtight container. For longer storage, freeze it for up to 3 months. Feel free to check the Full Recipe for all the details! This blog post covered how to make oven-baked lemon salmon. We discussed key ingredients, tools, and the health benefits. I shared step-by-step instructions to prep the salmon and bake it just right. You learned tips for choosing salmon and ideas for tasty variations. Lastly, I provided storage info and answered common questions. Oven-baked lemon salmon is simple, healthy, and delicious. I hope you feel ready to try this dish yourself!

Oven-Baked Lemon Salmon Flavorful and Easy Recipe

If you’re looking for a quick and tasty meal, you’ve found it! This Oven-Baked Lemon Salmon recipe is not only

To make creamy tomato basil soup, you need a few key ingredients. Each one plays a big role in the flavor. Here’s what you will need: - 2 tablespoons olive oil - 1 medium onion, finely chopped - 3 cloves garlic, minced - 2 cans (14 oz each) diced tomatoes - 1 cup vegetable broth - 1 teaspoon sugar - 1 teaspoon dried oregano - Salt and pepper to taste - 1 cup heavy cream (or coconut cream for a dairy-free option) - 1/2 cup fresh basil leaves, chopped - Croutons and fresh basil for garnish Let’s explore these ingredients a bit more. Olive oil is perfect for cooking. It adds a smooth flavor. Onion and garlic are the base of this soup. They create a strong aroma and taste. Chop the onion finely. Mince the garlic well. Both should be sautéed until soft. Diced tomatoes add sweetness and tang. They give the soup its rich color. Vegetable broth adds depth. It balances the flavors and makes the soup cozy. Sugar helps smooth the acidity of the tomatoes. Just a bit goes a long way. Dried oregano brings in a nice herbal taste. It complements the tomatoes and basil well. Salt and pepper are essential for seasoning. Adjust them to your taste for the best flavor. Heavy cream adds creaminess and richness. If you prefer a lighter option, try coconut cream. Fresh basil is key. It gives the soup a bright, fresh flavor. Croutons and additional basil can make your soup look beautiful. They are great for serving! When you have all these ingredients, you are ready to start cooking. Check out the Full Recipe for more details on how to make this delicious soup. First, I heat the olive oil in a large pot over medium heat. Then, I add the chopped onion. I sauté the onion for about 5 minutes until it looks soft and clear. Next, I stir in the minced garlic and cook for one more minute. This step fills the kitchen with a lovely smell. Now it's time to add the diced tomatoes. I pour in the tomatoes with their juices and the vegetable broth. I also add the sugar, dried oregano, salt, and pepper. I mix everything well to combine the flavors. I bring the mixture to a boil, then reduce the heat to low. I let it simmer uncovered for 20 minutes. This helps the flavors blend together nicely. After 20 minutes, I remove the pot from the heat. To make the soup creamy, I use an immersion blender to puree it. If you don't have one, you can carefully transfer the soup to a regular blender in batches. Blending gives the soup a smooth and rich texture. Next, I return the pot to low heat and stir in the heavy cream. I allow it to cook for about 5 minutes, but I avoid letting it boil again. This keeps the cream smooth and tasty. After that, I add the chopped fresh basil. I mix it well into the soup. Finally, I taste the soup and adjust the seasoning, adding more salt and pepper if needed. When serving, I like to add croutons and extra fresh basil on top for a nice look. You can find the complete recipe in the [Full Recipe]. To make your creamy tomato basil soup pop, think about spices and herbs. I suggest using fresh basil, as it brings a bright taste. You can also try adding a pinch of red pepper flakes for heat. If you want a deeper taste, add a bay leaf while simmering. Make sure to remove it before serving. Choosing the right cream is key too. Heavy cream gives the soup a rich taste. If you prefer a lighter option, go for coconut cream. It adds a subtle sweetness and keeps the soup creamy. Blending is crucial in this recipe. Use an immersion blender for ease and less mess. If you use a regular blender, do it in small batches. This helps avoid spills and makes sure you get a smooth texture. If your soup is too thick, add a splash of vegetable broth or water. For a thicker soup, let it simmer longer without a lid. This lets some water evaporate and makes the soup richer. Pair your creamy tomato basil soup with a fresh salad or a grilled cheese sandwich. These pairings add crunch and flavor. When serving, use a nice bowl and sprinkle fresh basil on top. You can also add croutons for texture. They make the dish look fancy and tasty. For a fun twist, serve the soup in a bread bowl. This not only looks great but also adds extra flavor. Check out the Full Recipe for more details on making this delicious dish! {{image_2}} You can make this soup fit your diet. For a dairy-free option, use coconut cream instead of heavy cream. This gives a nice, rich flavor while keeping it vegan. You can also use almond milk or cashew cream for a lighter touch. If you want a low-carb and gluten-free soup, skip the sugar and use fresh tomatoes. You can also add in zucchini or cauliflower for bulk. These veggies keep the soup filling without adding carbs. Want to make it heartier? Add cooked chicken, shrimp, or beans. These options give the soup a boost of protein. You can also use lentils for a plant-based protein. Seasonal veggies can make the soup more vibrant. Try adding in spinach, kale, or bell peppers. These not only add color but also pack in nutrients. You can swap out vegetables based on what you have on hand. To switch up the flavors, go for a Southwest twist. Add in cumin and chili powder for a warm, spicy kick. You can also mix in corn and black beans for a unique touch. If you want an Italian flair, add fresh herbs like thyme or rosemary. A splash of balsamic vinegar can enhance the tomato taste. These small changes can turn a simple soup into a gourmet dish. For the full recipe, check out the Cozy Creamy Tomato Basil Soup section. To keep your creamy tomato basil soup fresh, follow these tips: - Refrigeration tips: Let the soup cool down to room temperature. Transfer it to an airtight container. Store it in the fridge for up to 4 days. - Freezing instructions: If you want to save it longer, freeze the soup. Use freezer-safe bags or containers. The soup can last up to 3 months in the freezer. Just remember to leave some space for expansion. When you’re ready to enjoy your soup, here’s how to reheat it best: - Microwave vs. stovetop: You can use either method. For microwave, place the soup in a microwave-safe bowl. Heat it in short bursts, stirring in between. For stovetop, pour the soup into a pot and heat on low. Stir often to avoid burning. - Maintaining creamy texture: When reheating, whisk in a splash of cream or broth to keep it smooth. This step helps restore the rich texture you love. Knowing how long your soup lasts is important: - Storage duration: In the fridge, your soup is good for 4 days. In the freezer, it can last 3 months. - Identifying when soup is no longer good: Check for changes in smell, color, or texture. If it smells sour or has mold, throw it away. Always trust your senses! This creamy tomato basil soup is a treat, and knowing how to store it helps you enjoy it longer! For the full recipe, refer to the Full Recipe section. It takes about 35 minutes to make creamy tomato basil soup. This includes 10 minutes for prep and 25 minutes for cooking. You can enjoy a warm bowl of soup in no time! Yes, you can use fresh tomatoes. If you choose fresh, use about 2 pounds of ripe tomatoes. Blanch and peel them before adding them to your soup. Fresh tomatoes add a bright taste! You can use coconut cream or cashew cream for a dairy-free option. Both will give your soup a rich texture. If you want a lighter choice, use whole milk or half-and-half. Creamy tomato basil soup can be healthy. It has tomatoes, which are full of vitamins. Using less cream or a substitute makes it lighter. Add veggies for extra nutrition! To spice up your soup, add red pepper flakes or diced jalapeños. You can also stir in some hot sauce. Adjust the heat to match your taste. Enjoy the kick! Creamy tomato basil soup is simple and full of flavor. We covered key ingredients like olive oil, fresh basil, and cream to create a rich base. I shared steps to sauté, simmer, and blend the soup for a creamy texture. You learned tips for flavor enhancement and dietary variations to suit different needs. Remember, storage and reheating methods keep your soup tasting fresh. Enjoy this delicious recipe whenever you crave comfort food!

Creamy Tomato Basil Soup Rich and Flavorful Recipe

Who doesn’t love a warm bowl of creamy tomato basil soup? It’s rich, flavorful, and perfect for any day. I’ll

- 4 chicken thighs (bone-in, skin-on) - 2 tablespoons olive oil - 1 medium onion, chopped - 3 garlic cloves, minced - 1 bell pepper (any color), sliced - 1 zucchini, sliced - 1 can (14 oz) diced tomatoes (with juice) - 1 cup chicken broth - 1 teaspoon dried oregano - 1 teaspoon dried basil - Salt and pepper to taste - Fresh parsley, chopped (for garnish) For this Easy Chicken Cacciatore, I use chicken thighs. They stay juicy and packed with flavor. You can buy them bone-in and skin-on for the best taste. The skin adds a crispy texture when you brown it. Next, I grab some fresh vegetables. Onion and garlic are key aromatics that build the base. I love using a bell pepper for sweetness and a zucchini for extra color. These veggies soak up all the tasty juices. The sauce comes together with diced tomatoes and chicken broth. These bring a rich and hearty flavor. I add dried oregano and basil for that classic taste of Italian cuisine. Don’t forget to season with salt and pepper! Finally, for a lovely touch, I sprinkle fresh parsley on top. It adds color and a fresh taste. You can find the full recipe linked above to guide you through the cooking process. - Prepping the chicken and vegetables Start with four chicken thighs. Make sure they are bone-in and skin-on. Rinse them under cold water and pat them dry with a paper towel. This step keeps the chicken juicy. Next, chop one medium onion and three garlic cloves. Slice one bell pepper and one zucchini. - Browning the chicken thighs In a large skillet, heat two tablespoons of olive oil on medium-high heat. Season the chicken thighs with salt and pepper. Place them skin-side down in the hot oil. Let them cook for about 5 to 7 minutes. The skin should turn golden brown. Then flip them over and brown the other side for another 5 minutes. Once done, remove the chicken from the skillet and set it aside. - Sautéing the aromatics and vegetables In the same skillet, add the chopped onion and minced garlic. Sauté for 2 to 3 minutes. You want the onion to turn translucent and fragrant. Now, toss in the sliced bell pepper and zucchini. Cook for an additional 3 to 4 minutes until they soften a bit. - Combining ingredients to create the sauce Stir in the can of diced tomatoes along with their juice. Add one cup of chicken broth, one teaspoon of dried oregano, and one teaspoon of dried basil. Mix everything well to combine the flavors. - Cooking time and heat adjustments Return the browned chicken thighs to the skillet. Nestle them into the vegetable mix. Cover the skillet and let it simmer on low heat for about 30 minutes. This allows the flavors to blend. Make sure the chicken reaches an internal temperature of 165°F. Taste the sauce and adjust the seasoning with salt and pepper as needed. For the full recipe, check the [Full Recipe]. To make juicy chicken, choose bone-in, skin-on thighs. They stay moist during cooking. Brown them well for flavor. This step adds a nice crust, making the dish richer. For sauce consistency, you can adjust it easily. If it’s too thick, add more chicken broth. If it’s too thin, cook it uncovered for a few minutes. This helps it thicken up nicely. When it comes to pairing, crusty bread is a great choice. It soaks up the sauce well. You can also serve this dish over pasta or rice for a heartier meal. Feel free to add a side salad for some crunch. For the full recipe, check out the section above. Enjoy your cooking! {{image_2}} You can make chicken cacciatore your own. Start by using different proteins. Turkey thighs work well if you want a leaner option. You can even swap the chicken for hearty mushrooms or lentils for a vegetarian dish. Next, think about the vegetables. While the recipe calls for bell peppers and zucchini, you can add more. Try mushrooms, carrots, or even spinach. This gives your dish more color and flavor. Adjust the spice level to fit your taste. If you like heat, add crushed red pepper flakes. For a milder dish, skip the spice. You can also use smoked paprika for a unique twist. These variations let you tailor the dish to your family's likes. With the full recipe in hand, the possibilities are endless! To keep your Easy Chicken Cacciatore fresh, follow these tips. First, let the dish cool down to room temperature. Once it cools, store leftovers in an airtight container. You can place it in the fridge for up to three days. If you want to save it for longer, freezing works well too. Portion the chicken and sauce into freezer-safe bags. Try to remove as much air as possible before sealing. You can freeze it for up to three months. When you’re ready to eat, just thaw it overnight in the fridge. For reheating, use a stovetop or microwave. If you use the stove, heat it gently over low heat. Add a splash of chicken broth for moisture. Stir occasionally until it is heated through. If using a microwave, cover the container and heat in short bursts. This ensures even heating and keeps the chicken moist. By following these steps, you can enjoy your Easy Chicken Cacciatore any time! For the full recipe, check out the details above. Can I make Easy Chicken Cacciatore ahead of time? Yes, you can make Easy Chicken Cacciatore ahead of time. Just cook it fully and let it cool. Store it in the fridge for up to three days. Reheat it on the stove or in the microwave. The flavors will deepen as it sits. This makes it a great meal prep option. What can I serve with this dish? You can serve Easy Chicken Cacciatore with various sides. Here are some ideas: - Crusty bread for dipping - Pasta, like spaghetti or penne - Rice for a hearty option - A fresh green salad for balance Each option enhances the dish and adds texture. How can I adjust the recipe for dietary restrictions? To adjust for dietary needs, consider these swaps: - Use skinless chicken for a lighter option. - Substitute low-sodium chicken broth if you watch your salt. - For a vegan version, swap chicken with mushrooms or tofu. - Use gluten-free pasta or bread if needed. These changes keep the dish tasty while fitting your diet. What is the origin of Chicken Cacciatore? Chicken Cacciatore comes from Italy, meaning "hunter's chicken." It features ingredients that hunters would use, like vegetables and herbs. Each region in Italy has its twist, making it a beloved dish. The mix of chicken, tomatoes, and herbs reflects the rustic cooking style of Italian homes. Easy Chicken Cacciatore is a simple yet flavorful dish. We covered key ingredients, preparation steps, and cooking tips to make it perfect. You can adjust this recipe to fit your taste and needs. Proper storage techniques extend its freshness. Remember, you can make this dish ahead or customize it with your favorite add-ins. Enjoy the warm, rich flavors of this classic meal. It’s a recipe everyone loves!

Easy Chicken Cacciatore Savory and Simple Recipe

If you’re looking for a delicious dinner that’s quick and easy, you’ve found it! My Easy Chicken Cacciatore recipe combines

- 1 pound large shrimp, peeled and deveined - 8 oz linguine or spaghetti - 4 tablespoons unsalted butter - 4 tablespoons olive oil - 5 cloves garlic, minced - 1 teaspoon red pepper flakes - 1 cup low-sodium chicken broth - 2 tablespoons lemon juice - Zest of 1 lemon - Fresh parsley, chopped - Salt and pepper to taste Classic shrimp scampi relies on fresh and simple ingredients. The star here is the shrimp. Using large shrimp makes a big difference in flavor and texture. I always peel and devein them for ease. Pairing the shrimp with linguine or spaghetti gives a nice balance. Butter and olive oil create a rich base for the dish. I love using unsalted butter to control the saltiness. The garlic adds a wonderful aroma and taste. Red pepper flakes bring in a gentle heat. You can adjust this based on your taste. Chicken broth adds depth to the sauce. It helps to build layers of flavor. Don’t forget the lemon juice and zest. They brighten the dish and enhance the seafood. Fresh parsley adds a lovely color and taste. It’s a great way to finish your plate. Salt and pepper are key for seasoning. They help to bring all the flavors together. For the full recipe, you can check the details above. Enjoy your cooking! - Cook the pasta until al dente. This means it should be firm but not hard. - Reserve about 1 cup of pasta water for later. This helps adjust the sauce's thickness. - In a large skillet, heat olive oil and butter over medium heat. - Add minced garlic and red pepper flakes, stirring for 1-2 minutes. This brings out great flavors. - Next, add the shrimp. Season with salt and pepper. Cook until the shrimp turn pink, about 2-3 minutes. - Pour in chicken broth and lemon juice. Bring to a gentle simmer. - Let it cook for about 3-4 minutes. This lets the broth reduce a bit. - Stir in the remaining butter and lemon zest. Mix well until the butter melts. - Toss the cooked pasta with the shrimp and sauce in the skillet. - Add reserved pasta water a little at a time. This helps you get the right sauce consistency. Adjust seasoning as you go. For the full recipe, check out the details above! To make shrimp scampi shine, you need to balance the garlic and red pepper. Use five cloves of garlic for a strong flavor. Adjust the red pepper to fit your taste. Fresh lemon juice adds brightness to the dish. Squeeze it right before serving to keep the flavor fresh. Cook the shrimp for just 2-3 minutes. You want them pink and tender, not tough. For the pasta, cook until al dente, which means firm to the bite. Overcooked pasta can ruin the meal. Remember to save some pasta water for the sauce. Serve shrimp scampi in shallow bowls for a nice look. Garnish with fresh parsley for color. You can also add lemon wedges on the side. This adds a nice touch and extra flavor. Serve with crusty bread to soak up the sauce. These details make your dish feel special. {{image_2}} If you want to make shrimp scampi but need to switch some ingredients, you can. Here are some easy swaps: - Gluten-free pasta options: Use gluten-free linguine or spaghetti instead of regular pasta. It tastes great and fits your diet. - Alternatives for shrimp: You can use scallops or chicken in place of shrimp. Both options will still give you a yummy dish. Add a twist to your shrimp scampi with these simple ideas: - Adding vegetables like spinach or tomatoes: Toss in some fresh spinach or cherry tomatoes for extra color and nutrition. They cook quickly and add a nice touch. - Incorporating white wine for depth: A splash of white wine in your sauce makes it rich. It brings out the flavors and adds a lovely aroma. You can cook shrimp scampi in various ways to change it up: - Oven-baked shrimp scampi: Place shrimp and sauce in a baking dish. Bake at 400°F for about 10-12 minutes. This method gives you a nice, roasted flavor. - One-pan shrimp scampi variations: Cook everything in one pan for an easy clean-up. Just sauté the shrimp, add the pasta and sauce, and you are done. For the full recipe, check out the detailed instructions above! After enjoying your shrimp scampi, store any leftovers in the fridge. Place it in an airtight container. This helps keep the shrimp fresh. Use the leftovers within two days for the best taste. When reheating, you have two options: microwave or stovetop. The stovetop is best for even heating. Heat it gently over low heat. Stir often to prevent the shrimp from getting rubbery. If you use the microwave, heat in short bursts. Check frequently to avoid overcooking. You can freeze shrimp scampi for later. First, let it cool completely. Then, place it in a freezer-safe container. It can last up to three months in the freezer. When you want to eat it, thaw overnight in the fridge. For quick thawing, use the microwave on defrost. Enjoy your shrimp scampi with the same great taste! For the full recipe, check out the Garlic Butter Shrimp Scampi. Classic shrimp scampi stands out due to its simple and fresh ingredients. You typically use large shrimp, garlic, butter, and lemon juice. This dish often uses a light sauce that allows the shrimp's flavor to shine through. The cooking method involves sautéing, which gives the shrimp a nice sear. Most shrimp dishes do not highlight garlic and lemon as much as scampi does. Yes, you can use frozen shrimp for shrimp scampi. Just make sure to thaw it first. Place the frozen shrimp in a bowl of cold water for about 15-20 minutes. Once thawed, pat them dry with a paper towel. This step helps the shrimp sear better and prevents excess water in your dish. Shrimp scampi pairs well with several sides. Here are some ideas: - Garlic bread for soaking up the sauce - A fresh green salad with lemon vinaigrette - Steamed vegetables like asparagus or green beans - Rice or couscous to complement the dish To adjust the spiciness, simply change the amount of red pepper flakes. For a milder dish, use less than one teaspoon. If you prefer it spicy, add more flakes to taste. You can also include fresh chili or hot sauce for a different kick. Always taste as you go to find your perfect balance. Shrimp scampi can be a healthy choice. Shrimp is low in calories and high in protein. It also contains omega-3 fatty acids. However, keep an eye on the butter and oil you use. You can reduce the amount or use a healthier oil, like avocado oil. Pairing it with veggies also boosts the nutritional value. For more details, see the Full Recipe. Shrimp scampi is a classic dish with rich flavors. It combines shrimp, pasta, garlic, and lemon for a delightful meal. Remember, balance is key. Use fresh ingredients for the best taste. Whether you stick to the classic recipe or try variations, this dish is versatile and simple. Store leftovers properly to keep them fresh. With the right tips, you can make shrimp scampi that impresses everyone. Enjoy cooking this dish confidently, and happy dining!

Classic Shrimp Scampi Tasty and Easy Dinner Recipe

Looking for an easy and delicious dinner? You’re in the right place! Classic shrimp scampi combines fresh shrimp, garlic, and

- 1 cup cornmeal - 1 cup all-purpose flour - 1 tablespoon baking powder - 1/2 teaspoon salt - 1/4 teaspoon cayenne pepper - 1 cup buttermilk (or milk with 1 tablespoon vinegar) - 2 large eggs - 1/4 cup honey - 1/4 cup melted butter - 1 cup shredded sharp cheddar cheese - 1/2 cup pickled jalapeños, chopped - 1/3 cup corn kernels When I make Cheesy Jalapeño Cornbread, I love how simple the ingredients are. Each one plays a role in creating that perfect blend of flavor and texture. The cornmeal gives it a warm, hearty base, while the all-purpose flour offers a soft, tender crumb. The baking powder helps the bread rise, making it fluffy. I always add a pinch of salt to enhance the taste. A little cayenne pepper adds a gentle kick that pairs well with the cheese and jalapeños. For moisture, I use buttermilk. If you don't have it, just mix regular milk with vinegar, and it works great. Eggs bind everything together. Honey adds sweetness, and melted butter gives richness. Now, let’s talk cheese! Sharp cheddar gives that bold flavor. You can adjust the amount to your liking. The pickled jalapeños bring heat and tang, and corn kernels add a sweet crunch. - Calories: 200 per serving - Protein: 5 grams - Carbohydrates: 30 grams - Fat: 8 grams This cornbread is not just tasty; it packs fiber and protein. It’s filling and satisfying, making it a great side or snack. - Mixing bowls - Whisk - Baking dish or cast-iron skillet These tools make it easy to prepare your cornbread. The mixing bowls help combine ingredients, while a whisk ensures a smooth batter. A baking dish or a cast-iron skillet works well for baking, giving a nice crust. For the full recipe, check [Full Recipe]. 1. Preheat your oven to 400°F (200°C). Grease a 9-inch baking dish or cast-iron skillet with butter. This helps the cornbread not stick. 2. In a large bowl, mix together the cornmeal, all-purpose flour, baking powder, salt, and cayenne pepper. Whisk until all the dry bits blend well. 3. In another bowl, whisk the buttermilk, eggs, honey, and melted butter. Make sure there are no lumps for a smooth batter. 1. Pour the wet mixture into the dry mix. Stir gently until just combined. Be careful not to overmix, or your cornbread may become tough. 2. Fold in the shredded cheddar cheese, chopped jalapeños, and corn. This adds flavor and texture to the cornbread. 3. Pour the batter into your baking dish, spreading it evenly. Bake for 20-25 minutes until the top is golden. A toothpick should come out clean when inserted in the center. 1. Let the cornbread cool in the pan for about 10 minutes. This makes it easier to slice. 2. For the best serving experience, slice into squares. Serve warm, and consider adding melted cheese or a drizzle of honey on top for extra flavor. Enjoy this delightful Cheesy Jalapeño Cornbread! For the complete recipe, check out the Full Recipe section. To make the best Cheesy Jalapeño Cornbread, avoid overmixing the batter. When you mix too much, the cornbread can turn out tough. Stir just until everything is combined; this keeps it light and fluffy. The texture is key! Adjust the spice level based on your taste. If you love heat, add more jalapeños. For a milder flavor, use fewer. Remember, pickled jalapeños are less spicy than fresh. You can also remove the seeds for less heat. Cornbread pairs well with soups and salads. Try serving it alongside chili or a fresh garden salad. The warmth of the cornbread complements these dishes perfectly. For toppings, consider adding extra cheese. A sprinkle of melted cheese on top makes it even tastier. A drizzle of honey adds a sweet touch that balances the spice. You can also try butter for a classic finish. One common mistake is overbaking. Keep an eye on the time. The cornbread should bake for about 20-25 minutes. Check it with a toothpick. If it comes out clean, it’s done. Overbaking can make it dry. Using the right ingredients matters too. Fresh corn adds sweetness and texture. If you use frozen corn, make sure it’s thawed and drained. This keeps the batter from becoming too wet. For the best flavor, always use fresh ingredients when possible. For the complete recipe, check the [Full Recipe]. {{image_2}} You can mix up your Cheesy Jalapeño Cornbread by using different cheeses. Sharp cheddar gives a great flavor, but try pepper jack for more heat. Creamy mozzarella can add a nice stretch. If you need a dairy-free option, use vegan cheese. It melts well and still tastes good! Adjusting the spice is easy! You can add more jalapeños for heat, or use less if you like it mild. If you want extra kick, add more cayenne pepper. You could also try spices like smoked paprika or ground cumin for a different taste. Get creative with add-ins! Cooked bacon bits add a savory crunch. Fresh herbs like cilantro or green onions can brighten the flavor. For a sweet twist, mix in blueberries or corn kernels. These fun choices make your cornbread unique and tasty! You can find the full recipe to get started. Once your Cheesy Jalapeño Cornbread cools, store it properly. Let it cool at room temperature for about 10 minutes. This step helps avoid soggy cornbread. After cooling, cut it into squares for easy storage. Place the squares in an airtight container. If you don’t have one, use a zip-top bag. Make sure to press out as much air as you can. This keeps the cornbread fresh longer. When it’s time to enjoy your leftovers, reheating is key. The oven works best for even heating. Preheat your oven to 350°F (175°C). Place the cornbread on a baking sheet. Cover it with foil to keep it moist. Heat for about 10-15 minutes. If you need it fast, the microwave is an option too. Place a piece of cornbread on a microwave-safe plate. Cover it with a damp paper towel. Heat in short bursts of 15-20 seconds until warm. This method also helps keep it moist. Want to save some for later? Freezing is a great choice. First, let the cornbread cool completely. Wrap each piece tightly in plastic wrap. Then place the wrapped pieces in a freezer bag. Remove as much air as you can before sealing. This helps prevent freezer burn. To thaw, move the cornbread from the freezer to the fridge overnight. If you’re in a hurry, you can also thaw it in the microwave. Just use low power to avoid cooking it. Enjoy your delicious cornbread anytime! You can find the full recipe to make it fresh whenever you like. To make your cornbread spicier, add more jalapeños. You can use fresh or pickled ones. Chop them finely and mix them into the batter. If you want even more heat, add a pinch of cayenne pepper. You can also try swapping in hotter peppers like serrano or habanero. Just remember to taste as you go! Yes, you can use regular milk. Buttermilk makes the cornbread moist and tangy. If you don’t have buttermilk, mix one cup of milk with one tablespoon of vinegar or lemon juice. Let it sit for five minutes to sour before using it in the recipe. This helps mimic the flavor and texture of buttermilk. Cheesy Jalapeño Cornbread works well with many dishes. It pairs nicely with chili, soups, or stews. Try it alongside grilled meats or a fresh salad. For a fun twist, serve with barbecue. You can also enjoy it as a snack with butter or honey on top. Homemade cornbread lasts about three days at room temperature. Store it in an airtight container to keep it fresh. If you want it to last longer, place it in the fridge, where it can stay good for about a week. Always check for any signs of spoilage before eating. You learned how to make Cheesy Jalapeño Cornbread from scratch. We covered ingredients, steps, and tips to perfect your dish. This cornbread pairs well with many meals and offers a fun, spicy twist. Remember, adjusting spice levels and adding cheese can change the flavor. Store leftovers properly to enjoy later. With these guidelines, your cornbread will be a hit at every meal. I hope you feel ready to bake and share its tasty goodness!

Cheesy Jalapeño Cornbread Irresistible Flavor Boost

Are you ready to take your cornbread to the next level? Cheesy Jalapeño Cornbread is a mouthwatering twist on a

Older posts
Newer posts
← Previous Page1 … Page72 Page73 Page74 … Page85 Next →

dsad

© 2026 greenmealmap • Built with GeneratePress

Our Policies

  • Copyright Policy
  • Cookie Policy
  • GDPR Policy
  • Privacy Policy
  • Disclaimer
  • Terms Of Use

More Information

  • Home
  • About
  • Contact
  • Appetizers
  • Dessert
  • Dinner
  • Drinks
©2026, greenmealmap About Back To Top