If you love cheesecake and peanut butter, you’re in for a treat! These Peanut Butter Cup Cheesecake Bars combine creamy goodness with crunchy texture in every bite. Imagine rich cream cheese blended with creamy peanut butter, all topped with chocolate peanut butter cups. Not only are they easy to make, but they also impress at any gathering. Let’s dive into the delicious world of these delightful bars and satisfy your sweet tooth!
Ingredients
List of Ingredients
– 1 ½ cups graham cracker crumbs
– ½ cup unsalted butter, melted
– 2 cups cream cheese, softened
– ¾ cup creamy peanut butter
– 1 cup granulated sugar
– 2 large eggs
– 1 teaspoon vanilla extract
– 1 cup mini chocolate peanut butter cups, chopped
– ½ cup sour cream
– 1 tablespoon powdered sugar (for dusting, optional)
These ingredients make a rich and creamy dessert that everyone loves. The graham cracker crumbs form a sweet base, while the peanut butter adds a delicious flavor. Cream cheese gives the bars a soft texture. You will also need eggs to help bind everything together.
Kitchen Tools Needed
– Mixing bowls
– Electric mixer
– Measuring cups and spoons
– 9×9-inch baking pan
– Parchment paper (optional)
Having the right tools makes the process smooth. Use mixing bowls for combining and an electric mixer for smoothness. The baking pan holds your bars as they bake. Parchment paper helps with easy cleanup and removal. Enjoy the fun of making these bars!
Step-by-Step Instructions
Prepping and Preheating
– Preheat oven to 325°F (160°C).
– Prepare the baking pan with grease or parchment paper.
Start by warming your oven. This helps bake the bars evenly. Choose a 9×9-inch baking pan. Greasing it or using parchment paper makes for easy removal later.
Making the Crust
– Combine graham cracker crumbs and melted butter.
– Press mixture into the bottom of the pan.
In a bowl, mix graham cracker crumbs with melted butter. Stir until it feels like wet sand. Then, press this mix firmly into the bottom of the pan. This will be your tasty crust.
Preparing the Cheesecake Filling
– Beat cream cheese and peanut butter.
– Incorporate sugar, eggs, vanilla extract, and sour cream.
– Fold in chocolate peanut butter cups.
Take a large bowl and add softened cream cheese and peanut butter. Use an electric mixer to beat them together until smooth. Slowly add granulated sugar and mix well. Add eggs one at a time, mixing after each. Next, stir in the vanilla extract and sour cream. Finally, gently fold in chopped chocolate peanut butter cups to give your filling some fun bites.
Baking and Cooling
– Pour cheesecake batter over crust and bake.
– Cooling and chilling instructions.
Pour the creamy filling over your crust. Spread it evenly across the pan. Bake for 30 to 35 minutes. The center should be set but not jiggly. After baking, let it cool at room temperature for about an hour. Then, chill it in the fridge for at least three hours or overnight. This helps the bars firm up nicely.
Once chilled, lift them out using the parchment paper. Cut into squares for serving. Enjoy your delicious peanut butter cup cheesecake bars!
Tips & Tricks
Perfecting the Cheesecake Texture
To make your cheesecake smooth, use room temperature ingredients. Cold cream cheese does not mix well. Let your cream cheese and eggs sit out for about 30 minutes before mixing. This helps achieve a creamy texture.
To avoid cracks on the top, mix gently. Overbeating adds too much air. Bake your cheesecake in a water bath. This keeps the heat steady and helps it cook evenly.
Serving Suggestions
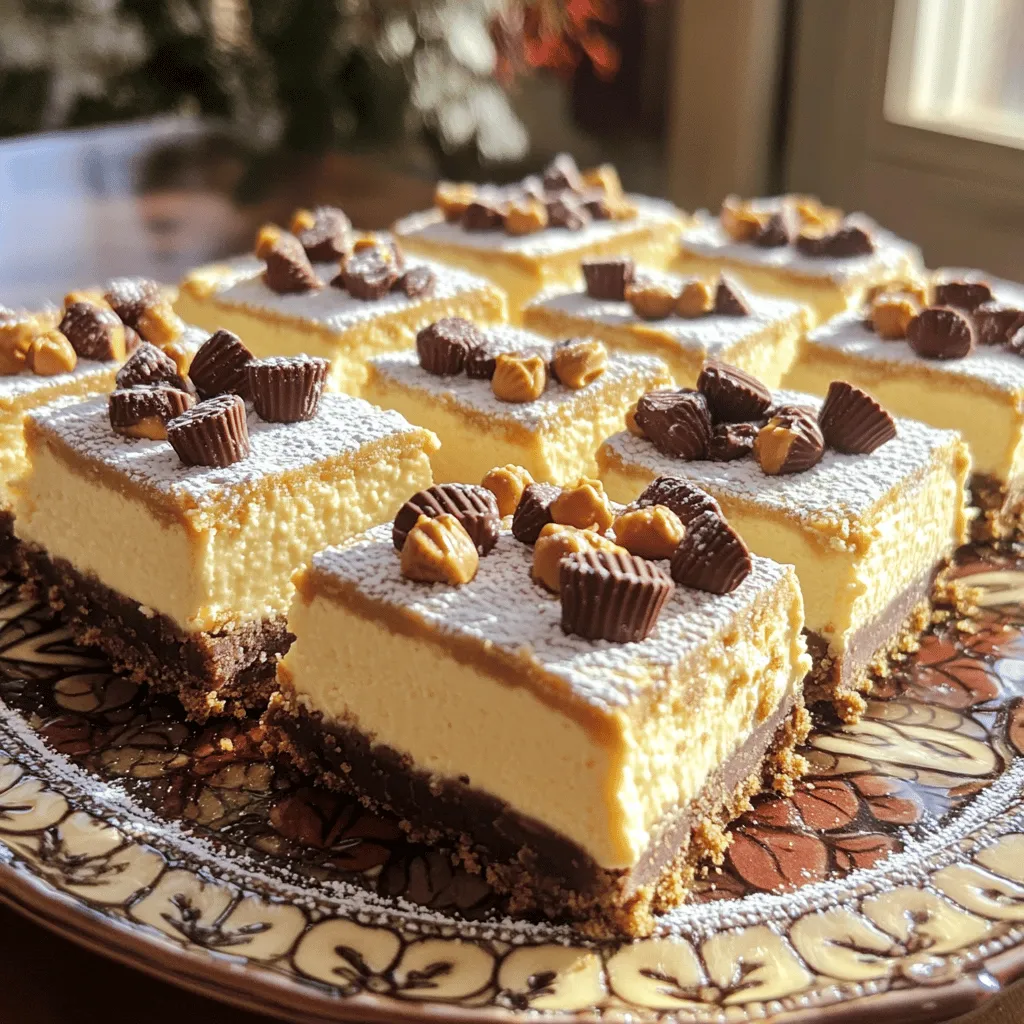
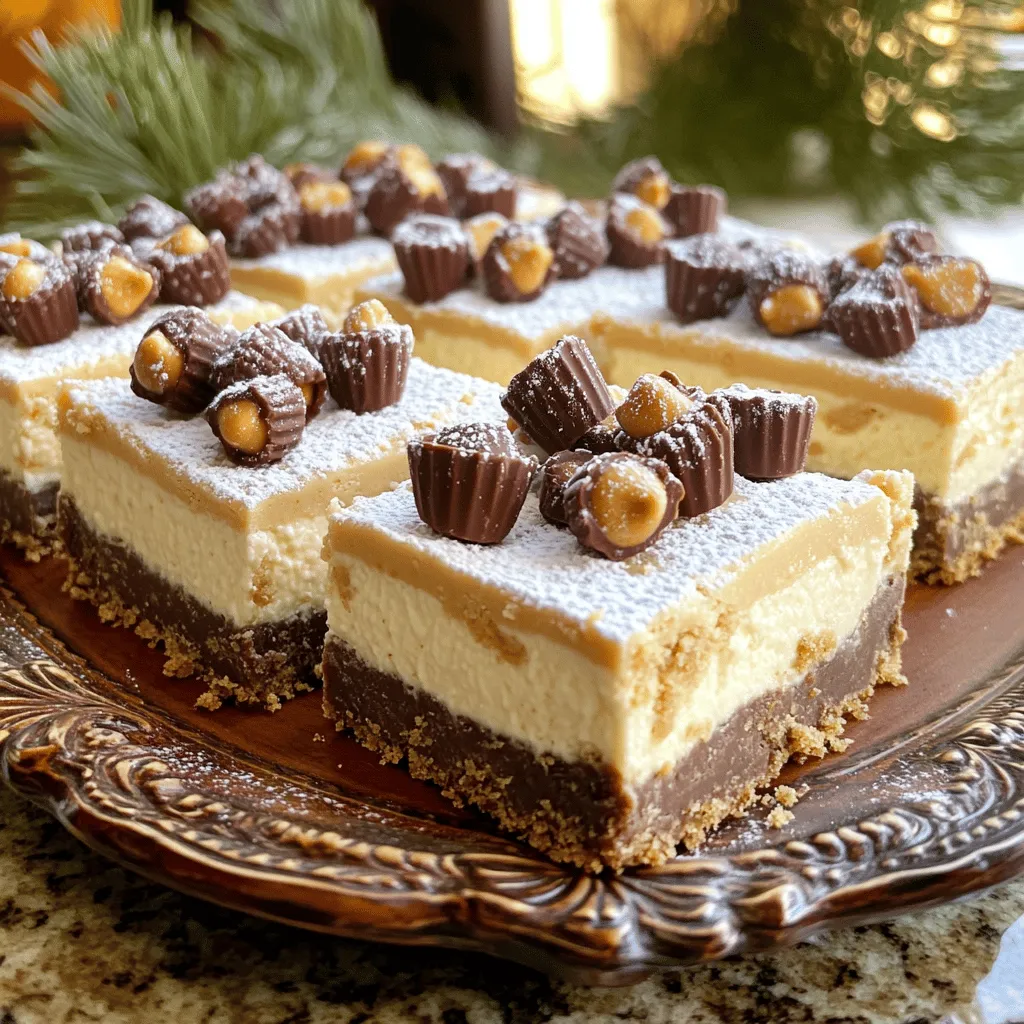
Presentation is key. Serve the cheesecake bars on a nice plate. Add a few whole mini chocolate peanut butter cups on top. Dust with powdered sugar for a sweet look.
Pair these bars with coffee or whipped cream. The flavors blend well and enhance each bite. You can also try serving them with fresh berries for a fruity touch.
Common Mistakes to Avoid
One common mistake is overmixing the batter. This can cause your cheesecake to puff up and crack. Mix just enough to combine ingredients smoothly.
Another mistake is not allowing enough cooling time. Let the cheesecake cool at room temperature for one hour. Then, chill it in the fridge for at least three hours. This helps the bars set properly and taste their best.
Variations
Flavors and Add-ins
You can easily change the flavors in these bars. Try swapping peanut butter for almond or cashew butter. This gives a new twist. Each nut butter has its own taste and can change the whole dessert.
Adding chocolate or caramel swirls can also make these bars more fun. Just drizzle melted chocolate or caramel into the cheesecake batter before baking. Use a knife to swirl it in. This adds a rich flavor and makes the bars look pretty.
Alternative Crust Options
If you want a different crust, consider using Oreo or chocolate cookie crumbs. This adds a chocolatey touch that pairs well with the cheesecake.
For those who need gluten-free options, use gluten-free graham cracker crumbs or crushed nuts. This way, everyone can enjoy these tasty treats without worry.
Serving Sizes and Scaling the Recipe
You might want to serve these at a party or a small gathering. To adjust servings, you can easily double or halve the recipe.
If you double the recipe, use a larger pan, like a 9×13-inch one. For halving, use a smaller pan, like a 8×8-inch one. Keep an eye on the baking time. Larger amounts may need a bit longer, while smaller ones may bake faster. Enjoy making these bars fit your event!
Storage Info
Refrigeration Guidelines
To store leftovers in the fridge, place the cheesecake bars in an airtight container. This keeps them fresh and tasty. Make sure to layer parchment paper between the bars. This prevents sticking. You can enjoy these bars for up to one week. After that, the taste may change.
Freezing Instructions
For freezing the cheesecake bars, cut them into squares first. Wrap each square tightly in plastic wrap. Then place them in a freezer-safe bag or container. This helps keep them from getting freezer burn. They can last up to three months in the freezer.
When you want to enjoy them, take out the bars and thaw them in the fridge. This helps keep the texture smooth. Avoid thawing at room temperature, as that can make them too soft. Enjoy your treat!
FAQs
Can I make these cheesecake bars ahead of time?
Yes, you can prepare these cheesecake bars in advance. Make them a day or two before your event. After baking, let them cool. Then, place them in the fridge to set. This helps the flavors meld together. Just remember to cover them well to avoid drying out.
How long do peanut butter cup cheesecake bars last?
These bars last about 4 to 5 days in the fridge. Store them in an airtight container. You can freeze them for up to 2 months too. Just wrap each bar in plastic wrap and then foil. This keeps them fresh and tasty.
What can I substitute for cream cheese?
If you need a cream cheese alternative, try using Greek yogurt or mascarpone. Both offer a smooth texture. You can also use vegan cream cheese if you want a dairy-free option. These substitutes will yield a creamy filling.
Where can I buy pre-made peanut butter cup cheesecake bars?
You can find pre-made cheesecake bars at many bakeries and grocery stores. Check the frozen dessert section too. Some online shops offer delivery options. This way, you can enjoy these treats without any baking.
This cheesecake bar recipe is simple and fun. You learned about the ingredients, tools, and steps. We covered tips for texture and common mistakes to avoid. You can even explore variations and storage tips.
Embrace your creativity with flavors and textures. Remember to enjoy each bite. Happy baking!