No-Bake Pumpkin Chocolate Oatmeal Squares Delight

WANT TO SAVE THIS RECIPE?

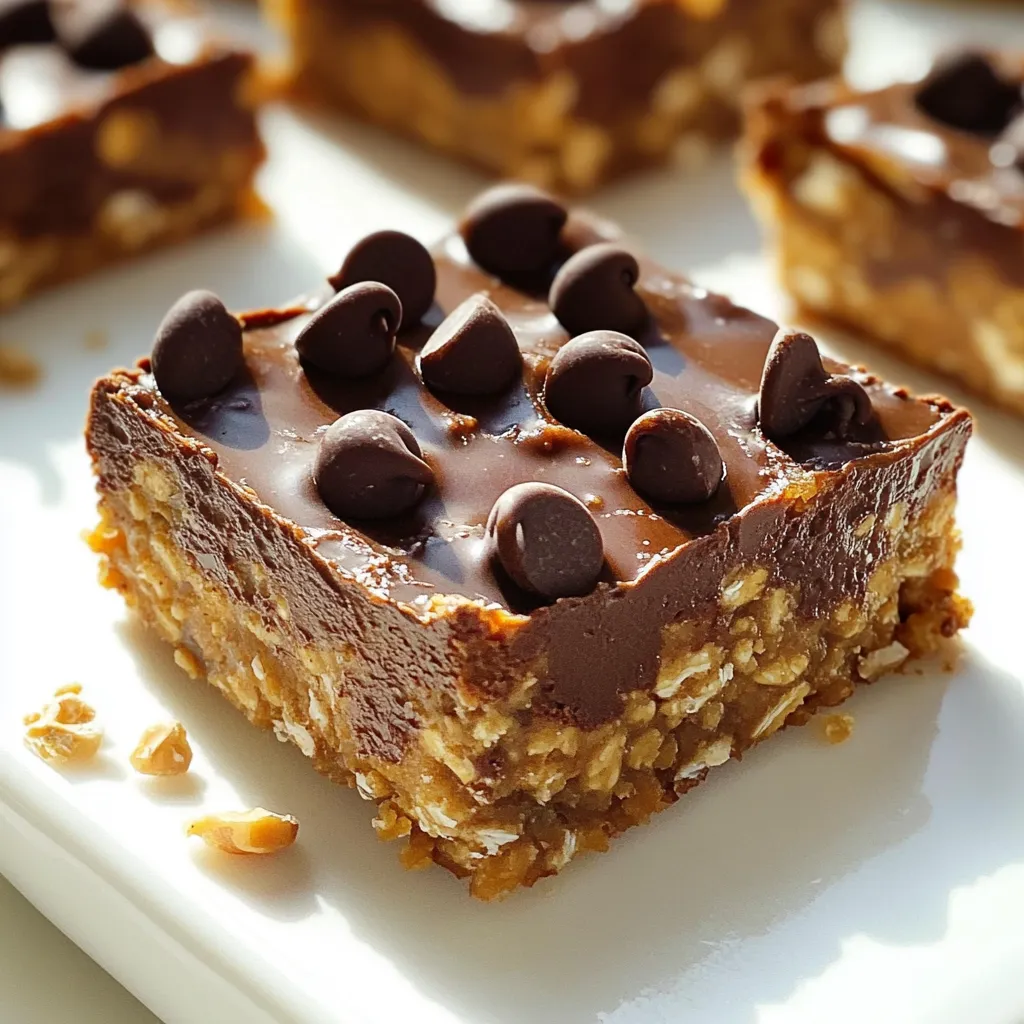
Are you ready for a treat that’s easy and delicious? My No-Bake Pumpkin Chocolate Oatmeal Squares combine rich chocolate, creamy pumpkin, and wholesome oats. You won’t need an oven, making this recipe perfect for any time of year, especially fall. With simple ingredients and quick steps, you can create a snack that your friends and family will love. Let’s dive into how to make these delightful squares!

Ingredients

Comprehensive List of Ingredients

To make No-Bake Pumpkin Chocolate Oatmeal Squares, gather these ingredients:

– 1 cup rolled oats

– 1/2 cup canned pumpkin puree

– 1/4 cup almond butter (or any nut butter)

– 1/4 cup honey or maple syrup

– 1/3 cup cocoa powder

– 1/2 teaspoon ground cinnamon

– 1/4 teaspoon nutmeg

– 1/4 cup mini chocolate chips (plus more for topping)

– Pinch of salt

– Optional: chopped nuts or seeds for added crunch

These ingredients blend together to form a tasty treat. The rolled oats give a nice base, while the pumpkin adds moisture and flavor. The nut butter binds everything, and the cocoa powder provides a rich chocolate taste.

Substitutions for Nut Butter and Sweeteners

If you don’t have almond butter, you can use any nut butter you like. Peanut butter works well too. For sweeteners, honey is great, but maple syrup is a good alternative. If you want something lower in sugar, try using agave syrup or a sugar substitute like stevia.

These swaps keep the squares delicious while catering to your taste and dietary needs.

Optional Add-Ins for Texture and Flavor

Want to jazz up your squares? You can add chopped nuts like walnuts or pecans. Seeds like chia or flaxseed also work well. These add a nice crunch and extra nutrients. You might even add dried fruit like cranberries or raisins for sweetness and chew.

Feel free to get creative! Each add-in can change the squares to suit your flavor preferences.

Step-by-Step Instructions

Mixing the Base Ingredients

Start by taking a large mixing bowl. Add 1 cup of rolled oats. Next, pour in 1/2 cup of canned pumpkin puree. Add 1/4 cup of almond butter, or your favorite nut butter. Then, mix in 1/4 cup of honey or maple syrup. Stir everything well until it forms a smooth paste. You want it to blend nicely.

Incorporating Dry Ingredients

Now, it’s time to add the dry ingredients. Sift in 1/3 cup of cocoa powder. Next, add a 1/2 teaspoon of ground cinnamon and 1/4 teaspoon of nutmeg. Don’t forget a pinch of salt to balance the flavors. Mix well until you see no dry spots. Everything should be combined nicely.

Preparing and Pressing into the Pan

Get an 8×8 inch square baking pan. Line it with parchment paper, leaving some paper hanging over the edges. This makes it easy to lift out later. Pour your mixture into the pan. Use a spatula or your hands to press it down. Make sure it’s packed tightly and even. This step is key for the right texture.

Chilling for Set Time

Once your mixture is pressed down, place the pan in the fridge. Let it chill for at least 2 hours. This helps the squares firm up. You can also leave them longer if you want. After chilling, they will cut into neat squares easily. Enjoy your delicious treat!

Tips & Tricks

Achieving the Best Texture

To get that perfect texture, follow a few key steps. First, use rolled oats. They give a chewy bite that works well with the creamy pumpkin. When mixing, make sure everything joins together well. Press the mixture firmly into the pan. This helps your squares hold their shape. You want them compact. If the mix feels too dry, add a bit more almond butter or honey. This will help bind it better.

Storing and Serving Suggestions

For storing, keep your squares in an airtight container. They stay fresh in the fridge for up to a week. When serving, cut them into squares. You can top them with extra chocolate chips or nuts for a nice touch. These are great as a quick snack or dessert. You can even pack them for lunch!

How to Make Ahead of Time

These squares are easy to make ahead. You can whip them up a day or two before you need them. Just follow the steps and chill them as directed. After they set, cut them into squares. Store them in the fridge until you are ready to serve. This way, you have a tasty treat ready to go whenever you want!

Variations

Switching Up Flavors (e.g., spices, nut butter)

You can easily change the flavors in your pumpkin chocolate oatmeal squares. Try using different spices. For example, add ginger or allspice for a warm kick. If you want a nutty taste, swap almond butter for peanut or cashew butter. Each nut butter brings its own unique flavor. This simple switch can change the whole vibe of your squares.

Gluten-Free and Vegan Options

Making these squares gluten-free is simple. Use certified gluten-free oats instead of regular rolled oats. For a vegan option, replace honey with maple syrup. This keeps the sweet flavor while staying plant-based. These swaps ensure everyone can enjoy this treat without worry.

Creative Toppings to Elevate

Toppings can make your squares even more fun. After cutting them, sprinkle extra mini chocolate chips on top. You can also add chopped nuts for a crunchy texture. Try using shredded coconut or a drizzle of nut butter for a rich finish. These toppings not only look great but also add new flavors and textures.

Storage Info

Best Practices for Refrigeration

To keep your No-Bake Pumpkin Chocolate Oatmeal Squares fresh, store them in the fridge. Place the squares in an airtight container. This helps maintain their taste and texture. You can layer parchment paper between the squares to prevent sticking. Make sure to consume them within a week for the best flavor.

Freezing and Thawing Instructions

You can freeze these squares for longer storage. First, cut them into individual squares. Wrap each square tightly in plastic wrap. Then, place them in a freezer-safe bag or container. They can last up to three months in the freezer. When you’re ready to enjoy, simply take a square out and let it thaw in the fridge overnight. You can also leave it at room temperature for about 30 minutes.

Shelf Life Overview

These squares have a solid shelf life. In the fridge, they last about 5 to 7 days. If you freeze them, they can stay good for about three months. Always check for any changes in smell or texture before enjoying them. Proper storage ensures you get the best taste for each bite.

FAQs

Can I use fresh pumpkin instead of canned?

Yes, you can use fresh pumpkin. Just make sure to cook it first. Roast or steam fresh pumpkin until soft. Then, puree it until smooth. This gives you a fresh flavor, but canned pumpkin is easier.

How long do these squares last in the fridge?

These squares last about one week in the fridge. Store them in an airtight container. This keeps them fresh and tasty. You can also freeze them for longer storage.

Can I make these squares nut-free?

Absolutely! You can swap almond butter for sunflower seed butter. This keeps the squares nut-free and delicious. Make sure to check for any nut traces in other ingredients.

What to do if my mixture is too dry or too wet?

If your mixture is too dry, add a bit more honey or pumpkin. Mix well until it holds together. If it’s too wet, add more oats and cocoa powder. You want a thick, moldable consistency.

This blog covered all you need for making tasty squares. We discussed key ingredients, including substitutions and add-ins for extra flavor. I shared step-by-step instructions to guide your process. You learned tips to improve texture and how to store and serve your squares.

In the end, feel free to experiment with flavors and make it your own. Enjoy making these snacks!

To make No-Bake Pumpkin Chocolate Oatmeal Squares, gather these ingredients: - 1 cup rolled oats - 1/2 cup canned pumpkin puree - 1/4 cup almond butter (or any nut butter) - 1/4 cup honey or maple syrup - 1/3 cup cocoa powder - 1/2 teaspoon ground cinnamon - 1/4 teaspoon nutmeg - 1/4 cup mini chocolate chips (plus more for topping) - Pinch of salt - Optional: chopped nuts or seeds for added crunch These ingredients blend together to form a tasty treat. The rolled oats give a nice base, while the pumpkin adds moisture and flavor. The nut butter binds everything, and the cocoa powder provides a rich chocolate taste. If you don't have almond butter, you can use any nut butter you like. Peanut butter works well too. For sweeteners, honey is great, but maple syrup is a good alternative. If you want something lower in sugar, try using agave syrup or a sugar substitute like stevia. These swaps keep the squares delicious while catering to your taste and dietary needs. Want to jazz up your squares? You can add chopped nuts like walnuts or pecans. Seeds like chia or flaxseed also work well. These add a nice crunch and extra nutrients. You might even add dried fruit like cranberries or raisins for sweetness and chew. Feel free to get creative! Each add-in can change the squares to suit your flavor preferences. Start by taking a large mixing bowl. Add 1 cup of rolled oats. Next, pour in 1/2 cup of canned pumpkin puree. Add 1/4 cup of almond butter, or your favorite nut butter. Then, mix in 1/4 cup of honey or maple syrup. Stir everything well until it forms a smooth paste. You want it to blend nicely. Now, it’s time to add the dry ingredients. Sift in 1/3 cup of cocoa powder. Next, add a 1/2 teaspoon of ground cinnamon and 1/4 teaspoon of nutmeg. Don't forget a pinch of salt to balance the flavors. Mix well until you see no dry spots. Everything should be combined nicely. Get an 8x8 inch square baking pan. Line it with parchment paper, leaving some paper hanging over the edges. This makes it easy to lift out later. Pour your mixture into the pan. Use a spatula or your hands to press it down. Make sure it’s packed tightly and even. This step is key for the right texture. Once your mixture is pressed down, place the pan in the fridge. Let it chill for at least 2 hours. This helps the squares firm up. You can also leave them longer if you want. After chilling, they will cut into neat squares easily. Enjoy your delicious treat! To get that perfect texture, follow a few key steps. First, use rolled oats. They give a chewy bite that works well with the creamy pumpkin. When mixing, make sure everything joins together well. Press the mixture firmly into the pan. This helps your squares hold their shape. You want them compact. If the mix feels too dry, add a bit more almond butter or honey. This will help bind it better. For storing, keep your squares in an airtight container. They stay fresh in the fridge for up to a week. When serving, cut them into squares. You can top them with extra chocolate chips or nuts for a nice touch. These are great as a quick snack or dessert. You can even pack them for lunch! These squares are easy to make ahead. You can whip them up a day or two before you need them. Just follow the steps and chill them as directed. After they set, cut them into squares. Store them in the fridge until you are ready to serve. This way, you have a tasty treat ready to go whenever you want! {{image_2}} You can easily change the flavors in your pumpkin chocolate oatmeal squares. Try using different spices. For example, add ginger or allspice for a warm kick. If you want a nutty taste, swap almond butter for peanut or cashew butter. Each nut butter brings its own unique flavor. This simple switch can change the whole vibe of your squares. Making these squares gluten-free is simple. Use certified gluten-free oats instead of regular rolled oats. For a vegan option, replace honey with maple syrup. This keeps the sweet flavor while staying plant-based. These swaps ensure everyone can enjoy this treat without worry. Toppings can make your squares even more fun. After cutting them, sprinkle extra mini chocolate chips on top. You can also add chopped nuts for a crunchy texture. Try using shredded coconut or a drizzle of nut butter for a rich finish. These toppings not only look great but also add new flavors and textures. To keep your No-Bake Pumpkin Chocolate Oatmeal Squares fresh, store them in the fridge. Place the squares in an airtight container. This helps maintain their taste and texture. You can layer parchment paper between the squares to prevent sticking. Make sure to consume them within a week for the best flavor. You can freeze these squares for longer storage. First, cut them into individual squares. Wrap each square tightly in plastic wrap. Then, place them in a freezer-safe bag or container. They can last up to three months in the freezer. When you're ready to enjoy, simply take a square out and let it thaw in the fridge overnight. You can also leave it at room temperature for about 30 minutes. These squares have a solid shelf life. In the fridge, they last about 5 to 7 days. If you freeze them, they can stay good for about three months. Always check for any changes in smell or texture before enjoying them. Proper storage ensures you get the best taste for each bite. Yes, you can use fresh pumpkin. Just make sure to cook it first. Roast or steam fresh pumpkin until soft. Then, puree it until smooth. This gives you a fresh flavor, but canned pumpkin is easier. These squares last about one week in the fridge. Store them in an airtight container. This keeps them fresh and tasty. You can also freeze them for longer storage. Absolutely! You can swap almond butter for sunflower seed butter. This keeps the squares nut-free and delicious. Make sure to check for any nut traces in other ingredients. If your mixture is too dry, add a bit more honey or pumpkin. Mix well until it holds together. If it’s too wet, add more oats and cocoa powder. You want a thick, moldable consistency. This blog covered all you need for making tasty squares. We discussed key ingredients, including substitutions and add-ins for extra flavor. I shared step-by-step instructions to guide your process. You learned tips to improve texture and how to store and serve your squares. In the end, feel free to experiment with flavors and make it your own. Enjoy making these snacks!

No-Bake Pumpkin Chocolate Oatmeal Squares

Looking for a delicious and healthy treat? Try these No-Bake Pumpkin Chocolate Oatmeal Squares! Packed with rolled oats, pumpkin puree, and rich cocoa, these squares are not only easy to make but also perfect for satisfying your sweet tooth. You'll love how quick they come together with just a few ingredients. Don’t miss out—click through for the full recipe and get ready to whip up these delightful snacks! #NoBakeDessert #PumpkinRecipes #HealthySnacks #ChocolateLovers

Ingredients
  

1 cup rolled oats

1/2 cup canned pumpkin puree

1/4 cup almond butter (or any nut butter)

1/4 cup honey or maple syrup

1/3 cup cocoa powder

1/2 teaspoon ground cinnamon

1/4 teaspoon nutmeg

1/4 cup mini chocolate chips (plus more for topping)

Pinch of salt

Optional: chopped nuts or seeds for added crunch

Instructions
 

Mix the Base: In a large mixing bowl, combine the rolled oats, canned pumpkin puree, almond butter, and honey (or maple syrup). Mix until well combined and the mixture forms a uniform paste.

    Add Dry Ingredients: Sift in the cocoa powder, ground cinnamon, nutmeg, and salt. Stir well until everything is fully incorporated.

      Fold in Chocolate Chips: Gently fold in the mini chocolate chips, ensuring they are evenly distributed throughout the mixture. If using, add your choice of chopped nuts or seeds for extra crunch.

        Prepare the Pan: Line an 8x8 inch (20x20 cm) square baking pan with parchment paper, leaving some overhang on the sides for easy removal later.

          Press Mixture into Pan: Pour the mixture into the prepared pan and press it down firmly with a spatula or your hands to create an even layer. Make sure it’s compacted well.

            Chill: Place the pan in the refrigerator for at least 2 hours, or until the squares are firm and set.

              Cut and Serve: Once set, remove from the pan using the parchment paper overhang. Cut into squares, and sprinkle additional mini chocolate chips on top if desired.

                Prep Time: 15 minutes | Total Time: 2 hours 15 minutes | Servings: 12 squares

                  WANT TO SAVE THIS RECIPE?

                  Leave a Comment

                  Recipe Rating