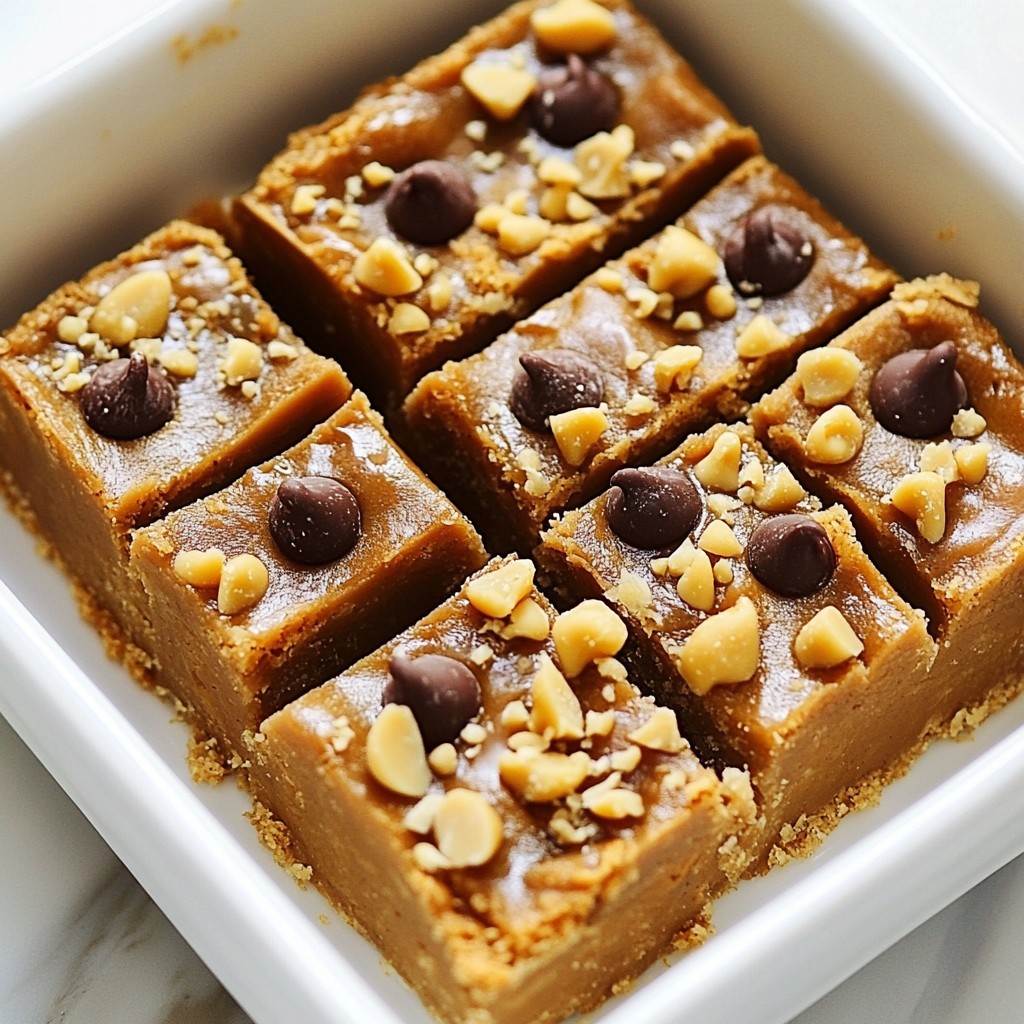
Are you ready to dive into a sweet treat that's as easy as can be? My No-Bake Cookie Butter Bars are a simple and delicious solution for your snack cravings! With just a few wholesome ingredients like cookie butter, rolled oats, and honey, you can whip up decadent bars that require no baking at all. Let’s get started on making these tasty delights together!
Why I Love This Recipe
- Quick and Easy: This recipe comes together in just 10 minutes, making it perfect for busy days or last-minute cravings.
- No Baking Required: No need to turn on the oven! These bars are set in the refrigerator, keeping your kitchen cool.
- Healthy Ingredients: Packed with oats and almond flour, these bars offer a nutritious snack option without sacrificing taste.
- Customizable Toppings: Add your favorite nuts or colorful sprinkles for a personal touch that makes these bars even more delightful.
Ingredients
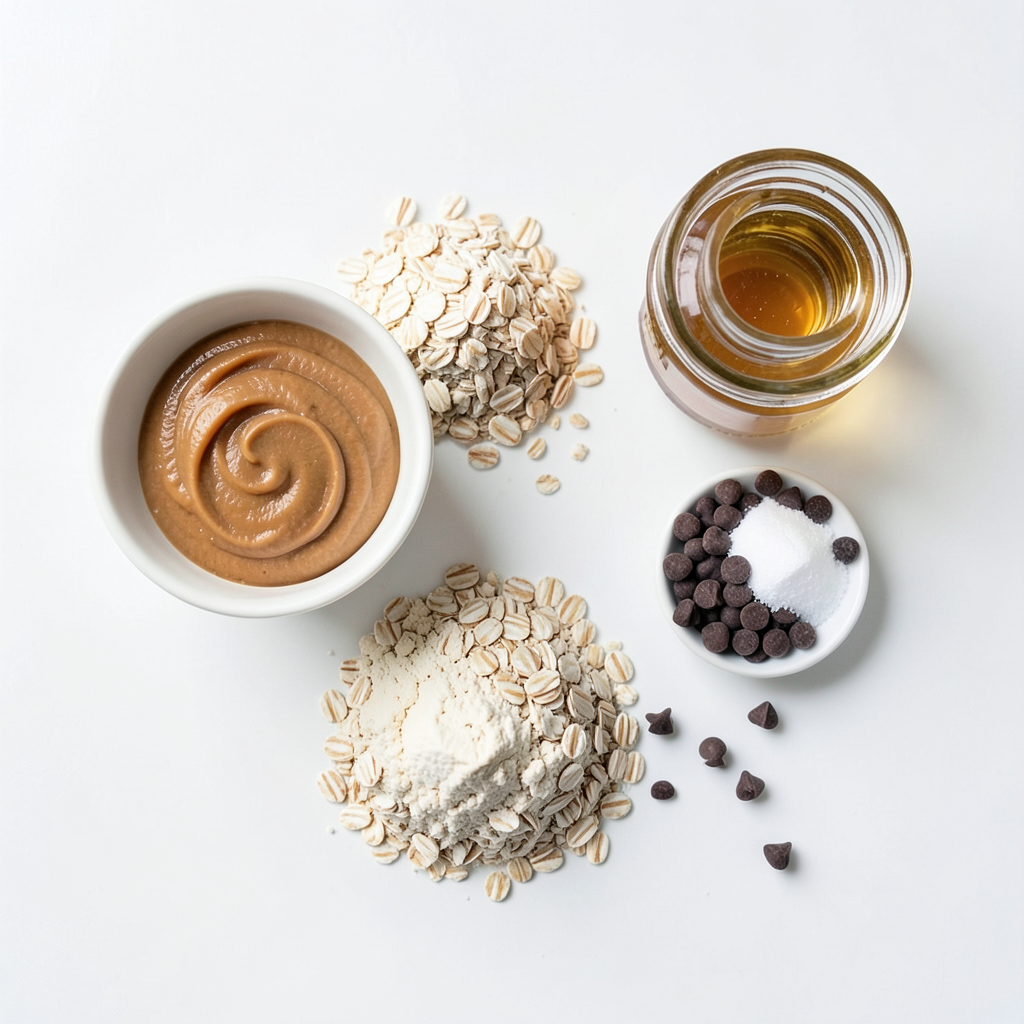
Main Ingredients
- 1 cup cookie butter
- 1 cup rolled oats
- 1/2 cup almond flour
- 1/4 cup honey or maple syrup
- 1/2 cup mini chocolate chips
- 1/4 teaspoon salt
- 1/2 teaspoon vanilla extract
These ingredients make the base of our no-bake cookie butter bars. Cookie butter gives a sweet and smooth flavor that everyone loves. Rolled oats add a nice chewy texture. Almond flour keeps it gluten-free and adds healthy fats. Honey or maple syrup brings in a touch of sweetness. Mini chocolate chips give little bursts of chocolate in every bite. A bit of salt balances the sweetness, while vanilla extract adds warmth to the mix.
Optional Toppings
- Crushed nuts
- Sprinkles
You can add crushed nuts for a crunchy bite. They also boost nutrition. Sprinkles can make the bars fun and colorful, perfect for kids or parties. You can choose your favorite toppings based on what you have or what you like.
Step-by-Step Instructions
Preparation Steps
1. Start by mixing the wet ingredients. In a bowl, add the cookie butter, honey (or maple syrup), and vanilla extract. Stir until the mixture is smooth and creamy.
2. Next, combine the dry ingredients. In another bowl, mix the rolled oats, almond flour, and salt. Make sure these ingredients are evenly combined.
3. Now, it’s time to mix the wet and dry ingredients. Gradually add the dry mixture to the wet mixture. Stir until you achieve a thick and tacky consistency. This texture is key for your bars.
Assembling the Bars
1. To assemble the bars, first line an 8x8-inch baking dish with parchment paper. Leave some overhang to help with removal later.
2. Transfer the cookie butter mixture into the dish. Press it down firmly and evenly with a spatula or your hands. Make sure there are no gaps in the mixture.
3. If you want, add optional toppings. Sprinkle crushed nuts or colorful sprinkles on top. Gently press them in for some extra texture and flair.
Chilling and Serving
1. Now, it’s time for the refrigeration process. Place the dish in the fridge and chill for at least 2 hours. This step helps the bars set properly.
2. Once the bars are firm, lift them out using the parchment paper. Place them on a cutting board.
3. Cut the chilled mixture into squares or bars. Serve them right away or store in an airtight container in the fridge for up to one week. Enjoy your delicious no-bake cookie butter bars!
Tips & Tricks
Achieving the Perfect Texture
Mixing well is key to great cookie butter bars. If you rush this step, your bars may not hold together. Take your time to combine all the wet and dry ingredients. You want a thick and tacky mix that sticks to itself. This will help your bars stay firm after chilling. If the mix feels too dry, add a little more cookie butter or syrup. If it seems too wet, add a bit more almond flour or oats.
Enhancing Flavor
Adding spices can elevate your cookie butter bars. Try a pinch of cinnamon or nutmeg for warmth. You can also use a little bit of sea salt to contrast the sweetness. Different cookie butters can change the taste too. If you use a spiced cookie butter, it will add depth. For a nutty flavor, try using almond or cashew cookie butter. Each choice brings its unique twist to your bars.
Pro Tips
- Use Natural Sweeteners: For a healthier option, consider using maple syrup or agave instead of honey.
- Customize Add-ins: Feel free to add your favorite mix-ins like dried fruits, seeds, or different types of chocolate chips for variety.
- Chill for Best Results: Ensure you refrigerate the bars for at least 2 hours; this helps them firm up for easier cutting and better texture.
- Storage Tips: Store the bars in an airtight container in the refrigerator to maintain freshness and prevent them from becoming too soft.
Variations
Flavor Variations
You can easily change the taste of these no-bake cookie butter bars. Try adding different types of chocolate. Dark, milk, or white chocolate chips can give your bars a unique twist. Each type of chocolate brings a new flavor and richness.
You can also incorporate dried fruits. Chopped dates, raisins, or cranberries add sweetness and chewiness. They brighten up the bars and make them more fun to eat. Just mix them in with the chocolate chips for a tasty surprise in every bite.
Dietary Options
If you follow a vegan diet, you have some easy swaps. Use maple syrup instead of honey. This keeps the bars sweet while staying vegan-friendly. You can also choose dairy-free chocolate chips to keep it plant-based.
For those needing gluten-free options, this recipe is a great fit. Both rolled oats and almond flour are naturally gluten-free. Just make sure to check that your oats are certified gluten-free. This way, everyone can enjoy these delicious bars without worry.
Storage Info
How to Store
To keep your no-bake cookie butter bars fresh, use an airtight container. I recommend a glass or BPA-free plastic container. This will help prevent moisture and keep the bars from drying out. Make sure to keep the lid on tightly. You can also layer parchment paper between the bars if you stack them. This helps avoid sticking.
Shelf Life
Your cookie butter bars will last about one week in the fridge. They taste best when cold, so enjoy them chilled. If you want to store them longer, you can freeze the bars. Wrap each bar in plastic wrap first, then place them in a freezer-safe bag or container. They can last for about three months in the freezer. Just let them thaw in the fridge before you enjoy them!
FAQs
Common Questions
Can I use other nut butters instead of cookie butter? Yes, you can use other nut butters! Almond butter or peanut butter work well. Just note that the flavor will change. Cookie butter has a sweet, spiced taste.
How long do the bars need to chill? Chill the bars for at least two hours. This helps them set and become firm. If you want, you can chill them longer for a firmer texture.
Can I add protein powder to the recipe? You can add protein powder. Just start with a small amount, like one or two tablespoons. This will boost the nutrition and not change the taste too much.
Troubleshooting
What to do if the mixture is too dry or too wet? If the mixture is too dry, add a bit of honey or cookie butter. Mix until it is sticky. If it is too wet, add more oats or almond flour to thicken it.
How to fix bars that don't hold together? If the bars fall apart, try adding more sticky ingredients. You can add more honey or cookie butter and mix well. Press the mixture firmly into the dish to help it stick better.
You learned how to make delicious cookie butter bars today. We explored the main ingredients, preparation steps, and tips for perfect texture. Variations allow you to try different flavors or meet dietary needs. Remember to store the bars properly to keep them fresh. This easy recipe will satisfy your sweet tooth and impress your friends. Enjoy creating, experimenting, and sharing these tasty treats!