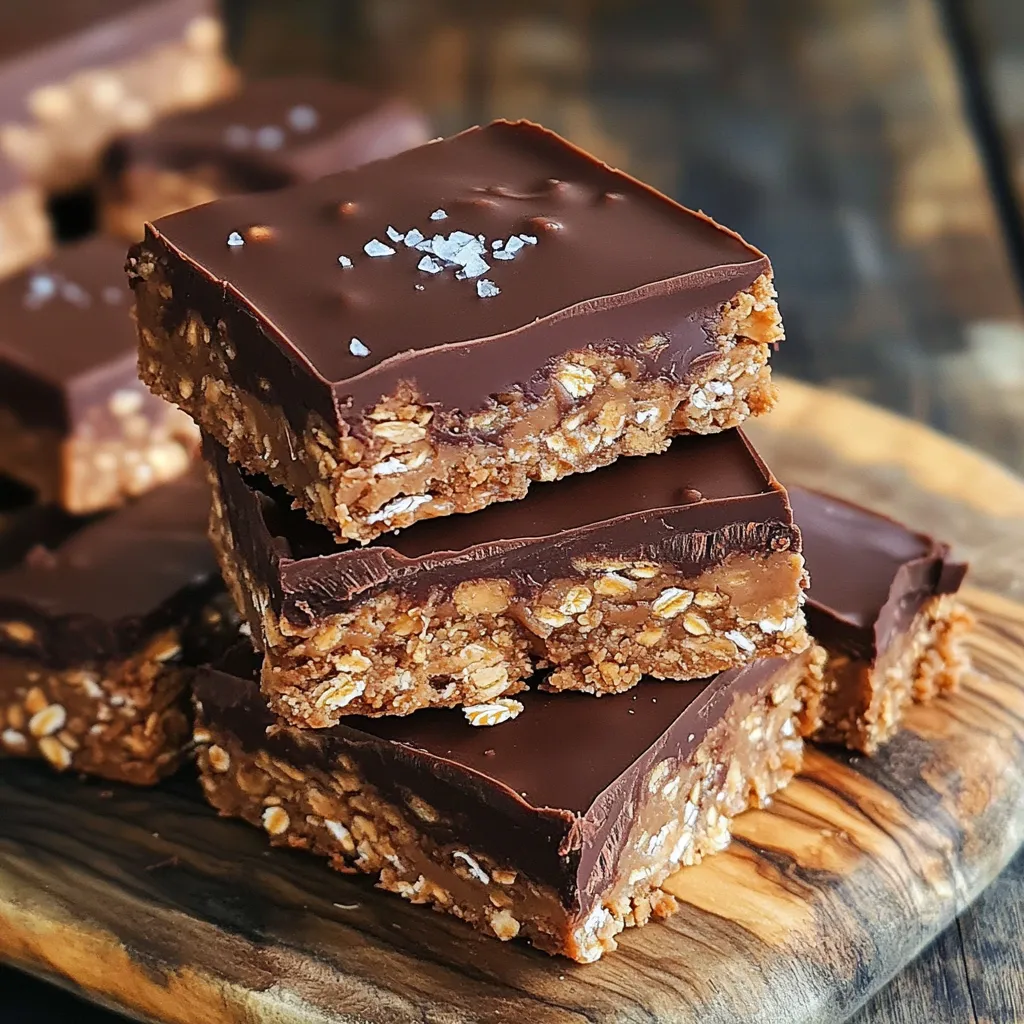
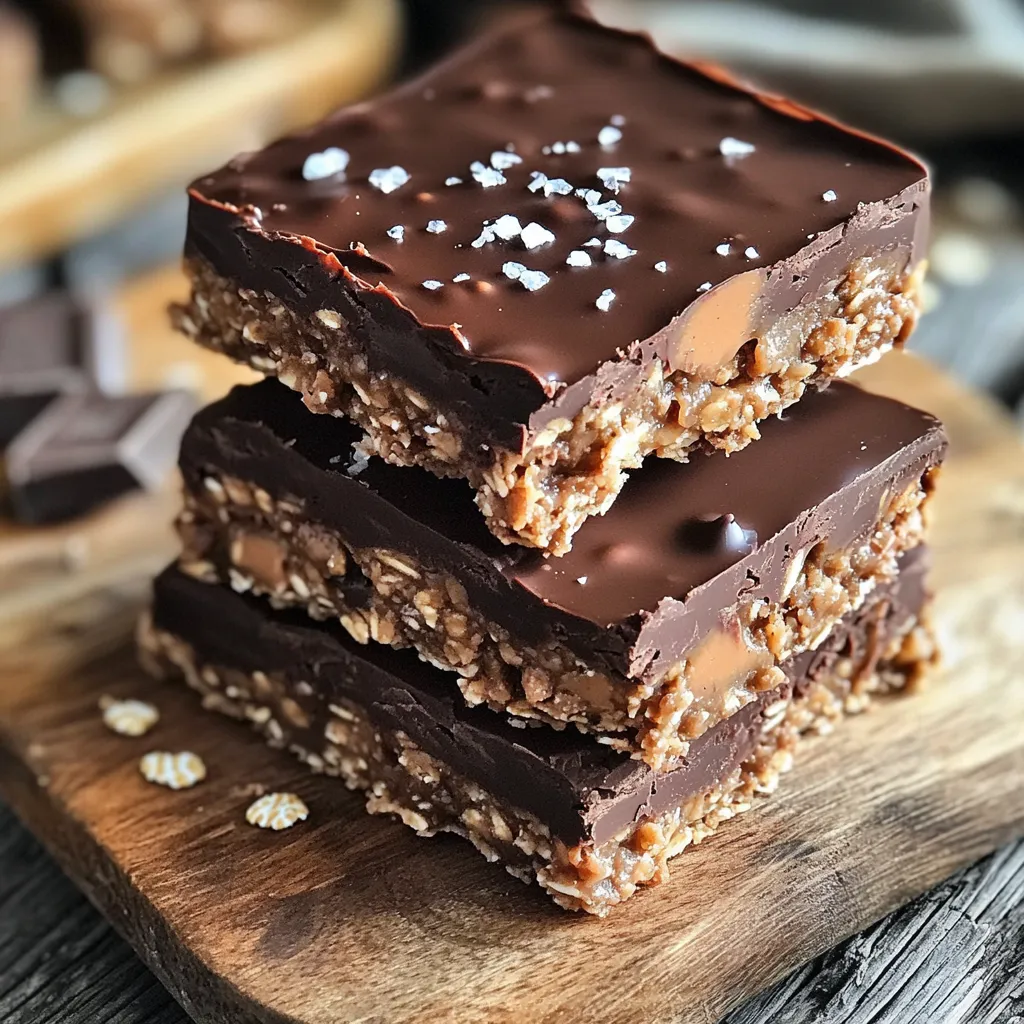
Are you ready to indulge in a tasty treat that’s easy to make? My No Bake Chocolate Peanut Butter Oat Bars are the perfect solution! You only need simple ingredients like rolled oats, peanut butter, and chocolate chips. Whether you’re a busy parent or a snack lover, this recipe delivers quick satisfaction without turning on the oven. Let’s dive into the steps and tips to create these delicious bars!
Ingredients
To make the No Bake Chocolate Peanut Butter Oat Bars, you will need a few simple ingredients. Each one plays a key role in creating the perfect balance of flavor and texture.
Detailed List of Ingredients
– 2 cups rolled oats
– 1 cup natural peanut butter
– 1/2 cup honey or maple syrup
– 1/4 cup cocoa powder
– 1/2 teaspoon vanilla extract
– 1/4 teaspoon salt
– 1/2 cup dark chocolate chips
– Optional: 1/4 cup chopped nuts or seeds (like almonds or sunflower seeds)
– Optional: Flaky sea salt for sprinkling
The rolled oats form the base. They add fiber and texture. Natural peanut butter gives a rich, nutty taste. Honey or maple syrup acts as a sweetener and helps bind everything together. Cocoa powder adds a deep chocolate flavor, while vanilla extract enhances the overall taste.
The salt balances the sweetness. Dark chocolate chips provide a melty, chocolatey bite. You can add nuts or seeds for extra crunch. Flaky sea salt on top makes it even more special.
Using quality ingredients is key for the best taste. I love how each bite is a mix of creamy, chewy, and crunchy. Trust me; these bars will make your taste buds dance!
Step-by-Step Instructions
Preparation Steps
– Mixing dry ingredients
Start with a large bowl. Add 2 cups of rolled oats, 1/4 cup of cocoa powder, and 1/4 teaspoon of salt. Stir until everything mixes well. This step gives your bars a strong base.
– Melting peanut butter and honey
Grab a microwave-safe bowl. Put in 1 cup of natural peanut butter and 1/2 cup of honey. Heat in the microwave for about 30 seconds. Stir until the mix is smooth. This makes it easy to combine with the dry ingredients.
– Combining mixtures
Pour the melted peanut butter mix into the bowl with dry ingredients. Add 1/2 teaspoon of vanilla extract. Stir everything together until it forms a thick and sticky mixture. Make sure no dry bits remain.
– Preparing the baking dish
Take an 8×8 inch baking dish. Line it with parchment paper. Leave some paper hanging over the edges. This helps you lift the bars out later.
– Pressing the mixture into the dish
Transfer the mixture into the lined dish. Use a spatula or your hands to press it down firmly. Make sure it is even and packed tightly. This is key for good bar structure.
– Refrigerating to set
Optionally, sprinkle some flaky sea salt on top for extra flavor. Cover the dish and place it in the fridge. Let it set for at least 1 hour. This helps the bars hold their shape.
After this, your No Bake Chocolate Peanut Butter Oat Bars are ready to enjoy!
Tips & Tricks
Achieving the Perfect Texture
To get the best bars, pack the mixture tightly. This helps them hold shape. If you don’t pack them, they might crumble. You can use alternative sweeteners like agave or brown rice syrup. They change the taste and texture a bit but can work well. For customization, try adding nuts or seeds. Almonds and sunflower seeds add crunch. You can also mix in dried fruits for extra flavor and chew.
Common Mistakes to Avoid
One mistake is overheating the peanut butter. Heat it just enough to melt, not too much. If it gets too hot, it can change the texture. Another error is not letting the bars set long enough. If they don’t chill for at least an hour, they will be too soft. Always wait to cut them until they are firm. This makes slicing easier.
Variations
Dietary Substitutions
You can make this recipe fit different diets with easy swaps. For a vegan option, use maple syrup instead of honey. Choose dark chocolate chips that are dairy-free.
If you need gluten-free bars, check your oats. Look for oats labeled as gluten-free. These oats are safe for those with gluten allergies.
Flavor Additions
Adding spices can boost the taste. A sprinkle of cinnamon gives warmth and depth. You can also try nutmeg or a dash of sea salt for a twist.
Using different types of chocolate can change the flavor. Dark chocolate adds richness, while milk chocolate makes it sweeter. For a fun twist, try white chocolate chips. This way, you can create your perfect bar!
Storage Info
Best Storage Practices
To keep your No Bake Chocolate Peanut Butter Oat Bars fresh, store them in the refrigerator. Place them in an airtight container. This helps prevent them from drying out. They stay good for about a week when refrigerated.
If you want to save them for later, freezing is a great option. Wrap each bar in plastic wrap. Then, place them in a freezer-safe bag or container. When you want a bar, just thaw it in the fridge overnight. This keeps the bars tasty and fresh for up to three months.
Shelf Life
These bars last well if stored properly. In the fridge, expect them to stay fresh for about one week. Keep an eye out for signs of spoilage. If they smell off or look dry, it’s best to toss them.
When frozen, they can last for about three months. After that, they may lose flavor or texture. Always check for changes. Enjoy these delicious bars while they are at their best!
FAQs
How do I make these bars nut-free?
To make these bars nut-free, swap the peanut butter for sun butter or soy nut butter. Both options provide a similar creamy texture and flavor. You can also try using tahini, which adds a unique taste. Ensure you check for nut-free labels on all ingredients to avoid cross-contamination.
Can I substitute the cocoa powder?
Yes, you can substitute cocoa powder with carob powder. Carob gives a sweet, mild flavor and is naturally caffeine-free. You can also use a chocolate protein powder for a boost. Just remember, this will change the taste, so adjust to your liking.
What’s the best way to cut the bars evenly?
The best way to cut the bars evenly is to use a sharp knife. First, remove the bars from the dish using the parchment paper. Then, score the top lightly with the knife. This helps guide your cuts. Finally, cut straight down with firm pressure for neat pieces.
Can I use rolled oats instead of quick oats?
Yes, you can use rolled oats instead of quick oats. The texture may be a bit chewier, but they still work well. Just keep in mind that rolled oats might need a little extra time to absorb moisture.
What are some other ways to use this recipe?
You can use this recipe as a base for other treats. Try adding dried fruits like raisins or cranberries for a fruity twist. You can also mix in seeds such as chia or flax for added nutrition. These bars can also be crumbled over yogurt or ice cream for a tasty topping.
You learned about the key ingredients for delicious bars. We covered preparation steps and tips for the best texture. You can personalize your bars with different flavors or dietary needs. Storing them properly helps keep them fresh longer. By avoiding common mistakes, you can create tasty treats each time. Try adding your own twists. Making these bars can be fun and rewarding. Enjoy the process and share them with friends!