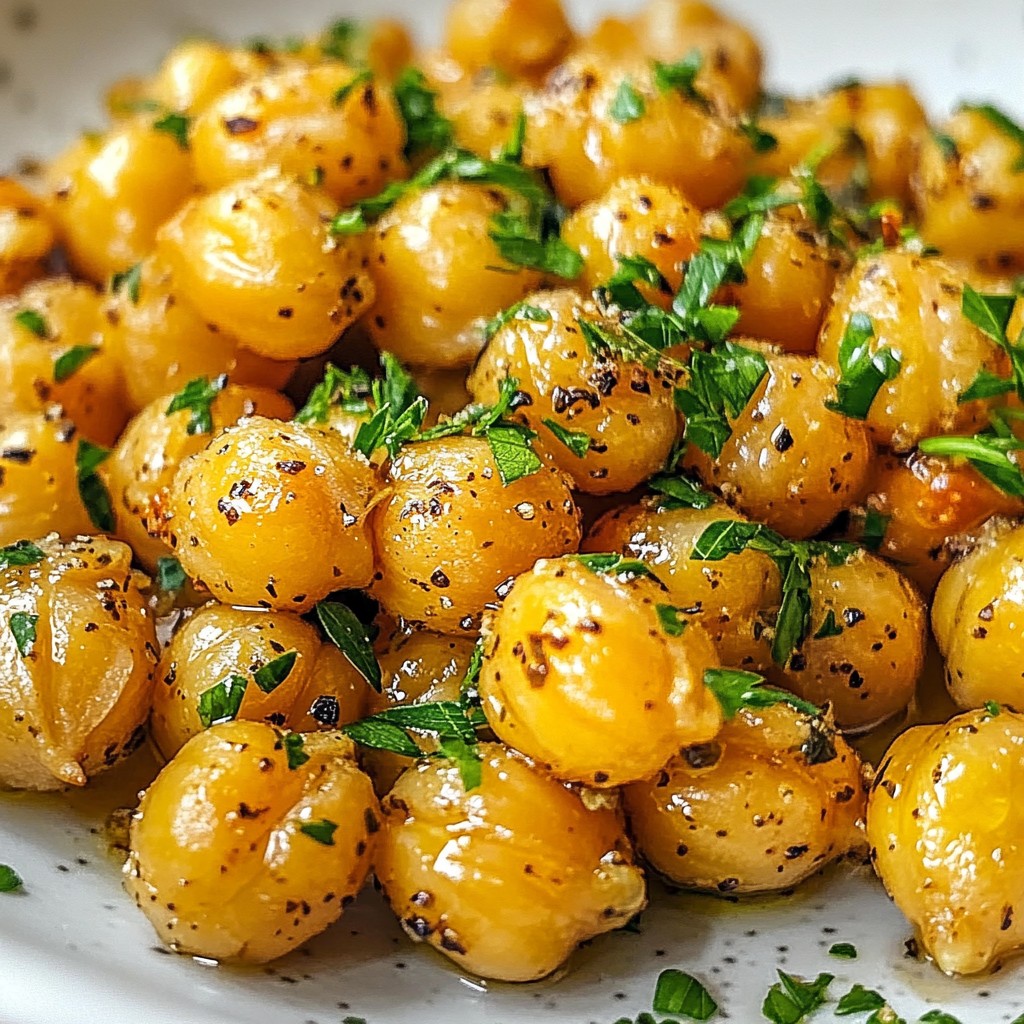
If you’re craving a snack that’s both tasty and healthy, you’ll love Garlic Herb Roasted Chickpeas. This simple recipe turns plain chickpeas into a crispy delight. With just a few ingredients, including fresh herbs, you can whip up a treat that’s perfect for sharing or enjoying alone. Join me as I guide you through the steps to make these savory snacks that pack a flavorful punch!
Why I Love This Recipe
- Healthy Snack: These roasted chickpeas are a nutritious alternative to chips, packed with protein and fiber.
- Easy to Make: With just a few simple ingredients and minimal prep time, this recipe is quick and accessible.
- Flavorful: The combination of garlic and herbs creates a deliciously fragrant and savory snack that’s hard to resist.
- Versatile: These chickpeas can be enjoyed on their own or as a crunchy topping for salads and soups.
Ingredients
Main Ingredients
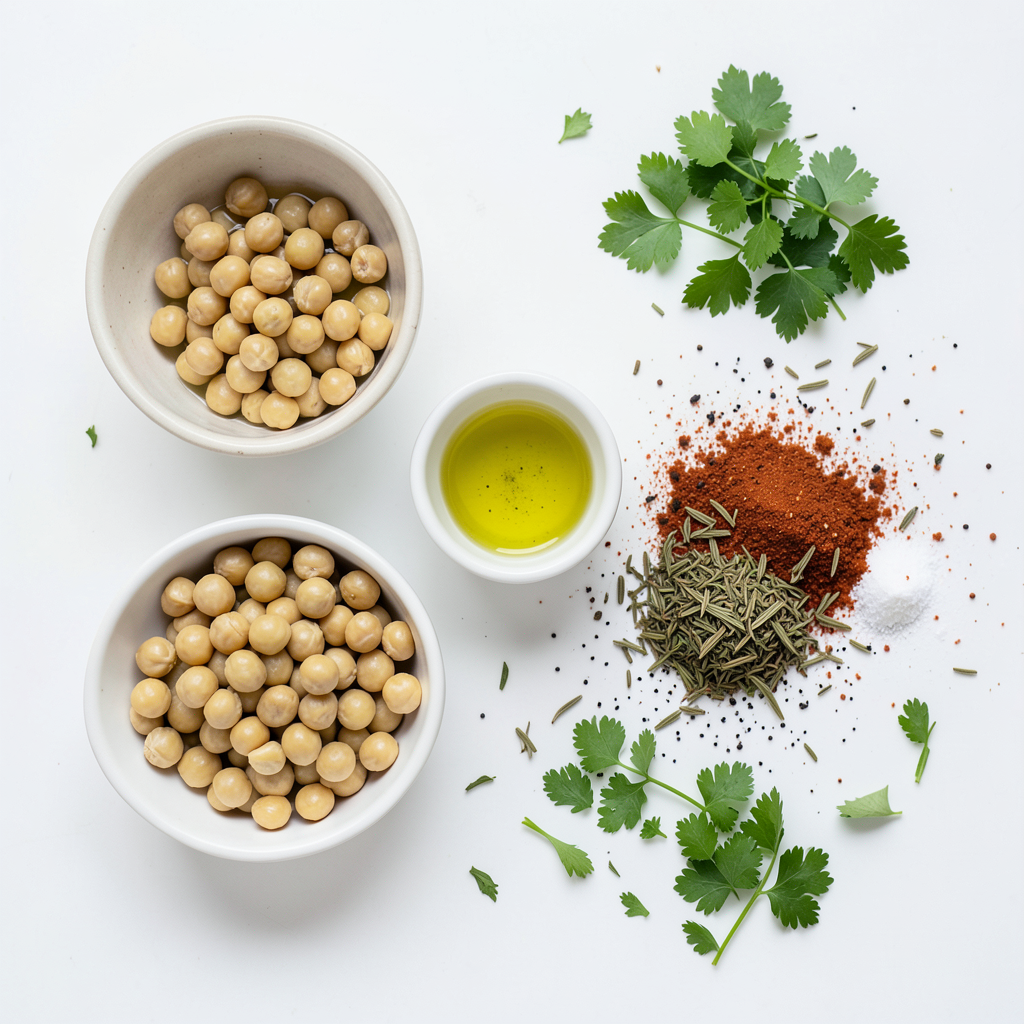
- 2 cans (15 oz each) chickpeas, drained and rinsed
- 3 tablespoons olive oil
- 4 cloves garlic, minced
- 1 teaspoon dried oregano
- 1 teaspoon dried thyme
- 1 teaspoon smoked paprika
- Salt and pepper to taste
- Fresh parsley, chopped (for garnish)
Measurement Details
I use two cans of chickpeas for this recipe. Each can holds about 15 ounces. You can swap canned chickpeas for dried ones, but they need longer cooking. For olive oil, 3 tablespoons give the right amount of richness. You can use any oil you prefer, like avocado oil. The spices add flavor, so be sure to include the garlic, oregano, thyme, and smoked paprika. Adjust salt and pepper to your taste. Fresh parsley is great for garnish, but you can skip it if you want.
Nutritional Information
Each serving has about 150 calories. Chickpeas give you protein, fiber, and healthy carbs. They help keep you full and satisfied. They also include vitamins and minerals, like iron and magnesium. Eating chickpeas may help with digestion and lower cholesterol. Snacking on these roasted chickpeas is a tasty and healthy choice!
Step-by-Step Instructions
Prepping the Chickpeas
Start by draining and rinsing the chickpeas. This step helps remove extra salt and liquid. Use a colander to make it easy. After rinsing, it’s very important to dry the chickpeas well. Wet chickpeas won’t become crispy when roasted. You can use a clean kitchen towel or paper towels. Pat them gently until they are dry.
Mixing Ingredients
In a mixing bowl, add the dried chickpeas. Pour in 3 tablespoons of olive oil. Then, add the minced garlic, oregano, thyme, smoked paprika, salt, and pepper. Mix well. Ensure every chickpea gets coated in the oil and spices. You can use a spatula or your hands for this. An even coat is key to getting great flavor.
Roasting Process
Preheat your oven to 400°F (200°C). Line a baking sheet with parchment paper. This helps prevent sticking. Spread the chickpeas evenly on the sheet. Make sure they are in a single layer. Roast them for 25-30 minutes. Halfway through, shake the pan to help with even cooking. You want them golden brown and crispy. When they are done, let them cool for a few minutes. This keeps them crispier.
Tips & Tricks
Achieving the Perfect Crispiness
To get that perfect crunch, you need the right oven temperature. Set your oven to 400°F (200°C). This heat helps the chickpeas dry out and become crispy.
Next, spread the chickpeas evenly on the baking sheet. Make sure they are in a single layer. This way, they cook evenly. If they overlap, some will stay soggy.
Flavor Enhancements
Want to boost the flavor of your roasted chickpeas? Try adding extra spices like cayenne or cumin. These add a nice kick.
Fresh herbs, like rosemary or basil, can also elevate the taste. You can mix and match flavors to suit your taste. Pair your chickpeas with dips like hummus or yogurt. They make a great snack together.
Common Mistakes to Avoid
One common mistake is overcrowding the baking sheet. When the chickpeas are too close, they steam instead of roast. Keep them spaced out for the best results.
Another mistake is not shaking the pan during roasting. Halfway through cooking, give the pan a good shake. This helps all the chickpeas cook evenly and get crispy.
Pro Tips
- Tip Title: Dry Chickpeas Well: Ensure that the chickpeas are thoroughly drained and patted dry before mixing with oil and spices for maximum crispiness.
- Tip Title: Spice Variations: Feel free to experiment with different spices like cumin or cayenne pepper to customize the flavor profile to your liking.
- Tip Title: Storage: Store any leftover roasted chickpeas in an airtight container at room temperature to maintain their crunchiness.
- Tip Title: Serving Suggestions: These roasted chickpeas make a great snack on their own or can be added to salads for an extra crunch.
Variations
Flavor Profiles
You can switch things up with spicy garlic herb chickpeas. Just add cayenne pepper or red pepper flakes. This will give your snack a nice kick. If you love Mediterranean flavors, try adding lemon zest and feta cheese. This twist makes your chickpeas taste fresh and bright.
Dietary Adaptations
These chickpeas are already gluten-free and vegan. You can enjoy them without worry. For a low-sodium diet, simply use less salt. You can also skip the added salt altogether. The herbs and spices will still give a lot of flavor.
Serving Suggestions
These roasted chickpeas are great with dips. Try them with hummus or tzatziki. They also make a great topping for salads. Sprinkle them on soups to add crunch. You can even use them as a snack on their own. They are tasty and fun to eat!
Storage Info
Recommended Storage Methods
To store your Garlic Herb Roasted Chickpeas, choose an airtight container. Glass jars or plastic containers with tight lids work well. This keeps them fresh and prevents moisture. To keep them crispy, avoid using paper bags. They trap moisture, making your snack soft.
Duration of Storage
These roasted chickpeas can last for about a week at room temperature. If you place them in the fridge, they may last up to two weeks, but they can lose some crispiness. For the best taste and crunch, eat them within a week. Freezing is not recommended, as it alters the texture.
Reheating Tips
If you want to enjoy them warm again, use the oven. Preheat it to 350°F (175°C). Spread them on a baking sheet and heat for about 5-10 minutes. This method helps restore their crunch. It's best to enjoy them fresh right after roasting for the best flavor and texture.
FAQs
Can I use dried chickpeas instead of canned?
Yes, you can use dried chickpeas. First, soak them overnight. This makes them soft. Then, cook them in boiling water for about one hour. Drain and rinse them well. You will need to adjust the cooking time. Dried chickpeas need more time to cook than canned ones. Just remember to let them cool before seasoning.
What can I do with leftover chickpeas?
Leftover chickpeas are very versatile. You can add them to salads for extra protein. Mash them to make hummus or a spread. Toss them in soups for added texture. You can also stir-fry them with veggies for a quick meal. They can enhance many dishes, so be creative!
How do I make chickpeas crispy?
To get crispy chickpeas, start by drying them well. Use a clean towel to absorb moisture. Make sure to coat them evenly with oil and spices. Spread them out on the baking sheet in one layer. This helps them cook evenly. Shake the pan halfway through cooking to ensure all sides get crispy.
This blog post walked you through making delicious roasted chickpeas. We covered the main ingredients, including canned chickpeas, olive oil, and spices. You learned how to prep and roast them for a perfect snack.
Always aim for that crispiness by adjusting your oven temperature and avoiding overcrowding. Remember, you can spice things up with different flavors or serve them in various ways. Now, you're ready to enjoy this healthy treat while knowing how to store and reheat leftovers. Happy cooking!