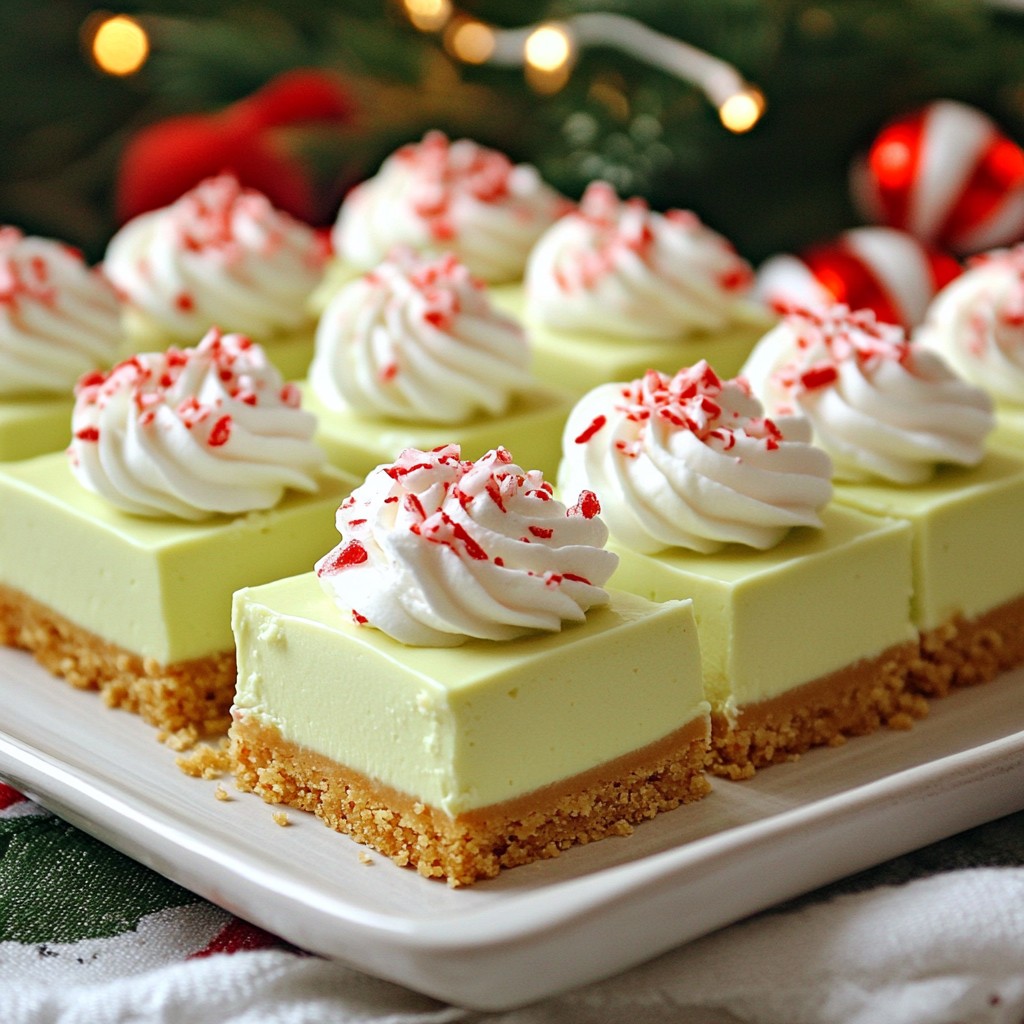
Get ready to wow your guests with my Creamy Holiday Peppermint Cheesecake Bars! These festive treats blend rich cheesecake with a refreshing peppermint twist. They are perfect for holiday gatherings or cozy nights in. I’ll guide you through simple steps and tips, ensuring everyone can enjoy this delightful dessert. Let’s dive into the ingredients and get baking! Your taste buds will thank you.
Why I Love This Recipe
- Festive Flavor: The combination of cream cheese and peppermint creates a delightful holiday flavor that is both rich and refreshing.
- Easy to Prepare: With simple ingredients and straightforward steps, these cheesecake bars can be whipped up in no time, making them perfect for busy holiday schedules.
- Charming Presentation: The vibrant crushed peppermint and whipped cream topping make these bars visually appealing, perfect for holiday gatherings.
- Make-Ahead Dessert: These cheesecake bars require chilling time, which means you can prepare them ahead of time and have a stress-free dessert ready for your guests.
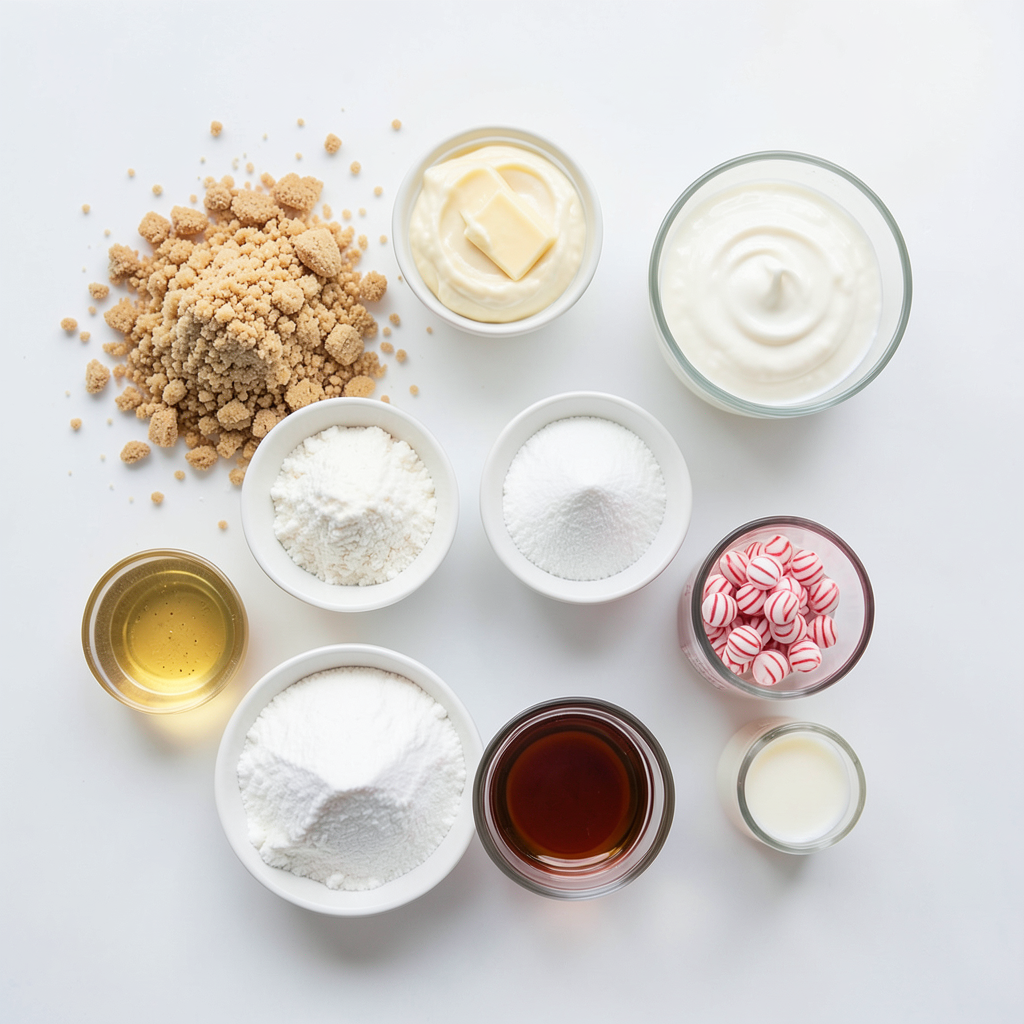
Ingredients
List of Ingredients
- 1 ½ cups graham cracker crumbs
- ½ cup unsalted butter, melted
- 2 cups cream cheese, softened
- 1 cup powdered sugar
- 1 teaspoon vanilla extract
- 2 large eggs
- ½ cup sour cream
- ½ teaspoon peppermint extract
- ¼ cup crushed peppermint candies (plus extra for topping)
- Whipped cream (for serving)
For this recipe, I recommend using unsalted butter. This lets you control the salt. If you prefer a healthier option, you can use coconut oil instead of butter. For a gluten-free version, swap graham crackers with gluten-free crumbs.
You can also try different types of cream cheese. Use low-fat or dairy-free cream cheese if needed. You can adjust the peppermint extract to match your taste. More extract makes a stronger mint flavor.
Crushed candy canes add a festive touch. You may use chocolate chips for a twist. Enjoy the fun of mixing and matching these ingredients!
Step-by-Step Instructions
Preheating and Preparing the Baking Dish
First, set your oven temperature to 325°F (160°C). This helps the cheesecake bake evenly. Next, take a 9x9-inch baking dish and line it with parchment paper. Let the edges hang over the sides. This will make it easy to lift the cheesecake out later.
Making the Crust
In a medium bowl, combine 1 ½ cups of graham cracker crumbs with ½ cup of melted unsalted butter. Mix until it looks like wet sand. Press this mixture firmly into the bottom of your prepared baking dish. Make sure it’s even. Bake the crust for 10 minutes. Once done, take it out and let it cool.
Preparing the Cheesecake Filling
In a large bowl, beat 2 cups of softened cream cheese until smooth. Gradually add 1 cup of powdered sugar and 1 teaspoon of vanilla extract. Mix on low speed until well blended. Next, add 2 large eggs one at a time. Mix just until each egg is combined; don’t overmix. Then, add ½ cup of sour cream and ½ teaspoon of peppermint extract. Stir until smooth and fold in ¼ cup of crushed peppermint candies.
Baking and Cooling
Pour the cheesecake filling over the cooled crust. Spread it evenly across the surface. Bake for 30-35 minutes. The center should be set but still slightly jiggly. After baking, turn off the oven. Let the cheesecake cool in the oven with the door slightly ajar for about 1 hour. Once cooled, move the dish to the fridge. Chill for at least 4 hours or overnight for best results. Before serving, lift the cheesecake out using the parchment edges. Cut into squares, and top with whipped cream and extra crushed peppermint candies.
Tips & Tricks
Achieving Creamy Texture
To get that dreamy, creamy texture, follow these tips:
- Use room temperature ingredients like cream cheese and eggs. This helps them blend well.
- Beat the cream cheese until smooth before adding other ingredients. This prevents lumps.
- Mix at low speed when adding sugar and eggs. Overmixing can make it too fluffy.
The key is to keep it smooth and well-blended. A creamy mix leads to a perfect cheesecake.
Perfecting the Peppermint Flavor
For the best peppermint flavor, choose a high-quality peppermint extract. Look for pure extracts instead of imitation ones. Pure extracts give a stronger, clearer taste.
When adding crushed peppermint candies, start with ¼ cup in the batter. For the topping, use more crushed candies as you like. This adds color and a nice crunch. Adjust the amounts to find your perfect peppermint balance!
Pro Tips
- Chill for Best Texture: For a smoother, creamier cheesecake, allow the bars to chill overnight. This enhances the flavor and texture significantly.
- Room Temperature Ingredients: Ensure your cream cheese and eggs are at room temperature before mixing. This helps achieve a smoother batter without lumps.
- Don’t Overmix: When adding the eggs, mix just until incorporated. Overmixing can introduce air into the batter, leading to cracks during baking.
- Use Quality Peppermint Extract: Opt for pure peppermint extract for a more authentic and intense flavor compared to artificial options.
Variations
Gluten-Free Options
You can make these cheesecake bars gluten-free. Simply swap regular graham crackers for gluten-free ones. Look for brands that use almond flour or oats. Both options create a tasty crust. Follow the same steps in the recipe. Mix the gluten-free crumbs with melted butter. Press it into the pan just like before. This way, everyone can enjoy these delicious bars!
Other Flavor Variations
You can change the flavor of these cheesecake bars with just a few tweaks. Try using different extracts to mix things up. Vanilla adds warmth, while almond gives a nutty touch. Just remember to keep the peppermint extract for that festive feel.
Another easy way to add flavor is by including chocolate. You can fold in mini chocolate chips or a swirl of melted chocolate in the batter. This makes each bite even more delightful. You can also sprinkle some chocolate shavings on top with the crushed peppermint. Experimenting with flavors makes this recipe fun and unique!
Storage Info
How to Store Leftovers
Store your leftover cheesecake bars in the fridge. Use an airtight container for best results. This keeps them fresh and safe to eat. Make sure the bars are completely cool before you cover them. They stay good for about five days. If you want to reheat them, do so gently. Place a piece in the microwave for about 10-15 seconds. This warms them without changing the texture.
Freezing Instructions
You can freeze these cheesecake bars if you have extra. First, cut them into squares. Wrap each square in plastic wrap tightly. Then, place the wrapped bars in a freezer-safe bag. This helps prevent freezer burn. They will stay good for up to three months. To serve, take them out of the freezer. Let them thaw in the fridge overnight. This keeps them creamy and tasty.
FAQs
How long can I keep these cheesecake bars?
You can store these cheesecake bars in the fridge for up to a week. Keep them in an airtight container. The bars taste great cold and stay fresh. If you like, you can also freeze them for up to three months. Just wrap them tightly in plastic wrap before putting them in a freezer bag.
Can I use a different type of crust?
Yes! You can try different crusts for your cheesecake bars. Here are some options:
- Oreos: Crush Oreos and mix with melted butter for a chocolate twist.
- Almond flour: For a gluten-free option, use almond flour mixed with butter.
- Graham cracker alternative: Use gluten-free graham crackers if needed.
Is there a way to make these cheesecake bars dairy-free?
Yes! You can make these bars dairy-free with a few swaps:
- Cream cheese: Use dairy-free cream cheese, like cashew or almond-based.
- Sour cream: Substitute with coconut cream or a dairy-free yogurt.
- Butter: Replace unsalted butter with coconut oil or a dairy-free margarine.
These simple changes keep the flavor and texture tasty!
You now have a clear plan to make delicious cheesecake bars. We covered ingredients, step-by-step baking, and tips for perfect results. Remember to try different flavors and crusts to find your favorite. Store your leftovers properly to enjoy these treats longer. Whether you share or keep them for yourself, you’ll impress everyone with your skills. Enjoy every bite of your tasty creation!