Looking for a delicious treat that’s both easy to make and hard to resist? You’ve found it! My Cherry Chocolate Chip Scones blend juicy cherries with rich chocolate, creating a perfect bite. Whether you're a baking novice or a seasoned pro, this straightforward recipe will make your kitchen smell amazing and your taste buds dance. Let’s dive into the simple steps to whip up these tasty scones!
Why I Love This Recipe
- Delicious Flavor Combination: The sweet cherries paired with rich chocolate create a delightful contrast that makes every bite memorable.
- Easy to Make: This scone recipe is straightforward and quick, making it perfect for both novice bakers and experienced chefs.
- Perfect for Any Occasion: Whether it’s a weekend brunch or an afternoon tea, these scones are always a hit with family and friends.
- Customizable Ingredients: You can easily swap the cherries or chocolate for your favorite fruits or nuts, allowing for endless variations!
Ingredients
Dry Ingredients
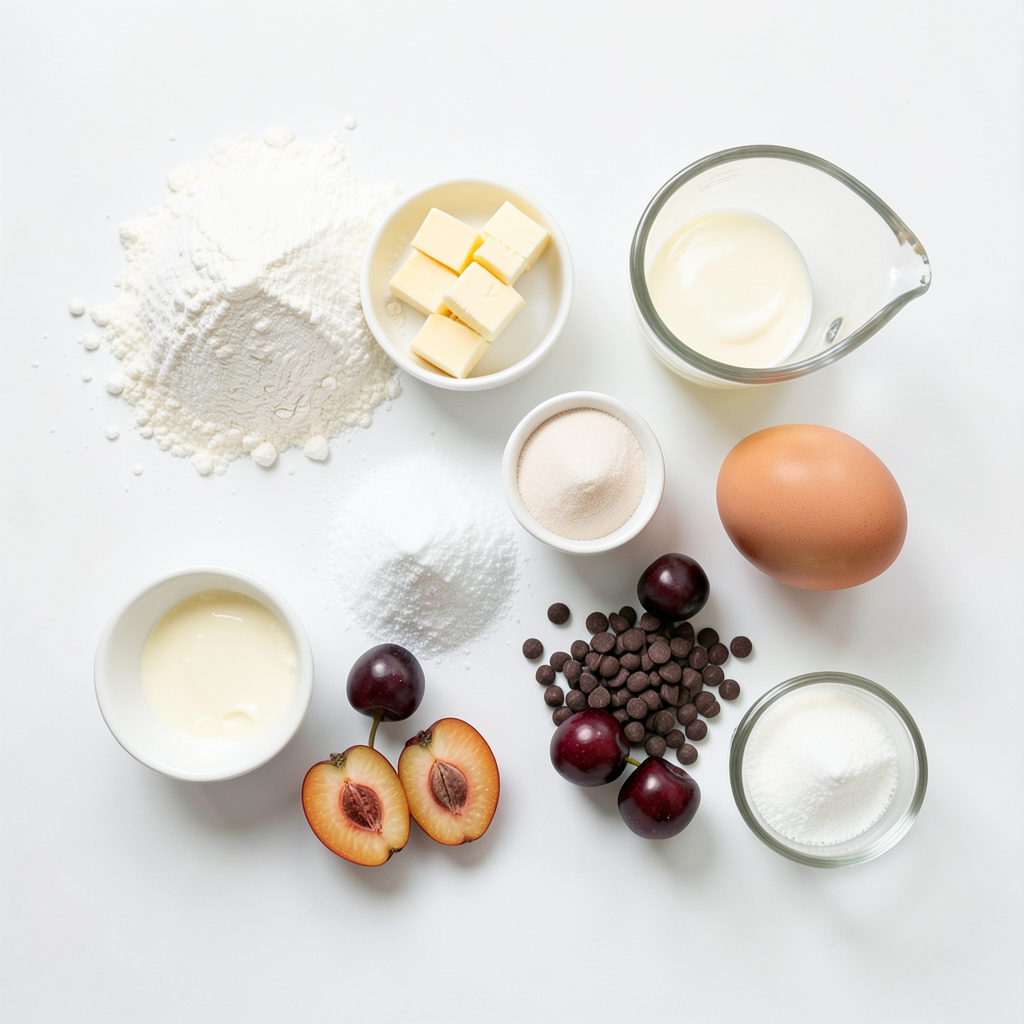
- 2 cups all-purpose flour
- 1/2 cup granulated sugar
- 1 tablespoon baking powder
- 1/4 teaspoon salt
The dry ingredients form the base of our scones. I use all-purpose flour for a light texture. Granulated sugar adds sweetness, while baking powder helps the scones rise. Salt balances the flavors.
Wet Ingredients
- 1/2 cup unsalted butter, cold and cubed
- 1/2 cup heavy cream
- 1 large egg
- 1 teaspoon vanilla extract
Unsalted butter is key for flavor. I keep it cold to create flaky layers. Heavy cream adds richness, while the egg binds everything together. Vanilla extract gives a warm, sweet note.
Add-ins
- 1 cup fresh cherries, pitted and halved
- 1/2 cup semi-sweet chocolate chips
- 1 tablespoon milk (for brushing)
- Extra sugar for sprinkling
Fresh cherries bring a burst of flavor. I love using semi-sweet chocolate chips for a nice contrast. The milk helps the tops brown, while a sprinkle of sugar adds a sweet crunch.
Step-by-Step Instructions
Preparation
- Preheat the oven to 400°F (200°C).
- Line a baking sheet with parchment paper.
- In a large bowl, combine 2 cups of flour, 1/2 cup of sugar, 1 tablespoon of baking powder, and 1/4 teaspoon of salt.
- Whisk these dry ingredients together until they mix well.
Incorporating Butter and Wet Ingredients
- Add 1/2 cup of cold, cubed butter into the flour mix.
- Use your fingers or a pastry cutter to crumble the butter until it looks like coarse crumbs.
- In another bowl, whisk together 1/2 cup of heavy cream, 1 large egg, and 1 teaspoon of vanilla extract.
Forming and Baking the Scones
- Pour the wet mixture into the flour mix.
- Stir gently with a spatula until just combined. Do not overmix.
- Fold in 1 cup of halved cherries and 1/2 cup of chocolate chips until they are evenly spread.
- Turn the dough onto a lightly floured surface. Knead it a few times until it holds together.
- Shape the dough into a circle about 1 inch thick.
- Cut the circle into 8 wedges and place them on the prepared baking sheet.
- Brush the tops with 1 tablespoon of milk and sprinkle a little extra sugar for sweetness.
- Bake for 15 to 20 minutes, or until they turn golden brown.
- Let them cool slightly on the baking sheet before moving them to a wire rack.
Tips & Tricks
Achieving the Perfect Texture
- Use cold ingredients. Cold butter helps make the scones flaky.
- Avoid overmixing. Mix just until combined to keep the scones tender.
Enhancing Flavor
- Try using almond extract for a nutty taste. It pairs well with cherries.
- Add citrus zest for a fresh twist. Lemon or orange zest works great.
- You can swap semi-sweet chocolate for dark or milk chocolate. Each brings a unique flavor.
Baking Tips
- Keep an eye on bake time. Check the scones around 15 minutes. They should be golden brown.
- For leftover scones, store them in an airtight container. This keeps them fresh longer.
Pro Tips
- Use Cold Butter: Ensure your butter is very cold for the flakiest scones. This will help create those delicious layers as they bake.
- Don't Overmix: When combining the wet and dry ingredients, mix just until combined. Overmixing can lead to dense scones.
- Fresh Cherries: For the best flavor and texture, use fresh cherries that are sweet and ripe. Frozen cherries can be used but may result in a wetter dough.
- Brush with Milk: Brushing the tops of the scones with milk before baking gives them a beautiful golden color and adds a nice shine.
Variations
Fruit Options
You can swap cherries for other fruits. Blueberries and raspberries work great too. Mixing different fruits adds a fun twist. Try half cherries and half blueberries for a fruity blend. Each fruit brings its own flavor and texture.
Chocolate Variations
Think about using dark chocolate instead of milk chocolate. Dark chocolate gives a richer taste. You can also add chocolate chunks for more bites of chocolate. This makes each scone extra special.
Alternative Ingredients
If you need gluten-free scones, use gluten-free flour. It works well and keeps the taste. For dairy-free options, try almond milk or coconut cream. These substitutes make the scones soft and tasty. Don't be afraid to experiment with these options!
Storage Info
Storing Leftover Scones
To keep your scones fresh, let them cool completely. Then, wrap them in plastic wrap. Place the wrapped scones in an airtight container. This way, they stay soft for up to two days at room temperature. If you want them to last longer, refrigerate them. They can stay fresh in the fridge for about a week. Just remember to wrap them well to avoid dryness.
Reheating Scones
To reheat scones without drying them out, use the oven. Preheat it to 350°F (175°C). Place the scones on a baking sheet and cover them loosely with foil. Heat for about 10 minutes. This keeps them moist while warming them up. You can also microwave them. Just heat each scone for 10-15 seconds. For serving, try adding some clotted cream or butter. A dollop of jam adds a nice touch too!
Freezing Scones
You can freeze both unbaked and baked scones. For unbaked scones, place them on a baking sheet and freeze until solid. Then, transfer them to a freezer bag. They can stay in the freezer for up to three months. When ready to bake, just place them in the oven straight from the freezer. For baked scones, let them cool completely first. Wrap them well and freeze them. To thaw, just leave them at room temperature for a few hours or overnight. Enjoy them warm for the best taste!
FAQs
How do I know when the scones are done baking?
You can tell the scones are done when they turn golden brown. They should feel firm to the touch. If you insert a toothpick, it should come out clean. The edges will look slightly crisp, while the center remains soft.
Can I make the dough ahead of time?
Yes, you can make the dough ahead of time! Prepare the dough and shape it into a circle. Wrap it tightly in plastic wrap. Chill it in the fridge for up to 24 hours. When ready, cut the wedges, brush with milk, and bake as usual.
What can I serve with Cherry Chocolate Chip Scones?
These scones pair well with many tasty options. Try them with clotted cream or butter for a rich touch. You can also enjoy them with fruit jams like cherry or raspberry. A nice cup of coffee or tea complements them perfectly too.
You now have a clear path to making delicious cherry chocolate chip scones. We covered the essential ingredients and steps, from mixing dry and wet components to adding fresh flavors. Remember, texture matters, so keep those ingredients cold and avoid overmixing. Feel free to experiment with fruits or chocolate types. Store any leftovers properly to keep them fresh. Enjoy these scones warm or reheated for a tasty treat. Happy baking!