Cherry Chocolate Chip Ice Cream Simple and Delicious Treat

WANT TO SAVE THIS RECIPE?

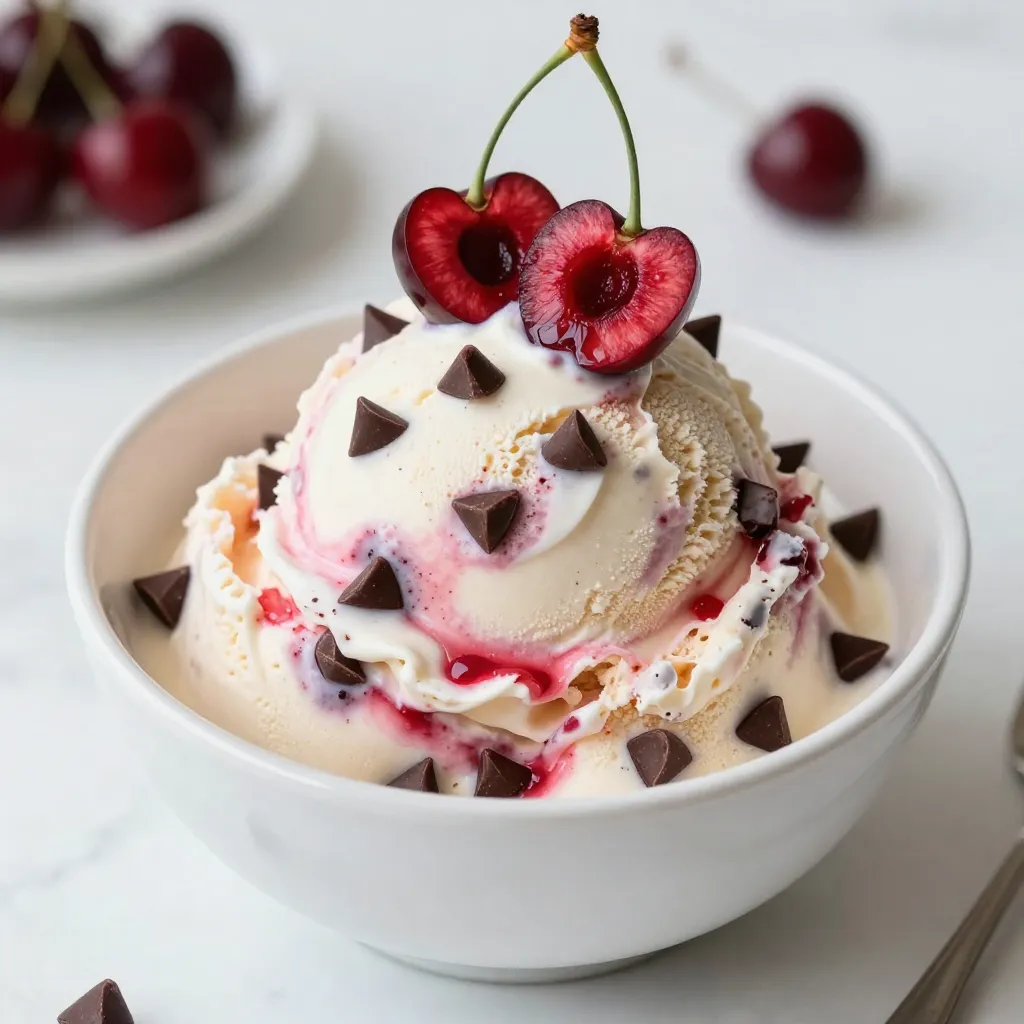
Looking for a tasty treat that beats the heat? Cherry Chocolate Chip Ice Cream is a perfect blend of sweet cherries and rich chocolate. It’s simple to make and super satisfying. In this post, I’ll walk you through every step, from selecting fresh ingredients to churning it up in your ice cream maker. So, grab your cherries and let’s dive into this delightful dessert that’s sure to impress!

Why I Love This Recipe

  1. Fresh and Fruity: The combination of fresh cherries brings a burst of sweetness and tartness, perfectly complementing the creamy base.
  2. Chocolate Delight: Adding semi-sweet chocolate chips creates a rich, indulgent experience that elevates the ice cream to a new level.
  3. Easy to Make: This recipe is straightforward and doesn’t require any special skills or ingredients, making it perfect for home cooks.
  4. Perfect for Summer: This refreshing dessert is ideal for hot days, bringing a cool treat that everyone will love.

Ingredients

List of Ingredients

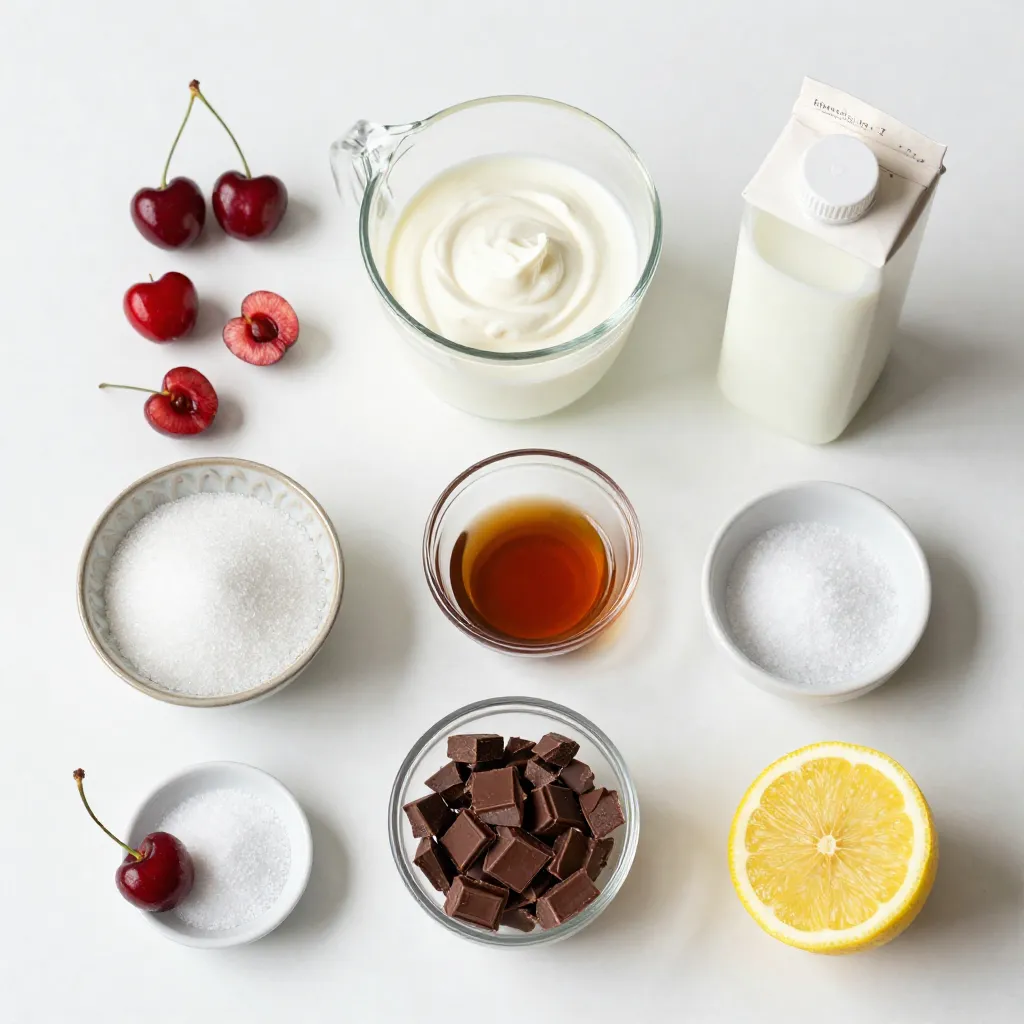
– 2 cups fresh cherries, pitted and halved

– 1 cup heavy cream

– 1 cup whole milk

– ¾ cup granulated sugar

– 1 teaspoon vanilla extract

– ½ cup semi-sweet chocolate chips

– ¼ teaspoon salt

– 1 tablespoon lemon juice

When you make Cherry Chocolate Chip Ice Cream, fresh cherries shine. Their sweet and tart flavor makes this treat special. I like to use ripe, juicy cherries. They add a burst of flavor. The heavy cream and whole milk give this ice cream a rich, creamy texture. Granulated sugar sweetens the mix, while vanilla extract adds warmth. A little salt helps balance the sweetness. The semi-sweet chocolate chips bring a delightful crunch. Lastly, lemon juice brightens the cherry flavor and helps keep the mixture fresh.

Alternative Ingredients

– Non-dairy options

– Sugar substitutes

– Dairy-free chocolate chips

If you want to make this ice cream non-dairy, use coconut cream instead of heavy cream. Almond milk or oat milk works well too. For sugar, you can use maple syrup or agave nectar. These will change the taste a bit but still taste great. If you need dairy-free chocolate, look for dairy-free chocolate chips. They melt well and taste delicious.

Equipment Needed

– Ice cream maker

– Mixing bowls

– Whisk

– Airtight container

To make this ice cream, you need a few tools. An ice cream maker is key for the right texture. Mixing bowls help combine the ingredients easily. A whisk is great for mixing the cream and sugar. Finally, use an airtight container to store your ice cream. It keeps your ice cream fresh and ready to enjoy.

Step-by-Step Instructions

Preparation of Cherries

First, take 2 cups of fresh cherries. Pit them and cut them in half. Place the cherries in a medium bowl. Add 1 tablespoon of lemon juice and 2 tablespoons of sugar. Toss the cherries well to coat them. Set this bowl aside for about 30 minutes. This process is called maceration. The sugar will draw out the juice from the cherries. You want to see a nice cherry syrup form in the bowl.

Mixing the Ice Cream Base

In a large mixing bowl, combine 1 cup of heavy cream and 1 cup of whole milk. Add ½ cup of granulated sugar, 1 teaspoon of vanilla extract, and ¼ teaspoon of salt. Use a whisk to mix these ingredients. Keep whisking until the sugar fully dissolves. This step is key for a smooth ice cream base. You want all the sugar to blend in nicely.

Churning and Freezing

Now, add the cherry mixture to the cream base. Be sure to include all the juices too. Stir gently to combine everything well. Next, pour this mixture into your ice cream maker. Churn according to the machine’s instructions, usually around 20 to 25 minutes. Once the ice cream is creamy and soft, fold in ½ cup of semi-sweet chocolate chips. This adds a rich flavor. Transfer the ice cream to an airtight container. Smooth the top with a spatula. Freeze it for at least 4 hours or until solid. Enjoy your homemade cherry chocolate chip ice cream!

Tips & Tricks

Perfecting Texture

To get a soft-serve consistency, follow these steps:

– Churn the mixture for 20-25 minutes in your ice cream maker.

– Check for the right texture; it should be creamy and light.

When you fold in the chocolate chips, do it gently. This helps to keep the ice cream smooth. Use a spatula to lift and turn the mixture. This way, you mix the chips evenly without breaking them.

Serving Suggestions

Serving your ice cream in colorful cones makes it more fun. Try adding fresh cherry halves on top. A sprinkle of chocolate chips adds extra flair. You can also pair it with brownies or a slice of pie. This makes for a great dessert combo.

Common Mistakes to Avoid

One big mistake is over-churning your ice cream. If you churn it too long, it can become icy. Listen to your machine, and stop when it’s fluffy.

Another mistake is not freezing it long enough. It needs at least four hours in the freezer. This helps it firm up nicely. If you skip this step, your ice cream might be too soft to scoop.

Pro Tips

  1. Use ripe cherries: Choose cherries that are deep red and slightly soft to the touch for the best flavor and sweetness.
  2. Chill your mixture: For a smoother texture, chill the cream mixture in the refrigerator for about an hour before churning.
  3. Experiment with chocolate: Try using dark chocolate or white chocolate chips for a different flavor profile in your ice cream.
  4. Store properly: To prevent ice crystals, make sure to store the ice cream in an airtight container and press a piece of plastic wrap directly onto the surface before sealing.

Variations

Flavor Variations

You can make this ice cream even better by adding nuts or other fruits. Chopped almonds or walnuts give a nice crunch. You can also mix in diced peaches or strawberries for a fruity twist. If you want a different taste, try swapping semi-sweet chocolate for white chocolate. This change gives a sweeter flavor that pairs well with cherries.

Diet-Specific Variations

If you follow a vegan diet, you can easily make vegan cherry chocolate chip ice cream. Replace heavy cream and whole milk with coconut cream and almond milk. Use a plant-based sugar substitute to keep it vegan and tasty. For those watching sugar, low-sugar or keto options are available. You can use erythritol or stevia in place of granulated sugar. This will cut calories while keeping the flavor rich.

Custom Mix-Ins

Feel free to get creative with mix-ins! You can add different flavors like mint or almond extract to change the taste. Candies like crushed Oreos or sprinkles can add fun textures. Seasonal ingredients can also enhance the taste. In summer, add fresh berries, or in fall, try pumpkin spice for a seasonal treat. Let your imagination guide you to create your perfect scoop!

Storage Info

Storage Recommendations

To keep your Cherry Chocolate Chip Ice Cream fresh, choose the right container. An airtight container is best. This helps avoid ice crystals and keeps the flavor strong. Glass containers work well, but plastic ones are lighter. Make sure the lid seals tight.

When storing, place a piece of plastic wrap over the ice cream before sealing the lid. This extra layer helps block air. Always scoop with a clean spoon to avoid adding germs.

Shelf Life

How long does homemade ice cream last? Homemade ice cream can last up to two weeks in the freezer. After that, it may lose texture and flavor.

Watch for signs of spoilage. If you see ice crystals on top, that means it’s losing quality. If the color changes or the smell is off, it’s time to toss it.

Re-Freezing Guidelines

Can you refreeze ice cream? Yes, you can refreeze it. However, it may change texture. If it melts a lot, refreezing can make it icy.

To maintain quality after refreezing, keep it cold. Move the ice cream back to the freezer as soon as you scoop. Try to limit how often you open the container. Each time you open it, warm air gets in, which can harm your ice cream.

FAQs

How to make Cherry Chocolate Chip Ice Cream without an ice cream maker?

You can easily make Cherry Chocolate Chip Ice Cream without an ice cream maker. Start by mixing your cream, milk, sugar, and vanilla in a large bowl. Then, add the cherry mixture after macerating. Pour everything into a shallow dish. Place it in the freezer. Every 30 minutes, stir the mixture with a fork. Repeat this process for about 3-4 hours. This method helps create a creamy texture without a machine.

Can I use frozen cherries instead of fresh?

Yes, you can use frozen cherries. They work well in this ice cream. Just thaw them before using. Drain any excess liquid. The flavor will still be delicious, but fresh cherries add a nice texture. If you use frozen cherries, you might skip the maceration step since they are already soft.

What are the nutritional facts for Cherry Chocolate Chip Ice Cream?

A serving of Cherry Chocolate Chip Ice Cream has about 250 calories. It contains 15 grams of fat, 25 grams of sugar, and 3 grams of protein. The nutritional values can change based on your ingredients. You can also adjust sugar and cream for healthier options. Check labels on any alternatives you choose.

Is there an allergy warning for this recipe?

Yes, this recipe contains dairy and sugar. These are common allergens. If you have a dairy allergy, consider using non-dairy milk and cream. Chocolate chips may also contain allergens like soy or nuts. Always check labels for any specific allergens.

Where can I buy Cherry Chocolate Chip Ice Cream?

You can find Cherry Chocolate Chip Ice Cream at most grocery stores. Look in the ice cream aisle. Some local shops may also carry it. If you prefer homemade, making it is fun and easy. You can customize it to your taste!

You learned how to make Cherry Chocolate Chip Ice Cream from fresh ingredients. We covered prep, mixing, and churning. You can also explore vegan and low-sugar options. Remember to keep your ice cream stored well for the best taste. Avoid common mistakes for a smooth texture. Making this treat can be fun and rewarding. Enjoy your homemade ice cream with friends and family. Celebrate your skills by sharing and enjoying every scoo

- 2 cups fresh cherries, pitted and halved - 1 cup heavy cream - 1 cup whole milk - ¾ cup granulated sugar - 1 teaspoon vanilla extract - ½ cup semi-sweet chocolate chips - ¼ teaspoon salt - 1 tablespoon lemon juice When you make Cherry Chocolate Chip Ice Cream, fresh cherries shine. Their sweet and tart flavor makes this treat special. I like to use ripe, juicy cherries. They add a burst of flavor. The heavy cream and whole milk give this ice cream a rich, creamy texture. Granulated sugar sweetens the mix, while vanilla extract adds warmth. A little salt helps balance the sweetness. The semi-sweet chocolate chips bring a delightful crunch. Lastly, lemon juice brightens the cherry flavor and helps keep the mixture fresh. - Non-dairy options - Sugar substitutes - Dairy-free chocolate chips If you want to make this ice cream non-dairy, use coconut cream instead of heavy cream. Almond milk or oat milk works well too. For sugar, you can use maple syrup or agave nectar. These will change the taste a bit but still taste great. If you need dairy-free chocolate, look for dairy-free chocolate chips. They melt well and taste delicious. - Ice cream maker - Mixing bowls - Whisk - Airtight container To make this ice cream, you need a few tools. An ice cream maker is key for the right texture. Mixing bowls help combine the ingredients easily. A whisk is great for mixing the cream and sugar. Finally, use an airtight container to store your ice cream. It keeps your ice cream fresh and ready to enjoy. {{ingredient_image_1}} First, take 2 cups of fresh cherries. Pit them and cut them in half. Place the cherries in a medium bowl. Add 1 tablespoon of lemon juice and 2 tablespoons of sugar. Toss the cherries well to coat them. Set this bowl aside for about 30 minutes. This process is called maceration. The sugar will draw out the juice from the cherries. You want to see a nice cherry syrup form in the bowl. In a large mixing bowl, combine 1 cup of heavy cream and 1 cup of whole milk. Add ½ cup of granulated sugar, 1 teaspoon of vanilla extract, and ¼ teaspoon of salt. Use a whisk to mix these ingredients. Keep whisking until the sugar fully dissolves. This step is key for a smooth ice cream base. You want all the sugar to blend in nicely. Now, add the cherry mixture to the cream base. Be sure to include all the juices too. Stir gently to combine everything well. Next, pour this mixture into your ice cream maker. Churn according to the machine's instructions, usually around 20 to 25 minutes. Once the ice cream is creamy and soft, fold in ½ cup of semi-sweet chocolate chips. This adds a rich flavor. Transfer the ice cream to an airtight container. Smooth the top with a spatula. Freeze it for at least 4 hours or until solid. Enjoy your homemade cherry chocolate chip ice cream! To get a soft-serve consistency, follow these steps: - Churn the mixture for 20-25 minutes in your ice cream maker. - Check for the right texture; it should be creamy and light. When you fold in the chocolate chips, do it gently. This helps to keep the ice cream smooth. Use a spatula to lift and turn the mixture. This way, you mix the chips evenly without breaking them. Serving your ice cream in colorful cones makes it more fun. Try adding fresh cherry halves on top. A sprinkle of chocolate chips adds extra flair. You can also pair it with brownies or a slice of pie. This makes for a great dessert combo. One big mistake is over-churning your ice cream. If you churn it too long, it can become icy. Listen to your machine, and stop when it’s fluffy. Another mistake is not freezing it long enough. It needs at least four hours in the freezer. This helps it firm up nicely. If you skip this step, your ice cream might be too soft to scoop. Pro Tips Use ripe cherries: Choose cherries that are deep red and slightly soft to the touch for the best flavor and sweetness. Chill your mixture: For a smoother texture, chill the cream mixture in the refrigerator for about an hour before churning. Experiment with chocolate: Try using dark chocolate or white chocolate chips for a different flavor profile in your ice cream. Store properly: To prevent ice crystals, make sure to store the ice cream in an airtight container and press a piece of plastic wrap directly onto the surface before sealing. {{image_2}} You can make this ice cream even better by adding nuts or other fruits. Chopped almonds or walnuts give a nice crunch. You can also mix in diced peaches or strawberries for a fruity twist. If you want a different taste, try swapping semi-sweet chocolate for white chocolate. This change gives a sweeter flavor that pairs well with cherries. If you follow a vegan diet, you can easily make vegan cherry chocolate chip ice cream. Replace heavy cream and whole milk with coconut cream and almond milk. Use a plant-based sugar substitute to keep it vegan and tasty. For those watching sugar, low-sugar or keto options are available. You can use erythritol or stevia in place of granulated sugar. This will cut calories while keeping the flavor rich. Feel free to get creative with mix-ins! You can add different flavors like mint or almond extract to change the taste. Candies like crushed Oreos or sprinkles can add fun textures. Seasonal ingredients can also enhance the taste. In summer, add fresh berries, or in fall, try pumpkin spice for a seasonal treat. Let your imagination guide you to create your perfect scoop! To keep your Cherry Chocolate Chip Ice Cream fresh, choose the right container. An airtight container is best. This helps avoid ice crystals and keeps the flavor strong. Glass containers work well, but plastic ones are lighter. Make sure the lid seals tight. When storing, place a piece of plastic wrap over the ice cream before sealing the lid. This extra layer helps block air. Always scoop with a clean spoon to avoid adding germs. How long does homemade ice cream last? Homemade ice cream can last up to two weeks in the freezer. After that, it may lose texture and flavor. Watch for signs of spoilage. If you see ice crystals on top, that means it's losing quality. If the color changes or the smell is off, it’s time to toss it. Can you refreeze ice cream? Yes, you can refreeze it. However, it may change texture. If it melts a lot, refreezing can make it icy. To maintain quality after refreezing, keep it cold. Move the ice cream back to the freezer as soon as you scoop. Try to limit how often you open the container. Each time you open it, warm air gets in, which can harm your ice cream. You can easily make Cherry Chocolate Chip Ice Cream without an ice cream maker. Start by mixing your cream, milk, sugar, and vanilla in a large bowl. Then, add the cherry mixture after macerating. Pour everything into a shallow dish. Place it in the freezer. Every 30 minutes, stir the mixture with a fork. Repeat this process for about 3-4 hours. This method helps create a creamy texture without a machine. Yes, you can use frozen cherries. They work well in this ice cream. Just thaw them before using. Drain any excess liquid. The flavor will still be delicious, but fresh cherries add a nice texture. If you use frozen cherries, you might skip the maceration step since they are already soft. A serving of Cherry Chocolate Chip Ice Cream has about 250 calories. It contains 15 grams of fat, 25 grams of sugar, and 3 grams of protein. The nutritional values can change based on your ingredients. You can also adjust sugar and cream for healthier options. Check labels on any alternatives you choose. Yes, this recipe contains dairy and sugar. These are common allergens. If you have a dairy allergy, consider using non-dairy milk and cream. Chocolate chips may also contain allergens like soy or nuts. Always check labels for any specific allergens. You can find Cherry Chocolate Chip Ice Cream at most grocery stores. Look in the ice cream aisle. Some local shops may also carry it. If you prefer homemade, making it is fun and easy. You can customize it to your taste! You learned how to make Cherry Chocolate Chip Ice Cream from fresh ingredients. We covered prep, mixing, and churning. You can also explore vegan and low-sugar options. Remember to keep your ice cream stored well for the best taste. Avoid common mistakes for a smooth texture. Making this treat can be fun and rewarding. Enjoy your homemade ice cream with friends and family. Celebrate your skills by sharing and enjoying every scoop!

Cherry Chocolate Chip Ice Cream

A delightful homemade ice cream featuring fresh cherries and chocolate chips.
Prep Time 30 minutes
Cook Time 25 minutes
Total Time 4 hours 30 minutes
Course Dessert
Cuisine American
Servings 6
Calories 250 kcal

Ingredients
  

  • 2 cups fresh cherries, pitted and halved
  • 1 cup heavy cream
  • 1 cup whole milk
  • ¾ cup granulated sugar
  • 1 teaspoon vanilla extract
  • ½ cup semi-sweet chocolate chips
  • ¼ teaspoon salt
  • 1 tablespoon lemon juice

Instructions
 

  • In a medium bowl, combine the fresh cherries, lemon juice, and 2 tablespoons of sugar. Toss to coat the cherries, then set aside for about 30 minutes to allow the juices to release.
  • In a separate large mixing bowl, whisk together the heavy cream, whole milk, remaining sugar (½ cup), vanilla extract, and salt until the sugar is completely dissolved.
  • After the cherries have macerated, add the cherry mixture to the cream mixture, including the juices. Stir gently to combine.
  • Pour the mixture into an ice cream maker and churn according to the manufacturer's instructions, usually around 20-25 minutes.
  • Once the ice cream reaches a soft-serve consistency, fold in the semi-sweet chocolate chips.
  • Transfer the ice cream to an airtight container and smooth the top with a spatula. Freeze for at least 4 hours or until firm.
  • When ready to serve, scoop the ice cream into bowls or cones and enjoy!

Notes

Serve each scoop in a colorful cone, topped with fresh cherry halves and a sprinkle of chocolate chips for an appealing look.
Keyword cherry, chocolate chip, dessert, ice cream

WANT TO SAVE THIS RECIPE?

Leave a Comment

Recipe Rating