Looking for a cool, sweet treat to beat the summer heat? Try my Berry Lemonade Popsicles! Bursting with berries and zesty lemon, these popsicles are easy to make and perfect for hot days. With just a few simple ingredients, you can enjoy a refreshing snack that kids and adults alike will love. Dive into this fun summer recipe and discover how to keep your family cool and happy!
Why I Love This Recipe
- Refreshing Treat: These berry lemonade popsicles are the perfect way to cool down on a hot day, offering a burst of fruity flavor.
- Easy to Make: With just a handful of ingredients and simple steps, anyone can whip up a batch of these delicious popsicles.
- Customizable Flavors: You can mix and match your favorite berries or adjust the sweetness to suit your taste, making it a versatile recipe.
- Healthy Snack: Made with fresh fruit and natural sweeteners, these popsicles are a guilt-free treat for kids and adults alike.
Ingredients
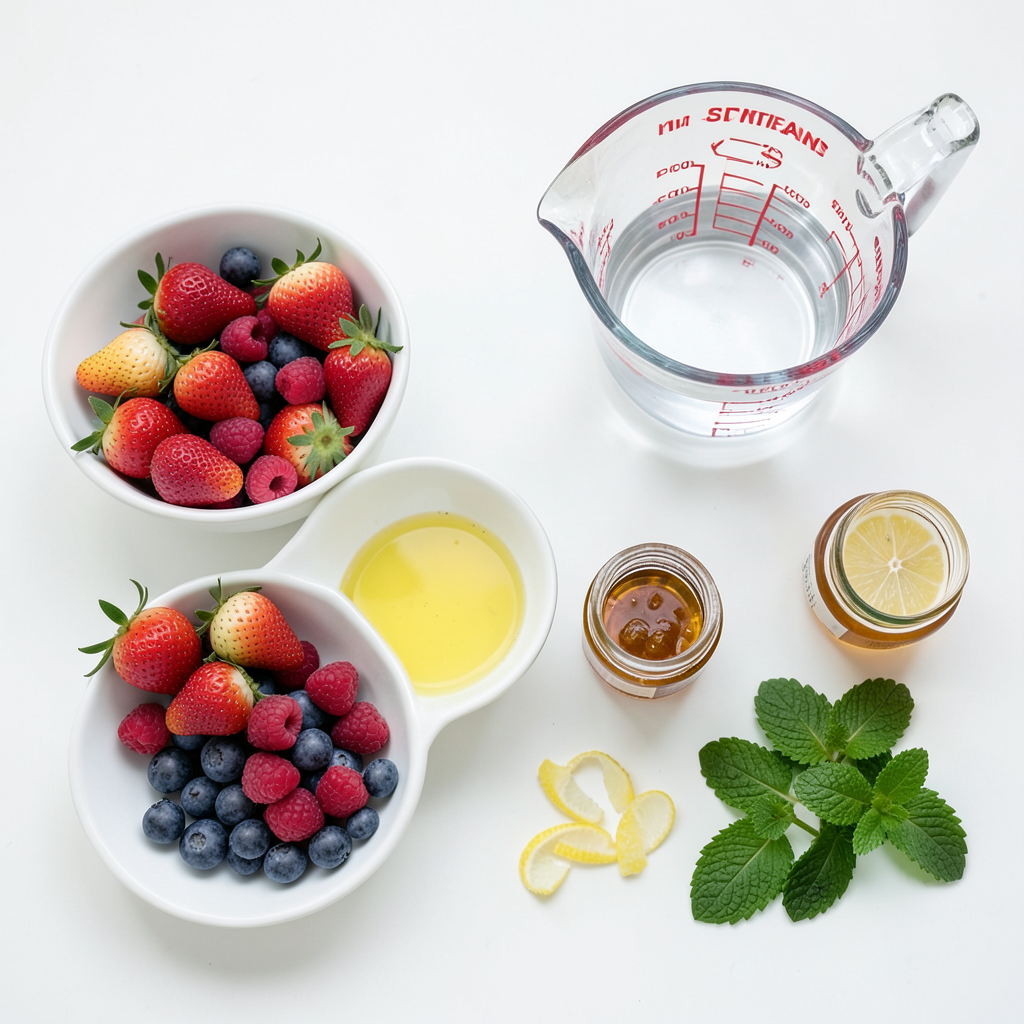
List of Required Ingredients
- 2 cups mixed berries (strawberries, blueberries, raspberries)
- 1 cup freshly squeezed lemon juice
- 2 cups water
- 1/2 cup honey or agave syrup
- Zest of 1 lemon
- Fresh mint leaves for garnish (optional)
Gathering the right ingredients is key to making perfect berry lemonade popsicles. You want fresh berries for the best taste. Strawberries, blueberries, and raspberries mix well. Each berry adds its unique flavor to the popsicle.
You will also need freshly squeezed lemon juice. This brightens the flavor and adds a refreshing kick. Don’t use bottled juice; it just won’t taste the same.
Water helps dilute the strong flavors. Honey or agave syrup adds sweetness, but you can adjust it based on your taste. If you like it sweeter, add more!
Don’t forget the zest of one lemon. It adds a nice touch to the overall flavor. Finally, if you like, grab some fresh mint leaves for garnish. They look pretty and add extra flavor when you serve your popsicles.
With these simple yet fresh ingredients, you are ready to create a delightful summer treat that will cool you down.
Step-by-Step Instructions
Preparation of Berries
To start, take 2 cups of mixed berries. You can use strawberries, blueberries, and raspberries. Place them in a medium bowl. Use a fork or potato masher to mash the berries. You want them juicy but still chunky. This adds good texture to your popsicles. Once mashed, set the berries aside for later.
Creating the Lemonade Base
Next, grab a pot and combine 2 cups of water, 1/2 cup of honey, and 1 cup of freshly squeezed lemon juice. Warm this mixture over low heat. Stir until the honey dissolves fully. Once combined, take it off the heat and let it cool slightly. This base will give your popsicles a bright, tangy flavor.
Combining Ingredients
Now, it’s time to mix the two parts. Add the mashed berries into the lemonade base. This is where the magic happens! Stir until everything combines well. To enhance the flavor, add the zest of 1 lemon. It adds a nice zing that makes these popsicles even better.
Filling Popsicle Molds
Take your popsicle molds and carefully pour the berry lemonade mixture into them. Fill them about 3/4 full. This allows space for the mixture to expand as it freezes. Make sure to avoid overfilling, or you’ll have a mess in your freezer!
Freezing Process
Insert popsicle sticks into the center of each mold. Ensure they stand upright. Now, place the molds in the freezer. Let them freeze for at least 4 to 6 hours. The longer they freeze, the firmer they will be.
Unloading Popsicles
When ready to enjoy, it's time to remove the popsicles. To do this, run warm water over the outside of the mold for a few seconds. This helps loosen them up. Gently pull on the sticks to free the popsicles. Serve them right away for the best taste! You can garnish with mint leaves if you like.
Tips & Tricks
Sweetness Adjustments
You can easily tweak the sweetness of your Berry Lemonade Popsicles. Start with the honey or agave syrup. If you like it sweeter, add more. If it's too sweet, add a bit more lemon juice. Always taste the mixture before you freeze it. This way, you can find the perfect balance for your palate.
Ensuring Smooth Popsicles
To prevent ice crystals from forming, blend the berries well. A smooth mix creates a creamier popsicle. If you see chunks, they might freeze into hard bits. After mashing the berries, make sure to stir them into the lemonade base thoroughly. This helps keep everything nice and smooth.
Presentation Suggestions
Serving your popsicles can be fun! You can place them in a glass with some ice for a cool look. For a pop of color, garnish with fresh mint leaves. Just a few sprigs on top will make them look fancy. You can also use fun plates or bowls to make your popsicles stand out.
Pro Tips
- Fresh Ingredients: Always use fresh lemons and ripe berries for the best flavor in your popsicles.
- Sweetness Adjustment: Taste the lemonade base before pouring it into molds; adjust the sweetness by adding more honey or agave syrup if needed.
- Layering Flavors: For a fun twist, try layering different berry mixtures in the popsicle molds for a colorful effect.
- Storage Tips: Store popsicles in an airtight container in the freezer to prevent freezer burn and maintain their flavor.
Variations
Different Berry Combinations
You can mix many berries for your popsicles. Try using strawberries, blueberries, and raspberries together. Each adds different flavors and colors. If you want a twist, add blackberries or cranberries. Blackberries give a deep flavor. Cranberries add a tart kick. You can also mix in some cherries for sweetness. The more berries you use, the more fun your popsicles will be!
Flavor Enhancements
To boost the taste, add other citrus fruits. Lime gives a zesty punch, while oranges add sweetness. You can mix lemon and lime for a refreshing twist. Don’t forget herbs! Fresh basil or thyme can add a unique taste. Just a little bit can change everything. Try adding mint for a cool flavor. It pairs nicely with the berries!
Alternative Sweeteners
If you want to change the sweetener, you have options. Maple syrup is a natural choice and adds a warm flavor. Stevia can also work well if you want a low-calorie option. You can even try flavored syrups like vanilla or coconut. This can give your popsicles a fun twist! Just remember to taste as you go. Adjust the sweetness to match your liking!
Storage Info
Best Practices for Freezing
To store your berry lemonade popsicles, use airtight containers. This keeps them fresh and tasty. You can also wrap each popsicle in plastic wrap. This prevents ice crystals from forming. Always store them in the coldest part of the freezer. Set your freezer to 0°F (-18°C) for the best results.
To avoid freezer burn, keep popsicles tightly sealed. Freezer burn can ruin the flavor and texture. If you see ice on the popsicles, that's a sign. It means they need better wrapping or sealing.
Shelf Life of Homemade Popsicles
You can keep your homemade popsicles for about two months. After that, they may lose flavor and texture. Always check for signs of spoilage. If they smell off, or have ice crystals, throw them out. They should look bright and fresh when you open the container.
Reusing Old Popsicle Molds
Cleaning popsicle molds is easy. Wash them with warm, soapy water, then rinse well. Avoid harsh cleaners that can leave residue. You can also use a mixture of baking soda and water for tough stains.
You can get creative with leftover ingredients too. Use extra berries or lemonade to make new popsicles. Blend leftover fruits into smoothies or yogurt. This way, nothing goes to waste!
FAQs
How long do berry lemonade popsicles take to freeze?
Berry lemonade popsicles usually take about 4 to 6 hours to freeze completely. If you want them ready for a hot day, make them in the morning. They will be perfect by afternoon.
Can I use frozen berries instead of fresh?
Yes, you can use frozen berries. They will work well, but the taste may differ. Fresh berries give a brighter flavor. Frozen berries may make the popsicles a bit softer.
What can I use in place of honey?
You can use agave syrup, maple syrup, or stevia as a sweetener. Each option changes the flavor a bit. Adjust the amount based on your taste.
Are these popsicles suitable for kids?
Yes, these popsicles are great for kids. They are full of fruit and low in added sugar. You can adjust sweetness to match what kids love.
How do I prevent popsicles from sticking to the mold?
To avoid sticking, run warm water over the mold for a few seconds. This will help loosen the popsicles. Gently pull on the sticks to remove them easily.
Making berry lemonade popsicles is simple and fun. You’ll need fresh berries, lemon juice, and a few other ingredients. Start by mashing the berries and mixing them with the lemonade base. Then, pour that mixture into molds, freeze, and enjoy. Remember to adjust sweetness to your taste and try different berry combos for variety. These popsicles are a tasty treat for everyone, especially kids. With these tips, your homemade popsicles will impress! Enjoy creating and sharing your delicious treats!