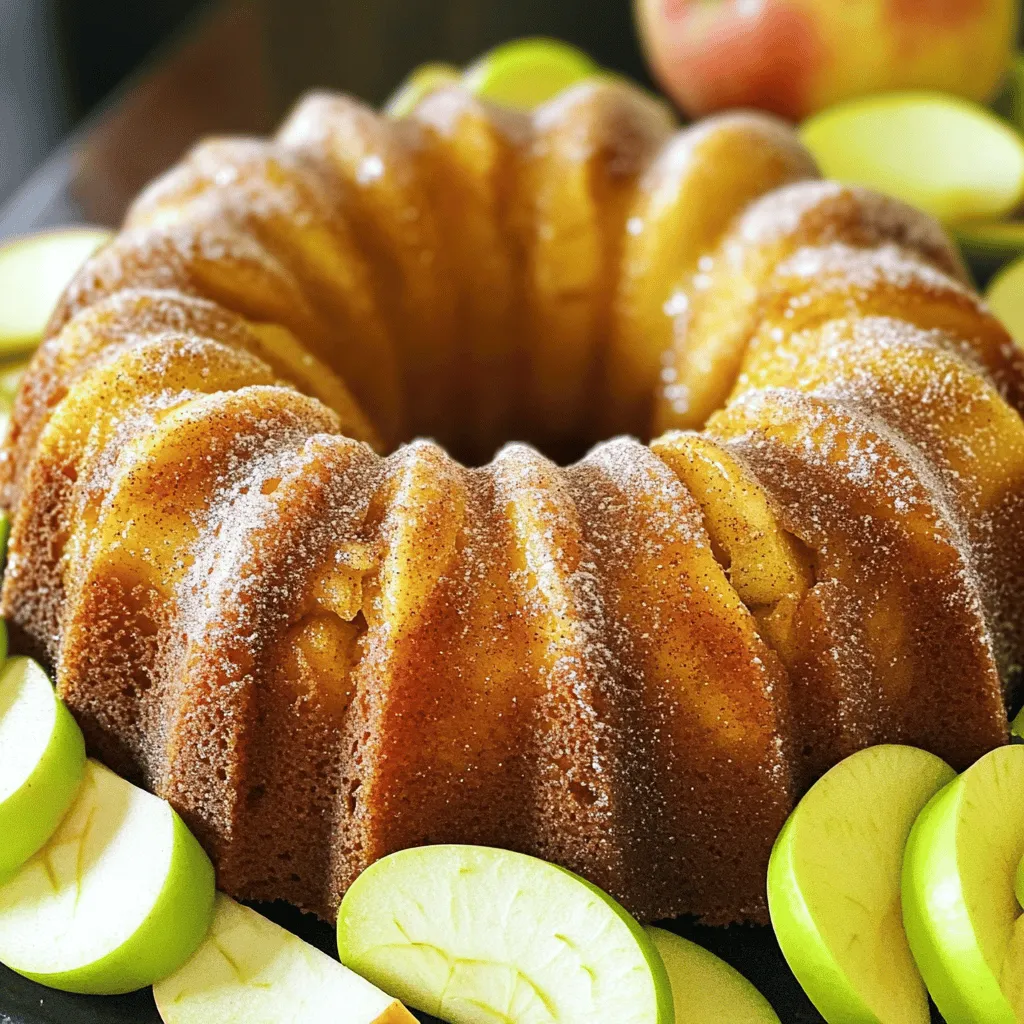
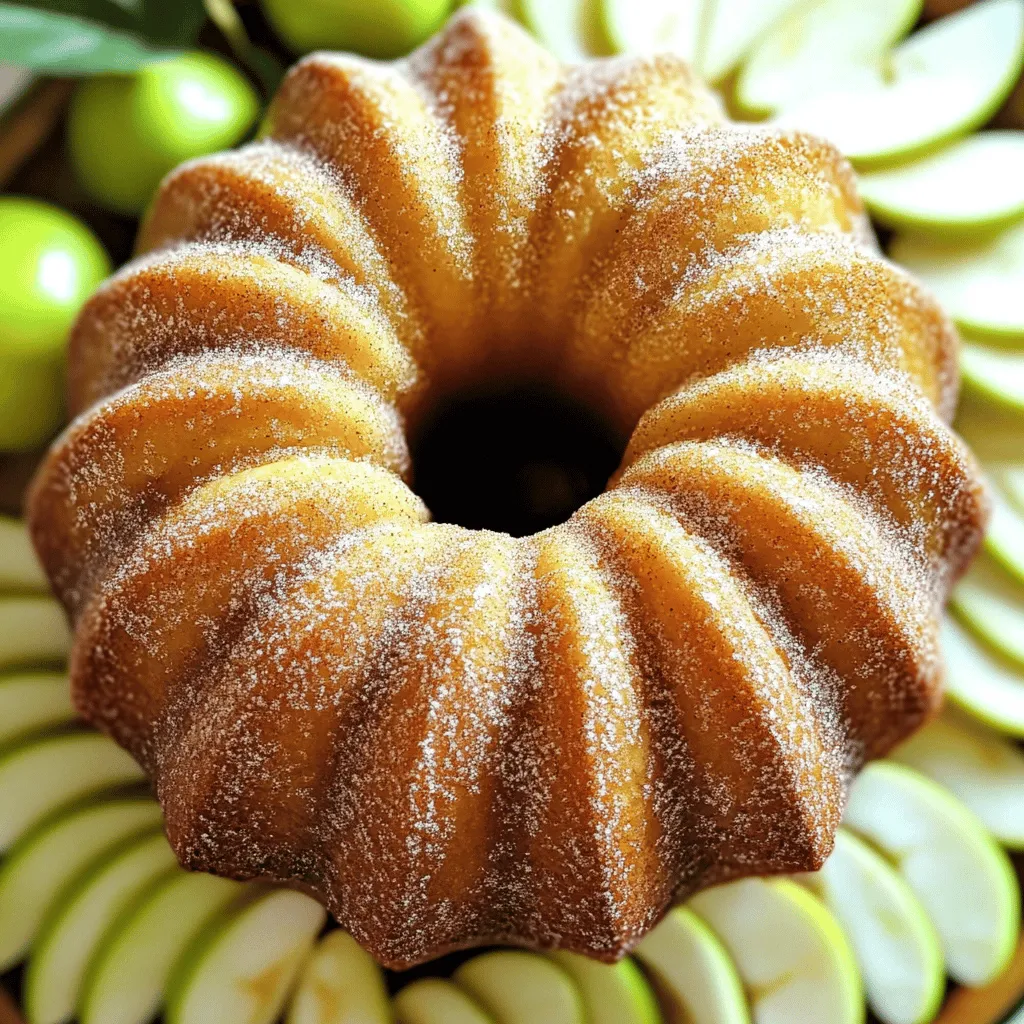
Get ready to delight your taste buds with my Baked Apple Cider Donut Cake! This easy-to-follow recipe combines the cozy flavors of apple cider, warm spices, and a tender cake texture. Perfect for fall, family gatherings, or a sweet treat anytime, this cake is sure to impress. Plus, I’ll share tips and tricks to make it even better. Let’s dive into this delicious baking adventure together!
Ingredients
Main Ingredients
– 2 cups apple cider
– 2 cups all-purpose flour
– 2 large eggs
Apple cider gives this cake its sweet and tangy flavor. Use fresh cider for the best taste. All-purpose flour forms the cake’s base, creating a light and fluffy texture. The eggs bind the ingredients, helping the cake rise.
Additional Flavorings
– ½ cup granulated sugar
– ½ cup brown sugar, packed
– 2 teaspoons ground cinnamon
– ¼ teaspoon ground nutmeg
– 1 teaspoon vanilla extract
Granulated sugar adds sweetness, while brown sugar adds depth. The ground cinnamon brings warmth, and nutmeg gives a hint of spice. Vanilla extract enhances all the flavors, making each bite memorable.
Optional Coatings
– ½ cup cinnamon sugar (for coating)
– Powdered sugar (for decoration)
Cinnamon sugar adds a sweet, crunchy layer. Powdered sugar serves as a beautiful finish, making the cake look fancy. You can choose one or both for a delightful touch!
Step-by-Step Instructions
Prepping the Oven and Bundt Pan
First, set your oven to preheat at 350°F (175°C). This step is key for the cake to bake evenly. While that warms up, grab your bundt pan. Use non-stick spray or butter to grease it. Make sure to coat all the crevices well. This will help your cake come out easily after baking.
Reducing Apple Cider
Next, take your apple cider and pour it into a small saucepan. Heat it over medium heat until it boils. Once boiling, lower the heat and let it simmer. You want to reduce the cider to about one cup. This should take around 15 to 20 minutes. After that, remove it from the heat and let it cool for a few minutes.
Mixing Ingredients
Now, in a medium bowl, whisk together your dry ingredients: flour, baking powder, baking soda, salt, cinnamon, and nutmeg. Set this bowl aside. In a large mixing bowl, combine granulated sugar, brown sugar, and eggs. Whisk these until they are well mixed. Then, add in your cooled apple cider, applesauce, vegetable oil, and vanilla extract. Mix until everything is smooth.
When adding the dry mix to the wet mix, do it gradually. Stir gently until everything is just combined. It’s okay if there are a few lumps. Overmixing can make the cake tough, and we want it soft and fluffy.
Baking the Cake
Pour your batter into the greased bundt pan. Use a spatula to smooth out the top. Now, place the pan in your preheated oven. Bake for 30 to 35 minutes. To check if it’s done, insert a toothpick into the center. If it comes out clean, the cake is ready.
Cooling and Serving
Once baked, let the cake cool in the pan for about 10 minutes. This helps it set. After that, carefully invert the bundt pan onto a wire rack. If you want an extra sweet touch, roll the warm cake in cinnamon sugar. For serving, slice it carefully. Place the slices on a nice platter. You can dust them with powdered sugar or serve with a scoop of vanilla ice cream for a delightful treat.
Tips & Tricks
Perfecting the Flavor
To select the best apple cider, look for fresh, unfiltered options. Fresh cider has a stronger apple taste. Avoid clear, overly processed types. A good cider should have a rich, deep color.
Spices play a key role in this cake. Ground cinnamon is a must, adding warmth and depth. Nutmeg adds a subtle sweetness. For a twist, consider adding allspice or ginger. These spices boost the flavor and make your cake unique.
Baking Techniques
Common baking mistakes can ruin your cake. First, always measure your ingredients correctly. Too much flour can make the cake dense. Also, avoid opening the oven door too soon. This can cause the cake to sink.
To ensure even baking, use an oven thermometer. Sometimes, ovens can be off by a few degrees. Bake your cake in the center of the oven for the best results. This helps it cook evenly.
Enhancements
Leftover apple cider can be used in many ways. Try it in pancakes or smoothies. You can also use it to make salad dressings. It adds a sweet, tangy flavor that brightens dishes.
For extra texture, consider adding nuts or dried fruit. Chopped walnuts or pecans give a nice crunch. Dried apples can enhance the apple flavor too. These additions make your cake even more delightful.
Variations
Flavor Variations
You can make this cake even more fun by adding chocolate chips. They melt and create little pockets of sweetness. Just fold in about ½ cup of mini chocolate chips when mixing your batter.
Another way to change the flavor is by using different spices. Try adding ground ginger or allspice to the batter. These spices add warmth and depth. You can mix in ½ teaspoon of each for a cozy twist.
Dietary Modifications
If you need a gluten-free option, you can swap the all-purpose flour for a gluten-free blend. Just make sure it has a good binding agent. This will keep the cake fluffy and moist.
For a vegan version, replace the eggs with flax eggs. Mix 1 tablespoon of ground flaxseed with 2.5 tablespoons of water for each egg. Use a plant-based oil instead of vegetable oil. Applesauce already makes this recipe friendly for vegans.
Serving Suggestions
This cake pairs well with coffee or warm apple cider. The warm spices and sweet flavors enhance your drink.
For a fun presentation, slice the cake and serve it on a colorful platter. You can dust it with powdered sugar for a fancy touch. A scoop of vanilla ice cream on the side makes it extra special.
Storage Info
Short-term Storage
To keep your Baked Apple Cider Donut Cake fresh for up to three days, store it in an airtight container. Make sure to place it at room temperature. If you live in a warm area, consider putting it in the fridge. This helps keep it moist and tasty. Avoid leaving it uncovered, as it can dry out quickly.
Long-term Storage
For long-term storage, you can freeze the cake. First, let it cool completely. Wrap it tightly in plastic wrap. Then, place it in a freezer-safe bag or container. This will help keep the cake fresh for up to three months. When you are ready to eat it, simply thaw it in the fridge overnight.
Reheating Tips
To reheat your cake, slice a piece and place it in the microwave. Heat it for about 10-15 seconds. This gives you a warm treat without drying it out. If you prefer a crispy texture, you can use an oven. Preheat it to 350°F (175°C) and place the slice on a baking sheet for 5-10 minutes. Enjoy your cake warm and delicious!
FAQs
How do I know when the cake is done?
To check if the cake is done, use the toothpick test. Insert a toothpick into the center of the cake. If it comes out clean or with a few crumbs, the cake is ready. This simple test ensures you don’t overbake or underbake your cake.
Can I make this cake ahead of time?
Yes, you can make this cake ahead of time. Bake it and let it cool completely. Wrap it tightly in plastic wrap or aluminum foil. Store it at room temperature for up to three days. For longer storage, refrigerate it. Just remember to bring it to room temperature before serving.
What can I substitute for apple cider?
If you don’t have apple cider, use apple juice. The flavor will be sweeter and lighter. You can also mix equal parts of water and vinegar for a tangy twist. This will change the taste, but it still works well in the recipe.
Is this recipe suitable for freezing?
Yes, this cake is great for freezing. Once it cools, slice it for easy thawing. Wrap each slice in plastic wrap and then in foil. Store in a freezer-safe bag. To thaw, leave it in the fridge overnight or at room temperature for a few hours.
This blog post outlined how to make a delicious apple cider cake. We covered the key ingredients, including apple cider, flour, and eggs. You learned step-by-step how to prepare, bake, and serve the cake. I shared tips to enhance its flavor and avoid common mistakes. Different variations and storage methods were also discussed. In the end, this cake is not just a treat; it’s a fun and tasty project. Enjoy baking and sharing it with others. Happy baking!