Skip to content
DisclaimerTerms Of UseGDPR PolicyCookie Policy

greenmealmap

  • Home
  • Drinks
  • Appetizers
  • Dinner
  • Dessert
  • About
  • Contact
  • Privacy Policy
DisclaimerTerms Of UseGDPR PolicyCookie Policy

Lauren

- 1 cup cornmeal - 1 cup all-purpose flour - 1/4 cup granulated sugar - 1 tablespoon baking powder - 1/2 teaspoon salt - 1 cup milk - 1/4 cup unsalted butter, melted - 2 large eggs - 1/2 cup sweet corn kernels (fresh or canned) - 1/2 cup honey - 1/2 teaspoon cinnamon (optional) This recipe uses simple and common units. You need 1 cup of cornmeal and 1 cup of flour. For sweetness, we add 1/4 cup of sugar. One tablespoon of baking powder helps the cornbread rise. A pinch of salt, just 1/2 teaspoon, brings out the flavors. You will also need 1 cup of milk and 1/4 cup of melted butter. For richness, use 2 large eggs. Add 1/2 cup of sweet corn for texture. Finally, you can add 1/2 cup of honey for sweetness and 1/2 teaspoon of cinnamon for warmth. To make your cornbread more exciting, consider adding a few extras. You can mix in 1/2 teaspoon of cinnamon to give it a warm spice. If you enjoy a sweeter taste, drizzle in extra honey. Fresh herbs like thyme or chives can add a nice touch too. For some zest, consider adding jalapeños for heat. Each option will give your cornbread a unique twist! If you want to explore the full recipe, check out Sweet Cornbread Delight. Start by preheating your oven to 400°F (200°C). Next, grab an 8-inch square baking pan. Grease the pan well or line it with parchment paper. This step helps the cornbread come out easily after baking. In a large bowl, combine the cornmeal, all-purpose flour, sugar, baking powder, and salt. If you want a hint of spice, add cinnamon here. Mix these dry ingredients well. This ensures all the flavors blend together nicely. In a separate bowl, whisk together the milk, melted butter, eggs, and honey. Mix until everything is smooth and well combined. This mixture adds moisture and sweetness to your cornbread. Pour the wet mixture into the dry bowl. Now, add the sweet corn kernels. Gently stir the batter until just combined. The batter should be slightly lumpy; do not over-mix. Over-mixing can make your cornbread tough. Transfer your batter to the prepared baking pan. Smooth the top with a spatula for a nice finish. Bake in your preheated oven for 20-25 minutes. Check for doneness by inserting a toothpick in the center. If it comes out clean, your cornbread is ready! Let it cool in the pan for about 10 minutes before slicing. To make your cornbread sweet, use the right amount of sugar. I suggest 1/4 cup of granulated sugar. You can add more honey for a richer taste. Honey gives a nice flavor and keeps the bread moist. If you want, try using brown sugar instead of white. It adds a warm, caramel note that many love. Just remember, a little sweetness goes a long way! Mixing your batter too much can cause tough cornbread. To avoid this, gently stir the wet and dry ingredients together. You want a few lumps in the batter. This will help keep your cornbread light and fluffy. If you over-mix, the bread may end up dense and chewy. Trust me, less is more when it comes to mixing! Store any leftover cornbread in an airtight container. This helps keep it fresh for up to three days. If you want to save it longer, freeze it. Wrap each piece in plastic wrap and then in foil. This keeps it from getting freezer burn. When you’re ready to eat, just thaw it and reheat. You can warm it in the oven or microwave. Enjoy your sweet cornbread whenever you like! {{image_2}} You can take your sweet cornbread to the next level by adding honey. Simply mix in 1/2 cup of honey into your wet ingredients. This adds a rich sweetness that kids and adults will love. Honey also makes the cornbread extra moist and flavorful. You can drizzle more honey on top when serving for a lovely touch. Fruits can add a burst of flavor and color. Try adding 1 cup of fresh blueberries to the batter. Gently fold them in before baking. The blueberries will soften and create juicy pockets in each bite. You can also use other fruits, like diced peaches or cranberries, for a fun twist. For a savory kick, add 1 cup of shredded cheese or 1/2 cup of diced jalapeños. Mix them into the batter for a unique flavor. Cheese adds creaminess, while jalapeños bring heat. This way, you can enjoy cornbread with chili or as a side for barbecues. Each of these variations makes the cornbread special and fun to share. For the full recipe, check out Sweet Cornbread Delight. To keep your sweet cornbread fresh, let it cool first. Wrap it in plastic wrap or foil. You can also use an airtight container. This helps keep moisture in and prevents it from drying out. Store it at room temperature for up to three days. If you want to keep it longer, go for freezing. Freezing sweet cornbread is easy and a great way to save leftovers. First, let the cornbread cool completely. Then, slice it into squares. Wrap each piece in plastic wrap, and then place them in a freezer bag. Be sure to remove as much air as possible. You can freeze it for up to three months. When you're ready to eat it, just thaw it in the fridge overnight. Reheating sweet cornbread is simple. For the best texture, use the oven. Preheat your oven to 350°F (175°C). Place the cornbread on a baking sheet. Heat for about 10-15 minutes. If you're in a hurry, you can use the microwave. Heat each piece for about 15-20 seconds. Enjoy your warm cornbread just like when it was fresh! You can use fine ground oats or polenta. Both give a nice texture. If you need a quick fix, you can also use all-purpose flour. However, the flavor will change a little. Yes, you can! Use gluten-free flour in place of all-purpose flour. Make sure your cornmeal is also gluten-free. Many stores have great mixes that work well in this recipe. Check for a golden top and firm texture. Insert a toothpick in the center. If it comes out clean, your cornbread is ready! The edges should pull away from the pan slightly. Sweet cornbread pairs well with chili or stew. You can also enjoy it with butter and honey. For a fun twist, try it with fresh berries or jam. These add a nice contrast to the sweet cornbread. This blog post covered the key steps to make sweet cornbread. We explored the ingredients, measurements, and optional flavors to boost taste. I gave detailed instructions on how to mix and bake your cornbread perfectly. You now have tips for storage and creative variations, like adding fruits or cheese. In baking, small changes can make a big difference. Use this guide to create your version of sweet cornbread. Enjoy every delicious bite!

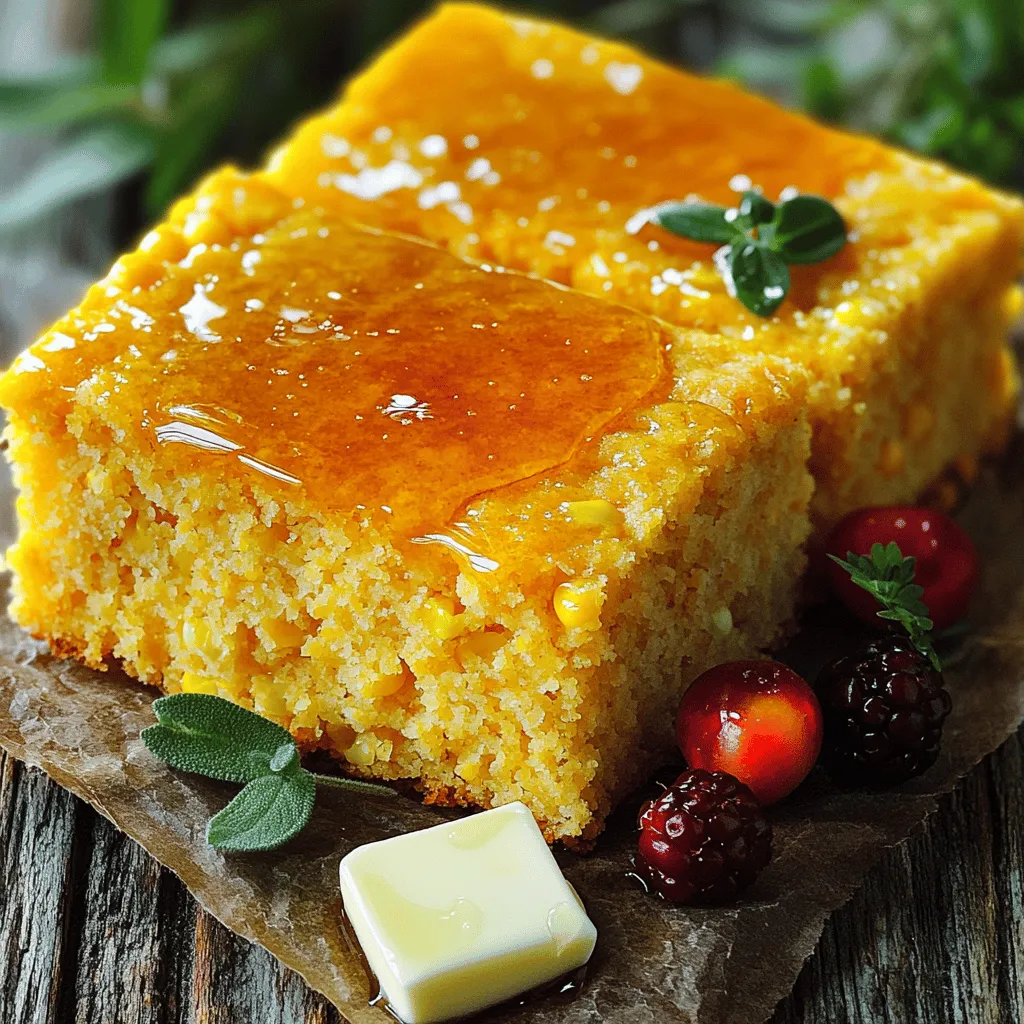
Sweet Cornbread Delightful Recipe for Everyone

Looking to bake something special? Sweet cornbread is a warm, inviting treat perfect for everyone. I’ll guide you through a

To make Baked Lemon Butter Chicken, you need: - 4 boneless, skinless chicken breasts - 1/2 cup unsalted butter, melted - 2 large lemons (zested and juiced) - 4 cloves garlic, minced - 1 tablespoon fresh thyme or 1 teaspoon dried thyme - 1 teaspoon paprika - Salt and pepper to taste - Fresh parsley for garnish When measuring ingredients, use dry measuring cups for solids. For liquids, use a liquid measuring cup. Level off dry ingredients with a knife for accuracy. Always pack brown sugar firmly. For butter, use the markings on the wrapper for easy measurement. Fresh herbs should be chopped finely for the best flavor release. Use fresh lemons for the best taste. They should feel firm and juicy. Pick unsalted butter for better control of salt in the dish. Choose fresh garlic for a strong aroma and flavor. When using dried thyme, ensure it is not expired to maintain potency. Fresh parsley adds a pop of color and flavor, so select vibrant green leaves. For chicken, look for breasts that are plump and pink, with no signs of discoloration. This ensures a juicy and tasty result. For a full recipe, check out the link provided above. To start, gather all your ingredients. You need 1/2 cup of melted butter, the zest and juice from 2 large lemons, 4 minced garlic cloves, fresh thyme, paprika, salt, and pepper. Mix these in a medium bowl. This mix creates a zesty, tangy flavor that makes the chicken shine. The butter adds richness, while the lemon gives a bright taste. Next, take 4 boneless, skinless chicken breasts and place them in a large baking dish. Make sure they have space to breathe. Pour your lemon butter marinade over the chicken. Use a spoon to coat each piece well. Let the chicken sit for at least 30 minutes. If you can, let it marinate for 2 hours in the fridge. This step is key for flavor. Now, preheat your oven to 375°F (190°C). Cover the baking dish with aluminum foil. This keeps the chicken moist. Bake for 20 minutes. After 20 minutes, take off the foil. Bake for an extra 15-20 minutes. You want the chicken to be golden brown and reach an internal temperature of 165°F (75°C). Once done, let it rest for 5 minutes. Garnish with fresh parsley for a bright touch. This step makes it look as good as it tastes. You can find the full recipe [here](#). Marinade time matters a lot. For best results, let your chicken marinate for at least 30 minutes. This step allows the flavors to soak in. If you have time, go for up to 2 hours. Longer marinating gives you a richer taste. Just remember, don’t let it sit too long. Chicken can become too salty if marinated overnight. Juicy chicken is key to this dish. Start with fresh, high-quality chicken breasts. Dry chicken can ruin your meal. Make sure to cover the chicken with foil in the oven. This keeps the moisture locked in while it cooks. After baking, let the chicken rest for 5 minutes. This helps the juices redistribute throughout the meat. You’ll end up with tender, juicy bites. Garnishing makes your dish look great. Use fresh parsley for color and freshness. You can also add lemon slices around the plate. This adds a nice touch and hints at the flavors inside. For extra flavor, try adding capers or olives. They pair well with the lemon butter sauce. Remember, a good garnish can elevate your dish to gourmet status. {{image_2}} You can change the herbs to add new flavors. Try using rosemary, oregano, or basil. Each herb brings its own taste. For example, rosemary gives a woodsy flavor. Oregano adds a slight peppery note. You can use fresh or dried herbs based on what you have. Just remember, fresh herbs are usually stronger in flavor. Baking is great, but you can try other methods too. Grilling gives a nice smoky flavor. Just marinate the chicken and grill it over medium heat. You can also pan-sear the chicken. Start in a hot skillet with some oil. Sear each side for a few minutes before finishing in the oven. This way, you get a crispy outside and juicy inside. You can easily adapt this dish to fit dietary needs. For a dairy-free option, replace butter with olive oil or a dairy-free spread. If you want it gluten-free, there are no gluten ingredients here. And for low-carb diets, serve the chicken with veggies instead of starches. Feel free to adjust the recipe to suit your tastes and needs. For the full recipe, check out the original instructions. After enjoying your Baked Lemon Butter Chicken, you may have some leftovers. To keep them fresh, let the chicken cool down first. Place it in an airtight container. Store it in the fridge. It will stay good for up to three days. Make sure to cover the chicken with some of the lemon butter sauce. This keeps it juicy and tasty. When you are ready to eat the leftovers, reheating is key. Preheat your oven to 350°F (175°C). Place the chicken in an oven-safe dish. Pour a little of the leftover sauce on top. Cover the dish with foil to keep moisture in. Heat for about 20 minutes or until warm. You can also use a microwave if you’re in a hurry. Just heat for 1-2 minutes, checking often to avoid overcooking. If you want to save your chicken for later, freezing works well. First, let the chicken cool completely. Then, wrap each piece tightly in plastic wrap. Place the wrapped chicken in a freezer-safe bag. Squeeze out as much air as possible. Label the bag with the date. You can freeze it for up to three months. When you’re ready to use it, thaw it in the fridge overnight before reheating. For step-by-step preparation, check out the Full Recipe. I love serving Baked Lemon Butter Chicken with fresh sides. Roasted vegetables work great. You can use carrots, broccoli, or zucchini. A light salad with mixed greens is refreshing too. You might also enjoy it with rice or mashed potatoes. They absorb the tasty lemon butter sauce perfectly. A slice of crusty bread is nice. It helps you scoop up every bit of the sauce. Yes, you can use frozen chicken breast. Just remember to thaw it first. Thawing allows the marinade to soak in better. You can thaw chicken in the fridge overnight. If you're short on time, use the microwave's defrost setting. Make sure to marinate the chicken well. This adds flavor and helps keep it moist when cooked. To check if the chicken is done, use a meat thermometer. Insert it into the thickest part of the chicken. It should read 165°F (75°C) for safe eating. If you don’t have a thermometer, cut into the chicken. The juices should run clear, not pink. Let the chicken rest for five minutes after baking. This helps keep it juicy and tender. For the full recipe, check out the details above. You now have all the tools to make Baked Lemon Butter Chicken. We covered the right ingredients and measuring tips to boost quality. You learned the steps to prepare, marinate, and bake the chicken perfectly. Remember the tips to keep it juicy and ideas for garnishing. Explore fun variations and know how to store extras safely. Answering common questions helps clear up any confusion. With these skills, your cooking will shine. Enjoy your meal creation journey!

Baked Lemon Butter Chicken Juicy and Flavorful Dish

Looking to impress your dinner guests with a flavorful dish? Let me introduce you to Baked Lemon Butter Chicken! This

- 2 cups all-purpose flour - 1/4 cup granulated sugar - 1/2 teaspoon salt - 1 tablespoon instant yeast - 1/2 cup warm milk (110°F) - 1/4 cup unsalted butter, melted - 1 large egg - 1/2 cup cream cheese, softened - 1/4 cup powdered sugar - 1 teaspoon vanilla extract - 1 cup fresh strawberries, chopped - 1 tablespoon lemon juice - 1/4 cup strawberry preserve - Optional: powdered sugar for dusting When I make these strawberry cheesecake sweet rolls, I gather fresh ingredients. The flour gives the rolls their structure. The sugar adds sweetness, and salt balances the flavors. Yeast makes the dough rise and become fluffy. Warm milk and melted butter add richness and moisture. Next, I use a large egg for binding. Cream cheese gives that cheesecake flavor. The powdered sugar makes the filling sweet and smooth. Vanilla extract adds a nice aroma. Fresh strawberries bring a burst of flavor. Lemon juice brightens the filling and enhances the strawberries. I also include strawberry preserves for extra sweetness. Dusting with powdered sugar is optional but adds a lovely final touch. For the full recipe, I recommend checking the detailed steps. You will love how these rolls turn out! - In a large bowl, mix 2 cups of flour, 1/4 cup of sugar, 1/2 teaspoon salt, and 1 tablespoon of instant yeast. Make sure to blend them well. - In another bowl, combine 1/2 cup of warm milk, 1/4 cup of melted butter, and 1 large egg. Stir until all the wet ingredients mix together. - Gradually add the wet ingredients to the dry mixture. Stir until you see a soft dough forming. - Knead the dough on a floured surface for about 5 minutes. You want it to be smooth and elastic. - Place the kneaded dough in a greased bowl. Cover it with a clean cloth. Let it rise in a warm place for about 1 hour. It should double in size. - To make the filling, mix 1/2 cup of softened cream cheese, 1/4 cup of powdered sugar, 1 teaspoon of vanilla extract, and 1 tablespoon of lemon juice in a medium bowl. Stir until smooth. - Once the dough has risen, punch it down gently. Roll it out on a floured surface into a rectangle about 1/4 inch thick. - Spread the cream cheese mixture evenly over the rolled dough. Sprinkle 1 cup of chopped strawberries and add 1/4 cup of strawberry preserves on top. - Starting from one long edge, roll the dough tightly into a log. Cut the log into 12 equal rolls. Place them in a greased baking dish. - Cover the rolls again with a cloth. Let them rise for another 30 minutes. - Preheat your oven to 350°F (175°C). - Bake the rolls in the preheated oven for 25-30 minutes. They should be golden brown. For the full recipe, check out the details in the previous sections. Enjoy making these sweet rolls! To get soft and fluffy rolls, kneading is key. Knead the dough for about 5 minutes. Focus on folding and pressing it. This helps develop gluten, giving your rolls that perfect texture. For the best rise, make sure your yeast is fresh. Use warm milk, about 110°F, to activate it. After mixing, let the dough sit in a warm spot. Cover it with a cloth to keep it cozy. This way, the dough will double in size. Serve your strawberry cheesecake sweet rolls warm. A drizzle of extra strawberry preserves adds flavor. Dust some powdered sugar on top for a nice touch. You can also pair them with a scoop of vanilla ice cream. The cold ice cream balances the warm, sweet rolls perfectly. For drinks, consider serving coffee or a light tea. They complement the sweetness well. You might also enjoy a glass of milk with these rolls. One common mistake is over-kneading the dough. This can make your rolls tough. Knead just until smooth and elastic. Another mistake is not allowing enough rise time. If you rush this step, your rolls won’t puff up properly. Give them the time they need to rise, both after kneading and after cutting. This will help you achieve those fluffy rolls you crave. For detailed instructions, check the Full Recipe. {{image_2}} You can add chocolate chips or nuts to the filling for a twist. Try semi-sweet chocolate chips for a rich flavor. Chopped pecans or walnuts add a nice crunch. Experiment with different fruit fillings, too! Blueberries, raspberries, or peaches work well. Each fruit brings its own taste and color. For gluten-free options, use a gluten-free flour blend. It will give you a similar texture. You can also try almond flour or coconut flour. Both can add unique flavors. For vegan variations, swap butter with coconut oil and use flax eggs instead of regular eggs. This way, you keep the rich taste without using animal products. To keep your strawberry cheesecake sweet rolls fresh, store them properly. Place them in an airtight container. You can keep them in the refrigerator for up to five days. If you want to store them at room temperature, they will last for about two days. Just make sure they are covered to prevent drying out. Reheating is key to enjoying these rolls again. To maintain their softness, use the oven. Preheat it to 350°F (175°C). Place the rolls on a baking sheet and cover them with foil. Heat for about 10 minutes. This keeps them nice and soft. If you’re in a hurry, the microwave works too. Place one roll on a microwave-safe plate. Heat on high for about 15 seconds. Watch closely to avoid overheating, which can make them tough. For the best taste, I recommend the oven method. For the full recipe, check out the notes above! To keep your sweet rolls fresh, wrap them in plastic wrap. Store them at room temperature. If you want them to last longer, place them in the fridge. This keeps them moist and tasty. For added flavor, warm them slightly in the microwave before serving. Yes, you can make these rolls ahead of time. Prepare the dough and filling the night before. Then, let the rolls rise in the fridge. The next day, just let them sit at room temperature for about 30 minutes before baking. This saves time and makes them easy to enjoy. If you can’t find fresh strawberries, use frozen ones. Thaw and drain them before using. You can also try other fruits like raspberries or blueberries. They will give a nice twist to the flavor. For a different taste, use fruit preserves instead of fresh fruit. Look for a golden brown color on the rolls. They should feel light and springy when you touch them. If you insert a toothpick, it should come out clean. This shows that the rolls are baked through and ready to eat. Enjoy your delicious strawberry cheesecake sweet rolls! For the complete process, check the full recipe. You now have a complete guide to making delicious strawberry cheesecake sweet rolls. We covered key ingredients, step-by-step instructions, and useful tips for perfecting your rolls. Remember to knead properly and give the dough enough time to rise. Explore variations to suit your taste, and don’t forget storage tips to keep them fresh. With this knowledge, you're ready to impress family and friends with your baking skills. Enjoy the process, and savor every bite of your homemade treat!

Strawberry Cheesecake Sweet Rolls Delightful Dessert

Are you ready to indulge in a dessert that combines two favorites into one? Strawberry Cheesecake Sweet Rolls are the

Dwarven feasts are grand events in their culture. They celebrate life, friendship, and food. These gatherings often last for days, filled with laughter and joy. The heart of every feast lies in the food, which is hearty and rich. Dwarven feasts trace back to ancient times. They mark important events like harvests, victories, and weddings. These feasts help strengthen bonds among friends and families. Sharing food shows trust and loyalty. It creates a sense of community that dwarves value deeply. Dwarven meals focus on robust flavors and filling ingredients. Here are some classic dishes you might find: - Beef Stew: A staple at every feast. It uses tender meat and root vegetables. - Roasted Game: Often includes boar or venison, seasoned with herbs. - Thick Breads: Dwarves enjoy rustic breads, perfect for soaking up sauces. - Root Vegetable Medley: Potatoes, carrots, and turnips cooked until soft and flavorful. These dishes not only fill the belly but also bring comfort to all. Dwarves love their drinks as much as their food. Here are some popular choices: - Dark Ale: A rich, hearty brew that complements meat dishes well. - Mead: A sweet honey drink that is often enjoyed during celebrations. - Cider: Made from apples, this drink is refreshing and pairs nicely with stews. - Berry Infusions: Juices made from local berries, often served chilled. These beverages enhance the flavors of the food, making every bite more enjoyable. For a taste of this tradition, try my full recipe for Dwarven Feast. It captures the spirit of these gatherings and brings a slice of dwarven culture to your table. - Beef and Vegetable Components - 2 lbs beef stew meat, cut into chunks - 1 lb potatoes, diced - 2 carrots, sliced - 1 onion, chopped - 4 cloves garlic, minced - Broth and Seasoning Details - 4 cups beef broth - 2 tablespoons olive oil - 1 tablespoon Worcestershire sauce - 1 teaspoon dried thyme - 1 teaspoon smoked paprika - Salt and pepper to taste - Garnishing Options - Fresh parsley, for garnish - Preparation Steps for Optimal Flavor Start by heating the olive oil in a large pot over medium heat. Add the beef stew meat in batches. Brown it on all sides and then set it aside. This step adds rich flavor. - Cooking Method and Timing In the same pot, add the chopped onion. Cook until it’s soft and clear, about 5 minutes. Add the garlic and cook for one more minute. Return the browned beef to the pot. Add the diced potatoes, sliced carrots, and Worcestershire sauce. Pour in the beef broth. Stir in thyme and smoked paprika for a savory depth. Bring to a boil, then lower the heat. Cover and let it simmer for 1.5 to 2 hours. Stir occasionally until the beef is tender. - Tasting Notes and Final Touches About 15 minutes before it’s done, season with salt and pepper. Once finished, remove it from the heat. Let it rest for a few minutes. Garnish with fresh parsley before serving. This stew is thick and hearty. Serve it in bowls with crusty bread for a true dwarven experience. Enjoy every bite! To make a great Dwarven Feast, use a heavy pot or Dutch oven. This helps brown the meat well. Start by heating olive oil over medium heat. Brown the beef in small batches. This gives a nice crust and rich flavor. After browning, remove the meat before adding the onions. Cook the onions until they turn soft. Then add garlic to bring out its aroma. Finally, return the meat and add the broth. This method keeps the stew rich and hearty. Pair your feast with hearty drinks. A rich stout or dark ale goes well with beef stew. The malt flavors complement the meat. If you prefer wine, a bold red wine works best. Look for a Cabernet Sauvignon or Malbec. These wines have deep flavors that match the stew. For a non-alcoholic option, try a spiced apple cider. It adds warmth and a hint of sweetness. For a rustic table, use wooden bowls and platters. This adds a warm feel to the feast. Serve the stew in deep bowls. Top with fresh parsley for color. Add crusty bread on the side for dipping. You can also use burlap or woven mats as table runners. For extra charm, light some candles. This creates a cozy atmosphere, perfect for sharing stories. Set up a large pot in the center for a communal feel. This encourages everyone to dig in and enjoy. For the full recipe, check out the Dwarven Feast section above. {{image_2}} You can easily make the Dwarven Feast without meat. Use mushrooms for a hearty texture. Portobello mushrooms are great for this. They soak up flavors well. Add lentils for protein and fiber. They cook fast and add a nice bite. Swap beef broth for vegetable broth to keep it vegan. If you want to try different meats, go for lamb or pork. Lamb adds a rich, earthy taste. Pork is tender and juicy, perfect for stews. You can even use chicken if you prefer. Just adjust the cooking time. Chicken cooks faster, so check it at one hour. Use seasonal vegetables to keep it fresh. In the fall, add sweet potatoes or squash. They give a sweet and nutty flavor. In the spring, use peas or asparagus for a bright touch. You can also mix in root veggies like parsnips in winter. Each season brings new tastes, so get creative! For the full recipe, check out the Dwarven Feast section. To keep your Dwarven Feast fresh, allow it to cool first. Store leftovers in airtight containers. Make sure to use them within three days for the best taste. Label each container with the date. This helps you track how long they have been in the fridge. When you’re ready to enjoy your leftovers, reheat them gently. Use a pot on low heat. Add a splash of broth or water if it seems dry. Stir often. This keeps the meal moist. Heat until hot but not boiling. You want to enjoy the flavors, not ruin them. If you want to save your feast for later, freezing is a great option. Place portions in freezer bags. Press out as much air as possible before sealing. Label each bag with the date. Use them within three months. When ready to eat, thaw overnight in the fridge. Reheat as mentioned above for a tasty meal that feels fresh. A typical Dwarven feast includes hearty dishes. You will find rich meats, root vegetables, and thick stews. The focus is on robust flavors, often with a smoky taste. Dwarves enjoy meals that fill their bellies and warm their hearts. Bread, cheese, and strong ales are common. Think of comfort food that brings friends together. The Dwarven Feast recipe showcases this spirit perfectly. Preparing a Dwarven Feast takes time, but it's worth it. The full recipe I shared takes about 2 hours and 30 minutes. You spend 20 minutes prepping the ingredients. The cooking time is around 2 hours. This slow cooking allows flavors to blend well. Patience is key to creating a delicious meal. Yes, you can adapt the Dwarven Feast recipe easily. If you need it to be gluten-free, use gluten-free broth. For vegetarian options, swap out the beef for hearty mushrooms or lentils. If dairy is a concern, skip the cheese on the side. Always check your ingredients to ensure they fit your needs. Cooking should be fun and inclusive for everyone. Many books, movies, and games show Dwarven feasts. J.R.R. Tolkien's works often feature these scenes. Think of "The Hobbit," where Dwarves gather for a meal. Video games like "The Elder Scrolls" also show rich feasting traditions. These feasts reflect the Dwarven love for food and fellowship. They inspire many to recreate their own gatherings. Dwarven feasts are rich in history, culture, and flavors. This blog detailed their significance, traditional dishes, and the drinks that accompany them. You learned how to create a delicious Dwarven feast with a full recipe, helpful tips for success, and variations to suit any diet. I hope you feel ready to bring the spirit of Dwarven culture to your table. Enjoy cooking and sharing these meals with friends and family!

Dwarven Feast Savory Recipes for Gatherings

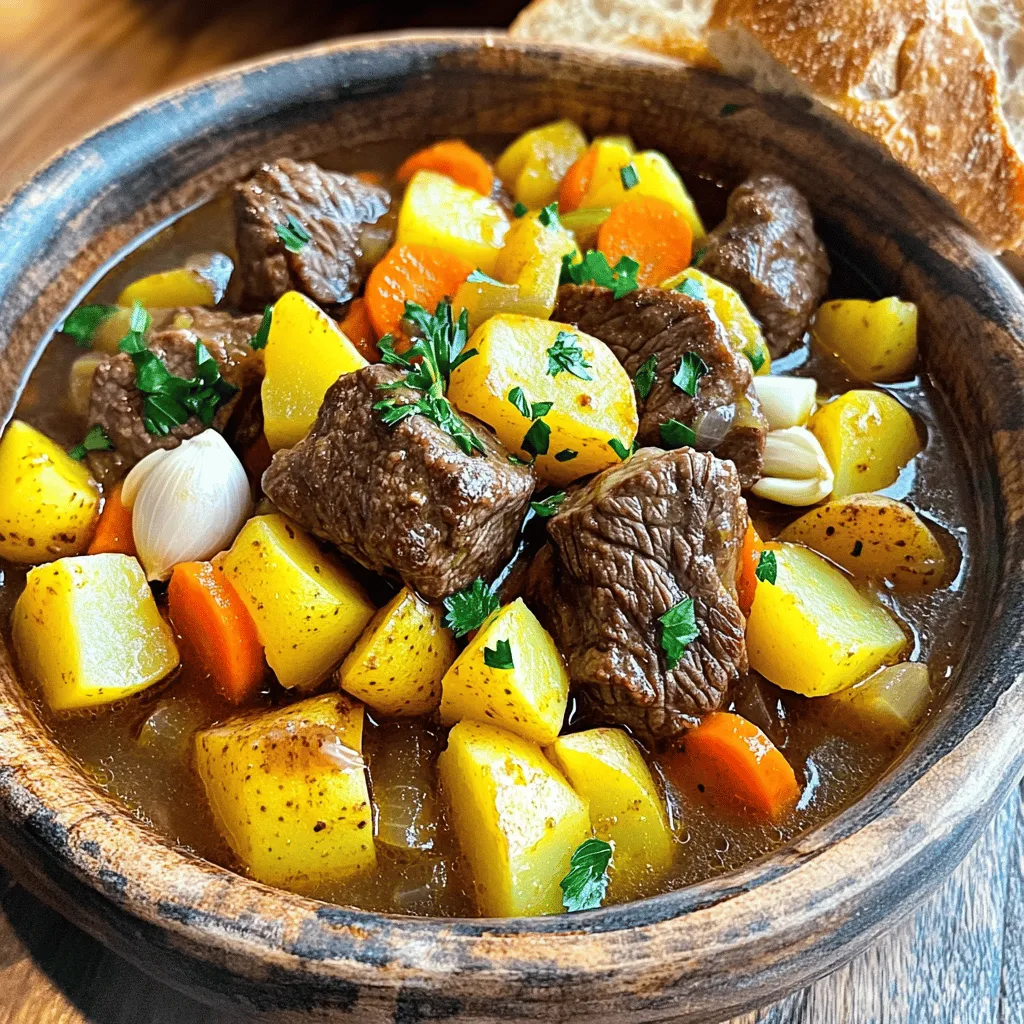
Gather your friends and family for a Dwarven feast like no other! This blog post dives into tasty recipes that

- 2 cups shredded cooked chicken - 1 cup cream cheese, softened - 1 cup shredded cheddar cheese - 1/2 cup sour cream - 1 cup salsa - 8 small tortillas For these easy cream cheese chicken enchiladas, we start with simple, tasty ingredients. The shredded cooked chicken gives the dish its protein and heartiness. I love using cream cheese for its creamy texture and rich flavor. Cheddar cheese adds a nice sharpness that blends perfectly with the other ingredients. Sour cream brings a little tang, while salsa ties everything together with its bright flavors. Finally, the tortillas wrap it all up nicely. - 1 teaspoon garlic powder - 1 teaspoon onion powder - 1/2 teaspoon cumin - 1/2 teaspoon salt - 1/4 teaspoon black pepper These seasonings enhance the flavor of the filling. Garlic powder and onion powder add depth to each bite. Cumin brings warmth, while salt and pepper balance the flavors. Every bite will burst with taste, making your enchiladas truly special. - Fresh cilantro Fresh cilantro is the perfect garnish for these enchiladas. It adds a pop of color and a fresh taste that brightens the dish. When serving, sprinkle a few cilantro leaves on top for a lovely touch. For the full recipe, be sure to check out the detailed instructions on how to bring these delicious enchiladas to life! - In a large bowl, mix the shredded chicken, cream cheese, sour cream, and spices. - Preheat your oven to 350°F (175°C) and grease a 9x13 inch baking dish. - Take a tortilla and place about 1/4 cup of the chicken mixture in the center. - Roll the tortilla tightly and place it seam-side down in the baking dish. Repeat until all tortillas are filled. - Pour salsa evenly over the rolled enchiladas. - Cover the dish with foil to keep them moist while baking. - Bake for 20 minutes, then remove the foil and bake for another 10 minutes. - Let cool for a few minutes before serving. Enjoy your delicious enchiladas! To make your enchiladas creamy, blend the cream cheese until smooth. Mixing it well with the chicken, cheddar, and sour cream helps too. This gives each bite a rich taste. For rolling tortillas without breaking, heat them slightly in the microwave. Warm tortillas are soft and easier to roll. Just 10 to 15 seconds will do the trick. These enchiladas shine with sides like rice, beans, or a fresh salad. The rice soaks up extra sauce, and the beans add protein. For toppings, try avocado slices or a dollop of sour cream. Fresh salsa and jalapeños give a nice kick too. If you need an alternative to cream cheese, Greek yogurt works well. It keeps the dish creamy while adding protein. For sour cream, you can use cottage cheese. Keep the taste light and fresh. If you want to switch up the salsa, go for mango salsa for sweetness or green salsa for heat. {{image_2}} You can change this recipe to fit your taste. For a vegetarian version, swap the chicken for black beans and add extra cheese. This gives you a creamy, cheesy bite without meat. If you like spice, add jalapeños or use a spicy salsa. This will kick up the heat and add more flavor. Both options are tasty and easy to make. You can cook these enchiladas in different ways. If you have a slow cooker, you can prepare them there. Just layer the rolled enchiladas with salsa and let them cook on low for about 4 hours. This makes the chicken super tender. For a quicker option, use an Instant Pot. Place the enchiladas in the pot with a cup of water. Cook on high pressure for 8 minutes, and you’ll have a fast meal ready. How you serve these enchiladas can change the whole meal. You can place them in a casserole dish for a family-style serving. This makes it easy for everyone to help themselves. If you want to impress, serve them in individual portions. Use small plates or bowls for a nice touch. For garnishing, sprinkle fresh cilantro on top. You can also add a dollop of sour cream or avocado slices for color and taste. These little touches make a big difference! For the full steps, check the Full Recipe. To store leftover enchiladas, use airtight containers. Glass or plastic containers work well. Make sure the enchiladas cool down before sealing. This helps keep them fresh. Place the container in the fridge. They can stay good for up to 3 days. You can freeze enchiladas either before or after baking. To freeze before baking, wrap each rolled enchilada in plastic wrap. Place them in a freezer bag or container. For freezing after baking, let them cool completely first. Then, cover with foil and place in a freezer-safe container. When you want to eat them, thaw overnight in the fridge. Bake them at 350°F (175°C) for 20-30 minutes until hot. If frozen before baking, cook them straight from the freezer. Just add about 10 more minutes to the baking time. Refrigerated enchiladas last for about 3 days. If you freeze them, they can last for up to 3 months. Just remember to date the container. This way, you know when to eat them. Enjoy your enchiladas later with great taste! Yes, rotisserie chicken works well in this recipe. It saves time and adds great flavor. Just shred the chicken before mixing it with the cream cheese and spices. This simple swap makes cooking quicker and easier. To add heat, use spicy salsa instead of mild. You can also add diced jalapeños or chili powder to the chicken mix. Start with small amounts, taste, and adjust to your liking. This way, you control the spice level. Yes, you can prepare the enchiladas ahead of time. Assemble them and cover the dish with foil. Refrigerate until ready to bake. You may need to increase the baking time if they are cold from the fridge. This makes meal prep a breeze. The best salsa depends on your taste. Mild salsa offers a balanced flavor, while spicy salsa gives a nice kick. Fresh salsa adds brightness, and homemade salsa can be even better! Choose one that fits your mood and spice level. Yes, whole wheat tortillas are a great option. They add a nutty flavor and extra fiber. Just make sure they are soft enough to roll without breaking. Whole wheat tortillas make this dish a bit healthier while still tasting great. You learned how to make delicious cream cheese chicken enchiladas. We covered key ingredients like chicken, cheeses, and spices. You saw step-by-step instructions for preparation, baking, and serving. I shared tips for texture, serving ideas, and ingredient swaps. Remember, you can also customize your enchiladas to fit your taste. Whether you like it spicy or vegetarian, the options are endless. Enjoy your cooking adventure, and share these tasty meals with others!

Easy Cream Cheese Chicken Enchiladas Flavorful Recipe

Looking for a delicious, quick meal? You’ll love these Easy Cream Cheese Chicken Enchiladas! With simple ingredients, like shredded chicken

To make the best vegan chocolate avocado pudding, you need a few simple items. Here’s what you will need: - Ripe avocados - Unsweetened cocoa powder - Maple syrup - Almond milk (or any plant-based milk) - Vanilla extract - Sea salt - Optional toppings (shredded coconut, chopped nuts, fresh berries) Ripe avocados are key for a smooth texture. They add creaminess without dairy. Unsweetened cocoa powder gives that rich chocolate taste. Maple syrup adds sweetness and keeps it vegan. You can choose any plant-based milk, though almond milk works great. Vanilla extract adds warmth to the flavor. A pinch of sea salt brings all the tastes together. Feel free to get creative with toppings. Shredded coconut gives a nice crunch. Chopped nuts add a hearty bite. Fresh berries not only taste great but look beautiful too. For the full recipe, check out the steps in the next section! - Preparing the avocados Start by slicing the avocados in half. Remove the pit and scoop the green flesh into your food processor. Make sure to use ripe avocados. They should feel soft when you press them. This gives the pudding a smooth texture. - Combining ingredients in a food processor Next, add the unsweetened cocoa powder, maple syrup, almond milk, vanilla extract, and a pinch of sea salt to the processor. Each ingredient adds flavor and creaminess. The cocoa powder gives it that rich chocolate taste. - Blending the mixture Blend everything on high speed until the mix is smooth and creamy. You may need to stop and scrape down the sides. This step ensures all ingredients mix well. Keep blending until you see no lumps. - Adjusting sweetness and consistency Taste your pudding. If you want it sweeter, add more maple syrup. If the pudding is too thick, add a bit more almond milk. The goal is to have a velvety texture. Adjust to your liking. - Chilling the pudding Once blended, transfer the pudding into serving bowls. Chill in the fridge for at least 30 minutes. This helps the flavors blend together and makes it cool and refreshing when served. Enjoy your vegan chocolate avocado pudding with optional toppings like shredded coconut, chopped nuts, or fresh berries for a delightful finish. For the full recipe, see the section above. Using ripe avocados is key for a smooth pudding. They should be dark green and slightly soft. If they are too firm, your pudding will be chunky. Next, choose between a blender and a food processor. A blender gives a creamier texture, while a food processor can be easier for some. Both work well, but I prefer a blender for this. You can adjust the sweetness and thickness as you blend. Start with the amount of maple syrup in the recipe. Taste it before serving. Add more syrup if you like it sweeter. If your pudding is too thick, add a splash of almond milk. Blend it again for a smooth finish. When serving, use small bowls or cups. This makes it fun and fancy. You can layer the pudding with toppings for a pretty look. For toppings, think outside the box. Shredded coconut adds texture and a nice touch. Chopped nuts give a crunch. Fresh berries bring a burst of flavor and color. They also add a touch of freshness that balances the rich chocolate. Check out the Full Recipe for a delicious way to enjoy this vegan treat. {{image_2}} You can easily change the taste of your vegan chocolate avocado pudding. One great idea is to add nut butter. A spoonful of almond or peanut butter makes it richer. It adds a new layer of flavor that pairs well with chocolate. You can also try coconut cream. This will make your pudding even creamier and add a hint of coconut. Spices can also change the taste. Adding a dash of cinnamon gives a warm, sweet flavor. If you love coffee, consider adding espresso powder. It enhances the chocolate taste and gives it depth. You can play around with these flavors to find your favorite mix! If you have allergies or dietary needs, there are options. For a nut-free version, swap almond milk for oat or soy milk. Both work well and keep the pudding creamy. You can also skip the nut toppings and use seeds instead. For those who want a sugar-free option, use stevia or erythritol instead of maple syrup. These sweeteners make the pudding tasty without the sugar. Adjust the amount to your taste. This way, everyone can enjoy this rich dessert! If you want to try the full recipe with these variations, you can check out the Full Recipe. Keep your vegan chocolate avocado pudding in an airtight container. This helps keep it fresh and tasty. Chill it in the fridge for at least 30 minutes before serving. It allows the flavors to blend well. The pudding stays good for about 3 to 5 days. Just check for any changes in smell or texture before enjoying it again. Yes, you can freeze avocado pudding! It works well if you want to save some for later. Use a freezer-safe container to store it. When you are ready to eat it, take it out and let it thaw in the fridge overnight. If the texture changes a bit, just blend it again. This helps bring back its creamy goodness. Enjoy your rich and creamy treat anytime! For the full recipe, check the complete list of steps and ingredients. Is avocado pudding healthy? Yes, avocado pudding is very healthy. It has good fats from avocados. These fats help your heart. The cocoa powder adds antioxidants. Maple syrup gives you natural sweetness. Overall, it’s a tasty treat that’s good for you. How can I make this pudding sweeter? You can make the pudding sweeter by adding more maple syrup. Start with a little bit and taste it. If you want more sweetness, add a bit more at a time. You can also try using agave syrup or a bit of honey if you’re not strictly vegan. Can I use different types of milk? Yes, you can use different types of milk. Almond milk works great, but you can try coconut milk, soy milk, or oat milk. Each type gives a unique flavor. Just make sure it is unsweetened to keep the balance right. What can I substitute if I don’t have cocoa powder? If you don’t have cocoa powder, you can use carob powder. It gives a similar taste but is sweeter. You could also try melted dark chocolate, but adjust the sweetness. For a different flavor, you can use a mix of vanilla and a bit of nut butter. For the full recipe, check out the preparation steps above. This blog shows how to make creamy avocado pudding. You need ripe avocados and cocoa powder. Combine all the ingredients in a food processor and blend until smooth. Remember, the right blender can change the texture! Try custom flavors for fun. You can also chill it or freeze it for later. Store it well for freshness. In the end, this dessert is tasty, healthy, and easy to make. You can impress family and friends with this simple recipe. Enjoy your pudding!

Vegan Chocolate Avocado Pudding Rich and Creamy Treat

If you crave a rich and creamy dessert that’s also healthy, you’ll love this Vegan Chocolate Avocado Pudding. This simple

- 2 medium sweet potatoes, peeled and diced - 1 can (15 oz) black beans, rinsed and drained - 1 cup corn kernels (fresh, frozen, or canned) - 1 small red onion, finely chopped - 2 cloves garlic, minced - 1 teaspoon cumin - 1 teaspoon chili powder - Salt and pepper to taste - 8 small corn tortillas - 1 cup enchilada sauce (store-bought or homemade) - 1 cup shredded cheese (cheddar or Monterey Jack) - Fresh cilantro for garnish These ingredients make up the heart of sweet potato black bean enchiladas. Sweet potatoes add sweetness and creaminess. Black beans provide protein and fiber. Corn brings a pop of color and crunch. The red onion and garlic add savory depth. Cumin and chili powder bring warmth and spice. Corn tortillas wrap the filling, while enchilada sauce binds it all together. Finally, cheese melts on top, creating a delicious layer. Fresh cilantro gives a bright finish. - Sour cream or Greek yogurt - Avocado - Lime wedges These optional garnishes add extra flavor and creaminess. Sour cream or Greek yogurt adds tang. Avocado provides richness, while lime wedges offer a zesty kick. You can mix and match these toppings to suit your taste. Enjoy personalizing your enchiladas! For the full recipe with cooking steps, check out the [Full Recipe]. - Preheat your oven to 400°F (200°C). - In a medium pot, bring water to a boil. Add the diced sweet potatoes. Cook for about 10-12 minutes until tender. Drain and set aside. - In a large skillet, heat a tablespoon of olive oil over medium heat. - Add the chopped red onion. Sauté for about 3-4 minutes until it turns translucent. - Stir in the minced garlic, cumin, chili powder, salt, and pepper. Cook for one more minute until fragrant. - Add the drained black beans, corn, and cooked sweet potatoes to the skillet. Mix well and cook for another 5 minutes. - Warm the corn tortillas in a dry skillet or microwave until they are pliable. - Spread a small amount of enchilada sauce on the bottom of a baking dish to prevent sticking. - To each tortilla, add about 2 tablespoons of the sweet potato and black bean filling. Roll the tortilla and place it seam-side down in the prepared baking dish. Repeat this for all tortillas. - Pour the remaining enchilada sauce over the rolled enchiladas, ensuring they are well covered. Sprinkle shredded cheese on top. - Bake in the preheated oven for 20 minutes or until the cheese is melted and bubbly. - Remove from the oven and let cool for a few minutes before garnishing with fresh cilantro. This recipe invites you into a world of flavor with each bite. You can find the Full Recipe to guide you through this tasty journey! How to avoid soggy tortillas To keep your tortillas crisp, warm them briefly. You can use a dry skillet or microwave. This makes them soft and easy to roll without getting soggy. Also, use enough enchilada sauce to coat but not drown the tortillas. This keeps them firm during baking. Best ways to season sweet potatoes To bring out the sweet potatoes' flavor, I like to add cumin and chili powder. These spices add warmth and depth. You can also mix in a bit of salt and pepper to balance the sweetness. If you want a bit of heat, try adding a dash of cayenne pepper too. Ideal accompaniments These enchiladas pair well with a fresh salad or rice. A side of guacamole or salsa adds a nice touch. You can also serve them with lime wedges. The acidity brightens the flavors. Creative serving ideas and platters For a fun presentation, use a large, colorful platter. Arrange the enchiladas in a circle. Drizzle extra enchilada sauce over them and sprinkle fresh cilantro on top. You can also add dollops of sour cream or Greek yogurt for extra creaminess. This makes your meal look inviting and tasty. {{image_2}} You can easily add protein to your enchiladas. For a heartier dish, try adding shredded chicken. Simply cook the chicken, shred it, and mix it with the sweet potato filling. If you want to keep it plant-based, consider using tofu. You can pan-fry or bake the tofu before mixing it in. If you want to switch up the beans, you can use pinto or kidney beans. Both will add a nice texture and flavor to the dish. If you're looking for vegan choices, there are great options. You can use dairy-free cheese made from cashews or almonds. These cheeses melt nicely and add creaminess. For the tortillas, choose whole grain or gluten-free options. Many stores offer these, and they work well with the filling. To boost the flavors, consider adding spices like smoked paprika or cayenne pepper. These can add a nice kick. You can also toss in some hot sauce for extra heat. Adding fresh veggies like spinach or bell peppers can also elevate your dish. Simply sauté them with the onions and garlic for added nutrients and color. These small changes can make your enchiladas even more delicious. For the complete recipe, check out the [Full Recipe]. To keep your enchiladas fresh, place leftovers in an airtight container. This helps prevent drying out. You can store them in the fridge for up to three days. If you want them to last longer, consider freezing. You can freeze enchiladas before or after baking. If freezing before baking, wrap them tightly in plastic wrap. Then, place them in a freezer-safe bag. They can last up to three months. If you bake them first, let them cool completely. Store them in an airtight container. When you want to reheat the frozen enchiladas, take them out and thaw overnight in the fridge. To reheat, bake them at 350°F (175°C) for about 25-30 minutes, or until hot. You can also microwave them for a quick meal, but baking gives the cheese a nice melt. For the best flavor, enjoy your Sweet Potato Black Bean Enchiladas fresh or properly stored. Can I make Sweet Potato Black Bean Enchiladas ahead of time? Yes, you can. Make the filling and roll the enchiladas. Place them in a baking dish. Cover with sauce and cheese. Store in the fridge for up to 24 hours. When ready, just bake them. They will taste fresh and delicious. What can I substitute for the black beans? You can use pinto beans or chickpeas. Both options work well. They add protein and taste. Try lentils for a softer texture. Each will give a different flavor but still taste great. How do I make enchilada sauce from scratch? To make your own enchilada sauce, blend these items: - 2 tablespoons olive oil - 2 tablespoons flour - 2 cups tomato sauce - 1 teaspoon chili powder - ½ teaspoon cumin - Salt to taste Heat the oil in a pot. Add flour and stir for a minute. Slowly add the tomato sauce. Mix in the spices and cook for about 10 minutes. This sauce is rich and tasty. Calorie count and macronutrient breakdown One serving of these enchiladas has about 350 calories. They contain roughly: - 15g protein - 60g carbohydrates - 10g fat These numbers may vary based on the cheese and sauce used. Are these enchiladas gluten-free? Yes, if you use corn tortillas and gluten-free sauce. Always check labels on your ingredients. This way, you will be sure they are gluten-free. Enjoy them without worry. For the full recipe, check out the earlier sections. These Sweet Potato Black Bean Enchiladas are easy to make and delicious. You learned about the key ingredients, step-by-step instructions, and tips to perfect the dish. Variations give you options for different tastes. You can also store or freeze them for later. I hope you feel ready to try this recipe. Enjoy every tasty bite you create!

Savory Sweet Potato Black Bean Enchiladas Recipe

If you crave a delicious plant-based meal, look no further! My Savory Sweet Potato Black Bean Enchiladas are packed with

- 2 pounds chicken wings - 2 tablespoons olive oil - 1 tablespoon baking powder - 1 teaspoon garlic powder - 1 teaspoon onion powder - 1 teaspoon smoked paprika - ½ teaspoon cayenne pepper (adjust for spice preference) - Salt and pepper to taste - Your favorite dipping sauce (like ranch or blue cheese) - Fresh parsley, chopped (for garnish) For this crispy air fryer chicken wings recipe, you need just a few main ingredients. The chicken wings are the star. Olive oil helps make them crispy. Baking powder is key for that perfect crunch. Now, let’s break down the seasoning. Garlic powder adds a nice touch. Onion powder brings sweetness. Smoked paprika gives a lovely smokiness. Cayenne pepper can bring heat, so adjust it to your taste. Don’t forget salt and pepper to make the flavors pop. If you want to elevate your wings, consider some optional ingredients. A tasty dipping sauce like ranch or blue cheese can complement your wings well. Garnish with fresh parsley for a pop of color and flavor. Find the full recipe for more details! Drying and prepping chicken wings Start by patting the chicken wings dry with paper towels. This step is vital for crispiness. The drier they are, the better they will crisp up in the air fryer. Make sure to remove any excess moisture. Mixing seasonings In a large bowl, combine the baking powder, garlic powder, onion powder, smoked paprika, cayenne pepper, salt, and pepper. Mix well to ensure the seasonings are evenly distributed. This blend gives the wings great flavor and that perfect crunch. Coating the wings Add the dried chicken wings to the bowl with the seasonings. Drizzle the olive oil over them. Toss everything together until the wings are fully coated with the seasoning mix. This step ensures that every bite is packed with flavor. Air fryer preheating and cooking time Preheat your air fryer to 400°F (200°C) for about 5 minutes. Once preheated, place the seasoned wings in the air fryer basket in a single layer. Cook for 25-30 minutes, shaking the basket halfway through. This helps the wings cook evenly and get that nice crunch. Checking for crispiness After the initial cooking time, check the wings. If you want them extra crispy, add an additional 5-10 minutes. Keep an eye on them and check often until they reach your desired crispiness. Serving suggestions Once done, take the wings out of the air fryer. Let them rest for a few minutes. Garnish with freshly chopped parsley for a pop of color. Serve with your favorite dipping sauce. Enjoy these crispy delights! For the complete recipe, refer to the full recipe. To get the best crispiness in your chicken wings, drying them is key. When you pat the wings dry with paper towels, you help remove moisture. This allows the skin to get crispy in the air fryer. The dryer the wings, the better the crunch! Next, you want to cook at the right temperature. Set your air fryer to 400°F (200°C). This high heat helps the wings cook fast and get crispy on the outside while staying juicy inside. If your wings are not crispy enough, check a few things. First, ensure you dry them well before seasoning. Also, make sure you are not overcrowding the air fryer basket. Cook in batches if needed to let hot air flow around each wing. If you find your wings are overcooked, reduce the cooking time next time. Each air fryer can be different. Start with 25 minutes and check for doneness. If you want extra crispiness, add 5-10 minutes but watch closely. Marinating your wings can boost their taste. Try a simple marinade of olive oil, garlic, and lemon juice. Let them sit for at least 30 minutes for a great flavor. You can also add spices to your seasoning mix. Try adding some cumin or chili powder for a kick. A little smoked paprika gives a nice depth too. Feel free to mix and match to create your own unique flavors. For the full recipe, check out the provided details. {{image_2}} You can change the flavor of your crispy air fryer chicken wings easily. For a spicy kick, try buffalo sauce. Just toss the cooked wings in the sauce after frying. You can also use hot sauce mixed with melted butter for a rich taste. If you prefer something sweet, honey garlic wings are a great option. Mix honey with soy sauce and minced garlic. Toss the wings in this mix right before serving for a sticky, tasty treat. You don’t have to stick with the air fryer. You can bake these wings in the oven, too. Set your oven to 425°F (220°C). Spread the wings on a baking sheet lined with parchment paper. Bake for 40-45 minutes, flipping halfway for even cooking. If you enjoy grilling, toss the wings on a preheated grill. Cook them for about 20-25 minutes, turning often to get that nice char. If you need gluten-free options, check your seasonings. Many spices are gluten-free, but always read the labels. You can also use gluten-free baking powder. For low-fat wings, remove the skin before cooking. This cuts down the fat but still keeps the flavor. You can also use less oil or even spray the wings lightly with cooking spray instead. To keep your crispy air fryer chicken wings fresh, use airtight containers. Glass or plastic containers work well. Make sure to let the wings cool completely before sealing them. This helps prevent moisture buildup. Store the wings in the fridge for up to four days. To reheat your chicken wings, the air fryer is best. Set it to 350°F (175°C) and cook for 5 to 10 minutes. This method keeps them crispy. You can also use the oven for reheating. Preheat it to 350°F (175°C) and place the wings on a baking sheet. Heat them for about 10 to 15 minutes. You can freeze cooked chicken wings. Let them cool first, then place them in freezer bags. Squeeze out as much air as you can. They can stay good in the freezer for about three months. To defrost, move the wings to the fridge overnight. You can also use the microwave to defrost them quickly if needed. For the full recipe, check out the Crispy Air Fryer Chicken Wings. You should cook chicken wings in an air fryer for 25 to 30 minutes. Start at 400°F (200°C). Shake the basket halfway for even cooking. If you want your wings extra crispy, add 5 to 10 more minutes. Always check for crispiness before serving. Yes, you can use frozen chicken wings. However, it's best to thaw them first. Thaw wings in the fridge overnight or use cold water. This helps the wings cook evenly and become crispy. Cook time may increase by about 5 to 10 minutes for thawed wings. Many sauces go well with air fryer chicken wings. Some popular choices are ranch, blue cheese, and BBQ sauce. You can also try hot sauce for a spicy kick. These sauces add flavor and excitement to your meal. You can prepare chicken wings ahead of time. Season them and store in the fridge for up to 24 hours. This saves time on cooking day. Just cook them in the air fryer when you're ready. Enjoy your crispy wings fresh! For the full recipe, check out the previous section. You now have all the tools to make perfect air-fried chicken wings. We covered the key ingredients, steps, and tips to achieve crispiness. Don't forget the flavor variations to suit your taste. Storage advice helps keep leftovers fresh too. Use this guide to impress friends and family with tasty wings. Cooking is fun, and now you can enjoy every bite! Keep experimenting to find your favorite flavors. Success in the kitchen brings joy and satisfaction.

Crispy Air Fryer Chicken Wings Quick and Easy Recipe

Are you ready to make the crispiest chicken wings ever? In this quick and easy air fryer recipe, I’ll show

To make Garlic Butter Shrimp Pasta, you need simple, fresh ingredients. Here’s what you will need: - 8 oz spaghetti or linguine - 1 lb large shrimp, peeled and deveined - 4 tablespoons unsalted butter - 4 cloves garlic, minced - 1 teaspoon red pepper flakes - 1 lemon, juiced and zested - 1 cup cherry tomatoes, halved - 1/4 cup fresh parsley, chopped - Salt and pepper to taste - Grated Parmesan cheese for serving (optional) These ingredients create a dish full of flavor and color. The shrimp adds protein, while the pasta serves as a hearty base. Garlic and lemon bring a fresh zing. Red pepper flakes give a touch of heat, but you can adjust this to your taste. The cherry tomatoes add sweetness and a pop of color. Fresh parsley not only looks great but also adds freshness to each bite. You can find the full recipe to guide you through the cooking process. Enjoy your cooking! 1. Start by boiling a large pot of water. 2. Add 8 oz of spaghetti or linguine. 3. Cook until the pasta is al dente, about 8-10 minutes. 4. Reserve 1 cup of pasta water before draining. 5. Drain the pasta and set it aside. 1. In a large skillet, melt 4 tablespoons of unsalted butter over medium heat. 2. Once the butter melts, add 4 cloves of minced garlic and 1 teaspoon of red pepper flakes. 3. Sauté for about 1-2 minutes. Keep an eye on the garlic; you don’t want it to brown. 1. Increase the heat to medium-high. 2. Add 1 lb of large shrimp, peeled and deveined, to the skillet. 3. Season with salt and pepper to taste. 4. Cook the shrimp for 3-4 minutes until they turn pink and are fully cooked. 1. Stir in 1 cup of halved cherry tomatoes, the juice of 1 lemon, and the lemon zest. 2. Sauté for another 2 minutes. You want the tomatoes to soften but not break down. 3. Add the cooked pasta to the skillet. Toss everything together well. 4. If the pasta looks dry, add reserved pasta water a little at a time until you reach your desired texture. This Garlic Butter Shrimp Pasta is simple and quick to make. You can find the full recipe for more details. When making garlic butter shrimp pasta, the type of shrimp matters. You can choose between fresh and frozen shrimp. Fresh shrimp can taste better, but frozen shrimp is often more convenient. Just make sure to thaw frozen shrimp properly before cooking. For size, I recommend using large shrimp. They are easy to handle and cook evenly. Look for shrimp labeled as U10 or U12. This means you get about 10 to 12 shrimp per pound. These sizes give you a nice bite and hold up well in the dish. The garlic butter sauce is key to this dish. Start with four cloves of garlic, but feel free to adjust to your taste. If you love garlic, add more! For spice, red pepper flakes are great. Start with one teaspoon, then taste and add more if you want more heat. When it comes to butter, I suggest using high-quality unsalted butter. Brands like Kerrygold or Plugra offer rich flavor. They melt nicely and blend well with garlic. To make your meal complete, consider side dishes. A simple green salad pairs well. You can also serve garlic bread for extra flavor. For drinks, a crisp white wine is perfect. Sauvignon Blanc or Pinot Grigio complements the shrimp nicely. If you prefer non-alcoholic options, lemonade or sparkling water with lemon works well. Check out the Full Recipe for more details on how to make this dish! {{image_2}} You can easily make this dish gluten-free. Just swap regular pasta for gluten-free pasta alternatives. Look for options made from rice, quinoa, or chickpeas. These options cook well and taste great, too. Feel free to get creative by adding more ingredients. Toss in some fresh spinach or colorful bell peppers for added nutrition and flavor. You can also try different proteins. Chicken or scallops work nicely in this dish. Just adjust the cooking time as needed. Don’t be afraid to play with flavors. Fresh herbs like basil or thyme can add a lovely touch. You might also try using white wine in the sauce. It adds depth and a nice acidity. Just remember to reduce the heat before adding the wine, letting it cook down for a few minutes. With these variations, you can make the Garlic Butter Shrimp Pasta your own. Explore and enjoy your cooking journey! For the complete recipe, check out the Full Recipe section. After you enjoy your meal, store leftovers in proper containers. Use an airtight container to keep the shrimp and pasta fresh. You can refrigerate the dish for up to three days. If you wait longer, the shrimp may lose flavor and texture. To reheat, use low heat on the stove. This method helps keep the shrimp juicy. Add a splash of water or broth to prevent dryness. Stir gently until warmed through. Avoid using high heat, as it can make shrimp rubbery. You want to enjoy every bite of your garlic butter shrimp pasta! For the full recipe, check out the detailed steps above. You can tell shrimp are cooked by their color and texture. They turn pink and form a C shape. If they curl tightly, they are overcooked. Perfectly cooked shrimp will have a firm feel but remain juicy. You can use dried garlic, but the flavor will change. Fresh garlic gives a brighter taste. If using dried, use about 1/8 teaspoon for each clove. This way, you can still enjoy some garlic flavor. If you want to avoid butter, try olive oil or coconut oil. Both options add great flavor. You can also use vegan butter for a dairy-free dish. Each fat gives its own taste, so pick what you like best. To prep this dish early, cook the pasta and shrimp separately. Store them in the fridge in airtight containers. When ready to eat, warm each part and mix them together. This keeps the shrimp from getting rubbery. Garlic Butter Shrimp Pasta can be healthy. Shrimp are high in protein and low in fat. You can use whole grain pasta for added fiber. To lighten it, cut back on butter and cheese. Enjoy a tasty meal without extra calories. For the detailed cooking method, check the Full Recipe. You can create a delicious garlic butter shrimp pasta with just a few steps. We covered the ingredients, how to cook, and ways to customize the dish. Remember to choose fresh shrimp for the best taste and adjust the sauce to suit your palate. Don’t be afraid to mix in vegetables or alternative proteins. With the right storage, your leftovers will stay fresh. This dish is not only tasty but also easy to make ahead. Enjoy your cooking journey and savor each bite!

Garlic Butter Shrimp Pasta Quick and Flavorful Meal

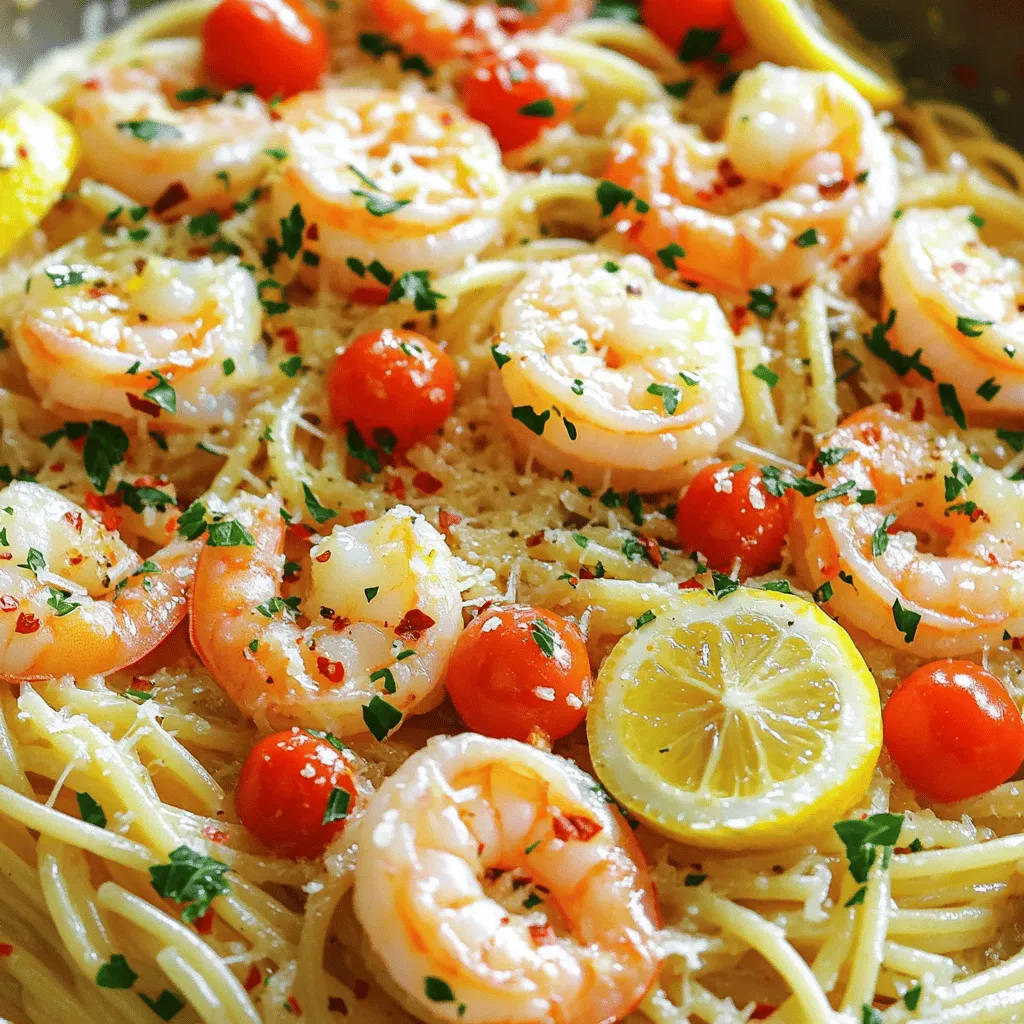
If you’re looking for a quick, tasty meal, you’ve found it! Garlic Butter Shrimp Pasta is my go-to dish for

To make these delightful gluten-free blueberry muffins, gather the following ingredients: - 2 cups almond flour - 1/2 cup coconut flour - 1/2 cup granulated sugar (or coconut sugar) - 2 teaspoons baking powder - 1/2 teaspoon baking soda - 1/4 teaspoon salt - 3 large eggs - 1/2 cup unsweetened applesauce - 1/4 cup almond milk (or any non-dairy milk) - 1 teaspoon vanilla extract - 1 ½ cups fresh blueberries - Zest of 1 lemon (optional) These ingredients work together to create soft, moist muffins packed with flavor. Almond flour gives a nutty taste and great texture. Coconut flour adds a hint of sweetness and a unique mouthfeel. The blueberries burst with flavor, making each bite a treat. You can use frozen blueberries if fresh ones are not available. Adding lemon zest brightens the muffins. It’s a small touch that elevates the flavor. Each ingredient plays a key role in making these muffins gluten-free yet delicious. For the full recipe, check the details above. - Preheat your oven to 350°F (175°C) and prepare your muffin tin. - In a large bowl, mix together: - 2 cups almond flour - 1/2 cup coconut flour - 1/2 cup granulated sugar (or coconut sugar) - 2 teaspoons baking powder - 1/2 teaspoon baking soda - 1/4 teaspoon salt - In another bowl, whisk together: - 3 large eggs - 1/2 cup unsweetened applesauce - 1/4 cup almond milk (or any non-dairy milk) - 1 teaspoon vanilla extract - Zest of 1 lemon (optional) - Pour the wet ingredients into the dry ingredients. Mix until just combined. - Gently fold in 1 ½ cups fresh blueberries. Be careful not to break them. - Using a spoon or ice cream scoop, fill each muffin cup about 2/3 full. - Bake in your preheated oven for 18-22 minutes. Check with a toothpick to see if it comes out clean. - After baking, let the muffins cool in the pan for about 5 minutes. - Transfer them to a wire rack to cool completely. - For presentation, serve warm with a light dusting of powdered sugar. Add a few extra blueberries for color. You can also top them with Greek yogurt or a drizzle of honey for sweetness. For the full recipe, check out the details above. Enjoy your gluten-free blueberry muffins! To bake great gluten-free muffins, you need to avoid some common problems. The first pitfall is using too much coconut flour. It absorbs a lot of moisture, so use it wisely. Stick to the recipe to keep a good balance. Next, ensure you add enough moisture. This is key for a soft texture. The applesauce and almond milk help here. If your batter seems too thick, add a little more almond milk. These muffins are perfect warm. Serve them with a light dusting of powdered sugar. You can also top them with a few fresh blueberries for a nice look. Pair muffins with coffee or tea for a delightful snack. Greek yogurt is a great side too. It adds creaminess and a bit of protein. To keep your muffins fresh, store them in an airtight container. They last about three days at room temperature. If you want them to last longer, you can freeze them. Wrap each muffin in plastic wrap and place them in a zip-top bag. They will stay good for about three months. When you're ready to eat one, just thaw it at room temperature or warm it in the oven. {{image_2}} You can swap almond flour for oat flour. Oat flour gives a nice, soft texture. You can also try gluten-free flour blends. These blends mix different flours for a balanced taste. Both options will work well in the recipe. Always check for gluten-free labels to avoid cross-contamination. Want to jazz up your muffins? Add spices like cinnamon or nutmeg. These spices bring warmth and depth. You may also mix in chopped apples or raspberries for a fruity twist. Adjust sweetness by using less sugar if you prefer. You can also use honey or maple syrup for a natural sweetener. These muffins offer many health perks. Almond flour is high in protein and healthy fats. Blueberries are packed with antioxidants. They support heart health and brain function. For lower sugar options, cut back on sugar or use a sugar substitute. Applesauce keeps the muffins moist while cutting sugar, too. Try these changes to boost nutrition and flavor! For more details, check out the Full Recipe. Each muffin packs a tasty punch. Here is the breakdown per muffin: - Calories: 180 - Fat: 9g - Protein: 4g - Carbohydrates: 22g - Fiber: 3g Almond flour is a star in this recipe. It has fewer carbs than wheat flour. It also gives good fiber, which aids digestion. Blueberries bring more than just sweetness. They are full of vitamins and antioxidants. These tiny fruits can help improve your heart health. A gluten-free diet can help many people feel better. It may reduce bloating and improve energy. Many find that they digest food easier. If you are sensitive to gluten, this muffin is a great choice. I suggest one muffin as a serving. You can enjoy it as a snack or with breakfast. These muffins fit well into a balanced diet. Pair them with protein, like Greek yogurt. This balance keeps you full and happy longer. For more flavor, try adding some nuts or seeds on top. Enjoy your muffins fresh or save some for later! Gluten-free muffins stay fresh for about 2 to 3 days at room temperature. To keep them longer, store them in an airtight container. This helps keep them moist. You can also freeze the muffins for up to three months. Just thaw them at room temperature when you want to enjoy them. Yes, you can use frozen blueberries in this recipe. They work well and add great flavor. Just fold them into the batter while still frozen. This prevents them from bleeding too much color into the batter. It’s an easy way to enjoy blueberry muffins year-round. If you need a different flour, here are some good options: - Oat flour - Coconut flour - Gluten-free all-purpose flour Each flour has its own taste and texture. You may need to adjust the liquid in the recipe if you swap them out. To check if your muffins are done, insert a toothpick into the center of one. If it comes out clean, they are ready. You can also look for a golden-brown color on top. The muffins should spring back when you touch them lightly. To make sugar-free muffins, use a sugar substitute like stevia or monk fruit sweetener. These options add sweetness without the calories. You can also mash a ripe banana for natural sweetness. It’s a tasty way to reduce sugar and add flavor. For more answers to common questions, check out additional links. In this post, I shared a simple recipe for gluten-free blueberry muffins. We covered the key ingredients, step-by-step instructions, and tips for baking success. You learned how to store your muffins and explore fun variations too. These muffins are tasty and healthy. Enjoy them fresh or with your favorite drink. Making these treats can boost your kitchen skills and satisfy your sweet cravings! Happy baking!

Gluten-Free Blueberry Muffins Fresh and Tasty Treat

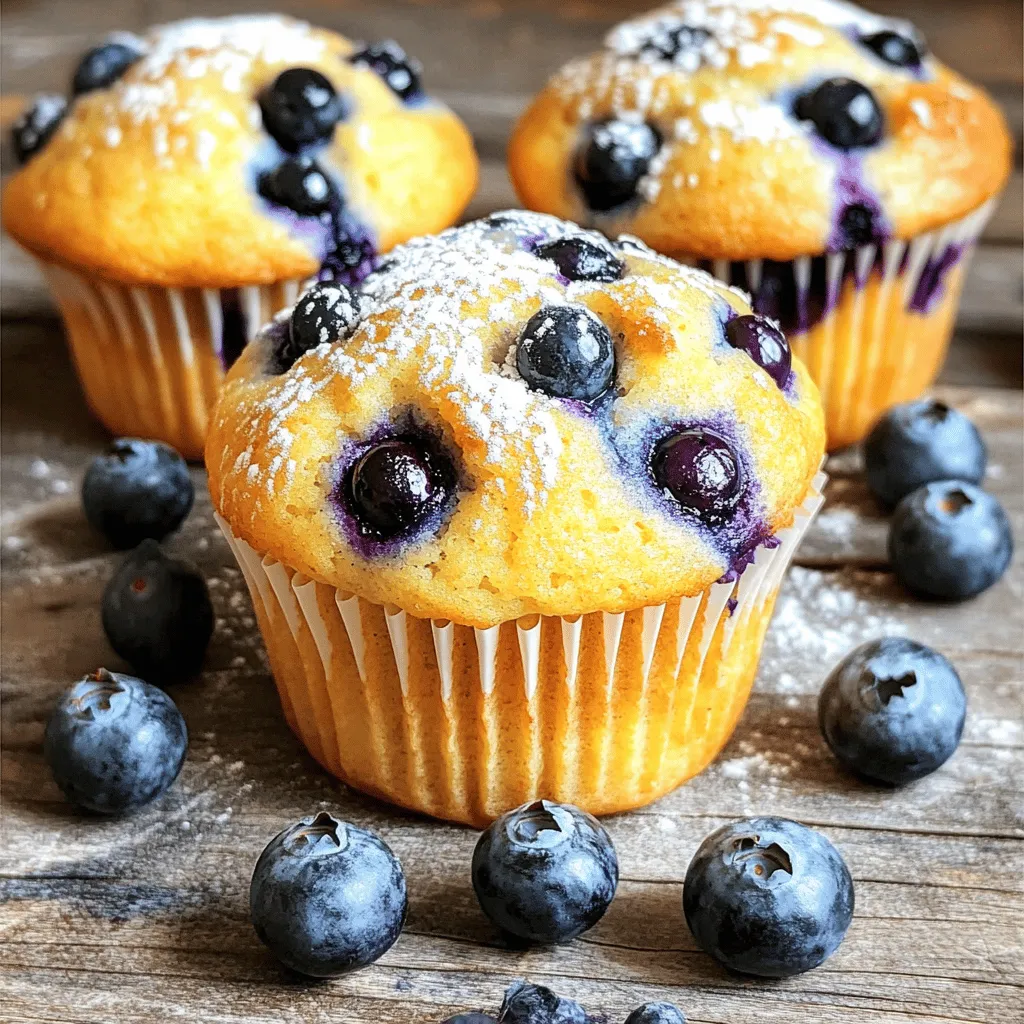
Looking for a delicious gluten-free treat? You’re in the right place! These Gluten-Free Blueberry Muffins are simple to make and

Older posts
Newer posts
← Previous Page1 … Page7 Page8 Page9 … Page23 Next →

dsad

© 2025 greenmealmap • Built with GeneratePress

Our Policies

  • Copyright Policy
  • Cookie Policy
  • GDPR Policy
  • Privacy Policy
  • Disclaimer
  • Terms Of Use

More Information

  • Home
  • About
  • Contact
  • Appetizers
  • Dessert
  • Dinner
  • Drinks
©2025, greenmealmap About Back To Top