Skip to content
DisclaimerTerms Of UseGDPR PolicyCookie Policy

greenmealmap

  • Home
  • Drinks
  • Appetizers
  • Dinner
  • Dessert
  • About
  • Contact
  • Privacy Policy
DisclaimerTerms Of UseGDPR PolicyCookie Policy

Lauren

To make crispy fried chicken, you need the following main ingredients: - 1 whole chicken (cut into pieces) - 2 cups buttermilk - 2 cups all-purpose flour - 1 tablespoon garlic powder - 1 tablespoon onion powder - 1 tablespoon smoked paprika - 1 teaspoon cayenne pepper (adjust to taste) - 1 teaspoon salt - 1 teaspoon black pepper - Vegetable oil (for frying) These ingredients create a rich flavor and a nice crunch. You can add optional ingredients to change the taste a bit. Consider these: - Hot sauce (for a spicy kick) - Fresh herbs (like rosemary or thyme) - Lemon zest (for brightness) - Other spices (like cumin or black pepper) Using these can make your chicken unique and fun! Having the right tools makes cooking easier. Here’s what I recommend: - Large mixing bowls - Measuring cups and spoons - Deep skillet or heavy-bottom pot - Cooking thermometer (to check oil temp) - Wire rack (for draining chicken) - Tongs (for handling hot chicken) These tools help you cook perfectly crispy fried chicken every time. For the full recipe, check out the detailed steps in the main article. Marinating chicken makes it juicy and tasty. I use buttermilk for this recipe. First, find a large bowl. Place the chicken pieces in it. Pour in two cups of buttermilk. This will soak into the chicken and add flavor. Cover the bowl and put it in the fridge. Let it marinate for at least two hours. If you can, let it sit overnight. The longer it marinates, the better the taste. Next, it's time to make the seasoned flour. Grab another large bowl. Add two cups of all-purpose flour. Then mix in one tablespoon of garlic powder, one tablespoon of onion powder, and one tablespoon of smoked paprika. For some heat, add one teaspoon of cayenne pepper. This adds spice, but you can adjust it to your liking. Also, add one teaspoon of salt and one teaspoon of black pepper. Mix this all together well. This flour will coat the chicken and give it a nice crunch. Now let’s get ready to fry the chicken. In a deep skillet or heavy pot, heat about two inches of vegetable oil. Aim for a temperature of 350°F (175°C). Test the oil by dropping in a small piece of bread. If it sizzles, you are good to go! Take the marinated chicken out of the fridge. Let the excess buttermilk drip off. Dredge each piece in the seasoned flour. Press lightly to coat well. For extra crunch, dip it back into the buttermilk and then into the flour again. Carefully place the chicken in the hot oil. Avoid crowding the pan. It’s better to fry in batches. Cook each piece for about 12-15 minutes. Turn them occasionally. Look for a golden brown color and check the internal temperature. It should read 165°F (74°C). Once done, transfer the chicken to a wire rack or a towel-lined plate to drain excess oil. Let the chicken rest for about 5-10 minutes. This helps keep it crispy. Enjoy your crispy fried chicken! For the full recipe, check out the details above. To get that perfect crunchy skin, follow these tips: - Marinate in buttermilk: Soaking the chicken in buttermilk helps tenderize it. - Use seasoned flour: Mix flour with spices like garlic powder and paprika. - Double dip: For extra crunch, coat the chicken in flour twice. - Use the right oil: Oils with high smoke points work best. Avoid these common pitfalls for crispy fried chicken: - Overcrowding the pan: Fry in small batches. This keeps the oil hot. - Using cold oil: Make sure your oil is hot enough before adding chicken. - Skipping the rest: Let the chicken rest on a wire rack after frying. This helps keep it crispy. Choosing the right oil is key for frying chicken. Here are some good options: - Vegetable oil: This is neutral and great for frying. - Canola oil: It has a high smoke point and mild flavor. - Peanut oil: This oil adds a nice taste and can handle high heat. - Sunflower oil: Another excellent choice for crispy results. For the full recipe, check out the detailed steps to make your crispy fried chicken shine! {{image_2}} To make spicy crispy fried chicken, add cayenne pepper or chili powder. You can also use hot sauce in the buttermilk. This gives the chicken a nice kick. Adjust the spice level to fit your taste. More heat means more flavor! Southern fried chicken is known for its crunchy, seasoned crust. It often uses a thicker batter. Northern fried chicken tends to be lighter and less spicy. It may use just flour for coating. Both styles are delicious and loved by many. If you're gluten-free, use rice flour or almond flour instead of regular flour. You can also try cornstarch for a crispier texture. Make sure to check all labels for hidden gluten. This way, everyone can enjoy your crispy fried chicken! To keep your leftover crispy fried chicken fresh, let it cool first. Place the chicken pieces in an airtight container. Make sure to separate layers with paper towels to absorb moisture. This helps keep the skin crispy. Store the container in the fridge. It will last up to four days. When it's time to enjoy your leftovers, avoid the microwave. Instead, use the oven or an air fryer. Preheat the oven to 375°F (190°C). Place the chicken on a wire rack over a baking sheet. Bake for 10-15 minutes until warm and crispy. The air fryer works great too. Set it to 375°F (190°C) and heat for about 5-7 minutes. If you want to save your crispy fried chicken for later, freezing is a smart choice. Wrap each piece tightly in plastic wrap or aluminum foil. Place the wrapped chicken in a freezer-safe bag. Remove as much air as possible. Label the bag with the date. You can freeze it for up to three months. When ready to eat, thaw it in the fridge overnight before reheating. For the complete recipe, check out the Full Recipe. The best temperature for frying chicken is 350°F (175°C). This heat cooks the chicken evenly. Too hot, and the outside burns before the inside cooks. Too cool, and the chicken absorbs too much oil, making it greasy. You can check if the chicken is done by using a meat thermometer. The thickest part should reach 165°F (74°C). Alternatively, pierce the chicken; the juices should run clear, not pink. Yes, you can use chicken thighs or wings! They both work well in this recipe. Thighs stay juicy and tasty, while wings are fun finger food. Adjust cooking time as needed since they may cook faster or slower than larger pieces. You can easily make a buttermilk substitute. Mix 1 cup of milk with 1 tablespoon of lemon juice or vinegar. Let it sit for 5-10 minutes. This will give you a tangy flavor similar to buttermilk, perfect for marinating your chicken. For the full recipe, check the section above. We explored everything you need for crispy fried chicken. You learned about key ingredients, tools, and cooking steps. I shared tips to avoid common mistakes and ways to customize your chicken. You also found out how to store leftovers and keep them crispy. Fried chicken can be simple or exciting, depending on your choice. Enjoy cooking and sharing your delicious fried chicken with others!

Crispy Fried Chicken Simple and Flavorful Recipe

Are you ready to dive into the delicious world of crispy fried chicken? This simple and flavorful recipe will transform

- 1 lb carrots, peeled and cut into sticks - 3 tablespoons olive oil - 4 cloves garlic, minced - Zest of 1 lemon - 2 tablespoons fresh lemon juice - 1 teaspoon honey - 1 teaspoon dried thyme - Salt and pepper to taste - Fresh parsley, chopped, for garnish - A pinch of red pepper flakes for heat - 1 tablespoon balsamic vinegar for depth - A sprinkle of feta cheese for creaminess - Calories: 150 - Protein: 2g - Fat: 7g - Carbohydrates: 22g - Fiber: 5g - Sugar: 5g These ingredients make your Tangy Lemon Garlic Roasted Carrots shine. The carrots bring a sweet flavor. The garlic adds a nice kick, while lemon zest and juice brighten every bite. Honey balances the flavors, and thyme adds earthiness. If you want to play with flavors, try the optional ingredients. They can enhance your dish even more. For those tracking nutrition, I’ve included the information per serving. This dish is rich in fiber and low in calories. It's a great way to enjoy veggies without guilt. Each serving gives you a healthy dose of flavor and nutrition. The full recipe offers clear steps for you to create this dish with ease. First, set your oven to 425°F (220°C). This high heat helps caramelize the carrots. Line a baking sheet with parchment paper. This step keeps the carrots from sticking. It also makes cleanup easier. In a large bowl, combine the olive oil, minced garlic, lemon zest, and lemon juice. Add the honey, dried thyme, salt, and pepper. Whisk everything together until it blends well. This mix gives the carrots a bright, tangy flavor. Now, add the carrot sticks to the bowl. Toss them well to coat in the lemon-garlic mixture. Spread the carrots out on the baking sheet in a single layer. Leave space between them for even roasting. Roast in the oven for 20-25 minutes. Toss the carrots halfway through for even cooking. When done, they should be soft and slightly caramelized. Remove them from the oven and sprinkle fresh parsley on top. This adds color and freshness. Serve warm as a tasty side dish. For the full recipe, check out the details in the article! Roasting carrots is simple, but a few tips can help. First, cut the carrots into uniform sticks. This step ensures they cook evenly. Second, make sure to coat the carrots well in the lemon-garlic mix. If they are dry, they won’t caramelize right. Also, spread them out on the baking sheet. If they touch, they will steam instead of roast. The key to great flavor is layering it. Start with the olive oil and garlic. These form the base. Then, the lemon zest and juice add a bright kick. Honey brings a touch of sweetness to balance the tang. Lastly, add thyme for a hint of earthiness. Taste the mix before adding the carrots. Adjust the salt and pepper to suit your taste. Presentation makes a meal more exciting. Arrange the roasted carrots on a nice platter. Drizzle some extra lemon juice over them for shine. Garnish with fresh parsley for a pop of green. You can also add lemon wedges on the side. This way, guests can add more if they want. For a fun twist, serve them with a yogurt dip for added creaminess. For the full recipe, check out the Tangy Lemon Garlic Roasted Carrots section. {{image_2}} You can change up the taste of Tangy Lemon Garlic Roasted Carrots by adding more ingredients. Try adding red pepper flakes for heat. A pinch of smoked paprika brings a nice depth. You can also toss in some sliced onions or bell peppers for a sweet contrast. Fresh herbs like rosemary or basil can bring a fresh twist. These additions will make your dish even more exciting. Not every kitchen has the exact ingredients. If you do not have olive oil, canola oil works too. You can swap lemon juice with lime juice for a different sour note. If honey is not on hand, maple syrup adds a nice sweetness. For those who don’t like thyme, use oregano or dill instead. These swaps can help you create a tasty dish with what you have. You can use different vegetables to make this dish year-round. In the spring, asparagus or radishes roast well with the same lemon-garlic mix. Summer zucchini and yellow squash shine with this flavor too. Fall brings sweet potatoes or butternut squash, which add creaminess. In winter, try parsnips or Brussels sprouts for a hearty option. Each season offers a unique twist on this recipe. After enjoying your Tangy Lemon Garlic Roasted Carrots, let them cool first. Place the leftovers in an airtight container. They stay fresh in the fridge for up to four days. If you store them properly, they will taste great on day four! Reheating roasted carrots can be simple. Use the oven for the best results. Preheat your oven to 350°F (175°C). Spread the carrots evenly on a baking sheet. Heat them for about 10 minutes. You can also use the microwave if you're in a hurry. Just heat them in short intervals to avoid sogginess. Freezing is a smart way to save extra carrots. First, let them cool completely. Then, spread them in a single layer on a baking sheet. Freeze them for about an hour. Once frozen, transfer the carrots into a freezer bag. They can last up to three months. When you're ready, just reheat them straight from the freezer. Enjoy the bright flavors anytime! Yes, you can use baby carrots. They save time since they are already cut. Just make sure to adjust the roasting time. Baby carrots may cook faster. Check them after 15 minutes to see if they are tender. These carrots pair well with many dishes. Serve them alongside grilled chicken or fish. They also go great with a quinoa salad. You can also add them to a veggie platter. For a fun twist, serve them with a yogurt dip. To make this recipe vegan, simply replace honey with maple syrup. You can also skip the sweetener altogether if you prefer. The lemon and garlic will still give great flavor to the carrots. For the full recipe, check out the detailed steps and ingredients mentioned above. Enjoy tasty carrots with a zesty kick! You learned how to make Tangy Lemon Garlic Roasted Carrots. We covered ingredients, from basic to optional ones for extra flavor. The step-by-step instructions guided you through preparation and roasting techniques. I shared tips for the best taste and how to present them nicely. You saw some variations to try different flavors and vegetables too. Lastly, we discussed how to store leftovers for later use. Enjoy making this easy, tasty dish! Your meals can now be both simple and delicious.

Tangy Lemon Garlic Roasted Carrots Flavorful Twist

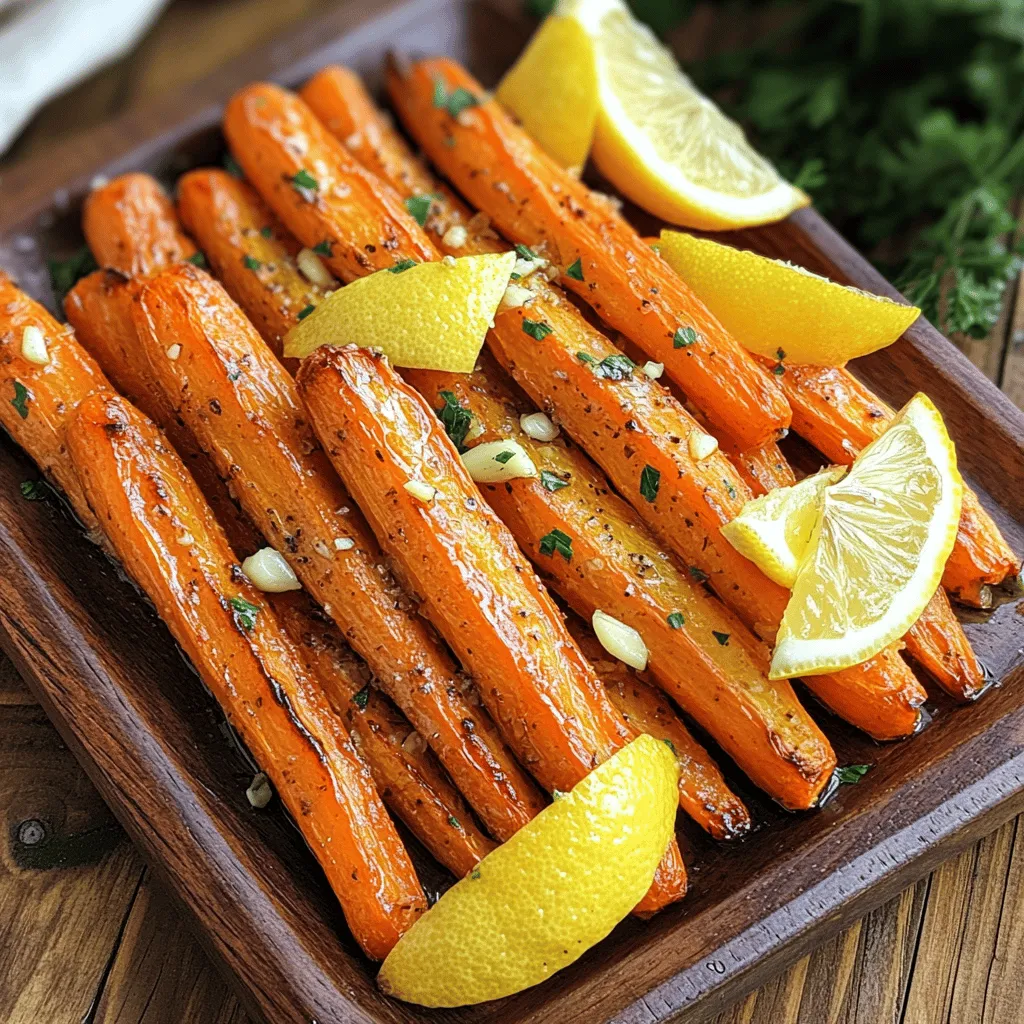
Are you ready to elevate your vegetable game? My Tangy Lemon Garlic Roasted Carrots bring zing and flavor to your
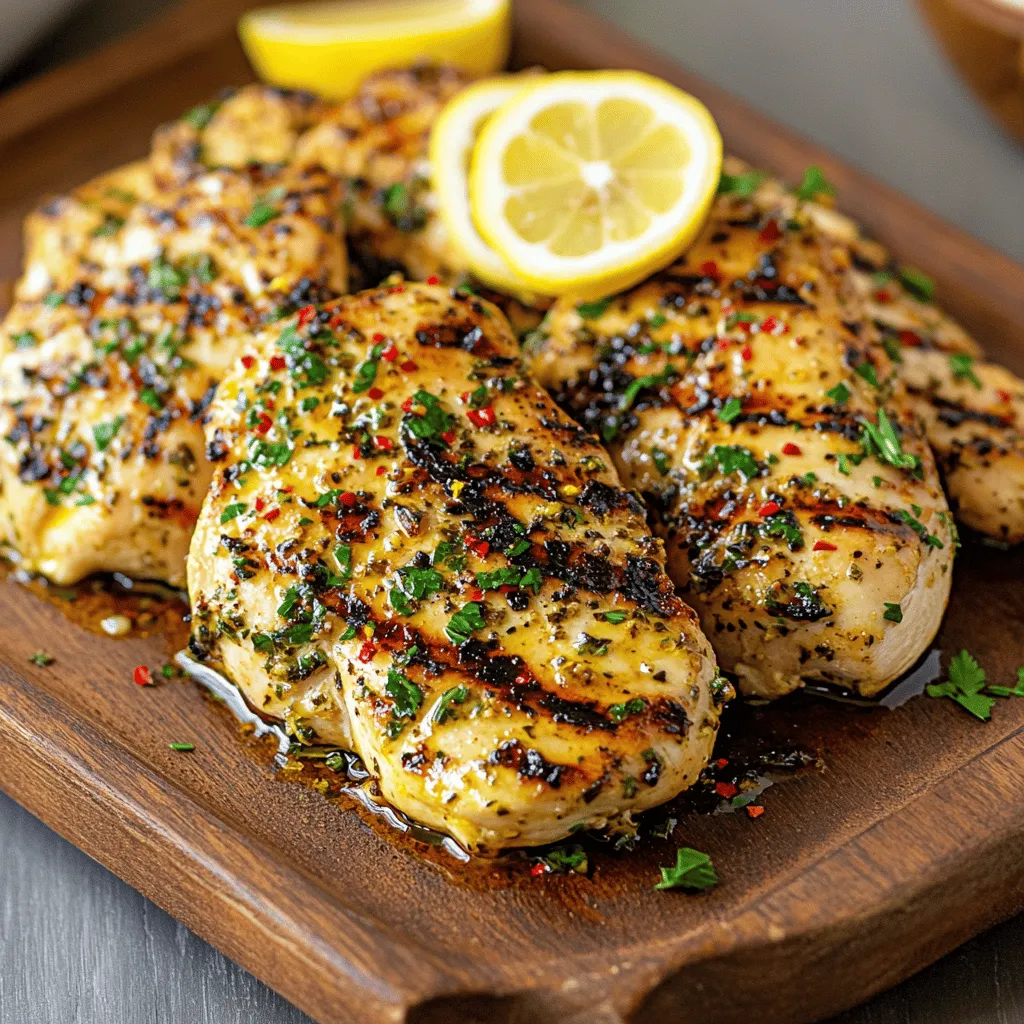
- Chicken and Marinade Components - 4 boneless, skinless chicken breasts - 4 tablespoons olive oil - 4 cloves garlic, minced - 1 tablespoon fresh rosemary, chopped - 1 tablespoon fresh thyme, chopped - Zest and juice of 1 lemon - Salt and pepper to taste - Broth and Pasta Ingredients - 2 cups low-sodium chicken broth - 1 cup orzo pasta - 2 cups baby spinach - Optional Add-ins - ¼ cup grated Parmesan cheese To create this dish, start with fresh chicken. Boneless, skinless breasts work best. You want them tender and easy to cook. The marinade is key. It adds flavor and keeps the chicken moist. I use olive oil and fresh herbs like rosemary and thyme. Garlic gives a nice punch, while lemon adds brightness. This balance makes every bite exciting. Next, we have the orzo. This pasta cooks quickly and absorbs flavors well. I prefer low-sodium chicken broth for a rich base. Add baby spinach to bring in some greens and nutrients. If you want, sprinkle in grated Parmesan cheese for a creamy finish. It enhances the dish and adds depth. For the full recipe, check out the complete instructions. Enjoy crafting this delightful meal! Preparing the Marinade To start, I mix olive oil, minced garlic, rosemary, thyme, lemon zest, and lemon juice in a bowl. I add salt and pepper to taste. This mix creates a flavorful marinade that makes the chicken tender and tasty. Importance of Marinating Time I let the chicken marinate for at least 30 minutes. If I have more time, I leave it overnight in the fridge. This longer time allows the flavors to soak in deeply. Searing Techniques In a large skillet, I heat more olive oil over medium-high heat. I take the chicken out of the marinade and let the excess drip off. I sear the chicken for about 5-6 minutes per side. I want it golden brown and cooked through. Importance of Chicken Temperature It’s key to cook the chicken until it reaches 165°F (75°C). This ensures it’s safe to eat. After cooking, I transfer the chicken to a plate and cover it with foil to keep warm. Cooking Instructions for Orzo In the same skillet, I add chicken broth and bring it to a simmer. I stir in the orzo and cook it according to the package instructions. Usually, this takes about 8-10 minutes until the orzo is al dente. Tips for Avoiding Overcooking I stir the orzo occasionally. This helps prevent it from sticking to the pan. Keeping an eye on the timer is also important to avoid mushy pasta. Adding Spinach and Optional Cheese Once the orzo is done, I add baby spinach to the skillet. I stir it until it wilts down. If I want a creamier texture, I sprinkle in grated Parmesan cheese. This adds a nice touch of flavor. Final Mixing and Seasoning I mix everything well. I taste and add more salt and pepper if needed. This step ensures every bite is full of flavor. Presentation Ideas I slice the chicken breasts and serve them over the lemon orzo. The bright colors of the dish make it look appealing. I like to drizzle any remaining juices from the skillet on top for extra flavor. Accompaniments This dish pairs well with a fresh salad or steamed vegetables. You can also enjoy it with crusty bread on the side for a complete meal. For the full recipe, check out the [Full Recipe]. - Overcooking Chicken: Chicken can dry out easily. Cook it just until it reaches 165°F. This keeps it juicy and tender. - Underseasoning the Orzo: Orzo needs flavor too! Use enough salt in the broth to enhance its taste. A bland orzo can ruin the dish. - Additional Herbs and Spices: Try adding basil or oregano for a different taste. Fresh herbs can brighten the dish. You can also add a hint of red pepper flakes for a spicy kick. - Melting Variations: Instead of Parmesan, use feta for a tangy twist. Goat cheese also adds creaminess and depth. Melted cheese makes everything better! - Recommended Cookware: A non-stick skillet is great for cooking the chicken. It helps to achieve that golden crust without sticking. - Useful Kitchen Gadgets: A meat thermometer ensures perfect chicken doneness. Also, a large spoon helps in stirring and serving the orzo. Check the Full Recipe for all the details. Happy cooking! {{image_2}} You can change the meat in this dish easily. Try using turkey instead of chicken. Turkey breasts work well and stay juicy with the same marinade. If you want a richer flavor, use duck. Just adjust the cooking time since duck takes longer to cook. For a vegetarian option, use tofu. Tofu absorbs flavors well. Press the tofu to remove excess water. Then, marinate it just like the chicken. Cook the tofu until it is golden brown. This gives you a tasty and healthy meal. If you don't have orzo, you can use rice or quinoa. Both options are easy to cook and pair well with the chicken. Just replace orzo with the same amount of rice or quinoa in the recipe. For those who need gluten-free options, choose gluten-free pasta. Many brands offer gluten-free orzo. You can also use chickpea pasta for extra protein. Cook it according to the package instructions for the best results. You can change the flavors in this dish with ease. Infusing different citrus fruits can add a twist. Try lime or orange juice instead of lemon. Each fruit gives a unique taste that pairs well with the chicken. Adding seasonal vegetables can also enhance the dish. Think about using zucchini, bell peppers, or asparagus. Sauté them with the chicken or toss them in with the orzo. This adds color and nutrition to your meal. For the full recipe, check out the complete guide I provided. Store your Garlic Herb Chicken with Lemon Orzo in proper containers. Use airtight containers to keep it fresh. Glass or plastic containers work well. Make sure the chicken and orzo cool down before sealing them. This will help avoid moisture buildup. In the fridge, this meal lasts about three to four days. Always check for any off smells or changes in texture before eating. If you notice anything odd, it’s best to throw it away. You can freeze both the chicken and orzo. First, let them cool completely. Then, place them in freezer-safe bags or containers. Remove as much air as possible to prevent freezer burn. Label the bags with the date. This helps you keep track of how long they’ve been in there. When you’re ready to eat, thaw the meal in the fridge overnight. For a quicker option, you can use the microwave. Reheat it gently on low power. Make sure the chicken reaches an internal temperature of 165°F (75°C) before serving. This ensures it’s safe to eat. To make Garlic Herb Chicken with Lemon Orzo, it takes about 50 minutes in total. You will spend around 30 minutes prepping and marinating the chicken. Cooking the chicken and orzo takes about 20 minutes. This dish is quick and easy, making it perfect for a weeknight meal. Yes, you can use different herbs in this recipe. If you don’t have rosemary or thyme, try using basil or oregano. Fresh herbs bring a lot of flavor. Dried herbs work too, but use less. About one-third the amount is a good start. Feel free to experiment and find the mix you enjoy most. Garlic Herb Chicken with Lemon Orzo goes great with many side dishes. Here are some ideas: - Roasted vegetables, like carrots and broccoli - A simple green salad with lemon vinaigrette - Garlic bread for a tasty touch - Steamed asparagus or green beans for freshness These sides balance the meal well and make it more filling. Yes, you can make this dish ahead of time. Marinate the chicken a day before. This will enhance its flavor. You can also cook the orzo and store it separately in the fridge. Just reheat it before serving. If you want, you can warm the chicken in the oven at a low temperature. This method helps keep everything juicy and tasty. For the full recipe, refer to the earlier section. To wrap up, this article explored each step for making Garlic Herb Chicken with Lemon Orzo. We covered the ingredients, cooking details, and helpful tips to ensure your dish shines. Remember, marinating the chicken is key for great flavor. Avoid common mistakes like overcooking the chicken or underseasoning the orzo. With the right variations, tools, and storage tips, this meal fits any occasion. Enjoy your cooking and impress everyone with this tasty dish!

Garlic Herb Chicken with Lemon Orzo Delightful Meal

If you’re seeking a bright, tasty meal that impresses with ease, you’re in the right place. My Garlic Herb Chicken

- 2 cups cooked jasmine rice (or short-grain rice) - 3 large eggs - 1 tablespoon sesame oil - 2 tablespoons soy sauce - 1 tablespoon gochujang (Korean chili paste) - 1 green onion, finely chopped - 1 tablespoon toasted sesame seeds - Salt and pepper to taste - Optional: Kimchi for serving - Non-stick skillet - Mixing bowl - Spatula Gyeran Bap is not just tasty; it's also good for you. Each serving has about 400 calories. It packs around 15 grams of protein and 10 grams of fat. The carbs come in at about 60 grams. The main ingredients offer several health benefits: - Eggs provide high-quality protein and essential vitamins. - Jasmine rice offers quick energy and is easy to digest. - Gochujang adds flavor and contains antioxidants. You can enjoy this dish knowing it's both delicious and nutritious! For a full recipe, check out the link. - Beating the eggs Start by cracking the eggs into a medium bowl. Use a fork or whisk to mix them well. You want a nice, even blend. Add a pinch of salt and pepper for flavor. - Cooking in the skillet Heat a non-stick skillet over medium heat. Pour in the sesame oil and let it warm up. Once hot, add the beaten eggs. Swirl the pan to coat it evenly. - Scrambling the eggs Let the eggs cook without stirring for about 1-2 minutes. Watch for the edges to set gently. Use a spatula to stir and scramble them until fully cooked. - Stir-frying the rice with seasonings In the same skillet, add the cooked jasmine rice. Pour in the soy sauce and gochujang. Stir-fry this mix for about 3-5 minutes. Make sure the rice heats through and absorbs the flavors. - Combining eggs and rice Gently fold the scrambled eggs into the rice. Use a spatula to mix them evenly. This step ensures every bite is flavorful and delicious. - Presentation tips Serve your Gyeran Bap hot. Garnish with chopped green onions and toasted sesame seeds. This adds color and crunch to your dish. - Recommended side dishes Pair your Gyeran Bap with kimchi for a classic touch. The spicy tang of kimchi complements the savory rice perfectly. Enjoy your meal! - How to achieve perfect scrambled eggs: Start with fresh eggs. Crack them into a bowl and beat them well. Use a fork or whisk for a fluffy texture. Heat your skillet on medium. Add sesame oil and let it warm. Pour in the eggs and don’t stir right away. Let them sit for one to two minutes. When the edges set, gently stir. This keeps them soft and creamy. - Tips for best rice texture: Use cooked jasmine or short-grain rice. It should be slightly sticky but not mushy. If you make rice, rinse it under cold water first. This removes excess starch. Let it cool before using in the dish. Cold rice works better for stir-frying. - Adding spices or herbs: You can spice up Gyeran Bap easily. Try adding black pepper or a pinch of paprika for heat. Fresh herbs like cilantro or parsley can add freshness. Just chop them finely and mix in. - Alternate sauces for customization: While soy sauce and gochujang are great, feel free to switch it up. You can use teriyaki sauce for a sweeter flavor. Sriracha can add heat if you like spice. Mix and match to find your favorite combination. - Overcooking the eggs: Cooking the eggs too long makes them rubbery. Keep an eye on them. Remove them from heat once fully scrambled but still soft. - Incorrect rice preparation: Using fresh, warm rice is a mistake. It can lead to clumping. Make sure your rice is cooled before frying. This helps it mix well with eggs and sauces in Gyeran Bap. {{image_2}} You can change Gyeran Bap to suit your taste. Adding vegetables makes it colorful and healthy. Try adding spinach or carrots for extra nutrition. Both vegetables blend well with the rice and eggs. You can also use different types of meat. For instance, diced chicken or pork adds protein and flavor. If you prefer seafood, shrimp works nicely too. These options let you create your version of Gyeran Bap. If you follow a vegan diet, don't worry! You can use plant-based egg alternatives. Products made from mung beans or chickpeas mimic eggs well. This way, you can enjoy a tasty version without eggs. If gluten is a concern, swap regular soy sauce for tamari. Tamari is gluten-free and tastes great in this dish. These adjustments let everyone enjoy Gyeran Bap. Want to make your Gyeran Bap even better? Add cheese for a creamy texture. Melted cheese on top makes it extra delicious. You can also drizzle sauces like sriracha or mayonnaise for a kick. Consider toppings like sliced avocado for added creaminess. These add-ons elevate this simple dish into something special. You can explore different flavors each time you make it. For the full recipe, check the complete guide. To keep your Gyeran Bap fresh, store it in the fridge. Use an airtight container for best results. It stays good for 3 to 4 days. If you want to keep it longer, freezing is a great option. Place the rice in a freezer-safe bag. Squeeze out the air before sealing. This way, it keeps its taste and texture. When you’re ready to enjoy your leftovers, use the microwave for quick reheating. Heat it in short bursts, stirring in between. This helps the rice warm evenly. You can also reheat it in a skillet. Add a splash of water to keep it moist. This will help maintain the texture and flavor. In the fridge, Gyeran Bap stays fresh for about 3 to 4 days. If you freeze it, it can last for up to 2 months. Just remember to label your containers with the date. This way, you won't forget how long it has been stored. Enjoy your delicious Gyeran Bap anytime you want! Gyeran Bap is a savory Korean rice dish topped with scrambled eggs. The name means "egg rice" in Korean. This dish is simple, quick, and full of flavor. It originates from Korea, where rice is a staple food. People enjoy it for breakfast or a fast meal. The combination of rice, eggs, and soy sauce creates a comforting taste. You can serve it with kimchi for a delicious kick. Yes, you can prepare Gyeran Bap ahead of time. Cook the rice and scramble the eggs earlier in the day. Store them separately in the fridge. When ready to eat, just reheat the rice and eggs together. This saves time and makes meal prep easy. You can also pack it for lunch. Just remember to add some green onions when serving for freshness. For Gyeran Bap, jasmine rice or short-grain rice works best. Jasmine rice has a nice aroma and a fluffy texture. Short-grain rice sticks together, which is great for scooping. Both types absorb flavors well, making your dish tasty. If you have leftover rice, it’s perfect for this recipe. Just ensure it’s cooked and cooled before using. Absolutely! Gyeran Bap is very flexible. You can add vegetables like spinach or carrots for more color and nutrition. If you want more protein, add cooked chicken or tofu. You can also swap soy sauce for tamari for a gluten-free option. Feel free to experiment with spices or herbs to suit your taste. Each time, you can create a unique dish! For the full recipe, check out the [Full Recipe]. Gyeran Bap is a simple yet tasty dish packed with flavor. We explored key ingredients, useful kitchen tools, and the cooking process. With some tips and variations, you can easily customize this dish to your liking. Remember to avoid common mistakes for the best results. Whether you enjoy it as a meal or a snack, Gyeran Bap offers great nutrition and delicious taste. Now, it’s time to try making it your own!

Gyeran Bap Savory Rice Dish for Quick Meals

If you’re looking for a quick and tasty meal, Gyeran Bap is a must-try! This savory rice dish combines fluffy

To make the best homemade cinnamon rolls, you need simple, quality ingredients. Here’s what you must have: - 4 cups all-purpose flour - 1/4 cup granulated sugar - 1 packet (2 1/4 tsp) instant yeast - 1/2 teaspoon salt - 1 cup milk, warm - 1/4 cup unsalted butter, melted - 2 large eggs - 1 tablespoon vanilla extract - 1/2 cup brown sugar, packed - 2 tablespoons ground cinnamon - 1/4 cup unsalted butter, softened (for spreading) - 1 cup powdered sugar (for icing) - 2 tablespoons milk (for icing) - 1 teaspoon vanilla extract (for icing) Each ingredient plays a key role. The flour gives structure. Yeast helps the rolls rise. Sugar adds sweetness. Butter makes it rich and flavorful. Want to make your cinnamon rolls even better? You can add some fun flavors. Here are a few ideas: - Chopped nuts (like walnuts or pecans) for crunch. - Raisins or dried cranberries for sweetness. - Cream cheese for a tangy twist. - A touch of nutmeg or cardamom for warmth. These add-ins can change the flavor and texture. Be creative and try different combinations! Don’t have all the ingredients? No problem! Here are some easy swaps: - Use almond milk or oat milk instead of regular milk. - Swap granulated sugar for brown sugar for a deeper flavor. - If you run out of butter, use coconut oil or vegetable oil. - For a gluten-free option, try gluten-free flour blends. These substitutions work well and still give great results. It’s all about making the recipe work for you. For the full recipe, check out Heavenly Cinnamon Rolls. To make the dough, start with a large mixing bowl. Pour in the warm milk, melted butter, sugar, and yeast. Let it sit for about 5 minutes. You want it to become frothy. This shows the yeast is alive. Next, add the eggs and vanilla extract. Stir everything until well mixed. Now, gradually add the flour and salt. Mix until the dough comes together. Knead the dough on a floured surface for about 5-7 minutes. You should feel it get smooth and elastic. After kneading, place it in a greased bowl. Cover it with a cloth and let it rise in a warm spot for about 1 hour. It should double in size. While the dough is rising, mix the brown sugar and ground cinnamon in a bowl. Set it aside for later. Once the dough has risen, punch it down gently. Roll it out on a floured surface into a rectangle, about 16x12 inches. Spread softened butter over the dough, leaving a small edge. Then, sprinkle the cinnamon-sugar mixture evenly across the buttered dough. Starting from one long side, roll the dough into a log. Pinch the seams to seal it. Cut the log into 12 equal pieces. Place them in a greased baking dish, giving them space to rise. Cover the dish with a cloth and let them rise for another 30-45 minutes. While the rolls are rising, preheat your oven to 350°F (175°C). Once the rolls are puffy, bake them for 20-25 minutes. They should turn golden brown. While they bake, prepare the icing. In a bowl, whisk together powdered sugar, milk, and vanilla extract until smooth. Once the rolls are out of the oven, let them cool slightly. Drizzle the icing generously over the warm rolls. For the full recipe, check out Heavenly Cinnamon Rolls. Enjoy your delicious treat! When making cinnamon rolls, a few errors can spoil your treat. Here are some common mistakes to watch out for: - Using cold ingredients: Always use warm milk and eggs at room temperature. This helps yeast work better. - Not proofing the yeast: If your yeast doesn't foam, it’s dead. Start over with fresh yeast. - Over-kneading the dough: Knead just until smooth. Over-kneading makes the rolls tough. - Skipping the second rise: Don’t rush this step. Letting the dough rise again makes the rolls fluffy. For soft, fluffy rolls, follow these tips: - Use high-protein flour: This helps create a strong dough that can trap air. - Knead properly: Knead for about 5-7 minutes. The dough should feel smooth and elastic. - Warm rising place: Choose a cozy spot for the dough to rise. A turned-off oven or a sunny window works well. - Don’t overcrowd the pan: Place rolls in the dish with space. This allows them to expand during baking. Want to boost the taste of your cinnamon rolls? Try these ideas: - Add nuts: Chopped walnuts or pecans bring a nice crunch. - Use flavored extracts: Substitute some vanilla with almond extract for a twist. - Experiment with spices: Add nutmeg or cardamom for extra warmth. - Try different fillings: Mix in fruit, chocolate chips, or cream cheese for unique flavors. For more detailed steps, check out the Full Recipe. {{image_2}} You can switch up the filling for your cinnamon rolls. Try using chocolate chips for a sweet twist. Nuts, like pecans or walnuts, add a nice crunch. For a fruity touch, use diced apples mixed with cinnamon. You can even experiment with cream cheese for a rich filling. Each option brings its own flavor and fun. It keeps your rolls exciting! The icing on your cinnamon rolls can change the whole taste. Classic powdered sugar icing is always a hit. For a zesty flavor, add lemon juice to the icing mix. You can also use maple syrup for a sweet glaze. Want something richer? Try cream cheese frosting. Top with nuts or sprinkles for a fun finish. Each choice makes your rolls unique! You can still enjoy cinnamon rolls if you follow a gluten-free diet. Use gluten-free flour blends that work well for baking. Look for blends that include xanthan gum, which helps the dough rise. You can also make a dairy-free version. Swap milk with almond or oat milk and use coconut oil instead of butter. These changes keep your rolls soft and tasty, just like the originals. To keep your cinnamon rolls fresh, place them in an airtight container. If you do not have one, wrap them tightly in plastic wrap. This helps prevent them from drying out. Store them at room temperature for up to two days. For longer storage, consider refrigerating them. Just remember, cold rolls may lose some of their soft texture. When you are ready to enjoy your leftover cinnamon rolls, reheating them is key. Preheat your oven to 350°F (175°C). Place the rolls on a baking sheet. Cover them with foil to keep them moist. Heat for about 10-15 minutes until warm. If you want a quick fix, use the microwave. Heat one roll for 15-20 seconds. This gives you a soft and warm treat. Freezing is a great option for long-term storage. Before baking, you can freeze the unbaked rolls. Prepare the rolls and place them in the baking dish. Cover the dish tightly with plastic wrap. Then, wrap it in foil. You can freeze them for up to three months. When ready to bake, remove from the freezer. Let them thaw in the fridge overnight, then let them rise before baking. If you have baked rolls, wait until they cool completely. Wrap them well and store them in a freezer bag. These can last for about three months as well. When you’re ready to eat, thaw and reheat as needed. Homemade cinnamon rolls stay fresh for about 2 to 3 days. Keep them in an airtight container to lock in moisture. If you want them to last longer, you can freeze them. Wrap each roll in plastic wrap, then place them in a freezer bag. They can stay frozen for up to 3 months. Yes, you can make cinnamon rolls overnight. After shaping the rolls, place them in the fridge instead of letting them rise at room temperature. The next morning, let them sit out for about 30 minutes before baking. This helps them rise a bit more before they go into the oven. If your cinnamon rolls do not rise, check a few things. First, make sure your yeast is fresh. Old yeast can fail to activate. Also, ensure your dough is in a warm spot while it rises. If the area is too cold, the dough won't rise properly. Lastly, avoid adding too much flour, as this can lead to dense rolls. Homemade cinnamon rolls are easy to make and fun to share. We covered the essential ingredients and optional add-ins to boost flavor. I shared step-by-step instructions to guide you through the process. You learned helpful tips to avoid common mistakes and keep your rolls fluffy. We explored tasty variations to suit your tastes and dietary needs. Finally, I provided ways to store and reheat your rolls for maximum enjoyment. I hope you feel ready to dive into baking your own perfect cinnamon rolls! Enjoy your delicious treat!

Homemade Cinnamon Rolls Soft and Flavorful Treat

Have you ever craved a warm, soft cinnamon roll that melts in your mouth? If so, you’re in for a

To create a delicious Chicken Salmoriglio, you need fresh, quality ingredients that pack a punch. Here’s what you’ll need:

Chicken Salmoriglio Flavorful and Easy Grilled Dish

Ready to impress your guests at the next barbecue? Chicken Salmoriglio is a tasty and simple grilled dish that packs

- 2 chicken breasts, sliced into strips - 2 cups mixed mushrooms (shiitake, cremini, and button), sliced - 1 medium onion, thinly sliced - 3 cloves garlic, minced

Mushroom Chicken Savory and Simple Dinner Recipe

Are you looking for a quick and tasty dinner? Look no further! This Mushroom Chicken recipe is savory, simple, and

- 1 pound bacon, cut into thirds - 1 pound breakfast sausage, casings removed - 8 ounces cream cheese, softened

Spicy Chipotle Breakfast Pigshots Flavorful Delight

Are you ready to spice up your breakfast routine? Today, I’m sharing my favorite recipe for Spicy Chipotle Breakfast Pigshots.

To make chicken shawarma, you need a few key ingredients. Let's gather what you will need:

Chicken Shawarma with Creamy Garlic Sauce Delight

Are you ready to enjoy a taste sensation? Chicken Shawarma with Creamy Garlic Sauce Delight will make your taste buds

To make Golden Oreo Strawberry Cheesecake Bars, you need simple ingredients. They create a rich and creamy treat. This recipe combines sweet strawberries with a crunchy Oreo base.

Golden Oreo Strawberry Cheesecake Bars Delightful Treat

Are you ready to indulge in a sweet delight? My Golden Oreo Strawberry Cheesecake Bars are a treat you won’t

Older posts
Newer posts
← Previous Page1 … Page73 Page74 Page75 Page76 Next →

dsad

© 2025 greenmealmap • Built with GeneratePress

Our Policies

  • Copyright Policy
  • Cookie Policy
  • GDPR Policy
  • Privacy Policy
  • Disclaimer
  • Terms Of Use

More Information

  • Home
  • About
  • Contact
  • Appetizers
  • Dessert
  • Dinner
  • Drinks
©2025, greenmealmap About Back To Top