Skip to content
DisclaimerTerms Of UseGDPR PolicyCookie Policy

greenmealmap

  • Home
  • Drinks
  • Appetizers
  • Dinner
  • Dessert
  • About
  • Contact
  • Privacy Policy
DisclaimerTerms Of UseGDPR PolicyCookie Policy

Lauren

To make the best cinnamon roll pancakes, you need the following: - 1 cup all-purpose flour - 2 tablespoons sugar - 1 teaspoon baking powder - 1/2 teaspoon baking soda - 1/4 teaspoon salt - 1 cup buttermilk (or 1 cup milk + 1 tablespoon vinegar) - 1 large egg - 2 tablespoons melted butter - 1 teaspoon vanilla extract Cinnamon Swirl: - 1/4 cup brown sugar - 1 tablespoon ground cinnamon - 2 tablespoons unsalted butter, softened Cream Cheese Glaze: - 4 ounces cream cheese, softened - 1/2 cup powdered sugar - 2 tablespoons milk - 1 teaspoon vanilla extract You can make these pancakes with some simple swaps: - Flour: Use whole wheat flour for a healthier option. - Sugar: Try coconut sugar or a sugar substitute for lower calories. - Buttermilk: If you don’t have buttermilk, mix regular milk with vinegar or lemon juice. - Egg: Use a flax egg or applesauce for a vegan version. - Cream Cheese: Substitute with dairy-free cream cheese for a non-dairy glaze. Each serving of cinnamon roll pancakes has about: - Calories: 350 - Protein: 8g - Carbohydrates: 50g - Fat: 15g - Fiber: 2g These pancakes are a sweet treat but still offer some nutrition. Enjoy them on special mornings without guilt! To make the cinnamon swirl, first grab a small bowl. Add 1/4 cup of brown sugar and 1 tablespoon of ground cinnamon. Mix these two until well combined. In another bowl, take 2 tablespoons of softened unsalted butter and blend it into the sugar-cinnamon mixture. It should turn into a paste. Set this mixture aside for later. This swirl will give the pancakes their delightful cinnamon flavor. Next, let's focus on the pancake batter. In a large bowl, whisk together 1 cup of all-purpose flour, 2 tablespoons of sugar, 1 teaspoon of baking powder, 1/2 teaspoon of baking soda, and 1/4 teaspoon of salt. In a separate bowl, combine 1 cup of buttermilk, 1 large egg, 2 tablespoons of melted butter, and 1 teaspoon of vanilla extract. Pour the wet ingredients into the dry ones. Mix gently until just combined. Remember, do not overmix! This will keep your pancakes light and fluffy. Now it's time to cook! Preheat a non-stick griddle or skillet over medium heat. Lightly grease it with butter or cooking spray. Pour 1/4 cup of pancake batter onto the hot surface. Immediately add a swirl of your cinnamon mixture on top. You can use a condiment bottle or a spoon to create a nice spiral pattern. Cook until bubbles form on the surface, about 2-3 minutes. Flip the pancake and cook for an additional 2 minutes, or until it turns golden brown. Repeat this process with the remaining batter. You can find the full recipe for additional details and tips. Enjoy your cooking adventure! Flipping pancakes can be tricky. Here’s how to do it right. Wait until bubbles form on the surface of the pancake. This shows it’s ready to flip. Use a wide spatula for a smooth turn. Slide the spatula under the pancake and lift it gently. Turn the pancake quickly but carefully. You want it to land flat on the pan. If you master this, you’ll have perfect pancakes every time. Serving is key to enjoying these pancakes. Stack them high on a large plate. Drizzle the cream cheese glaze generously over the top. You can add a sprinkle of powdered sugar for extra sweetness. Try placing a few pecans on top for crunch. This not only looks great but tastes amazing too. For a fun touch, serve with fresh fruit on the side, like strawberries or bananas. You can make these pancakes even better with toppings. Here are some ideas: - Maple syrup for sweetness - Whipped cream for creaminess - Chopped nuts for crunch - Fresh berries for a fruity twist - A dusting of cinnamon for warmth Feel free to mix and match these toppings! They can change the flavor and make your breakfast exciting. The full recipe gives you the base, but the toppings let you personalize your meal. {{image_2}} You can make vegan cinnamon roll pancakes easily. Replace the egg with a flax egg. To make a flax egg, mix one tablespoon of ground flaxseed with two and a half tablespoons of water. Let it sit for five minutes to thicken. Use non-dairy milk instead of buttermilk. Almond milk or oat milk works well. For the butter, you can use coconut oil or vegan butter. The taste will still be sweet and delicious. For a gluten-free twist, swap out regular flour. Use a gluten-free all-purpose flour mix. Make sure the mix has a binding agent. This will help the pancakes stick together well. If your mix lacks this, add a tablespoon of ground flaxseed or chia seeds. Follow the same steps from the Full Recipe. You will get fluffy pancakes without gluten. Add fruits or nuts to your pancakes for extra flavor. Blueberries or sliced bananas are great choices. Just fold them into the batter gently. If you like nuts, chopped pecans or walnuts add a nice crunch. You can also experiment with spices. A dash of nutmeg or cardamom can give your pancakes a unique twist. Customize them to your taste! You might have some pancakes left after a tasty breakfast. To store them, stack the pancakes in an airtight container. Place a piece of parchment paper between each pancake. This helps keep them from sticking together. You can store them in the fridge for up to three days. When you want to enjoy leftover pancakes, you have a few easy ways to reheat them. The microwave is quick. Just place a pancake on a microwave-safe plate and heat for 20-30 seconds. If you want them crispier, use a skillet. Heat the skillet on low and warm each side for about one minute. Freezing is a great option if you want to save pancakes for later. Let the pancakes cool completely first. Then, stack them with parchment paper between each one. Wrap the stack tightly in plastic wrap. Place the wrapped stack in a freezer bag. They can last up to two months in the freezer. When you're ready to eat them, thaw in the fridge overnight before reheating. Enjoy those delicious pancakes again! For the full recipe, check out the earlier section. You can use milk with vinegar. Just mix 1 cup of milk with 1 tablespoon of vinegar. Let it sit for 5 minutes. This will give you a good buttermilk substitute. To make your pancakes fluffier, use fresh baking powder. Avoid overmixing the batter. A few lumps are okay. Also, let the batter rest for 5 to 10 minutes before cooking. Yes, you can prepare the batter ahead. Store it in the fridge for up to 24 hours. Just give it a quick stir before cooking. It may thicken, so you can add a bit of milk if needed. Absolutely! Stack the pancakes with parchment paper in between. Place them in a freezer-safe bag. They can last up to 2 months in the freezer. Reheat in the toaster or microwave. Store leftover pancakes in an airtight container. They can last in the fridge for about 3 days. Just heat them up before serving. Yes, adding chocolate chips is a fun twist! Sprinkle them into the batter before cooking. They melt nicely and add a sweet touch. You can top your pancakes with maple syrup, fresh fruit, or whipped cream. A dusting of powdered sugar feels fancy too! Yes, these pancakes are simple and fun to make. Kids can help swirl the cinnamon mixture! For the full recipe, check out the detailed steps provided earlier. Cinnamon roll pancakes combine two favorite treats in one. I shared key ingredients, cooking tips, and tasty variations. You'll find options for vegan and gluten-free pancakes. Storing and reheating leftovers is easy too. Remember, the right toppings can make a big difference. These pancakes are not only fun to make but also delicious to eat. Enjoy this warm and sweet treat anytime!

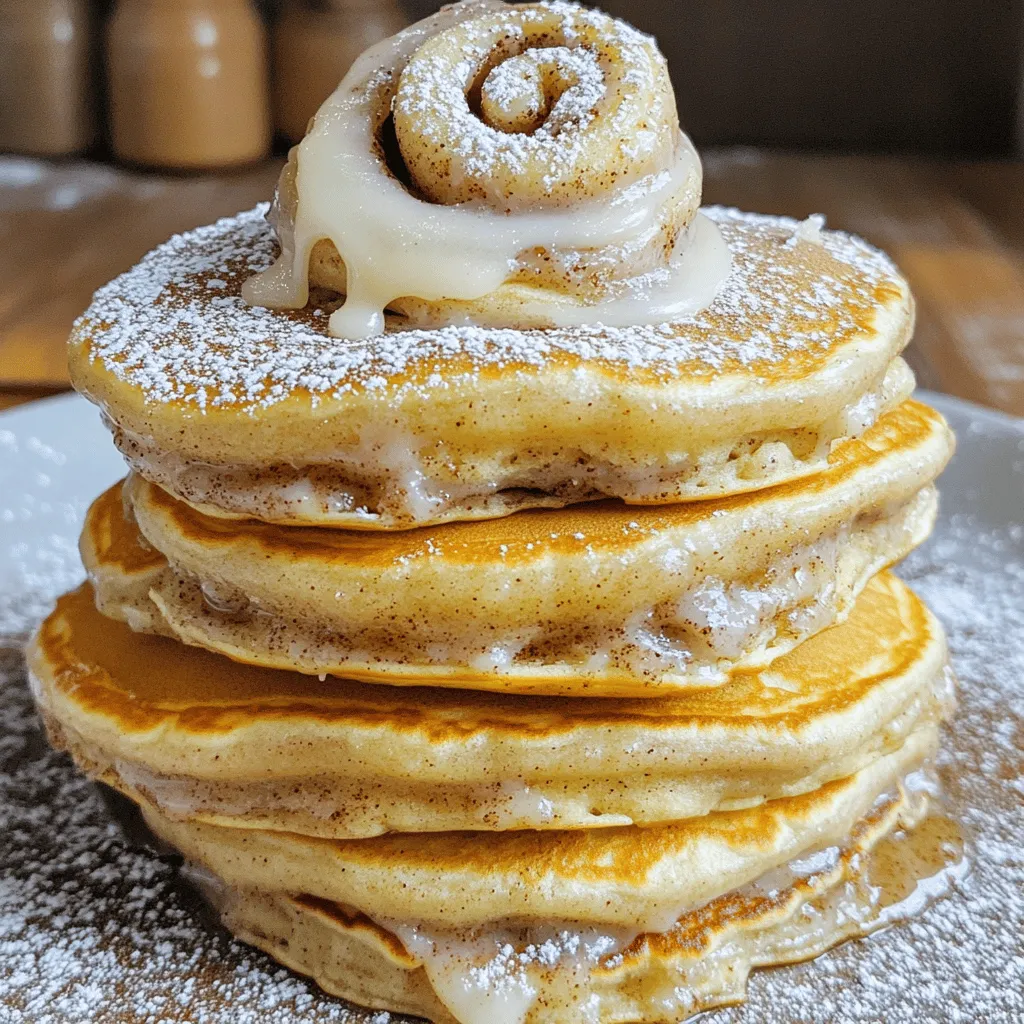
Cinnamon Roll Pancakes Delightful and Easy Recipe

Get ready to enjoy a delightful breakfast with my easy cinnamon roll pancakes! These fluffy treats combine the rich flavors

- 1 lb ground beef (or ground turkey for a lighter option) - 1/2 cup breadcrumbs - 1/4 cup grated Parmesan cheese - 1/4 cup finely chopped green onions - 1 egg - 2 garlic cloves, minced - 1/4 teaspoon salt - 1/4 teaspoon black pepper - 1 teaspoon minced ginger - 1/4 cup honey - 1/4 cup sriracha - 2 tablespoons soy sauce - 1 tablespoon rice vinegar - Sesame seeds - Extra green onions To make these honey sriracha meatballs, you start with simple ingredients. You can use ground beef or turkey based on your choice. The breadcrumbs help bind the meatballs, while Parmesan adds flavor. Green onions bring some freshness. The sweet and spicy sauce comes from honey and sriracha. Soy sauce adds depth, and rice vinegar gives a nice tang. You can also use sesame seeds and extra green onions to garnish. This makes the dish look even better. For the full recipe, you can check the details above. Every ingredient plays a part in creating a balanced flavor and texture. Enjoy cooking! - Preheat the oven to 400°F (200°C). - In a large bowl, combine: - 1 lb ground beef (or turkey) - 1/2 cup breadcrumbs - 1/4 cup grated Parmesan cheese - 1/4 cup finely chopped green onions - 1 egg - 2 minced garlic cloves - 1/4 teaspoon salt - 1/4 teaspoon black pepper - 1 teaspoon minced ginger Mix these ingredients well, but don’t overwork the meat. This keeps your meatballs tender. - Shape the mixture into small meatballs, about 1 inch in diameter. - Place them on a prepared baking sheet. - Bake for 15-20 minutes, until they are cooked through and slightly browned. - In a saucepan, whisk together: - 1/4 cup honey - 1/4 cup sriracha - 2 tablespoons soy sauce - 1 tablespoon rice vinegar Cook this over medium heat for about 5 minutes. Stir often until the sauce thickens. - Remove the baked meatballs from the oven. - Drizzle the honey sriracha sauce over the meatballs. Toss gently to coat. - Return to the oven for an additional 5-7 minutes. This lets the meatballs soak up the flavors. - Garnish with sesame seeds and extra chopped green onions before serving. For the full recipe, check out the detailed instructions above. Enjoy your tasty Honey Sriracha Meatballs! When making meatballs, you want them to stay soft. Avoid overmixing the meat. Mix just enough to blend all the flavors. This keeps your meatballs tender and juicy. Use wet hands while forming the meatballs. This simple trick helps prevent the mixture from sticking to your hands. The sauce is key to great flavor! You can customize the spice level by adjusting the amount of sriracha. If you like it spicy, add more. For extra depth, consider adding minced garlic or fresh ginger. These ingredients boost the sauce’s flavor and make it even better. You have options for cooking these meatballs. You can use the stovetop, slow cooker, or grill them. Each method offers a unique taste. Baking gives them a nice crust, while grilling adds a smoky flavor. Choose the method that fits your time and taste! {{image_2}} You can change the meat in this recipe for fun. Ground chicken or pork works well. These options offer a lighter taste. If you prefer plant-based meals, try mushrooms or lentils. Both options bring a hearty texture. They soak up flavors nicely, just like beef. To make your meatballs even better, add spices. Smoked paprika gives a warm, smoky taste. Cumin adds a nice earthiness. If you want to switch things up, use maple syrup instead of honey. It adds a different sweetness and depth. These meatballs are super versatile! You can pair them with rice or noodles. Another fun idea is to serve them in lettuce wraps. They also work great as appetizers at parties. You can enjoy them as a main dish, too. For the full recipe, check out the previous sections! After you enjoy your honey sriracha meatballs, store any leftovers in an airtight container. This keeps them fresh for up to 3 days. Make sure to let the meatballs cool down before sealing them away. This helps avoid excess moisture, which can make them soggy. If you want to keep your meatballs longer, freeze them cooked. They stay good for up to 3 months. To freeze, place the meatballs in a single layer on a baking sheet. Once they are frozen, move them to a freezer bag. When you’re ready to eat, you can reheat directly from frozen in the oven. Just add a few extra minutes to the cooking time. To keep the meatballs tender, I recommend reheating them in the oven. Preheat your oven to 350°F (175°C) and bake for about 10-15 minutes. This way, they stay nice and juicy. If you need a quick option, the microwave works too. Just heat them for 1-2 minutes, but be careful, as this can make them a bit dry. For best flavor, try the oven! To make your Honey Sriracha Meatballs spicier, you can do a couple of things. First, increase the amount of sriracha in the sauce. You can also add red pepper flakes. Just a pinch can add a kick. Adjust the spice to fit your taste. Yes, you can prepare Honey Sriracha Meatballs in advance. Make the meatballs and store them in the fridge or freezer. If you freeze them, just thaw before baking. This makes meal prep easy and quick for busy days. There are many great options to serve with these meatballs. You can try steamed vegetables, fluffy rice, or a fresh side salad. Each side adds a nice touch to the meal. Choose what you enjoy most! Absolutely! To make this recipe gluten-free, use gluten-free breadcrumbs. Also, check that your soy sauce is gluten-free. These simple swaps make it easy for everyone to enjoy these tasty meatballs. For the full recipe, check out the earlier sections. You can make tasty Honey Sriracha Meatballs by following simple steps. We discussed the key ingredients, easy directions, and how to customize them. You learned storage tips to keep your meatballs fresh. Remember, you can swap proteins, adjust spices, and select your favorite sides. Enjoy making these flavorful meatballs for any meal. Try different twists and enjoy your culinary success!

Honey Sriracha Meatballs Delightful and Easy Recipe

Are you ready to spice up dinner? These Honey Sriracha Meatballs are a game changer! They combine sweet and spicy

For a great vegetable quiche, you need a few key items. Let’s break down what you’ll need: - 1 pre-made pie crust (or homemade if preferred) - 1 cup spinach, chopped - 1 cup mushrooms, sliced - 1 red bell pepper, diced - 1 small zucchini, grated - ½ cup onion, finely diced - 4 large eggs - 1 cup heavy cream - 1 cup shredded cheese (cheddar or your choice) - 1 teaspoon garlic powder - 1 teaspoon fresh thyme (or ½ teaspoon dried thyme) - Salt and pepper to taste - 1 tablespoon olive oil The pie crust is the base of your quiche. You can buy it ready-made or make your own. Using fresh vegetables brings bright flavors. Spinach adds color, while mushrooms give a nice, earthy taste. The red bell pepper adds a sweet crunch, and zucchini gives a soft texture. The egg and dairy mixture binds everything together. Heavy cream makes it rich and smooth. You can choose any cheese you like, but cheddar is a classic choice. Don’t forget the herbs! Thyme adds a fresh, aromatic touch. Garlic powder gives a warm flavor, while salt and pepper enhance everything. With these ingredients, you can create a savory and satisfying vegetable quiche. You can find the Full Recipe to guide you through each step! First, preheat your oven to 375°F (190°C). This step is key for a well-cooked quiche. While the oven heats, let’s prepare the vegetables. In a skillet, add 1 tablespoon of olive oil over medium heat. Next, toss in the diced onion, sliced mushrooms, diced red bell pepper, and grated zucchini. Sauté these for about 5-7 minutes, until they soften. After that, add 1 cup of chopped spinach. Cook for another 2 minutes until it wilts. Season with salt, pepper, and 1 teaspoon of garlic powder. Once done, remove the skillet from the heat and let it cool slightly. In a large mixing bowl, whisk together 4 large eggs and 1 cup of heavy cream until smooth. This mixture will be the base of your quiche. Next, stir in 1 teaspoon of fresh thyme and half of the 1 cup of shredded cheese, which adds flavor and richness. Once your sautéed vegetables have cooled, add them to the egg mixture. Stir until everything is evenly combined. This step ensures each slice is packed with flavor. Now, it’s time to fill the crust. Pour the vegetable and egg mixture into your prepared pie crust. If you are using a pre-made crust, make sure it fits well in your pie dish. Sprinkle the remaining cheese on top for a cheesy finish. Bake your quiche in the oven for 35-40 minutes. You know it’s ready when the center is set and the top is golden. To check, insert a knife into the center. It should come out clean. Once baked, let your quiche cool for about 10 minutes before slicing. This resting time helps it set and makes cutting easier. For the full recipe, refer to the previous section. Enjoy your delicious vegetable quiche! Choosing the right vegetables is key for great flavor and texture. I love using spinach, mushrooms, bell pepper, zucchini, and onion. Each veggie adds a unique taste and color. Spinach gives a nice green pop, while mushrooms add earthiness. Red bell pepper brings sweetness, and zucchini adds moisture. You can mix and match based on your favorites. Fresh, seasonal vegetables always taste best. For a flaky pie crust, keep your ingredients cold. Use chilled butter and ice water when making dough. If you're using a pre-made crust, make sure it fits well in your pie dish. Press down gently to avoid air pockets. Poking holes in the bottom helps steam escape, keeping the crust crispy. Ovens can vary, so adjust cooking time and temperature as needed. If your quiche looks set but still jiggles, give it an extra 5-10 minutes. A good test is inserting a knife in the center. If it comes out clean, it’s done. If you're looking for a crustless quiche, just skip the pie crust. Pour the egg and vegetable mixture directly into a greased pie dish. It cooks just as well and saves time. A crustless version is also lower in carbs, making it a great choice for many diets. For the full recipe, check out the Garden Delight Vegetable Quiche 🥧. {{image_2}} You can make your vegetable quiche even more delicious by adding proteins like bacon or ham. These meats give the quiche a savory twist. Choose crispy bacon or diced ham to mix in with your veggies. This adds richness and flavor. Using different cheeses or spices can change the taste too. Try feta for a tangy kick or Swiss for a nutty flavor. Adding spices like paprika or cumin can also bring new life to your dish. Each choice creates a unique flavor profile that fits your taste buds. If you need a gluten-free option, use a gluten-free crust. Many stores sell ready-made gluten-free crusts. You can also make your own using almond flour or gluten-free oats. For vegetarian and vegan adaptations, swap the eggs and heavy cream with chickpea flour and plant milk. This mixture creates a creamy base that holds everything together. You can also use tofu for a protein boost. These tweaks make your quiche suitable for everyone, no matter their diet. Check out the Full Recipe to explore more ways to enjoy this tasty dish! To keep your vegetable quiche fresh, store it in the fridge. Place leftovers in a tight container. Make sure it cools down first. It will stay good for about three to four days. If you want to save it for longer, freeze your quiche. Wrap it well in plastic wrap or foil. Then, place it in a freezer bag. This way, it can last up to three months. Remember to label the bag with the date. To reheat your quiche, there are a few good methods. The best way is in the oven. Preheat your oven to 350°F (175°C). Place the quiche on a baking sheet. Heat it for about 15 to 20 minutes. This keeps the crust crisp and the filling warm. You can also use the microwave. If you choose this method, heat it in short bursts. Start with 30 seconds, then check. This way, the texture stays nice. For a quick snack, enjoy it cold! The flavors will still be great. For more tips and the full recipe, check out the Garden Delight Vegetable Quiche. How long does homemade vegetable quiche last? Homemade vegetable quiche lasts about 3 to 4 days in the fridge. Make sure to store it in an airtight container. This keeps it fresh and tasty for your next meal. Can I make vegetable quiche ahead of time? Yes, you can make vegetable quiche ahead of time. Just prepare it, bake it, and cool it. Then, cover it and store it in the fridge. You can also freeze it. Just thaw it overnight in the fridge before reheating. What should I serve with quiche? Quiche pairs well with salads or fresh fruit. A simple green salad with a light dressing works great. You can also enjoy it with a fruit platter for a sweet touch. - User-submitted suggestions for enhancements: Some users love adding sun-dried tomatoes or feta cheese for extra flavor. Others suggest using different herbs like basil or oregano. Experiment with your favorites! - Serving suggestions for various meals: Quiche is perfect for brunch or lunch. Serve it with toast or a warm baguette. You can also enjoy it as a light dinner with roasted veggies on the side. Making vegetable quiche is fun and easy. You learned about key ingredients like a good pie crust, fresh veggies, and the egg mixture. Following my step-by-step guide, you can cook a tasty quiche that's perfect for any meal. Use my tips to improve flavor, texture, and baking techniques. Don’t forget the variations to suit different diets. With proper storage and reheating tips, your quiche will stay fresh. Enjoy experimenting with flavors and creating your own delicious quiche at home!

Vegetable Quiche Savory and Satisfying Recipe

Are you ready to whip up a delicious Vegetable Quiche that’s both savory and satisfying? This tasty dish is perfect

- 4 boneless, skinless chicken thighs - 1 cup button mushrooms, sliced - 1 cup cremini mushrooms, sliced - 2 tablespoons olive oil - 3 cloves garlic, minced - 1 teaspoon dried thyme - 1 teaspoon dried rosemary - 1 teaspoon onion powder - Salt and pepper to taste - 1 cup chicken broth - ¼ cup heavy cream - 2 tablespoons fresh parsley, chopped (for garnish) To create the perfect mushroom chicken, I focus on using fresh, high-quality ingredients. The chicken thighs provide a tender base. The button and cremini mushrooms add rich, earthy flavors. For seasoning, I use a blend of herbs. Olive oil helps to bring out the aromas of garlic and herbs. You can adjust the salt and pepper to your taste. The liquid ingredients, like chicken broth and cream, create a creamy sauce. This sauce ties together all the flavors. You can find the full recipe for this delight in my previous section. When gathering ingredients, always choose what looks fresh and vibrant. Quality really matters in making this dish shine! - Season the chicken thighs - Preheat skillet Start by seasoning the chicken thighs. Use salt, pepper, onion powder, thyme, and rosemary. Coat both sides well for full flavor. Next, preheat your skillet over medium-high heat. This helps create a nice crust on the chicken. - Sear the chicken thighs - Set chicken aside Add one tablespoon of olive oil to the hot skillet. Place the seasoned chicken thighs in the skillet. Sear them for about 5-6 minutes on each side until golden brown. Once done, remove the chicken and set it aside. - Sauté the mushrooms - Add garlic In the same skillet, add the remaining tablespoon of olive oil. Toss in the sliced button and cremini mushrooms. Sauté them for 4-5 minutes until golden and tender. Then, stir in the minced garlic and cook for an extra minute. The garlic will make everything smell amazing! - Pour in chicken broth - Simmer for flavor Now, pour in one cup of chicken broth. Be sure to scrape the bottom of the skillet. This releases all those tasty bits! Bring it to a simmer and let it cook for about 2 minutes. This will build the sauce's flavor. - Return chicken to skillet - Simmer until cooked through Next, return the seared chicken thighs to the skillet. Cover and let them simmer for 10-12 minutes. Make sure the chicken reaches an internal temperature of 165°F. This ensures it's safe to eat. - Add cream to sauce - Garnish and serve Lower the heat and stir in the heavy cream. Allow the sauce to thicken for about 2-3 minutes. Taste and adjust seasoning if needed. Finally, sprinkle fresh parsley over the dish before serving. This adds a nice touch of color and flavor. For the full recipe, check out the details above! - Choosing fresh mushrooms: Look for firm, smooth mushrooms with no spots. Fresh mushrooms add great taste. Button and cremini mushrooms work well together. Always wash them gently before use. This keeps their flavor intact. - Adjusting seasonings to taste: Start with the basic seasoning in the recipe. Then, taste as you cook. If you want more flavor, add a pinch of salt or a dash of pepper. You can also try adding more thyme or rosemary. Trust your taste buds! - Best frying techniques for chicken: Use medium-high heat to sear the chicken. This gives a nice golden crust. Make sure the skillet is hot before adding the chicken. Don’t crowd the pan. This helps cook the chicken evenly. - How to achieve perfectly sautéed mushrooms: Sauté mushrooms over medium heat. Give them space in the pan to brown nicely. Stir them often for even cooking. Once they are golden and tender, they are ready for the next step. - Pairing ideas with side dishes: Mushroom chicken pairs well with rice or mashed potatoes. You can also serve it with a fresh salad. Choose something light to balance the creamy sauce. - Serving recommendations for presentation: Serve the dish in a shallow bowl. This highlights the sauce and mushrooms. Sprinkle fresh parsley on top for a pop of color. A slice of lemon on the side adds a nice touch too. For the complete Mushroom Chicken experience, check out the Full Recipe! {{image_2}} You can change the chicken type in this recipe. Try using chicken breasts or drumsticks. Each cut has a unique taste and texture. For mushrooms, you have many options. Shiitake, portobello, or oyster mushrooms can all work well. Each type brings a different flavor to your dish. To boost the flavor, consider adding white wine or sherry. Just pour a splash into the pan after sautéing the mushrooms. This adds depth and richness to the sauce. You can also mix in spinach or other vegetables. Kale, bell peppers, or peas can add color and nutrition. Just toss them in during the last few minutes of cooking. If you need a gluten-free version, use gluten-free chicken broth. Most broths are gluten-free, but always check the label. For a dairy-free option, swap the heavy cream with coconut milk or a dairy-free cream. It keeps the dish creamy without the dairy. These variations let you personalize your mushroom chicken. Feel free to get creative with flavors and ingredients! To store leftovers, let the mushroom chicken cool completely. Place it in an airtight container. This keeps it fresh for up to four days. You can also separate the sauce from the chicken. This helps maintain the chicken's texture. The best container types are glass or plastic with tight lids. These help avoid spills. Choose containers that are the right size. This way, you waste less space in your fridge. For freezing, make sure the dish is cool. Use freezer-safe containers or heavy-duty bags. Remove as much air as possible. This prevents freezer burn and keeps the taste intact. To thaw, move the dish from the freezer to the fridge overnight. This is the safest way. You can also use the microwave, but be careful. Heat it gently to avoid cooking it further. For safe reheating, use a microwave or stove. Heat the chicken until it reaches 165°F. This ensures it is hot and safe to eat. To maintain texture, avoid overcooking. If using the microwave, cover the dish. This keeps moisture in and helps prevent dryness. Stir occasionally for even heating. For the complete recipe, check the Full Recipe section. What can I serve with mushroom chicken? You can serve mushroom chicken with rice or pasta. Mashed potatoes also pair well. A fresh salad adds a nice crunch. Try some steamed veggies for color and nutrition. Can I use dried mushrooms instead of fresh? Yes, you can use dried mushrooms. Just soak them in warm water first. This will help rehydrate and soften them. Use the soaking liquid to add flavor to your dish. How do I know when the chicken is fully cooked? Check the internal temperature of the chicken. It should reach 165°F (75°C). You can also cut into the chicken. The meat should be white with no pink spots. Can I make this recipe in advance? Absolutely! You can cook the dish ahead of time. Just store it in the fridge for up to three days. Reheat gently on the stove or in the microwave. What are the nutritional benefits of chicken and mushrooms? Chicken is a great source of protein. It helps build muscles and keeps you full. Mushrooms provide vitamins and minerals. They are low in calories and high in fiber. Is mushroom chicken a healthy option? Yes, mushroom chicken can be healthy. It has lean protein and vegetables. Just watch the cream and oil you use. With the right balance, it makes a tasty and nutritious meal. In this article, we explored a delicious chicken and mushroom dish. We covered ingredients, step-by-step cooking, and helpful tips. You learned how to enhance flavors and store leftovers. Cooking can be fun and rewarding. Don’t hesitate to try new variations. Whether you stick to the basics or experiment, enjoy your meals. Remember, every dish is a chance to create something special. Happy cooking!

Mouthwatering Mushroom Chicken Creamy Flavor Delight

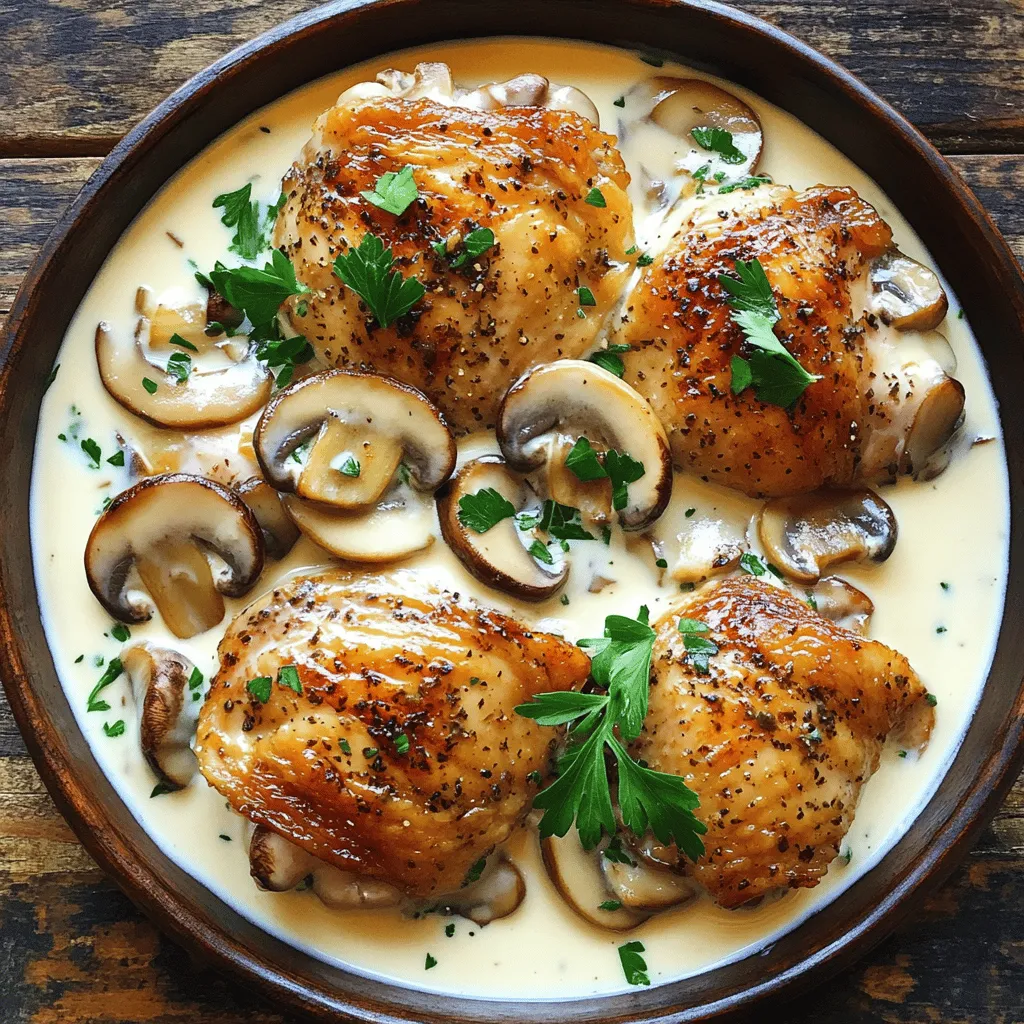
If you’re craving a dish that’s both easy and delicious, you’ve found it! My Mouthwatering Mushroom Chicken Creamy Flavor Delight

For a classic Hummingbird Cake, gather these simple ingredients: - 2 cups all-purpose flour - 1 ½ cups sugar - 1 teaspoon baking soda - ½ teaspoon salt - 1 teaspoon ground cinnamon - 1 cup vegetable oil - 3 large eggs, room temperature - 1 teaspoon vanilla extract - 1 ½ cups crushed ripe bananas (about 3 medium bananas) - 1 cup crushed pineapple, drained - 1 cup finely chopped pecans or walnuts - ½ cup shredded coconut (unsweetened) These ingredients create a moist cake full of flavor. The bananas and pineapple add sweetness and moisture. The nuts and coconut bring a delightful texture. To make the rich cream cheese frosting, you will need: - 8 oz cream cheese, softened - ½ cup unsalted butter, softened - 4 cups powdered sugar - 1 teaspoon vanilla extract - Chopped pecans or coconut for topping (optional) This frosting is creamy and sweet. It pairs perfectly with the fruity flavors of the cake. You can enhance your Hummingbird Cake by adding: - ½ cup of diced mango (for extra flavor) Adding mango gives a tropical twist. Feel free to experiment with other fruits, too! Each add-in will change the flavor and texture. Try different combinations to find your favorite. For the full recipe, refer to the detailed instructions. Start by mixing the dry ingredients. In a large bowl, add 2 cups of all-purpose flour, 1 ½ cups of sugar, 1 teaspoon of baking soda, ½ teaspoon of salt, and 1 teaspoon of ground cinnamon. Whisk these until they blend well. In another bowl, combine 1 cup of vegetable oil, 3 large eggs, and 1 teaspoon of vanilla extract. Beat this mixture until smooth. Next, slowly mix the wet ingredients into the dry ones. Stir gently until just combined. Now, add the fun flavors! Fold in 1 ½ cups of crushed ripe bananas, 1 cup of crushed pineapple (make sure it’s drained), 1 cup of finely chopped pecans or walnuts, and ½ cup of shredded coconut. If you want an extra kick, add ½ cup of diced mango. Now it’s time to bake! Preheat your oven to 350°F (175°C). Grease and flour two 9-inch round cake pans. Divide your batter evenly between the two pans. Bake them in the oven for about 25 to 30 minutes. To check if they are done, insert a toothpick in the center. If it comes out clean, they are ready. Once baked, let the cakes cool in the pans for 10 minutes. After that, carefully transfer them to a wire rack. Allow them to cool completely before frosting. For the cream cheese frosting, start by mixing 8 oz of softened cream cheese and ½ cup of softened unsalted butter in a bowl. Beat them together until creamy. Gradually add in 4 cups of powdered sugar. Then, add 1 teaspoon of vanilla extract. Beat this mixture until it becomes smooth and fluffy. When the cakes are cool, place one layer on a serving plate. Spread a nice layer of cream cheese frosting on top. Place the second layer on top and frost the entire cake with the remaining frosting. You can sprinkle some chopped pecans or shredded coconut on top for a lovely finish. Enjoy your delightful Hummingbird Cake! For the complete recipe, check the [Full Recipe]. To keep your hummingbird cake moist, use ripe bananas and fresh pineapple. They add natural sweetness and moisture. Make sure to drain the pineapple well. Extra liquid can make the cake soggy. Use room temperature eggs and oil for better mixing. This helps the batter come together smoothly. Another tip is to not overmix the batter. Mix just until combined to keep your cake light and fluffy. When it comes to decorating, cream cheese frosting is a must. Spread a thick layer on top and sides. For added flair, sprinkle chopped pecans or shredded coconut on top. You can even add edible flowers for a pop of color. For a tropical theme, place slices of fresh mango on top. This enhances the cake's flavor and looks stunning. Avoid using unripe bananas; they won’t give the cake the right taste. Also, don’t skip the baking soda. It helps the cake rise. Another mistake is not checking the cakes for doneness. Use a toothpick; if it comes out clean, your cake is ready. Lastly, let your cakes cool completely before frosting. This prevents the frosting from melting and sliding off. For the full recipe, check out the Tropical Hummingbird Cake section. {{image_2}} You can easily add a tropical twist to your hummingbird cake. Try adding diced mango for a burst of flavor. Fresh passion fruit can also bring a bright, zesty taste. Replace some bananas with ripe papaya for a fun change. These fruits blend well with the cake's sweetness. If you need a gluten-free cake, use gluten-free flour. Look for one that works in a 1:1 ratio with regular flour. You may also add a bit of almond flour for extra moisture. Ensure your baking soda is gluten-free too. This way, you can enjoy a tasty cake that fits your needs. To make a vegan hummingbird cake, swap eggs for flaxseed meal. Mix one tablespoon of flaxseed with three tablespoons of water. Let it sit until it thickens. Use a plant-based oil and coconut yogurt instead of cream cheese in the frosting. This makes a rich, creamy texture without using dairy. To keep your Hummingbird Cake fresh, store it in an airtight container. This helps keep moisture in and prevents it from drying out. You can also wrap it tightly in plastic wrap. If you plan to eat it within a few days, store it at room temperature. If not, refrigerate it to extend its life. You can freeze Hummingbird Cake for later enjoyment. First, let the cake cool completely. Then, wrap each layer in plastic wrap and foil. This will keep the cake fresh for up to three months. When you're ready to eat it, thaw the cake in the fridge overnight. When stored properly, Hummingbird Cake lasts about 3 to 5 days in the fridge. If it's at room temperature, aim to enjoy it within 2 to 3 days. Always check for any signs of spoilage before eating. For the best taste and texture, eat it fresh, but it still tastes great after storage! You can find the full recipe for this delightful treat and learn how to make it at home. Hummingbird Cake comes from the Southern United States. It first appeared in a Jamaican recipe in the 1960s. A popular fruit cake, it uses bananas and pineapple. Its sweet taste makes it a favorite at parties. People often serve it with cream cheese frosting. The cake is named after the hummingbird, which loves sweet nectar. Yes, you can definitely use fresh fruit! If you choose fresh fruit, it can add great flavor. Use ripe bananas and fresh pineapple for the best taste. Make sure to mash the bananas well. For the pineapple, chop it into small pieces. This swap keeps the cake moist and delicious. To boost flavor, think about adding spices. More cinnamon or nutmeg can enhance the cake. You might also add a splash of rum or coconut extract. Another great idea is to mix in extra fruit. Diced mango or even dried fruit can add a new layer. Adjust the sugar to keep it sweet but balanced. For the full recipe, check out the Tropical Hummingbird Cake section above! Hummingbird cake is a delightful blend of flavors. We explored its key ingredients, from traditional components to tasty add-ins. You learned how to bake the cake and whip up cream cheese frosting. I shared tips to keep your cake moist and added simple decorating ideas. You also discovered variations like gluten-free and vegan options. In summary, this cake is versatile and fun to make. Enjoy creating your own version and share it with family and friends. Hummingbird cake will surely impress everyone!

Hummingbird Cake Delightful Recipe to Try Today

Hummingbird cake is a taste of sunshine in every bite. This delightful dessert mixes banana, pineapple, and spices for a

To make a delightful Ambrosia Salad, gather these key ingredients: - Mini marshmallows - Shredded sweetened coconut - Diced pineapple - Mandarin oranges - Halved strawberries - Greek yogurt - Sour cream - Honey - Vanilla extract - Chopped pecans or walnuts If you want to switch things up, try these alternatives: - Replace Greek yogurt with dairy-free yogurt or silken tofu. - Use coconut cream for a rich, dairy-free option. - Pick seasonal fruits like blueberries or peaches for fresh flavors. This salad is not just tasty, but also nutritious: - Approximately 150 calories per serving. - Rich in vitamin C and fiber. - It's gluten-free and vegetarian, making it a great choice for many diets. Making Ambrosia Salad takes about 15 minutes to prep and an hour to chill. You will need a large mixing bowl and a separate small bowl for mixing the yogurt. A spatula or spoon is also helpful for folding the ingredients together. 1. Mixing fruits and marshmallows: Start by taking a large mixing bowl. Add 1 cup of mini marshmallows, 1 cup of shredded coconut, 1 cup of diced pineapple, 1 cup of mandarin oranges, and 1 cup of halved strawberries. Gently toss these together until they mix well. 2. Preparing the yogurt mixture: In a small bowl, combine 1/2 cup of Greek yogurt, 1/2 cup of sour cream, 1 tablespoon of honey (if you want it sweeter), and 1/4 teaspoon of vanilla extract. Stir until the mixture is smooth and creamy. 3. Combining and chilling the salad: Pour the yogurt mixture over the fruit and marshmallow mix. Carefully fold it in, making sure the fruits are coated but not mashed. If you like, add 1/4 cup of chopped pecans or walnuts for extra crunch. Cover the bowl with plastic wrap and place it in the fridge for at least 1 hour. This chilling time lets the flavors blend and cools the salad. For serving, choose a clear glass bowl or individual cups to show off the colorful layers. Top each serving with a sprinkle of coconut or nuts for extra flair. Enjoy this delightful and refreshing Ambrosia Salad as a sweet treat or a fun side dish at your next gathering. To make your Ambrosia Salad really shine, chilling time is key. I recommend letting it chill for at least one hour. This time allows the flavors to blend well. The coolness also makes it refreshing. When you choose your fruit, avoid overly mushy pieces. Fresh fruits like strawberries and pineapple work best. If you use canned fruit, ensure it’s well-drained. This step helps keep your salad from becoming too wet. If you want to prepare your Ambrosia Salad ahead, it’s easy! Mix the fruit and yogurt just before serving. This keeps everything fresh and crunchy. Store your salad in an airtight container. Keep it in the fridge until you’re ready to serve. It will stay good for up to three days. Just remember, the longer it sits, the softer the fruit gets. Creative plating can make your Ambrosia Salad pop! Use clear bowls to show off the colorful layers. You can also serve them in small cups for individual servings. At parties, consider adding a sprig of mint on top for a touch of green. It makes the dish look fancy. Your friends will love it! {{image_2}} The classic Ambrosia Salad is a sweet mix of fruits and cream. It usually has: - Mini marshmallows - Shredded sweetened coconut - Diced pineapple - Mandarin oranges - Halved strawberries - Greek yogurt - Sour cream This recipe is simple and tasty. You can twist it for a modern touch. Try adding: - Fresh berries like blueberries or raspberries - Chopped apples for crunch - A splash of citrus juice for zing These twists can change the flavor and keep it fresh. You can make a low-sugar version of Ambrosia Salad. Use fresh fruits instead of sweetened ones. Swap Greek yogurt with: - Low-fat yogurt - Plain yogurt If you want a vegan option, use: - Coconut yogurt - Silken tofu for creaminess These options keep the taste while cutting calories. Adding unique fruits can make your Ambrosia Salad stand out. Here are some ideas: - Kiwi adds a tart flavor. - Mango brings a sweet tropical touch. - Pomegranate seeds offer crunch and color. You can also experiment with nuts and toppings. Consider: - Almonds for a light crunch - Sunflower seeds for a nut-free option Mixing flavors keeps every bite exciting and fun. Enjoy creating your own version! For the full recipe, check out the Tropical Ambrosia Delight. To keep your Ambrosia Salad fresh, store it in an airtight container. This helps prevent odors from other foods in your fridge. It is best to refrigerate the salad right after serving. Proper storage keeps the salad tasting great. The shelf life of Ambrosia Salad is about 3 to 5 days in the fridge. After that, the fruits may start to lose their texture. Always check for freshness before enjoying leftovers. You can freeze Ambrosia Salad, but some ingredients may change texture. If you want to freeze it, do so before adding fresh fruit. To freeze, place the salad in a freezer-safe container. Leave some space at the top for expansion. When ready to eat, thaw it in the fridge overnight. This helps keep the flavors intact. To tell if your Ambrosia Salad has gone bad, look for changes in color or texture. If the fruit looks mushy or discolored, it is best to discard it. A sour smell is also a sign that it is no longer safe to eat. Safety tips for food storage include checking the date you made the salad. Always use clean utensils when serving. This prevents bacteria from getting into your food. Ambrosia salad is a sweet, fruity dish. It has roots in the southern United States. Traditionally, it mixes fruits with creamy ingredients like yogurt and marshmallows. This dish often brings a sense of nostalgia, reminding many of family gatherings and potlucks. Yes, you can skip the marshmallows. You can use extra fruit instead. Chopped apples or berries add great texture. Some people like to use granola for crunch. This can give your salad a unique twist. You can keep Ambrosia salad for about 3 days in the fridge. Make sure to store it in an airtight container. To keep it fresh, avoid adding nuts until just before serving. You can add many fruits to Ambrosia salad. Here are some popular choices: - Bananas - Kiwi - Grapes - Blueberries - Peaches Mix and match based on your taste! Ambrosia salad can be both! Some serve it as a sweet dessert, while others use it as a side. It fits well at picnics, barbecues, and holiday meals. Its creamy texture and fruity flavor make it a crowd-pleaser. In this blog post, we explored the delicious world of Ambrosia Salad. We covered essential ingredients, substitutions, and nutritional tips. I shared step-by-step instructions and serving ideas to make it shine. You can personalize your salad with unique flavors and variations to make it truly yours. Remember, proper storage ensures freshness, and knowing when to throw it out keeps you safe. Ambrosia Salad is versatile, fun, and perfect for any occasion. Enjoy making it your way!

Ambrosia Salad Delightful and Refreshing Recipe

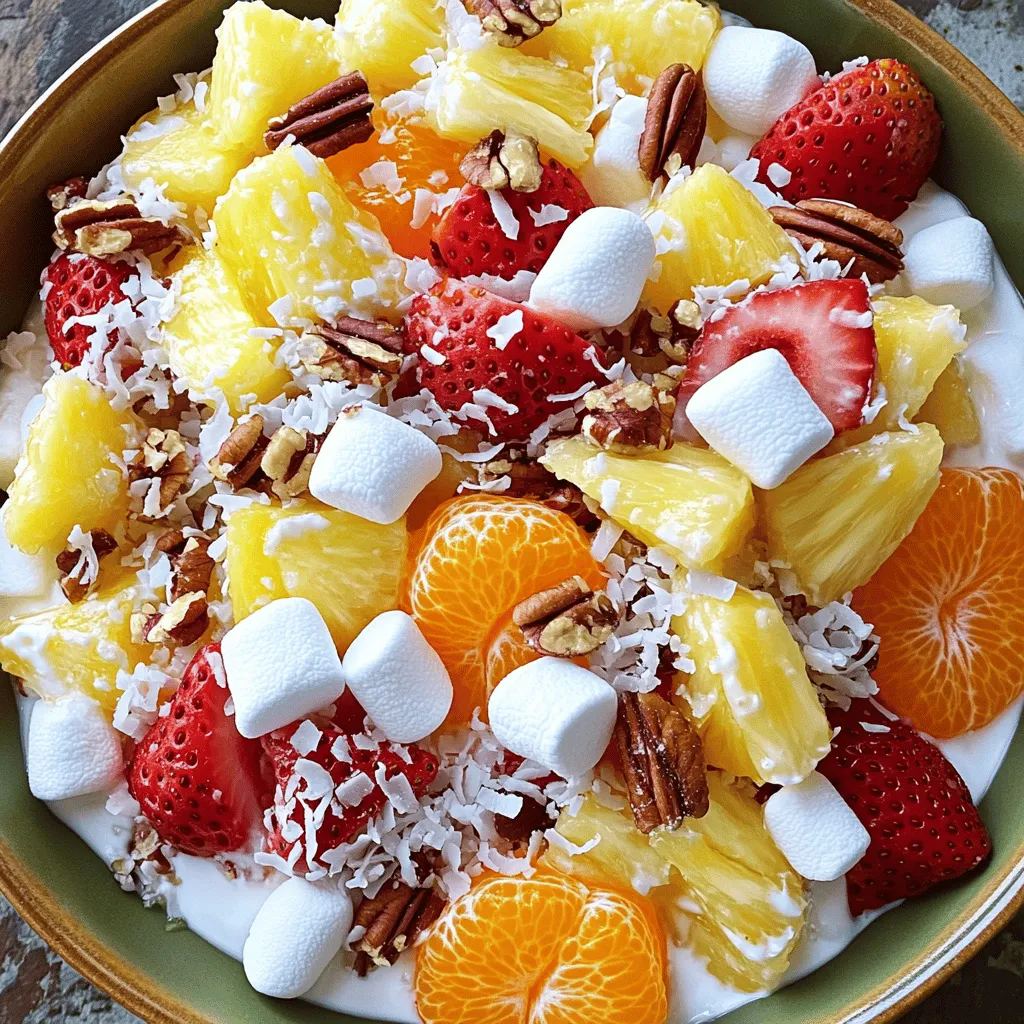
If you’re craving a treat that’s both fun and refreshing, Ambrosia Salad is for you! This delightful mix of fruits

For a vibrant spring vegetable stir-fry, use these fresh spring vegetables: - 1 cup snap peas, trimmed - 1 bell pepper (red or yellow), sliced - 1 zucchini, sliced into half-moons - 1 cup asparagus, cut into 2-inch pieces - 1 cup baby spinach - 1/2 cup carrots, julienned These vegetables bring color and crunch to your dish. Each has unique tastes and nutrients. Season your stir-fry for the best flavor. Here are the must-have seasonings: - 2 garlic cloves, minced - 1-inch piece ginger, grated - 3 tablespoons soy sauce (low sodium if preferred) - 2 tablespoons sesame oil These ingredients add depth and warmth. The garlic and ginger offer a fragrant aroma that wakes up your dish. For a touch of sweetness, consider these options: - 1 tablespoon honey or maple syrup (for sweetness) - Sesame seeds for garnish Adding a bit of honey or maple syrup balances the savory taste. Finish with sesame seeds for a lovely crunch and look. For the full recipe and step-by-step instructions, check out the [Full Recipe]. Start by washing all your vegetables. Clean snap peas, bell pepper, zucchini, asparagus, and carrots. Slice the bell pepper and zucchini into thin pieces. Cut the asparagus into 2-inch sections. Julienned carrots should be thin strips. Mince the garlic and grate the ginger. This prep makes your stir-fry quick and easy. Heat a large skillet or wok over medium-high heat. Add the sesame oil once the pan is hot. Next, toss in the minced garlic and grated ginger. Stir for about 30 seconds until you smell their strong aroma. Now, add the snap peas, bell pepper, zucchini, asparagus, and carrots. Stir-fry for 4-5 minutes. You want the veggies to be tender but still crisp. Pour in the soy sauce and honey (or maple syrup). Mix everything well and cook for another 2-3 minutes. Last, add the baby spinach to the pan. Stir until it wilts, which should take just a minute. Season with salt and pepper to your taste. Remove the pan from heat. Garnish with sesame seeds before serving. For a tasty presentation, serve over steamed jasmine rice or quinoa. Arrange the colorful veggies nicely on the plate. Enjoy your vibrant Spring Vegetable Stir-Fry! For the full recipe, check the ingredients section above. To make a great stir-fry, start with a hot pan. Heat your skillet or wok on medium-high. Add sesame oil when the pan is hot. This makes your veggies sizzle and cook fast. Cut the vegetables into similar sizes. This ensures they cook evenly. Stir and toss them often to avoid burning. Keep the colors bright and the crunch alive. You can add flavor in many ways. Use fresh garlic and ginger for a strong base. Soy sauce gives a salty taste. For a sweet hint, drizzle honey or maple syrup. Try adding a splash of rice vinegar for tang. A bit of chili paste can spice things up. Finally, sprinkle sesame seeds on top for crunch. Serve your stir-fry over steamed jasmine rice or quinoa. This makes the dish filling and balanced. You can also add protein like tofu or chicken. Arrange your colorful veggies on the plate for a feast for the eyes. For a special touch, drizzle extra sesame oil before serving. Check out the Full Recipe for more tips on making this dish shine! {{image_2}} You can mix in other fresh veggies for fun. Try using broccoli, bok choy, or snow peas. These choices bring new textures and flavors. You might also add mushrooms for an earthy taste. Carrots can be swapped for bell peppers if you prefer. Remember, the key is to keep it colorful and fresh. To make your stir-fry more filling, add protein. Chicken, beef, or shrimp works well. If you want plant-based options, tofu or tempeh are great choices. Just cube them and cook with the garlic and ginger. This way, they soak up all the flavors. Adding nuts like cashews or almonds can also bring crunch and protein. If you need to make this dish gluten-free, use tamari instead of soy sauce. It has a similar taste without the gluten. For a vegan option, skip the honey and use maple syrup. You can also try agave syrup for sweetness. These simple swaps keep the dish tasty for everyone. For the protein, focus on legumes like chickpeas or lentils. They add nutrition and are very filling. For the full recipe, check the earlier section. After enjoying your spring vegetable stir-fry, let any leftovers cool. Store them in a clean, airtight container. This keeps the flavors fresh and prevents odors. You can place them in the fridge for up to three days. Make sure to label the container with the date. This way, you won’t forget when you made it! When you are ready to eat your leftovers, reheating is key. Use a skillet or wok on low heat. Add a splash of water or soy sauce to keep the veggies moist. Stir them gently until warm. This helps maintain their crunch. You can also use a microwave if you need to be quick. Just cover the bowl to keep moisture in. If you want to keep your stir-fry longer, freezing is a good choice. First, let it cool completely. Then transfer it to a freezer-safe container. You can also use freezer bags for easier storage. Squeeze out as much air as possible. This way, the flavors stay locked in. It can last up to three months in the freezer. When you want to eat it, thaw it in the fridge overnight before reheating. Enjoy your delicious meal whenever you like! Cutting vegetables properly makes a big difference. First, aim for even sizes. This helps them cook at the same rate. For stir-frying, cut vegetables into bite-sized pieces. Thin strips or small chunks work best. This method allows for quick cooking and a better texture. For example, slice bell peppers and zucchini into thin strips. Julienne carrots for a nice crunch. Yes, you can use frozen vegetables in this stir-fry. They save time and still taste good. Just remember to thaw them slightly before cooking. This helps avoid excess water in the dish. If you use frozen veggies, toss them in right after the garlic and ginger. Cook them for a few extra minutes until they are heated through. To amp up the flavor of your stir-fry, add more seasonings. You can include different sauces like oyster sauce or chili paste. Fresh herbs, like basil or cilantro, add a nice touch too. A squeeze of lime juice can brighten the dish. Experimenting with these options will make your stir-fry even better. For more ideas, check out the Full Recipe. In this post, we explored how to make a tasty stir-fry. We covered fresh spring veggies, essential oils, and sweeteners. You learned step-by-step instructions to prepare and serve your dish. Tips on cooking technique and flavor boosters made it easy. We also discussed fun variations and helpful storage tips. Remember, a good stir-fry is all about balance and freshness. Enjoy experimenting with different flavors!

Spring Vegetable Stir-Fry Flavorful and Nutritious Meal

Spring is here, and it’s the perfect time to whip up a vibrant Spring Vegetable Stir-Fry! Packed with fresh veggies,

To make this Italian baked chicken, you'll need a few main items. Here is what you need: - 4 bone-in, skin-on chicken thighs - 1 cup cherry tomatoes, halved - 1 medium zucchini, sliced into half-moons - 1 red bell pepper, chopped - 1/4 cup olive oil - 1/4 cup grated Parmesan cheese These main ingredients create a hearty, filling meal. The chicken thighs are juicy and flavorful. The veggies add color and nutrients. Next, we need the right seasonings to bring out the best flavors. Here’s what to use: - 1 teaspoon garlic powder - 1 teaspoon onion powder - 1 teaspoon dried oregano - 1 teaspoon dried basil - 1 teaspoon dried thyme - 1/2 teaspoon red pepper flakes (optional) - Salt and pepper, to taste These seasonings make your chicken taste great. They provide a distinct Italian flair. The red pepper flakes add a little spice, but you can leave them out if you prefer it mild. Vegetables not only add flavor but also boost nutrition. Use these veggies for a colorful dish: - 1 cup cherry tomatoes - 1 medium zucchini - 1 red bell pepper The cherry tomatoes burst with flavor as they roast. The zucchini becomes tender, and the bell pepper adds sweetness. Together, they create a balanced meal that tastes fantastic. For the full recipe, you can refer to the [Full Recipe]. Start by preheating your oven to 400°F (200°C). This temperature cooks the chicken evenly. Grab a large baking sheet or dish. Make sure it is ready for the chicken and veggies. In a small bowl, mix the garlic powder, onion powder, oregano, basil, thyme, red pepper flakes, salt, and pepper. Rub these spices all over the chicken thighs. Be sure to coat them well. This step adds rich flavor to every bite. In another bowl, combine cherry tomatoes, zucchini, and red bell pepper. Drizzle half the olive oil over the veggies. Add salt and pepper, then toss until well coated. Place the chicken thighs skin-side up on your baking sheet. Surround the chicken with the mixed vegetables. Drizzle the rest of the olive oil over everything. Finally, sprinkle grated Parmesan cheese on top. This creates a tasty crust. Bake for 30-35 minutes. Check the internal temperature; it should be 165°F (74°C). The skin should be golden and crispy. Let it rest for 5 minutes, then garnish with fresh basil before serving. For the complete recipe, see the Full Recipe. To season the chicken well, blend the dry spices together. Use garlic powder, onion powder, oregano, basil, thyme, salt, and pepper. Rub this mix all over the chicken. Make sure to coat every part. This gives the chicken great flavor. You can add red pepper flakes for a little heat. For crispy skin, start with bone-in, skin-on chicken thighs. These help lock in moisture. When seasoning, let the chicken sit for a bit. This allows the spices to soak in. Bake the chicken at the right temperature. The hot oven creates a nice, crispy texture. You can also drizzle olive oil on top. It helps crisp up the skin even more. Set your oven to 400°F (200°C). This temperature works great for roasting chicken. It cooks the meat evenly and keeps it juicy. Make sure to preheat the oven before placing the chicken inside. This step is key for getting that perfect golden-brown skin. Always check the chicken's internal temperature. It should reach 165°F (74°C) for safe eating. For more details, check the Full Recipe. {{image_2}} You can change the veggies in this dish. Try broccoli, asparagus, or carrots. Each adds its own flavor. Use what you like or what you have. You can also mix frozen vegetables for a quick option. Just remember to adjust the cooking time if needed. If you want a twist, try other herbs. You can use rosemary or sage for a different taste. Adding lemon zest or balsamic vinegar can brighten the dish. For a Mediterranean flair, mix in some za'atar or sumac. Feel free to experiment with what you have on hand. For a kick, add more red pepper flakes. If you love heat, try cayenne pepper. A dash of hot sauce can also work well. Spice levels depend on your taste. Start small and add more if you like. This dish can be as mild or spicy as you want. For the full recipe, check out the details above. To keep your Italian baked chicken fresh, let it cool down first. Place the chicken in an airtight container. You can also add the veggies to the same container. Store it in the fridge for up to three days. Make sure to label the container with the date. This way, you won't forget when you cooked it. When you're ready to eat your leftovers, preheat the oven to 350°F (175°C). Place the chicken and veggies on a baking sheet. Cover them with foil to keep the moisture in. Heat for about 15-20 minutes. If you want, you can also use a microwave. Heat in short bursts, checking every minute. This keeps the chicken juicy. If you want to save the chicken for later, freezing is a great option. Wrap the cooled chicken tightly in plastic wrap. Then, place it in a freezer bag. Make sure to squeeze out all the air. This helps prevent freezer burn. You can freeze it for up to three months. When you're ready to cook it, thaw it in the fridge overnight before reheating. For more details on how to prepare this dish, check out the Full Recipe. You can serve Italian baked chicken with many tasty sides. A fresh green salad pairs well. You can also enjoy it with garlic bread or pasta. Roasted vegetables add color and flavor. Mashed potatoes are another great choice, too. For a hearty meal, serve it with risotto. Choose sides that you love to make it special. Yes, you can prep Italian baked chicken ahead of time. Season the chicken and store it in the fridge for up to 24 hours. You can also chop the vegetables in advance. This way, dinner time becomes easy. Just assemble everything and bake when you're ready. Making it in advance saves time on busy nights. The best way to check chicken doneness is with a meat thermometer. Insert it into the thickest part of the chicken. It should read 165°F (74°C) to ensure it is safe to eat. If you don’t have a thermometer, cut into the chicken. The juices should run clear, not pink. Always ensure it is fully cooked for the best taste and safety. In this post, we explored how to make Italian Baked Chicken. We covered the key ingredients, from chicken to seasonings and vegetables. I provided step-by-step instructions for preparation and baking, along with tips for perfect seasoning and crispy skin. You learned about variations and how to store leftovers. Cooking this dish can be fun and tasty. With these tips, you can impress your family and friends. Enjoy the journey of creating this delicious meal!

Italian Baked Chicken Flavorful Dish for Every Meal

Looking for a tasty meal that’s easy to make? Italian Baked Chicken is the answer! This dish bursts with flavor

- 400g udon noodles - 3 tablespoons chili oil - 2 garlic cloves, minced - 1 inch ginger, grated Udon noodles are thick and chewy. They soak up flavors well. Chili oil adds spice and depth. Garlic and ginger give a fresh kick. Their scents fill your kitchen with warmth. - 1 tablespoon soy sauce - 1 tablespoon sesame oil - 1 tablespoon rice vinegar - 1 tablespoon sugar Soy sauce brings umami to the mix. Sesame oil adds a nutty flavor. Rice vinegar balances the taste. Sugar gives a hint of sweetness, making this sauce complete. - 1 cup bok choy, chopped - 1 red bell pepper, thinly sliced - 2 green onions, chopped - Sesame seeds for garnish - Fresh cilantro for garnish Bok choy adds crunch and a green touch. Red bell pepper adds color and sweetness. Green onions give a fresh bite. Sesame seeds and cilantro are great for a pretty finish. For the full recipe, check out the Full Recipe section. - Bring a large pot of water to a boil. - Add the udon noodles and cook for 8-10 minutes. - Check the package for exact cooking time. - Drain the noodles and set them aside. - Heat 3 tablespoons of chili oil in a large skillet over medium heat. - Once hot, add 2 minced garlic cloves and 1 inch of grated ginger. - Sauté for 1-2 minutes until fragrant but not burnt. - Toss in 1 cup of chopped bok choy and 1 sliced red bell pepper. - Stir-fry for 3-4 minutes until the veggies are tender-crisp. - In a small bowl, mix 1 tablespoon each of soy sauce, sesame oil, rice vinegar, and sugar. - Stir until the sugar dissolves. - Add the drained udon noodles to the skillet with the vegetables. - Pour the sauce mixture over the noodles and toss well. - Cook for an additional 2-3 minutes to heat everything through. - Serve in deep bowls, garnished with chopped green onions, sesame seeds, and fresh cilantro. - Drizzle with extra chili oil for a spicy kick. For the full recipe, check the detailed instructions above. Enjoy your flavorful chili oil udon noodles! To cook udon noodles, follow the package’s cooking time. Usually, it takes about 8-10 minutes. Check the texture by tasting a noodle. You want it soft but still firm. If you prefer a bite, cook for a minute less. This makes the noodles perfect for stir-frying. Chili oil packs a punch, but you can adjust the spice. If you like it milder, use less chili oil. You can also add some soy sauce for more depth. For a fresh twist, try adding a splash of lime juice. Other seasonings like garlic powder or black pepper can boost flavor too. Serve your chili oil udon noodles in deep bowls. This adds a nice touch. Drizzle a bit more chili oil on top for color. For garnishes, green onions give a nice crunch. Sesame seeds add a nutty flavor. Fresh cilantro brightens the dish. Mix and match these garnishes for a fun look. Check the Full Recipe for more serving ideas. {{image_2}} You can make your chili oil udon noodles more filling by adding proteins. Chicken, shrimp, or tofu work great. For chicken, cut it into bite-sized pieces. Sauté it in the chili oil until cooked through. For shrimp, add them when the garlic and ginger are fragrant. Cook until they turn pink. If you choose tofu, use firm tofu. Cut it into cubes and pan-fry until golden. This adds both texture and flavor to your dish. If you want a vegetarian or vegan version, you can easily swap some ingredients. Use tamari instead of soy sauce for a gluten-free option. Instead of chili oil, try using garlic oil for a milder taste. Adding more vegetables, like snap peas or carrots, makes the dish colorful and nutritious. You can even toss in some mushrooms for extra umami flavor. The spice level in your chili oil udon noodles can be adjusted easily. If you prefer mild noodles, use less chili oil or choose a milder brand. You can also add a splash of coconut milk to tone down the heat. For those who love spice, feel free to add more chili oil. Just remember to taste as you go. This way, you’ll find the heat level that suits your palate. To keep your chili oil udon noodles fresh, store them in the fridge. Place the noodles in an airtight container. This helps keep moisture in and prevents them from drying out. Make sure to cool the noodles before sealing the container. They will stay good for about three days. If you have sauce left, store it separately. This keeps the noodles from getting soggy. When you’re ready to eat leftovers, reheating is key. Use a pan on low heat. Add a splash of water or broth to keep them moist. Stir often to warm evenly. Avoid using the microwave if you want to keep the texture. Microwaving can make the noodles chewy and dry. If you want to save your chili oil udon noodles for later, freezing is a great choice. First, let the noodles cool completely. Then, place them in a freezer-safe bag. Squeeze out as much air as you can before sealing. This prevents freezer burn. They can last for up to three months in the freezer. When you’re ready to eat, thaw them in the fridge overnight. Reheat in a pan as mentioned above. Enjoy your tasty noodles even after freezing! For the full recipe, check out the earlier section. You can use several types of noodles if you cannot find udon. Here are some alternatives: - Soba noodles: These are thin and made from buckwheat. - Rice noodles: Great for a gluten-free option. - Spaghetti: This is a common substitute, but it will change the flavor. For gluten-free options, consider: - Rice noodles: They work well in this dish. - Zoodles: Spiralized zucchini adds a fresh twist. Yes, making chili oil at home is simple and fun! You need a few basic ingredients: - Oil: Use vegetable or canola oil. - Chili flakes: Adjust the amount based on your spice level. - Garlic: Whole cloves or minced work great. Here are the steps to prepare it: 1. Heat oil in a small pan over low heat. 2. Add chili flakes and garlic. 3. Cook until the garlic is golden, then let it cool. You can find chili oil udon noodles at local markets. Check these options: - Asian grocery stores: They often carry udon noodles and chili oil. - Health food stores: Some have a good selection of specialty noodles. You can also purchase them online. Websites like Amazon or specialty food sites offer many options. Look for brands that focus on quality ingredients. This blog covered how to make chili oil udon noodles from start to finish. We explored the main ingredients like udon noodles, chili oil, and veggies. You learned how to cook the noodles, prepare the sauce, and mix everything together. I also shared tips for storage and creative variations. Now, you can enjoy a tasty dish that’s easy to make. Feel free to adapt the recipe to fit your taste. Embrace the cooking journey and let this meal bring joy to your table.

Chili Oil Udon Noodles Flavorful and Simple Recipe

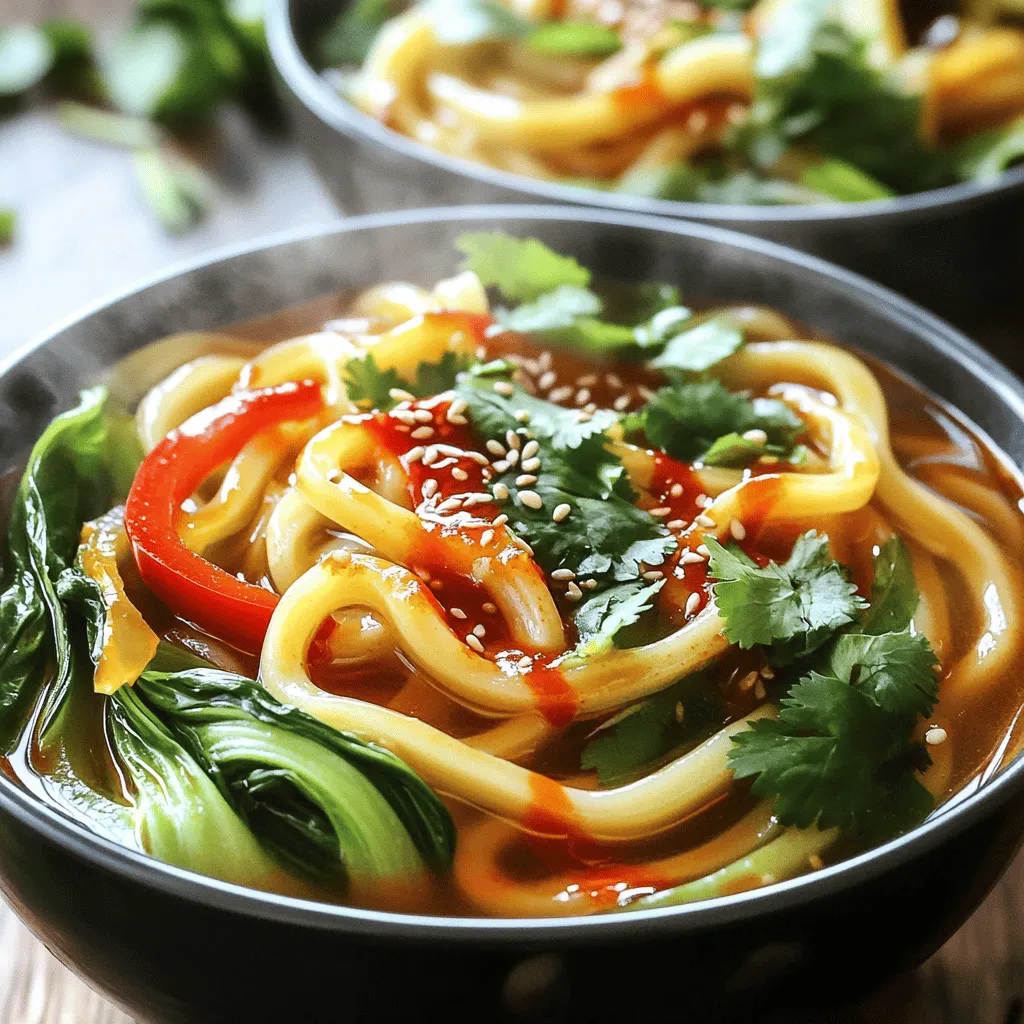
Craving a flavor-packed meal that’s easy to make? Let me introduce you to Chili Oil Udon Noodles! This dish combines

To make a great coconut cream pie, you need a few key ingredients: - 1 ½ cups graham cracker crumbs - ½ cup unsweetened shredded coconut, toasted - ½ cup unsalted butter, melted - 1 cup granulated sugar These ingredients create the base and filling of the pie. The graham cracker crumbs form a sweet and crunchy crust, while the unsweetened shredded coconut adds that tasty coconut flavor. For the filling, we also need: - ¼ cup cornstarch - ½ teaspoon salt - 2 cups whole milk - 4 large egg yolks, lightly beaten - 1 teaspoon pure vanilla extract The cornstarch helps thicken the filling, while the milk and egg yolks create a rich and creamy texture. The vanilla extract adds a lovely aroma and taste. To finish off our pie, we will use: - 1 ½ cups heavy whipping cream - 3 tablespoons powdered sugar - Extra toasted coconut and whipped cream for garnish The heavy whipping cream becomes a fluffy topping, while the powdered sugar sweetens it up. The extra toasted coconut adds a nice touch for garnish. For the full recipe, visit Tropical Coconut Cream Pie 🥥. 1. Preheat your oven to 350°F (175°C). This step is key for a crispy crust. 2. Mix the crust ingredients: In a medium bowl, combine 1 ½ cups of graham cracker crumbs, ½ cup of toasted shredded coconut, and ½ cup of melted unsalted butter. Add ¼ cup of granulated sugar too. Mix well until crumbly. 3. Press the mixture firmly into the bottom and sides of a 9-inch pie dish. This helps form a sturdy base. 4. Bake the crust: Place the pie dish in the preheated oven. Bake for 8-10 minutes or until golden brown. Remove it and let it cool completely. 1. Combine the filling ingredients: In a saucepan over medium heat, whisk together 1 cup of sugar, ¼ cup of cornstarch, and ½ teaspoon of salt. This forms the base of your filling. 2. Gradually add milk: Slowly pour in 2 cups of whole milk while whisking continuously. Keep whisking until smooth. 3. Cook the mixture: Stir constantly until it thickens and starts to bubble. This usually takes a few minutes. Once it thickens, remove it from the heat. 4. Incorporate egg yolks: Take a small amount of the hot mixture and whisk it into 4 large beaten egg yolks. This tempers the yolks. Then, pour the yolk mixture back into the saucepan, stirring constantly for another minute. 5. Finish the filling: Remove from heat again. Stir in 1 teaspoon of pure vanilla extract and 1 cup of shredded coconut. Let the filling cool slightly before pouring it into the cooled crust. 1. Pour the filling into the cooled crust. Spread it evenly. Then cover with plastic wrap and refrigerate for at least 4 hours or until set. 2. Whip the cream: In a large mixing bowl, beat 1 ½ cups of heavy whipping cream with 3 tablespoons of powdered sugar until stiff peaks form. 3. Top the pie: Once the pie has set, spread the whipped cream evenly over the top. 4. Garnish with coconut: Add extra toasted coconut on top to make it look beautiful and tasty. Now you have a delicious coconut cream pie ready to enjoy! For the full recipe, check out Tropical Coconut Cream Pie. Tempering egg yolks is key for a creamy filling. If you add hot mixture directly, you risk scrambling the eggs. - To temper, take a small amount of the hot filling and mix it with the yolks. - Then, slowly pour this yolk mix back into the pot, stirring all the while. This method helps the filling cook evenly and become smooth. For a velvety texture, whisk continuously while cooking. This keeps the mixture lump-free. To make your pie even more delightful, consider adding flavors like almond extract. A tiny splash can add depth without overpowering the coconut. To boost coconut flavor, use both shredded coconut and coconut milk. This gives layers of coconut taste and aroma. Also, try toasting the shredded coconut before adding it. This adds a nutty flavor that's simply amazing. Garnishing can elevate your pie. For a fun touch, use extra toasted coconut. It adds texture and looks beautiful on top. You can also add fresh fruit, like mango slices or berries, for a pop of color. When serving, cut neat slices and place each piece on a colorful plate. This makes your dessert even more inviting. {{image_2}} To make a vegan coconut cream pie, you need to swap out dairy and eggs. Use coconut milk or almond milk instead of whole milk. Instead of egg yolks, you can use a mix of cornstarch and water. This will help thicken the filling just right. For whipping cream, look for plant-based options. Brands now offer coconut cream or almond cream. These will give you a similar taste and texture to traditional whipped cream. You can still enjoy the same creamy, luscious pie without the dairy. If you need a gluten-free coconut cream pie, start with the crust. Use a gluten-free graham cracker or make one from gluten-free flour. Just crush the crackers and mix them with melted butter. This will help create a tasty base. Check all your other ingredients too. Make sure your sugar, cornstarch, and coconut are gluten-free. This way, everyone can enjoy a slice without worry. You can add a fun twist to your coconut cream pie by including fresh fruit. Pineapple or mango can brighten the flavor. Just chop them up and mix them into the filling. This makes each bite burst with tropical goodness. You can also try other coconut desserts. Coconut cream bars are a great option. They are easy to make and pack a punch of coconut flavor. With these twists, you can keep your dessert exciting and fresh. For the Full Recipe, check out Tropical Coconut Cream Pie. Enjoy the fun and flavors! To store leftover coconut cream pie, wrap it tightly in plastic wrap. Place it in the fridge right away. This keeps the pie fresh and safe to eat. If you want the crust to stay crisp, avoid covering it directly. Instead, use a pie dome if you have one. This allows air to flow and keeps the crust from getting soggy. You can freeze coconut cream pie if you won't eat it soon. First, let the pie cool completely. Then, wrap it tightly in plastic wrap and aluminum foil. This helps prevent freezer burn. When you want to enjoy it, take it out of the freezer. Thaw the pie in the fridge overnight. Serve it chilled for the best taste. Coconut cream pie lasts up to 4 days in the fridge. After that, it may spoil. Look for signs like an off smell or discoloration. If it smells funny or looks strange, do not eat it. Always trust your senses. Keeping the pie sealed well helps it last longer and stay tasty. You can find the Full Recipe to make this treat again. To keep your crust firm, pre-bake it. Start by mixing graham cracker crumbs, toasted coconut, and melted butter. Press this mix into a pie dish. Bake it at 350°F for about 8-10 minutes. This helps it set before adding the filling. Let it cool completely too. A cold crust holds up better against the creamy filling. Yes, you can make coconut cream pie ahead of time. It’s best to chill the pie for at least 4 hours. You can even prepare it a day in advance. Just keep it covered in the fridge. This lets the flavors blend well. Plus, it saves you time when you want to serve it. One common mistake is not mixing the filling well. This can lead to clumps in the pie. Always whisk the cornstarch, sugar, and salt together first. Gradually add the milk while whisking. This helps create a smooth filling. Take your time when adding the egg yolks too. It prevents cooking them too fast, which can cause clumping. You can check out the Full Recipe for this treat: Tropical Coconut Cream Pie 🥥. You now have all the tools to make a great coconut cream pie. You learned about the key ingredients, from the crust to the toppings. The step-by-step guide makes the process easy to follow. Remember to try the tips and tricks for the best texture and flavor. You can even explore variations like vegan or gluten-free options. When storing your pie, follow the tips to keep it fresh. Enjoy your delicious, homemade coconut cream pie!

Decadent Coconut Cream Pie Simple and Delicious Recipe

If you crave a sweet treat that’s both simple and indulgent, you’re in for a delight! In this guide, I’ll

Older posts
Newer posts
← Previous Page1 … Page72 Page73 Page74 … Page76 Next →

dsad

© 2025 greenmealmap • Built with GeneratePress

Our Policies

  • Copyright Policy
  • Cookie Policy
  • GDPR Policy
  • Privacy Policy
  • Disclaimer
  • Terms Of Use

More Information

  • Home
  • About
  • Contact
  • Appetizers
  • Dessert
  • Dinner
  • Drinks
©2025, greenmealmap About Back To Top