Skip to content
DisclaimerTerms Of UseGDPR PolicyCookie Policy

greenmealmap

  • Home
  • Drinks
  • Appetizers
  • Dinner
  • Dessert
  • About
  • Contact
  • Privacy Policy
DisclaimerTerms Of UseGDPR PolicyCookie Policy

Lauren

- 4 chicken thighs (bone-in and skin-on) - 1 cup buttermilk - 1 teaspoon hot sauce (optional) - 1 cup all-purpose flour - 1 teaspoon paprika - 1 teaspoon garlic powder - 1 teaspoon onion powder - 1 teaspoon cayenne pepper - Salt and pepper to taste - Vegetable oil for frying - Fresh parsley for garnish - Lemon wedges for serving When I make country fried chicken, I start with the chicken thighs. Bone-in and skin-on pieces give the best flavor. I soak them in buttermilk. This step makes the chicken juicy and tender. The hot sauce adds a nice kick but feel free to skip it if you want milder chicken. Next, I prepare the coating. I mix flour with paprika, garlic powder, onion powder, and cayenne pepper. This mix is key for that crunchy crust. Don't forget to add salt and pepper. These simple spices pack a punch. For frying, vegetable oil works great. I use enough to cover the chicken halfway. You can garnish the finished dish with fresh parsley and serve it with lemon wedges. The lemon adds a fresh touch that pairs perfectly with the rich chicken. If you want the full recipe, check it out. It contains all the steps to create your own country fried chicken magic! - In a bowl, combine 1 cup of buttermilk and 1 teaspoon of hot sauce. - Place 4 chicken thighs in the mixture and ensure they are fully submerged. - Cover the bowl and refrigerate for at least 2 hours. For more flavor, marinate overnight. Marinating the chicken makes it tender and juicy. The buttermilk adds a rich flavor. If you like spice, the hot sauce really wakes up the taste. - In a separate bowl, mix 1 cup of all-purpose flour, 1 teaspoon of paprika, 1 teaspoon of garlic powder, 1 teaspoon of onion powder, and 1 teaspoon of cayenne pepper. - Add salt and pepper to taste and mix until everything is well combined. This coating gives the chicken a crispy texture. Each spice adds a layer of flavor that makes every bite special. The cayenne gives it a nice kick. - Heat about 1 inch of vegetable oil in a large skillet over medium-high heat until it reaches 350°F (175°C). - Carefully place the coated chicken thighs into the hot oil. Cook them in batches to avoid overcrowding. - Fry for about 7-10 minutes on each side until the outside is golden brown. Cooking in batches helps the chicken fry evenly. Make sure to check the internal temperature. It should reach 165°F (75°C) for safe eating. After frying, let the chicken rest on a wire rack or plate lined with paper towels. This helps drain excess oil and keeps it crispy. For the full experience, try the full recipe! To make the best crispy coating, use a mix of flour and spices. I like combining all-purpose flour with paprika, garlic powder, and cayenne pepper. This mix gives the chicken great flavor and crunch. You can also add cornstarch for extra crispiness. Oil temperature is key for crispiness. Heat your oil to around 350°F (175°C). If the oil is too cool, the chicken absorbs too much oil and becomes soggy. If it's too hot, the outside cooks too fast, leaving the inside raw. Use a thermometer to check the oil temperature before frying. Marinating the chicken is essential for flavor and moisture. I recommend soaking the chicken in buttermilk for at least two hours. Overnight is even better for deep flavor. The acidity in the buttermilk breaks down the proteins, making the chicken tender. When frying, avoid overcrowding the pan. Fry the chicken in small batches to keep the oil hot. Cook each piece for about 7-10 minutes per side. This keeps the chicken juicy while giving it a golden brown crust. Always check the internal temperature. It should reach 165°F (75°C) to be safe to eat. Presentation matters! Serving your fried chicken on a rustic wooden platter adds charm. Garnish with fresh parsley and lemon wedges for color. Pair your chicken with sides like homemade coleslaw or a simple green salad. This not only looks great but also balances the meal. A nice side can elevate your dish and impress your guests. {{image_2}} You can switch up your seasoning to make your country fried chicken unique. Here are a few ideas: - Other spice blends to try: You can use Cajun seasoning for a spicy kick. Italian seasoning adds a nice herb flavor. You can even try a mix of curry powder for a fun twist. - Adding herbs for flavor variations: Fresh herbs like thyme or rosemary can really boost the taste. Just chop them finely and mix them into your flour. This adds a fresh note to your fried chicken. If you want to enjoy fried chicken with less fat, try these methods: - Air frying options: An air fryer cooks food with hot air. It gives a crispy texture with much less oil. Just coat your chicken and cook it according to your air fryer’s guide. - Baking techniques for a lighter version: Preheat your oven to 425°F (220°C). Place your coated chicken on a baking sheet. Bake for about 25-30 minutes, flipping halfway. This will give you a nice crispy skin without the frying. Make your chicken exciting by adding some international flavors: - Cajun-style version with local spices: Use a mix of paprika, cayenne, and thyme for a Cajun vibe. This will add heat and depth. - Asian-influenced versions and side dishes: Try adding soy sauce or ginger to your buttermilk. Serve your chicken with rice and stir-fried veggies for a complete meal. For more details, check out the Full Recipe to create your own delicious variations! After you enjoy your country fried chicken, store leftovers right. Place the chicken in an airtight container. This keeps moisture in and prevents other smells from mixing in. If it’s still warm, let it cool first. Refrigerate it within two hours of cooking. Your chicken will stay fresh up to 3 days. To reheat and keep it crispy, use an oven. Preheat it to 375°F (190°C). Place the chicken on a wire rack over a baking sheet. This helps air circulate around the chicken. Heat for about 10-15 minutes, or until hot. This method keeps the outside crispy and the inside juicy. If you want to save your chicken for later, freezing is great. Make sure it’s cooled completely. Wrap each piece tightly in plastic wrap. Then, place the wrapped chicken in a freezer bag. Squeeze out as much air as possible. This prevents freezer burn. Your chicken can last in the freezer for up to 3 months. When you’re ready to eat it, thaw the chicken in the fridge overnight. For reheating, use the oven again. This method ensures the chicken stays crispy when reheated. For refrigerated chicken, expect it to last about 3 days. After that, the flavor and quality may fade. If you freeze it, it should stay good for about 3 months. Always check for signs of spoilage before enjoying any leftovers. Keeping your chicken properly stored helps you enjoy the incredible flavor longer. To enhance the flavor of country fried chicken, start with a good marinade. Use buttermilk mixed with spices, like garlic and onion powder. You can also add herbs like thyme or rosemary. For a spicy kick, include cayenne pepper or your favorite hot sauce. Marinating the chicken overnight brings out great taste. Don't forget to season your flour! Mixing in spices like paprika or black pepper makes a big difference. Yes, you can easily convert measurements. Here are some common conversions: - 1 cup = 240 ml - 1 teaspoon = 5 ml - 1 tablespoon = 15 ml If you prefer grams, use the following: - 1 cup all-purpose flour = 120 grams - 1 cup buttermilk = 240 grams These conversions help you follow the recipe no matter what system you use. Absolutely! You can use gluten-free flour blends instead of all-purpose flour. Look for brands that have a mix of rice flour, potato starch, and tapioca flour. You can also try almond flour for a nutty flavor. Just ensure the other ingredients are gluten-free too, especially the hot sauce and spices. For frying chicken, choose oils with high smoke points. Good options include vegetable oil, canola oil, or peanut oil. These oils withstand high heat without burning. Ideally, aim for an oil that smokes at around 400°F (204°C). This helps you achieve that perfect crispy crust while keeping the chicken juicy inside. In this blog post, we explored how to make crispy, juicy fried chicken. We covered ingredients, step-by-step instructions, and tips for the perfect meal. You learned about marinating, coating, and frying methods that add flavor and crunch. We also discussed healthier options and ways to store leftovers. My final thought is to have fun while cooking this dish. Experiment with spices and enjoy your delicious results. Share your fried chicken with friends and family for even more joy!

Country Fried Chicken Magic for Incredible Flavor

Are you ready to dive into a world of incredible flavor? In this post, we’ll uncover the magic behind making

To make a delicious jambalaya, gather the following ingredients: - 1 pound andouille sausage, sliced - 1 pound shrimp, peeled and deveined - 1 cup chicken breast, diced - 1 bell pepper, diced (preferably red or green) - 1 cup onion, chopped - 1 cup celery, chopped - 3 cloves garlic, minced - 1 can (14 oz) diced tomatoes, with juices - 4 cups chicken broth - 2 cups long-grain rice - 2 teaspoons Cajun seasoning - 1 teaspoon dried thyme - 1 bay leaf - Salt and pepper to taste - 2 tablespoons olive oil - ¼ cup green onions, chopped (for garnish) - Fresh parsley, chopped (for garnish) Each ingredient plays a key role in flavor. For the sausage, use one pound. It adds a rich, smoky taste. You will also need one pound of shrimp. This gives the dish a nice seafood touch. The chicken breast should be one cup, diced. This adds heartiness. For vegetables, prepare one bell pepper, one cup of onion, and one cup of celery. These add color and crunch. Garlic should be three cloves, minced, for that extra flavor. Use one can of diced tomatoes, and four cups of chicken broth. This creates a tasty base. For rice, you will need two cups of long-grain rice to soak up all the flavors. Season with two teaspoons of Cajun seasoning and one teaspoon of dried thyme. These spices bring out the dish's soul. Don't forget salt and pepper to taste! Quality matters. Fresh ingredients make a big difference. Choose ripe tomatoes and fresh herbs. This choice enhances your jambalaya’s overall taste. Start with a large pot or Dutch oven. Heat up the olive oil over medium heat. Add the sliced andouille sausage. Sauté it until it turns brown, about 5 minutes. This step adds a nice flavor to the dish. Next, add the diced chicken breast. Cook until it is browned and cooked through, about 5 to 7 minutes. Both meats need to be cooked well for the best taste. Now it's time to add some color and crunch. Stir in the diced bell pepper, chopped onion, chopped celery, and minced garlic. Sauté these vegetables until they are tender, which takes about 4 to 5 minutes. Getting the cooking times right is key. This way, the veggies still have some texture and flavor when you serve the dish. It's time to bring everything together! Add the diced tomatoes, chicken broth, and long-grain rice to the pot. Don't forget the Cajun seasoning, dried thyme, bay leaf, salt, and pepper. Stir everything well to mix the flavors. Bring the mixture to a boil, then reduce the heat to low. Cover the pot and let it simmer for about 20 minutes. The rice should be tender and absorb most of the liquid. After the rice cooks, gently fold in the shrimp. Cook for an additional 5 minutes. The shrimp will turn pink and opaque when done. This is the final touch for your jambalaya. Remove the bay leaf and fluff the jambalaya with a fork. Adjust seasoning with extra salt and pepper if needed. For the full recipe, don't forget to check the complete list of ingredients and instructions! To make your jambalaya truly shine, adjust your seasonings. Taste your dish as it cooks. If it feels bland, a pinch of salt or a dash of Cajun seasoning can elevate the taste. Trust your palate! Cooking techniques also matter. Start with browning your andouille sausage well. This adds depth. The fond left in the pot gives great flavor. Sauté your veggies just until tender. This keeps them vibrant and tasty. Garnishing your jambalaya can make it pop. Use fresh green onions and parsley. Sprinkle them on top right before serving. This adds color and freshness. When serving, choose deep bowls. Ladle the jambalaya in and let it shine. Pair it with crusty bread or a fresh salad. This adds a nice contrast and rounds out your meal beautifully. {{image_2}} For a tasty seafood jambalaya, you can add various seafood types. Shrimp is common, but you can also try crab, scallops, or mussels. Each of these seafood options brings its own unique flavor. Cooking times differ based on the seafood type: - Shrimp cooks in about 5 minutes. - Scallops need about 3-4 minutes. - Mussels should cook for 5-7 minutes until they open. These cook times ensure that your seafood stays tender and juicy. If you prefer a chicken-only version, you will need to adjust the ingredient amounts. Use about 2 cups of diced chicken breast instead of the sausage and shrimp. When cooking chicken jambalaya, brown the chicken first for extra flavor. Sauté it for about 5-7 minutes. This step creates a nice base for your dish. To make a vegetarian jambalaya, substitute proteins with beans or tofu. Black beans or kidney beans work well for added protein and fiber. For flavor enhancement, add more spices like smoked paprika or cayenne pepper. You can also toss in extra veggies, such as zucchini or corn, to make it hearty. These variations allow you to customize jambalaya to your taste and dietary needs. Check out the Full Recipe for more details on how to create your perfect dish! To keep your jambalaya fresh, follow these steps: - Cool Down: Let the jambalaya cool to room temperature. This helps prevent condensation. - Refrigerate: Store in the fridge within two hours of cooking. The cold keeps bacteria away. - Use Airtight Containers: Choose plastic or glass containers with tight lids. This keeps the flavors locked in. Leftover jambalaya can last for about three to four days in the fridge. If you want to keep it longer, freezing is a great option. When you are ready to eat leftover jambalaya, here are the best ways to reheat it: - Stovetop Method: Place jambalaya in a pot. Add a splash of broth or water to keep it moist. Heat over low, stirring often until warm. - Microwave Method: Put jambalaya in a microwave-safe bowl. Add a little water. Cover with a damp paper towel. Heat in 1-minute intervals, stirring each time, until hot. To keep the texture and flavor, avoid high heat. This can make the rice mushy. Enjoy your delicious jambalaya again with the full recipe for a fresh twist! To make jambalaya from scratch, follow these basic steps: 1. Cook the sausage: Start by heating olive oil in a large pot. Add sliced andouille sausage and brown it for about 5 minutes. 2. Add chicken: Next, add diced chicken breast. Cook it for about 5 to 7 minutes until it is no longer pink. 3. Sauté vegetables: Stir in diced bell pepper, chopped onion, chopped celery, and minced garlic. Cook them for around 4 to 5 minutes until they become soft. 4. Mix in other ingredients: Add diced tomatoes, chicken broth, rice, and spices like Cajun seasoning and thyme. Stir everything well. 5. Simmer: Bring the mix to a boil, then reduce heat. Cover the pot and let it simmer for about 20 minutes until the rice is tender. 6. Add shrimp: Fold in peeled shrimp and cook for 5 more minutes until they turn pink. 7. Serve: Fluff the jambalaya with a fork and enjoy your meal! The key differences between jambalaya and gumbo are in their ingredients and texture: - Ingredients: Jambalaya uses rice cooked with meats and vegetables, while gumbo is a stew often served over rice. - Texture: Jambalaya is thicker and drier, while gumbo is more liquid and soupy. Yes, you can use brown rice instead of white rice, but you need to adjust cooking times. Brown rice takes longer to cook, typically about 40 to 45 minutes. It also adds a nuttier flavor and chewier texture to the dish. Just be sure to add more broth to keep the dish moist. This article covers how to make delicious jambalaya. You learned about essential ingredients like sausage, shrimp, and chicken. I shared cooking steps to help you perfect the dish. You also discovered tips for flavor and presentation. Remember, quality matters. Adjust seasonings for your taste. Experiment with variations to suit your needs. Finally, store any leftovers properly for later enjoyment. Now, it's time to create your own tasty jambalaya!

Delicious Jambalaya Flavorful and Easy Recipe Guide

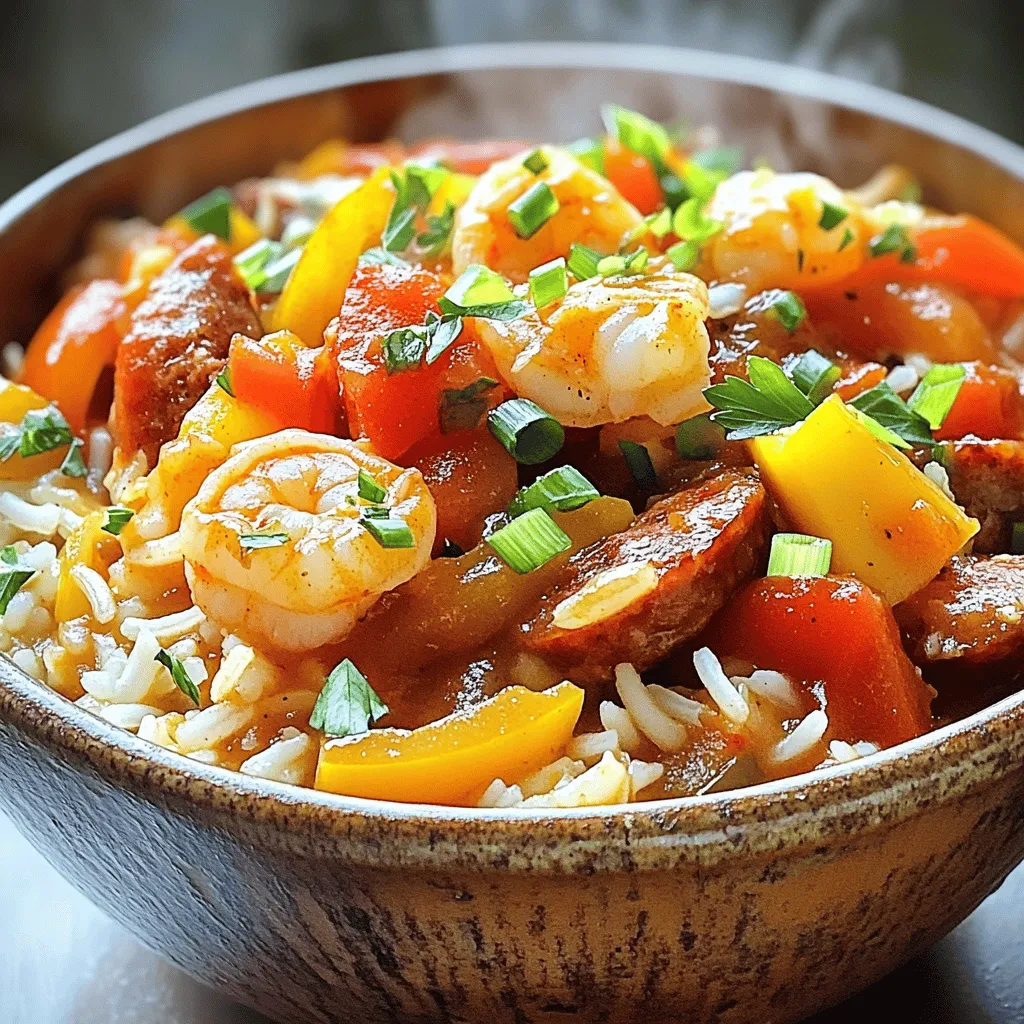
If you’re craving something bold and hearty, you’ve come to the right place! This Delicious Jambalaya: Flavorful and Easy Recipe

- 1 cup unsalted butter, softened - 3 ½ cups powdered sugar, sifted - ½ cup unsweetened cocoa powder, sifted - 1 teaspoon vanilla extract - 4 tablespoons heavy cream (or milk) - A pinch of salt The right ingredients make the best chocolate buttercream. First, you need unsalted butter. Softened butter mixes easily, creating a light and fluffy base. Powdered sugar gives sweetness and helps with texture. Cocoa powder adds rich chocolate flavor. Vanilla extract brings warmth and depth. Heavy cream or milk helps make the frosting smooth. A pinch of salt balances the sweetness. - Dairy-free butter: You can use coconut oil or vegan butter. These work well for a plant-based frosting. - Alternative sweeteners: If you want a healthier version, consider using agave syrup or honey. Adjust the amount to taste. - Different cocoa powders: Try Dutch-process cocoa for a smoother flavor. You can also use dark cocoa for a richer taste. These substitutions allow you to customize your frosting. Play around and find what you like best. To make perfect chocolate buttercream frosting, you need a few tools: - Large mixing bowl - Electric mixer - Measuring cups and spoons - Sifter - Spatula These tools help you mix well and create a smooth frosting. 1. Mixing butter and sugar: Start with the softened butter. Place it in your large mixing bowl. Use the electric mixer on medium speed. Beat the butter for about 2-3 minutes. It should become light and fluffy. This step is key for a nice texture. 2. Incorporating cocoa and additional ingredients: Gradually add the sifted powdered sugar and cocoa powder. Do this one cup at a time. Mix on low speed until everything is combined. Once combined, increase the speed to medium. Beat for another 2 minutes to aerate the mixture. This adds air and fluffiness. - Achieving the right consistency: Next, add the vanilla extract, heavy cream, and a pinch of salt. Beat on medium speed for another 3-4 minutes. The frosting should be smooth and creamy. If you want it thinner, add more cream one tablespoon at a time. For a firmer frosting, add more powdered sugar. - Tasting and adjusting flavors: Now, taste your frosting. If it needs more sweetness or chocolate flavor, add more powdered sugar or cocoa powder. Mix well. When you are happy with the flavor and texture, your frosting is ready. You can use it to top cakes or cupcakes. For a great look, try a spatula or piping bag. For more detailed steps, check the Full Recipe. To get the best texture in your chocolate buttercream, focus on mixing. Start by beating the softened butter until it’s light and fluffy. This step helps create a nice base. Use an electric mixer on medium speed for about 2-3 minutes. Next, add powdered sugar and cocoa powder slowly. This helps avoid a mess and ensures even mixing. Ingredient temperature also matters. Make sure your butter is at room temperature. Cold butter can lead to lumps. If you need it softer, cut it into smaller pieces. This speeds up the softening process. Sometimes, frosting can turn out grainy. If this happens, you can fix it easily. Mix longer to break down the sugar granules. If that doesn’t work, try adding a little more cream. This helps smooth everything out. Adjusting sweetness is also key. If your frosting is too sweet, add a bit more cocoa powder. This balances the flavor. If you want more sweetness, add more powdered sugar. Always taste as you go! How you apply your frosting matters. If you want a smooth finish, use a spatula to spread it. For a fancy look, use a piping bag. Piping gives a beautiful touch to cupcakes and cakes. Get creative with your decorations! Add chocolate shavings, sprinkles, or even fresh fruit. These small touches make your treats stand out. For more ideas, check out the Full Recipe for inspiration. {{image_2}} You can change the flavor of your chocolate buttercream in fun ways. Adding espresso gives it a mocha taste. Just mix in one tablespoon of espresso powder with your dry ingredients. Infusing with orange or mint adds fresh zest. For orange, use the zest of one orange. For mint, add a few drops of mint extract. Want a different look? You can make a chocolate ganache frosting. Heat equal parts chocolate and cream until smooth. Let it cool for a glossy finish. Another option is to combine chocolate buttercream with cream cheese. This mix gives a tangy twist that pairs well with red velvet or carrot cakes. If you need gluten-free frosting, stick with the basic recipe! All the ingredients are gluten-free. For a vegan chocolate buttercream, replace butter with dairy-free butter. Use almond milk or coconut cream instead of heavy cream. These swaps keep the rich taste while making it plant-based. These variations let you customize your perfect chocolate buttercream. Explore them and find your favorite! For more details, check the Full Recipe. To keep your chocolate buttercream fresh, store it in an airtight container. Place it in the fridge for up to one week. This keeps it cool and safe. If you have a large batch, consider freezing it for longer storage. Just make sure to use a freezer-safe container to avoid freezer burn. You can freeze chocolate buttercream for up to three months. When freezing, scoop the frosting into a container. Leave some space for expansion. Label the container with the date. This helps you track how long it has been in the freezer. When you want to use your frozen frosting, take it out of the freezer. Let it thaw in the fridge overnight. If you're short on time, you can also thaw it at room temperature for about 1-2 hours. After thawing, give it a good mix with a hand mixer. This will help restore its creamy texture. You can spread thawed frosting on cupcakes or cakes. It’s also great for filling cookies or even brownies. If you want to get creative, use it as a dip for fruits or pretzels. The options are endless! Homemade chocolate buttercream lasts about one week in the fridge. In the freezer, it stays good for three months. Always check for freshness before using. If it smells off or has an unusual color, it’s best to toss it. Look for changes in texture or smell. If the frosting seems grainy or has an odd scent, it is time to throw it away. Always trust your senses; they can help you avoid spoiled frosting. For a full recipe of this delightful frosting, check out the Perfect Chocolate Buttercream Frosting recipe. Homemade chocolate buttercream can last up to two weeks in the fridge. Keep it in an airtight container. If you freeze it, it can stay good for up to three months. Make sure to thaw it in the fridge before using. When ready to use, just whip it again to bring back its fluffy texture. Yes, you can! If you want a different flavor, try using melted chocolate instead. Use about 4 ounces of melted chocolate for every half cup of cocoa powder. You can also use carob powder as a cocoa substitute. It gives a unique taste and is a healthy option. Chocolate buttercream is perfect for many treats. Here are a few great ideas: - Chocolate cake: It’s a classic combo. - Vanilla cupcakes: The flavors balance well. - Brownies: Spread the frosting on top for a rich treat. - Cookies: Use it as a filling for sandwich cookies. For more ideas, check out the Full Recipe for perfect chocolate buttercream frosting. You learned how to make delicious chocolate buttercream frosting. From ingredient lists to inventive variations, this guide covered it all. I shared tips to fix common problems and ways to store your frosting properly. Now you have the tools to create a smooth, rich frosting for your treats. Remember, you can adjust flavors to make it your own. Enjoy the process, and let your creativity shine in the kitchen!

Perfect Chocolate Buttercream Frosting Recipe Guide

You love chocolate, and so do I! If you’re on a quest for the perfect chocolate buttercream frosting, you’ve landed

To make Pumpkin Delight, you need simple, fresh ingredients. Here’s what you need: - 2 cups pumpkin puree (fresh or canned) - 1 cup coconut milk - 1/2 cup maple syrup - 1/4 cup brown sugar - 1 teaspoon vanilla extract - 1 teaspoon ground cinnamon - 1/2 teaspoon ground nutmeg - 1/4 teaspoon ground ginger - 1/4 teaspoon salt - 1/2 cup rolled oats - 1/4 cup chopped pecans (optional) - 1/4 cup shredded coconut (optional) Each ingredient adds its own flavor and texture. Pumpkin puree gives a rich base and a lovely orange color. Coconut milk adds creaminess, making it cozy. Maple syrup and brown sugar sweeten the dish, while vanilla extract lifts the flavors. The spices bring warmth and a hint of fall. Ground cinnamon, nutmeg, and ginger work together to create a comforting aroma. Salt balances the sweetness and enhances the other flavors. The rolled oats add a nice chewiness. If you like, you can add chopped pecans or shredded coconut for extra crunch and flavor. These optional add-ins make your Pumpkin Delight even more special. For the full recipe, check out the detailed instructions. Enjoy making this warm, delicious dessert! 1. Preheat your oven and grease the dish. Set your oven to 350°F (175°C). Grease a 9-inch pie dish or casserole dish with a little oil or butter. This helps the Pumpkin Delight not stick. 2. Mixing the main ingredients. In a large bowl, add 2 cups of pumpkin puree, 1 cup of coconut milk, 1/2 cup of maple syrup, and 1/4 cup of brown sugar. Then, add 1 teaspoon of vanilla extract, 1 teaspoon of ground cinnamon, 1/2 teaspoon of ground nutmeg, 1/4 teaspoon of ground ginger, and 1/4 teaspoon of salt. Mix everything well until it looks smooth and creamy. 3. Adding oats and optional ingredients. Stir in 1/2 cup of rolled oats. If you want, add 1/4 cup of chopped pecans or 1/4 cup of shredded coconut for extra texture. Make sure these ingredients blend evenly into the pumpkin mix. 4. Pouring into the baking dish. Carefully pour the mixture into your greased baking dish. Use a spatula to spread it out evenly. This helps it bake uniformly. 5. Baking time and checking for doneness. Place the dish in the preheated oven. Bake for 40 to 45 minutes. Check if it’s done by gently touching the center. It should feel slightly firm, and the edges should be set. This Pumpkin Delight will fill your kitchen with warm, cozy scents as it bakes. Enjoy the process! For the full recipe, refer to the beginning of this article. To get the best texture in your Pumpkin Delight, you can choose between fresh or canned pumpkin. Fresh pumpkin gives a richer flavor, but canned pumpkin is quick and easy. If you use fresh pumpkin, cook it, and puree it until smooth. Canned pumpkin saves time and still tastes great. If you have dietary needs, there are easy swaps you can make. You can use almond milk instead of coconut milk for a nutty taste. For a sweeter dish, try agave syrup instead of maple syrup. To enhance the flavor, spices are key. Ground cinnamon adds warmth, while nutmeg gives a sweet aroma. Adding ground ginger brings a nice kick. Don’t skip the salt; it balances the sweetness and makes flavors pop. Serving Pumpkin Delight can be fun and creative! You can dish it up in small bowls or even in jars for a cute look. Top each serving with whipped cream or coconut cream to make it special. To make it visually appealing, sprinkle some chopped pecans or shredded coconut on top. A dash of cinnamon can add color and a hint of flavor. For added flavor, consider drizzling some maple syrup over the top. A few chocolate chips or caramel sauce can make it even more delightful. You can also serve it with a scoop of ice cream for extra indulgence! Check out the Full Recipe to try this delicious dessert! {{image_2}} You can easily change this recipe to fit your needs. - Dairy-free options: Use almond milk or oat milk instead of coconut milk. Both add a nice flavor. - Sweetener alternatives: If you want less sugar, try agave syrup or honey. They work well and taste great. - Nut and seed variations: Swap pecans for walnuts or add sunflower seeds for crunch. You can mix and match based on what you like. Serving Pumpkin Delight can be fun and creative. - Individual servings: Use small ramekins to make personal desserts. This way, everyone gets their own treat. - Layering ideas for desserts: Create a layered parfait by adding Pumpkin Delight with granola or yogurt. This adds texture and looks beautiful. For a full recipe, check out the detailed instructions above. To keep your Pumpkin Delight fresh, use airtight containers. Glass or plastic containers work well. Make sure they seal tightly to keep moisture out. Store the dessert in the fridge. It stays good for about three to five days. If you have a lot left, consider freezing it. Use freezer-safe containers or bags. This way, you can enjoy it later. Just remember to label them with the date. To safely reheat Pumpkin Delight, use the microwave or oven. If using a microwave, place it on a microwave-safe plate. Heat it for 30 seconds at a time, checking often. For the oven, preheat it to 350°F (175°C). Place the dessert in a baking dish, cover with foil, and heat for about 10 to 15 minutes. To keep the texture nice, avoid overheating. You want it warm, not hot. Enjoy it with whipped cream or coconut cream on top! How can I make Pumpkin Delight vegan? To make Pumpkin Delight vegan, replace the coconut milk with almond or oat milk. Use agave syrup instead of maple syrup for a plant-based sweetener. This keeps the dish creamy and sweet without using animal products. Can I freeze Pumpkin Delight? Yes, you can freeze Pumpkin Delight. Let it cool completely before placing it in an airtight container. It can last in the freezer for about three months. When ready to enjoy, thaw it in the fridge overnight and reheat it gently. What is the best way to serve this dish? Serve Pumpkin Delight warm or at room temperature. A dollop of whipped cream or coconut cream on top adds a nice touch. You can also sprinkle some cinnamon or nuts for extra flavor and crunch. Caloric breakdown per serving Each serving of Pumpkin Delight has around 200 calories. It includes healthy fats from coconut milk and fiber from oats. This makes it a satisfying dessert. Health benefits of pumpkin and other ingredients Pumpkin is rich in vitamins A and C, which support eye health. It also has antioxidants that fight inflammation. Coconut milk provides healthy fats, while oats add fiber for good digestion. The maple syrup gives natural sweetness without refined sugars. This blog post detailed how to make a delicious Pumpkin Delight. We covered the key ingredients, step-by-step instructions, and tips for the best texture. We also explored variations for dietary needs and storage methods. In conclusion, this recipe is versatile and easy to follow. You can make it your own with different ingredients. Enjoy the rich flavors and comforting texture. Try it out, and share your results!

Pumpkin Delight Yummy and Cozy Fall Dessert

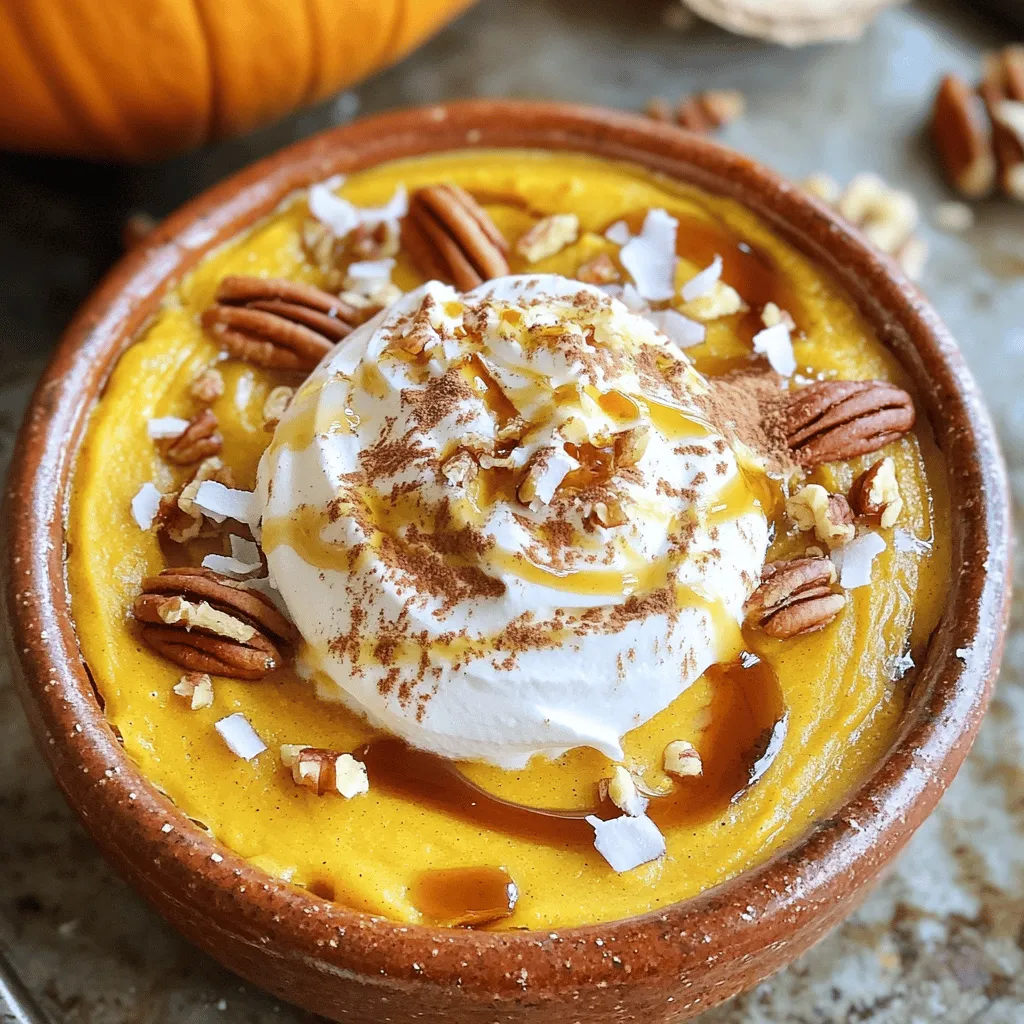
Get ready to savor the warmth of fall with my Pumpkin Delight! This cozy dessert blends creamy pumpkin puree with

- 12 oz rotini or fusilli pasta - 1 cup cherry tomatoes, halved - 1 cup corn kernels (frozen or fresh) - 1 cup black beans, drained and rinsed - 1 red bell pepper, diced - 1/2 cup red onion, finely chopped - 1 cup cheddar cheese, cubed To make a great Cowboy Pasta Salad, you'll need some fresh and colorful ingredients. I love using rotini or fusilli pasta because they catch the dressing and flavors well. The cherry tomatoes add a sweet burst, while corn brings a nice crunch. Black beans add protein and heartiness, making the salad filling. The red bell pepper gives a vibrant look and sweet taste. Don't forget the red onion for a sharp flavor that balances everything. Finally, I add cheddar cheese for creaminess and richness. Each ingredient plays a role in creating a fun, tasty dish. - 1/2 cup jalapeño ranch dressing - 1 tablespoon olive oil - 1 tablespoon lime juice - 1 teaspoon cumin - Salt and pepper to taste - Fresh cilantro for garnish The dressing is just as crucial as the salad itself. I use jalapeño ranch dressing for a zesty kick. Mixing it with olive oil gives it a smooth texture. Lime juice adds brightness, while cumin brings a warm earthiness. I like to season it with salt and pepper. This dressing pulls everything together beautifully. Finally, fresh cilantro makes a lovely garnish. It adds color and a fresh taste that enhances the whole salad. For the complete recipe, check out the section above. Enjoy this Cowboy Pasta Salad during summer picnics or family gatherings! 1. Bring a large pot of salted water to a boil. 2. Add 12 oz of rotini or fusilli pasta. 3. Cook until al dente, about 8 to 10 minutes. 4. Drain the pasta and rinse it under cold water. - Chop 1 cup of cherry tomatoes in half. - Dice 1 red bell pepper. - Finely chop 1/2 cup of red onion. - In a large mixing bowl, add the cooled pasta. - Mix in 1 cup of corn, 1 cup of black beans, the chopped bell pepper, onion, and 1 cup of cubed cheddar cheese. - In a small bowl, whisk together the dressing. - Use 1/2 cup of jalapeño ranch dressing, 1 tablespoon of olive oil, 1 tablespoon of lime juice, and 1 teaspoon of cumin. - Add salt and pepper to taste. - Pour the dressing over your pasta salad mixture. - Toss everything gently until well combined. - Cover the bowl with plastic wrap. - Refrigerate for at least 30 minutes before serving. For the complete recipe, check out the Full Recipe. To make a great cowboy pasta salad, cook the pasta until it is al dente. This means the pasta should be firm and not mushy. Al dente pasta holds its shape better and gives a nice bite. After cooking, drain the pasta and rinse it under cold water. This stops the cooking and cools it down quickly. Let the pasta chill in the fridge for at least 30 minutes. Chilling helps the flavors mix and taste better. The longer it sits, the more the flavors blend together. You can change up the spice level by using different dressings. If you want some heat, use a spicier dressing. If you prefer mild flavors, stick to a creamy dressing. Jalapeño ranch is a great choice, but you can try others like Italian or balsamic vinaigrette. For a fresh twist, make your own dressing. You can mix plain yogurt, lime juice, and spices. A homemade dressing can add a personal touch to your salad. When serving cowboy pasta salad, presentation matters. Use a large, colorful bowl to show off the bright ingredients. For extra flair, sprinkle fresh cilantro on top. You can also add lime wedges on the side. This not only looks good but also adds a zesty flavor. Pair your salad with grilled chicken or shrimp for a complete meal. It also goes well with tortilla chips or crusty bread. Enjoy your delicious and fresh summer dish! {{image_2}} You can change the pasta type in cowboy pasta salad. Try whole wheat or gluten-free pasta. Both options bring great taste and texture. You can also switch up the veggies. Add broccoli, zucchini, or bell peppers for more crunch. This way, you can make the salad your own. Want to add protein? Try cooked chicken, shrimp, or even tofu. They all mix well with the other ingredients. If you add protein, adjust the dressing. You may need more dressing to keep every bite tasty. Just taste as you go and find the right balance. Boost the flavor with fresh herbs. Basil and parsley work great in this salad. You can also explore different cheeses. Feta or pepper jack adds a new twist. Each option gives you a unique flavor experience. Enjoy experimenting with your cowboy pasta salad. For the full recipe, check out the Cowboy Pasta Salad section above. To keep your Cowboy Pasta Salad fresh, use an airtight container. This helps lock in flavor and moisture. Store it in the fridge for up to 3 days. After that, the taste may change, and the veggies can get soggy. You can enjoy Cowboy Pasta Salad cold or warm. If you want to warm it up, use a microwave. Heat it in short bursts, stirring often. This keeps the pasta from getting mushy. Serving it chilled is refreshing, especially on hot days. You can freeze Cowboy Pasta Salad, but the texture may change. If you choose to freeze it, pack it tightly in a freezer-safe container. When you are ready to eat it, thaw it in the fridge overnight. To refresh it, add a bit of dressing and mix well. This helps bring back some of the original flavors. For the full recipe, check out the details above. Cowboy Pasta Salad is a fun and colorful dish. It combines pasta, veggies, and beans. The popular ingredients include rotini or fusilli pasta, cherry tomatoes, corn, black beans, and bell pepper. You can also add cheese for extra flavor. This salad is fresh and perfect for summer meals. Yes, you can make Cowboy Pasta Salad ahead of time. It tastes even better after chilling. To meal prep, make the salad a day before serving. Store it in the fridge in an airtight container. This keeps the flavors fresh and helps them blend well. For Cowboy Pasta Salad, jalapeño ranch dressing works great. You can use store-bought or make your own. A simple homemade dressing can include yogurt, lime juice, and spices. Both options add a tasty kick. Choose what suits your taste best. Cowboy Pasta Salad can last about 3 to 5 days in the fridge. Store it in a sealed container to keep it fresh. If it smells off or looks strange, it’s best to toss it out. Enjoy the savory flavors while they last! Cowboy Pasta Salad is a fun and tasty dish. You learned about the main ingredients, like pasta, beans, and cheese. We discussed how to make this salad step by step. Remember to chill it for better flavor! You can mix and match ingredients, add protein, or try different dressings. Storing it in an airtight container helps keep it fresh. This salad is great for sharing or meal prep. Enjoy making and eating it with your friends and family!

Cowboy Pasta Salad Tasty and Fresh Summer Dish

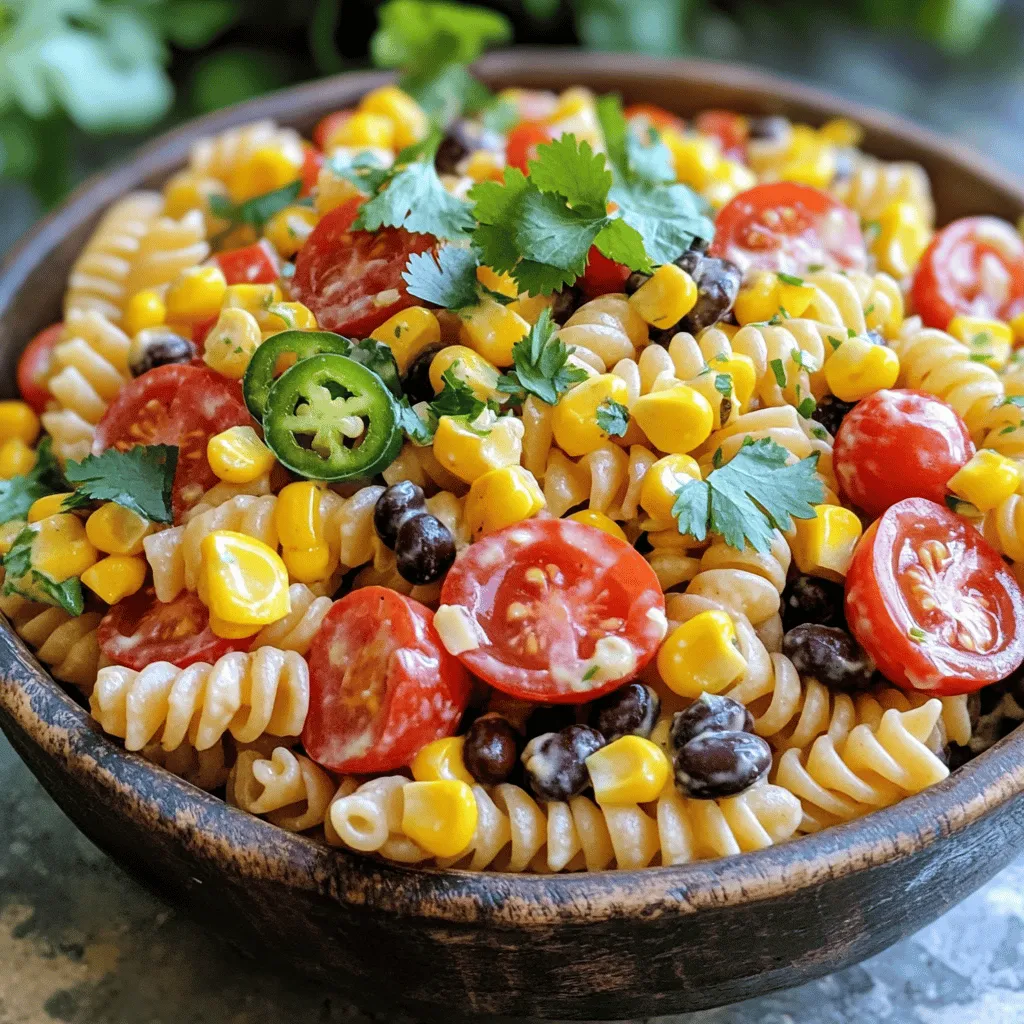
Looking for a vibrant and easy dish for summer? Cowboy Pasta Salad combines fresh vegetables, zesty dressing, and colorful pasta

- 2 lbs boneless, skinless chicken thighs - 1 packet ranch seasoning mix - 8 oz cream cheese - 1 cup chicken broth The main ingredients are simple yet crucial. The chicken thighs give the dish its rich flavor and tender texture. I always opt for boneless, skinless thighs because they cook evenly and absorb the seasoning well. The ranch seasoning mix adds a savory touch that enhances the overall taste. Cream cheese brings creaminess and richness to the dish, making it comforting. Chicken broth adds moisture and depth, ensuring the chicken stays juicy. - 1 cup shredded cheddar cheese - 6 slices cooked bacon - 1/2 cup green onions - Salt and pepper for seasoning For added flavor, I include shredded cheddar cheese. It melts beautifully, making the dish even creamier. The crispy bacon adds a crunchy texture and smoky flavor. Green onions provide a fresh bite and a pop of color. Finally, I use salt and pepper to adjust the taste. You can find the full recipe above. - Place chicken thighs in slow cooker. - Sprinkle ranch seasoning mix evenly on top. Starting with the chicken thighs, I find they bring the best flavor. Their tenderness shines through after cooking. Sprinkle the ranch seasoning mix over the chicken. This mix adds a savory kick right from the start. - Add cream cheese and chicken broth. - Cover and cook on low for 6-7 hours or high for 4 hours. Next, I add cream cheese and chicken broth. The cream cheese melts into a rich sauce. It makes the dish creamy and delicious. Cover the slow cooker and set it. Low heat cooks the chicken slowly, making it tender and juicy. If you're in a hurry, use high heat. - Shred chicken and mix with sauce. - Stir in cheese and bacon. Once the chicken is done, I shred it with two forks. Mixing it back into the sauce keeps it moist. Then, I stir in shredded cheddar cheese and crumbled bacon. These make the dish even more flavorful. The cheese melts, creating a yummy blend. Enjoy the creamy crack chicken with green onions on top for extra flavor. For the full recipe, check the earlier section. To make Creamy Crack Chicken even tastier, adjust the seasoning to your liking. You can add more ranch mix or a pinch of garlic powder. Taste it as you go. This is key for great flavor. Choosing the right chicken cut is also important. I recommend using boneless, skinless chicken thighs. They stay juicy and tender during cooking. This cut works best for this recipe. You have two main options: slow cooker or stovetop. The slow cooker gives you a hands-off approach. It lets the flavors meld beautifully. If you want to cook it faster, use the stovetop. Just watch it closely. Using a meat thermometer is a smart move. The chicken should reach an internal temperature of 165°F (74°C). This ensures your dish is safe and delicious. For side dishes, serve Creamy Crack Chicken over rice or mashed potatoes. These options soak up the creamy sauce well. You can also add a fresh salad for a nice crunch. Eye-catching garnishes make the dish pop. Top with crumbled bacon and sliced green onions. These add color and flavor. Your meal will look as good as it tastes! For the full recipe, click [Full Recipe]. {{image_2}} You can make creamy crack chicken lighter by using low-fat cream cheese. This swap cuts calories without losing the rich taste. Cream cheese alternatives like Greek yogurt work well too. If you're not a fan of cheddar, try mozzarella or pepper jack cheese. These cheeses bring a different flavor and texture. To boost flavor, think about spices. Garlic powder, onion powder, and paprika add depth. You can also use cayenne pepper for a kick. Adding vegetables to the dish can enhance nutrition and flavor. Try bell peppers, spinach, or even mushrooms. Toss them in during cooking for a tasty twist. For a quicker option, use an Instant Pot. Cook the chicken on high pressure for about 10 minutes. This method saves time while keeping the chicken juicy. If you prefer an oven-baked version, place the chicken in a baking dish. Bake it at 375°F (190°C) for about 30-40 minutes. Both methods create a delicious meal. Check the [Full Recipe] for more details. To keep Creamy Crack Chicken fresh, store it in the fridge. Place leftovers in an airtight container. This helps prevent moisture loss and keeps flavors intact. Make sure to seal the container well. You can store it for up to four days in the fridge. Always let it cool before sealing to avoid steam build-up. You can freeze Creamy Crack Chicken for later use. First, allow it to cool completely. Then, scoop portions into freezer-safe bags or containers. Be sure to remove as much air as possible before sealing. Label the bags with the date. To reheat, thaw in the fridge overnight. Then, warm it in a pot over low heat or in the microwave. Stir occasionally to ensure even heating. In the fridge, Creamy Crack Chicken lasts about four days. If frozen, it can last up to three months. Always check for signs of spoilage before eating. Look for any off smells or changes in color. If it smells strange or looks odd, it's best to toss it. Creamy Crack Chicken is a rich, savory dish. It combines chicken thighs, cream cheese, and ranch seasoning. The dish likely started in the U.S. and became popular due to its ease and flavor. You get a creamy, cheesy texture that is hard to resist. It has a unique taste from the ranch mix and bacon, making it a crowd favorite. Yes, you can easily make Creamy Crack Chicken ahead of time. Prepare it in the slow cooker as normal. After cooking, let it cool and store it in the fridge. When you are ready to eat, reheat it on low heat in the cooker. Add a splash of chicken broth if it seems too thick. Creamy Crack Chicken can be rich in calories. If you want a lighter version, use low-fat cream cheese or chicken breast. You can also add vegetables like spinach or bell peppers to boost nutrition. This way, you keep the flavor while making it healthier. Absolutely! To add heat, mix in some diced jalapeños or a dash of hot sauce. You can also try using spicy ranch seasoning. This will give the dish a nice kick without losing its creamy charm. This dish pairs well with many sides. You can serve it over rice or mashed potatoes for a filling meal. Green beans or a fresh salad make great sides, too. For drinks, a light iced tea or lemonade complements the rich flavors well. This blog post covers everything you need for Creamy Crack Chicken. You learned the main ingredients, step-by-step instructions, and helpful tips. We discussed variations for extra flavor and storage methods for leftovers. You can easily make this dish your own. Keep it simple and fun. Experiment with flavors and enjoy this tasty meal anytime. It’s a comforting dish that everyone will love. Your kitchen will feel warm and inviting with this recipe. Happy cooking!

Creamy Crack Chicken Delightful Comfort Food Recipe

Are you looking for a new comfort food that’s easy and delicious? Look no further than Creamy Crack Chicken! This

To make Mongolian beef, you need a few key ingredients. Here’s what you will need: - 1 lb flank steak, cut into thin strips - 1 cup soy sauce - 1/2 cup brown sugar - 2 cloves garlic, minced - 1-inch piece ginger, grated - 2 green onions, chopped (separate white and green parts) - 1 tablespoon cornstarch - 2 tablespoons vegetable oil - 1 tablespoon sesame oil - 1/2 teaspoon red pepper flakes (optional) - Steamed rice or noodles, for serving These ingredients create a delicious and savory flavor. The flank steak works well because it cooks quickly and stays tender. You can add some optional ingredients to make your dish even tastier. Consider these: - Red pepper flakes for heat - Bell peppers for extra crunch - Broccoli for added nutrition These additions can enhance the dish and give it a personal touch. Feel free to mix and match based on what you have at home. If you can’t find some ingredients, don’t worry! Here are some substitutes: - Use sirloin or ribeye instead of flank steak for a different taste. - Honey can replace brown sugar if you prefer a healthier sweetener. - Use tamari as a gluten-free option for soy sauce. - Fresh ginger can be swapped with ground ginger in a pinch. These substitutes will still give you a great flavor. With these ingredients, you can make Mongolian beef that is both savory and simple. For the full recipe, check out the details above. To start, you need to marinate the beef. Grab a medium bowl and mix together these ingredients: - 1 cup soy sauce - 1/2 cup brown sugar - 2 cloves garlic, minced - 1-inch piece ginger, grated - Chopped white parts of 2 green onions Add the flank steak strips to this mix. Stir it well so the beef gets coated. Let it sit for at least 30 minutes. This step makes the beef tender and flavorful. Next, heat a large skillet or wok over medium-high heat. Pour in 2 tablespoons of vegetable oil. Once the oil is hot, add the marinated beef. Don't forget to save the marinade for later! Cook the beef for about 3-4 minutes. You want it browned and cooked through. After that, remove the beef from the pan and set it aside on a plate. In the same skillet, add the saved marinade and bring it to a simmer. This will help build depth in flavor. In a small bowl, mix 1 tablespoon of cornstarch with 2 tablespoons of water to make a slurry. Stir this slurry into the simmering sauce. Cook it for 2-3 minutes until the sauce thickens. Now, return the beef to the skillet. Toss it well to coat the beef in the thickened sauce. For an extra layer of flavor, stir in 1 tablespoon of sesame oil and, if you like, 1/2 teaspoon of red pepper flakes. This adds a nice touch of spice! Just before serving, toss in the green parts of the green onions. This adds freshness and color. Now you’re ready to serve your Mongolian beef over steamed rice or noodles, drizzling some extra sauce on top. Enjoy a meal that tastes gourmet but is simple to make! For the full recipe, check out the details above. To make your Mongolian beef shine, focus on the marinade. Use fresh garlic and ginger. They add a lot of flavor. Marinate the beef for at least 30 minutes. This step is key for tender meat. If you have time, marinate it longer. The longer, the better! For a smoother sauce, mix the cornstarch with water well. This prevents lumps in your sauce. When you simmer the sauce, keep stirring. This helps the flavors blend nicely. When cooking the beef, use high heat. This gives nice browning. Sear the meat in small batches. Crowding the pan makes it steam instead of sear. Once the beef is cooked, remove it right away. This keeps it juicy. Add the beef back to the pan only when the sauce is ready. This helps keep it tender. If you prefer, slice the beef against the grain. This makes it even softer to chew. One mistake is not marinating long enough. Give your beef enough time to soak in flavors. Another common error is using low heat. This can make the beef tough. Be careful with the cornstarch slurry. If you add it too quickly, your sauce may clump. Always stir it in slowly. Lastly, avoid overcooking the beef. It should be just right, not dry. These tips will help you create a delicious Mongolian beef dish. For the full recipe, check the earlier sections! {{image_2}} If you like heat, try spicy Mongolian beef. To add spice, mix in red pepper flakes with the sauce. You can also add sliced fresh chili peppers. These will give your dish a nice kick. Adjust the amount to suit your taste. More heat means more flavor! You can make a tasty vegetarian version of Mongolian beef. Use tofu or seitan as your protein. Both options soak up the sauce well. Replace flank steak with these ingredients in the marinade. Cook them the same way as the beef. You’ll still enjoy that rich flavor without meat! Adding vegetables is a simple way to make your Mongolian beef more colorful and healthy. Try bell peppers, broccoli, or snap peas. Slice them thin and toss them in the skillet with the beef. Cook until they are just tender. This adds crunch and vitamins to your meal. You can also mix in carrots for a hint of sweetness. For the full recipe, check the [Full Recipe]. Store your Mongolian beef in an airtight container. Let it cool to room temperature first. This helps keep the meat tender. Place the container in the fridge. It will last for about 3 to 4 days. If you want to keep it longer, freezing is a good option. When reheating, the goal is to keep the beef juicy. You can use a skillet for this. Heat it over medium heat. Add a splash of water or broth to keep it moist. Stir often to heat evenly. You can also use a microwave. Place the beef in a microwave-safe dish. Add a little water, cover it, and heat in short bursts. This will prevent it from drying out. Freezing Mongolian beef is easy. First, allow it to cool completely. Then, place it in a freezer-safe bag. Make sure to remove as much air as possible. Label the bag with the date. Frozen, it will last for up to 3 months. When you are ready to eat it, thaw it overnight in the fridge. Reheat it as described above for the best taste. The best cut of beef for Mongolian Beef is flank steak. Flank steak has a great flavor and is tender when cooked right. It’s thin, which helps it absorb the marinade well. If you can’t find flank steak, you can use sirloin or ribeye. Both cuts will give you a tasty dish. Yes, you can make Mongolian Beef ahead of time. You can marinate the beef for up to 24 hours. This adds more flavor. After cooking, let it cool and store it in the fridge. It will keep for about three days. Just reheat it on the stove or in the microwave when you are ready to eat. Mongolian Beef is sweeter and has a thicker sauce than many other stir-fries. It uses a soy sauce and brown sugar mix. Other stir-fries might use more vegetables and lighter sauces. The focus in Mongolian Beef is on the beef and sauce. This makes it a unique dish that stands out in flavor. You can find the full recipe for Mongolian Beef in the earlier sections. Mongolian beef is a tasty dish made from simple ingredients. We covered what to use and how to cook it. I shared tips to make your beef tender and flavorful. Remember to try variations like spicy or vegetarian options. Store leftovers safely for later meals. With this guide, you can enjoy great Mongolian beef at home. Happy cooking!

Mongolian Beef Savory and Simple Dinner Recipe

Welcome to your new favorite dinner recipe: Mongolian Beef! This dish packs bold flavors and is simple to make. I’ll

To make these tasty treats, you will need: - 1 cup unsalted butter, softened - 1 cup brown sugar, packed - 1/2 cup granulated sugar - 1 large egg - 1 teaspoon vanilla extract - 1 1/2 cups all-purpose flour - 1 teaspoon baking soda - 1 teaspoon cinnamon - 1/2 teaspoon salt - 3 cups old-fashioned oats - 1/2 cup raisins (or chocolate chips for a twist) - 1 cup powdered sugar - 1/2 cup marshmallow fluff - 1 teaspoon vanilla extract (for filling) These ingredients create a chewy, sweet, and satisfying dessert. The oats give a lovely texture, while the filling makes each pie special. You can customize your oatmeal cream pies with a few changes: - Use chocolate chips instead of raisins for a richer flavor. - Swap in whole wheat flour to make them healthier. - Try adding nuts like walnuts or pecans for a crunch. - For a touch of spice, mix in a bit of nutmeg or ginger. These substitutions help you make the recipe your own. Feel free to experiment with flavors! Each homemade oatmeal cream pie has about 200 calories. They provide a good mix of carbs, fats, and sugars. Here’s a quick breakdown: - Calories: 200 - Total Fat: 8g - Saturated Fat: 4g - Cholesterol: 30mg - Sodium: 120mg - Total Carbohydrates: 32g - Dietary Fiber: 2g - Sugars: 14g - Protein: 2g Enjoy these treats in moderation! They’re a delightful snack or dessert. For the full recipe, check out the details above. Start by gathering all your ingredients. You will need: - 1 cup unsalted butter, softened - 1 cup brown sugar, packed - 1/2 cup granulated sugar - 1 large egg - 1 teaspoon vanilla extract - 1 1/2 cups all-purpose flour - 1 teaspoon baking soda - 1 teaspoon cinnamon - 1/2 teaspoon salt - 3 cups old-fashioned oats - 1/2 cup raisins (or chocolate chips for a twist) - 1 cup powdered sugar - 1/2 cup marshmallow fluff - 1 teaspoon vanilla extract (for filling) Make sure your butter is soft. This helps it mix well with the sugars. 1. Preheat the Oven: Set your oven to 350°F (175°C). Line two baking sheets with parchment paper. 2. Cream the Butter and Sugars: In a large bowl, cream the butter, brown sugar, and granulated sugar together. Mix until light and fluffy, about 3-5 minutes. 3. Add Egg and Vanilla: Beat in the egg and vanilla extract until well mixed. 4. Mix Dry Ingredients: In another bowl, whisk together the flour, baking soda, cinnamon, and salt. Slowly stir this into your wet mix until just combined. 5. Add Oats and Raisins: Fold in the oats and raisins (or chocolate chips) until they are evenly mixed. 6. Scoop the Cookies: Use a cookie scoop or tablespoon to drop rounded dough onto the prepared sheets. Leave about 2 inches between each scoop. 7. Bake: Place in the oven and bake for 10-12 minutes. The edges should be golden, and the centers should stay soft. 8. Cool: Let the cookies cool on the baking sheet for 5 minutes. Then, transfer them to a wire rack to cool completely. 1. Prepare the Filling: In a mixing bowl, whisk together the powdered sugar, marshmallow fluff, and vanilla extract. Mix until smooth and well combined. 2. Assemble the Pies: Once the cookies cool, spread a generous dollop of filling on the flat side of one cookie. Top it with another cookie to make a sandwich. Repeat with all cookies and filling. Making these homemade oatmeal cream pies is easy and fun. You will love how they taste! For the full recipe, check the previous section. To get those perfect chewy cookies, I have a few key tricks. First, always use room temperature butter. This helps create a soft dough. Second, do not overmix the dough after adding the flour. Mixing too much makes the cookies tough. Third, take the cookies out when they are just lightly golden. They will keep cooking on the tray. Store your oatmeal cream pies in an airtight container. This keeps them soft and fresh. If you want to serve them warm, heat them for just a few seconds in the microwave. You can also add a scoop of ice cream in between two cookies for a fun treat. It’s a great way to impress friends and family. For a beautiful presentation, dust the pies with powdered sugar. This adds a nice touch. You can also arrange them on a colorful platter. If you want to make them more fun, wrap each pie in parchment paper. This makes for a cute gift or snack to share. {{image_2}} You can make your oatmeal cream pies a bit healthier. Use whole wheat flour instead of all-purpose flour. This choice boosts fiber and nutrients. Replace some butter with unsweetened applesauce. This swap cuts fat and adds moisture. If you want less sugar, use a sugar substitute like Stevia. These changes keep your treat tasty while making it a bit better for you. You can easily change the flavors of your oatmeal cream pies. Adding chocolate chips makes them rich and sweet. Chopped nuts add crunch and a nutty taste. Try different dried fruits like cranberries or apricots for extra flavor. If you want a spicy kick, add a pinch of nutmeg or ginger. Each of these options gives a fun twist to the classic recipe. Seasonal ingredients can bring new life to your pies. In the fall, add pumpkin puree and spice for a cozy flavor. During the holidays, mix in peppermint extract for a festive touch. In summer, fresh berries like blueberries or strawberries can make a bright filling. These seasonal changes keep your oatmeal cream pies fresh and exciting all year. Check out the Full Recipe for more ideas! To keep your oatmeal cream pies fresh, store them in an airtight container. This helps maintain their chewy texture and flavor. You can place parchment paper between the pies to stop them from sticking together. If you have leftovers, they should stay good for several days at room temperature. If you want to save some for later, freezing is a great option. First, let the pies cool completely. Then, wrap each pie in plastic wrap and place them in a freezer bag. Make sure to remove as much air as possible from the bag. They will last up to three months in the freezer. When you are ready to eat them, just thaw them at room temperature. Oatmeal cream pies can last about five days when stored properly at room temperature. If you put them in the fridge, they may dry out faster. For the best taste, eat them within a few days. Always check for any signs of spoilage before enjoying your treats. Remember, these pies are best fresh but can stay tasty even after some time. To make oatmeal cream pies from scratch, follow these steps: 1. Cream Butter and Sugars: Start by creaming the butter, brown sugar, and granulated sugar. Mix until light and fluffy. 2. Add Egg and Vanilla: Beat in one large egg and a teaspoon of vanilla extract. 3. Mix Dry Ingredients: In another bowl, whisk together flour, baking soda, cinnamon, and salt. Stir this into the wet mix. 4. Add Oats and Raisins: Fold in three cups of old-fashioned oats and half a cup of raisins (or chocolate chips). 5. Bake Cookies: Drop dough onto baking sheets and bake at 350°F for 10-12 minutes. 6. Make Filling: For the filling, mix powdered sugar, marshmallow fluff, and vanilla extract until smooth. 7. Assemble: Spread the filling between two cookies to form a sandwich. You can find the full recipe included earlier to guide you through each step. Yes, you can use quick oats instead of old-fashioned oats. Quick oats are smaller and cook faster. This can change the texture of your pies. The result may be softer and less chewy. If you like a chewier bite, stick with old-fashioned oats. If you need a substitute for marshmallow fluff, try using cream cheese. Mix it with powdered sugar and vanilla for sweetness. You can also use a mix of whipped cream and powdered sugar. This will give you a light and fluffy filling, similar to marshmallow fluff. Homemade oatmeal cream pies are simple and fun to make. We covered key ingredients, baking steps, and tasty variations. You can choose healthier swaps, try different flavors, or get creative with how you present them. Remember to store them properly to keep them fresh. With these tips, you’ll have delicious treats ready to enjoy. Dive in, get baking, and share your tasty results with others!

Homemade Oatmeal Cream Pies Quick and Tasty Treat

Homemade Oatmeal Cream Pies are a delightful treat that everyone will love. If you’ve ever craved that perfect blend of

To make these tasty truffles, you will need: - 1 cup sugar cookies (store-bought or homemade, crumbled) - 1/4 cup cream cheese, softened - Zest of 1 lemon - Zest of 1 lime - 1 tablespoon lemon juice - 1 tablespoon lime juice - 1/2 teaspoon vanilla extract - 1 cup white chocolate chips - 1 tablespoon coconut oil (or vegetable oil) - Sprinkles (for decoration) When picking sugar cookies, you can choose store-bought or make your own. Homemade cookies let you control the flavor and texture. If you buy them, look for cookies that are fresh and tasty. The cream cheese should be softened to mix well. This makes the truffles smooth and creamy. Using fresh lemons and limes gives the best flavor. Zesting adds a bright taste that is hard to beat. You can swap some ingredients if needed. For cream cheese, try mascarpone for a different taste. If you can't find white chocolate chips, you can use milk chocolate instead. For a dairy-free option, use a vegan cream cheese. If you want a lower-fat version, skip the coconut oil. Just remember, these changes might change the taste a bit. Feel free to experiment and find what you love. Start by gathering your ingredients. Use either store-bought or homemade sugar cookies. Crumble them into a large mixing bowl. Add softened cream cheese to the bowl. Mix well until the two combine smoothly. Next, add the zest of one lemon and one lime. This adds bright flavor. Then, pour in the lemon juice and lime juice. Stir in the vanilla extract. Mix until everything is evenly distributed. Use a cookie scoop or your hands to form small balls. Aim for about one inch in diameter. Place these on a lined baking sheet. Chilling the truffles is key. It helps them firm up nicely. Place the shaped truffles in the refrigerator for about 30 minutes. This time allows the flavors to meld together. A well-chilled truffle is easier to coat later. While your truffles chill, melt the white chocolate chips. Use a microwave-safe bowl for this step. Add one tablespoon of coconut oil to the chips. Heat the mixture in 30-second intervals. Stir after each interval until the chocolate is smooth. This method prevents burning. Once melted, remove the truffles from the fridge. Dip each one into the melted chocolate. Make sure to coat them fully. Place the coated truffles back on the lined sheet. Sprinkle colorful decorations on top before the chocolate sets. This adds a fun touch to your truffles. To make the best lemon-lime sugar cookie truffles, here are my top tips: - Use fresh ingredients: Fresh lemon and lime zest give the best flavor. - Chill thoroughly: Ensure the truffles chill long enough to hold their shape. - Melt chocolate carefully: Heat white chocolate in short bursts to avoid burning. - Mix well: Combine the cream cheese and cookies until no dry spots remain. These tips will help you achieve perfect texture and flavor. Mistakes can happen in the kitchen. Here are some common ones and how to avoid them: - Not chilling enough: If truffles are too soft, they will not hold their shape. - Overheating chocolate: Stir often while melting to keep it smooth. - Skipping sprinkles: These add fun color and texture. Don’t skip this step! By being mindful of these points, your truffles will be a hit. To enhance the flavor of your truffles, consider these ideas: - Add a pinch of salt: Salt brings out the sweetness and makes flavors pop. - Experiment with extracts: Try almond or lemon extract for additional depth. - Use zest from both fruits: This gives a bright, fresh taste that shines through. These enhancements can elevate your truffles from good to great! If you're curious about the full recipe, check out the detailed instructions above. {{image_2}} You can change the flavor of your truffles by using different citrus fruits. Try orange or grapefruit zest for a new twist. Each fruit brings its own taste and aroma. You can mix and match zest from several fruits for a fun flavor blend. Just remember to keep the balance right so it still tastes light and bright. When it comes to coating your truffles, you have options. White chocolate is sweet and creamy, but dark chocolate gives a rich taste. You can also use milk chocolate for a middle ground. If you want to keep it fun, sprinkle colorful toppings on the truffles instead. Sprinkles add a festive look and a bit of crunch. Choose what speaks to your sweet tooth! You can easily make these truffles gluten-free. Just use gluten-free cookies instead of regular sugar cookies. For a vegan version, swap cream cheese with a dairy-free option. Also, you can use dairy-free chocolate for coating. This way, everyone can enjoy these delicious treats! For the full recipe, check out the complete recipe details above. To keep your Lemon-Lime Sugar Cookie Truffles fresh, store them in an airtight container. Place a piece of parchment paper between layers to avoid sticking. This method helps maintain their shape and taste. Keep them in a cool, dry place. If it gets warm, your truffles might melt or lose their great look. You can store these truffles for up to one week. They will taste best within the first few days. After that, the flavors may fade. Check them often to make sure they stay fresh. If you notice any changes in smell or texture, it is best to toss them. If you want to keep your truffles for a longer time, freezing works great. First, place them on a lined baking sheet and freeze for about an hour. Once they are firm, transfer them to a freezer-safe bag or container. Make sure to label them with the date. They can last for up to three months in the freezer. To enjoy, simply thaw them in the fridge overnight before serving. For the best taste, only freeze truffles once. Remember, following these storage tips will help you enjoy your Lemon-Lime Sugar Cookie Truffles at their best! For the full recipe, check the earlier section of the article. You will know the truffles are set when they feel firm to the touch. After chilling, they should not be squishy or soft. A good test is to gently press on one. If it holds its shape, it is ready. Letting them chill for about 30 minutes usually gives the best results. If you want quicker results, pop them in the fridge for about 10 to 15 minutes after coating. Absolutely! You can use dark chocolate, milk chocolate, or even colored candy melts. Each type gives a unique taste and look. If you prefer a richer flavor, dark chocolate is a great choice. For a sweeter treat, milk chocolate works well. Just remember to melt the chocolate slowly to avoid burning it. Serve these truffles on a bright, fun plate to showcase their colors. You can also arrange them in a decorative box for gifting. Pair them with slices of fresh lemon and lime for a lovely presentation. For an extra touch, consider adding a scoop of vanilla ice cream on the side. These ideas make the truffles even more enjoyable. For more detailed instructions on making these truffles, check out the Full Recipe. In this post, we explored how to make Lemon-Lime Sugar Cookie Truffles. We discussed the best ingredients to use, along with tips on choosing them. I shared step-by-step instructions for easy preparation and emphasized chilling and melting chocolate effectively. We also looked at fun variations and storage tips. Making these truffles can be simple and fun. With a few adjustments, you can create your own unique flavors. Enjoy the process and share these delightful treats with friends and family.

Lemon-Lime Sugar Cookie Truffles Delightful Sweet Treat

Get ready to delight your taste buds with Lemon-Lime Sugar Cookie Truffles! These sweet bites are bursting with zesty flavor

- 4 chicken thighs (bone-in, skin-on) - 4 chicken drumsticks - 1 cup buttermilk - 1 tablespoon hot sauce (optional) - 2 cups all-purpose flour - 1 teaspoon paprika - 1 teaspoon garlic powder - 1 teaspoon onion powder - 1 teaspoon dried thyme - 1 teaspoon salt - ½ teaspoon black pepper - ½ teaspoon cayenne pepper (adjust for spiciness) To make this oven-baked fried chicken, start with fresh chicken thighs and drumsticks. These cuts have enough fat to keep the meat juicy and flavorful. Buttermilk is essential. It helps tenderize the chicken while adding rich taste. Adding hot sauce is optional, but it gives a nice kick. Next, you need a seasoning mix. Combine flour with spices like paprika, garlic powder, and thyme. This mix adds depth to the flavor and a nice crunch. - Cooking spray or olive oil for greasing - Gluten-free options: almond flour or gluten-free bread crumbs For that golden, crispy finish, I always use cooking spray or olive oil. Lightly coat the chicken before baking. It helps achieve that fried look and texture. If you prefer gluten-free, try almond flour or gluten-free bread crumbs. Both work well and still give you that crunch. If you want the full recipe, check out Crispy Oven-Baked Fried Chicken. Start with the chicken pieces. I use bone-in, skin-on thighs and drumsticks. For the best flavor, mix buttermilk and hot sauce in a large bowl. This adds moisture and taste. Make sure the chicken is well-coated. Cover the bowl and place it in the fridge. I recommend marinating for at least two hours, but overnight gives better results. The longer you marinate, the more flavor the chicken absorbs. Next, let’s prepare the oven. Preheat it to 425°F (220°C). This high heat helps the chicken crisp up nicely. While the oven heats, line a baking sheet with aluminum foil. This makes cleanup easy. Then, place a wire rack on top of the baking sheet. The wire rack is key for getting crispy chicken all over. It allows hot air to circulate around the chicken while it bakes. Now it’s time to coat the chicken. In a separate bowl, mix flour with spices like paprika, garlic powder, and thyme. This spice mix adds great taste. Remove the chicken from the buttermilk marinade, letting excess liquid drip off. Dredge each piece in the flour mix. Press down firmly to ensure an even coat. A good coating will make your chicken super crispy. Once coated, place the chicken on the wire rack. For extra crispiness, lightly spray or drizzle olive oil over the chicken. This helps it turn golden brown as it bakes. Now you are ready to bake! If you want to see the complete recipe, check the Full Recipe link. To get that crispy texture, follow these tips: - Marinate your chicken in buttermilk. This tenderizes the meat. - Let the excess marinade drip off before coating. This prevents sogginess. - Use a wire rack on the baking sheet. It allows air to circulate. How do you know when the chicken is done? - Use a meat thermometer. Insert it in the thickest part of the chicken. - The internal temperature should reach 165°F (75°C). This ensures safety. - Look for a golden brown color on the outside. What pitfalls should you watch for? - Avoid overcrowding the baking sheet. It can lead to steaming instead of baking. - Don't skip the resting time. Let the chicken sit for 5 minutes after baking. - Ensure your oven is fully preheated before putting in the chicken. For more detailed steps and a full list of ingredients, check the Full Recipe. {{image_2}} You can change how your chicken tastes with different spices. Try using Cajun seasoning for a kick or Italian herbs like oregano and basil for a fresh twist. You can even add some lemon zest for brightness. Mixing in herbs like rosemary or parsley can also add depth. Experimenting helps you find your favorite flavor blend. If you want a change from chicken, you can use turkey or even pork. Just keep in mind that different meats need different cooking times. For turkey, you may need to bake a bit longer. Pork may cook faster, so monitor it closely. Always check the internal temperature to ensure it's safe to eat. An air fryer can make your chicken even crispier. Set it to 400°F and cook for about 25-30 minutes. This method gives you that crunch without frying in oil. You can also broil the chicken for the last few minutes of baking. This tip adds extra browning and crunch. Just watch it closely to prevent burning. You can find the full recipe in the earlier section, where I share all the steps and tips to make this dish perfect. To keep your cooked chicken fresh, let it cool first. Place the chicken in an airtight container. This helps to keep moisture in. Store it in the fridge for up to four days. Avoid stacking pieces to prevent sogginess. For best results, use glass or plastic containers with tight lids. When it’s time to reheat, keep the chicken crispy. The oven is best for this. Preheat your oven to 375°F (190°C). Place the chicken on a baking sheet. Heat it for about 15 to 20 minutes. This way, the skin stays crunchy. If using a microwave, cover the chicken with a paper towel. Heat it for one minute, then check. You may need to heat it a little longer, but the oven is still better. You can freeze leftover chicken for later. Wrap each piece in plastic wrap, then place it in a freezer bag. Make sure to remove as much air as possible. This prevents freezer burn. Label the bag with the date. You can freeze it for up to three months. When ready to eat, thaw it in the fridge overnight. To reheat, follow the oven method for the best texture. To make oven-baked fried chicken crispy, follow these tips: - Marinate the chicken in buttermilk. This adds flavor and moisture. - Use a wire rack on your baking sheet. This lets hot air circulate around the chicken. - Press the flour mixture onto the chicken. Make sure it sticks well. - Spray or drizzle with oil before baking. This helps the coating brown nicely. - Bake at a high temperature of 425°F (220°C) for that perfect crunch. These steps create a crispy texture that rivals fried chicken. You can use skinless chicken, but the results will differ. Skin adds flavor and helps keep the chicken moist. Without skin, the chicken may dry out faster. If you prefer skinless, consider these tips: - Adjust cooking time. Skinless chicken cooks quicker, so check it earlier. - Add extra fat. Brush or coat skinless pieces in oil to help with moisture. - Marinate longer. This adds flavor and helps tenderize the meat. Skinless chicken can work, but it needs a bit more care. Oven-baked fried chicken lasts about 3-4 days in the fridge. To store it properly: - Let it cool before putting it in the fridge. - Use an airtight container. This helps keep the chicken fresh. - Label and date the container for easy tracking. For best taste, eat it within the first few days. Pair your oven-baked fried chicken with these tasty sides: - Coleslaw adds crunch and freshness. - Mashed potatoes offer creaminess and comfort. - Corn on the cob gives a sweet touch. - Baked beans add a hearty flavor. These sides complement the chicken's crispy texture and flavor. For the complete recipe and detailed instructions on how to make crispy oven-baked fried chicken, visit the [Full Recipe](#). Oven-baked fried chicken is simple and delicious. We covered essential ingredients, like chicken and buttermilk, to create flavor. I shared step-by-step instructions for marinating, coating, and baking the chicken to achieve that crispy texture. Tips helped avoid common mistakes, while variations gave ideas to spice things up. Proper storage advice keeps leftovers tasty. Use these techniques for the best results. Enjoy your crispy chicken that’s full of flavor and perfect for any meal!

Oven Baked Fried Chicken Crispy and Flavorful Delight

If you crave fried chicken but want a healthier twist, you’re in the right place! This Oven Baked Fried Chicken

Older posts
Newer posts
← Previous Page1 … Page71 Page72 Page73 … Page76 Next →

dsad

© 2025 greenmealmap • Built with GeneratePress

Our Policies

  • Copyright Policy
  • Cookie Policy
  • GDPR Policy
  • Privacy Policy
  • Disclaimer
  • Terms Of Use

More Information

  • Home
  • About
  • Contact
  • Appetizers
  • Dessert
  • Dinner
  • Drinks
©2025, greenmealmap About Back To Top