Skip to content
DisclaimerTerms Of UseGDPR PolicyCookie Policy

greenmealmap

  • Home
  • Drinks
  • Appetizers
  • Dinner
  • Dessert
  • About
  • Contact
  • Privacy Policy
DisclaimerTerms Of UseGDPR PolicyCookie Policy

Lauren

- 1 lb (450g) boneless, skinless chicken thighs, cut into bite-sized pieces - 1/4 cup honey - 2 tablespoons soy sauce (low-sodium preferred) - 1 tablespoon apple cider vinegar - 2 garlic cloves, minced - 1/2 teaspoon grated ginger - 1 tablespoon cornstarch - 2 tablespoons water - 1 tablespoon sesame oil - Salt and pepper to taste - 2 green onions, sliced (for garnish) - Sesame seeds (for garnish) You can swap honey with maple syrup or agave for a different taste. If you need a soy-free option, try coconut aminos instead of soy sauce. For a twist, add vegetables like bell peppers or snow peas. You can also use chicken breasts if you prefer leaner meat. Tofu or shrimp works well too! These swaps keep the dish tasty and fun. Try them out to match your taste! For the full recipe, be sure to check the details. To start, we need to marinate the chicken. First, grab a mixing bowl. Add these ingredients: - 1/4 cup honey - 2 tablespoons soy sauce - 1 tablespoon apple cider vinegar - 2 minced garlic cloves - 1/2 teaspoon grated ginger - Salt and pepper to taste Whisk these together until they blend well. Next, toss in the chicken pieces and coat them evenly. Let the chicken marinate for 15-20 minutes. This gives the chicken great flavor. Now, we prepare the sauce. In a small bowl, mix 1 tablespoon of cornstarch with 2 tablespoons of water. Stir until you have a smooth slurry. Set this aside for later. Now, let’s cook the chicken. Heat 1 tablespoon of sesame oil in a large skillet over medium-high heat. Once hot, add the marinated chicken. Cook for 6-8 minutes, stirring often. You want the chicken to turn brown and cook through. After the chicken is cooked, lower the heat to medium. Pour the honey mixture into the skillet with the chicken. Stir and let it cook for another 2 minutes. This helps the chicken soak up more flavor. Next, we’ll thicken the sauce. Slowly add the cornstarch slurry to the skillet. Stir continuously until the sauce thickens and becomes sticky. It should coat the chicken nicely. Once the sauce is thickened, take the skillet off the heat. Now it’s time to garnish. Slice 2 green onions and sprinkle them on top. Add sesame seeds for extra crunch and flavor. For serving, I suggest pairing this sticky honey chicken with steamed rice or a fresh salad. It makes for a colorful and tasty meal. Enjoy the sweet and savory flavors that are sure to impress! To ensure tender chicken, start with thighs. They stay moist during cooking. Marinate your chicken for at least 15 minutes. This adds flavor and helps keep it juicy. Use a large skillet for even cooking. Non-stick pans work well for sticky recipes like this. You can add spices like paprika or chili flakes for extra kick. Fresh herbs like cilantro or basil can also boost flavor. To balance the honey sweetness, add a splash of vinegar or a pinch of salt. This helps create a well-rounded taste. For serving, use white plates for a nice contrast. This highlights the vibrant colors of the dish. You can sprinkle sesame seeds and green onions on top for a pop of color. For a creative touch, serve the chicken on a bed of rice or with steamed veggies. This adds texture and makes the meal look appealing. {{image_2}} You can use different meats or tofu in this recipe. Chicken thighs work well, but chicken breast also tastes great. If you want a vegetarian option, try using firm tofu. Just cut it into cubes and marinate it like the chicken. Adding vegetables makes your meal more complete. You can toss in bell peppers, broccoli, or snap peas. Add them to the skillet when the chicken is almost cooked. This way, they stay crisp and vibrant. Want a spicy version? Add some red pepper flakes or sriracha to the sauce. This will give it a nice kick and make your taste buds dance. You can also use chili garlic sauce for more flavor. Incorporate different cuisines by adding spices. Try using cumin and coriander for a Middle Eastern twist. Or, mix in some soy sauce and ginger for an Asian flair. Each twist creates a unique dish. Sticky honey chicken can shine in many forms. You can serve it in tacos. Just fill soft tortillas with the chicken and top with veggies. It makes a fun, hands-on meal. Another great option is to serve it over rice or noodles. The sticky sauce is perfect for soaking into the grains. You can choose jasmine rice, brown rice, or even stir-fried noodles. Each choice brings a different texture and taste. For more details, check the Full Recipe. To store your sticky honey chicken, let it cool down first. Place leftovers in an airtight container. This keeps the chicken fresh. It can last in the fridge for up to three days. Always check for any off smells or changes in texture before eating. You can freeze sticky honey chicken if you want to save some for later. Just place it in a freezer-safe bag or container. Make sure to remove as much air as possible. It will stay good for up to three months. When you are ready to eat it, thaw it in the fridge overnight. To heat it up, use a skillet over low heat. This helps maintain its taste and texture. Leftover sticky honey chicken is versatile. You can use it in many ways. Try making a chicken stir-fry with veggies. You can also add it to salads for extra flavor. Another idea is to make chicken tacos. Just warm the chicken and add your favorite toppings. This way, you enjoy the meal in different styles! You can serve Sticky Honey Chicken with many tasty sides. Here are some ideas: - Steamed broccoli for a crunchy bite - White rice to soak up the sauce - Fried rice for a savory twist - Mixed green salad for freshness - Roasted carrots for natural sweetness These sides balance the dish and make your meal complete. To add heat to your sauce, try these tips: - Add red pepper flakes for instant spice - Stir in sriracha for a bold kick - Use chili garlic sauce for depth of flavor - Mix in some fresh chopped jalapeños for freshness These options let you control the heat level to fit your taste. Yes, you can use chicken breast. Here’s what to know: - Chicken breast is leaner and cooks faster. - It can be drier than thighs if overcooked. - Thighs have more fat, giving a richer flavor. Choose your protein based on your preferred taste and texture. Follow these steps for storing and reheating: - Place leftovers in an airtight container in the fridge. - They stay fresh for up to 4 days. - To reheat, use a microwave or skillet on low heat. This helps keep the chicken juicy and flavorful. This blog post covered ingredients for sticky honey chicken and provided step-by-step instructions. You learned about ingredient substitutions, cooking tips, and fun variations. We also explored storage methods to keep your leftovers fresh. In the end, this dish offers plenty of options for creativity and taste. Enjoy experimenting with flavors and make it your own! Now, you can create a delicious meal that everyone will love.

Sticky Honey Chicken Quick Recipe for Delicious Flavor

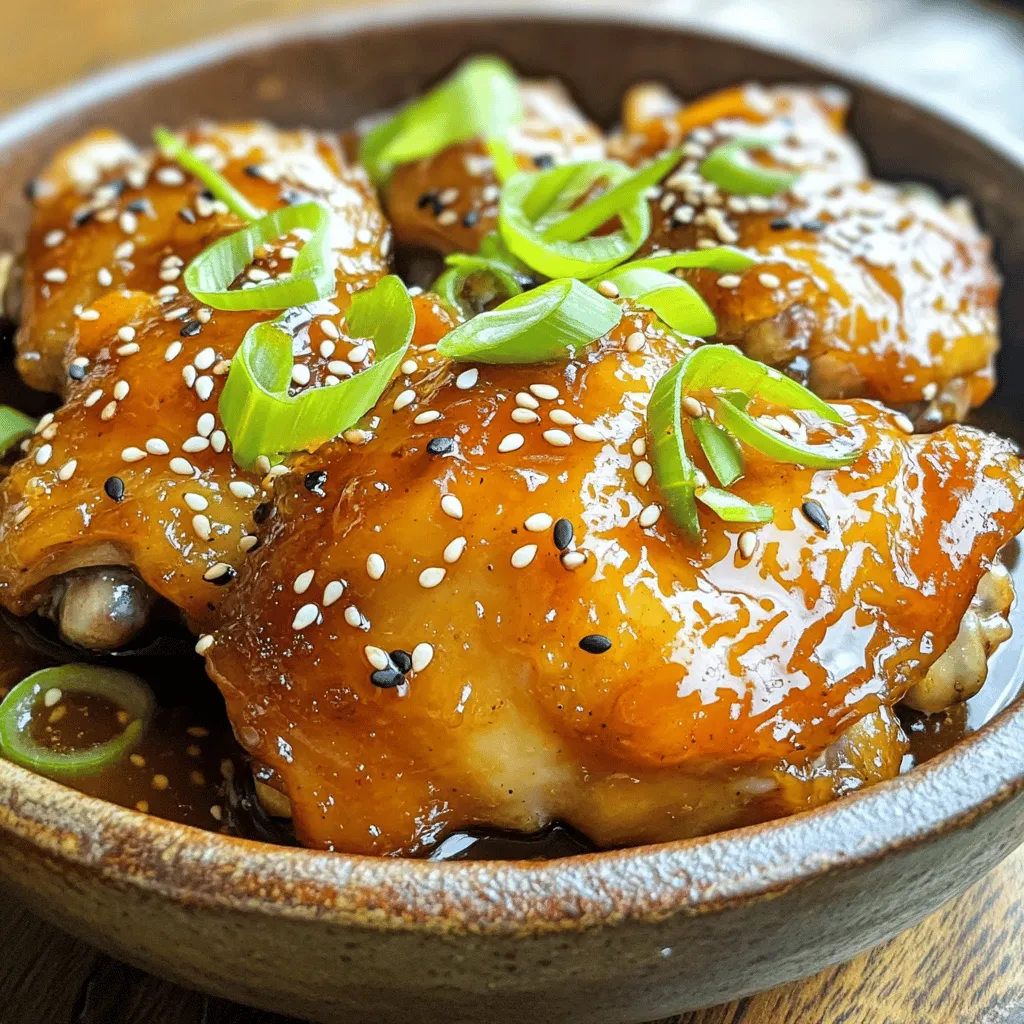
Are you ready to impress your family with a quick dinner? This Sticky Honey Chicken recipe is your answer! With

- 1 cup Arborio rice - 4 cups coconut milk (canned) - 1/2 cup sugar - 1/4 teaspoon salt - 1 teaspoon vanilla extract - 1/2 cup shredded coconut (sweetened or unsweetened) - Fresh mango slices (for serving) - Toasted coconut flakes (for garnish) The main ingredients for coconut rice pudding create a rich and creamy base. Arborio rice gives the pudding its lovely texture. Coconut milk adds a creamy flavor, making every bite a delight. Sugar sweetens the dish, and a little salt balances the flavors. Vanilla extract brings warmth, while shredded coconut adds a fun chewiness. Fresh mango slices are perfect for serving and add a bright touch. Toasted coconut flakes on top give a crunchy twist. - A pinch of cinnamon - Chopped nuts (e.g., almonds or pistachios) If you want to change things up, add a pinch of cinnamon. It brings a warm spice that pairs well with coconut. Chopped nuts like almonds or pistachios add crunch and flavor. Feel free to mix and match based on your taste! - Medium saucepan - Stirring spoon - Serving bowls You will need a medium saucepan to cook the rice pudding. A stirring spoon is key to mix everything well. Finally, use serving bowls to present your delightful treat. When you serve it in clear bowls, everyone can see its creamy goodness. Make sure to check the full recipe for all the steps to create this magical dish! To start, gather your ingredients. In a medium saucepan, combine the following: - 1 cup Arborio rice - 4 cups coconut milk (canned) - 1/2 cup sugar - 1/4 teaspoon salt Stir to mix these ingredients well. This step is key for even cooking. Next, place the saucepan over medium heat. Watch closely as you heat and stir until the mixture begins to boil. This should take just a few minutes. Once you see bubbles, it’s time to adjust the heat. Reduce it to low and cover the saucepan. This helps the rice cook evenly. Let it simmer for about 30-35 minutes. Stir occasionally. This keeps the rice from sticking to the bottom. You want the rice to become creamy and tender. After cooking, take the saucepan off the heat. Now, stir in these two ingredients: - 1 teaspoon vanilla extract - 1/2 cup shredded coconut Mix well and let the pudding cool slightly. As it cools, it will thicken just right. You can serve the pudding warm or chilled. Top each bowl with fresh mango slices and a sprinkle of toasted coconut flakes. This adds a lovely touch and makes it look great! For the complete recipe, check the Full Recipe section. To make coconut rice pudding, you must avoid sticky rice. Rinse the Arborio rice under cold water before cooking. This removes excess starch. Starch can make the rice clump together. After rinsing, cook it in coconut milk. Stir often to keep it creamy and smooth. Stirring is key to great rice pudding. It keeps the rice from sticking to the pan. Stir every few minutes while it cooks. This helps the rice absorb the coconut milk evenly. It also prevents burning. Serving coconut rice pudding can be fun. Use clear glass bowls to show off the creamy look. Add a sprig of mint on top for color. This makes the dish even more appealing. You can enhance the flavor with toppings. Fresh mango slices add sweetness. Toasted coconut flakes give a nice crunch. A sprinkle of cinnamon can add warmth. You can also try chopped nuts for extra texture. Many people overcook or undercook the rice. If you overcook it, the rice will turn mushy. If you undercook it, the rice will be hard. Make sure to follow the cooking time closely. Using the wrong type of rice can ruin your pudding. Arborio rice is best for this dish. It has the right amount of starch. This gives the pudding its creamy texture. Avoid regular long-grain rice, as it won't work well. For the full recipe, check out the Coconut Rice Pudding: Disney Copycat. {{image_2}} You can easily adjust this coconut rice pudding for different diets. If you're vegan, swap out sugar for a vegan-friendly sweetener, like maple syrup or agave. This keeps the flavor rich while catering to plant-based diets. If gluten is a concern, rest easy! This recipe is naturally gluten-free. Just focus on using certified gluten-free ingredients. Want to jazz up your pudding? Try adding fruits like pineapple or berries. These fruits bring fresh flavors and vibrant colors. You can also play with spices. A pinch of nutmeg or cardamom can add warmth and depth. Experiment with what you love! Presentation matters! Layer your coconut rice pudding with fresh fruits or a sweet sauce. This not only looks great but adds flavor too. Use dessert glasses for a fancy look. It makes your treat feel special and upscale. You’ll impress everyone at the table with just a few simple touches. Try these variations to make this delightful dish your own! For the full recipe, check out the detailed instructions above. To keep your coconut rice pudding fresh, place it in an airtight container. Make sure it is cool before sealing. This helps avoid moisture buildup. You can store it in the fridge for up to four days. When you want to enjoy leftovers, simply reheat the pudding. The best way is on the stove over low heat. Stir often and add a splash of coconut milk if it seems too thick. You can also microwave it in short bursts. Start with 30 seconds, then stir and check the temperature. If you want to save coconut rice pudding for later, freezing works well. Just spoon it into freezer-safe containers. Leave some space at the top for expansion. It can last up to three months in the freezer. To thaw, move it to the fridge for a few hours or overnight. This keeps the texture nice. If you are in a hurry, you can use the microwave, but be careful to avoid hot spots. Coconut rice pudding lasts about four days in the fridge. After that, it may lose its taste and texture. Look for signs of spoilage. If it smells sour or has a strange color, it's best to toss it. A change in texture can also mean it's time to say goodbye. Enjoy your dessert fresh for the best flavor. The secret lies in using Arborio rice. It gives the pudding a creamy texture. You need to stir often while cooking. This keeps the rice from sticking and helps it absorb flavors. Adding vanilla extract enhances the taste. Don’t forget the shredded coconut for extra flavor and texture. You can use regular rice, but the texture will change. Arborio rice is starchier and creates that creamy feel. If you use regular rice, your pudding may be less rich. Long-grain rice will not work well. Stick with short or medium-grain rice for a better result. You can serve it either way. Warm pudding feels cozy and comforting. Chilled pudding is refreshing, especially on a hot day. It thickens as it cools, making it even creamier. Try both ways to see which you prefer! To replicate that smooth texture, stir frequently while cooking. Use the right amount of coconut milk. Let it simmer long enough for the rice to soften. Adding shredded coconut at the end also helps. You want a creamy, dreamy pudding that melts in your mouth. You can top it with fresh mango slices for sweetness. Toasted coconut flakes add crunch and flavor. Chopped nuts like almonds or pistachios add a nice touch too. A drizzle of honey or a sprinkle of cinnamon can also elevate your dish. Enjoy mixing and matching your favorite toppings! You have all the steps to make delicious coconut rice pudding. We covered the key ingredients, easy cooking instructions, and tips for perfecting your dish. You learned about variations and how to store leftovers properly. With these insights, you can create a tasty treat for any occasion. Enjoy your cooking, and don't be afraid to try new flavors or toppings. Happy pudding making!

Coconut Rice Pudding Disney Copycat Delightful Treat

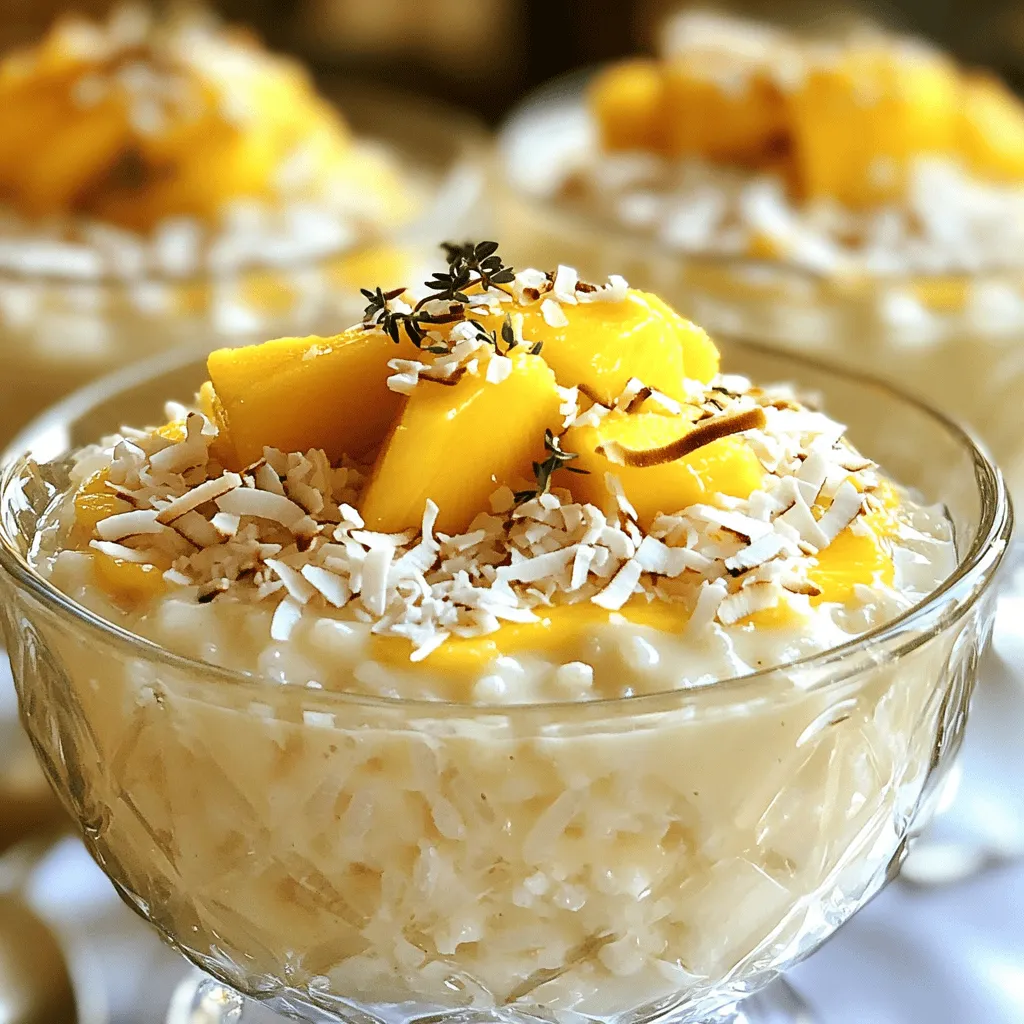
If you love Disney’s coconut rice pudding, you’re in for a treat! This delightful copycat recipe brings the magic of

- 4 boneless, skinless chicken breasts - 1/3 cup honey - 3 cloves garlic, minced - 2 tablespoons soy sauce (low-sodium preferred) - 1 tablespoon apple cider vinegar - 1 tablespoon cornstarch - 2 tablespoons olive oil - Salt and pepper to taste - Fresh parsley, chopped (for garnish) - Medium bowl - Skillet - Resealable plastic bag or shallow dish - Whisk To create a great dish, you need the right ingredients. The chicken breasts are the star here. They are lean and soak up flavors well. Honey gives a nice sweetness. Garlic adds depth and aroma. Low-sodium soy sauce keeps it savory without too much salt. Apple cider vinegar adds a nice tang. Cornstarch helps thicken the sauce later. Olive oil keeps the chicken juicy while cooking. Do not forget salt and pepper for seasoning. Finally, fresh parsley brightens up the dish when you serve it. Gather these items before you start. It makes cooking smoother and more fun. You can find all these ingredients at your local store. If you want to see how to use them, check out the Full Recipe. First, we need to make the marinade. In a medium bowl, whisk together the honey, minced garlic, soy sauce, apple cider vinegar, and cornstarch. This mix gives the chicken a sweet and savory flavor that you will love. Next, season your chicken breasts. Sprinkle salt and pepper on both sides. This simple step adds a nice touch to your chicken. Then, combine the chicken and marinade. Place the chicken breasts in a large resealable bag or shallow dish. Pour the marinade over the chicken. Make sure each piece is well coated. Seal the bag or cover the dish, then put it in the fridge for at least 30 minutes. If you have time, marinate for up to 2 hours to boost the flavor. Now, let’s cook the chicken. Heat olive oil in a large skillet over medium heat. This step is key for getting a nice sear on the chicken. After the oil is hot, take the chicken out of the marinade. Let the excess marinade drip off. Place the chicken in the skillet. Cook the chicken for about 5 to 7 minutes on each side. You want the outside to be golden brown, and the inside should reach an internal temperature of 165°F (75°C). Once the chicken is cooked, it’s time to make the sauce. Remove the chicken from the skillet and cover it with aluminum foil to keep it warm. In the same skillet, add the reserved marinade. Bring it to a simmer over medium heat. Cook for 2 to 3 minutes. Stir frequently until the sauce thickens slightly. Now, you can drizzle this thickened sauce over the chicken or toss the chicken in the skillet to coat it well. This adds extra flavor to every bite. Enjoy your Easy Honey Garlic Chicken Breasts! For more details, check the Full Recipe. - Recommended marinating times: I suggest marinating your chicken breasts for at least 30 minutes. For the best flavor, aim for up to 2 hours. This allows the chicken to soak up the honey garlic goodness. - Impact of timing on flavor: The longer you marinate, the deeper the flavor. A quick marinade gives a hint of taste, while a longer one makes every bite burst with flavor. - Ensuring even cooking: Make sure your chicken breasts are about the same thickness. This helps them cook evenly. If some pieces are thicker, pound them down gently with a meat mallet. - Checking doneness with a meat thermometer: Always use a meat thermometer. Chicken should reach 165°F (75°C) to be safe to eat. This ensures juicy chicken without undercooking or overcooking. - Best side dishes to complement the dish: Pair your honey garlic chicken with steamed rice or roasted vegetables. These sides soak up the sauce well and balance the meal. - Presentation tips for an appealing meal: Serve the chicken on a nice platter, drizzled with sauce. Add a sprinkle of fresh parsley for color. This simple touch makes the dish look gourmet. You can find the full recipe to impress your guests. {{image_2}} You might want to change the honey in this dish. Maple syrup is a great alternative. It brings a sweet flavor, too. You can also use agave nectar if you prefer. Both swaps keep the dish delicious. For vinegar, you can swap apple cider vinegar for rice vinegar. Rice vinegar adds a mild taste. You can even try balsamic vinegar for a richer flavor. Each change gives a new twist to your honey garlic chicken. Want some spice? Add red pepper flakes or a pinch of cayenne. This will give your dish a nice kick. If you like herbs, consider adding fresh thyme or rosemary. They work great with chicken and add depth. You can also toss in veggies like bell peppers or broccoli. These not only add color but also nutrition. Sauté them with the chicken for a one-pan meal. It makes the dish even more appealing. If you're gluten-free, use a gluten-free soy sauce. There are many brands available today. This way, you can enjoy the dish without worry. For a low-sugar option, try using a sugar substitute in place of honey. Products like monk fruit sweetener can work well. Just adjust the amount to your taste. You will still have a tasty dish without the extra sugar. For more ideas, check out the Full Recipe. To store leftovers, let the chicken cool to room temperature. Place it in an airtight container. This helps keep it fresh. You can store it in the fridge for up to four days. When reheating, use the microwave or skillet. Heat it gently to avoid drying out the chicken. To freeze cooked chicken, let it cool first. Wrap it tightly in plastic wrap. Then, place it in a freezer bag. Make sure to squeeze out all the air. For best results, use it within three months. Thaw in the fridge overnight before reheating. You can also use the microwave for quick thawing. In the fridge, this dish lasts about four days. Keep an eye out for any changes in color or smell. If the chicken looks slimy or has a sour odor, it’s time to toss it. Always trust your senses when checking for spoilage. For the best flavor, marinate chicken breasts for at least 30 minutes. You can go up to 2 hours for deeper taste. Longer marination gives you more sweetness and garlic flavor. Just don’t exceed 24 hours to avoid mushiness. Yes, you can use bone-in chicken. Adjust the cooking time to 10-12 minutes per side. Make sure the internal temperature reaches 165°F. Bone-in chicken cooks more slowly, so check it often. If you need a soy sauce alternative, try coconut aminos. It’s soy-free and has a mild flavor. You can also use tamari for a gluten-free option. For a sweeter taste, mix balsamic vinegar with some water. In this article, we explored the key ingredients and tools needed for a delicious chicken dish. We walked through marinating, cooking, and creating a rich sauce. I provided helpful tips to enhance flavor and ensure perfect cooking. Remember, you can customize this recipe with various ingredients and flavors. Follow the storage tips for freshness and enjoy your tasty meals!

Easy Honey Garlic Chicken Breasts Flavorful Dinner Dish

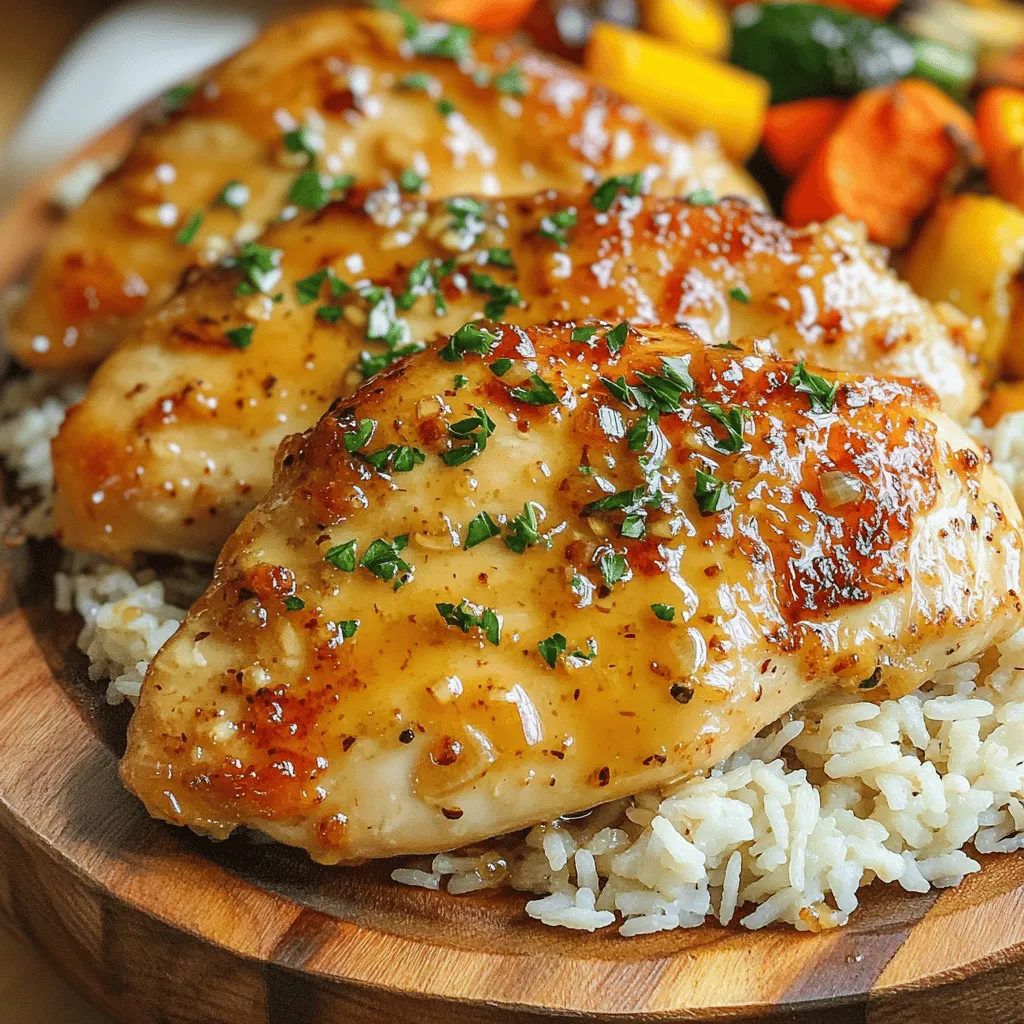
Looking for a quick, tasty dinner idea? You’ll love this Easy Honey Garlic Chicken Breasts recipe! It’s simple, flavorful, and

- 8 oz rotini pasta - 1 cup crab meat (or imitation crab, shredded) - 1/2 cup celery, finely chopped - 1/2 cup red bell pepper, diced - 1/4 cup red onion, finely chopped - 1/2 cup cherry tomatoes, halved - 1/2 cup mayonnaise - 2 tablespoons lemon juice - 1 teaspoon Dijon mustard - 1/2 teaspoon garlic powder - Salt and pepper to taste - Fresh parsley, chopped (for garnish) Gathering fresh ingredients is key. Each one adds flavor and texture. You want the best taste! I love using rotini pasta. The spirals hold the dressing well. You can also use any small pasta shape you like. Crab meat is the star of this dish. Real crab has a sweet taste. If you're on a budget, imitation crab works too. It’s still tasty and easy to find. Fresh vegetables are a must! Celery adds crunch, while bell pepper and red onion give a sweet bite. Cherry tomatoes bring a juicy pop. For the dressing, mayonnaise is creamy and rich. The lemon juice adds a bright zing. Dijon mustard gives a slight kick. Garlic powder rounds out the flavors. Don't forget to add salt and pepper to taste! Chopped parsley makes a lovely garnish. It adds color and freshness. This Super Easy Crab Pasta Salad is quick to prepare. Check the Full Recipe for step-by-step instructions. You’ll love how simple it is to make! - Boiling the Water Fill a large pot with water. Add a pinch of salt to the water. Bring the water to a boil over high heat. - Cooking the Rotini When the water is boiling, add the rotini pasta. Cook it according to the package instructions until it is al dente. This usually takes about 8 to 10 minutes. After cooking, drain the pasta in a colander. Rinse it under cold water to cool it down and stop the cooking process. - Mixing the Ingredients Take a large mixing bowl. Add the cooled rotini pasta. Then, add 1 cup of crab meat, 1/2 cup of finely chopped celery, 1/2 cup of diced red bell pepper, 1/4 cup of finely chopped red onion, and 1/2 cup of halved cherry tomatoes. - Making the Dressing In a small bowl, mix together 1/2 cup of mayonnaise, 2 tablespoons of lemon juice, 1 teaspoon of Dijon mustard, and 1/2 teaspoon of garlic powder. Add salt and pepper to taste. Stir it well until it is smooth and creamy. - Tossing the Salad Pour the dressing over the pasta and crab mixture. Gently toss everything together until all the ingredients are coated. Taste it and adjust the seasoning if needed. - Refrigerating for Best Flavor Cover the bowl with plastic wrap. Place it in the fridge for at least 30 minutes. This helps the flavors come together nicely. Before serving, give it a final toss and garnish with fresh parsley. Enjoy your super easy crab pasta salad! For the full recipe, check the earlier section. Adjusting Seasoning Taste is key in this dish. Start with the basic salt and pepper. After mixing, taste your salad. If it needs more zing, add a pinch of salt or a squeeze of lemon juice. This simple adjustment can brighten the entire dish. Adding Fresh Herbs Fresh herbs elevate your crab pasta salad. I love using parsley for its bright flavor. You can also try dill or chives. Chop the herbs finely and mix them in just before serving for a fresh burst. Cooking Pasta Al Dente Cook your pasta to al dente. This means it should be firm to the bite. Overcooked pasta can become mushy in the salad. Check the package for cooking times and taste it a minute early to get it just right. Choosing Fresh Vegetables Fresh veggies make a big difference. Use crisp celery and sweet bell peppers for crunch. Look for bright cherry tomatoes, too. They should be firm and vibrant. Fresh vegetables add color and a satisfying texture to your salad. Best Side Dishes This crab pasta salad pairs well with many sides. Try serving it with garlic bread or a simple green salad. A light vinaigrette can balance the creaminess. These sides complement the flavors nicely. Presentation Ideas Presentation matters! Serve your salad in a large bowl. Garnish with extra parsley on top. You can also use a clear glass dish to show off the colorful layers. A good presentation makes the dish even more inviting. {{image_2}} Using Different Pasta Shapes You can swap rotini for other pasta. Fusilli, penne, or even bowties work great. Each shape gives a new twist. They hold the dressing and mix well with the other ingredients. Try a whole grain or chickpea pasta for a healthy twist! Alternative Protein Options If crab isn't your thing, don't worry! You can use shrimp, chicken, or even canned tuna. Imitation crab also works if you want a budget-friendly choice. Each protein adds its own flavor to the dish. Adding Spices or Seasonings Want to spice things up? Add a pinch of cayenne or red pepper flakes. You can also mix in some Italian herbs like oregano or basil. These simple changes can boost the taste and make it your own. Incorporating Cheese or Nuts Cheese can make this salad even better. Try feta or shredded cheddar for extra creaminess. You can also add nuts like walnuts or almonds for a nice crunch. Nuts give a great texture contrast and a boost of protein. Gluten-Free Options Need a gluten-free dish? Use gluten-free pasta made from rice or lentils. Many brands make it easy to enjoy this dish without gluten. Just check the labels to ensure it meets your needs. Vegan Substitutes To make this salad vegan, swap crab for chickpeas or vegan crab meat. Use vegan mayo to replace regular mayonnaise. These changes keep the salad tasty and suitable for everyone. Storing in the Refrigerator After making your crab pasta salad, store it in an airtight container. This keeps it fresh. It will last well in the fridge. I recommend using it within three days for the best taste. Freezing for Later You can freeze crab pasta salad, but it may change texture. If you choose to freeze it, place it in a freezer-safe container. Make sure to leave some space for expansion. Use it within one month for the best quality. How Long It Lasts in the Fridge In the fridge, crab pasta salad lasts about three days. Keep an eye on it. If you see any changes, it’s best to toss it out. Signs of Spoilage Look for off smells or changes in color. If the salad seems watery or mushy, it’s time to let it go. Food safety is key! Best Practices for Reheating If you want to reheat your crab pasta salad, do it gently. Use a microwave on low power. Heat it in short bursts to avoid cooking the crab. Maintaining Texture and Flavor To keep it fresh, add a little dressing after reheating. This will help restore the flavor. Enjoy your dish just like the first time! To make crab pasta salad, follow these simple steps: 1. Boil a pot of salted water. 2. Cook 8 oz of rotini pasta until al dente. 3. Drain and rinse the pasta with cold water. 4. In a large bowl, mix the pasta with 1 cup of crab meat, 1/2 cup of chopped celery, 1/2 cup of diced red bell pepper, 1/4 cup of chopped red onion, and 1/2 cup of halved cherry tomatoes. 5. In another bowl, blend 1/2 cup of mayonnaise, 2 tablespoons of lemon juice, 1 teaspoon of Dijon mustard, 1/2 teaspoon of garlic powder, salt, and pepper. 6. Pour the dressing over the pasta mixture and toss gently. 7. Cover and chill for at least 30 minutes before serving. This recipe is quick and full of flavor. You can find the full recipe above! Yes, you can make this salad ahead of time. Here are some tips: - Prepare the salad a few hours or even a day before serving. - Store it in the fridge in a sealed container. - The flavors will blend better if it sits for a while. - Just give it a quick stir before serving. If you cannot find crab meat, here are some alternatives: - Imitation crab works well and is budget-friendly. - You can use shrimp or cooked chicken for a different taste. - For a vegetarian option, try chickpeas or tofu. - Each option will add its own unique twist to the salad. This blog post covered a fun crab pasta salad recipe. We reviewed key ingredients, cooking steps, and helpful tips. I shared ways to change flavors and what to serve with it. Proper storage methods keep your salad fresh. This dish is great for meals or parties. You can adjust it to suit your taste. Enjoy making and sharing this tasty salad!

Super Easy Crab Pasta Salad Quick and Flavorful Dish

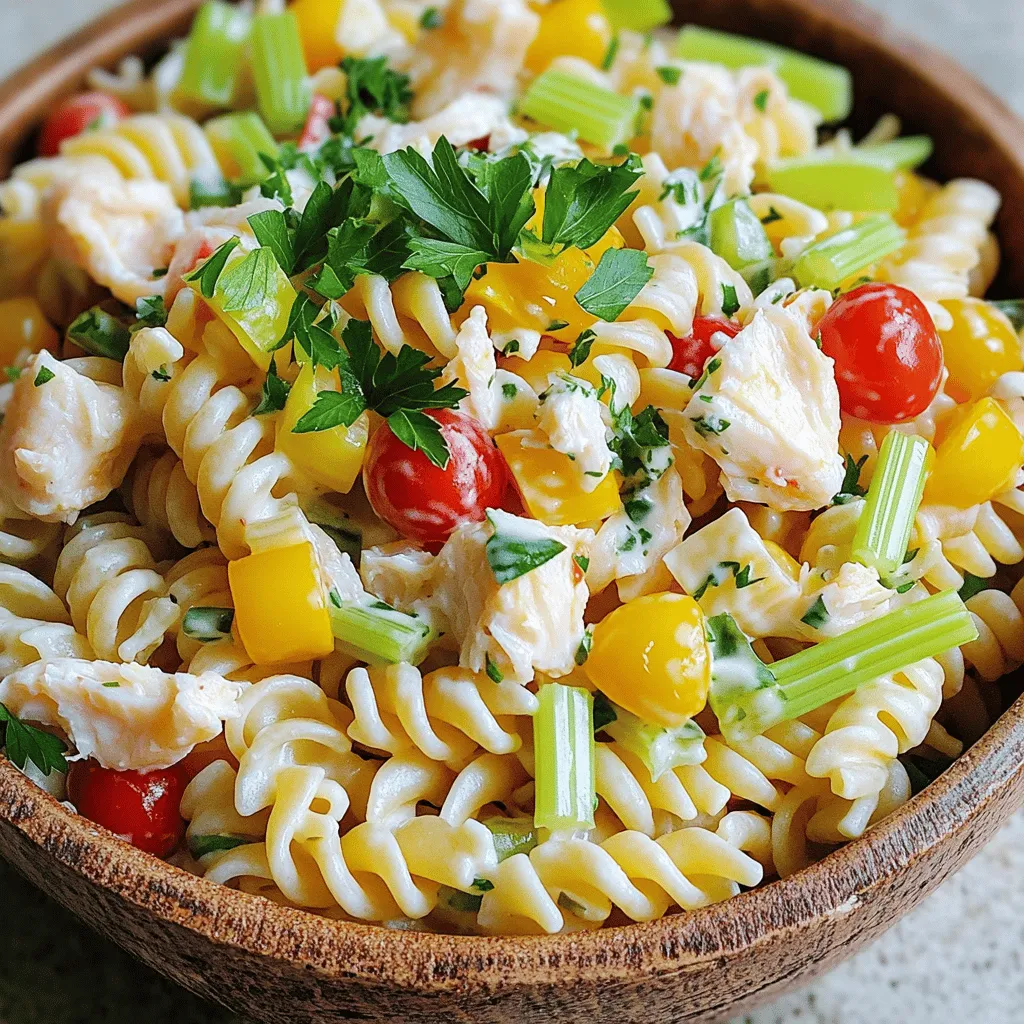
Craving a fresh, tasty dish without the fuss? Try my Super Easy Crab Pasta Salad! This quick and satisfying meal

To make this creamy banana dessert, you need a few key ingredients. These are simple yet essential for great taste and texture. - 3 ripe bananas, mashed - 1 cup heavy cream - 1/2 cup cream cheese, softened - 1/2 cup powdered sugar - 1 teaspoon vanilla extract - 1/4 teaspoon cinnamon - 1/2 cup crushed graham crackers These ingredients work together to create a rich and smooth dessert. The ripe bananas add natural sweetness, while the cream cheese gives it a nice creaminess. The heavy cream brings a fluffy texture that makes it perfect for layering. You can also add a few optional ingredients for extra flavor. This can elevate your dessert even more. - 1/4 cup chopped walnuts or pecans - Fresh banana slices and mint leaves for garnish Chopped nuts add a delightful crunch. They also introduce a nutty flavor that complements the sweetness. Fresh banana slices and mint leaves not only look pretty but also add freshness to each bite. This creamy banana dessert is not only delicious but also has some nutritional benefits. Here’s a quick look at what you get per serving: - Calories: Approximately 350 - Protein: 3g - Fat: 24g - Carbohydrates: 30g - Fiber: 2g This dessert does have sugar and fat, mainly from the cream and cream cheese. However, you get some fiber from the bananas and nuts, making it a tasty treat in moderation. Enjoy this creamy banana delight as an occasional dessert! For the full recipe, check out the details above. Start by taking three ripe bananas. Mash them well in a mixing bowl. Add in half a cup of softened cream cheese. Next, sprinkle in half a cup of powdered sugar and one teaspoon of vanilla extract. Use an electric mixer to beat this mixture until it is smooth and creamy. This banana base will be the heart of your dessert. In a separate bowl, pour in one cup of heavy cream. Use a hand mixer or a whisk to whip the cream. Keep mixing until you see stiff peaks form. This means the cream can hold its shape well. Be careful not to over-whip; it can turn into butter! Gently fold the whipped cream into your banana mixture. This step adds air and lightness. Now, grab some serving glasses or bowls. Start by adding a spoonful of your creamy banana mix at the bottom. Follow this with a layer of crushed graham crackers. Repeat these layers until you use all the ingredients. Make sure to end with a layer of the banana cream. Chill the desserts in the fridge for at least one hour. This waiting time lets the flavors blend beautifully. Before serving, add some fresh banana slices and mint leaves on top. These will make your dessert look stunning and fresh. For the full recipe, check out the main section! Use ripe bananas for a sweeter flavor. The best bananas have brown spots. They are soft and easy to mash. Fresh cream cheese makes your dessert rich. Always check the date on your cream and cheese. This ensures they are fresh and safe to eat. High-quality heavy cream whips better and adds a nice texture. Your dessert will taste great with top-notch ingredients. Serve this dessert in clear glasses. This lets everyone see the lovely layers. You can also add a sprinkle of crushed graham crackers on top. Fresh banana slices and mint leaves make it look fancy. Try serving it with a scoop of vanilla ice cream for extra fun. It balances the flavors well and adds creaminess. Mix the banana base until smooth. You want no lumps for a creamy texture. Whip the heavy cream until it has stiff peaks. This gives your dessert a light and airy feel. When you fold the whipped cream into the banana mix, do it gently. This keeps the air in and maintains the fluffiness. If the mix is too thick, add a splash of milk to help it blend. {{image_2}} You can swap bananas for other fruits. Try ripe strawberries, peaches, or mangoes. Each fruit adds its unique taste. Strawberries bring a sweet and tangy note. Peaches add a juicy freshness. Mangoes offer a tropical vibe. You can mix and match to find your favorite fruit. If you want a lighter version, use Greek yogurt instead of cream cheese. It gives a creamy texture with less fat. You can also use honey or maple syrup in place of powdered sugar. These natural sweeteners boost flavor without the guilt. Using almond milk instead of heavy cream cuts calories too. To make this dessert vegan, replace heavy cream with coconut cream. It whips up nicely and adds a tropical twist. Use a plant-based cream cheese for a creamy base. For sweetness, agave syrup works well as a substitute. This way, everyone can enjoy this delicious treat. For the complete recipe and more details, check the Full Recipe. Store your leftover creamy banana dessert in an airtight container. This keeps air out and helps avoid spoilage. Make sure to put it in the fridge right after serving. The dessert will stay good for about three days. If you notice any signs of browning, it’s best to toss it. To keep your dessert fresh, avoid exposing it to air. It can lead to a dry texture. If you want to enjoy it later, add fresh banana slices just before serving. This keeps the flavor bright and the look appealing. Also, try using plastic wrap directly on the dessert's surface. This step helps lock in moisture and prevents browning. If you want to save your dessert for a longer time, freezing is a smart option. First, scoop the dessert into individual portions. This makes it easy to thaw only what you need. Use freezer-safe containers or bags to prevent freezer burn. When you’re ready to eat, let it thaw in the fridge overnight. Enjoy the creamy goodness from your freezer stash! For the full recipe, check the instructions above. Yes, you can use frozen bananas. Just thaw them first. Frozen bananas work well because they become very soft when thawed. This makes them easy to mash. However, they can be a bit watery. Drain excess liquid before adding them to your mix. This will keep your dessert from becoming too runny. If you need a substitute for heavy cream, try coconut cream. It whips up nicely and adds a light coconut flavor. You can also use full-fat Greek yogurt for a healthier option. It won’t whip, but it will add creaminess. If you prefer a dairy-free choice, almond milk mixed with a bit of cornstarch can work too. You can store the Creamy Banana Dessert in the fridge for up to three days. Cover it well with plastic wrap or a lid to keep it fresh. The bananas may brown slightly, but it will still taste great. If you want to save it longer, try freezing it. Just remember to let it thaw in the fridge before serving. In this blog post, I covered how to make a creamy banana dessert. I shared key ingredients, tips, and step-by-step instructions. You learned about variations, storage, and answered common questions. Now, you can create this tasty treat with confidence. Enjoy experimenting with flavors and ingredients. Remember to have fun and share it with others. Happy dessert making!

Creamy Banana Dessert Delightfully Easy to Make

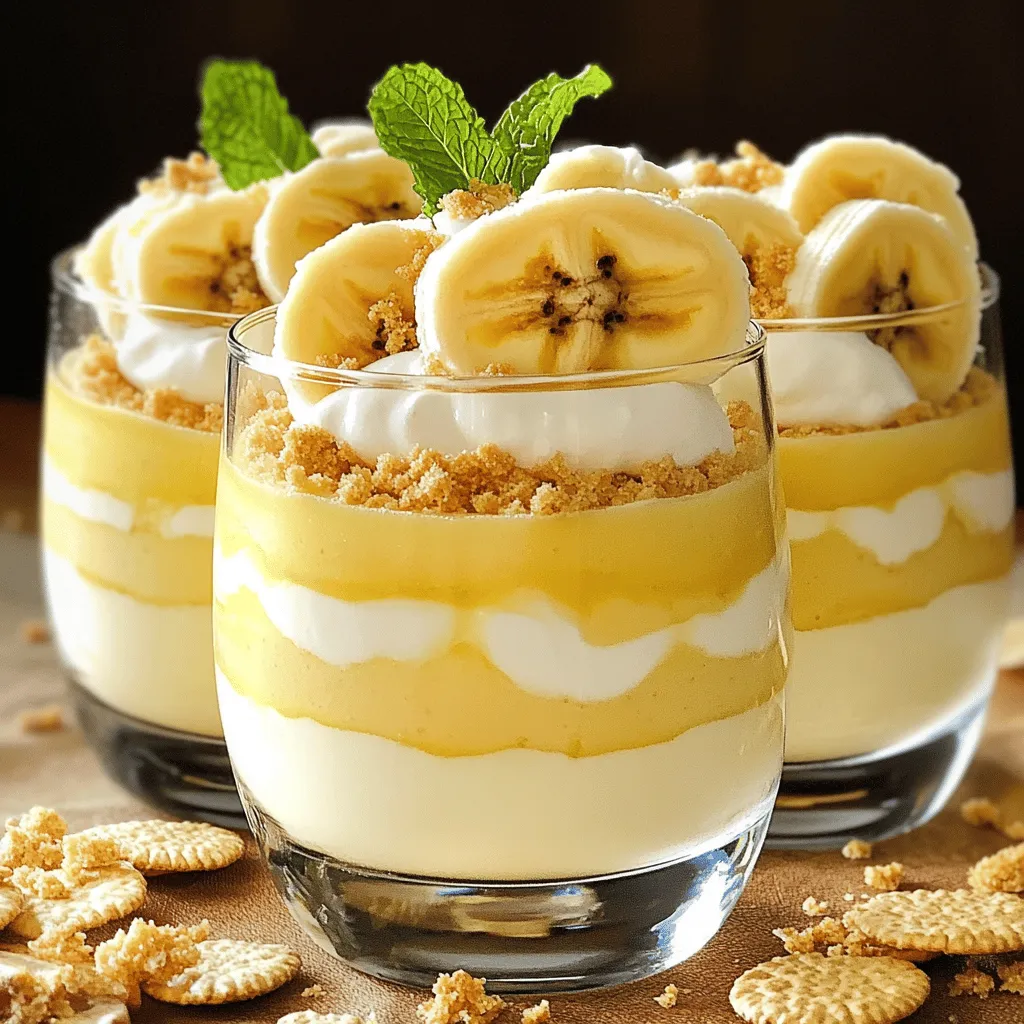
If you’re craving something sweet yet simple, this creamy banana dessert is for you! I’ll guide you through easy steps

- 2 cups all-purpose flour - 1 tablespoon baking powder - 1 teaspoon garlic powder - 1 teaspoon onion powder The base of these biscuits is simple and classic. First, you need all-purpose flour, which gives the biscuits their structure. The baking powder helps them rise and become fluffy. Garlic powder and onion powder add great flavor. These ingredients work together to create the perfect biscuit dough. - 1 cup lump crab meat - ¼ cup mayonnaise - 2 green onions, finely chopped For the crab filling, use lump crab meat. This type is sweet and tender. Mix in mayonnaise for creaminess and moisture. The green onions add a nice crunch and freshness. Be gentle when mixing to keep the crab meat intact. - 1 teaspoon Old Bay seasoning - 2 tablespoons fresh parsley, chopped (for garnish) Old Bay seasoning adds a classic seafood flavor. It brings warmth and spice to the crab stuffing. Once baked, the biscuits look beautiful with a sprinkle of fresh parsley. This adds color and a hint of herbal taste. For the complete recipe, check [Full Recipe]. First, heat your oven to 425°F (220°C). Line a baking sheet with parchment paper. This step helps the biscuits bake evenly. In a large bowl, mix together the dry ingredients. Combine 2 cups of flour, 1 tablespoon of baking powder, 1 teaspoon of garlic powder, 1 teaspoon of onion powder, 1 teaspoon of salt, and ½ teaspoon of black pepper. Next, add ½ cup of cold, cubed unsalted butter to the dry mix. Use your fingers or a pastry cutter to blend until the mixture looks like coarse crumbs. After that, stir in 1 cup of shredded sharp cheddar cheese. Slowly, pour in ¾ cup of milk. Mix just until combined. Do not overmix or your biscuits will be tough. Now, let’s make the crab filling. In a separate bowl, gently mix 1 cup of lump crab meat with 2 chopped green onions, ¼ cup of mayonnaise, 1 tablespoon of lemon juice, and 1 teaspoon of Old Bay seasoning. When handling crab meat, be gentle. You want to keep the lumps intact for a nice texture. To assemble, scoop tablespoons of the biscuit dough. Flatten each scoop slightly. Place a heaping teaspoon of the crab mixture in the center of each dough piece. Fold the dough over the filling, sealing it well. Make sure there are no gaps. Place the stuffed biscuits seam-side down on the prepared baking sheet. Space them about 2 inches apart. Bake in the preheated oven for 15-18 minutes. They should turn golden brown on top. Once done, remove them from the oven and let them cool slightly. For a finishing touch, sprinkle fresh chopped parsley on top. Enjoy your crab stuffed cheddar bay biscuits! Find the full recipe here. To get a golden brown finish, make sure your oven is preheated to 425°F (220°C). This heat helps the biscuits rise and bake evenly. While baking, check them around 15 minutes. If they are not golden yet, give them a few more minutes. You can add more fun to your biscuits by mixing in different seasonings. Try adding some smoked paprika for a smoky kick. If you love cheese, consider mixing in pepper jack for some heat or mozzarella for a milder taste. Serve these biscuits warm with a side of lemon herb butter. It pairs well and adds a nice zing. One common mistake is overmixing the dough. Mix just until the ingredients combine. Overmixing can lead to tough biscuits. Another mistake is using warm butter instead of cold. Cold butter creates a flaky texture. Always use cold, cubed butter for the best results. {{image_2}} If you want to change things up, consider using shrimp instead of crab. Shrimp adds a sweet taste and works well with the biscuit. Just cook and chop it fine before mixing. You can also try vegetarian options. Mix in cheese like feta or mozzarella with some chopped veggies. Spinach and bell peppers blend nicely. These options bring a new twist to your dish. Cheese is a key part of your biscuits. You can switch it up to get different flavors. Try pepper jack for a kick or gouda for a smoky taste. Flavor-infused cheeses can also work wonders. Look for cheeses with herbs or spices. They can add an extra layer of taste, making your biscuits even more exciting. For those who need gluten-free options, use a gluten-free flour blend. Many brands work well in biscuit recipes. Just make sure it has a good mix of flours and starches. You may need to adjust the liquid too. Gluten-free dough can be thicker. Add a bit more milk if needed to reach the right texture. These tweaks help keep your biscuits light and fluffy. To keep your leftover crab stuffed cheddar bay biscuits fresh, store them properly. Place the biscuits in an airtight container. You can line the container with parchment paper to absorb moisture. This helps maintain their texture. Store them in the refrigerator for up to three days. If you want them to last longer, consider freezing. When you reheat these biscuits, you want to keep them soft and tasty. The best way is to use an oven. Preheat your oven to 350°F (175°C). Place the biscuits on a baking sheet and cover them with foil. Heat for about 10 minutes. This method helps prevent drying. You can also use a microwave, but be quick. Heat for just 20-30 seconds, checking often to avoid drying them out. If you want to freeze the stuffed biscuit dough, it's easy. Shape the dough and stuff it as usual. Place the stuffed biscuits on a baking sheet lined with parchment paper. Freeze them for about an hour until firm. After that, transfer them to a freezer bag. Seal tightly and label with the date. You can keep them in the freezer for up to three months. To bake frozen biscuits, do not thaw them first. Preheat your oven to 425°F (220°C). Bake for an extra 5-7 minutes. This keeps them nice and fluffy. For the full recipe, check out the recipe section. It takes about 20 minutes to prep and 15 to 18 minutes to bake. In total, you need around 35 minutes from start to finish. This quick time makes it easy to enjoy these tasty treats any night of the week. You can use canned crab meat, but fresh crab is best. Canned crab saves time and is easy to find. However, it may not have the same sweet flavor or texture as fresh crab. If you want the best taste, go for fresh lump crab meat. These biscuits pair well with a fresh salad or a bowl of soup. A light Caesar salad or a creamy tomato soup works nicely. You can also serve them as an appetizer during a family gathering or party. Look for a golden-brown color on top. The biscuits should rise and feel firm to the touch. A toothpick inserted in the center should come out clean. Don’t let them over-bake, or they may dry out. Yes, you can make the dough ahead of time. Wrap it in plastic wrap and store it in the fridge for up to 24 hours. Just make sure to let it sit at room temperature for a few minutes before baking. For the full recipe, click [here](#). In this article, we covered how to make delicious Crab Stuffed Cheddar Bay Biscuits. We explored the key ingredients, step-by-step instructions, and helpful tips to make the process easy. We also discussed variations and storage methods for your leftovers. Enjoy these tasty biscuits anytime, whether fresh or reheated. With the right care, they can bring joy to meals. You can impress friends and family with your skills. Make sure to try different fillings, cheeses, and flavors. Happy baking!

Crab Stuffed Cheddar Bay Biscuit Tasty Delightful Treat

Are you craving a delicious blend of seafood and comfort food? Look no further! My Crab Stuffed Cheddar Bay Biscuits

- 1 ½ cups graham cracker crumbs - ½ cup unsalted butter, melted - 2 cups cream cheese, softened - 1 cup powdered sugar - 1 teaspoon vanilla extract - 1 cup heavy whipping cream - 1 cup fresh orange juice - Zest of 1 orange - 2 tablespoons orange gelatin powder - Fresh orange slices for garnish (optional) Tips for selecting fresh oranges: When picking oranges, look for firm and smooth skin. The color should be bright, with no blemishes. Give them a gentle squeeze; they should feel heavy for their size. This means they have plenty of juice. Best alternatives for gelatin powder: If you want to skip gelatin, use agar-agar. It's plant-based and works well. You can also try pectin, found in many fruit preserves. Both alternatives can help set your cheesecake without compromising flavor. This no-bake orange creamsicle cheesecake is simple and exciting. You can find the full recipe above to guide you through each step. This no-bake orange creamsicle cheesecake takes about 20 minutes to prep. The total time, including chilling, is about 4 hours and 20 minutes. You will need a few tools: mixing bowls and a 9-inch springform pan. 1. Making the crust: In a bowl, mix the graham cracker crumbs with melted butter. Combine until it feels like wet sand. This is your cheesecake base. 2. Preparing the cheesecake filling: In a large bowl, beat softened cream cheese with an electric mixer until smooth. Add powdered sugar and vanilla. Mix until well blended. 3. Incorporating flavors: Pour in fresh orange juice and add the orange zest. Mix until everything is evenly combined. 4. Adding whipped cream: In another bowl, whip the heavy cream until it forms stiff peaks. Carefully fold this whipped cream into the cream cheese mixture. Don’t deflate the whipped cream; it makes the cheesecake light. 5. Incorporating gelatin: Dissolve orange gelatin powder in two tablespoons of hot water in a small bowl. Once dissolved, mix it into the cheesecake filling. Ensure that it is fully incorporated. 6. Assembling the cheesecake: Pour the creamy filling over your crust in the springform pan. Smooth the top with a spatula. Cover it with plastic wrap and place it in the fridge for at least 4 hours, or overnight for the best results. After chilling, carefully remove the cheesecake from the springform pan. Slice into pieces and serve it cold. You can garnish with fresh orange slices for a nice touch. Enjoy this refreshing dessert! To get a smooth, creamy cheesecake, use room temperature ingredients. When cream cheese warms up, it mixes better. Cold cream cheese can lead to lumps in your filling. Leave your cream cheese out for about 30 minutes before you start. When you whip the heavy cream, aim for stiff peaks. This means the cream holds its shape well. After whipping, fold it into the cream cheese mix gently. Use a spatula and lift the mixture from the bottom. This way, you keep it light and fluffy. Be careful not to stir too hard, or you will lose that airy texture. For a stunning look, consider adding garnishes. Fresh orange slices add a pop of color and taste. You can also use whipped cream swirls on top. Another idea is to sprinkle some orange zest for extra flair. When serving, think about the event. For birthday parties, slice the cheesecake into fun shapes. You can even top each slice with a small candle. For a fancy dinner, serve it on a nice plate with a drizzle of orange sauce. This makes the dish feel special and inviting for your guests. {{image_2}} You can easily change the flavors of your No-Bake Orange Creamsicle Cheesecake. Here are some fun ideas: - Adding chocolate or vanilla elements: You can mix in some melted chocolate or chocolate chips. This will give a rich twist to your cheesecake. If you prefer a milder flavor, use vanilla extract instead of orange zest. Just keep the orange juice to keep that creamsicle vibe. - Using different citrus juices: Try using lemon, lime, or grapefruit juices. Each citrus brings its unique taste. Lemon adds a bright zing, while lime gives a refreshing kick. Grapefruit can add a nice bitterness that balances the sweetness. You can also modify the recipe for different diets. Here are some tips: - Gluten-free crust alternatives: If you need a gluten-free option, use crushed gluten-free cookies or almond flour. Mix it with melted butter just like you would with graham crackers. This keeps the crust tasty and firm. - Dairy-free cream cheese options: For a dairy-free version, look for plant-based cream cheese. Brands like Tofutti or Kite Hill work well. You can still enjoy a creamy cheesecake without the dairy! To keep your No-Bake Orange Creamsicle Cheesecake fresh, follow these tips: - Refrigerate: Always store the cheesecake in the fridge. - Cover: Use plastic wrap or a lid. This helps prevent drying out. - Separate: If adding toppings, store them in a separate container. For storage containers, a springform pan works best. If you need to move it, use an airtight container. This keeps the cheesecake safe and fresh. To freeze the cheesecake, first let it set completely in the fridge. Then, follow these steps: - Wrap it Up: Use plastic wrap and foil to cover the cheesecake well. - Label: Write the date on the foil for easy tracking. You can freeze it for up to three months. To thaw, move it to the fridge overnight before serving. This keeps the texture smooth and creamy. Enjoy your delicious treat later! Can I use a different type of crust? Yes, you can use a different crust. Options like Oreo or nut crusts work well. Just make sure they are firm enough to hold the cheesecake filling. How long does the cheesecake last in the refrigerator? This cheesecake stays fresh for about five days in the fridge. Keep it covered to prevent it from drying out or absorbing other odors. Can I add fruit toppings before serving? Absolutely! Fresh fruit like berries or additional orange slices add flavor and beauty. Just be sure to add them right before serving for the best taste. What to do if the filling is too runny? If your filling is runny, try chilling it longer. You can also add more gelatin if needed. Dissolve it in hot water first, then mix it in gently. Fixing issues with crust texture If your crust is too crumbly, add a bit more melted butter. If it’s too wet, add more graham cracker crumbs. Aim for a texture similar to wet sand. This cheesecake recipe combines simple ingredients with clear steps for a tasty treat. You'll learn how to make a creamy orange cheesecake from scratch and explore variations to suit your taste. Remember, using fresh ingredients helps your cheesecake shine. And don't forget the tips for great texture and presentation! Enjoy sharing this dessert with friends and family. I'm excited for you to try this delicious recipe and make it your own!

No-Bake Orange Creamsicle Cheesecake Simple Delight

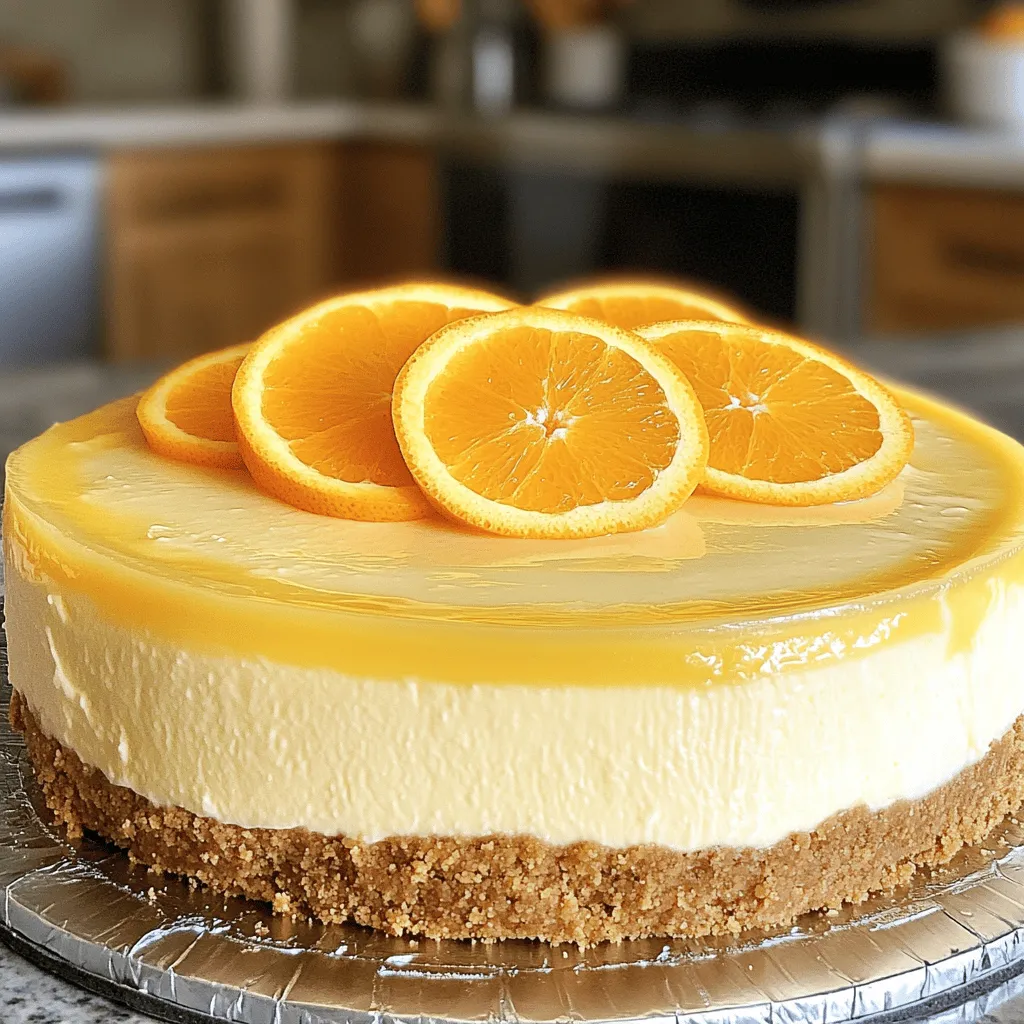
Craving a sweet and zesty treat? Let’s make a No-Bake Orange Creamsicle Cheesecake that’s simple and delicious! This delightful dessert

To make Crack Chicken Baked Ziti, you need a few key ingredients. Here’s a complete list of what you’ll need: - 2 cups ziti pasta - 2 cups cooked, shredded chicken - 2 cups cream cheese, softened - 1 cup ranch dressing - 1 cup shredded cheddar cheese - 1 cup shredded mozzarella cheese - 1 teaspoon garlic powder - 1 teaspoon onion powder - 1 teaspoon paprika - Salt and pepper to taste - 1/2 cup green onions, chopped (for garnish) Each ingredient plays a big part in the flavor. The ziti pasta gives a hearty base. Shredded chicken adds protein and richness. Cream cheese brings creaminess, while ranch dressing adds a tangy kick. Cheddar and mozzarella cheeses melt beautifully on top, giving a nice, gooey texture. The garlic powder, onion powder, and paprika bring warmth and depth. Finally, salt and pepper enhance all the flavors. Don’t forget the green onions! They add a fresh crunch and bright color when you garnish your dish. For the full recipe, you can check the detailed cooking instructions. - Preheat the oven: Set your oven to 350°F (175°C). This step is key for even cooking. - Cook the ziti pasta: Boil a large pot of salted water. Add the ziti and cook until al dente. This usually takes about 8 to 10 minutes. Once done, drain the pasta and set it aside. - Prepare the cream cheese mixture: In a large bowl, mix softened cream cheese, ranch dressing, garlic powder, onion powder, paprika, salt, and pepper. Stir until the mixture is smooth and creamy. - Mix chicken and ziti with cream cheese: Add the shredded chicken and cooked ziti to the cream cheese mixture. Stir gently until every piece is coated well. - Transfer to baking dish: Grease a 9x13 inch baking dish. Pour the ziti and chicken mix into the dish, spreading it evenly. - Top with cheese: Sprinkle shredded cheddar and mozzarella cheese on top of the mixture. This will add a nice, cheesy crust. - Bake until bubbly and golden: Place the dish in the oven and bake for 25-30 minutes. Look for a golden top and bubbly edges. This means it’s ready to come out. For more details, check the Full Recipe. To get the right pasta texture, cook the ziti until al dente. This keeps it firm and prevents mushiness. Make sure to drain it well, but do not rinse. Rinsing can wash away the starch that helps sauce stick. When mixing cream cheese, soften it first. Let it sit at room temperature. This makes blending easier. Use a sturdy mixer for smooth results. A whisk works too, but it takes more effort. To boost flavor, try adding seasonings like garlic powder, onion powder, and paprika. These spices add depth to the dish. You can also add a pinch of red pepper flakes for heat. Using fresh herbs brightens the meal. Chopped parsley or basil adds color and a fresh taste. Sprinkle them on top before serving for a pop of flavor. Pair this dish with simple sides like a green salad or garlic bread. A crisp salad adds freshness and crunch. Garlic bread is great for soaking up any extra sauce. For garnishing, chopped green onions work well. They add a nice crunch and a pop of color. You can also add a sprinkle of extra cheese right before serving for a cheesy finish. {{image_2}} You can switch to low-fat cream cheese. This makes the dish lighter. You can also try gluten-free pasta. It tastes great and fits many diets. Add veggies like spinach or bell peppers. They give color and nutrients. You can also use different proteins. Turkey or lean beef work well with this dish. If you like heat, try adding jalapeños. They bring a spicy kick. You can also make Italian-style baked ziti. Use marinara sauce instead of ranch dressing for a new taste. For the complete recipe, check out the Full Recipe section. To keep your Crack Chicken Baked Ziti fresh, place it in the fridge. Use an airtight container for the best results. This helps seal in moisture and flavor. Make sure to cool the dish to room temperature before storing. This step prevents condensation, which can make the pasta soggy. When you’re ready to enjoy leftovers, there are a few great ways to reheat. The best method is to use an oven. Preheat it to 350°F (175°C). Place the ziti in a baking dish, cover it with foil, and heat for 20 minutes. This helps the cheese melt evenly. If you want a quick option, use a microwave. Heat it in short bursts, stirring in between, to keep the textures nice. If you want to freeze your Crack Chicken Baked Ziti, aim for a freezer-safe container. Make sure to divide it into portions. This makes it easier to thaw later. For best results, let it cool completely before freezing. When you're ready to eat, thaw it overnight in the fridge. Reheat it in the oven or microwave as described above. Enjoy your delicious meal anytime! Crack Chicken is a creamy, savory dish that brings comfort to your table. It combines shredded chicken, cream cheese, and ranch dressing for a rich flavor. The main ingredients include: - 2 cups ziti pasta - 2 cups cooked, shredded chicken - 2 cups cream cheese, softened - 1 cup ranch dressing - 1 cup shredded cheddar cheese - 1 cup shredded mozzarella cheese - Seasonings like garlic powder, onion powder, and paprika This dish is cheesy, tangy, and oh-so-delicious. It’s perfect for a family dinner or a cozy night in. The ranch dressing adds a lovely zest, making it a hit with all ages. Yes, you can prepare this dish in advance, which makes it super convenient. To do this, follow these steps: 1. Cook the ziti and mix it with the cream cheese mixture as directed. 2. Place this mixture in a greased baking dish but do not add the cheese on top yet. 3. Cover the dish with foil and refrigerate for up to 24 hours. When you are ready to bake, sprinkle the cheese on top and bake as directed. This method saves time and lets the flavors blend nicely. If you want to switch things up, there are many great alternatives for ranch dressing: - Use blue cheese dressing for a bold flavor. - Try Italian dressing for a zesty kick. - Make a homemade dressing with yogurt and herbs. These swaps can change the taste and add a fun twist to your Crack Chicken Baked Ziti. Feel free to get creative! This blog post covered everything you need to make Crack Chicken Baked Ziti. We discussed the ingredients, step-by-step cooking instructions, and tips for flavor and texture. I shared fun variations, from healthier options to international twists. Lastly, we went over storage methods and answered common questions. Now you have the tools to make this dish your own, whether it's a cozy dinner or a special occasion. Enjoy cooking and sharing this tasty meal with loved ones!

Crack Chicken Baked Ziti Flavorful and Simple Meal

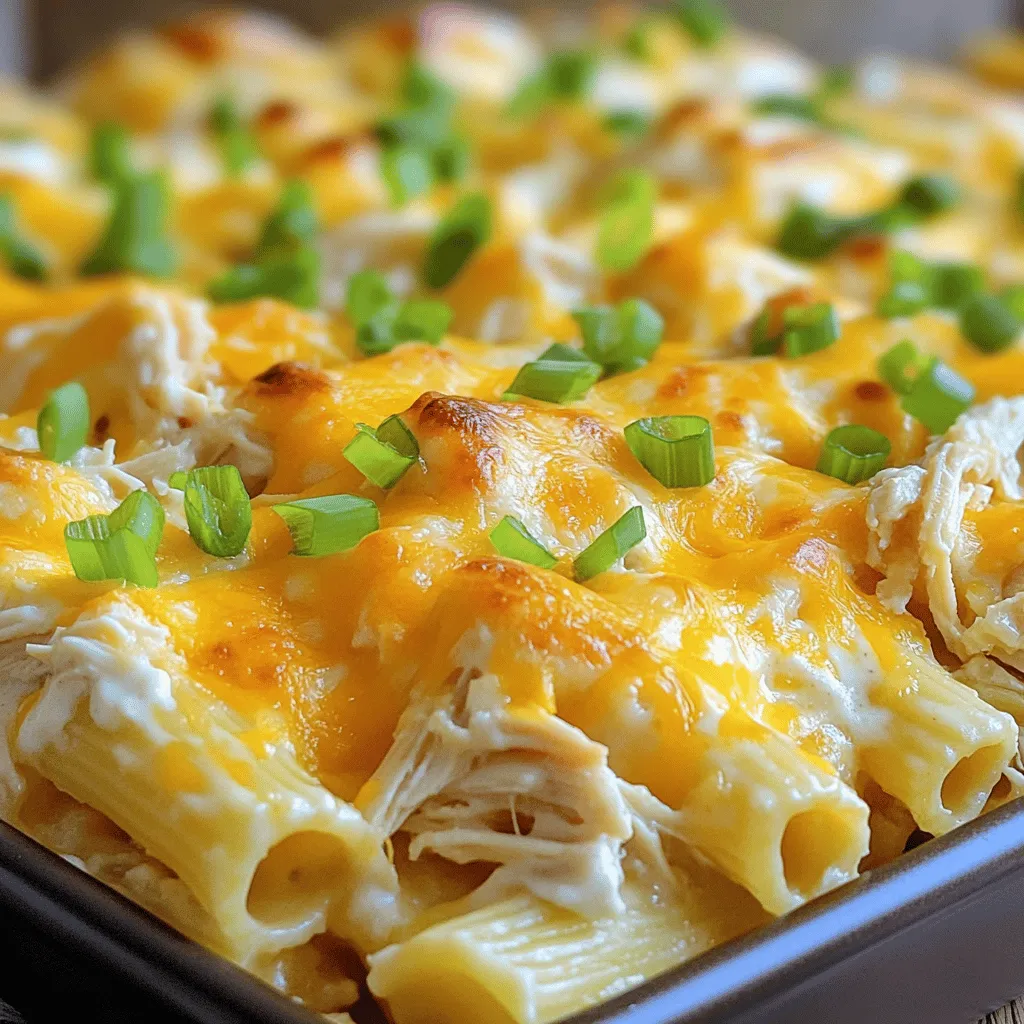
Crack Chicken Baked Ziti is a delicious and simple meal that everyone will love. Imagine creamy pasta, tender chicken, and

- 1 pound large shrimp, peeled and deveined - 2 tablespoons olive oil - 4 cloves garlic, minced - 1 teaspoon smoked paprika - 1 teaspoon chili powder - Salt and pepper to taste - 1 cup cooked quinoa - 1 cup cherry tomatoes, halved - 1 avocado, sliced - 1 cup fresh spinach - 2 tablespoons fresh cilantro, chopped - 1 lime, cut into wedges - 1 teaspoon smoked paprika - 1 teaspoon chili powder - Salt and pepper The base of your grilled shrimp bowl starts with fresh, quality ingredients. Use large shrimp for a juicy bite. Olive oil adds richness and helps the shrimp cook well. Fresh garlic gives a strong flavor, while smoked paprika and chili powder add a little kick. Don't forget salt and pepper for balance. Your bowl gets its heart from quinoa, a nutritious grain. Cherry tomatoes bring sweetness, and avocado adds creaminess. Fresh spinach gives a nice crunch, while cilantro adds a burst of flavor. A wedge of lime provides zesty brightness. Mixing these ingredients creates a colorful and tasty dish. This recipe is not just about the shrimp but how all these parts come together. For the full recipe details, check the full recipe section. - Start by combining 2 tablespoons of olive oil, 1 teaspoon of smoked paprika, and 1 teaspoon of chili powder in a bowl. - Add 4 cloves of minced garlic to the mix. Stir it all together until well blended. - Toss 1 pound of large shrimp in the marinade. Make sure each shrimp gets coated well. - For best flavor, let the shrimp marinate for about 20 minutes at room temperature. - Preheat your grill or grill pan over medium-high heat. This step is key for nice grill marks. - Skewer the marinated shrimp onto metal or soaked wooden skewers. Leave space between each shrimp for even cooking. - Grill the shrimp for about 2-3 minutes on each side. They should turn pink and opaque when done. - In a large serving bowl, layer 1 cup of cooked quinoa, 1 cup of fresh spinach, and 1 cup of halved cherry tomatoes. - Add slices of 1 avocado on top, then carefully place the grilled shrimp over the vegetables. - Drizzle any leftover garlic marinade on the bowl for extra flavor. - Finally, garnish with 2 tablespoons of chopped cilantro and serve with lime wedges on the side. For the full recipe, check the instructions above! Enjoy your delicious grilled shrimp bowl! To enhance the garlic sauce, start by adjusting flavors. If you want it spicier, add more chili powder. For a milder taste, reduce the garlic or paprika. You can also try adding lemon juice for a fresh twist. If you want to switch up the marinade, consider using coconut aminos instead of olive oil. You can mix in some fresh herbs like basil or parsley. These changes can create a new flavor profile, keeping your dish exciting. When grilling shrimp, keep a few best practices in mind. First, always preheat your grill to medium-high heat. This helps the shrimp cook evenly. Skewering your shrimp is a great way to keep them together and makes turning them easy. To avoid overcooking, watch the color closely. Shrimp should turn pink and opaque. This usually takes about 2-3 minutes per side. If you leave them on too long, they can become tough and rubbery. To make your dish look stunning, think about layering your bowl. Start with a base of quinoa, then add fresh spinach, cherry tomatoes, and avocado. Finally, top it with the grilled shrimp. For added flair, drizzle any extra garlic sauce over the top. Garnish with fresh cilantro and lime wedges. This not only enhances the look but also adds flavor. Serve your bowl with a smile, and enjoy the compliments! {{image_2}} - Alternative proteins: You can swap shrimp for chicken, tofu, or scallops. Each brings a unique twist to the dish. Chicken offers a hearty bite, while tofu caters to vegans. Scallops add a sweet flavor that pairs well with garlic. - Different vegetables: Feel free to mix in your favorite veggies. Bell peppers, zucchini, or corn can brighten your bowl. Roasted or grilled veggies can also enhance flavor and texture. - Adding heat: If you like spice, add red pepper flakes or jalapeños. These options can turn up the heat and add depth. A dash of hot sauce can also complement the garlic sauce nicely. - Incorporating different herbs: Swap cilantro for fresh parsley or basil. Each herb adds a distinct taste. Mint can also give a refreshing twist to your grilled shrimp bowl. - Making it a salad bowl: For a lighter meal, serve the shrimp on a bed of mixed greens. You can mix in cucumbers or radishes for crunch. Drizzle more garlic sauce for added flavor. - Taco-style serving option: Turn this bowl into tacos! Use small tortillas and fill them with shrimp and veggies. Top with lime juice and extra sauce for fun and flavor. This dish lasts about three days in the fridge. To store leftovers, place the shrimp and quinoa in an airtight container. This keeps them fresh and safe to eat. Separate the shrimp from the quinoa if you can. This way, the shrimp will not make the quinoa soggy. Yes, you can freeze the grilled shrimp bowl. To freeze, let the dish cool completely first. Then, place the shrimp and quinoa in freezer-safe bags. Make sure to remove as much air as possible. Label the bags with the date. It can last up to three months in the freezer. The best way to reheat shrimp is in a skillet over low heat. This keeps them tender. For quinoa, you can use the microwave. Add a little water to keep it moist. Heat until warm, stirring often. Enjoy your meal as if it was freshly made! To make grilled shrimp tender, follow these tips: - Choose fresh shrimp: Fresh shrimp cook better and taste great. - Don’t overcook: Grill shrimp for just 2-3 minutes on each side. - Marinate well: A good marinade helps keep shrimp juicy. - Use medium heat: Too high heat can make shrimp tough fast. When shrimp turn pink and opaque, they are done. Remove them from heat right away. Yes, you can use frozen shrimp! Here’s how to thaw them: - Place shrimp in the fridge overnight. - Use cold water: Seal shrimp in a bag and submerge in cold water for 15-20 minutes. Always dry shrimp well after thawing. This helps the marinade stick better. Here are some great sides for your grilled shrimp bowl: - Steamed vegetables: Broccoli or green beans add color and nutrients. - Rice or couscous: They complement shrimp and soak up flavors. - Fresh salad: A light salad can balance the meal. - Corn on the cob: Sweet corn pairs nicely with shrimp. Feel free to mix and match for variety! For the full recipe, visit the link. This blog post covered a tasty grilled shrimp bowl. We explored main ingredients like shrimp, quinoa, and spices. I provided steps for marinating and grilling shrimp until just right. Tips helped perfect your garlic sauce and enhance presentation. You can also try flavor variations, substitutes, and different serving styles. In summary, this bowl is versatile and simple. You can store leftovers and freeze them too. Enjoy experimenting with the recipe while impressing friends and family!

Grilled Shrimp Bowl with Garlic Sauce Recipe Delight

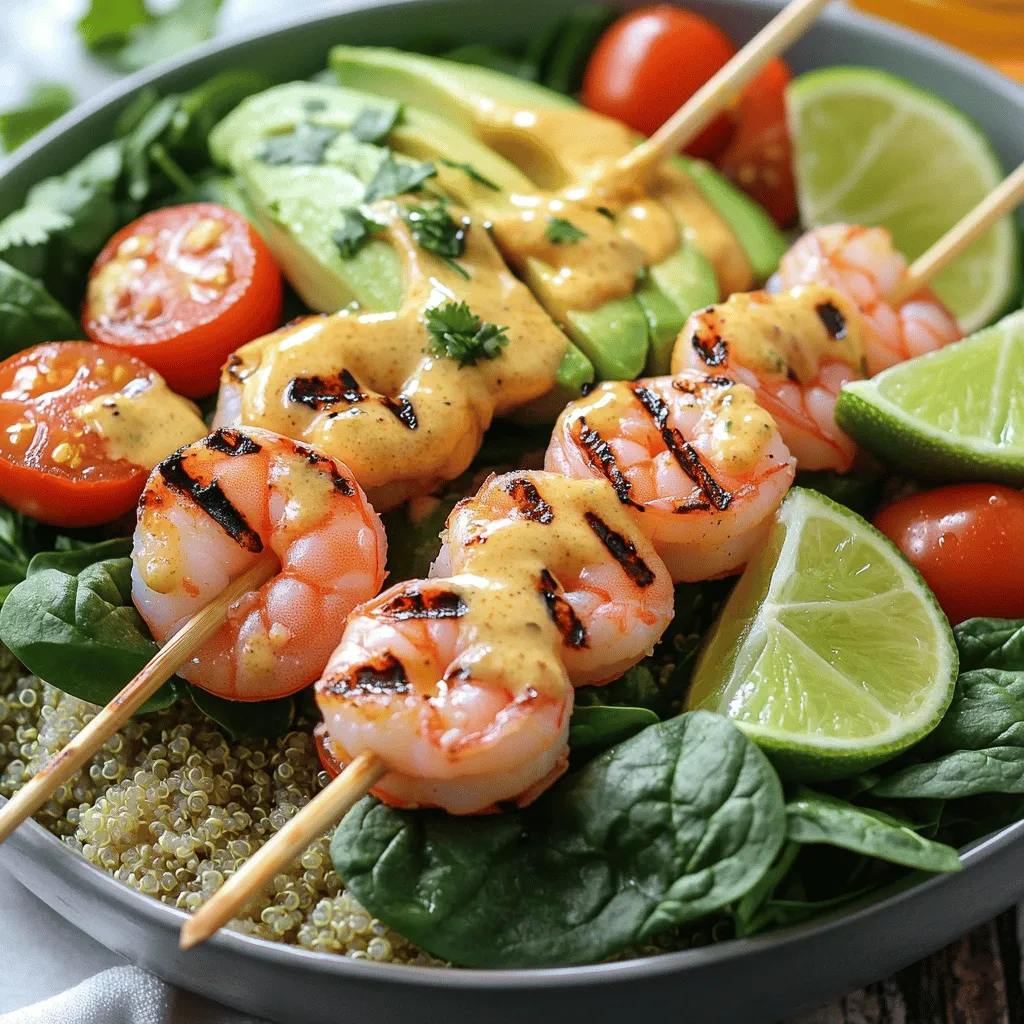
Ready to elevate your dinner game? This Grilled Shrimp Bowl with Garlic Sauce recipe is packed with flavor and nutrition,

- 2 cups cooked shredded chicken - 1 can (15 oz) black beans, drained and rinsed - 1 cup corn kernels - 1 cup diced tomatoes - 1 cup salsa For the Chicken Taco Casserole, you need simple, tasty ingredients. I love using cooked shredded chicken. It makes the dish easy and quick. You can use rotisserie chicken for even less work. Black beans add protein and fiber. Corn brings sweetness, and diced tomatoes add freshness. Salsa ties everything together with its bold flavor. - 1 teaspoon chili powder - 1 teaspoon cumin - ½ teaspoon garlic powder - ½ teaspoon onion powder - 1 cup shredded cheddar cheese - 1 cup crushed tortilla chips - Fresh cilantro, chopped - Sour cream, optional The seasonings are key to a flavorful casserole. Chili powder and cumin give warmth and depth. Garlic and onion powders add savory notes. For toppings, shredded cheddar cheese melts perfectly and adds richness. Crushed tortilla chips offer a nice crunch on top. Fresh cilantro brightens the dish, and sour cream adds creaminess. You can find the full recipe in the article. Enjoy! - Preheat the oven to 350°F (175°C). - Grease a 9x13-inch baking dish. Start by getting your oven ready. This helps the casserole cook evenly. Greasing the dish prevents sticking. You want a good, non-stick surface for easy serving. - Mix chicken, beans, corn, tomatoes, salsa, and spices. - Layer ingredients in the baking dish. In a large bowl, mix cooked shredded chicken, black beans, corn, diced tomatoes, and salsa. Add chili powder, cumin, garlic powder, and onion powder. Stir until everything is well combined. This mix gives your casserole great flavor. Next, spread half of this mixture evenly across the bottom of your greased dish. Sprinkle half of the shredded cheddar cheese on top. Then, add a layer of crushed tortilla chips. They add crunch and texture. Top it all off by spooning the rest of the chicken mixture over the chips. Finish with the remaining shredded cheese. - Bake covered for 20 minutes. - Bake uncovered for an additional 10 minutes. Cover the dish with aluminum foil and place it in the oven. Bake for 20 minutes. This keeps the moisture in. After that, remove the foil and bake for another 10 minutes. You want the cheese to be bubbly and slightly golden. Once baked, let it cool for a few minutes. This helps it hold together when you slice it. You can find the full recipe for easy reference. - Use rotisserie chicken for quicker preparation. - Avoid overcooking chicken for optimal texture. When shredding chicken, I find rotisserie chicken is a big help. It saves time and adds great flavor. You can find it at most grocery stores, ready to go. Just peel off the skin and shred the meat with two forks. This method keeps the chicken tender. Overcooking chicken can make it dry. Cook it just until it’s done and no longer pink. This way, you keep that juicy goodness. - Add jalapeños or bell peppers for extra heat and color. - Use different cheese varieties for richer taste. To make your casserole pop, consider adding jalapeños or bell peppers. These peppers bring a nice heat and bright color to your dish. If you want a richer taste, try mixing different cheeses. Cheddar is great, but Monterey Jack or pepper jack can add a fun twist. Mixing cheeses can also create a creamier texture. - Garnish with cilantro right before serving. - Serve with lime wedges for an added zing. Presentation matters in cooking. I like to garnish with fresh cilantro right before serving. It adds a lovely green touch and a fresh taste. Lime wedges are another great addition. Just a squeeze of lime can brighten the flavors in the casserole. These simple steps can make your Chicken Taco Casserole look and taste gourmet. For the full recipe, check your cooking notes! {{image_2}} You can easily make a vegetarian version of this dish. Just swap the chicken for sautéed mushrooms or tofu. Both choices offer great texture and flavor. I love using a vegetable broth-based salsa to keep the taste fresh and vibrant. This swap allows anyone to enjoy the casserole without meat. If you need a gluten-free option, check the tortilla chips. Make sure they are clearly labeled gluten-free. You can also use rice instead of chips for a healthier twist. This change keeps the dish tasty and satisfying for those avoiding gluten. For a spicy kick, use spicy salsa and add more chili powder. You can also add serrano or habanero peppers to heat things up. This version is perfect for those who love bold flavors. It transforms a simple casserole into a fiery delight. Store leftovers in an airtight container for up to 3 days. This keeps the flavors fresh. When ready to eat, check if it smells good. If it does, you're all set! To freeze your Chicken Taco Casserole, let it cool first. Then, wrap it tightly in plastic wrap and foil. This helps prevent freezer burn. You can freeze it for up to 3 months. When you are ready to eat it, take it out of the freezer. Place it in the fridge overnight to thaw. This method keeps the taste and texture nice. To reheat, I recommend using the oven. Set it to 350°F (175°C). Place the casserole in a dish and cover it with foil. Heat for about 20 minutes. This keeps the cheese melted and delicious. You can also use a microwave for quicker reheating. Just cover it and heat in short bursts. Stir in between to warm it evenly. Alternatively, you can use a stovetop. Place in a pan and heat over low. Stir gently to avoid burning. For the full recipe, visit the Chicken Taco Casserole section. Yes, you can use fresh chicken. Start by cooking the chicken first. I suggest boiling or baking it until it reaches 165°F (75°C). Once cooked, shred the chicken and use it in your casserole. This keeps the dish juicy and packed with flavor. To check if your casserole is done, look for bubbling cheese. You want a nice golden color on top. This usually takes about 30 minutes in the oven. If the cheese looks melted and bubbly, it's ready to serve. You can prep this casserole in advance! Just follow these steps: - Mix all the ingredients as stated in the recipe. - Layer them in your baking dish, but do not bake yet. - Cover the dish with plastic wrap and store it in the fridge for up to 24 hours. When ready, just pop it in the oven and bake as instructed. When serving Chicken Taco Casserole, consider these sides: - Fresh guacamole for a creamy touch. - A simple green salad for crunch. - Mexican rice for a hearty addition. - Refried beans to complement the flavors. These sides enhance the meal and offer variety. This Chicken Taco Casserole is tasty and simple to make. You mix cooked chicken, beans, corn, and spices, then bake. With tips for shredding chicken and flavor tricks, it's easy to customize. You can make it vegetarian or gluten-free too. Don't forget to store leftovers right! Enjoying good food shouldn't be hard, and this dish proves that. Try it out today and see how fun cooking can be!

Chicken Taco Casserole Savory One-Dish Delight

Get ready for a tasty treat with my Chicken Taco Casserole! This one-dish delight is perfect for busy weeknights or

Older posts
Newer posts
← Previous Page1 … Page6 Page7 Page8 … Page23 Next →

dsad

© 2025 greenmealmap • Built with GeneratePress

Our Policies

  • Copyright Policy
  • Cookie Policy
  • GDPR Policy
  • Privacy Policy
  • Disclaimer
  • Terms Of Use

More Information

  • Home
  • About
  • Contact
  • Appetizers
  • Dessert
  • Dinner
  • Drinks
©2025, greenmealmap About Back To Top