Skip to content
DisclaimerTerms Of UseGDPR PolicyCookie Policy

greenmealmap

  • Home
  • Drinks
  • Appetizers
  • Dinner
  • Dessert
  • About
  • Contact
  • Privacy Policy
DisclaimerTerms Of UseGDPR PolicyCookie Policy

Lauren

To make this zesty Italian pasta salad, gather these ingredients: - 2 cups rotini or penne pasta - 1 cup cherry tomatoes, halved - 1 medium cucumber, diced - 1/2 cup black olives, sliced - 1/2 cup bell peppers (red, yellow, or green), diced - 1/4 cup red onion, finely chopped - 1/2 cup mozzarella balls or diced mozzarella cheese - 1/4 cup grated Parmesan cheese - 1/4 cup olive oil - 2 tablespoons red wine vinegar (you can use apple cider vinegar if you prefer) - 1 teaspoon dried oregano - 1 teaspoon garlic powder - Salt and pepper to taste - Fresh basil leaves for garnish When selecting ingredients, quality matters. Here are some brands I trust: - For pasta, Barilla is a solid choice with various shapes. - For cherry tomatoes, look for Organic Girl. Their tomatoes are sweet and fresh. - Use Lucini for olive oil; it has rich flavor and is great for dressings. - For cheese, BelGioioso mozzarella and Parmesan are top-notch and flavorful. You can adapt this recipe for different diets: - For gluten-free pasta, try Tinkyada or Barilla Gluten-Free. - If you're vegan, swap mozzarella with vegan cheese and skip the Parmesan. - For a low-carb option, use zucchini noodles instead of pasta. - If you're allergic to olives, simply leave them out or replace them with artichoke hearts. Finding the right ingredients and making adjustments helps everyone enjoy this dish. First, gather all your ingredients. You need rotini or penne pasta, cherry tomatoes, cucumber, black olives, bell peppers, red onion, mozzarella, and Parmesan cheese. This mix adds color and taste. Chop the veggies, and slice the olives. This helps them blend well in the salad. Cook the pasta according to the package instructions. Aim for al dente, which means it should be firm but not hard. Once done, drain the pasta. Rinse it under cold water to stop the cooking process. This step keeps your pasta from getting mushy. Set the pasta aside to cool completely. In a large bowl, combine the halved cherry tomatoes, diced cucumber, sliced black olives, diced bell peppers, chopped red onion, mozzarella, and grated Parmesan cheese. In a separate small bowl, whisk together olive oil, red wine vinegar, oregano, garlic powder, salt, and pepper. This will be your dressing. Add the cooled pasta to the veggies and pour the dressing over. Toss everything gently. Make sure the pasta and veggies are well coated. Let the salad chill in the fridge for at least 30 minutes. This allows the flavors to blend beautifully. Just before serving, toss again and adjust the seasoning if needed. Enjoy your zesty Italian pasta salad! For the full recipe, check the earlier section. To boost the flavor of your Zesty Italian Pasta Salad, use fresh herbs. Fresh basil and parsley add great taste. You can also try adding a pinch of red pepper flakes for warmth. Dried herbs are good too. Oregano and thyme work well. Always taste as you go! This helps you find the right balance. Chilling your salad is key. After mixing, cover it with plastic wrap. Place it in the fridge for at least 30 minutes. This allows the flavors to blend. If you have more time, chill it for a few hours. The longer it sits, the better it tastes! When it's time to serve, present your pasta salad in a big bowl. Add a few fresh basil leaves on top for color. You can also sprinkle more Parmesan cheese for extra flavor. For a fun touch, serve it in individual cups. This makes it easy for guests to grab a portion. Enjoy your beautiful creation! For the full recipe, check the earlier section. {{image_2}} You can add protein to your Zesty Italian Pasta Salad to make it heartier. Cooked chicken, turkey, or shrimp works great. For a quick fix, use store-bought rotisserie chicken. Just shred it and mix it in. You can also try canned tuna or chickpeas for a different twist. Each protein adds a new flavor that makes the salad fun and filling. If you want a vegetarian or vegan version, skip the cheese and meat. You can use tofu or tempeh instead for protein. Marinate them in some olive oil and herbs for flavor. You can also add more veggies like avocado or artichokes. They will make the salad richer and more satisfying without animal products. Don't be afraid to swap ingredients in your pasta salad. You can use different pasta shapes like fusilli or farfalle. Try adding sweet corn or green peas for a pop of color and sweetness. Instead of olives, you might enjoy capers for a briny kick. Experiment with fresh herbs like parsley or dill for a fresh taste. Each swap can turn this salad into a new dish every time you make it. For more details, see the full recipe. After enjoying your Zesty Italian Pasta Salad, store any leftovers in a tight container. This keeps the salad fresh and tasty. You can use a glass or plastic container with a snug lid. Make sure to cool it down to room temp before sealing. When stored properly, your pasta salad lasts up to three days in the fridge. The flavors will deepen over time, making it even more delicious. Just remember to check for any signs of spoilage before you dig in. If it smells funny or looks off, it’s best to toss it. You can serve Zesty Italian Pasta Salad cold or at room temperature. I prefer it cold, as it keeps the fresh taste. If you want to reheat it, do so gently on low heat. Avoid overheating, as this can make the pasta mushy. A quick warm-up in the microwave can work, but I recommend enjoying it cold for the best flavor. For the full recipe, check the section above. Yes, you can make this salad ahead of time. This pasta salad tastes even better after it sits. Make it a few hours before serving or even a day ahead. Just keep it in the fridge. The flavors will mix and become more zesty. If you make it too far ahead, the pasta may soak up too much dressing. You can add a little more dressing just before serving. To make this salad gluten-free, swap regular pasta for gluten-free pasta. There are many brands available now. Look for ones made from rice, quinoa, or chickpeas. They cook well and taste great. Always check the labels to ensure they are certified gluten-free. This way, you can enjoy a tasty salad without worry. The best dressing for Zesty Italian Pasta Salad is a simple olive oil and vinegar mix. I like to use red wine vinegar for a tangy kick. You can also try apple cider vinegar if you prefer. Add a bit of dried oregano and garlic powder to boost the flavor. This dressing is light, fresh, and complements the salad perfectly. If you want something creamier, use a light Italian dressing instead. In this blog post, we explored how to make a Zesty Italian Pasta Salad. We discussed key ingredients and brands while offering substitutions for dietary needs. You learned the step-by-step process, tips for enhancing flavors, and creative variations. Storing and reheating the salad is easy, ensuring freshness. Lastly, I answered common FAQs. Embrace this recipe and make it your own. Enjoy the process and your tasty results!

Zesty Italian Pasta Salad Flavorful and Fun Recipe

Looking for a fresh and fun dish that packs a punch? My Zesty Italian Pasta Salad is here to brighten

- 2 cups heavy cream - 1 cup whole milk - 3/4 cup granulated sugar - 1 teaspoon pure vanilla extract - 1 cup fresh cherries, pitted and halved - 1 cup semi-sweet chocolate chips - 1 tablespoon lemon juice - A pinch of salt Choosing great ingredients makes your ice cream shine. Start with heavy cream. It gives your ice cream a rich and creamy texture. Whole milk also adds creaminess and balances the mix. When picking cherries, look for fresh, ripe ones. They should be bright red and firm. Avoid any with bruises or soft spots. Fresh cherries bring a burst of flavor. Pitting and halving them makes them easy to mix in. For chocolate chips, semi-sweet is the best choice. They add just the right sweetness and richness. You can try dark chocolate chips for a bolder taste or milk chocolate for a sweeter treat. If you need an alternative for heavy cream, you can use coconut cream. It gives a nice flavor and creamy texture, too. Just keep in mind it will add a hint of coconut taste. You can find the full recipe for this delightful summer treat [here](insert link). To start, you need to mix the cream and sugar. In a large bowl, whisk together: - 2 cups heavy cream - 1 cup whole milk - 3/4 cup granulated sugar - 1 teaspoon pure vanilla extract - A pinch of salt Whisk until the sugar dissolves and the mix is smooth. This step is key for a creamy base. Next, you add flavor enhancers. Pour in 1 tablespoon of lemon juice. This brightens the flavor and adds a zesty note. Blend it well into the cream mixture. Now it’s time to fold in the cherries and chocolate. You’ll want to add: - 1 cup fresh cherries, pitted and halved - 1 cup semi-sweet chocolate chips Gently fold these into the cream base. Use a spatula and be careful not to break the cherries. This ensures they stay whole and juicy. For even distribution, mix slowly. You want the cherries and chocolate chips spread throughout the ice cream. Now, pour the mixture into your ice cream maker. Follow the manufacturer’s instructions. Usually, this takes about 20-25 minutes. You want it to reach a soft-serve consistency. After churning, transfer the ice cream to an airtight container. Smooth the top with a spatula for a nice finish. If you prefer a firmer texture, place the container in the freezer. Let it freeze for at least 4 hours before serving. This step is crucial for that perfect scoop. For the full recipe, check the main section. Enjoy your homemade treat! To make smooth ice cream, avoid ice crystals. Start with very cold ingredients. This helps keep the ice cream creamy. Use an ice cream maker. It helps incorporate air, which gives a light texture. Churn the mixture for about 20-25 minutes. Stop when it reaches soft-serve consistency. This ensures a rich and creamy treat. Serve the ice cream at the right temperature. Let it sit out for about five minutes before scooping. This makes it easier to serve. For a fun presentation, use chilled bowls. Add extra cherries and chocolate shavings on top. This makes your ice cream look fancy and delicious. Overmixing can ruin your ice cream. Mix just until combined, then stop. Too much salt or lemon juice can overpower the flavor. Use only a pinch of salt. For lemon juice, stick to one tablespoon. These tips will help you make the best cherry chocolate chip ice cream. Enjoy your homemade treat from the Full Recipe! {{image_2}} You can make cherry chocolate chip ice cream even better! Try adding nuts like walnuts or almonds. They give a nice crunch and contrast the soft ice cream. You can also swirl in other flavors, such as caramel or peanut butter. Adding these gives new tastes with each bite. If you want a dairy-free version, use coconut cream or almond milk instead of heavy cream and whole milk. These options still make a creamy ice cream. For a sugar-free treat, use a sugar substitute like stevia or erythritol. This way, you can enjoy the flavor without the extra sugar. Switching up the fruit can create fun new flavors. In summer, use fresh peaches or strawberries. In fall, add pumpkin puree for a seasonal treat. You can also make themed variations for holidays. For example, add peppermint extract for a festive touch during winter. Each season brings a chance to try something new! Check out the Full Recipe for more details on making this delicious treat. To keep your cherry chocolate chip ice cream fresh, use an airtight container. This helps prevent ice crystals. A plastic container with a tight lid works well. You can also use a glass container if it seals tightly. Before placing the ice cream inside, smooth the top with a spatula. This minimizes air exposure. When freezing, place the container in the coldest part of your freezer. Avoid the door, as it fluctuates in temperature. Cover the surface of the ice cream with plastic wrap. This adds an extra layer of protection against freezer burn. You can store homemade cherry chocolate chip ice cream for about two weeks. After this time, the flavor may fade. Always check for signs of spoilage. If you see ice crystals on top or notice a grainy texture, it’s time to toss it. If the ice cream smells off, do not eat it. Yes, you can refreeze ice cream, but I don’t recommend it. The texture may change and become icy. If you choose to refreeze, do it quickly. Put the ice cream back in the freezer as soon as you finish serving it. To maintain quality after refreezing, ensure it stays in an airtight container. Freeze it at a low temperature. This helps keep the texture smooth. Enjoy the cherry chocolate chip ice cream from the [Full Recipe]. You can make ice cream without a maker using a simple method. Start by mixing your ingredients in a bowl. Then, pour the mix into a large, shallow dish. Place the dish in the freezer. Every 30 minutes, stir the mixture with a fork for about 3 hours. This helps break up any ice that forms. You will create a creamy texture without a machine! Yes, you can use frozen cherries. They are convenient and often ready to use. Frozen cherries can make your ice cream cold and refreshing. However, they may be softer than fresh cherries. This can change the texture of your ice cream slightly. If you use frozen cherries, let them thaw first. Drain extra juice before adding them to your mix. Add fun toppings to your ice cream for extra flavor. Try crushed nuts, like walnuts or almonds, for a nice crunch. You can also add whipped cream for a creamy touch. A drizzle of chocolate syrup or caramel can enhance the sweetness. Fresh mint leaves can add a nice pop of color and flavor. Get creative with your toppings! You can find Cherry Chocolate Chip Ice Cream at many grocery stores. Look for popular brands like Ben & Jerry's and Haagen-Dazs. Local ice cream shops may also offer it as a seasonal flavor. Check out farmer's markets for homemade versions. They often use fresh, local ingredients. If you want to make it yourself, check the Full Recipe to create your own at home! To make Cherry Chocolate Chip Ice Cream, gather all the right ingredients. Use fresh cherries and quality chocolate chips for the best flavor. Follow the steps to mix, churn, and freeze. Remember to avoid common mistakes like overmixing. For creative twists, try seasonal fruits or alternative diets. Store it properly to keep it fresh. Making ice cream at home can be fun and tasty. Enjoy every scoop and share it with friends!

Cherry Chocolate Chip Ice Cream Delightful Summer Treat

Summer calls for a sweet treat, and Cherry Chocolate Chip Ice Cream hits the spot! This creamy delight combines fresh

- 1 ½ lbs flank steak - 4 cloves garlic, minced - ⅓ cup soy sauce - 2 tablespoons brown sugar - 2 tablespoons sesame oil The key to this dish is the flank steak. It is a lean cut that cooks well on the grill. The garlic adds a punch of flavor. Soy sauce gives a savory depth. Brown sugar adds a hint of sweetness, balancing the saltiness of the soy. Sesame oil brings a nutty aroma that ties everything together. - 1 teaspoon red pepper flakes - 2 green onions, chopped (for garnish) - Sesame seeds (for garnish) You can add red pepper flakes if you like some heat. Green onions give a fresh crunch when sprinkled on top. Sesame seeds add a nice touch and extra flavor. - Salt and pepper - Additional herbs or spices Don’t forget to season with salt and pepper. You can also use other herbs or spices. Try adding fresh herbs like cilantro or rosemary for a unique twist. This recipe is straightforward, yet it bursts with flavor. You can find the full recipe for Garlic Soy Grilled Flank Steak and make it at home! To start, gather your ingredients. You need minced garlic, soy sauce, brown sugar, sesame oil, and grated ginger. These ingredients make a great marinade for the flank steak. 1. In a medium bowl, whisk together the minced garlic, soy sauce, brown sugar, sesame oil, and grated ginger. 2. Make sure the brown sugar dissolves completely. This step is key for a balanced flavor. Now it's time to marinate the flank steak. 1. Place the flank steak in a large resealable plastic bag or a shallow dish. 2. Pour the marinade over the steak. Ensure the steak is evenly coated. 3. Seal the bag or cover the dish and refrigerate. For the best flavor, marinate for at least 2 hours. Overnight is even better. Grilling is where the magic happens. 1. Preheat your grill to medium-high heat. This helps achieve a nice sear on the meat. 2. Remove the flank steak from the marinade. Let any excess marinade drip off. 3. Season both sides of the steak with salt and pepper. 4. Place the steak on the grill. Cook for about 4-5 minutes on each side for medium-rare. 5. Use a meat thermometer to check the temperature. Aim for 130°F for medium-rare. After grilling, let the steak rest for 5-10 minutes. This keeps the juices inside. Don't forget to slice it against the grain for tender bites. Enjoy your flavorful garlic soy grilled flank steak! For more details, check the Full Recipe. - Slicing against the grain: Always slice the flank steak against the grain. This helps make each bite tender. If you cut with the grain, the meat can feel tough and chewy. Look closely at the meat fibers. Cut across them for the best results. - Using a meat thermometer: A meat thermometer is a must. It takes the guesswork out of cooking. For medium-rare, aim for 130°F. This ensures your steak is juicy and not overcooked. Insert it into the thickest part of the steak for the most accurate reading. - Adding citrus elements: A splash of lime or lemon juice can brighten the flavors. Just add it to the marinade before you soak the steak. The acidity also helps to tenderize the meat. - Alternative marinades: Don’t be afraid to mix it up. Try teriyaki sauce for a sweet twist. Or add some chili paste for heat. Each marinade offers a unique flavor profile, so explore what you love. - Color indicators: Look for the steak's color. A medium-rare steak should be a warm red inside. If it’s brown throughout, it’s likely overcooked. You want that perfect pink center. - Juiciness check: When you cut into the steak, look for juices. It should release some juice but not be swimming in it. If the steak is dry, it may be overcooked. Always let it rest after grilling to keep those juices in. For a full recipe, check the details provided earlier. Happy cooking! {{image_2}} You can switch up the flavor by using different marinades. - Teriyaki Sauce Alternative: Instead of soy sauce, try teriyaki sauce. It adds a sweet and savory taste. The flavors of the teriyaki work well with flank steak. You will still get a tender and juicy steak. - Spicy Variations with Chili Paste: Add chili paste to the marinade for heat. This gives the steak a spicy kick. If you like bold flavors, this is a great choice. You can adjust the amount to suit your taste. You can grill or cook the flank steak in other ways. - Oven Broiling Method: If you can't grill outside, use your oven. Preheat the broiler and place the steak on a pan. Broil it for about 4-5 minutes on each side. This method still gives you a flavorful result. - Sous Vide Cooking Technique: For precise cooking, try sous vide. Seal the steak in a bag and cook it in water at a set temperature. This method makes sure the meat cooks evenly. It also keeps the steak juicy and tender. Pair your flank steak with delicious sides. - Pairing with Side Dishes: Serve it with rice, grilled veggies, or a fresh salad. These sides complement the flavors of the steak. - Creative Serving Presentations: Slice the steak into thin strips and arrange them on a platter. You can garnish with green onions and sesame seeds for a nice touch. This makes your dish look beautiful and appetizing. For the full recipe, check here: [Full Recipe]. To store leftover steak, let it cool first. Place it in an airtight container. This helps keep the steak fresh. The steak can stay in the fridge for up to three days. Always label the container with the date. This way, you know when to use it. If you want to keep leftover steak longer, freezing is a great option. Wrap the steak tightly in plastic wrap. Then, place it in a freezer bag. Remove as much air as possible before sealing. You can freeze the steak for up to three months. Remember to label the bag with the date. Reheating steak can be tricky. You want to keep it juicy and tender. One good method is to use the oven. Preheat your oven to 250°F. Place the steak on a baking sheet. Heat it for about 20-30 minutes. You can also use a skillet on low heat. Add a bit of oil or butter to keep it moist. Flip it often, so it warms evenly. Avoid high heat, as it can dry out the meat. For the best flavor, marinate the flank steak for at least two hours. If you have time, try marinating it overnight. This helps the meat soak up the garlic and soy sauce. Longer marinating times build deeper flavors and make the steak tender. Yes, you can use other cuts of steak. Skirt steak works well, as it has a similar texture. Sirloin or ribeye can also be good choices. Adjust cooking times based on the thickness of the meat. Each cut has its own flavor and texture, so feel free to experiment. Many sides pair nicely with this dish! You might enjoy serving it with: - Steamed rice - Grilled vegetables - A fresh salad - Mashed potatoes - Noodles These sides balance the rich flavors of the steak and create a satisfying meal. You learned how to make a delicious garlic soy grilled flank steak. We covered key ingredients, including flank steak, garlic, and soy sauce. I shared tips for marinating, grilling, and serving your steak perfectly. Remember to slice against the grain for better texture and enjoy experimenting with flavor variations. Proper storage keeps leftovers tasty. Take these steps, and you'll impress everyone at your next meal. Enjoy your cooking adventure!

Garlic Soy Grilled Flank Steak Flavorful and Tender Dish

Are you ready to unlock bold flavors with Garlic Soy Grilled Flank Steak? This recipe is simple, tasty, and perfect

To make your Veggie Spring Roll Bowls, gather these ingredients: - 1 cup vermicelli rice noodles - 1 cup shredded carrots - 1 cup cucumber, julienned - 1 red bell pepper, thinly sliced - 1 cup red cabbage, shredded - 1 avocado, sliced - 1/4 cup fresh mint leaves - 1/4 cup fresh cilantro leaves - 1/4 cup chopped green onions - 1/4 cup sesame seeds - 1/4 cup soy sauce (or tamari for gluten-free) - 2 tablespoons peanut butter - 1 tablespoon rice vinegar - 1 tablespoon sesame oil - 1 tablespoon honey or maple syrup - Juice of 1 lime - Salt and pepper to taste You can tweak this recipe to fit your taste. Here are some ideas: - Use zucchini noodles instead of rice noodles for a low-carb option. - Swap the red bell pepper with yellow or orange for sweetness. - Try different herbs like basil or parsley instead of mint. - Use almond butter if you want a nut-free sauce. - Add sliced radishes for extra crunch and spice. Each serving of Veggie Spring Roll Bowls provides a healthy mix of nutrients. Here’s a quick breakdown: - Calories: Approximately 300-350 - Protein: About 10 grams - Carbohydrates: Roughly 40 grams - Fiber: Around 8 grams - Healthy fats: 15 grams These bowls are packed with vitamins and minerals from the fresh veggies. Plus, they offer a good source of plant-based protein. Enjoying a balanced meal has never been easier! Start by boiling water in a large pot. Once boiling, add 1 cup of vermicelli rice noodles. Cook them for about 3 to 5 minutes, following the package instructions. Stir occasionally to prevent sticking. After cooking, drain the noodles and rinse them under cold water. This keeps them from getting mushy. Set the noodles aside while you prepare the vegetables. While your noodles cook, you can get your veggies ready. Shred 1 cup of carrots using a grater. Julienne 1 cup of cucumber into thin strips. Thinly slice 1 red bell pepper. Shred 1 cup of red cabbage. Place each vegetable in separate bowls. This makes it easy to assemble your spring roll bowls later. You can mix and match the veggies as you like. The colors make the dish pop. In a small bowl, mix the sauce ingredients. Start with 1/4 cup of soy sauce or tamari if you prefer gluten-free. Add in 2 tablespoons of peanut butter for creaminess. Pour in 1 tablespoon of rice vinegar and 1 tablespoon of sesame oil for flavor. Next, add 1 tablespoon of honey or maple syrup to sweeten. Squeeze in the juice of 1 lime for zing. Whisk everything until it's smooth. Taste the sauce and adjust it with salt and pepper if you want. This sauce brings all the flavors together. Now you're ready to assemble the Veggie Spring Roll Bowls! For the full recipe, check out the details above. Start by boiling water in a large pot. Add the vermicelli rice noodles. Cook them for 3-5 minutes. Keep an eye on them to avoid overcooking. Drain the noodles when they are soft. Rinse them under cold water. This stops the cooking process and helps them stay firm. Toss a bit of oil on the noodles to keep them from sticking. You can enhance the flavor of your veggie spring roll bowls in many ways. First, add fresh herbs like basil or cilantro. They really brighten the dish. Next, consider adding a splash of lime juice for a zesty kick. If you want more heat, add some chili flakes or sriracha to the sauce. Mixing in a dash of sesame oil can also deepen the flavor profile. Make your bowls look colorful and inviting. Start with a base of noodles in each bowl. Arrange the vegetables in a rainbow pattern. Place the bright red bell pepper next to the green cucumber. Top it off with creamy avocado slices and sprinkle sesame seeds for crunch. Serve with the sauce on the side. This way, guests can add as much as they like. You’ll impress everyone with your beautiful veggie spring roll bowls! For the full recipe, check out the complete guide! {{image_2}} You can boost the protein in your veggie spring roll bowls easily. Add tofu for a plant-based option. Firm tofu works best. Press it to remove excess water, then cube and pan-fry until golden. You can also use chicken or shrimp. For chicken, use cooked, shredded pieces. For shrimp, sauté them until they turn pink. Both add flavor and protein to your meal. If you need gluten-free options, use tamari instead of soy sauce. It has the same great taste without gluten. You can also swap vermicelli rice noodles for zucchini noodles. They offer a fresh crunch and keep it light. Always check labels on sauces for hidden gluten. The sauce is key to flavor. You can try new sauces to mix things up. A spicy sriracha sauce adds heat and excitement. A sweet chili sauce gives a nice balance. You could even make a creamy dressing with tahini and lemon. It’s fun to explore and find your favorite! For a full recipe, check out the Veggie Spring Roll Bowls section. After you enjoy your veggie spring roll bowls, store any leftovers in an airtight container. Make sure to keep the sauce separate to avoid soggy noodles or veggies. Place the container in the fridge. Your leftovers will stay fresh for up to three days. When you're ready to eat, take the noodles and veggies out of the fridge. Heat the noodles in a pot with a splash of water. Stir them until warm, about two minutes. For veggies, you can use the microwave for about one minute. If you prefer, you can eat them cold as a salad, too. You can freeze the noodles and veggies if you want to keep them longer. First, let them cool completely. Then, pack them in freezer-safe bags, removing as much air as possible. They can last for up to three months in the freezer. When you're ready to use them, thaw them overnight in the fridge. Reheat them as mentioned above. Get the full recipe to enjoy this dish at any time! To make veggie spring roll bowls, start with the noodles. Cook the vermicelli rice noodles according to the package. Then, rinse them under cold water. This stops the cooking and keeps them from sticking. Next, prep the vegetables. Shred the carrots, julienne the cucumber, and slice the bell pepper. Arrange the veggies nicely in bowls for easy assembly. Then, whisk together the sauce in a small bowl. Mix soy sauce, peanut butter, rice vinegar, sesame oil, honey, and lime juice. Taste it and add salt and pepper as needed. Finally, assemble the bowls. Place the noodles at the bottom, then top with veggies and herbs. Drizzle the sauce on top or serve it on the side. This method makes each step simple and fun. Yes, you can prep the ingredients in advance. This helps save time when you want to make the bowls. You can cook the noodles a day before. Just store them in the fridge after rinsing. Prepare the vegetables too. Cut and shred them the night before. Keep them in separate containers in the fridge. This way, they stay fresh and crisp. You can also make the sauce in advance. Store it in a jar or container in the fridge. When you are ready to eat, simply assemble the bowls and enjoy a quick meal. You can easily customize veggie spring roll bowls to fit your dietary needs. If you need a gluten-free option, use tamari instead of soy sauce. For a vegan dish, skip the honey and use maple syrup. If you want more protein, add tofu, chicken, or shrimp. You can also change the veggies based on what you like. Use bell peppers, carrots, or any crunchy vegetables you enjoy. If you prefer a different sauce, try adding sriracha for heat or sesame dressing for a nutty flavor. This recipe is flexible and lets you explore your taste. This blog post covered how to make delicious Veggie Spring Roll Bowls. We discussed each ingredient, gave cooking steps, and shared useful tips. You learned about variations, storage, and answered common questions. In closing, I hope you feel ready to create your own tasty bowls. Try different ingredients and flavors. Make this dish your own and enjoy!

Veggie Spring Roll Bowls Flavorful and Healthy Meal

Are you ready to dive into a fresh, healthy meal? Veggie Spring Roll Bowls are packed with flavors and good-for-you

- 1 cup dark chocolate chips (70% cocoa or higher) - 1/2 cup roasted almonds, roughly chopped - 1/4 cup dried cranberries - 1/4 cup coconut flakes (unsweetened) - 1 teaspoon flaky sea salt - 1 tablespoon coconut oil (optional, for smoother chocolate) When you make Dark Chocolate Sea Salt Bark, start with quality ingredients. Dark chocolate chips form the base. Choose a brand with at least 70% cocoa for deep flavor. Roasted almonds add crunch and nutty taste. Dried cranberries offer a tart contrast. Coconut flakes give a hint of tropical sweetness. Flaky sea salt brings all the flavors together. Optionally, coconut oil can make the chocolate smoother and shinier. - Other nuts (e.g., walnuts, pecans) - Different types of dried fruits - Alternative sweeteners You can customize the bark to fit your taste. If you love walnuts or pecans, swap them for almonds. Try different dried fruits like apricots or figs for varied flavors. For sweetness, consider using honey or maple syrup. Each change can give a new twist to your bark. - Recommended brands for dark chocolate - Choosing high-quality sea salt For the best results, I recommend using well-known brands for dark chocolate. Look for brands that focus on high-quality ingredients. When choosing sea salt, opt for flaky types like Maldon or fleur de sel. These add a nice crunch and burst of flavor. Using quality ingredients ensures your bark will taste amazing. For the full recipe, check the provided link. Lining your baking sheet is key for this treat. It keeps the chocolate from sticking. I recommend using parchment paper. It makes cleanup easy, too! If you don’t have parchment, a silicone mat works well as an alternative. Just make sure the surface is smooth for the best results. You have two great ways to melt chocolate: the microwave or a double boiler. The microwave is quick and easy. Just heat in 30-second bursts. Stir in between to prevent burning. If you prefer the double boiler, fill a pot with water and let it simmer. Place a bowl on top, making sure it doesn't touch the water. Stir until smooth. No matter the method, keep an eye on it. Overheating can ruin your chocolate. Once your chocolate is melted, it’s time to mix! Add the chopped almonds, dried cranberries, and coconut flakes. Stir gently but quickly to spread everything evenly. Timing is important here, especially with the sea salt. Add the flaky sea salt right before the chocolate sets. This gives it a nice crunch and a burst of flavor. Remember, you want every bite to be delicious! For the full recipe, check out the section above. To get smooth chocolate, avoid grainy chocolate. Start with high-quality dark chocolate chips. If your chocolate becomes grainy, it may have overheated. Melt it slowly, using short bursts in the microwave. Stir often to check the melt. Using coconut oil can help your bark shine. Just mix one tablespoon with your chocolate chips. It adds a nice gloss and makes it smoother. This simple trick takes your bark to a new level. Store your chocolate bark in a cool, dry place. Keep it in an airtight container to avoid moisture. This helps maintain its crispness. Avoid placing it near strong odors. Chocolate can absorb these smells easily. To keep your bark fresh, check for any signs of melting or moisture. If it feels sticky, it may need to be eaten quickly. Proper storage keeps your treat tasting great for longer. For a stunning display, arrange the bark pieces on a decorative plate. You can drizzle melted white chocolate over the top for flair. This adds a nice contrast and makes it look fancy. If you plan to give it as a gift, consider using decorative bags. Wrap up the bark with colorful ribbons. This not only looks nice but also shows you care. Enjoy sharing this treat with friends and family! {{image_2}} You can easily change the taste of your dark chocolate sea salt bark. Try adding spices for a fun twist. A pinch of cinnamon gives warmth. Chili powder adds a nice kick. Both spices mix well with the rich chocolate flavor. You can also try flavor extracts. A drop of vanilla or almond extract can enhance the bark. These flavors blend perfectly and add depth to your treat. Get creative and find combinations you love! Seasonal changes bring new ideas for your bark. During the holidays, you can make peppermint bark. Just add crushed peppermint candies on top. This adds a minty crunch that is festive and fun. In the summer, consider adding fresh fruits. Chopped strawberries or dried mango can brighten your bark. These fruits pair well with dark chocolate and give a refreshing taste. Adjust your ingredients for each season to keep things exciting! You can easily modify the recipe to fit your diet. For a vegan version, use dairy-free dark chocolate. Make sure your other ingredients are also vegan-friendly. You can use maple syrup or agave instead of sugar for a sweet touch. If you're gluten-free, this bark is already a great choice. Just ensure your ingredients are gluten-free. These adaptations let everyone enjoy this tasty treat! To keep your dark chocolate sea salt bark fresh, choose an airtight container. Glass or plastic containers work well. Make sure the container is clean and dry before putting the bark inside. Place a layer of parchment paper between the bark and the lid. This prevents sticking and keeps the bark nice. Store the container in a cool, dry place away from sunlight. Dark chocolate sea salt bark can last about two weeks at room temperature. If you keep it well-sealed, it may last a bit longer. Look for signs that the bark has gone bad. If it smells off or has a white film, it is best to toss it. You can freeze dark chocolate bark for longer storage. Wrap it tightly in plastic wrap, then place it in a freezer bag. Be sure to squeeze out any air to prevent freezer burn. When you want to enjoy it, thaw it in the fridge. This helps keep the chocolate's texture smooth. Avoid thawing at room temperature, as it can cause condensation. Enjoy your bark as a tasty treat! For more details, check the Full Recipe. Use dark chocolate chips with at least 70% cocoa. This gives a rich flavor. Higher cocoa content adds depth and pairs well with sea salt. Brands like Ghirardelli or Lindt are great choices. They offer a smooth melt and bold taste. Yes, you can make this recipe vegan. Choose dairy-free dark chocolate chips. Many brands now offer vegan options. For the coconut oil, use a plant-based substitute if desired. The rest of the recipe stays vegan-friendly. To prevent blooming, ensure proper tempering. Melt chocolate slowly in the microwave or a double boiler. Keep the chocolate at a steady temperature. Store your bark in a cool, dry place to avoid moisture. This helps maintain its shine. Absolutely! You can add various toppings. Try chopped nuts like walnuts or pecans. Dried fruits like apricots or mango add sweetness. For a fun twist, sprinkle in some peppermint or orange zest. Let your creativity shine! Dark chocolate sea salt bark is a fun treat to make. You learned about the essential ingredients, like dark chocolate chips and roasted almonds. We also covered how to melt chocolate and combine ingredients for the best taste. Don't forget the tips for storage and presentation. You can get creative with flavors or make dietary swaps. With the right ingredients and techniques, you can enjoy this tasty snack anytime. Get started today and treat yourself!

Dark Chocolate Sea Salt Bark Simple and Tasty Treat

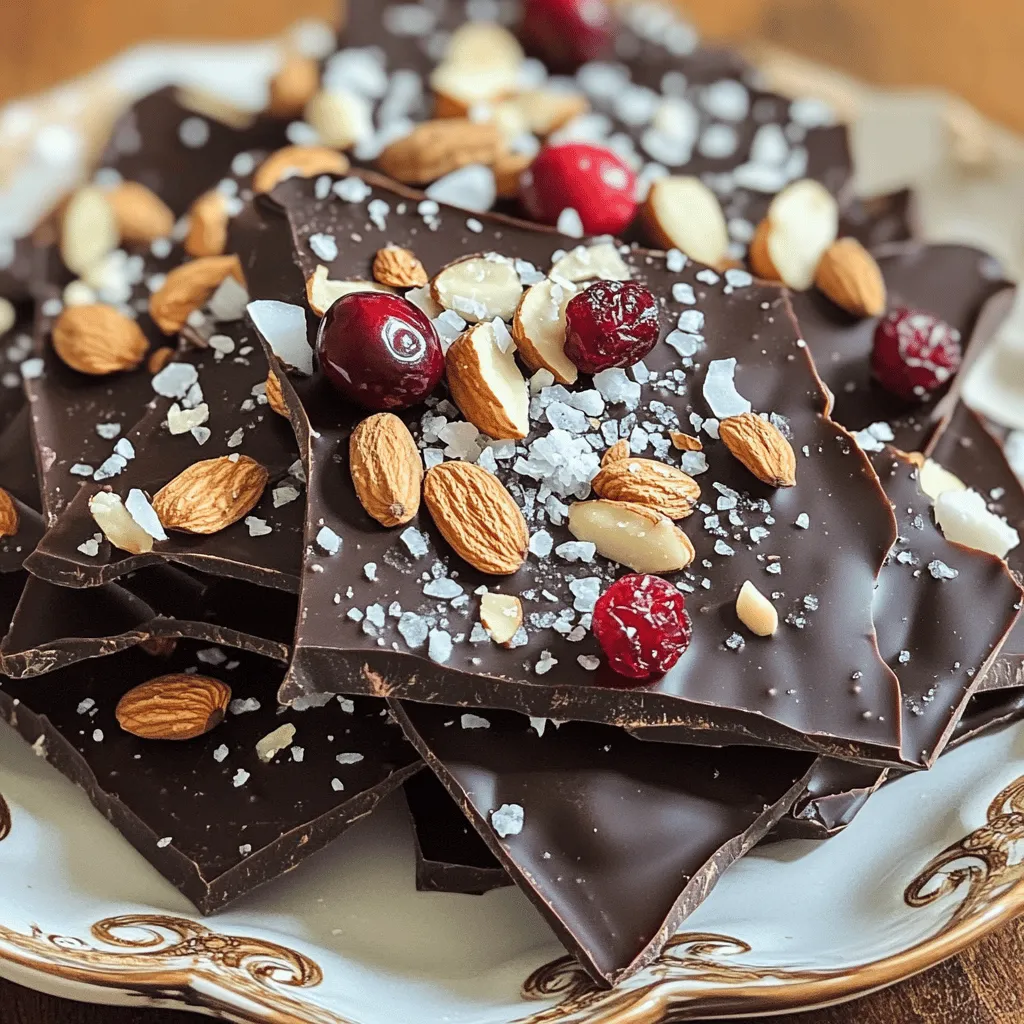
If you crave a sweet treat that’s easy to make, you’re in the right place! My Dark Chocolate Sea Salt

- 6 medium ripe tomatoes - 1 cup cooked quinoa - 1/2 cup feta cheese, crumbled - 1/4 cup kalamata olives, chopped - 1/4 cup fresh parsley, chopped - 1/4 cup red onion, finely chopped - 2 cloves garlic, minced - 1 teaspoon oregano - 2 tablespoons olive oil - Salt and pepper to taste Gather these ingredients first. Using fresh, ripe tomatoes is key. Look for ones that are firm but yield slightly when pressed. The quinoa adds a nutty flavor and is a great source of protein. You can also use any leftovers from meals earlier in the week. Feta cheese brings a tangy taste that pairs well with the olives. Kalamata olives add depth and richness. Fresh parsley gives a pop of color and flavor. The red onion adds a nice crunch, while garlic enhances the overall taste. Make sure to have olive oil on hand. It helps bind the filling and adds moisture. Salt and pepper balance the dish nicely. Use these ingredients to create a meal that's full of flavor and nutrition. - Calories per serving: Approximately 200 - Macronutrient breakdown: - Carbs: 25g - Fats: 10g - Proteins: 7g - Vitamin and mineral content: - Vitamin C: 15% of daily value - Iron: 10% of daily value - Calcium: 8% of daily value This dish is not only tasty but also healthy. It packs a good amount of vitamins and minerals. The combination of ingredients supports a balanced diet. Enjoy these stuffed tomatoes as a great way to eat well. For the full recipe, check out the section above. 1. Preheating the oven Start by preheating your oven to 375°F (190°C). A hot oven ensures even cooking. 2. Preparing the tomatoes Cut the tops off the tomatoes. Use a spoon to scoop out the insides. Set the pulp aside in a bowl. This pulp adds flavor to your filling. 1. Combining the ingredients In a large bowl, mix the cooked quinoa, crumbled feta cheese, chopped kalamata olives, fresh parsley, finely chopped red onion, minced garlic, and oregano. This mix brings great flavor. 2. Ensuring proper seasoning Dice the reserved tomato pulp and add it to your mix. Drizzle with olive oil and season with salt and pepper. Stir until everything blends well. Taste the filling to check the seasoning. 1. Packing the tomatoes Spoon the quinoa mixture into each hollowed tomato. Pack the filling gently. This helps prevent spillage while baking. 2. Baking time and temperature Place the stuffed tomatoes in a baking dish. You can drizzle a bit of olive oil on top if you like. Bake for 25-30 minutes. The tomatoes should be tender and slightly roasted when done. Enjoy these Mediterranean stuffed tomatoes as a tasty meal. For the full recipe, check the detailed instructions above. To avoid soggy tomatoes, choose firm, ripe tomatoes. Hollow them out gently to keep their shape. Bake them until they are just tender, not mushy. This helps retain their structure. For a flavorful filling, use fresh herbs like parsley and oregano. Mix in diced tomato pulp for added taste. Season with salt and pepper. Taste the filling before stuffing. Adjust the spices to your liking for a personal touch. Garnish your stuffed tomatoes with fresh herbs. Sprinkle parsley or basil on top for color. You can also add a lemon wedge for a zesty kick. For ideal pairings, serve them with a crisp green salad or warm pita bread. A light white wine, like Sauvignon Blanc, complements the flavors well. You can also enjoy them with a yogurt dip for extra creaminess. Use a sturdy baking dish, preferably glass or ceramic. These materials help cook the tomatoes evenly. Ensure it is deep enough to hold the stuffed tomatoes upright. For preparation, use a sharp knife and a spoon to scoop out the insides. A mixing bowl is essential for combining your filling ingredients. Having a measuring cup and spoons handy will help ensure accuracy in your recipe. Follow the Full Recipe for more detailed steps, and enjoy your Mediterranean adventure! {{image_2}} When you make Mediterranean stuffed tomatoes, you can get creative. Here are some fun ideas to change things up. You can swap quinoa with rice or couscous. Both options work well. Rice gives a soft texture, while couscous adds a nice bite. Use what you have on hand! For cheese, try goat cheese or mozzarella. Each brings a different flavor. If you want to skip cheese, add extra herbs for more taste. To make this dish vegan, skip the cheese and use a plant-based protein. Chickpeas or lentils are great options here. They add protein and keep the meal hearty. For gluten-free needs, use quinoa or rice. Both are safe options. You can also check the labels for gluten-free couscous. If you want a low-carb version, skip the grains altogether. Use diced eggplant or zucchini instead. This keeps your stuffed tomatoes light and fresh. You can add spices like cumin or paprika for extra warmth. A pinch of red pepper flakes gives a nice kick, too. Get creative with spices you enjoy! Try adding other veggies, like bell peppers or spinach. They boost nutrition and add color. Mix them into the filling for a tasty surprise. Don't forget about Mediterranean herb blends! Consider using thyme, basil, or dill. Each adds a layer of flavor that will elevate your dish. By making these variations, you can enjoy stuffed tomatoes in many delicious ways. You can always find a new favorite! How long do Mediterranean stuffed tomatoes last in the fridge? They last about 3 to 4 days. Store them in an airtight container. This keeps them fresh and tasty. What are the recommended storage containers? Use glass or plastic containers with tight lids. This helps prevent any odors from your fridge from affecting the flavor. What are the best methods for reheating stuffed tomatoes? The oven works best. Preheat your oven to 350°F (175°C) and place the tomatoes on a baking sheet. Heat them for about 10 to 15 minutes. How can you maintain texture and flavor? Cover them lightly with foil. This keeps moisture in, so the tomatoes don't dry out. Can Mediterranean stuffed tomatoes be frozen? Yes! You can freeze them for later use. What are the steps to freeze and reheat correctly? First, let the cooked tomatoes cool completely. Then, wrap each tomato in plastic wrap, and place them in a freezer bag. When ready to eat, thaw them in the fridge overnight. Reheat them in the oven as before. Enjoy your easy Mediterranean stuffed tomatoes anytime! For the full recipe, check out the details. Can I prepare Mediterranean Stuffed Tomatoes in advance? Yes, you can prepare the filling ahead of time. Just store it in the fridge. Hollow out the tomatoes and fill them right before baking. This keeps them fresh and tasty. What can I serve with Mediterranean Stuffed Tomatoes? These stuffed tomatoes pair well with a crisp green salad. You could also serve them with warm pita bread. A light yogurt sauce can add a lovely touch too. What is the best type of tomato to use? Use medium ripe tomatoes for the best flavor. They should be firm but slightly soft. Roma or vine-ripened tomatoes work great for stuffing. Are there any substitutes for feta cheese? Yes, you can use goat cheese or ricotta as substitutes. They both add creaminess and flavor. For a dairy-free option, try using tofu with herbs. How do I know when the tomatoes are done? The tomatoes are done when they are tender and slightly wrinkled. You can poke them gently with a fork. If they give easily, they are ready. Can I grill stuffed tomatoes instead of baking them? Absolutely! Grilling gives a nice smoky flavor. Just wrap the tomatoes in foil and grill for 15-20 minutes. Keep an eye on them so they don’t burn. To recap, we explored the delightful world of Mediterranean Stuffed Tomatoes. We covered ingredients, step-by-step prep, and baking techniques. I shared tips for perfecting your dish and suggested variations for different diets. Understanding storage and reheating could help your meal last longer and taste great. These stuffed tomatoes are healthy, versatile, and fun to make. Whether cooking for yourself or friends, this dish brings flavor and nutrition to the table. Enjoy experimenting with ingredients and make it your own!

Mediterranean Stuffed Tomatoes Flavorful and Easy Dish

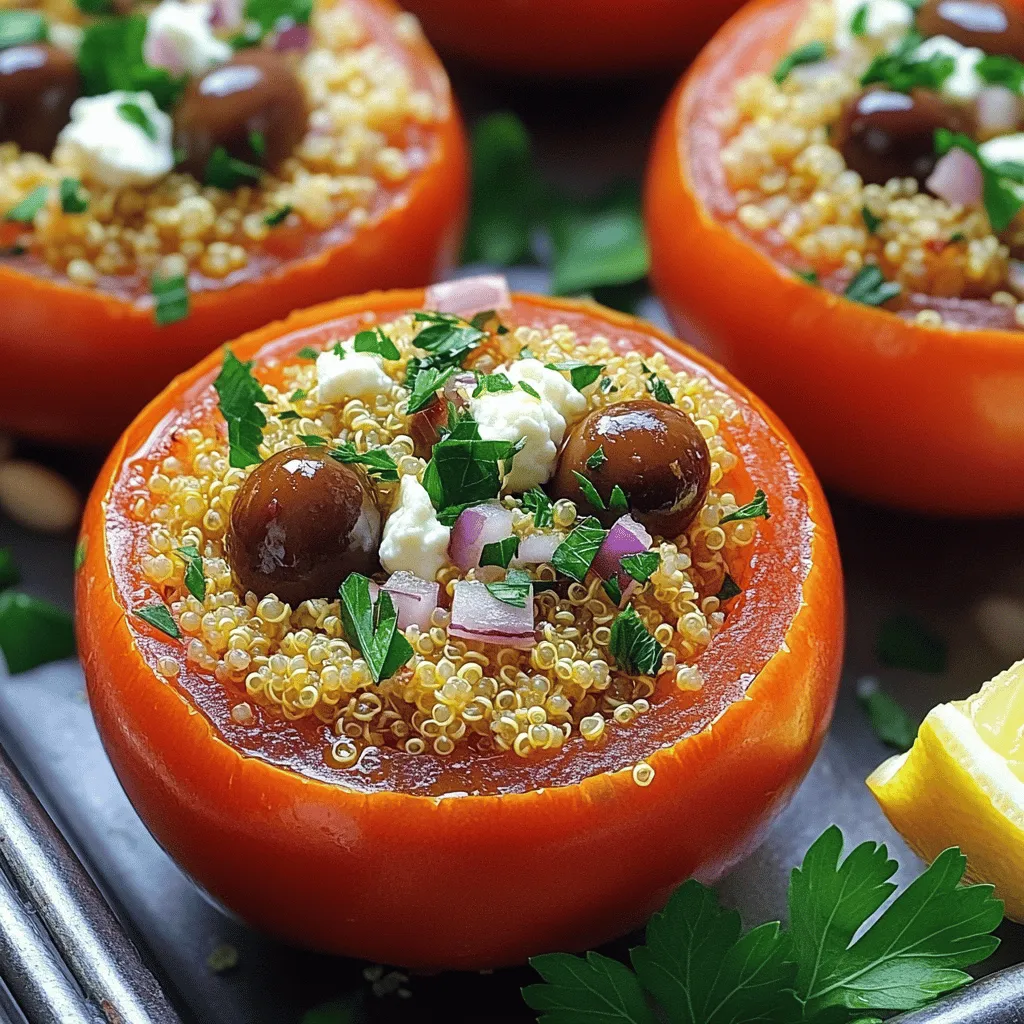
Looking for a quick and tasty meal? Mediterranean stuffed tomatoes deliver! With juicy tomatoes filled with quinoa, feta, and olives,

To make a refreshing Peach Iced Tea Lemonade, gather these main ingredients: - 4 ripe peaches, peeled and sliced - 4 cups water - 4 black tea bags - 1 cup fresh lemon juice (about 4-6 lemons) - 1/2 cup honey (adjust to taste) These ingredients create a perfect balance of sweet peach flavor and tart lemony zest. The fresh peaches add a fruity twist, while the black tea gives it depth. To elevate your drink, consider these optional garnishes: - 1 lemon, sliced (for garnish) - Fresh mint leaves (for garnish) These garnishes not only add beauty but also enhance the drink's aroma. A slice of lemon and some mint leaves brighten up each glass. You'll need a few tools to prepare this drink: - Medium saucepan - Blender - Large pitcher - Measuring cups - Ice cubes A blender helps to smoothly mix the peaches, while a pitcher makes it easy to serve. Having these tools will simplify the process and make your Peach Iced Tea Lemonade a breeze to prepare. For the full recipe, refer to the mentioned section. Start by boiling water. Pour 4 cups of water into a medium saucepan. Heat it until it boils. Once boiling, take it off the heat. Add 4 black tea bags to the water. Let them steep for 5 minutes. This step helps create a strong tea base. After 5 minutes, remove the tea bags. Set the tea aside to cool down. Next, prepare the peaches. Take 4 ripe peaches, peel them, and slice them. Place the peach slices in a blender. Blend the peaches until smooth. If you like some texture, pulse the peaches a few times. You want a nice mix of peach flavor. This adds freshness to your drink. Now, it’s time to mix everything. Grab a large pitcher. Pour the cooled tea into the pitcher. Add the blended peaches and 1 cup of fresh lemon juice. Stir well to mix all the flavors. To sweeten, add 1/2 cup of honey. Stir until the honey dissolves. Taste it to see if you need more honey. If it’s perfect, refrigerate the pitcher for at least 1 hour. This chilling time helps the flavors blend. When you’re ready to serve, pour the Peach Iced Tea Lemonade over ice cubes. Garnish with a slice of lemon and fresh mint leaves. Enjoy this refreshing summer sip! For the full recipe, check the details above. You can change the sweetness to suit your taste. Start with half a cup of honey. After mixing, taste it. If you want it sweeter, add more honey slowly. Honey blends well with the peach and lemon. You can also use sugar or agave syrup if you prefer. Just remember to mix well so it dissolves fully. Want to boost the flavor? Try adding fresh herbs like basil or mint. They add a nice twist. You can also mix in a splash of ginger or a dash of cinnamon. These flavors pair well with peach and lemon. If you love bubbles, add sparkling water just before serving. This gives your drink a fun fizz. Serve your Peach Iced Tea Lemonade in clear glasses. This lets everyone see the pretty colors. Add ice cubes for a cool sip. For an elegant touch, garnish with lemon slices and mint leaves. You can also serve it in a big pitcher for gatherings. This drink is perfect for picnics or BBQs. Don't forget to share the Full Recipe with friends! {{image_2}} You can easily turn Peach Iced Tea Lemonade into a fun adult drink. Add vodka or rum for a tasty twist. Start with 1 to 2 ounces of your choice of alcohol per glass. Mix it in after you have combined the tea, peaches, and lemon juice. Stir gently to blend. This drink is a great choice for summer parties or relaxing on the porch. If you want to switch up the flavor, use different fruits. Strawberries or raspberries work well in this recipe. Simply replace the peaches with an equal amount of your chosen fruit. Blend them just like the peaches. You can also mix fruits for a more complex taste. Each fruit adds its own charm to the drink. For a healthier version, you can skip the honey. Instead, use a sugar substitute like stevia or monk fruit. These options can provide sweetness without the calories. Add them a little at a time to reach your desired taste. This way, you still enjoy the peachy flavor without the extra sugar. To store leftovers, pour any extra Peach Iced Tea Lemonade into a clean pitcher. Make sure to cover it tightly. If you use a lid, it keeps the drink fresh longer. Store the pitcher in the fridge. This drink will stay fresh for up to three days. To keep your Peach Iced Tea Lemonade fresh, avoid adding ice to the pitcher. Ice will melt and water down the drink. Instead, serve the lemonade over ice in individual glasses. This way, the drink stays strong in flavor. If you notice any separation, just give it a gentle stir before serving. You can freeze Peach Iced Tea Lemonade if you want to enjoy it later. Pour the lemonade into ice cube trays or freezer-safe containers. Leave some space at the top for expansion. When you're ready to enjoy, thaw it in the fridge overnight. You can also blend the frozen cubes for a slushy treat! Peach iced tea lemonade lasts about 3 to 5 days in the fridge. Make sure you keep it in a sealed container. This helps keep the flavors fresh. The peaches may change texture over time, but the taste remains great. Yes, you can make peach iced tea lemonade ahead of time! I suggest making it a day before serving. This gives the flavors time to blend. Just chill it in the fridge. When you're ready to serve, pour it over ice for a cool drink. If you want a substitute for honey, try using agave syrup or maple syrup. Both work well and add sweetness. You can also use simple syrup if you like a clear drink. Just mix equal parts sugar and water until dissolved. Adjust the sweetness to your taste in the full recipe. Peach Iced Tea Lemonade is a refreshing drink, full of flavor and fun. We covered main ingredients, optional garnishes, and the right tools. Step-by-step, you learned how to steep tea and prepare peaches. Tips helped you adjust sweetness and enhance flavor. You saw variations for new twists and how to store leftovers. You can make this drink your own with simple changes. Enjoy each sip, and share it with friends for a bright, sunny day!

Peach Iced Tea Lemonade Refreshing Summer Sip

Looking for a drink that screams summer? Peach Iced Tea Lemonade is your perfect match! This delightful blend combines sweet

- 200g ramen noodles - 4 cloves garlic, minced - 1-inch piece ginger, grated - 2 tablespoons sesame oil - 4 cups vegetable broth - 2 tablespoons soy sauce - 1 tablespoon miso paste - 1 cup broccoli florets - 1 carrot, julienned - 1 bell pepper, sliced To make garlic ginger ramen noodles, you start with the ramen noodles. These noodles cook quickly and soak up flavors well. The garlic and ginger are the stars. They bring warmth and spice to the dish. Next, you need vegetables and broth. I like to use vegetable broth for a lighter taste. Broccoli, carrots, and bell peppers add color and crunch. They also pack nutrients. - 2 green onions, chopped (for garnish) - Sesame seeds (for garnish) Garnishes make your ramen look nice. Green onions add a fresh taste. Sesame seeds give a nutty crunch. You can add these before serving. They lift the dish from simple to special. For the full recipe, check out the detailed steps to make this tasty meal! Preparing the Pot Start by filling a large pot with water. Add a pinch of salt for flavor. Bring the water to a rolling boil. This step is key for great noodles. Timing for Perfect Noodles Add the ramen noodles to the boiling water. Cook them according to the package instructions. Usually, this takes about 3-5 minutes. You want them just tender, not mushy. Drain the noodles and set them aside. Importance of Heat Control In a skillet, pour in sesame oil. Heat it over medium heat. This oil adds a nice depth to your dish. Fragrance and Flavor Development Once the oil is hot, add minced garlic and grated ginger. Stir them for 1-2 minutes. You should smell the wonderful aroma. This step builds the flavor base for your ramen. Combining Ingredients Pour in 4 cups of vegetable broth. Add soy sauce and miso paste, stirring well. This mix gives your broth a rich taste. Cooking Time for Vegetables Now, toss in broccoli, julienned carrot, and sliced bell pepper. Let the broth simmer for 5-7 minutes. This cooks the veggies and enhances the broth's flavor. Techniques for Mixing Gently add the cooked ramen noodles into the skillet. Use tongs or a fork to mix them in. This ensures the noodles soak up the broth. Ensuring Uniform Heating Let everything heat together for about 2 minutes. This step ensures every bite is warm and flavorful. Plating Techniques Ladle the garlic ginger ramen noodles into bowls. Make sure to include plenty of broth and veggies. Presentation Suggestions Top with chopped green onions and a sprinkle of sesame seeds. This adds color and crunch. Enjoy your meal! For more details, check out the Full Recipe. - Adding Additional Spices: You can boost the taste with spices. Try adding red pepper flakes for heat. A pinch of smoked paprika gives a nice depth. Fresh herbs like cilantro can also brighten the dish. - Customizing Broth Base: Use different broths to change flavors. Chicken broth adds richness, while miso broth gives a savory kick. You can even mix broths for more depth. - Best Practices for Sautéing: Heat your skillet before adding oil. This helps the garlic and ginger cook evenly. Stir them until they smell great, but don’t burn them. Lower heat if they cook too fast. - Avoiding Overcooked Vegetables: Keep an eye on your veggies. Add them to the broth for just a few minutes. You want them tender but still crisp. This keeps them vibrant and flavorful. - Accompaniments to Consider: Serve your ramen with a side of dumplings or spring rolls. A simple salad can also add a fresh crunch. Pickled vegetables bring extra flavor and contrast. - Pairing with Protein Options: Add protein to make it a full meal. Grilled chicken or shrimp works well. For a vegetarian option, try tofu or chickpeas for extra protein. {{image_2}} You can easily make this dish vegetarian or vegan. To do this, use vegetable broth instead of chicken broth. For toppings, replace animal-based options with mushrooms or extra greens. You can add tofu for protein or use avocado for creaminess. This keeps the dish light and flavorful while ensuring it fits a plant-based diet. If you love heat, add chili flakes or chili oil. Start with a small pinch, then taste. You can always add more if you want extra spice. This will elevate the flavors and give a nice kick to your ramen. The heat pairs well with the garlic and ginger, making each bite exciting. For extra protein, consider chicken, tofu, or shrimp. If you pick chicken, cook it in the skillet before adding garlic and ginger. For tofu, use firm tofu and cut it into cubes. Sauté until golden brown for a nice texture. Shrimp cooks quickly and adds a sweet flavor. Just toss it in during the last few minutes of cooking. Each option makes this dish more filling and satisfying. For the full recipe, check the details above. To keep your garlic ginger ramen noodles fresh, store them properly. Use an airtight container for best results. Let the noodles cool before sealing. Place them in the fridge within two hours of cooking. They should stay good for about three days. When reheating, avoid mushy noodles. Use a skillet over medium heat. Add a splash of broth or water to keep them moist. Stir gently until everything is warm. This helps maintain the noodles' texture and flavor. If you want to save some for later, freezing is a smart choice. Separate the noodles from the broth and veggies. Place them in freezer bags, squeezing out air. They can last up to three months in the freezer. When ready to eat, thaw in the fridge overnight. Reheat as usual, adding fresh broth for flavor. For the full recipe, check out the section above. You can use tahini or nut butter as a substitute. Both add creaminess and depth. Another option is to mix soy sauce with a little vinegar. This mix creates a similar umami flavor. If you have access to nutritional yeast, it can also work well. You can store garlic ginger ramen noodles in the fridge for up to three days. Keep them in an airtight container. This helps preserve the flavor and texture. If you notice excess moisture, drain it before sealing. Reheat gently to avoid mushy noodles. Yes, you can easily make this dish gluten-free. Simply use gluten-free ramen noodles instead. Also, make sure to choose gluten-free soy sauce or tamari. These will keep the flavors intact. Always check labels to ensure the products are certified gluten-free. You can add many vegetables to this dish. Try bok choy, snap peas, or mushrooms for variety. Spinach or kale works well too. For a crunchy texture, add bean sprouts or radishes. Feel free to mix and match based on your taste. In this guide, we covered how to make delicious ramen from start to finish. I shared key ingredients like ramen noodles, garlic, ginger, and fresh vegetables. You learned step-by-step instructions for cooking, sautéing, simmering, and serving. Tips helped you enhance flavors and try variations for different diets. Remember to store leftovers wisely and reheat them without losing texture. With this knowledge, you can create tasty ramen that fits your tastes and needs. Enjoy your cooking journey with this comforting dish!

Garlic Ginger Ramen Noodles Simple and Flavorful Dish

If you’re craving a warm bowl of comfort, you’re in the right place! Garlic Ginger Ramen Noodles are quick to

- 4 cups all-purpose flour - 1 packet (2 1/4 tsp) active dry yeast - 1 cup warm milk (about 110°F) - 1/4 cup unsalted butter, melted - 1/4 cup sugar - 1 teaspoon salt - 1/2 teaspoon garlic powder - 1 tablespoon mixed dried herbs (thyme, oregano, and rosemary) - 1/4 cup fresh parsley, chopped - 4 tablespoons unsalted butter, melted (for brushing) - Sea salt to sprinkle Accurate measurements are key for great rolls. Use dry measuring cups for flour and sugar. For liquids, go with a liquid measuring cup. Always level off your flour and sugar for the best results. Using a kitchen scale can also help ensure precision. Fresh herbs add bright flavor and aroma. They can elevate your rolls to a whole new level. If you're using dried herbs, remember they are stronger. Use about one-third of the amount of fresh herbs. So, if a recipe calls for one tablespoon of fresh herbs, use just one teaspoon of dried herbs. This swap will keep your rolls tasting fresh and vibrant. To make garlic herb pull-apart rolls, start by mixing the yeast and warm milk. In a bowl, combine 1 cup of warm milk with 1/4 cup of sugar. Sprinkle 1 packet of yeast on top and let it sit. Wait about 5 to 10 minutes. You will notice it becomes frothy. Next, combine the dry ingredients to form the dough. In a large bowl, whisk together 4 cups of flour, 1 teaspoon of salt, 1/2 teaspoon of garlic powder, and 1 tablespoon of mixed dried herbs. Pour the yeast mixture and 1/4 cup of melted butter into the flour mix. Stir until combined. The first rise is very important for the dough. After combining, knead the dough on a floured surface for around 5 to 7 minutes. You want it smooth and elastic. Form a ball and place it in a greased bowl. Cover it with a clean towel and let it rise in a warm spot for about 1 hour, or until it doubles in size. To keep the dough warm, you can place it near a warm oven or in a sunny spot. This helps the yeast work best. When the dough has risen, it’s time to shape the rolls. Punch it down and divide it into small, equal pieces. Aim for about 16 to 20 balls. Roll each piece into a ball and dip it in melted butter. For the next step, arrange the dough balls in a greased baking dish. If you like, sprinkle some fresh parsley between the layers. This adds a nice touch of flavor and color. Cover the dish again and let it rise for another 30 minutes. Preheat the oven to 350°F (175°C) while the dough rises. This ensures even baking. Once the rolls have risen, bake them for 25 to 30 minutes. Look for a golden brown color on top. This shows they are cooked perfectly. As soon as they come out of the oven, brush the tops with melted butter and sprinkle sea salt. This gives them a delicious finish. Enjoy the amazing smell while letting them cool slightly before pulling them apart and serving. For the full recipe, check out the complete guide. To make great rolls, avoid common mistakes. Don't rush the rising time. Letting the dough rise properly is key for light rolls. If it doesn’t rise enough, the rolls will be dense. Be gentle when shaping the rolls. Overworking the dough can make it tough. Aim for a smooth texture, which helps create those soft layers. Use warm milk to activate the yeast. Too hot or too cold milk can kill the yeast. For the best flavor, use fresh herbs whenever you can. They add a bright taste that dried herbs just can't match. Mix dried herbs with garlic powder to enhance the flavor. Garlic herb pull-apart rolls pair well with many dishes. Try serving them with soups, stews, or salads. They make a great side for a family dinner or a holiday feast. For a fun twist, serve the rolls with dips. A warm cheese dip or a garlic butter sauce works great. You can also try a spicy salsa for a zesty kick. Want to boost the flavor? Add cheese to the rolls. Options like mozzarella or cheddar melt nicely. Just sprinkle some cheese into the dough before rolling. You can sauté garlic in butter for a richer taste. This adds depth and a lovely aroma. Don’t shy away from experimenting with spices. Red pepper flakes or Italian seasoning can give the rolls a unique twist. For the full recipe, check out the detailed steps and enjoy making these delightful rolls! {{image_2}} You can make these rolls even better by adding cheese. To do this, simply take your small dough balls and press a small piece of cheese in the center before rolling them back into a ball. This adds a delightful surprise inside each roll. For the best cheese options, consider using: - Mozzarella (1 cup, shredded) - Cheddar (1 cup, shredded) - Parmesan (1/2 cup, grated) These cheeses melt well and give a rich flavor. Adjust the amount based on how cheesy you want your rolls! If you like heat, try adding spices for a kick. You can mix in some crushed red pepper flakes or diced jalapeños into your dough. Here are some suggested spicy ingredients: - 1/2 teaspoon crushed red pepper flakes - 1 small jalapeño, seeds removed and diced - 1/2 teaspoon cayenne pepper These spices give the rolls a zesty bite that pairs great with the garlic and herbs. You can easily make these rolls gluten-free. Use a good gluten-free flour blend instead of all-purpose flour. Look for one that includes xanthan gum, as it helps with texture. Here are some adjustments to consider: - Use 4 cups gluten-free all-purpose flour - Add 1 tablespoon of apple cider vinegar to the wet ingredients - Let the dough rise longer if needed, as gluten-free dough can take more time This way, everyone can enjoy these tasty rolls! For the full recipe, check the earlier section. To keep your garlic herb pull-apart rolls fresh, store them properly. Start by letting the rolls cool completely. Then, wrap them tightly in plastic wrap or foil. You can also place them in an airtight container. This method helps keep out air and moisture. For longer storage, freeze the rolls. Place them in a freezer bag, and squeeze out as much air as you can. They will stay fresh for up to three months in the freezer. When it’s time to enjoy your rolls again, reheating them is simple. The best way is to use an oven. Preheat it to 350°F (175°C). Place the rolls on a baking sheet and cover them with foil. Heat for about 10-15 minutes until warm. This keeps the rolls soft. If you need a quicker option, use the microwave. Place a roll on a microwave-safe plate and cover it with a damp paper towel. Heat for about 15-20 seconds. This method makes them warm but may not keep them as soft as the oven. When stored properly, garlic herb pull-apart rolls can last about 3-4 days at room temperature. If you keep them in the fridge, they can last up to a week. Always check for signs of spoilage before eating. Look for mold or an off smell. If you see any, it's best to throw them away. Enjoy your delicious rolls while they're fresh! Yes, you can prepare these rolls in advance. Here are some tips: - Dough Prep: You can make the dough and let it rise. After the first rise, shape the rolls and place them in the baking dish. - Refrigerate: Cover the dish and store it in the fridge. This slows down the rise but keeps the dough ready. - Timing: When you are ready to bake, take the dish out. Let it sit at room temperature for about 30 minutes before baking. If you don't have active dry yeast, here are some options: - Instant Yeast: Use the same amount as active dry yeast. No need to proof it first. - Fresh Yeast: Use 0.6 ounces for each packet. Dissolve it in warm milk before mixing. - Baking Powder: This is not a direct substitute. You need to adjust the recipe. Use 1 teaspoon for each cup of flour, but the rolls will not rise as much. Yes, you can try other flours, but it changes the rolls. Here are some options: - Whole Wheat Flour: Use 50% whole wheat and 50% all-purpose. This adds fiber and a nutty taste. - Bread Flour: This flour has more protein. It makes the rolls chewier and taller. Start with a bit less liquid in the recipe. - Gluten-Free Flour: Use a 1:1 gluten-free blend. The texture may be different, so add 1 tablespoon of extra liquid if needed. This blog post covered the key steps to make delicious garlic herb pull-apart rolls. I shared the right ingredients, measurement tips, and how to achieve the best texture. You learned about rising, shaping, and baking the rolls, along with some tasty ways to serve them. Lastly, we explored variations and storage tips. With these tools, you can enjoy fresh, warm rolls any time. Now, get ready to impress everyone with your baking skills!

Garlic Herb Pull-Apart Rolls Soft and Flavorful Treat

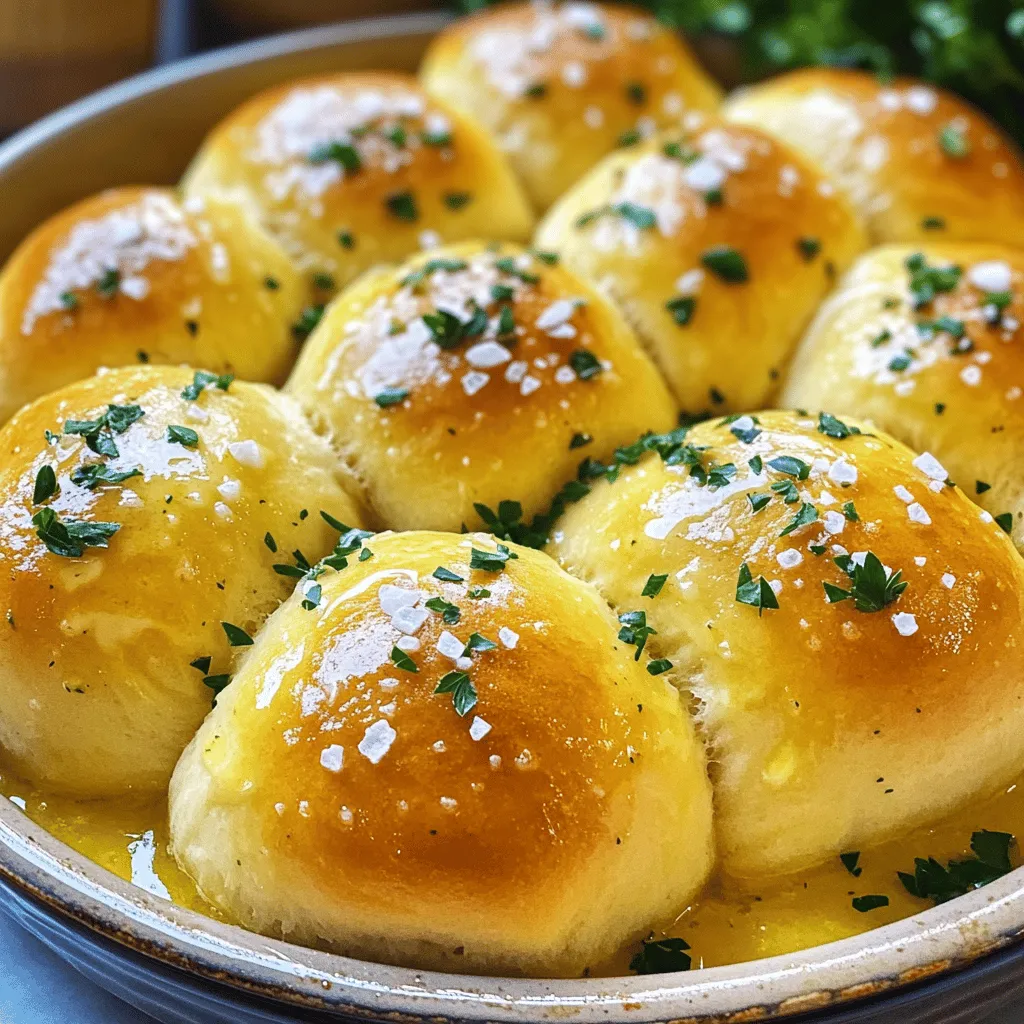
Welcome to the world of Garlic Herb Pull-Apart Rolls! If you’re looking for a soft, flavorful treat that will impress

To make Sweet Heat Mango Salsa, gather these fresh ingredients: - 2 ripe mangoes, diced - 1 small red onion, finely chopped - 1 red bell pepper, diced - 1 jalapeño, deseeded and minced (adjust for heat preference) - 1/4 cup fresh cilantro, chopped - 2 tablespoons lime juice - 1 tablespoon honey (or agave syrup for a vegan option) - Salt to taste - Zest of 1 lime If you cannot find any of these ingredients, don’t worry! Here are some easy swaps: - Use green onions instead of red onion for a milder taste. - Swap red bell pepper with yellow or orange pepper for different colors. - If jalapeño is too spicy, use a bell pepper instead. - For a sweeter option, try using ripe peaches in place of mangoes. - If you don't have lime juice, lemon juice works well too. Choosing fresh produce is key to a tasty salsa. Here are some tips: - For mangoes, look for skin that is slightly wrinkled and gives a little when pressed. - Choose onions that are firm and have no soft spots. - Select bell peppers that are shiny and have a firm feel. - When picking jalapeños, choose ones that are firm with a bright color. - Always smell your cilantro; it should have a strong, fresh scent. With these tips and ingredients, you're ready to make a vibrant and tasty Sweet Heat Mango Salsa! For the complete instructions, check the Full Recipe. First, gather your ingredients. You need: - 2 ripe mangoes, diced - 1 small red onion, finely chopped - 1 red bell pepper, diced - 1 jalapeño, deseeded and minced - 1/4 cup fresh cilantro, chopped - 2 tablespoons lime juice - 1 tablespoon honey - Salt to taste - Zest of 1 lime Wash all your fresh produce. Peel and dice the mangoes. Chop the red onion and bell pepper. For the jalapeño, remove the seeds to control the heat. If you like it spicy, keep some seeds. Use gloves if you need to. In a large mixing bowl, add the diced mangoes, red onion, red bell pepper, and cilantro. In a small bowl, mix the lime juice, honey, lime zest, and salt. Whisk it until well combined. Pour this mixture over the fruit and veggies. Gently toss everything together. You want each piece to be coated. After mixing, taste your salsa. You can add more salt or honey to suit your taste. Let the salsa sit for at least 15 minutes. This step helps the flavors blend together. Serve your Sweet Heat Mango Salsa chilled or at room temperature. It pairs well with grilled chicken or fish. You can also enjoy it with tortilla chips for a fun snack. For a fresh twist, add it to tacos or salads. You can find the full recipe above. Enjoy your delicious creation! To control the heat, start with one jalapeño. If you want more spice, add another jalapeño. You can also leave the seeds in for extra heat. If you prefer it milder, remove the seeds and the white parts inside. This salsa balances sweet and spicy, so find the right heat for your taste. Mangoes can be tricky to cut. First, wash the mango and slice off both ends. Stand it upright and cut down along the pit. This gives you two large pieces. Use a knife to score the flesh into cubes without cutting through the skin. Then, scoop the mango out with a spoon. This method makes dicing easy and fun! To boost the flavor, use fresh lime juice. The acidity brightens the taste. You can also add a pinch of salt to enhance sweetness. For extra depth, consider adding a dash of cumin or smoked paprika. These spices can add a new layer of flavor to your mango salsa. Each addition creates a unique taste experience. Enjoy experimenting! {{image_2}} You can switch up flavors by adding other fruits. Pineapple and peach work great. Pineapple adds a tropical, tangy taste. It pairs well with mango's sweetness. To use pineapple, chop it into small pieces. Mix it in with the other ingredients. Peach brings a juicy and fragrant twist. It adds a nice balance to the heat. Just like with pineapple, chop the peach small. You can even blend the fruits for a smooth salsa. Get creative and see which fruit you like best! If you love heat, there are easy ways to spice things up. Start with a hotter pepper, like serrano or habanero. You can also add more jalapeños. Just remember to taste as you go! Another fun option is to sprinkle in cayenne pepper or chili powder. This can boost the heat without changing the salsa's texture. For a smoky flavor, try adding smoked paprika. Making this salsa vegan is simple and tasty. Swap honey for agave syrup; it works perfectly! You can also use maple syrup for a different sweetness. If you want a zesty kick, try adding chopped avocado. It gives a creamy texture while keeping it vegan. Mixing in some black beans can add protein and make it heartier. Enjoy exploring these vegan swaps! Check out the Full Recipe for more details. To keep your Sweet Heat Mango Salsa fresh, store it in an airtight container. Glass containers work well, as they help prevent odors. Place a piece of plastic wrap directly on the salsa before sealing. This keeps air out and helps maintain freshness. When stored properly, your mango salsa lasts about 3 to 5 days in the fridge. The flavors will meld and deepen over time. However, the texture may change as the mangoes soften. Always check for any signs of spoilage before eating. If you have leftover salsa, use it in fun ways. Add it to tacos or grilled chicken. You can mix it into a salad for a fresh twist. You can even blend it into a smoothie for a fruity kick. Don't let the salsa go to waste; get creative! Yes, you can make Sweet Heat Mango Salsa in advance. It tastes better after resting. The flavors blend well when you let it sit. I suggest making it a few hours before serving. Just keep it covered in the fridge. You can serve mango salsa with many dishes. It pairs well with grilled chicken or fish. You can also use it as a topping for tacos. Serve it with tortilla chips for a tasty snack. It adds a nice kick to any meal. Mango salsa is great for meal prep. It lasts for up to three days in the fridge. You can easily make a big batch and enjoy it all week. Just remember to store it in a sealed container. This makes it easy to grab and go. Check out the Full Recipe for more tips on meal prep! This blog post covered key steps to make delicious Sweet Heat Mango Salsa. We explored ingredients, substitutes, and tips to pick fresh produce. You learned how to prepare and combine those ingredients for great taste. We shared tricks for spice adjustments and flavor enhancements. There are also ideas for fruity variations and best storage practices. In the end, this salsa is easy to make and fun to enjoy. You can adapt it to suit your taste. Dive in and start creating your own unique salsa masterpiece!

Sweet Heat Mango Salsa Flavorful and Easy Recipe

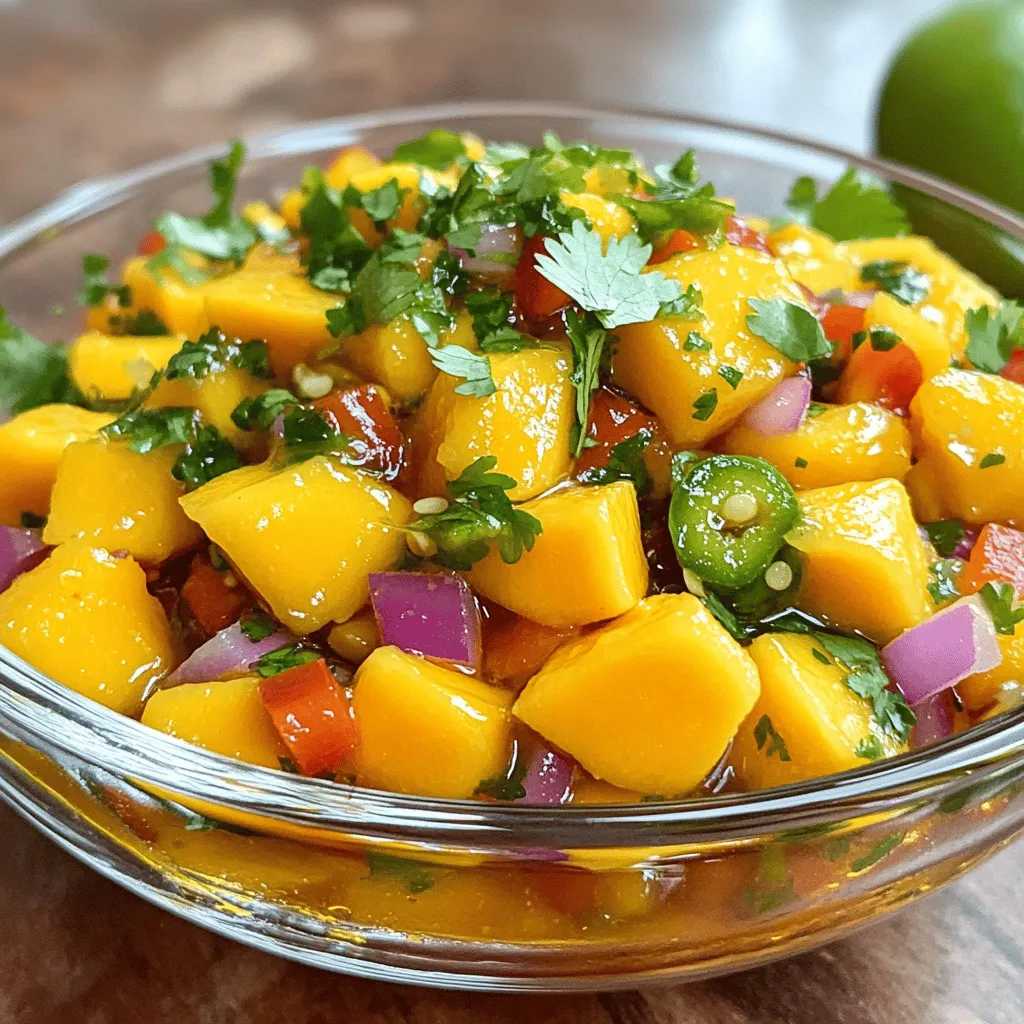
Are you ready to add a burst of flavor to your meals? My Sweet Heat Mango Salsa recipe combines sweet,

Older posts
Newer posts
← Previous Page1 Page2 Page3 … Page75 Next →

dsad

© 2025 greenmealmap • Built with GeneratePress

Our Policies

  • Copyright Policy
  • Cookie Policy
  • GDPR Policy
  • Privacy Policy
  • Disclaimer
  • Terms Of Use

More Information

  • Home
  • About
  • Contact
  • Appetizers
  • Dessert
  • Dinner
  • Drinks
©2025, greenmealmap About Back To Top