Skip to content
DisclaimerTerms Of UseGDPR PolicyCookie Policy

greenmealmap

  • Home
  • Drinks
  • Appetizers
  • Dinner
  • Dessert
  • About
  • Contact
  • Privacy Policy
DisclaimerTerms Of UseGDPR PolicyCookie Policy

Lauren

To make delicious Caprese salad skewers, you'll need fresh, vibrant ingredients. Here’s a list of what to gather: - 1 pint cherry tomatoes - 8 oz fresh mozzarella balls (bocconcini) - 1 ripe avocado, diced - Fresh basil leaves - Salt and pepper to taste These fresh ingredients create a bright and tasty flavor. The tomatoes add sweetness, while the mozzarella brings creaminess. The avocado adds richness, and basil gives a fresh aroma. You can boost the taste of your skewers with a few optional ingredients: - 1 tablespoon balsamic glaze - 2 tablespoons olive oil Balsamic glaze adds a sweet tang, while olive oil enhances the overall flavor. You can also sprinkle some crushed red pepper for a spicy kick. To assemble your skewers, you’ll need some basic tools: - Skewers (8-10 inches long) - A cutting board - A sharp knife - A serving platter Having these tools ready makes assembly easy. You can enjoy making these skewers as a fun activity for family or friends. For the full recipe, check out Caprese Skewers with a Twist! To start, gather your fresh ingredients. Rinse the cherry tomatoes and basil leaves under cold water. Drain the mozzarella balls to remove excess liquid. Next, cut the ripe avocado into small, bite-sized pieces. This adds creaminess to our skewers. Don’t forget to sprinkle a pinch of salt and pepper on the avocado. This step enhances its flavor. Now, let’s build our skewers. Grab a skewer, about 8-10 inches long. Start by threading one cherry tomato onto it. Follow this with a fresh basil leaf. Next, add a mozzarella ball. Finally, place a piece of diced avocado on the skewer. Repeat this layering until the skewer is filled. Aim for 3-4 of each ingredient per skewer. This gives a colorful and tasty treat. Once done, place the assembled skewers on a serving platter. It’s time for the finishing touches! Drizzle olive oil and balsamic glaze over the skewers. This adds extra flavor and a nice shine. Then, sprinkle some salt and pepper to taste. For a stunning presentation, arrange the skewers in a tall glass or jar. You could also add a few basil leaves around the base. This makes your dish not just tasty, but also beautiful. Enjoy your Caprese skewers as a fresh and flavorful treat! For a complete guide, check out the Full Recipe. When selecting tomatoes, look for firm, bright ones. Cherry tomatoes should feel heavy for their size. They should also smell sweet and fresh. For mozzarella, choose fresh balls, known as bocconcini. They should feel soft and moist. Make sure they are in water or brine to keep them fresh. The best mozzarella melts in your mouth and has a creamy taste. To impress your guests, think about how you arrange your skewers. Place them upright in a tall glass or jar. This makes a beautiful centerpiece. You can also add basil leaves to the base for color. Adding a drizzle of balsamic glaze on top adds shine and an eye-catching look. Keep the skewers colorful by mixing the ingredients on each stick. A simple sprinkle of salt can bring out the flavors of your fresh ingredients. You can also use cracked black pepper for a touch of spice. For a fresh twist, add a squeeze of lemon juice just before serving. This gives a bright flavor. For an extra boost, drizzle some olive oil right before serving. These small touches will enhance your dish. You can find the full recipe for these delicious Caprese skewers for more details. {{image_2}} You can switch up the classic Caprese flavors. Try using grape tomatoes instead of cherry tomatoes. They are just as sweet and tasty. Swap fresh mozzarella with feta for a tangy kick. You can also add olives for a briny touch. For crunch, consider adding cucumber slices or roasted red peppers. Each change gives the skewers a new twist. Caprese skewers can change with the seasons. In summer, use heirloom tomatoes for vibrant colors. In fall, add roasted butternut squash for a warm taste. During winter, try using sun-dried tomatoes for a rich flavor. In spring, fresh peas or asparagus can bring a bright crunch. Adapting ingredients to the season keeps the dish fresh and exciting. If you're looking for dairy-free options, replace mozzarella with marinated tofu. This keeps the flavors while meeting vegan needs. Gluten-free eaters can enjoy this recipe as it’s naturally gluten-free. For a low-carb option, skip the avocado and add more tomatoes. Each change makes the dish fit for different diets and tastes. Check out the Full Recipe for more ideas! To store leftover skewers, first, place them in a shallow airtight container. This keeps them fresh. You can also wrap them in plastic wrap. Store the container in the fridge. Use them within two days for the best taste. If you want to prepare in advance, cut the ingredients but keep them separate. Store cherry tomatoes, mozzarella, and avocado in separate containers. This stops them from getting soggy. You can also layer the skewers without adding dressing. Just drizzle it on right before serving. If you have leftover ingredients, avoid reheating the skewers. Instead, enjoy them cold. If you want to heat the mozzarella, try a quick microwave blast. Heat it for just a few seconds, then add it back to a skewer. This keeps the flavors fresh and delicious. For more details, check out the Full Recipe. Yes, you can make Caprese skewers ahead of time. I recommend preparing them a few hours before your event. Just keep them in the fridge until you are ready to serve. This way, the flavors stay fresh, and the ingredients maintain their crispness. If you layer them with care, they will look great on the platter. You can get creative with your Caprese skewers! Here are a few ideas: - Pepperoni slices for a savory touch. - Cubes of salami add a nice bite. - Roasted red peppers bring a sweet flavor. - Olives add a briny taste. - Artichoke hearts offer a unique twist. Mix and match to find your favorite combo! To keep your skewers fresh for a party, follow these tips: - Cover them with plastic wrap or a clean kitchen towel. - Store them in the fridge until serving time. - Drizzle balsamic glaze just before serving to avoid sogginess. This will ensure your skewers stay tasty and colorful for all your guests to enjoy. For the full recipe, check out the details above. Caprese salad skewers are simple yet tasty. We explored fresh ingredients, optional add-ons, and tools. Then, I shared step-by-step instructions for preparation and assembly. I included tips to choose the best tomatoes and mozzarella while enhancing your presentation. Don’t forget to try various ingredients and store leftover skewers properly. With these ideas, you can make your next gathering special. Enjoy creating your own tasty skewers!

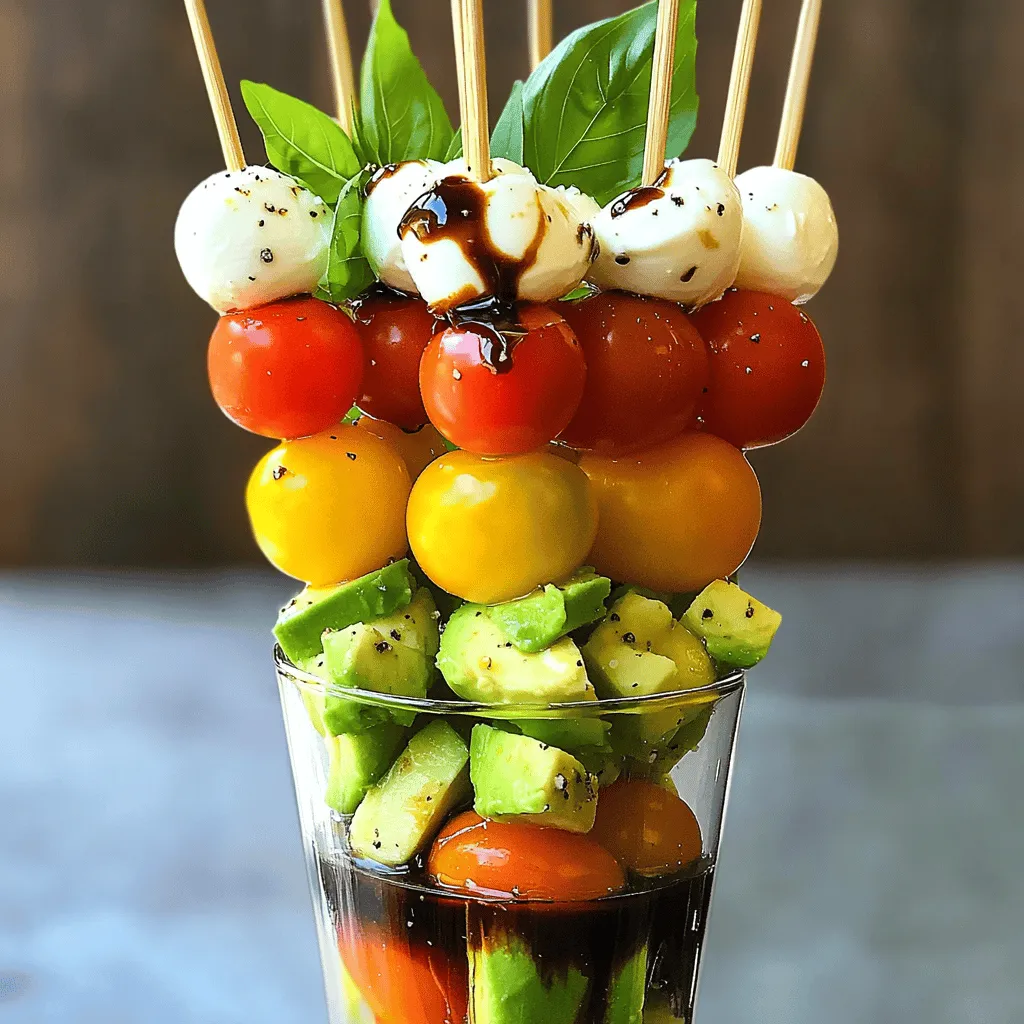
Quick Caprese Salad Skewers Fresh and Flavorful Treat

Looking for a fresh and delightful snack? Quick Caprese Salad Skewers are the answer! With ripe tomatoes, creamy mozzarella, and

- 1 medium cauliflower, cut into florets - 2 tablespoons olive oil - 1 teaspoon smoked paprika - 1 teaspoon ground cumin - 1 teaspoon garlic powder - 1/2 teaspoon salt - 1/4 teaspoon black pepper - 8 small corn tortillas The star of our dish is the cauliflower. It gets tender and flavorful when roasted. I use olive oil to help the spices stick. Smoked paprika adds a touch of smokiness. Ground cumin brings warmth and earthiness. Garlic powder gives a nice savory kick. Salt and black pepper enhance all the flavors. The corn tortillas are soft and perfect for holding all the goodness. - 1 cup red cabbage, thinly sliced - 1 avocado, sliced - 1/4 cup fresh cilantro, chopped For toppings, I love using red cabbage. Its crunch adds great texture. Avocado brings creaminess and richness to each bite. Fresh cilantro adds a burst of flavor and freshness. These toppings make the tacos bright and colorful. - Hot sauce - Lime wedges For some heat, I suggest adding hot sauce. It gives the tacos a spicy kick. Lime wedges are great too. A squeeze of lime adds zest and balances the flavors. You can mix and match these add-ins to suit your taste. For the full recipe, check out the [Full Recipe]. First, preheat your oven to 425°F (220°C). This step is key for great roasting. Next, take a large bowl and toss the cauliflower florets with olive oil, smoked paprika, ground cumin, garlic powder, salt, and black pepper. Mix well until every piece is coated. This blend of spices brings bold flavors that elevate the dish. Spread the seasoned cauliflower onto a baking sheet. Make sure the florets sit in a single layer. This helps them roast evenly. Bake for about 25 minutes. Flip the cauliflower halfway through to ensure all sides get that nice golden color. Keep an eye on them; they should be tender and golden by the end of the baking time. While the cauliflower roasts, heat the corn tortillas in a dry skillet over medium heat. Warm them for about 30 seconds on each side. This makes the tortillas soft and easy to fold. Once the cauliflower is ready, it’s time to assemble your tacos. Place a generous scoop of roasted cauliflower on each tortilla. Top with sliced red cabbage, creamy avocado, and fresh cilantro. Serve immediately with lime wedges on the side for squeezing. A drizzle of hot sauce is perfect for extra spice. For the full recipe, check out the detailed instructions above. When you season your cauliflower, think bold. I love using spices like smoked paprika, cumin, and garlic powder. They bring out the best flavors. You can also try different blends, like taco seasoning or chipotle powder. For added depth, marinate the cauliflower for 30 minutes. This gives the spices time to soak in. I recommend roasting the cauliflower at 425°F (220°C). This high heat makes it crispy outside and tender inside. Spread the florets evenly on the pan for even cooking. If you want a quicker method, try air frying. Set it to 400°F (200°C) and cook for about 15 minutes. Shake the basket halfway through for great results. Pair these tacos with simple sides. A fresh salad or black beans works well. You can also serve them with rice for a hearty meal. For drinks, try a light beer or sparkling water with lime. The bright flavors of the tacos blend nicely with these options. For the full recipe, check out the detailed cooking instructions above. {{image_2}} You can enhance your Vegan Cauliflower Tacos by adding beans or lentils. Black beans or pinto beans work well. They bring extra protein and fiber. Lentils also add a rich texture. Use cooked lentils for a hearty bite. Tofu is another great option. You can cube and season it like the cauliflower. Bake or pan-fry until golden. This adds a nice crunch. Switch up the flavor by choosing a different profile. For a Southwest twist, add corn and chili powder. This will give your tacos a vibrant kick. If you prefer Asian-inspired flavors, use soy sauce and ginger. Top with sesame seeds for added texture. Both styles offer a fun twist on the classic recipe. Need gluten-free options? Use corn tortillas instead of flour ones. They taste great and hold up well. If you're avoiding nuts, skip any nut-based toppings. This keeps the recipe safe for those with allergies. You can still enjoy a fresh and tasty meal without them. To store your cauliflower tacos, place them in an airtight container. This helps keep the flavors fresh. You can refrigerate them for up to three days. If you have leftover toppings, store them separately. This prevents sogginess and keeps everything crisp. If you want to freeze the tacos, first cool them completely. Wrap each taco in foil or plastic wrap. Then, put them in a freezer-safe bag. They can last up to three months in the freezer. To reheat, thaw them in the fridge overnight. Then, warm them in the oven at 350°F (175°C) for about 10 minutes. This helps restore that delightful crunch. Cooked cauliflower can stay fresh in the fridge for about three to five days. The tortillas, once cooked, are best eaten within two days. Always check for any signs of spoilage before eating. This way, you ensure a tasty meal every time! For the full recipe, check out the detailed steps above. To make your Vegan Cauliflower Tacos spicier, you can add chili powder or fresh jalapeños. Chili powder adds warmth without overpowering the dish. Fresh jalapeños give a crisp and sharp heat. You can slice the jalapeños thin or chop them finely. Mix them with the cauliflower before roasting. You can also serve hot sauce on the side for extra kick. This way, everyone can adjust the spice to their taste. Yes, you can meal prep Vegan Cauliflower Tacos! Start by roasting the cauliflower and then store it in an airtight container. Keep the tortillas, cabbage, avocado, and cilantro separate to keep them fresh. You can prepare the cauliflower up to three days ahead. When it’s time to eat, just heat the tortillas and assemble the tacos. This saves you time on busy days and makes meals quick and easy. You can serve many tasty sides with Vegan Cauliflower Tacos. Some great options include: - Black beans for protein - Mexican rice for a hearty meal - Fresh salsa for a zesty touch - Corn salad for a crunchy side Each of these complements the tacos well and adds more flavor to your meal. You can also enjoy a refreshing drink like agua fresca or a cool beer alongside. Check out the Full Recipe to enhance your dining experience! You've explored how to create delicious vegan cauliflower tacos. We started with key ingredients like cauliflower and spices, then moved on to toppings like avocado and cilantro. I shared step-by-step instructions for preparing, roasting, and assembling the tacos. We discussed tips for seasoning and cooking methods, plus variations to suit your taste. Lastly, we covered storage tips and answered common questions. These tacos are easy to make and packed with flavor. Enjoy experimenting with your favorite toppings and add-ins!

Vegan Cauliflower Tacos Fresh and Flavorful Delight

Are you ready to spice up taco night with a fresh twist? My Vegan Cauliflower Tacos offer a burst of

- 1 lb boneless chicken thighs - 2 tablespoons soy sauce - 2 tablespoons honey - 1 tablespoon fish sauce - 2 cloves garlic, minced - 1 tablespoon fresh ginger, grated - 1 tablespoon red curry paste - 1 tablespoon lime juice - 1 teaspoon brown sugar - 1 red bell pepper, cut into chunks - 1 yellow bell pepper, cut into chunks - Fresh cilantro for garnish - Skewers (wooden or metal) To make the best sweet and spicy Thai chicken skewers, you need quality ingredients. The star of this dish is the boneless chicken thighs. They stay juicy and tender, perfect for grilling. The marinade is where the magic happens. It blends soy sauce, honey, and fish sauce for a sweet and salty bite. The garlic and ginger add depth. Red curry paste gives warmth and a hint of spice. Lime juice brings brightness, while brown sugar balances everything. You can add colorful bell peppers for crunch and flavor. They not only taste great but also make the skewers look appealing. - Skewers (wooden or metal) - Grill or grill pan Using skewers is essential for this recipe. You can choose between wooden and metal ones. If you use wooden skewers, soak them in water. This step helps prevent burning. A grill or grill pan is also important. It gives the chicken those lovely grill marks and enhances the flavor. - Caloric content per serving: Approximately 250 calories - Breakdown of macronutrients: - Protein: 20g - Carbohydrates: 15g - Fats: 12g Each serving of these skewers is about 250 calories. You get a good amount of protein from the chicken. The carbs mainly come from the honey and brown sugar. Lastly, you have healthy fats from the chicken and any oil you may use for grilling. To make the marinade, grab a large mixing bowl. Add 2 tablespoons of soy sauce, 2 tablespoons of honey, and 1 tablespoon of fish sauce. Next, add 2 cloves of minced garlic and 1 tablespoon of grated ginger. Then, mix in 1 tablespoon of red curry paste, 1 tablespoon of lime juice, and 1 teaspoon of brown sugar. Whisk these ingredients together until they blend well. This marinade brings that sweet and spicy flavor we all love. Marination time is key. It allows the chicken to soak up all those great flavors. I recommend marinating your chicken for at least 30 minutes. If you have more time, go for 2 hours. To coat the chicken, put the bite-sized pieces in the bowl with the marinade. Use your hands or a spoon to ensure each piece is well-coated. Cover the bowl and place it in the fridge. If you're using wooden skewers, soak them in water for about 30 minutes. This helps prevent burning on the grill. While the chicken marinates, preheat your grill or grill pan over medium-high heat. When you're ready, take the marinated chicken and thread it onto the skewers. Alternate the chicken pieces with chunks of red and yellow bell pepper. Grill the skewers for about 10-12 minutes, turning occasionally. You want the chicken to be cooked and have nice grill marks. When done, let them rest for a few minutes before serving. This step helps keep them juicy. You can cook your sweet and spicy Thai chicken skewers in different ways. If you don't have a grill, try baking them. Preheat your oven to 400°F (200°C). Place the skewers on a baking sheet lined with parchment paper. Bake for about 20-25 minutes. Flip them halfway for even cooking. Broiling is another option. Set your oven to broil and cook the skewers for about 10-15 minutes. Keep an eye on them so they don't burn. Marination is key for flavor. The longer you marinate, the better the taste. Aim for at least 30 minutes. If you have more time, go for 2 hours. This helps the chicken absorb all those yummy flavors. Make sure to coat every piece well in the marinade. You can even poke small holes in the chicken to let the marinade seep in. This little trick packs in the flavor. Presentation makes food more appealing. Serve your skewers on a bright platter. Add lime wedges for a pop of color. A sprinkle of fresh cilantro adds vibrancy. You can also drizzle leftover marinade over the skewers for extra taste. Just remember to boil it first for safety. This can make your dish look gourmet and taste even better. {{image_2}} You can switch the chicken for shrimp or tofu. Shrimp cooks fast and absorbs flavors well. Just marinate it for about 15-20 minutes. For tofu, use firm tofu. Cut it into cubes and press it to remove excess water. Then marinate it like chicken. Both options bring a fresh twist to the dish. You can change the sweet and spicy levels easily. If you want it sweeter, add more honey. For more heat, increase the red curry paste or add chili flakes. Taste the marinade before using it. This lets you find the right balance for your preference. Don't be afraid to experiment! You don't have to stick to bell peppers. Try zucchini, cherry tomatoes, or mushrooms. These veggies grill nicely and add different flavors. Just make sure to cut them into similar sizes. This helps everything cook evenly. Adding colorful veggies makes your skewers look great, too. For a fun twist, use pineapple for a sweet touch! To store leftover Sweet and Spicy Thai Chicken Skewers, place them in an airtight container. Make sure the skewers are cool before sealing. This helps keep them fresh. You can store them in the fridge for up to three days. If you want to keep them longer, freezing is a good option. When you reheat the skewers, aim for keeping their flavor and texture. The best way is to use an oven or a grill. Preheat your oven to 350°F (175°C). Place the skewers on a baking sheet and cover them with foil. Heat for about 10-15 minutes, or until warmed through. If using a grill, heat it over medium heat for a few minutes on each side. Yes, you can freeze cooked skewers! Just wrap them tightly in plastic wrap or foil. Then, place them in a freezer bag. They will stay good for up to three months. When ready to eat, thaw them in the fridge overnight before reheating. This method keeps the taste intact. For the complete recipe, check out the Full Recipe of Sweet and Spicy Thai Chicken Skewers. For best results, marinate the chicken for at least 30 minutes. If you have more time, aim for 2 hours. This longer marination allows the flavors to soak in deeply. The chicken becomes tender and rich in flavor. Yes, you can use chicken breast, but the taste and texture will change. Chicken thighs offer more fat, which keeps them juicy. Breasts can dry out faster, so watch your cooking time closely. If you prefer breast meat, consider brining it first to add moisture. These skewers pair well with rice or noodles. You can also serve them with a fresh salad or a tangy dipping sauce. For a fun twist, try serving with peanut sauce or sweet chili sauce. Fresh herbs or lime wedges also add a nice touch. You can find the Full Recipe of Sweet and Spicy Thai Chicken Skewers in the main article. It details all the steps and ingredients to create this dish. Enjoy cooking! In this post, I covered the key ingredients for Thai chicken skewers, including the marinade and vegetables. I also shared tools you will need, plus nutritional details to help you plan. The step-by-step instructions guide you from marinating to grilling, ensuring great taste. I shared tips for cooking, presentation, and variations for different proteins and flavors. Lastly, I talked about storage options and answered common questions. With these insights, you’re ready to make flavorful skewers that everyone will enjoy. Happy cooking!

Savory Sweet and Spicy Thai Chicken Skewers Recipe

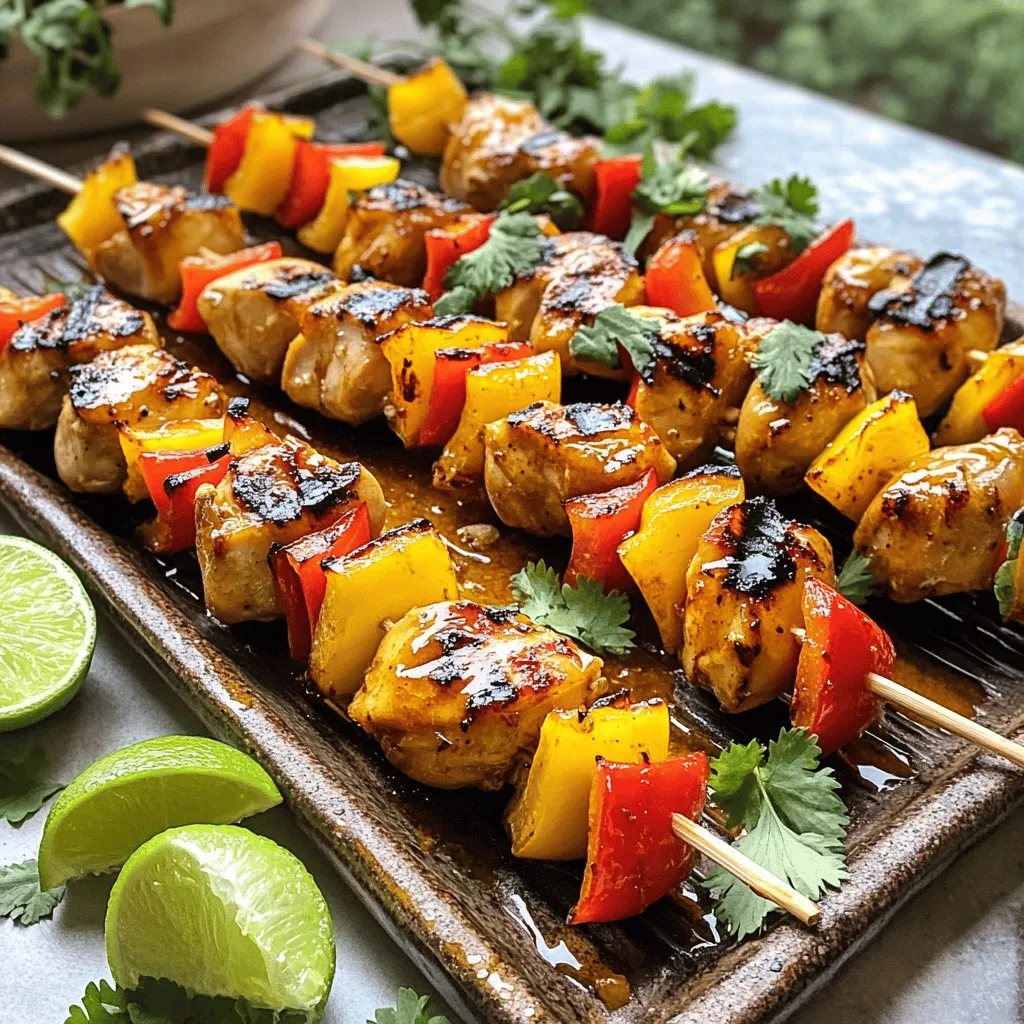
Are you ready to spice up your dinner routine? These Savory Sweet and Spicy Thai Chicken Skewers pack a flavorful

To make a delicious creamy mushroom risotto, you need some key ingredients. Here’s what you should gather: - 1 cup Arborio rice - 4 cups vegetable broth - 2 cups mixed mushrooms (like cremini, shiitake, and button), sliced - 1 small onion, finely chopped - 2 cloves garlic, minced - ½ cup heavy cream - ½ cup grated Parmesan cheese - 2 tablespoons olive oil - 2 tablespoons butter - Salt and pepper to taste These ingredients work together to create a rich, creamy dish. Arborio rice is important because it absorbs liquid well. The mushrooms add depth and umami flavor. While the essential ingredients are a must, you can add some optional ones for extra flavor: - A splash of white wine for acidity - Fresh herbs like thyme or rosemary for aroma - A pinch of nutmeg for warmth - Lemon zest for brightness These optional ingredients can elevate the dish. They add layers of taste that make your risotto even more special. To make your creamy mushroom risotto look appealing, garnishes are key. Here are some ideas: - Fresh parsley, chopped - Extra grated Parmesan cheese - A few sautéed mushroom slices - Truffle oil for a luxurious touch Garnishing your risotto not only enhances the look but also adds flavor. A sprinkle of parsley gives a fresh pop of color. Adding sautéed mushrooms on top makes it inviting and delicious. For the full recipe, check out the details above. Start by heating the vegetable broth in a saucepan. Keep it on low heat. This keeps the broth warm and ready for the risotto. Warm broth helps the rice cook evenly. In a large skillet, heat olive oil and one tablespoon of butter over medium heat. Add the finely chopped onion. Cook it for about five minutes or until it turns translucent. Then, add minced garlic and sliced mushrooms. Sauté them until the mushrooms are tender and golden brown, which takes about seven to eight minutes. Season the mixture with salt and pepper to taste. This step adds great flavor to your risotto. Now, stir in the Arborio rice. Toast the rice for one to two minutes until it becomes slightly translucent. Begin adding the warm vegetable broth, one ladleful at a time. Stir continuously while the rice absorbs the broth. Wait until most of the liquid is absorbed before adding more. This process should take about 18 to 20 minutes. The rice should end up creamy and al dente. Once the rice is cooked, lower the heat. Stir in the heavy cream and the remaining tablespoon of butter. Mix until it is combined and creamy. Remove from heat and add the grated Parmesan cheese. Adjust the seasoning with salt and pepper if needed. Let the risotto sit for a few minutes to thicken. For serving, use shallow bowls. Garnish with fresh parsley and extra Parmesan on top. You can also add some sautéed mushrooms on the side for extra flair. Enjoy your creamy mushroom risotto! For the full recipe, check out the details above. To get that rich, creamy texture, start with Arborio rice. This rice has a high starch content. It helps create the creaminess you want. Always add warm broth slowly. Stir the rice often; this releases more starch. When the rice is al dente, mix in the heavy cream and Parmesan. This adds extra creaminess and flavor. One common mistake is adding too much broth at once. This can make the risotto soupy. Also, don't skip the stirring; it’s key to the texture. Another mistake is not using enough salt. Proper seasoning makes a big difference. Lastly, don’t rush the cooking time. Good risotto takes patience! You will need a few key tools to make great risotto. A heavy-bottomed skillet helps heat evenly. A wooden spoon is best for stirring. Use a ladle to add broth slowly. A good-quality vegetable broth is essential for flavor. Lastly, don’t forget a measuring cup for the rice and broth. Check out the Full Recipe for all the details. {{image_2}} You can easily add proteins to your creamy mushroom risotto. Chicken or shrimp works great. For chicken, use diced, cooked chicken breast. Add it when you stir in the cream and cheese. For shrimp, sauté them in the skillet before adding the mushrooms. They cook fast and add a nice touch. This makes the dish heartier and adds extra flavor. For a vegetarian twist, simply skip the meat. Use vegetable broth and add more veggies. Spinach, peas, or asparagus can brighten the dish. If you want a vegan version, replace the cream with coconut cream. Use nutritional yeast instead of Parmesan for a cheesy flavor. This keeps the dish rich without dairy. Herbs and spices can take your risotto to the next level. Fresh thyme or rosemary pairs well with mushrooms. Just add a teaspoon while sautéing the onions. You can also add a pinch of nutmeg for warmth. A splash of white wine can deepen the flavors too. Experiment with different herbs to find your favorite mix. For the full recipe, check out the detailed instructions above. To store leftover risotto, first let it cool down. Place it in an airtight container. You can keep it in the fridge for up to three days. Make sure to label the container with the date. This way, you won't forget when you made it. When you are ready to eat your risotto again, add a splash of broth or water. This helps it regain its creamy texture. Heat it on low in a saucepan, stirring gently. You can also use the microwave if you prefer. Just cover the bowl with a damp paper towel to keep it moist. If you want to freeze your risotto, do it right after it cools. Use freezer-safe bags or containers. Make sure to remove as much air as possible. Frozen risotto can last up to three months. When you’re ready to enjoy it, thaw it in the fridge overnight and reheat as mentioned above. You’ll still have a tasty meal ready to eat! For the full recipe, check out the Creamy Mushroom Risotto section above. The best rice for risotto is Arborio rice. This rice has a high starch content. That starch gives risotto its creamy texture. You can also use Carnaroli or Vialone Nano rice. These types work well too and create a nice creaminess. Cooking risotto takes about 18 to 20 minutes. You will need to stir it often. This helps the rice absorb the broth and release starch. The goal is creamy, al dente rice. Keep the broth warm to speed up cooking. You can prepare risotto ahead of time, but it may not be as creamy. If you do, store it in the fridge. Reheat with a little broth or water. Stir well to bring back the creaminess. It’s best to serve risotto fresh, but reheating is fine. If you lack Arborio rice, use another short-grain rice. Sushi rice is a good choice. It has similar starch and can create creaminess. You can also choose medium-grain rice or even quinoa for a twist. Just keep an eye on cooking time and liquid needed. For the full recipe, check out the Creamy Mushroom Risotto section! In this blog post, I covered all you need to know for creamy mushroom risotto. We explored essential and optional ingredients, cooking steps, and helpful tips for success. I also shared delicious variations and how to store leftovers. Remember, perfect risotto needs the right rice and patience. With these easy steps, you can create a dish that impresses. Enjoy experimenting with flavors and textures. Your friends and family will love your homemade risotto!

Creamy Mushroom Risotto Flavorful and Easy Recipe

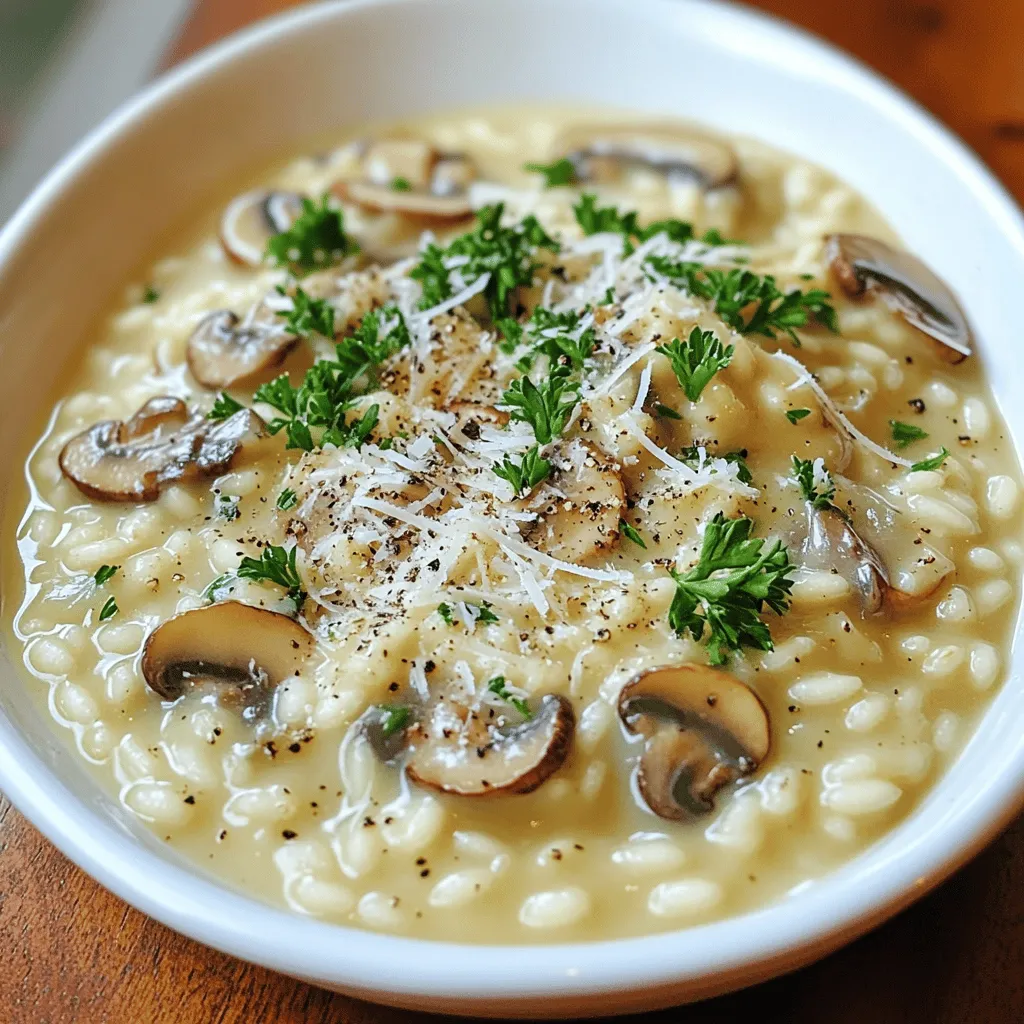
Welcome to your new favorite dish: Creamy Mushroom Risotto! You can make this hearty meal easily at home. With simple

To make fluffy pancakes with blueberries, you need simple ingredients. Here is what you will need: - 1 cup all-purpose flour - 2 tablespoons sugar - 1 tablespoon baking powder - 1/2 teaspoon salt - 1 cup whole milk (or almond milk) - 1 large egg - 2 tablespoons unsalted butter, melted - 1 cup fresh blueberries (plus extra for serving) - 1 teaspoon vanilla extract - Maple syrup, for serving These ingredients come together to create delicious pancakes. Each component plays a role in the final texture and taste. For instance, the baking powder helps your pancakes rise and become fluffy. The sugar adds a hint of sweetness, balancing the tartness of the blueberries. I recommend using fresh blueberries for the best flavor. You can also try this recipe with frozen blueberries, but fresh ones provide a burst of taste. When you have everything ready, you can check the [Full Recipe] and start cooking! Start by gathering your dry ingredients. In a large bowl, add 1 cup of all-purpose flour, 2 tablespoons of sugar, 1 tablespoon of baking powder, and 1/2 teaspoon of salt. Whisk these together until they are well mixed. This step is key for fluffy pancakes. The baking powder helps them rise. Now, grab another bowl for the wet ingredients. Pour in 1 cup of milk, then crack in 1 large egg. Add 2 tablespoons of melted unsalted butter and 1 teaspoon of vanilla extract. Whisk these together until they blend smoothly. This mix adds flavor and moisture to your pancakes. Carefully combine the dry and wet ingredients in one bowl. Pour the wet mix into the bowl with the dry ingredients. Stir gently until just combined. Don’t worry if there are small lumps; they help keep the pancakes fluffy. Now, fold in 1 cup of fresh blueberries. This adds a burst of sweetness in every bite. Preheat your non-stick skillet or griddle over medium heat. Lightly grease it with butter or cooking spray. Pour about 1/4 cup of batter for each pancake. Cook until bubbles appear on the surface, about 2-3 minutes. The edges should look set. Flip the pancakes and cook for another 1-2 minutes until they are golden brown. Serve your pancakes warm. Top them with more blueberries and a drizzle of maple syrup. This adds a sweet touch that everyone loves. Enjoy your fluffy pancakes with blueberries for a delightful breakfast. For the full recipe, refer back to the ingredients list. To make your pancakes fluffy, avoid overmixing the batter. Mix until the dry and wet ingredients just combine. A few lumps are okay. Overmixing makes the pancakes dense. Next, heat management is key. Preheat your skillet on medium heat. If it’s too hot, the pancakes burn. If it’s too cool, they turn soggy. A drop of water should sizzle and evaporate when the skillet is ready. Adding blueberries is simple. Use fresh blueberries for the best flavor. Fold them into the batter gently. This ensures they spread evenly in each pancake. If you prefer, toss the blueberries in a bit of flour first. This prevents them from sinking to the bottom. For toppings, maple syrup is classic. You can also try yogurt or whipped cream. Fresh fruit like bananas or strawberries pairs well too. Nuts add crunch and flavor. Mixing flavors makes breakfast fun! For more details, check the Full Recipe. {{image_2}} You can switch out blueberries for other fruits. Strawberries and bananas work great. Just slice the strawberries and mash the bananas before adding them to your batter. This change adds a new twist to your fluffy pancakes. Each fruit brings its own flavor, making breakfast more fun. If you need gluten-free pancakes, use gluten-free flour. Many brands offer blends that work well in any pancake recipe. Just swap the all-purpose flour with gluten-free flour. Your pancakes will still be fluffy and delicious. This option makes it easy to enjoy a tasty breakfast without the gluten. Adding spices can make your pancakes even better. Try adding a pinch of cinnamon or nutmeg to the batter. These spices add warmth and extra flavor. They pair well with the sweetness of the blueberries. Feel free to experiment and find your favorite spice mix. You can also mix in some lemon zest for a bright flavor. For the full recipe, check out the complete guide for fluffy blueberry pancakes. You can easily store leftover pancakes in the fridge. First, let them cool down completely. Then, stack the pancakes with a piece of parchment paper between each one. This prevents them from sticking together. Place the stack in an airtight container or wrap them tightly in plastic wrap. They will stay fresh for about 3 to 4 days. If you want to keep pancakes longer, freezing is a great option. Use the same cooling method as before. Once cool, stack the pancakes with parchment paper in between. Place them in a freezer-safe bag or container. Squeeze out as much air as possible to prevent freezer burn. When you’re ready to eat, just reheat them in the microwave or toaster. For the best results, heat them on low power for a few minutes. Pancakes last about 3 to 4 days in the fridge. In the freezer, they can last up to 2 months. Make sure to label your container with the date. This way, you’ll know when to eat them. Enjoy your fluffy pancakes with blueberries anytime you want! You can find the full recipe in the previous section. Yes, you can. Make the batter and store it in the fridge. Use an airtight container to keep it fresh. When ready to cook, stir the batter gently. It may thicken overnight, so add a splash of milk if needed. To make fluffier pancakes, use enough baking powder. This ingredient is key for lift. A good rule is one tablespoon per cup of flour. Make sure your baking powder is fresh. You can also separate the egg. Whip the egg white until light, then fold it in last. This adds air for a fluffier texture. To reheat pancakes, use a microwave or skillet. For the microwave, place pancakes on a plate and cover with a damp paper towel. Heat in short bursts until warm. If using a skillet, heat on low. Add a small amount of butter and warm each pancake for about 30 seconds on each side. Yes, there are many vegan options. You can use flaxseed meal mixed with water. Combine 1 tablespoon of flaxseed with 2.5 tablespoons of water. Let it sit until it thickens. Another option is unsweetened applesauce. Use 1/4 cup for each egg. Both will keep your pancakes moist and tasty. For a full recipe, check out the [Full Recipe]. You now know how to make delicious blueberry pancakes. We covered each step, from mixing ingredients to cooking. I shared tips for perfect texture and ideas for variations. You can even store leftovers easily. Remember, cooking is fun, and experimenting with flavors can lead to tasty results. Don’t be afraid to try new fruits or toppings. Enjoy your pancakes and share them with friends and family!

Fluffy Pancakes with Blueberries Easy Breakfast Recipe

Looking for an easy breakfast that dazzles? Fluffy pancakes with blueberries are your solution! These light, airy treats are simple

- Two 15 oz cans of chickpeas - Medium onion, finely chopped - Garlic cloves, minced - Fresh ginger, minced - Medium tomatoes, diced - Coconut milk - Curry powder - Ground cumin - Turmeric - Cayenne pepper - Salt - Fresh cilantro - Cooked rice or naan bread To make this spicy chickpea curry, you'll need some simple yet flavorful ingredients. Start with two cans of chickpeas. They provide great texture and protein. Next, grab a medium onion and chop it finely. Onions add sweetness and depth to your dish. You’ll also need three cloves of garlic. Mince them, as they add a strong, aromatic flavor. Fresh ginger is another key ingredient. Just one inch, minced, will bring warmth and spice. Now, get two medium tomatoes. Diced tomatoes give the curry a fresh taste and help create a thick sauce. Finally, a can of coconut milk is essential. It adds creaminess and balances the spices. For spices, use curry powder, ground cumin, turmeric, and cayenne pepper. These spices create the rich flavor profile. Don’t forget salt to enhance all the tastes. To garnish, fresh cilantro adds brightness. Serve the curry with cooked rice or warm naan bread. This combination makes for a hearty meal. For the full recipe, check out the detailed instructions provided. 1. Heating the oil in a large pot: Start by pouring 2 tablespoons of olive oil into a large pot. Turn the heat to medium. Allow the oil to warm for a minute or two. 2. Sautéing onions and aromatics: Next, add 1 finely chopped onion. Cook it until it turns translucent, about 5 minutes. Then, add 3 minced garlic cloves and 1 inch of minced ginger. Cook for another 2 minutes. This builds a great base of flavor. 1. Adding and cooking spices: Now, stir in 2 tablespoons of curry powder, 1 teaspoon of ground cumin, 1 teaspoon of turmeric, and 1/2 teaspoon of cayenne pepper. Let this cook for about 1 minute. This step helps the spices bloom and release their aromas. 2. Incorporating tomatoes and chickpeas: Add 2 diced tomatoes to the pot. Cook them until they soften, about 5 minutes. Then, pour in 2 cans of drained and rinsed chickpeas. Stir well to coat them with the spices. 1. Engaging coconut milk and simmering: Pour in 1 can of coconut milk. Bring the mixture to a gentle simmer. Let it cook for 15 to 20 minutes. This thickens the curry and blends the flavors. 2. Adjusting seasoning and serving: Taste the curry and add salt as needed. Once it’s ready, serve it hot. Garnish with fresh cilantro over cooked rice or warm naan bread. For the full recipe, check out the detailed instructions above. Enjoy your cooking! To boost the flavor of your Spicy Chickpea Curry, try adding more spices while you cook. Adding spices like cumin or coriander can deepen the taste. You can also adjust the cayenne pepper for heat. If you want it milder, use less. For more heat, add a bit more. Taste as you go to find your sweet spot. Perfecting the texture of chickpeas is key. Make sure to rinse and drain canned chickpeas well. This helps remove excess salt and gives a fresher taste. When you sauté your onions, cook them until they are soft and clear. This step builds a strong flavor base for your curry. Don’t rush it; good flavor takes time. Pair your Spicy Chickpea Curry with sides like cooked rice or warm naan bread. This combination makes a complete meal. For presentation, serve the curry in a large bowl. Top it with fresh cilantro for a pop of color. You can also add a slice of lime on the side for extra zest. For the full recipe, check out the details above. {{image_2}} You can make this spicy chickpea curry your own. Swapping ingredients can add new flavors. For a fun twist, use different beans or lentils. Black beans or kidney beans work great. You can also try lentils for a unique texture. Changing up the veggies is another option. Add spinach, kale, or bell peppers for a fresh taste. You can even include sweet potatoes for a sweet note. These swaps keep the dish exciting and full of surprises. Not everyone loves heat. You can adjust the spice level for your family. For a milder dish, reduce the cayenne pepper or leave it out. Try adding a bit of honey or coconut sugar to balance the heat. If you want more creativity, mix spices. Use smoked paprika for a smoky flavor. Adding a pinch of chili powder can also give it a nice kick. Play around with the spices until you find your perfect mix. Making this dish vegan is easy. All the ingredients are plant-based, so no changes needed! Just serve it with rice or naan for a complete meal. If you need gluten-free options, use gluten-free naan or rice. This curry is already free from gluten, so you’re safe! It’s delicious for everyone, no matter their diet. For the full recipe, check the earlier sections. Enjoy your cooking adventures! To keep your spicy chickpea curry fresh, store leftovers in the fridge. Place the curry in an airtight container. Glass containers work great, as they do not stain. If you use plastic, make sure it is BPA-free. If you want to save some for later, freezing is easy. Let the curry cool completely before freezing. Use freezer-safe bags or containers to avoid freezer burn. When ready to eat, thaw it in the fridge overnight. To reheat, simply warm it up on the stove or in the microwave. Add a splash of coconut milk to restore creaminess. In the fridge, the curry lasts about 4 to 5 days. If you freeze it, it can last up to 3 months. Always check for signs of spoilage before eating. If it smells sour or looks off, it’s best to toss it. Proper storage helps keep your meals safe and tasty! Cooking Spicy Chickpea Curry is quick and easy. It takes about 10 minutes to prep. The total cooking time is around 30 minutes. So, you can enjoy this dish in just 40 minutes. Yes, you can use dried chickpeas. First, soak them overnight in cold water. This helps them soften. After soaking, cook them in fresh water for about 1 to 1.5 hours. Make sure they are tender before adding them to the curry. Using dried chickpeas takes more time but adds great flavor. Serve Spicy Chickpea Curry hot. I love it with cooked rice or warm naan bread. The rice soaks up the sauce well. You can also sprinkle fresh cilantro on top for a burst of flavor. This dish is perfect for any meal! For the full recipe, check the section above. This blog post explored cooking a spicy chickpea curry from scratch. We covered key ingredients, preparation steps, and cooking techniques. You learned ways to enhance flavor and adapt the recipe to suit your taste. We also discussed storage tips and answered common questions. With this knowledge, you can create a delicious curry. It’s a simple dish that allows for creativity. Enjoy making it your own and sharing it with friends and family. Happy cooking!

Spicy Chickpea Curry Flavorful and Simple Recipe

Are you ready to spice up your dinner routine? This Spicy Chickpea Curry is both flavorful and easy to make!

Lemon spaghetti with shrimp is a bright, tasty dish. It combines fresh flavors with a creamy sauce. You can make this meal in just 20 minutes. It serves four people and is perfect for any night. To make this lemon spaghetti with shrimp, you will need: - 8 oz spaghetti - 1 lb large shrimp, peeled and deveined - 3 cloves garlic, minced - 1 lemon, zested and juiced - 1/4 cup olive oil - 1/4 cup heavy cream - 1/2 teaspoon red pepper flakes - Salt and pepper to taste - Fresh parsley, chopped (for garnish) - Grated Parmesan cheese (optional) This dish is not just delicious but also quite balanced. Here’s a quick look at what you get in one serving: - Calories: 450 - Protein: 28g - Carbohydrates: 40g - Total Fat: 20g - Fiber: 2g You can enjoy a meal that feels good and tastes even better. For the full recipe, check the details above. Start by gathering your ingredients. You need: - 8 oz spaghetti - 1 lb large shrimp, peeled and deveined - 3 cloves garlic, minced - 1 lemon, zested and juiced - 1/4 cup olive oil - 1/4 cup heavy cream - 1/2 teaspoon red pepper flakes - Salt and pepper to taste - Fresh parsley, chopped (for garnish) - Grated Parmesan cheese (optional) Make sure your shrimp is fresh. Check for any shells left on. Mince the garlic finely. Zest the lemon before juicing it. This zest adds a bright flavor. Fill a large pot with water. Add a good amount of salt. Bring it to a boil. Once boiling, add the spaghetti. Cook it according to the package instructions until it's al dente. This usually takes about 8-10 minutes. Before draining, reserve 1/2 cup of pasta water. This water is starchy and useful for adjusting the sauce later. Drain the spaghetti and set it aside. In a large skillet, heat the olive oil over medium heat. Add the minced garlic and red pepper flakes. Cook them for about 1-2 minutes until they smell great. Be careful not to let the garlic brown. Next, add the shrimp to the skillet. Season it with salt and pepper. Cook the shrimp for about 2-3 minutes on each side. When done, the shrimp should turn pink and opaque. Now, stir in the lemon juice and zest. Pour in the heavy cream. Mix everything well and let it simmer for 2-3 minutes. The sauce should thicken slightly. Finally, add the cooked spaghetti to the skillet. Toss the pasta to coat it in the lemon-shrimp sauce. If it looks dry, add some reserved pasta water until you reach the right consistency. Adjust seasoning with more salt, pepper, or lemon juice as needed. Serve the dish right away. Garnish with chopped parsley and Parmesan cheese if you like. You can find the full recipe for this dish in the earlier section. To get a great sauce, start with the right balance. Use olive oil and heavy cream. Olive oil adds depth, while cream gives a rich feel. If the sauce is too thick, add reserved pasta water bit by bit. This helps create a silky texture. Always stir well to combine all the flavors. Seasoning is key for flavor. I like to use salt, pepper, and lemon juice. Start with a pinch of salt and a dash of pepper. Taste as you go. If you want more zing, add lemon juice. The balance of salt and lemon is what makes this dish pop. Cooking shrimp takes just a few minutes. Heat your skillet and add shrimp. Cook them for about 2-3 minutes on each side. Look for that pink color; it tells you they are ready. Avoid overcooking, as shrimp can turn rubbery. Juicy, tender shrimp make this dish shine. For the complete recipe, check the Full Recipe section. {{image_2}} You can boost the flavor and color by adding vegetables. Try tossing in fresh spinach or cherry tomatoes. Both add taste and a healthy twist. Cook the spinach until it wilts. Add the tomatoes just before mixing in the pasta. You can also add zucchini or bell peppers for extra crunch. Simply sauté them with garlic before adding the shrimp. If shrimp isn't your thing, you have options. Chicken or scallops work well in this dish. Cut chicken into bite-sized pieces and cook them until golden. Scallops cook quickly, just like shrimp. Season them the same way. These proteins absorb the lemony flavor, making every bite delicious. For gluten-free lemon spaghetti, swap regular pasta for gluten-free pasta. There are many options available, like brown rice or chickpea pasta. They cook similarly, so follow the package instructions. The sauce is naturally gluten-free, so you won’t lose any flavor. Enjoy this dish without worry! For the full recipe, check out the details above! After you make Lemon Spaghetti with Shrimp, let it cool first. Then, store it in an airtight container. This keeps the dish fresh for up to three days. Always keep it in the fridge. The shrimp and pasta will taste best when eaten fresh, but you can enjoy leftovers. If you want to freeze it, use a freezer-safe container. You can freeze Lemon Spaghetti with Shrimp for up to two months. Make sure to cool it completely before freezing. It’s best to avoid freezing the shrimp if they are cooked, as they can become rubbery. To reheat, you can use the microwave or stovetop. If using the microwave, warm it in short bursts. Stir in between to heat evenly. If you choose the stovetop, add a splash of water or olive oil in a pan over low heat. Stir frequently until it’s hot. This will help keep the pasta from drying out. Enjoy your meal again! Making Lemon Spaghetti with Shrimp takes about 30 minutes. You spend 10 minutes prepping and 20 minutes cooking. This quick time makes it great for busy nights. You can enjoy a fresh, flavorful dish without a long wait. Yes, you can use frozen shrimp! Just remember to thaw them first. Place the shrimp in cold water for about 15-20 minutes. Once thawed, peel and devein them if needed. This method saves time and still gives you tasty shrimp. If you want a lighter option, use half-and-half instead of heavy cream. You can also try Greek yogurt for a creamy texture. For a dairy-free choice, use coconut cream. Each option gives a different flavor, so pick one you like best. For the full recipe, check the section above. In this post, we explored how to make Lemon Spaghetti with Shrimp. We covered the ingredients, step-by-step instructions, and tips for perfecting your dish. You learned about variations, storage, and answered common questions. Cooking can be fun and rewarding. With this recipe, you can impress family and friends. Enjoy your meal and feel proud of your cooking skills.

Lemon Spaghetti with Shrimp Easy and Flavorful Recipe

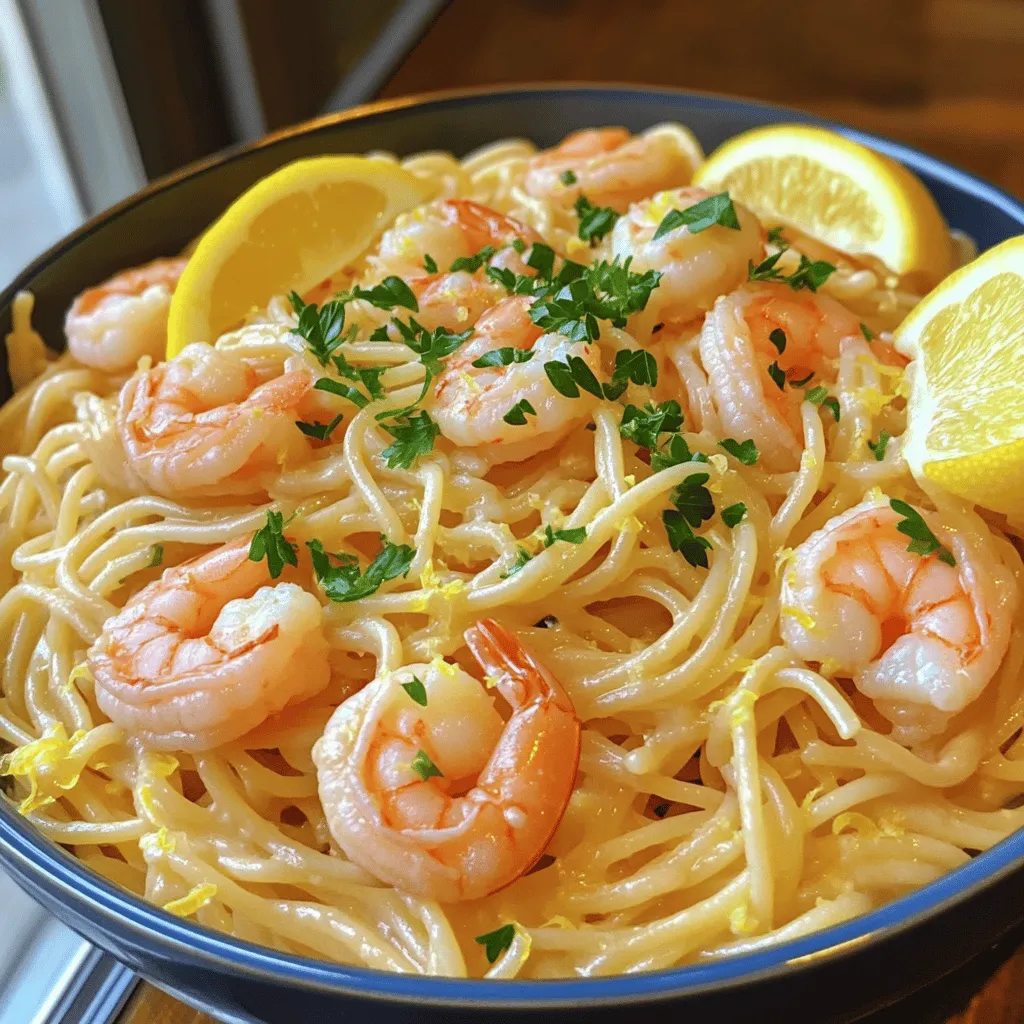
Are you ready to whip up a simple yet delicious meal? This Lemon Spaghetti with Shrimp recipe is easy, zesty,

To make a vibrant Mexican street corn salad, you need fresh and tasty ingredients. Here’s what you will gather: - 4 ears of corn, husked and cleaned - 1 cup cherry tomatoes, halved - 1/2 red onion, finely diced - 1 avocado, diced - 1/2 cup cotija cheese, crumbled - 1/4 cup fresh cilantro, chopped - 1 jalapeño, finely chopped (seeds removed for less heat) - Juice of 2 limes - 2 tablespoons olive oil - 1 teaspoon chili powder - 1/2 teaspoon smoked paprika - Salt and pepper to taste Each ingredient adds a unique burst of flavor. The corn brings sweetness, while the tomatoes add juiciness. Red onion adds a sharp bite. The creamy avocado balances it all. Cotija cheese adds a salty kick. Cilantro gives freshness, and jalapeño adds just the right heat. Lime juice and olive oil create a zesty dressing. Chili powder and smoked paprika deepen the flavor profile. Check out the [Full Recipe] to see how to pull this all together! Start by grilling the corn. Preheat your grill to medium-high heat. Place the husked corn directly on the grill. Cook it for about 10 to 12 minutes. Turn the corn occasionally until it gets nice char marks and is tender. Remove the corn from the grill and let it cool slightly. Once the corn is cool enough to handle, it’s time to cut the kernels off the cob. Use a sharp knife to slice down the sides of the corn. This will give you fresh, juicy kernels for your salad. Place all the kernels into a large mixing bowl. Now, we’ll combine all the ingredients. In the bowl with the corn, add the halved cherry tomatoes, finely diced red onion, diced avocado, crumbled cotija cheese, chopped cilantro, and chopped jalapeño. Each of these ingredients adds a burst of flavor. Next, prepare the dressing. In a small bowl, whisk together the lime juice, olive oil, chili powder, smoked paprika, salt, and pepper. Mix until everything is well combined. This dressing will give your salad a zesty kick. Pour the dressing over the salad mixture. Gently toss everything together until well coated. Make sure all the ingredients are mixed evenly. Taste the salad and adjust the seasoning if needed. You can add more lime juice, salt, or pepper for extra flavor. After mixing, chill the salad in the refrigerator for at least 30 minutes. This chilling time allows the flavors to meld together beautifully. When you're ready to serve, you’ll have a refreshing and colorful Mexican Street Corn Salad to enjoy! For the full recipe, check out the details above. To make the perfect Mexican street corn salad, start by grilling the corn well. Grill the corn on medium-high heat. Turn it every few minutes for even cooking. Aim for a nice char without burning. This adds a smoky flavor that makes the dish shine. Next, seasoning is key. After mixing, taste the salad and adjust. If you want more zest, add lime juice. For extra kick, sprinkle in more chili powder or salt. This way, you make the salad just right for your taste. When serving, presentation matters. Use a large, colorful bowl to showcase the salad. Garnish with extra cilantro and a sprinkle of cotija cheese. This adds color and texture. You can also add lime wedges on the side. They offer a fresh touch and look nice. For a fun twist, serve the salad in small cups. This creates a great finger food option for gatherings. People will love the vibrant colors and flavors. Prepping ingredients ahead can save you time. Husk and clean your corn the day before. You can even grill the corn ahead and store it in the fridge. This way, assembly is quick and easy. If you need to save even more time, use canned or frozen corn. Both options work well in this salad. They cook faster and still taste great. Just drain canned corn and thaw frozen corn before mixing. This keeps your prep fast and simple. For the full recipe, check the earlier section. Enjoy making this delicious dish! {{image_2}} You can make your Mexican Street Corn Salad even more fun. Try adding spices for extra kick. Cumin gives a warm flavor. Chili flakes add heat. Both will make your salad pop. Different cheeses can change the taste too. Feta or Monterey Jack work well instead of cotija. This keeps it exciting every time you make it. Not a fan of avocado? You could use mango instead. It adds a sweet touch and bright color. If you want a different herb, swap cilantro for parsley. Parsley has a fresh taste and works great in this salad. These changes can make it your own twist on the classic. For a vegan option, look for plant-based cheese. There are many brands that taste great. This way, everyone can enjoy the salad. If you need a gluten-free version, don’t worry! All ingredients are naturally gluten-free. You can serve it without any changes. Enjoying this salad fits many diets. To keep your Mexican Street Corn Salad fresh, store it in an airtight container. This will help keep it crisp and tasty. The salad will stay fresh for about 3 days in the fridge. If you notice any browning on the avocado, simply mix it gently before serving. Can you freeze this salad? I don’t recommend it. Freezing can change the texture of the corn and avocado. If you must freeze it, place it in a freezer-safe bag and press out as much air as possible. For thawing, move it to the fridge overnight. When ready to serve, give it a good mix to restore some freshness. Got leftover ingredients? Use them in other tasty dishes! Here are some ideas: - Throw leftover corn in a quesadilla for extra flavor. - Use extra cherry tomatoes in a pasta salad. - Mix diced avocado into your morning omelet. These tips help prevent food waste and add variety to your meals. Enjoy the burst of flavor in every bite! For the full recipe, check out the [Full Recipe]. Mexican Street Corn Salad, or Elote Salad, comes from Mexico. It showcases grilled corn, fresh veggies, and bold flavors. This salad highlights sweet corn, creamy avocado, and zesty lime. You will find crumbled cotija cheese, which adds a salty touch. It balances flavors and textures beautifully. Yes, you can make this salad ahead. Just follow a few tips. Prepare the corn and mix the salad without the dressing. Store it in the fridge for up to 24 hours. When ready to serve, add the dressing. This keeps the flavors bright and fresh. To spice up your salad, add more jalapeño. Leave some seeds for extra heat. You can also sprinkle in chili powder or hot sauce. This will give your dish a bold kick. Taste as you go to find the right balance for you. Each serving of this salad has about 200 calories. It includes healthy fats from avocado and cheese. You get fiber from the corn and veggies, too. This dish is a great option for a light meal or side. It’s colorful and packed with nutrients! This blog covered a refreshing Mexican Street Corn Salad. I shared key ingredients, step-by-step cooking instructions, and tips for perfecting the dish. You learned ways to customize flavors and make substitutions. We also explored storage tips to keep leftovers fresh. In conclusion, this salad is easy to make and full of flavor. Enjoy it fresh, or adapt it to your taste. Whether for a party or a simple meal, it is sure to impress.

Mexican Street Corn Salad Burst of Flavor Recipe

You’re in for a treat with this Mexican Street Corn Salad! Packed with fresh flavors and vibrant colors, this dish

To make Skillet Cajun Spiced Flounder, gather these ingredients: - 4 flounder fillets (about 6 ounces each) - 2 tablespoons Cajun seasoning - 2 tablespoons olive oil - 1 tablespoon butter - 2 cloves garlic, minced - 1 red bell pepper, thinly sliced - 1 cup cherry tomatoes, halved - 1/4 cup fresh parsley, chopped - Juice of 1 lemon - Salt and pepper to taste This dish is not only tasty but also healthy. Each serving provides: - Calories: 280 - Protein: 25g - Carbohydrates: 10g - Fat: 15g - Fiber: 2g These numbers can vary based on ingredient brands and preparation methods. When buying flounder, look for fillets that are moist and shiny. They should smell like the sea, not fishy. For the bell pepper, choose one that is firm and bright. The skin should be smooth with no blemishes. For cherry tomatoes, pick ones that are plump and vibrant. Fresh parsley adds a burst of flavor, so select bright green leaves without brown spots. Using fresh ingredients makes your meal better and more delicious! For the full recipe, check out the instructions above. First, gather all your ingredients. You need four flounder fillets, Cajun seasoning, olive oil, butter, garlic, a red bell pepper, cherry tomatoes, fresh parsley, lemon juice, salt, and pepper. Make sure to pat the flounder fillets dry. This helps the seasoning stick. Next, season both sides of each fillet with Cajun seasoning, salt, and pepper. This adds great flavor. Now, heat a large skillet over medium-high heat. Add two tablespoons of olive oil and one tablespoon of butter. Let the butter melt and bubble. Once ready, add the seasoned flounder fillets. Cook them for about three to four minutes on each side. You want them golden brown and cooked through. After cooking, remove the fillets and set them aside on a plate. In the same skillet, lower the heat to medium. Add two cloves of minced garlic. Stir it for about thirty seconds to release the smell. Then, add the sliced red bell pepper. Sauté it for about three minutes until it softens a bit. Now, toss in one cup of halved cherry tomatoes. Cook them for an additional two to three minutes until they burst and release their juices. Finally, return the flounder to the skillet. Gently spoon the sautéed veggies over the fillets. Drizzle with the juice of one lemon and sprinkle with fresh parsley. This will make the dish pop with flavor and color. To serve, place the flounder on a warm plate. Top each fillet with some of the sautéed vegetables. For an extra touch, garnish with more parsley and lemon wedges. This dish looks beautiful and is sure to impress. You can find the full recipe in the main article. To cook flounder just right, start with fresh fillets. Dry them well using a paper towel. This helps the seasoning stick better. Heat your skillet to medium-high heat. Add olive oil and butter until it bubbles. Place the fillets in the skillet, careful not to overcrowd. Cook for about 3-4 minutes on each side. You'll know they're done when they turn golden and flake easily with a fork. This simple method keeps the fish moist and flavorful. If you don’t have Cajun seasoning at home, don’t worry! You can make your own mix. Combine paprika, garlic powder, onion powder, cayenne pepper, and oregano. This mix packs a similar punch. You can also use Creole seasoning for a different flavor. For a milder taste, try a blend of smoked paprika and black pepper. These alternatives still capture the bold flavors of Cajun cuisine. For this recipe, you'll need a few key tools. A large skillet is a must for even cooking. A spatula helps you flip the flounder without breaking it. Use a sharp knife for slicing the vegetables. A cutting board will keep your workspace clean. Lastly, having a lemon juicer makes it easy to add that fresh zing. With these tools, you will make cooking effortless and enjoyable. {{image_2}} You can easily swap flounder for other fish. Try tilapia, sole, or catfish. Each fish brings its own flavor, but they all pair well with Cajun spice. Just adjust cooking times based on thickness. For thicker fish, cook a bit longer. For thinner fillets, watch them closely to avoid overcooking. If you prefer a meat-free meal, try using firm tofu or tempeh. Cut them into fillet shapes and season them with Cajun spice. Sauté them just like you would the flounder. You could also use portobello mushrooms for a hearty option. They soak up flavors well and add a nice texture. You can control the heat in this dish. For less spice, use less Cajun seasoning. Alternatively, add a touch of cayenne pepper for more heat. You can also balance the spiciness with a splash of cream or yogurt. This makes the dish rich and smooth. Enjoy experimenting with flavors to find your perfect balance. To keep your skillet Cajun spiced flounder fresh, store it in an airtight container. Make sure to place it in your fridge within two hours of cooking. The flounder can stay fresh for up to three days. If you have leftovers, it’s best to separate the fish from the vegetables. This way, the flounder won’t get soggy. When you’re ready to enjoy your leftovers, reheat the flounder gently. Preheat your skillet over medium heat. Add a splash of olive oil to prevent sticking. Place the flounder in the skillet for about 2-3 minutes on each side. You can also microwave it. Use a microwave-safe dish and cover it with a damp paper towel. Heat in short bursts, checking often to avoid overcooking. If you want to keep your flounder longer, you can freeze it. Wrap the cooked flounder tightly in plastic wrap and then place it in a freezer bag. Remove as much air as possible. It will last up to three months in the freezer. When you’re ready to eat it, thaw it in the fridge overnight before reheating. This keeps the texture nice and tasty. For the full recipe, check the details above. Cooking flounder is quick and easy. It takes about 6 to 8 minutes in total. Each side needs about 3 to 4 minutes. You want the fish to be golden brown and flake easily with a fork. Yes, you can use frozen flounder. Just make sure to thaw it first. Thawing helps the fish cook evenly. You can place it in the fridge overnight or put it in cold water for quick thawing. Cajun-spiced flounder pairs well with many sides. Some great options are: - Rice or quinoa for a filling base - Steamed vegetables for a healthy touch - A fresh salad for some crunch - Corn on the cob for a sweet side These sides can enhance your meal and make it a complete feast. Check the Full Recipe for more ideas! This post covered key areas for cooking flounder, from ingredients to storage. I shared tips on selecting fresh items, cooking methods, and serving ideas. Remember, perfecting flounder is easy once you follow these steps. Consider your seasonings and variations to fit your taste. Proper storage ensures you maximize flavor and freshness. Use this guide to enjoy delicious meals with flounder or any fish. Cooking can be fun and rewarding!

Skillet Cajun Spiced Flounder Easy Flavorful Meal

Looking for an easy, flavorful meal that’s sure to impress? This Skillet Cajun Spiced Flounder is your answer! With just

For this Chicken Cordon Bleu Casserole, the main proteins are cooked chicken and ham. You need 2 cups of cooked chicken, shredded into bite-sized pieces. This adds a nice, tender texture. Next, use 6 slices of ham, chopped into small bits. The ham gives a salty and savory kick that works well with chicken. Cheese is key to making this dish creamy and rich. I use 1 cup of Swiss cheese, shredded, for its nutty flavor. Swiss melts beautifully, adding a lovely stretch. Alongside that, I include 1 cup of cheddar cheese, shredded. Cheddar adds a sharp taste and a golden color when baked. A few more ingredients make this casserole shine. You will need 1 cup of cooked noodles, like cavatappi or egg noodles, for a hearty base. 1 cup of cream of chicken soup brings creaminess and flavor. Add 1/2 cup of milk to thin the soup. Season with 1 teaspoon of garlic powder, 1 teaspoon of onion powder, 1/2 teaspoon of black pepper, and 1/2 teaspoon of dried thyme to enhance taste. Finally, top with 1/2 cup of breadcrumbs mixed with 2 tablespoons of melted butter for a crispy finish. For the full recipe, check out the details provided. To start, gather your ingredients. You will need cooked chicken, ham, cheeses, and noodles. Measure out 2 cups of shredded chicken and 6 slices of chopped ham. Next, grab 1 cup each of Swiss and cheddar cheese, and 1 cup of cooked noodles. In a large bowl, combine the chicken, ham, both cheeses, and noodles. Then, add 1 cup of cream of chicken soup and 1/2 cup of milk. You can use garlic powder, onion powder, black pepper, and dried thyme for flavor. Mix everything until it is well blended. Now, it’s time to prepare your casserole dish. Preheat your oven to 350°F (175°C) and grease a 9x13 inch dish. Pour the chicken mixture into the dish, spreading it evenly. This ensures each bite is tasty. In a small bowl, mix 1/2 cup of breadcrumbs with 2 tablespoons of melted butter. Once coated, sprinkle the breadcrumbs on top of the casserole. This will create a crispy layer when baked. Cover your casserole loosely with aluminum foil. Place it in the oven and bake for 25 minutes. After that, remove the foil and bake for another 10 to 15 minutes. You want the top to be golden brown and bubbly. Once done, let the casserole cool for 5 to 10 minutes before serving. This will help it set and make it easier to serve. For a lovely touch, sprinkle fresh parsley on top before you enjoy this comforting dish. For the full recipe, check out the details provided above. To keep your casserole creamy, use cream of chicken soup. This soup adds rich flavor and moisture. Also, add milk to thin it out just a bit. You can adjust the milk based on how creamy you want it. For the best cheese melt, use a mix of Swiss and cheddar. Swiss cheese melts well and gives a nice stretch. Cheddar adds sharpness and depth to the dish. Make sure to shred the cheese yourself. Pre-shredded cheese often contains anti-caking agents that prevent proper melting. To boost flavor, use garlic powder and onion powder. These spices add a warm taste. You can also mix in fresh herbs like thyme or parsley. Fresh herbs make the dish bright and fresh. Lastly, try adding a dash of lemon juice for a zing. This small addition can make a big difference. For the full recipe, check out the details above. {{image_2}} You can switch the chicken for turkey or pork. Both meats work well. You could also try shrimp or even tofu for a fun twist. Each protein brings its own flavor. Mixing it up keeps the dish exciting. Swiss cheese is great, but don't stop there. Try mozzarella for a gooey texture. Gouda adds a rich flavor that many love. You can also mix in some blue cheese for a bold taste. Each cheese can change the whole dish. Want a meatless meal? Use mushrooms and spinach instead of chicken and ham. Add artichokes for a nice touch. You can also include some roasted veggies like zucchini or bell peppers. This gives you a hearty and tasty casserole without meat. For the full recipe, check out the details provided above. After baking your Chicken Cordon Bleu Casserole, let it cool down. I usually let it sit for about 5 to 10 minutes. This step helps to set the layers and makes serving easier. Don’t rush this part; it’s key for great texture. To store leftover casserole, first, cover it. Use plastic wrap or foil to keep it fresh. You can also place it in an airtight container. This dish stays good in the fridge for up to three days. If you want to keep it longer, freeze it. Just ensure you wrap it tightly to prevent freezer burn. Reheating your Chicken Cordon Bleu Casserole is simple. Preheat your oven to 350°F (175°C). Place the casserole in an oven-safe dish. Cover it with foil to keep it moist, and heat it for about 20 to 25 minutes. If you prefer, you can also reheat slices in the microwave. Just heat them for 1-2 minutes, checking often to avoid overcooking. Enjoy this tasty dish again with just a little effort! You can prepare this casserole a day in advance. Just follow the recipe until you are ready to bake. Once mixed, cover it and store it in the fridge. When you’re ready, preheat your oven and bake it straight from the fridge. This saves time and keeps flavors fresh. Yes, you can freeze this casserole. Assemble it as the recipe shows, but do not bake it. Wrap the dish tightly with plastic wrap and then foil. You can freeze it for up to three months. When you want to eat it, thaw it in the fridge overnight and then bake it. This dish pairs well with fresh salad and steamed veggies. You can also serve garlic bread for added crunch. Mashed potatoes or rice can give a nice base too. Each option adds flavor and balance to your meal. For more ideas, check the Full Recipe for serving tips! This blog post covered how to make a tasty Chicken Cordon Bleu Casserole. We discussed the key ingredients, detailed the steps for preparation and cooking, and shared tips for creamy, cheesy goodness. You learned about variations to try and the best ways to store leftovers. In closing, enjoy creating this dish and explore your unique twists. Happy cooking!

Chicken Cordon Bleu Casserole Simple and Tasty Dish

If you love comfort food with a twist, Chicken Cordon Bleu Casserole is a must-try! This simple dish combines tender

Older posts
Newer posts
← Previous Page1 … Page14 Page15 Page16 … Page25 Next →

dsad

© 2025 greenmealmap • Built with GeneratePress

Our Policies

  • Copyright Policy
  • Cookie Policy
  • GDPR Policy
  • Privacy Policy
  • Disclaimer
  • Terms Of Use

More Information

  • Home
  • About
  • Contact
  • Appetizers
  • Dessert
  • Dinner
  • Drinks
©2025, greenmealmap About Back To Top