Skip to content
DisclaimerTerms Of UseGDPR PolicyCookie Policy

greenmealmap

  • Home
  • Drinks
  • Appetizers
  • Dinner
  • Dessert
  • About
  • Contact
  • Privacy Policy
DisclaimerTerms Of UseGDPR PolicyCookie Policy

Lauren

- Ground Beef - Potatoes - Onion and Garlic Ground beef is the star of this dish. It brings rich flavor and protein. I love using 1 pound for a hearty meal. Potatoes add a nice texture. Four medium potatoes, diced, work best for this recipe. They soak up all the tasty juices. Onion and garlic give depth and aroma. Use one medium onion and two cloves of garlic for great taste. - Frozen Mixed Vegetables - Spices and Seasonings - Garnish Options You can add frozen mixed vegetables for color and nutrition. A cup of mixed veggies adds sweetness and crunch. Spices and seasonings make your dish unique. I use Worcestershire sauce, paprika, and dried thyme. Adjust salt and pepper to your liking for flavor. Lastly, fresh parsley makes a lovely garnish. It adds a pop of color and freshness to your plate. For the full recipe, check out the Beefy Potato Fusion Delight! Sautéing Onion and Garlic First, heat the olive oil in a large skillet over medium heat. Add the finely chopped onion and minced garlic. Sauté these ingredients until the onions turn soft and clear, about 3 to 4 minutes. This step adds great flavor to your dish. Browning the Ground Beef Next, add the ground beef to the skillet. Use a spatula to break it apart as it cooks. You want it to brown evenly and lose its pink color. This takes about 6 to 7 minutes. Don’t forget to season it with salt, pepper, and paprika. This adds depth to the taste. Incorporating Potatoes and Broth Now, stir in the diced potatoes and pour in the beef broth. Bring this mixture to a gentle simmer. Cover the skillet with a lid and let it cook for about 15 minutes. This step is key as you want the potatoes to become tender. Adding Mixed Vegetables and Seasoning Once the potatoes are soft, it’s time to add the frozen mixed vegetables. Pour in the Worcestershire sauce and sprinkle the dried thyme. Give everything a good stir to combine. Let it simmer for an additional 5 minutes. This helps the flavors mix well together. For the full recipe, check [Full Recipe]. Choosing the Right Potatoes For this meal, I love using Yukon Gold or Russet potatoes. These types are creamy and fluffy. They hold their shape well and cook evenly. Avoid waxy potatoes, as they won't give you that nice texture you want. Always peel and dice your potatoes to make sure they cook faster. Tips for Flavors Boost the flavor with fresh herbs like thyme or parsley. Add them at the end for a fresh touch. You can also mix in a splash of soy sauce or hot sauce for a kick. You might want to try some cheese on top for extra richness. Skillet vs. Slow Cooker I prefer a skillet for this dish. It cooks quickly and gives you great browning. A slow cooker works too, but it takes longer. If you use one, set it on low for about 6 hours. Both methods will yield a tasty meal. Adjusting Cooking Times Keep an eye on the potatoes. If they are cut small, they cook fast—about 15 minutes. Larger pieces may need a bit more time. Always check with a fork to make sure they are tender. Adjust the cooking time based on how you cut your potatoes. {{image_2}} Gluten-Free Options This dish is naturally gluten-free. You can enjoy it without worry. Just make sure your beef broth is gluten-free. Some broth brands add gluten. Check the label to be safe. Vegetarian Substitutes If you want a vegetarian meal, swap the ground beef for lentils or mushrooms. Cook the lentils until soft, or use finely chopped mushrooms for a meaty texture. This change keeps the dish hearty and tasty. Instant Pot Recipe You can make this meal in an Instant Pot for speed. Start by sautéing the onion and garlic using the sauté function. Then, add the ground beef and cook until browned. Next, toss in the potatoes, broth, and seasonings. Seal the lid and cook on high pressure for 10 minutes. Let the steam release naturally for best results. Oven-Baked Casserole For a cozy oven-baked version, layer the cooked mixture in a baking dish. Top it with cheese or breadcrumbs for a crunchy finish. Bake it at 375°F for 20-25 minutes. This method allows the flavors to meld together beautifully. For the full recipe, check out Beefy Potato Fusion Delight. You can store leftovers in an airtight container. Keep them in the fridge for up to three days. Make sure they cool down before sealing. This helps keep the flavors fresh. For reheating, use a skillet over low heat. Stir often to heat evenly. You can also use the microwave. Just cover the dish to keep moisture in. Heat it in short bursts, stirring in between. To freeze your dish, let it cool first. Then, place it in a freezer-safe container. Squeeze out as much air as possible to prevent freezer burn. You can freeze it for up to three months. When you're ready to eat, thaw it in the fridge overnight. You can also use the microwave for quick thawing. After thawing, reheat as mentioned before. This keeps the meal tasty and warm. How to make ground beef and potatoes taste better? To boost the flavor, add spices like paprika and thyme. Fresh herbs, like parsley, add great taste too. You can also mix in sauces like Worcestershire for depth. A splash of beef broth enhances the dish’s richness. Letting the dish simmer allows the flavors to blend well. Can I use other meats instead of ground beef? Yes, you can use turkey, chicken, or pork. Each meat gives a unique flavor. Ground turkey is leaner, while pork adds sweetness. Just remember to adjust cooking times based on the meat you choose. What to serve with ground beef and potatoes? This dish pairs well with a fresh salad or steamed veggies. You can also serve it with crusty bread for dipping. For a balanced meal, add fruit on the side. A light dessert, like fruit salad, can round off the meal nicely. Is this dish healthy? Yes, it can be a healthy option. Ground beef provides protein, while potatoes offer fiber. Adding mixed vegetables boosts vitamins and minerals in your meal. Just watch your portion sizes and seasoning for a balanced diet. For a healthier twist, use lean meats and olive oil. For a detailed recipe, check the Full Recipe. You learned how to make a great ground beef and potato dish. We covered essential ingredients and optional additions to enhance flavor. I shared step-by-step cooking instructions for perfecting your meal. Remember to choose the right potatoes and explore cooking methods. Storage tips help keep leftovers fresh, and I answered common questions. Experiment with variations to suit your diet. This dish is simple, tasty, and can fit many needs. I hope you enjoy cooking and sharing this meal with others. Happy cooking!

Ground Beef and Potatoes Hearty One-Pan Meal

Are you ready for a meal that’s easy, filling, and delicious? Ground Beef and Potatoes is the perfect one-pan dish

To make creamy Tuscan scallops, you need some simple and fresh ingredients. Here’s the list you’ll need: - 1 pound fresh scallops, patted dry - 2 tablespoons olive oil - 2 tablespoons unsalted butter - 3 cloves garlic, minced - 1 cup cherry tomatoes, halved - 2 cups baby spinach - 1 cup heavy cream - ½ cup grated Parmesan cheese - 1 teaspoon dried Italian herbs - Salt and pepper to taste - Fresh basil for garnish These ingredients come together to create a rich and tasty dish. The scallops give a sweet flavor, while the cream makes everything smooth. Cherry tomatoes add a pop of color and taste. Baby spinach brings in some freshness. The herbs and cheese round out the flavors nicely. This recipe is not just easy, but it feels special too. You can find the full recipe to guide you through the steps to make this delightful meal. To start, you need to season the scallops. Lightly sprinkle salt and pepper on both sides. This simple step enhances their natural taste. Make sure your scallops are dry. Pat them with a paper towel to remove moisture. A dry surface helps achieve a perfect sear. For the sear, use a large skillet. Heat 2 tablespoons of olive oil over medium-high heat. Wait until the oil shimmers; this shows it's hot enough. Place the scallops in the skillet, making sure they don’t touch. Sear them for 2-3 minutes until golden brown. Flip them and sear for another 2-3 minutes. Remove the scallops and set them aside. In the same skillet, melt 2 tablespoons of unsalted butter. Once melted, add 3 cloves of minced garlic. Cook it for about 1 minute until fragrant. Next, stir in 1 cup of halved cherry tomatoes and 1 teaspoon of dried Italian herbs. Cook for 2-3 minutes until the tomatoes soften and burst. Add 2 cups of baby spinach to the skillet. Stir and cook for another 1-2 minutes until it wilts. Now, pour in 1 cup of heavy cream. Bring the mixture to a gentle simmer. Stir in ½ cup of grated Parmesan cheese until it melts and blends well. Return the scallops to the skillet. Let them simmer in the sauce for 1 more minute. This warms them up and infuses them with flavor. Taste the sauce and adjust the seasoning with salt and pepper, if needed. For plating, serve the creamy Tuscan scallops over pasta or risotto. Spoon plenty of the sauce and veggies on top. For a special touch, garnish with fresh basil. This adds color and flavor to your dish. Enjoy making this creamy Tuscan scallops recipe, and check the Full Recipe for more details! To make creamy Tuscan scallops, timing is key. Cook scallops for 2-3 minutes per side. They should turn golden brown. Use medium-high heat for a nice sear. Avoid cooking them too long. Overcooked scallops turn rubbery, and no one wants that! For extra flavor, try adding fresh herbs like thyme or parsley. You can use crushed red pepper for a spicy kick. If you want a lighter dish, consider using half-and-half instead of heavy cream. This keeps the creaminess but cuts the fat. Creamy Tuscan scallops pair well with cooked pasta or creamy risotto. You can also serve them with garlic bread or a fresh salad. For garnish, sprinkle freshly chopped basil on top. It adds color and brightens the dish. Choose a large plate to showcase this beautiful meal. For the full recipe, refer to the [Full Recipe]. {{image_2}} You can switch out scallops for shrimp or fish. Both options work well in this dish. For a vegan twist, use tofu or chickpeas instead of scallops. Coconut cream can replace heavy cream for a plant-based version. Want some heat? Add red pepper flakes for spice. This will give your dish a nice kick. You can also try a Mediterranean twist. Add olives and artichokes for a fresh taste. This variation brings a new depth of flavor to the dish. Pair creamy Tuscan scallops with a crisp white wine. A Sauvignon Blanc or Pinot Grigio works best. For sides, serve a light salad or crusty bread. Garlic bread is a great choice for soaking up that creamy sauce. You can find the full recipe to explore these ideas more! To keep your creamy Tuscan scallops fresh, place them in an airtight container. This helps to maintain flavor and texture. Make sure to let the dish cool down before you seal it up. Store the container in the fridge. Your scallops will stay good for about 2-3 days. I recommend using glass containers for storing leftovers. They are durable and do not absorb odors. You can also use BPA-free plastic containers. Just ensure they are airtight to keep your scallops fresh. To reheat creamy Tuscan scallops, use a skillet on low heat. This method helps keep the scallops tender. Stir gently to avoid breaking them apart. You can also microwave them, but do it in short intervals. Check often to prevent overcooking. If you have extra creamy Tuscan scallops, consider adding them to pasta or risotto. They make a great topping for baked potatoes too. You can even mix them into a salad for added protein and flavor. What type of scallops are best for this recipe? I recommend using fresh sea scallops. They have a sweet, buttery flavor. Look for scallops that are plump and moist. Avoid any that smell fishy or are dry. Can I make creamy Tuscan scallops ahead of time? You can prepare the sauce in advance. Just cook the scallops right before serving. This keeps them tender and prevents them from becoming rubbery. Is there a substitute for heavy cream? Yes, you can use half-and-half or coconut cream. These options give a rich taste but may change the flavor slightly. How long does it take to cook scallops? Cooking scallops takes about 6 to 8 minutes. Sear them for 2-3 minutes on each side. They should be golden and firm when done. Can I freeze creamy Tuscan scallops? I do not recommend freezing them. The texture of the scallops changes when frozen. It’s best to enjoy them fresh. For more details on how to prepare this dish, check the Full Recipe. To make creamy Tuscan scallops, you need fresh ingredients and simple steps. This dish is quick and easy, perfect for a delightful dinner. Here’s what you need: - 1 pound fresh scallops, patted dry - 2 tablespoons olive oil - 2 tablespoons unsalted butter - 3 cloves garlic, minced - 1 cup cherry tomatoes, halved - 2 cups baby spinach - 1 cup heavy cream - ½ cup grated Parmesan cheese - 1 teaspoon dried Italian herbs - Salt and pepper to taste - Fresh basil for garnish You can find the full recipe with detailed steps and measurements in the complete guide. Follow the instructions for a creamy, rich meal that impresses. Enjoy cooking and tasting this dish! This blog post covered everything you need for creamy Tuscan scallops. We listed the key ingredients, shared step-by-step instructions, and provided helpful tips to perfect your dish. Remember, the right technique and flavors can elevate your meal. Don’t forget your sides and garnishes for a beautiful presentation. With options for variations and storage tips, you can adapt this dish to fit your needs. Enjoy creating this delicious recipe and impress your guests with ease!

Creamy Tuscan Scallops Delightful and Easy Dinner Dish

Are you ready to impress your family and friends with a delicious dinner? Creamy Tuscan scallops are a simple yet

- 1 ½ cups all-purpose flour - 1 cup granulated sugar - ½ cup unsalted butter, softened - 2 large eggs - ½ cup buttermilk - 2 tablespoons lemon zest (about 2 lemons) - ¼ cup fresh lemon juice (about 1-2 lemons) - Fresh berries and mint leaves (for garnish, optional) - 1 teaspoon baking powder - ½ teaspoon baking soda - ½ teaspoon salt - 1 teaspoon vanilla extract - Powdered sugar (for dusting, optional) To make Lemon Cake to Die For, you need simple, fresh ingredients. First, gather your required ingredients. All-purpose flour gives the cake structure. Granulated sugar makes it sweet. Unsalted butter adds richness. Eggs provide moisture and help it rise. Buttermilk keeps the cake soft and adds tang. Next, get fresh ingredients. Lemon zest brings bright flavor. Fresh lemon juice adds a tart kick. You can use berries and mint for a lovely garnish if you want. Finally, don’t forget the baking essentials. Baking powder and baking soda help the cake rise. Salt balances the sweetness. Vanilla extract adds warmth. Powdered sugar is great for dusting and looks nice on top. These ingredients work together to create a moist, flavorful cake. You can find the full recipe for more details. Enjoy the process and the delicious outcome! - Preheat your oven to 350°F (175°C). - Grease and flour an 8-inch round cake pan. - In a medium bowl, whisk together flour, baking powder, baking soda, and salt. - In a large mixing bowl, cream butter and sugar until light and fluffy. - Add eggs and vanilla extract one at a time. - Alternate adding the dry flour mixture and buttermilk to the wet mixture. - Gently fold in lemon zest and lemon juice. - Pour the batter into the prepared cake pan. - Bake for 25-30 minutes until a toothpick comes out clean. - Allow to cool in the pan, then transfer to a wire rack. Follow these steps closely for the best results. Each part is key to making your Lemon Cake to Die For. If you want to see all the details, check the Full Recipe. To get a fluffy cake, I recommend using room temperature ingredients. This helps the butter and sugar mix better. When you mix the batter, be careful not to overmix it. Overmixing can make the cake dense and heavy. Mix just until you see no dry flour. Using fresh lemons for zest and juice is a must. This makes the cake bright and fresh. If you want a stronger lemon taste, add a bit of lemon extract. It boosts the flavor without adding more juice. Dust the top of the cake with powdered sugar before serving. This adds a lovely touch and looks great. For an extra pop, serve the cake with fresh berries and mint leaves. They add color and freshness to your plate. {{image_2}} You can choose different frostings to match your taste. A classic lemon buttercream brings a bright and sweet flavor. It is smooth and creamy, perfect for a lemon lover. You can make it by mixing softened butter, powdered sugar, lemon juice, and zest. Another tasty choice is cream cheese frosting. This frosting adds a tangy twist that pairs well with the sweet lemon cake. To make this, blend cream cheese and butter until smooth. Add powdered sugar and lemon juice to achieve your desired taste. Fruits can make your lemon cake extra special. You can add blueberries or raspberries into the batter. This will bring a burst of flavor and a pop of color. Just fold the berries in gently to avoid breaking them. For a different look, you can top the cake with a fruit glaze or compote. A simple berry glaze can be made by cooking fresh berries with sugar and a bit of water. Pour this over the cooled cake for a fruity finish. If you want to try new flavors, I suggest a lemon and lavender combination. The floral notes of lavender mix well with the tart lemon. Just add a bit of culinary lavender to your batter for a unique twist. Another great option is a lemon poppy seed cake. This cake has a delightful crunch from the seeds. Simply add poppy seeds to the batter before baking. You can enjoy it plain or with your favorite frosting. For the full recipe, check the Lemon Cake to Die For section. To keep your Lemon Cake to Die For fresh, store it in an airtight container at room temperature. It will stay good for up to 3 days. If you want it to last longer, refrigerate it for up to 1 week. Just remember, the cake may dry out a little in the fridge, so make sure it’s sealed well. If you want to save some cake for later, you can freeze it. Just freeze the uniced cake for up to 3 months. When you're ready to enjoy it, thaw the cake in the refrigerator. This way, it stays moist and delicious, just like when you first baked it. To make this cake moist, use buttermilk and add lemon juice. Buttermilk adds rich flavor and keeps the cake soft. Lemon juice adds brightness and enhances the lemon taste. This combo makes the cake tender and delicious. Yes, you can make Lemon Cake to Die For a day in advance. Just bake, cool, and store the cake in an airtight container. It will taste just as fresh the next day. This is a great way to save time for a special event. This cake is best served with a dusting of powdered sugar and fresh fruit. The powdered sugar adds a sweet touch, while fresh berries give a burst of flavor. Mint leaves can also add a lovely pop of green. Yes, you can adjust the sweetness of the cake. Reduce or increase the sugar to your taste. Keep in mind, changing the sugar may affect the cake's texture. A sweeter cake may be more moist, while less sugar could make it drier. This blog post covered the key ingredients, steps, and tips for making a perfect lemon cake. You learned how to mix flavors and achieve great texture. Remember, using fresh ingredients makes a big difference. In the end, enjoy the process and have fun baking. Your cake will be a delicious treat for everyone!

Lemon Cake to Die For Simple and Delicious Recipe

If you crave a dessert that’s bursting with flavor, look no further. My Lemon Cake to Die For recipe is

To make savory Spanish rice, use these key ingredients: - 1 cup long-grain white rice - 2 cups vegetable broth (or chicken broth) - 1 medium onion, finely chopped - 1 red bell pepper, diced - 1 cup diced tomatoes (canned or fresh) - 2 cloves garlic, minced - 1 teaspoon smoked paprika - 1/2 teaspoon cumin - 1/2 teaspoon chili powder - 1/4 teaspoon saffron threads (optional for authenticity) - 1/2 cup frozen peas - 2 tablespoons olive oil - Salt and pepper to taste - Fresh cilantro, chopped for garnish These ingredients combine to create a rich flavor. The rice absorbs the broth and spices, making each bite delicious. You can swap some ingredients if needed. Here are a few ideas: - Use brown rice instead of white for a healthier option. Just adjust the cooking time. - Swap vegetable broth for chicken broth for a different flavor. - Any bell pepper can work; green ones are great too. - If you don’t have smoked paprika, regular paprika is fine. These changes still give you tasty Spanish rice without losing the essence. For even more flavor, consider adding these optional ingredients: - Corn for sweetness and a nice crunch. - Black olives, sliced, for a briny touch. - A splash of lime juice for brightness. - Chopped jalapeños for some heat. These additions can elevate your dish and make it more special. Feel free to mix and match based on your taste. For the full recipe, check the Sizzling Spanish Rice Fiesta section. Start by heating the olive oil in a medium pot over medium heat. Add the chopped onion and diced red bell pepper. Sauté them for about 5 minutes. You want the vegetables to soften and smell great. Next, stir in the minced garlic and cook for another minute. This will make the kitchen smell amazing! Now it’s time to add the rice. Pour in the long-grain white rice and cook for 2-3 minutes. Stir it often to toast the grains lightly. This step adds flavor and a nice texture. After that, sprinkle in the smoked paprika, cumin, and chili powder. If you want a true Spanish touch, add saffron too. Stir well, so every grain gets coated with these spices. Next, pour in the diced tomatoes and vegetable broth. Bring this mixture to a gentle boil. Once it boils, reduce the heat to low. Cover the pot and let it simmer for 20 minutes. The rice should be tender and the liquid absorbed. After the time is up, add the frozen peas. Stir gently to mix them in and cover for another 5 minutes. This warms up the peas nicely. Finally, fluff the rice with a fork. Taste it and add salt and pepper if needed. Serve it warm and top with fresh cilantro for a bright finish. For the full recipe, check out the details above. To get great texture, rinse the rice first. Rinsing removes extra starch. This helps the rice stay fluffy. Use long-grain white rice for the best results. When cooking, make sure to keep the heat low. This lets the rice cook evenly. Avoid lifting the lid while it simmers. This helps keep the steam in. To boost the flavor, try adding fresh herbs. Chopped cilantro adds a nice touch. You can also mix in lime juice for brightness. For more depth, add a bay leaf while cooking. If you like heat, add a pinch of cayenne pepper. These extras make a big difference in taste. A common mistake is using too much liquid. Stick to the recipe's broth amount for best results. Another mistake is overcooking the rice. This makes it mushy. Make sure to fluff the rice gently. Finally, don’t forget to taste before serving. Adjust salt and pepper to your liking. Following these tips will help you create the best Spanish rice. For a detailed guide, check out the Full Recipe. {{image_2}} You can easily make vegetarian Spanish rice. Start with the same base recipe. Instead of meat broth, use vegetable broth. This keeps it rich and flavorful. Add extra veggies for texture. You can toss in corn, zucchini, or black beans. These add color and taste. This dish remains filling and tasty. It works great as a side or main dish. Adding protein makes Spanish rice even heartier. You can use chicken, shrimp, or beef. Cook the protein first in the pot. Remove it before adding the veggies. Once the rice is ready, mix the protein back in. This adds a savory punch to your dish. If you use chicken, try using chicken broth for even more flavor. You will enjoy a balanced meal that fills you up. For those who love heat, spicy Spanish rice is the way to go. Start with the basic recipe. Add more chili powder or a diced jalapeño. If you like it very spicy, try adding cayenne pepper. You can also include hot sauce for an extra kick. This variation will wake up your taste buds. Pair it with grilled meats for a great meal. To store leftover Spanish rice, let it cool first. Place it in an airtight container. Make sure to seal it well to avoid air. You can keep it in the fridge for about 3 to 5 days. If you want to enjoy it later, freezing is a great option. When you reheat Spanish rice, add a splash of water or broth. This helps to keep it moist. You can use a microwave or a pan on the stove. Heat it slowly, stirring often. This way, the rice warms up evenly without drying out. To freeze Spanish rice, pack it in freezer-safe bags. Remove as much air as you can before sealing. Label the bags with the date. You can freeze it for up to 3 months. When you’re ready to eat, thaw it overnight in the fridge. Then, reheat it as mentioned above. Enjoy your delicious Spanish rice anytime! The best rice for Spanish rice is long-grain white rice. This type cooks evenly and stays fluffy. You can also use medium-grain rice if you prefer a creamier texture. Avoid short-grain rice, as it can become too sticky. Yes, you can make Spanish rice ahead of time. Just cook it, let it cool, and store it in an airtight container. Keep it in the fridge for up to four days. When you're ready to eat, simply reheat it on the stove or in the microwave. To make Spanish rice spicy, add more chili powder or a pinch of cayenne pepper. You can also mix in some jalapeños or diced green chilies during cooking. For a smoky kick, try using chipotle powder instead. Adjust the spice to suit your taste! For the full recipe, check out the Full Recipe section above. This blog post covered all you need to make Spanish rice. We looked at key ingredients, cooking steps, and useful tips to enhance your dish. I shared easy substitutions and variations to match your taste. Remember to store your leftovers properly for the best flavor. Spanish rice is versatile and rewarding. You can serve it as a side or a main dish. I hope you feel inspired to create your own yummy version! Enjoy cooking!

Savory Spanish Rice Easy Recipe for Any Meal

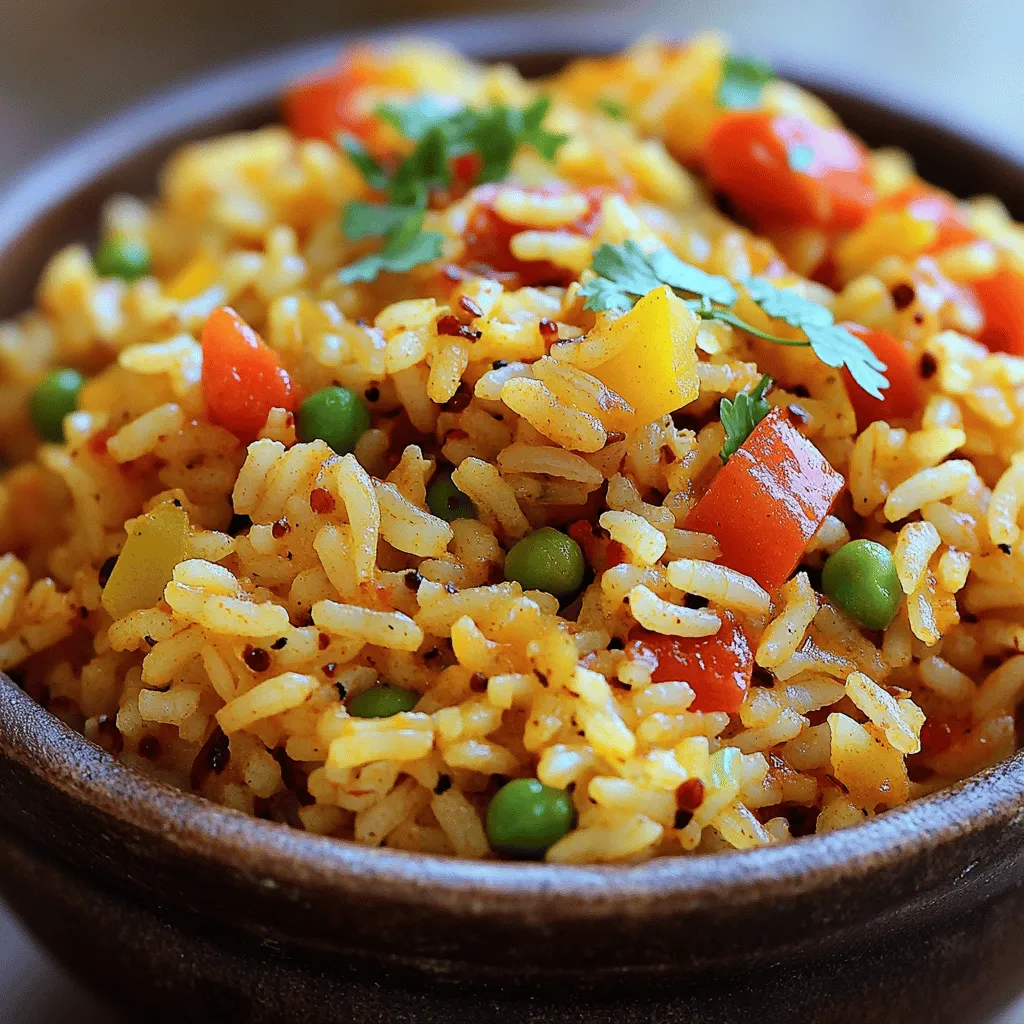
Looking to spice up your meals? This Savory Spanish Rice recipe is your answer! You can make rich, flavorful rice

- 1 cup all-purpose flour - 1/2 teaspoon baking powder - 1/4 teaspoon salt - 1/2 cup unsalted butter, softened - 3/4 cup granulated sugar - 1 large egg - 1 tablespoon pure vanilla extract - 1/4 teaspoon almond extract (optional for a unique twist) When making homemade vanilla wafers, using the right ingredients is key. Each item plays a role in the flavor and texture of the cookies. You can swap all-purpose flour for gluten-free flour if needed. This keeps the recipe friendly for those avoiding gluten. Use coconut oil or applesauce to replace butter and eggs for a vegan version. These options work well and maintain great taste. Choose a high-quality pure vanilla extract. This makes a big difference in flavor. Look for brands that do not use artificial ingredients. Room temperature butter is important for creaming. It blends better with sugar, creating a light and fluffy mix. With these ingredients and tips, you can make delicious vanilla wafers. Follow the Full Recipe to see how easy it is! 1. Preheating and preparing the baking sheets Start by preheating your oven to 350°F (175°C). This step is key for even baking. While the oven warms up, line two baking sheets with parchment paper. This will prevent the wafers from sticking and make cleanup easy later. 2. Mixing dry ingredients In a medium bowl, whisk together the flour, baking powder, and salt. Make sure to mix well so all the dry ingredients blend evenly. Set this bowl aside for now. 1. Creaming butter and sugar In a large mixing bowl, cream the softened butter and granulated sugar. Use an electric mixer for about 3-4 minutes. You want the mixture to be light and fluffy. This step adds air and helps your wafers rise. 2. Adding wet ingredients and combining Next, add one large egg, the pure vanilla extract, and almond extract if you choose to use it. Beat everything together until it is fully mixed. This creates a smooth batter that will hold your dry ingredients. 1. Portioning the dough Using a small scoop or a spoon, drop rounded tablespoons of dough onto your prepared baking sheets. Keep them about 2 inches apart. This spacing allows the wafers to spread as they bake. 2. Baking time and signs of done-ness Bake your wafers in the preheated oven for 10-12 minutes. Watch for the edges to turn lightly golden. This is a good sign that your wafers are ready. Once baked, let them cool on the sheets for about 5 minutes before moving them to a wire rack for full cooling. Wafer spread and uneven baking If your wafers spread too much, try chilling the dough for 30 minutes. This helps firm it up. Make sure to space the dough balls at least 2 inches apart on the baking sheet. Uneven baking can happen if your oven temperature is off. Use an oven thermometer to check the heat. Rotating the baking sheets halfway can also help. Overmixing and its effects on texture Mixing too much can make your wafers tough. Once you add the dry ingredients, mix just until combined. You want to see some lumps. This keeps the wafers light and crispy. Adding spices or citrus zest For a fun twist, add a pinch of cinnamon or nutmeg to the batter. Lemon or orange zest can brighten the flavor. Just a teaspoon makes a big difference. Adjusting baking time for different crispiness If you like your wafers crispier, bake them a minute longer. Watch them closely to avoid burning. For softer wafers, take them out when they are just lightly golden. Best ways to serve homemade vanilla wafers Stack your wafers in a clear jar for a fun look. You can also arrange them on a colorful plate. Dust with powdered sugar for a sweet touch. Serve with whipped cream or fresh fruit for dipping. Storing and keeping wafers fresh To keep your wafers fresh, store them in an airtight container. They will stay crunchy for about a week. You can also freeze them for longer storage. Just make sure they are cool before you freeze them. {{image_2}} You can get creative with your vanilla wafers. One fun idea is to make chocolate-dipped vanilla wafers. Simply melt some dark or milk chocolate. Dip half of each cooled wafer into the chocolate. Set them on parchment paper to harden. It's a sweet twist that adds a rich flavor. Another option is to infuse your vanilla wafers with citrus. You can use lemon or orange zest in the dough. This adds a fresh and tangy taste. The bright notes really complement the vanilla. Homemade vanilla wafers can do more than stand alone. You can also make a tasty vanilla wafer crust for desserts. Crush the wafers and mix them with melted butter. Press this mixture into a pie pan. Add your favorite filling, and you have a delicious dessert base. You can also use vanilla wafers in other recipes. Try layering them in a trifle with pudding and fruit. You can crumble them over ice cream or yogurt for an added crunch. The possibilities are endless! If you need to avoid sugar, there are ways to make sugar-free vanilla wafers. Use sugar alternatives like erythritol or stevia. These can give you the sweetness without the sugar. For low-carb versions, you can swap all-purpose flour with almond flour. This keeps the texture nice and light. If you have allergies, you can customize the recipe, too. Use nut-free butter if you're allergic to nuts. You can replace the egg with a flaxseed egg for a dairy-free option. Just mix one tablespoon of ground flaxseed with three tablespoons of water. Let it sit for a few minutes to thicken. With these variations, you can enjoy homemade vanilla wafers in many ways! Check out the Full Recipe for all the details. To keep your homemade vanilla wafers fresh, store them in an air-tight container. This helps block out air and moisture. You can use a glass jar or a plastic container with a tight seal. If you want to extend freshness, place a small piece of bread in the container. The bread will absorb moisture and keep the wafers crisp. Freezing is a great option if you want to save some wafers for later. Let the baked wafers cool completely before freezing. Place them in a single layer on a baking sheet. Once frozen, transfer them to an air-tight freezer bag. When you’re ready to enjoy them, thaw the wafers at room temperature. For the best taste, eat them within three months. Homemade vanilla wafers last about one week at room temperature. Store them in a cool, dry place. Check for signs of spoilage, like a stale smell or a change in texture. If they feel soft or chewy, they are past their prime. Always trust your senses; if they look or smell off, it’s best to toss them. Can I use different extracts for flavoring? Yes, you can! Feel free to swap vanilla with other extracts. Almond, lemon, or coconut extracts can add unique flavors. Just use the same amount as the recipe calls for. What can I do with leftover wafers? You can get creative! Use leftover wafers for ice cream sandwiches or crumble them for a dessert topping. They also make great snacks on their own. Store them in an airtight container for freshness. Why are my wafers soft instead of crunchy? If your wafers come out soft, you may have underbaked them. Make sure to bake until the edges are golden. Overmixing can also lead to softer wafers, so mix just until combined. Can I double the recipe easily? Yes, doubling the recipe is simple! Just multiply each ingredient by two. Make sure to have enough space on your baking sheets. You may need to adjust the baking time slightly. What’s the role of baking powder in the recipe? Baking powder helps the wafers rise slightly. It creates a light texture. Too much can make them puffy, so stick to the recipe amount for best results. Why is almond extract recommended? Almond extract adds a nice depth of flavor. It's optional, but it can enhance the vanilla taste. It gives your wafers a unique twist that many people enjoy. You now have all you need to make perfect homemade vanilla wafers. We covered the ingredients, how to mix and bake them, and tips for success. You also learned about fun variations and the best ways to store your wafers. Remember, using quality ingredients makes a big difference. With these steps, you’ll create delicious wafers to enjoy whenever you like. Happy baking!

Homemade Vanilla Wafers Simple and Tasty Recipe

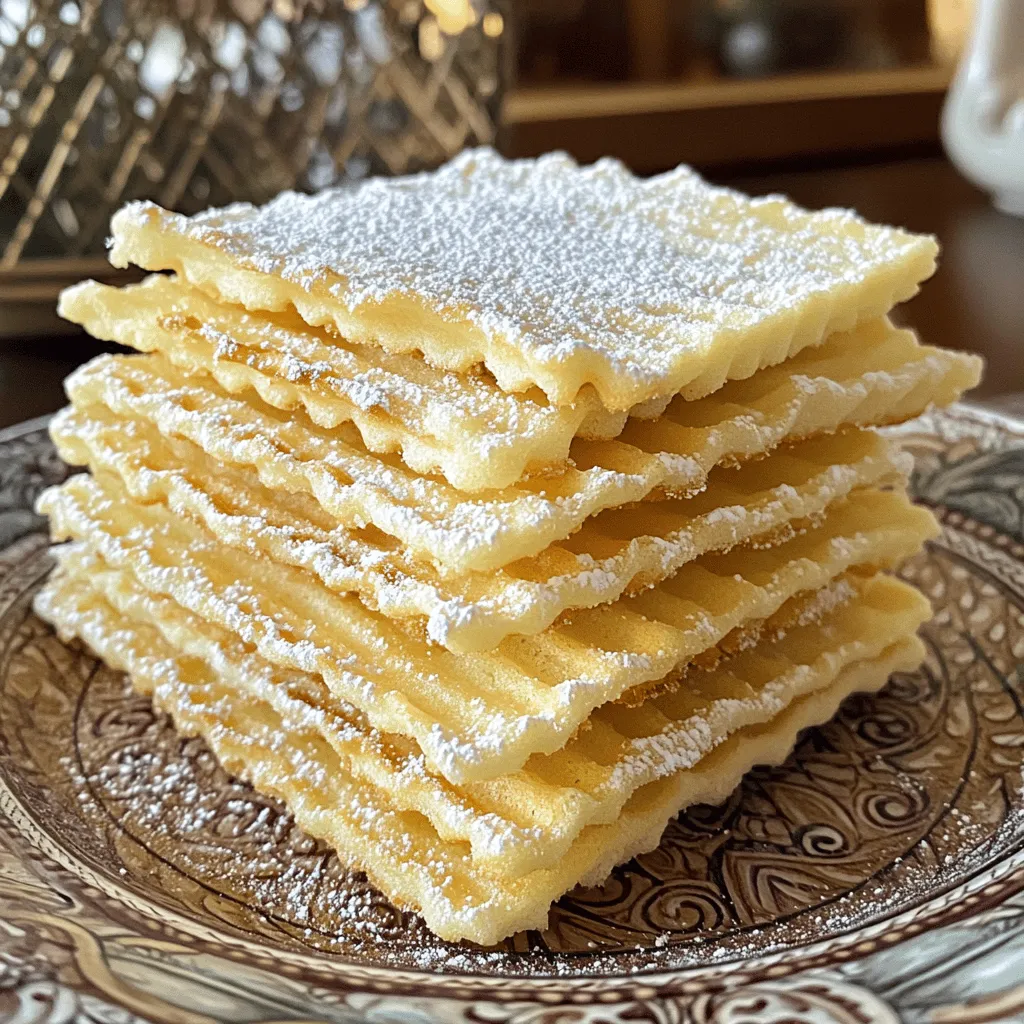
Homemade vanilla wafers are a simple treat that brings joy to any snack time. With just a few basic ingredients,

To make a rich and flavorful creamy rigatoni, gather these essential ingredients: - Rigatoni Pasta Quantity and Type - 12 ounces rigatoni pasta - Essential Cooking Oils and Fats - 2 tablespoons olive oil - Key Vegetables and Aromatics - 1 small onion, finely chopped - 3 cloves garlic, minced - Dairy Products for Creaminess - 1 cup heavy cream - 1 cup grated Parmesan cheese - Seasonings and Spices - 1 teaspoon garlic powder - 1 teaspoon Italian seasoning - Salt and black pepper, to taste - Optional Ingredients for Extra Flavor - 1/2 teaspoon crushed red pepper flakes (for heat) - Fresh basil leaves for garnish These ingredients come together to create a dish full of flavor and comfort. The rigatoni holds the creamy sauce well, making each bite satisfying. You can find the full recipe to guide you through each step. To start, fill a large pot with water. Make sure to add a good amount of salt. This salt helps to flavor the pasta. Bring the water to a boil. Once it boils, add the rigatoni. Cook according to the package instructions until al dente. This usually takes about 10 to 12 minutes. Remember to stir the pasta so it does not stick together. After cooking, save one cup of that pasta water. This water has starch that helps thicken the sauce later. Drain the pasta and set it aside. Now, let’s sauté the onions and garlic. Heat two tablespoons of olive oil in a large skillet over medium heat. Add the finely chopped onion first. Stir it for about 4 to 5 minutes until it turns soft and slightly clear. This step is key to building a good flavor base. Next, add the minced garlic. Cook it for about one minute. Watch it closely so it doesn’t burn. You want that nice garlic smell to fill your kitchen. Once the onion and garlic are ready, it’s time for the cream sauce. Lower the heat to low and pour in one cup of heavy cream. Stir in the grated Parmesan cheese, garlic powder, Italian seasoning, salt, and black pepper. Whisk it all together until smooth and creamy. If the sauce feels too thick, add some of the reserved pasta water. Just a bit at a time, until it reaches the right consistency. You want it creamy but not too runny. Now, add the cooked rigatoni and chopped spinach to the skillet. Toss everything gently to combine. This helps the pasta soak up the sauce. Cook for another 2 to 3 minutes until the spinach wilts and everything is heated through. Taste the dish and adjust the seasoning as needed. This step is crucial for a balanced flavor. For plating, I like to serve the creamy rigatoni in shallow bowls. Drizzle with extra olive oil for a glossy finish. Add a sprinkle of extra Parmesan on top. Fresh basil leaves make a lovely garnish. Pair this dish with garlic bread and a simple green salad for a complete meal. You can feel proud serving this rich and flavorful pasta dish to friends and family. For more details, check out the Full Recipe. To cook rigatoni perfectly, follow these tips: - Use plenty of water. This helps the pasta cook evenly. - Salt the water. Add a good amount of salt to enhance flavor. - Don't overcrowd the pot. This can lead to sticky pasta. - Taste for doneness. Check if it is firm but not hard. To keep rigatoni al dente, follow these steps: - Follow package time. Cook the pasta as directed on the package. - Reserve pasta water. Save some water before draining to help the sauce later. - Drain quickly. Don’t let it sit in the water too long. You can make your cream sauce even better with these add-ins: - Proteins: Consider cooked chicken, shrimp, or bacon for heartiness. - Vegetables: Add spinach, peas, or mushrooms for color and nutrition. Balancing flavors is key. Here’s how: - Season well. Taste for salt and pepper before serving. - Add herbs. Fresh basil or parsley can brighten the dish. A beautiful presentation can make your dish stand out. Here are ideas: - Use shallow bowls. This highlights the creamy sauce and pasta. - Garnish with herbs. Fresh basil adds color and freshness. - Drizzle with olive oil. A bit of extra oil gives a nice sheen. Choosing the right dinnerware also matters. Use: - White plates. They allow the food to shine. - Warm dishes. Hot plates keep the creamy rigatoni warm longer. For the full recipe, refer to the earlier section. Enjoy your cooking! {{image_2}} You can make creamy rigatoni a veggie delight. Use protein alternatives like tofu or chickpeas. They add texture and nutrition. Seasonal vegetables also work great. Try zucchini or bell peppers. Just chop them up and sauté with the onions. This adds color and flavor to your dish. For meat lovers, adding chicken or shrimp is simple. Cook the meat in the skillet before adding the cream sauce. This infuses the sauce with rich flavors. To enhance your meat dish, season it well. Garlic powder and Italian seasoning work perfectly. They help the meat shine in the creamy sauce. If you like heat, adjust the spice level easily. Add crushed red pepper flakes for a kick. Start small and add more if you can handle it. You can also use spicy sauces. Try sriracha or chili oil. These add extra flavor and heat to your creamy rigatoni. To keep your creamy rigatoni fresh, place it in an airtight container. Cool the pasta before sealing it. This step helps prevent moisture buildup. Store it in your fridge for up to three days. The sooner you eat it, the better it tastes. Use glass or plastic containers with tight lids. These materials help maintain flavor and texture. If you plan to eat it later, portion the pasta for easy access. Label the containers with the date to track freshness. To enjoy your creamy rigatoni again, gentle reheating is best. Reheat it on low heat in a skillet. Add a splash of water or cream to keep it creamy. Stir it often to prevent sticking. This method helps maintain the pasta's texture and flavor. If using a microwave, place the pasta in a bowl. Cover it loosely with a microwave-safe lid. Heat in short bursts, stirring in between. This prevents hot spots and uneven heating. The stovetop method usually yields better results, but the microwave is quicker. You can freeze creamy rigatoni if you have extra. Let the pasta cool completely before freezing. Portion it into freezer-safe bags or containers. Remove as much air as possible to prevent freezer burn. Label the bags with the date so you know when you froze it. To thaw, place the pasta in the fridge overnight. If you're short on time, you can use the microwave. Once thawed, reheat it on low heat as mentioned earlier. Enjoy your creamy rigatoni with little loss of flavor! Yes, you can use different types of pasta for creamy rigatoni. Some great choices include penne, fusilli, or farfalle. Each type has its own shape and texture, which can change the dish. Keep in mind that cooking times will vary. For example, penne may take about 11-13 minutes, while fusilli usually cooks in 8-10 minutes. Always check the package instructions for the best results. If you want to skip heavy cream, there are good substitutes. You can use half-and-half, which will make your sauce creamy but lighter. Coconut milk is a great non-dairy option that adds a hint of sweetness. Cashew cream is another choice; blend soaked cashews with water until smooth. Each option changes the flavor, so pick one that fits your taste. To make creamy rigatoni dairy-free, swap heavy cream with coconut milk or cashew cream. Use nutritional yeast instead of Parmesan cheese for a cheesy flavor. You can also add more veggies, like mushrooms or bell peppers, for extra taste. Choose dairy-free butter or olive oil for sautéing. Herbs can boost the flavor of your creamy rigatoni. Fresh basil, parsley, and oregano are great choices. For a bolder taste, try thyme or rosemary. Mix these herbs in during cooking to let their flavors blend in. Fresh herbs also add a nice pop of color to your dish. Creamy rigatoni lasts about 3-5 days in the fridge. Store it in an airtight container to keep it fresh. Check for any signs of spoilage, like an off smell or mold. If it looks or smells bad, it’s best to throw it away. Yes, you can prepare creamy rigatoni in advance. Cook the pasta and sauce separately, then mix them just before serving. This helps keep the pasta from getting too soft. You can store the components in the fridge for up to 3 days. When ready to eat, reheat them together on the stove. For the best flavor, add a splash of pasta water to loosen the sauce. For the full recipe, check out the original guide. This article covered all you need to know to make creamy rigatoni. We explored the key ingredients, cooking techniques, and tips for perfect flavor. You now have the steps to create delightful variations and know how to store leftovers. Remember, the right presentation can elevate your dish. Enjoy experimenting with flavors and textures. With practice, you’ll master this dish and impress your family and friends. Happy cooking!

Creamy Rigatoni Rich and Flavorful Pasta Dish

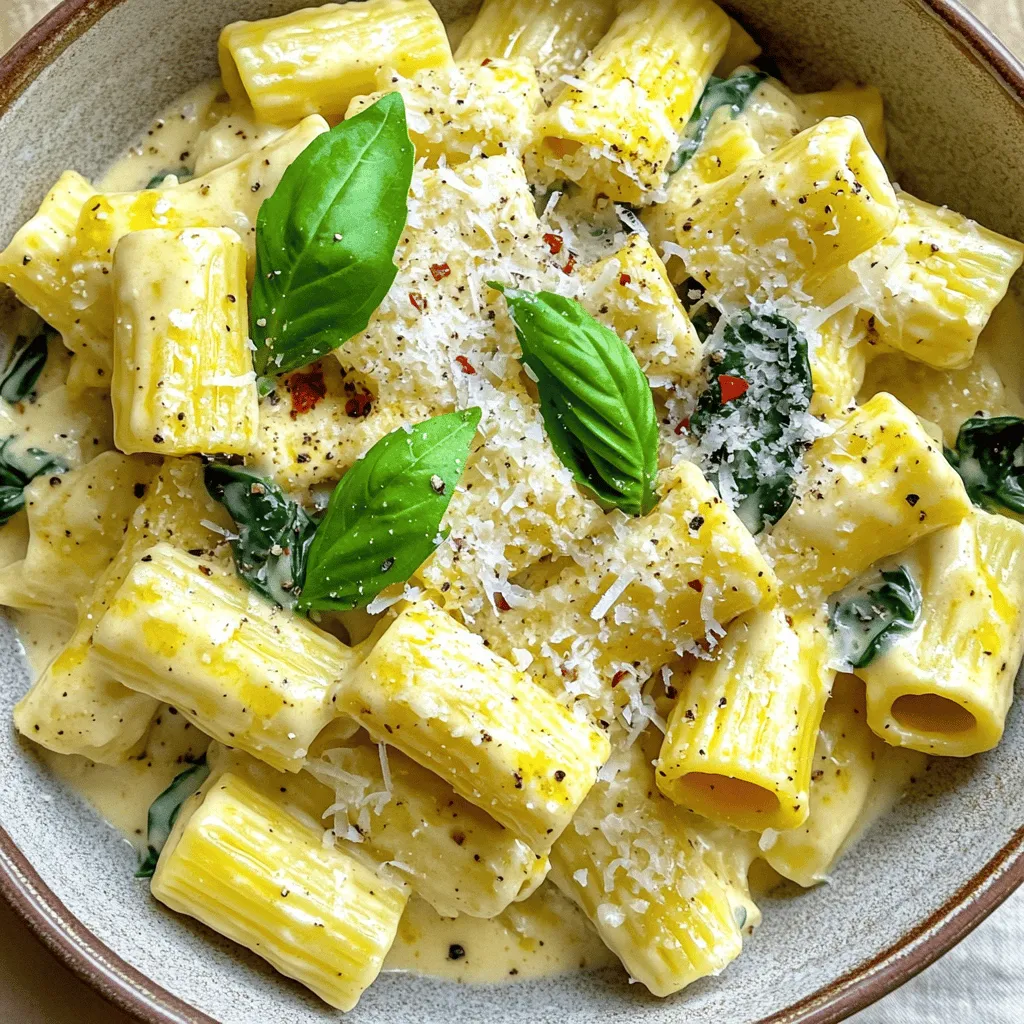
Are you ready to indulge in a rich and flavorful pasta dish? This creamy rigatoni will elevate your dinner experience.

For easy chicken enchiladas, gather these key items: - 2 cups cooked chicken, shredded - 1 cup black beans, drained and rinsed - 1 cup corn kernels (fresh or frozen) - 1 cup shredded cheddar cheese - 1 cup enchilada sauce (store-bought or homemade) - 8 small flour tortillas - 1/2 teaspoon cumin - 1/2 teaspoon garlic powder - Salt and pepper to taste These ingredients work together well. The shredded chicken adds protein. The black beans and corn bring fiber and sweetness. The cheese adds creaminess, while the enchilada sauce gives a tasty kick. You can dress up your enchiladas with these tasty toppings: - Fresh cilantro, chopped - Sour cream - Avocado slices - Sliced jalapeños - Chopped green onions These toppings can enhance flavor and add color to your dish. Cilantro gives freshness. Sour cream balances heat, and avocado adds creaminess. To round out your dinner, try these sides: - Guacamole - Simple green salad - Mexican rice - Refried beans These sides can make your meal more filling and varied. Guacamole adds creaminess, while a green salad brings crunch. Mexican rice or refried beans can provide extra flavor and texture. Enjoy your easy chicken enchiladas with these tasty options for a well-rounded meal! For the full recipe, check out the complete guide. To start, gather your ingredients. You need cooked chicken, black beans, corn, and spices. In a bowl, mix the shredded chicken, black beans, corn, half the cheese, cumin, garlic powder, salt, and pepper. Use a fork to combine everything well. This step is key for flavor. Make sure every bite has a taste of each ingredient. Now, we need to assemble the enchiladas. First, preheat your oven to 350°F (175°C). Spread some enchilada sauce on the bottom of a baking dish. This prevents sticking and adds flavor. Take a tortilla and spoon about 1/3 cup of the chicken mix into the center. Roll it tight and place it seam-side down in the dish. Repeat for all tortillas. Once they are in the dish, pour the rest of the sauce on top and sprinkle the remaining cheese. Cover the dish with foil and bake for 20 minutes. After that, remove the foil and bake for another 10 minutes. You want the cheese to be bubbly and lightly golden. This adds a nice texture. Once done, let them sit for a few minutes. Garnish with fresh cilantro before serving. Enjoy your easy chicken enchiladas hot! You can find the full recipe in the earlier section. To boost flavor in your enchiladas, try these simple ideas: - Use fresh spices: Fresh spices have more flavor than old ones. - Add lime juice: A squeeze of lime brightens the taste. - Mix in herbs: Fresh cilantro or parsley adds a nice touch. - Experiment with sauces: Try different enchilada sauces for a new twist. These small changes can make your dish stand out. You will notice the difference right away. Avoid these common pitfalls for great enchiladas: - Overfilling the tortillas: Too much filling can cause breakage. - Not sealing properly: Make sure you roll them tightly to keep the filling inside. - Skipping the sauce: Always add sauce at the bottom and on top to keep them moist. - Baking too long: Overbaking can dry out the enchiladas. Being mindful of these points helps you create a better meal. Having the right tools can simplify your cooking: - Mixing bowl: A large bowl helps combine ingredients without spilling. - 9x13 inch baking dish: This size fits all your enchiladas perfectly. - Tongs: Use tongs to flip tortillas easily without tearing them. - Measuring cups: Accurate measurements ensure balanced flavors. These tools can save you time and effort in the kitchen. You will enjoy cooking even more! {{image_2}} You can easily swap chicken for veggies. Try using black beans, mushrooms, or zucchini. These options give you a hearty filling. You can also add peppers for crunch. Using cheese or tofu can add protein. This way, you create a tasty vegetarian dish everyone will love. While enchilada sauce is classic, you can mix it up. Green sauce, or salsa verde, offers a fresh taste. You might also enjoy a creamy sauce made with sour cream and green chiles. For a twist, try a chipotle sauce for a smoky flavor. These variations keep your meal exciting and new. Keep spice levels in check by adjusting the ingredients. If you like heat, add diced jalapeños or a few pinches of cayenne. For a milder dish, skip the spicy elements. You can also use mild salsa. Just remember, the spice should enhance the flavor, not overwhelm it. To keep your leftover enchiladas fresh, let them cool first. Place them in an airtight container. Make sure to cover them tightly. This helps prevent drying out. Store them in the fridge for up to three days. If you have a lot, separate them into smaller portions. This way, you can enjoy them later without wasting food. When you're ready to eat your leftovers, use the oven for the best taste. Preheat your oven to 350°F (175°C). Place the enchiladas in a baking dish. Add a splash of enchilada sauce to keep them moist. Cover with foil to avoid drying out. Bake for about 20 minutes or until heated through. This method keeps the cheese gooey and delicious. To freeze enchiladas, wrap them tightly in plastic wrap or foil. You can also use a freezer-safe container. They can last for up to three months in the freezer. When ready to eat, thaw them in the fridge overnight. Reheat them in the oven as mentioned above. This makes for a quick and yummy meal on busy days. You can find the Full Recipe for more details on making these enchiladas. Yes, you can make Easy Chicken Enchiladas ahead of time. Assemble them and store them in the fridge. Cover the baking dish with plastic wrap or foil. They will stay fresh for up to 24 hours. When ready to bake, simply remove the cover and bake as directed. This saves time for a busy night. You can use many substitutes for chicken in this recipe. For a vegetarian option, try black beans or lentils. Shredded beef or pork also works well. If you want a lighter option, use shredded turkey. Each alternative brings its own flavor, so choose what you like best. To make enchiladas gluten-free, swap the flour tortillas for corn tortillas. Corn tortillas are naturally gluten-free. Check the enchilada sauce too; some brands add gluten. Look for labels that say gluten-free or make your own sauce. This way, you can enjoy your enchiladas without worry. Easy Chicken Enchiladas are a delight to make and enjoy. We covered simple ingredients, helpful steps, and tasty variations. You learned how to prepare, assemble, and bake them to perfection. Adding flavor, avoiding common mistakes, and knowing storage tips will help you succeed. With right substitutions, anyone can enjoy this dish. Keep these tricks in mind for the best enchiladas ever. Try it out, and enjoy your meal!

Easy Chicken Enchiladas Quick and Flavorful Dinner

Are you ready to impress your family with a quick and tasty meal? In this post, I’ll show you how

This creamy truffle baked macaroni and cheese is a comfort dish. It combines rich flavors with a crispy top. You can make it easily at home. This recipe serves six and takes about 50 minutes to prepare. To make this dish, you need these key ingredients: - 2 cups elbow macaroni - 4 cups sharp cheddar cheese, shredded - 1 cup Gruyère cheese, shredded - 1 cup milk - 1 cup heavy cream - 1/4 cup unsalted butter - 1/4 cup all-purpose flour - 2 teaspoons truffle oil - 1 teaspoon garlic powder - 1 teaspoon onion powder - Salt and pepper to taste - 1 cup panko breadcrumbs - 2 tablespoons fresh parsley, chopped (for garnish) These ingredients create a rich and creamy cheese sauce. The blend of cheddar and Gruyère gives deep flavor. The truffle oil adds a gourmet touch. You can customize your baked macaroni and cheese with these extras: - Cooked bacon for a savory twist - Smoked paprika for a hint of spice - Sautéed mushrooms for earthiness - Different cheeses like mozzarella or fontina These additions can enhance the taste and make the dish your own. Feel free to experiment! Start by boiling water in a large pot. Add a pinch of salt to the water. Once boiling, add 2 cups of elbow macaroni. Cook it until it is al dente, which usually takes about 7-8 minutes. Drain the macaroni and set it aside. This step makes sure your pasta has a nice bite. Now, grab a large pot and melt 1/4 cup of unsalted butter over medium heat. Once it melts, add 1/4 cup of all-purpose flour. Whisk them together for about 2 minutes. This mix is called a roux. Slowly pour in 1 cup of milk and 1 cup of heavy cream, whisking as you go. Keep whisking until it thickens, about 4-5 minutes. Next, stir in 1 teaspoon of garlic powder, 1 teaspoon of onion powder, salt, and pepper. Then, gradually add 4 cups of sharp cheddar cheese and 1 cup of Gruyère cheese. Stir until the cheese melts and the sauce is creamy. Finally, drizzle in 2 teaspoons of truffle oil for extra flavor. Take the cooked macaroni and mix it with the cheese sauce. Make sure every piece of pasta gets coated well. Grease a 9x13 inch baking dish and pour the mac and cheese inside. In a small bowl, mix 1 cup of panko breadcrumbs with a tablespoon of melted butter. Sprinkle this mixture evenly on top of your mac and cheese. Bake in the oven at 350°F (175°C) for 25-30 minutes. Look for a golden and crispy top. After baking, let it cool a bit. Garnish with 2 tablespoons of chopped fresh parsley. Enjoy your creamy and comforting dish! For more details, check the Full Recipe. To get the creamiest mac and cheese, use a mix of cheeses. Sharp cheddar gives a bold taste, while Gruyère adds depth. The heavy cream makes the dish rich. Always cook your macaroni just until al dente. This way, it holds up during baking. Stir your cheese sauce well to mix in all that creamy goodness. For a crunchy top, use panko breadcrumbs. They crisp up better than regular breadcrumbs. Mix them with melted butter for extra flavor. Spread the mixture evenly over your mac and cheese before baking. Bake it until the top turns golden brown. This adds a nice contrast to the creamy filling. Choosing the right cheeses is key. Sharp cheddar gives a strong flavor. Gruyère adds a nutty taste. You can also try mozzarella for stretchiness. Mixing cheeses creates a layered flavor profile. Don’t be afraid to experiment with your favorites. Each choice can change the dish in a fun way. For more cooking details, check out the Full Recipe. {{image_2}} Bacon adds a nice crunch and flavor to baked macaroni and cheese. You can cook 4-6 strips of bacon until crispy. Then, chop them into small pieces. Mix the bacon into the cheese sauce or sprinkle it on top before baking. The salty, smoky taste pairs well with the creamy cheese. You don’t have to stick to just cheddar and Gruyère. For a fun twist, try using mozzarella for a gooey texture. You can also add fontina for a rich flavor. Experimenting with cheese lets you create your perfect blend. Just keep the total amount of cheese the same. To make this dish vegetarian, simply skip the bacon. You can add veggies instead! Try mixing in steamed broccoli or sautéed mushrooms. These add color and taste without losing the creamy goodness. You can also use plant-based cheese if you want a dairy-free option. After you enjoy your baked macaroni and cheese, let it cool. Store leftovers in an airtight container. This keeps the dish fresh and tasty. You can keep it in the fridge for up to 3 days. Make sure to cover it well to avoid drying out. When you're ready to eat leftovers, I recommend reheating in the oven. Preheat your oven to 350°F (175°C). Place the macaroni in a baking dish. Add a splash of milk on top to help keep it moist. Cover with foil and heat for about 20 minutes. This method makes it creamy again and warms it through. You can also use the microwave, but it may not keep the texture as nice. If you want to save some for later, you can freeze it! First, let it cool completely. Then, portion it into freezer-safe containers. Make sure to label them with the date. It can stay good for up to 2 months. When you’re ready to eat, let it thaw in the fridge overnight. Then, reheat it using the oven for the best taste. Enjoy your creamy truffle baked macaroni and cheese anytime you want! Yes, you can make baked macaroni and cheese ahead of time. Prepare the dish up to the baking step. Cover it and store it in the fridge for up to 24 hours. When you are ready to bake, just pop it in the oven. You may need to add a few extra minutes to the cooking time. This makes it easy to serve on busy days or special occasions. If you don't have truffle oil, you can use olive oil or garlic-infused oil instead. These oils add flavor, though they won’t have the same earthy taste as truffle oil. You can also skip the oil if you prefer. Your baked macaroni and cheese will still be creamy and delicious. To make baked macaroni and cheese gluten-free, you need to swap out the flour and pasta. Use gluten-free pasta and a gluten-free flour blend for the roux. Check labels to ensure all ingredients are gluten-free. This way, you can enjoy this creamy dish without worry. This blog post covered everything you need for great baked macaroni and cheese. We explored essential ingredients, step-by-step cooking instructions, and tips for the perfect dish. I shared fun flavor variations and how to store leftovers. In the end, you can create a tasty meal easily with a few choices. Whether you pick extra cheese or a savory twist, enjoy making your own version. This recipe brings comfort and creativity to your kitchen!

Baked Macaroni and Cheese Creamy and Comforting Dish

There’s nothing quite like a bowl of baked macaroni and cheese to warm your heart. This creamy and comforting dish

- 1 pound flank steak - 2 cups broccoli florets - 1/4 cup low sodium soy sauce - 2 tablespoons oyster sauce - 2 tablespoons cornstarch - 2 tablespoons sesame oil - 1 tablespoon brown sugar - 3 cloves garlic, minced - 1 teaspoon grated ginger - 1/4 cup beef broth - 2 tablespoons chopped green onions (for garnish) - Cooked rice (for serving) The key to this dish is the flank steak. It is tender and rich in flavor. The broccoli adds a nice crunch and color. The sauce brings everything together with a savory taste. - Instant Pot - Sauté spoon - Mixing bowl You need an Instant Pot for quick cooking. A sauté spoon helps mix ingredients well. A mixing bowl is great for marinating the beef. - Cooked rice - Optional garnishes Serve this dish over warm cooked rice. It soaks up the sauce well. You can add chopped green onions on top for a fresh touch. Enjoy your meal with family or friends! If you want the full recipe, check out the complete guide for step-by-step instructions. To start, I mix soy sauce, oyster sauce, sesame oil, brown sugar, garlic, ginger, and beef broth in a bowl. This mix forms a savory base for the beef. Once well combined, I add the thinly sliced flank steak to the bowl. It’s important to coat each piece so it absorbs the flavors. I let it marinate for 10-15 minutes. This short time helps the beef get tender and tasty while I prep the broccoli. Next, I set my Instant Pot to Sauté mode and add a tablespoon of sesame oil. When the oil is hot, I place the marinated beef in a single layer. Browning the beef is key. It seals in juices and adds a nice flavor. I sauté the beef for 2-3 minutes until it turns brown. After browning, I sprinkle cornstarch over the beef and stir. This step helps thicken the sauce later, making it rich and delicious. Now comes the fun part! I add the remaining marinade to the beef and stir everything together. Then, I layer the broccoli florets on top of the beef without stirring. This helps the broccoli steam perfectly. I close the lid, set the valve to Sealing, and select Manual or Pressure Cook mode. I set the cooking time for 10 minutes. Once the cooking is done, I let it naturally release pressure for 5 minutes. Afterward, I do a quick release for any extra steam. If the sauce needs thickening, I turn on Sauté mode again. I simmer it until I reach the right consistency. Finally, I serve the dish hot over rice, garnished with green onions. For the full recipe, check out the details! To enhance your Instant Pot Beef and Broccoli, consider adjusting the soy sauce. If you like it salty, keep the amount the same. For a milder taste, reduce the soy sauce by one tablespoon. You can also try adding a splash of rice vinegar for a tangy twist. If you want an alternative marinade, mix equal parts of teriyaki sauce and soy sauce. This gives a sweet and savory flavor. You could use hoisin sauce for a richer taste too. To ensure your beef is tender, choose flank steak and slice it thinly against the grain. This helps break down the muscle fibers. When you sauté the beef, do not overcrowd the pot. This allows each piece to brown well. For cooking broccoli, add it on top of the beef. This keeps it from becoming mushy. The steam from the beef cooks the broccoli perfectly. Make sure to check that the broccoli is bright green and tender but still crisp. Pair your beef and broccoli with cooked rice or noodles for a complete meal. Jasmine rice or egg noodles work well. Add some sesame seeds on top for a nice crunch and extra flavor. To present your dish, use a white plate to show off the colors. Arrange the beef and broccoli neatly, and sprinkle chopped green onions on top. This makes your meal look as good as it tastes. For the full recipe, check out the details above. {{image_2}} You can switch out beef for other proteins. Chicken works great for a lighter meal. Tofu is perfect for a vegetarian option. If you use chicken, cut it into bite-sized pieces. Cook it for about 5 minutes less than beef. Tofu needs less time too; sauté it until golden. This gives it a nice texture. To make a plant-based version, use firm tofu or tempeh. Both soak up flavor well. You can also use mushrooms for a hearty texture. Replace beef broth with vegetable broth to keep it vegan. Add some extra veggies like bell peppers or carrots for color and taste. Add different spices to change the flavor. Consider adding red pepper flakes for heat. You can also use hoisin sauce for a sweet twist. Try a splash of sesame oil for a nutty flavor. Explore regional styles by adding ingredients like sriracha for a Thai flair or soy sauce for a classic touch. Each variation makes the dish your own, so have fun with it! To keep your beef and broccoli fresh, store it in an airtight container. Place it in the fridge right away. Your dish will stay good for about 3 to 4 days. If you want it to last longer, freezing is a great option. To freeze, let the dish cool first. Then, portion it into freezer-safe bags or containers. Remove any air to prevent freezer burn. When you are ready to eat, thaw it overnight in the fridge. Reheat it gently on the stove or in the microwave. This helps keep the beef tender and the broccoli bright. The best way to reheat is on the stove. Use low heat and add a splash of water or broth. This keeps the dish moist and flavorful. If you use a microwave, heat in short bursts. Stir it often to ensure even heating. Enjoy your meal just like when it was fresh! To thicken your sauce, you can use cornstarch. After cooking, turn on the Sauté mode. Let the sauce simmer for a few minutes. Stir in a mix of cornstarch and water. This will help create a nice, thick sauce. Yes, you can use frozen broccoli. Just add it to the pot during the last few minutes of cooking. Frozen broccoli cooks faster than fresh. So, adjust the cook time to about 8 minutes. This way, your broccoli stays bright and tender. To avoid tough beef, choose flank steak and slice it thin against the grain. Marinate it for at least 10 minutes. This helps break down tough fibers. Also, don’t overcook it! Stick to the set cook time for the best results. Absolutely, you can double the recipe. Just ensure your Instant Pot can hold all the ingredients. You might need to adjust the cooking time slightly. Check the beef for tenderness after the normal time. If needed, add a few more minutes. This post guides you through making a tasty beef and broccoli dish using an Instant Pot. We covered key ingredients, tools needed, and step-by-step instructions. I also shared tips for perfecting flavors and options for variations, including vegan choices. Remember to store leftovers properly and use recommended methods for reheating. Enjoy experimenting with this dish, and don’t hesitate to make it your own. Cooking can be simple and fun—your new meal is just a recipe away!

Instant Pot Beef and Broccoli Flavorful Quick Meal

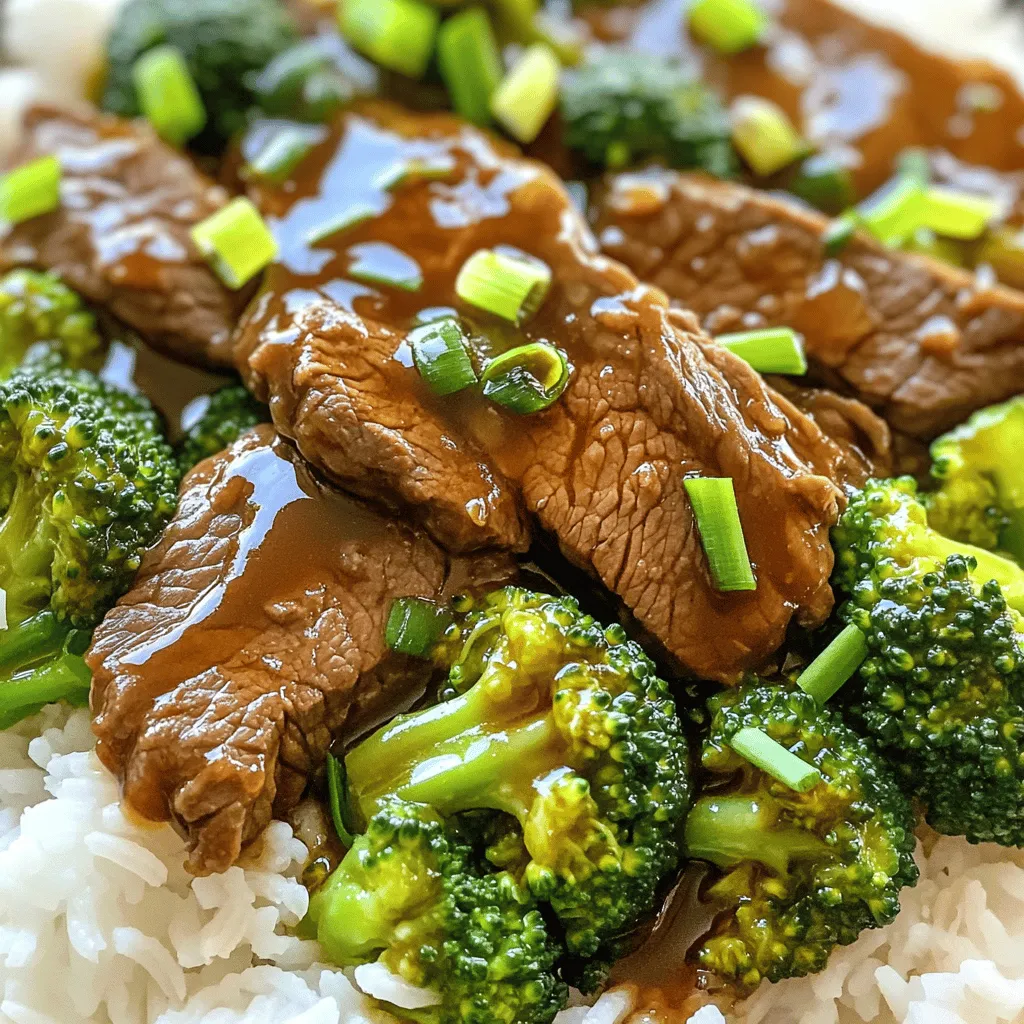
Craving a tasty, quick meal? Look no further! My Instant Pot Beef and Broccoli recipe brings you bold flavors in

- 4 bone-in, skin-on chicken thighs - 1/4 cup honey - 1/4 cup soy sauce - 4 cloves garlic, minced - 1 tablespoon grated fresh ginger - 1 tablespoon rice vinegar - 1 teaspoon sesame oil - Salt and pepper, to taste - 1 tablespoon olive oil - Chopped green onions and sesame seeds for garnish Gather these ingredients before you start. The chicken thighs provide a rich flavor and juicy texture. Honey and soy sauce blend well, creating a sweet and salty taste. Garlic and ginger add depth and warmth. Rice vinegar and sesame oil enhance the flavors and add a slight tang. Don’t forget salt and pepper to season your chicken. Olive oil helps in searing and gives it a nice crisp. Finally, green onions and sesame seeds make for a lovely garnish. For the complete cooking instructions, check the Full Recipe. - Preheat oven to 400°F (200°C). - In a bowl, whisk together the marinade ingredients: honey, soy sauce, garlic, ginger, rice vinegar, and sesame oil. This mix is what gives the chicken its sweet and savory flavor. - Take the chicken thighs and dry them well with paper towels. Season both sides with salt and pepper. This step helps the skin get crispy. - Heat olive oil in a large oven-safe skillet over medium-high heat. Add the chicken thighs skin-side down. Sear them for 5-7 minutes until they turn golden brown. This will lock in the juices and create a nice crust. - Carefully flip the chicken thighs over. Now pour the honey garlic marinade over them in the skillet. - Move the skillet to your preheated oven. Bake for 20-25 minutes or until the chicken reaches an internal temperature of 165°F (75°C). This ensures the chicken is fully cooked and safe to eat. For the full recipe, follow the complete instructions to enjoy this dish! To get that perfect crispy skin, start by patting the chicken dry. Wet skin doesn't crisp well. Use paper towels to remove excess moisture. Next, sear the chicken in a hot skillet. Heat your skillet before adding the chicken. This locks in flavors and gives a nice golden crust. Cook skin-side down for 5-7 minutes, and you'll see the magic happen. Want to spice things up? Add some chili flakes for a bit of heat. Just a pinch can elevate the dish. You can also use fresh herbs like thyme or rosemary. These herbs add a nice aroma and depth. Chop them finely and sprinkle them over the chicken before cooking. Pair your honey garlic chicken thighs with fluffy rice or steamed veggies. A crisp salad works well too. For an extra touch, drizzle some of the honey garlic sauce over the dish before serving. This adds flavor and makes it look even better. If you want to impress, garnish with chopped green onions and sesame seeds. They add color and crunch! For the complete cooking experience, check out the Full Recipe. {{image_2}} You can switch up the protein in this recipe. If you prefer chicken breasts, they work well. They cook faster, so check them early. Drumsticks are another option. They stay juicy and have great flavor. For a vegetarian choice, try tofu. Use firm tofu, cut into thick blocks. Marinate it just like the chicken, and bake until golden. Feel free to play with sweeteners. Maple syrup adds a nice twist; it brings a deep flavor. Agave nectar is a great substitute too. It’s lighter but still sweet. If you want a richer taste, brown sugar is perfect. It adds a hint of caramel that pairs nicely with garlic. You can brighten the dish by adding citrus. A splash of lime or orange juice lifts the flavors. It gives a fresh zing that contrasts with the sweetness. For a fun twist, try BBQ sauce. It adds tang and smokiness to the dish. Mix it into the marinade for a new flavor experience. After enjoying your honey garlic chicken thighs, you can store any leftovers. Place them in an airtight container. This will keep them fresh for up to 3 days in the fridge. Make sure to let them cool down before sealing. This helps avoid moisture buildup, which can make the chicken soggy. If you want to enjoy this dish later, freezing is a great option. You can freeze the cooked chicken for up to 2 months. To do this, wrap each piece tightly in plastic wrap. Then, place them in a freezer-safe bag. This prevents freezer burn and keeps the flavor intact. When you're ready to eat, take the chicken out of the freezer. Let it thaw in the fridge overnight for the best texture. For the best taste, reheat your chicken in the oven or a skillet. Preheat the oven to 350°F (175°C). Place the chicken on a baking sheet and cover it with foil. This keeps it moist. Heat for about 15-20 minutes. If using a skillet, add a splash of water or broth. Cover it with a lid and heat on medium-low. This helps keep the chicken juicy while warming it through. Enjoy your meal just like fresh! You can find the full recipe for honey garlic chicken thighs above. Yes, you can use boneless chicken thighs. They will cook faster than bone-in thighs. Reduce the cooking time to about 15-20 minutes in the oven. Always check for doneness before serving. If you need a soy sauce substitute, try tamari or coconut aminos. Both options provide a similar umami flavor. Tamari is gluten-free, while coconut aminos offers a slightly sweeter taste. To check if your chicken is cooked, use a meat thermometer. The internal temperature should reach 165°F (75°C). You can also look for clear juices running from the chicken. If the juices run clear, it's ready to eat. This post covered the key ingredients, cooking steps, and tips for a flavorful chicken dish. You learned how to create a tasty marinade, achieve crispy skin, and explore variations based on your taste. Remember, cooking is about experimenting and enjoying the process. Try new flavors, tweak the recipe, and share your delicious results. With these steps, you can easily impress anyone at your table. Happy cooking!

Honey Garlic Chicken Thighs Flavorful and Easy Recipe

Get ready to savor Honey Garlic Chicken Thighs, a dish bursting with flavor! This easy recipe will have everyone asking

Older posts
Newer posts
← Previous Page1 … Page13 Page14 Page15 … Page25 Next →

dsad

© 2025 greenmealmap • Built with GeneratePress

Our Policies

  • Copyright Policy
  • Cookie Policy
  • GDPR Policy
  • Privacy Policy
  • Disclaimer
  • Terms Of Use

More Information

  • Home
  • About
  • Contact
  • Appetizers
  • Dessert
  • Dinner
  • Drinks
©2025, greenmealmap About Back To Top