Skip to content
DisclaimerTerms Of UseGDPR PolicyCookie Policy

greenmealmap

  • Home
  • Drinks
  • Appetizers
  • Dinner
  • Dessert
  • About
  • Contact
  • Privacy Policy
DisclaimerTerms Of UseGDPR PolicyCookie Policy

Lauren

This Breakfast Burrito Casserole is a fun and tasty dish. It brings bold flavors and is easy to make. You can enjoy it for breakfast, brunch, or even dinner. With layers of eggs, meats, and veggies, this dish is sure to please everyone. Here is what you need for the casserole: - 6 large eggs - 1 cup milk - 1 teaspoon ground cumin - 1 teaspoon garlic powder - 1 teaspoon onion powder - Salt and pepper to taste - 1 cup cooked chorizo (or turkey sausage for a lighter option) - 2 cups cooked and diced potatoes (hash browns or roasted) - 1 cup black beans, drained and rinsed - 1 red bell pepper, diced - 1 cup shredded cheddar cheese - 1 cup salsa - Fresh cilantro for garnish (optional) These ingredients come together to create a hearty meal that warms the soul. To make this casserole even better, try these add-ins: - Spinach or kale for more greens - Jalapeños for heat - Avocado slices for creaminess - A mix of different cheeses for flavor depth Feel free to mix and match. The more you explore, the more you will find what you love! To start, preheat your oven to 350°F (175°C). This makes sure your casserole cooks evenly. Next, grab a 9x13-inch casserole dish. Grease it with cooking spray or a little oil. This step helps prevent sticking. Now, set the dish aside and get ready for the fun part—layering! Begin by layering your ingredients in the dish. First, spread the cooked chorizo evenly across the bottom. Chorizo gives a nice kick. Next, add the diced potatoes. Hash browns work great, but roasted potatoes add a nice flavor. Then, sprinkle the black beans and diced red bell pepper on top. These add color and texture. Finally, pour the egg mixture over all the layers. Make sure every inch is soaked. This helps bind everything together. Top it off with salsa and shredded cheddar cheese. Now, place your casserole in the preheated oven. Bake for 30-35 minutes. You will know it’s done when the eggs are fully set. The cheese should look golden and bubbly. Once it’s ready, take it out and let it cool for 5-10 minutes. This cooling time makes it easier to slice. If you want, garnish with fresh cilantro before serving. Enjoy your tasty breakfast burrito casserole! You can make this casserole your own. Choose your favorite meats or veggies. Try using turkey sausage instead of chorizo for a lighter dish. You can add spinach, kale, or mushrooms for extra greens. Swap out black beans for pinto beans if you like. Want a kick? Add jalapeños or hot sauce. Mix in different cheeses, like pepper jack or feta, for unique flavors. One mistake is not greasing the dish well. This can lead to sticking. Ensure your eggs are fully whisked for even texture. If you skip this, some parts may be dry. Don't overload your layers; keep it balanced. Too many ingredients can make it soggy. Lastly, always let it cool before cutting. This helps keep the pieces intact. The standard baking time is 30-35 minutes. If your oven runs hot, check it at 25 minutes. If you use a glass dish, it may cook faster. If you make a larger casserole, add 10-15 minutes to the time. You want the eggs set and cheese bubbly. Use a toothpick to test the center; it should come out clean. Adjust the time based on your oven's quirks for the best results. {{image_2}} You can make a tasty vegetarian breakfast burrito casserole. Just swap the chorizo for veggies. I love using mushrooms, spinach, and zucchini. These flavors blend well with the eggs and spices. You can also add more beans for protein. Black beans or pinto beans work great. This version is filling and healthy, perfect for all. If you like heat, try a spicy version. Add diced jalapeños or hot sauce to the egg mix. You can also choose spicy sausage instead of regular chorizo. This gives your casserole a nice kick. A bit of pepper jack cheese can enhance the spice, too. This variation is fun for those who enjoy bold flavors. For a gluten-free breakfast burrito casserole, use gluten-free tortillas. Layer them at the bottom of your dish. You can also ensure your sausage and beans are gluten-free. Most canned beans are safe, but check the label. This way, you can enjoy a delicious meal without worry. Gluten-free doesn’t mean less flavor! To store your breakfast burrito casserole, let it cool first. Cut it into squares for easier storage. Place the squares in an airtight container. This keeps them fresh for later. You can store leftovers in the fridge for up to three days. If you want to keep them longer, freezing is a good option. When you’re ready to eat your leftovers, preheat your oven to 350°F (175°C). Place a square of casserole in a baking dish. Cover it with foil to keep it moist. Heat for about 20 minutes or until warm. You can also use the microwave. Heat on high for 1-2 minutes. Check to ensure it's heated through before enjoying. To freeze your casserole, wrap each square in plastic wrap. Then place them in a freezer bag. This helps prevent freezer burn. You can freeze the casserole for up to three months. When ready to eat, thaw it overnight in the fridge. Then, reheat as described above. Enjoy the same great taste as when you first made it! Yes, you can make this casserole ahead of time. Prepare it the night before, then cover and chill in the fridge. This saves time in the morning. Just remember to bake it straight from the fridge. It may take a bit longer to cook, so check it often. You can use turkey sausage as a lighter option. Ground beef or chicken also works well. For a vegetarian choice, try using seasoned tofu or plant-based sausage. Each option brings its own flavor. This way, you can customize the dish to your taste. To avoid a soggy casserole, use cooked and cooled potatoes. Drain black beans well to remove extra moisture. Layer ingredients carefully; don't overcrowd. The egg mixture should soak in, not drown the layers. Bake it until the eggs are set and the cheese is golden. This keeps your casserole firm and tasty. In this blog post, I shared a full recipe for a delicious breakfast burrito casserole. You learned about key ingredients, step-by-step instructions, and how to customize your dish. I also provided tips to avoid common mistakes and ways to store leftovers. With variations like vegetarian or gluten-free options, there’s something for everyone. By trying this recipe, you can enjoy a tasty breakfast. Get creative and make it your own!

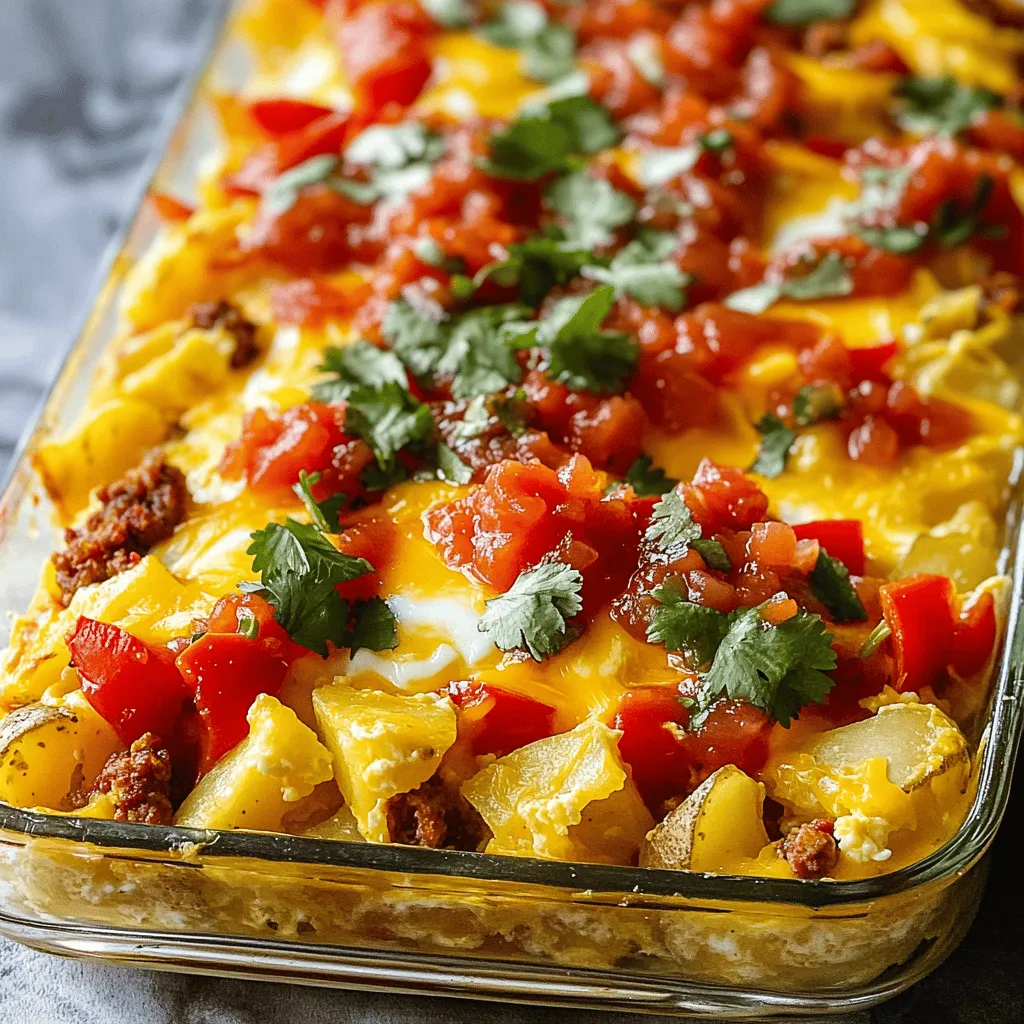
Breakfast Burrito Casserole Flavorful and Easy Meal

Are you ready to make breakfast exciting? My Breakfast Burrito Casserole is a full-flavored dish that’s simple to prepare. With

- Dark Chocolate: Use dark chocolate chips with at least 70% cocoa. This gives the bark a rich taste. Higher cocoa content makes it less sweet and more intense. You can find these at most grocery stores or specialty shops. - Freeze-Dried Raspberries: These berries add a burst of flavor and color. They are light and crunchy. You can buy them online or in health stores. Freeze-drying helps keep their nutrients intact. - Nuts: I love using chopped almonds or hazelnuts. They add great crunch and a nutty flavor. Feel free to mix them up based on your taste. - Optional Garnish: A sprinkle of sea salt flakes can really enhance the flavor. It adds a nice contrast to the sweetness of the chocolate and raspberries. Plus, it makes the bark look pretty! This simple snack recipe shines with these key ingredients. Each one plays a role in making your dark chocolate raspberry bark both tasty and beautiful. - How to line a baking sheet properly Start by grabbing a baking sheet. Cut a piece of parchment paper to fit. Make sure it covers the bottom fully. This helps in removing the bark later without any mess. - Melting techniques for dark chocolate Use a heatproof bowl for melting. You can use a double boiler, which is a pot with water and a bowl on top. Heat the water, and add chocolate to the bowl. Stir it as it melts. If using a microwave, heat the chocolate in 30-second bursts. Stir each time until it’s smooth. - Even spreading tips for the perfect bark Pour the melted chocolate onto the lined baking sheet. Use a spatula to spread it out evenly. Aim for about 1/4 inch thick. This thickness helps it set well and break easily. - How to evenly distribute freeze-dried raspberries Sprinkle the freeze-dried raspberries on the melted chocolate. Try to space them out evenly. This gives you a burst of flavor in every bite. - Incorporating nuts into the mixture Add the chopped nuts over the raspberries. Press them down gently. This helps them stick to the chocolate for a nice crunch. - Room temperature vs. refrigerator: best practices You can let the bark set at room temperature for about 1 hour. If you want it faster, place it in the fridge for 20 to 30 minutes. Both ways work great, but the fridge is quicker. - Ideal setting time for perfect texture Check the bark after the time is up. It should be firm but not too hard. This is the perfect time to break it into pieces. Enjoy your delicious dark chocolate raspberry bark! To make your dark chocolate raspberry bark smooth, avoid common melting mistakes. Never melt chocolate on high heat. Instead, use low heat or heat in short bursts. If you use the microwave, heat the chocolate in 30-second intervals. Stir after each interval until the chocolate is fully melted. This helps prevent burning. For a smooth spread, pour melted chocolate onto your lined baking sheet. Use a spatula to spread it evenly. Aim for about 1/4 inch thick. A thin layer helps the bark set faster and break easily. Jazz up your presentation with creative ideas. After you sprinkle the freeze-dried raspberries, consider adding a few whole ones on top. This adds color and makes the bark look pretty. You can also drizzle extra melted chocolate over the top for a fancy touch. For flavor pairings, try adding a pinch of sea salt. It enhances the sweetness of the chocolate and the tartness of the raspberries. You might also consider mixing in spices like cinnamon or a dash of chili powder for an extra kick. Dark chocolate offers great health benefits. It contains antioxidants that help protect your body. Eating dark chocolate in moderation may improve heart health and boost mood. Choose chocolate with 70% cocoa or higher for the best benefits. Raspberries bring their own nutritional advantages. They are low in calories and high in fiber. Raspberries are rich in vitamins and antioxidants too. Eating them can support your immune system and improve digestion. Enjoying this bark gives you a tasty treat with added health perks! {{image_2}} You can switch up the berries in this recipe. Strawberries and blackberries work well. Each berry adds its own taste. If you prefer, you can also use milk or white chocolate. This change makes the bark sweeter and creamier. Want some crunch? Add different nuts or seeds. Almonds give a nice bite, while sunflower seeds add a unique flavor. You can also mix in spices like cinnamon or chili powder. This twist gives your bark an exciting kick. If you follow a vegan diet, you can still enjoy this bark. Use dairy-free chocolate chips. For a gluten-free option, check the chocolate and nuts to ensure they are safe. If you're nut-free, use seeds instead. Sunflower or pumpkin seeds work great! Store your dark chocolate raspberry bark in an airtight container. This keeps it fresh and safe from moisture. Glass or plastic containers work well. If you use plastic, make sure it seals tightly. Keep the bark at room temperature away from direct sunlight. If it’s warm in your kitchen, the fridge is a good idea. However, be careful not to freeze it, as this can change the texture. When stored properly, your dark chocolate raspberry bark lasts about two weeks. After that, it may start to lose its taste and crunch. Look for signs of spoilage. If the chocolate develops a white coating, it’s called "bloom." This happens due to temperature changes. It’s safe to eat, but it won’t taste as good. Also, check for any off smells or changes in texture. If it feels soft or sticky, it’s best to toss it out. What is the best chocolate to use for bark? The best chocolate for bark is dark chocolate with 70% cocoa or higher. This chocolate has rich flavor and good texture. Look for high-quality brands for the best results. Can I use fresh raspberries instead of freeze-dried? Fresh raspberries are not ideal for this recipe. They contain water, which can make the chocolate soggy. Freeze-dried raspberries add a tart flavor without moisture. Use them for the best crunch and taste. How can I make this recipe in larger batches? To make a larger batch, simply double the ingredients. Use a bigger baking sheet to spread the chocolate. Make sure to adjust the melting time since more chocolate takes longer. What to do if the chocolate doesn’t set properly? If the chocolate doesn’t set, it may be too warm. Try placing it in the fridge for about 20-30 minutes. If it still doesn’t set, it could be due to moisture. Make sure all your tools are dry before starting. How to fix a crumbly bark? Crumbly bark often occurs when chocolate is overcooked or not mixed well. If this happens, melt the bark again gently and stir well. Pour it onto the sheet and let it set again. Where to find quality ingredients? You can find high-quality dark chocolate and freeze-dried raspberries at specialty grocery stores. Online retailers also carry many options. Look for brands that focus on quality and taste. Links to buy pre-made dark chocolate raspberry bark Many stores sell pre-made dark chocolate raspberry bark. Check local gourmet shops or online sites like Amazon. Always read reviews to ensure you buy a tasty product. You learned how to make tasty dark chocolate raspberry bark. We covered ingredients, steps, and tips for the best results. You can swap flavors, adjust for diets, and store it well. Enjoy your delicious creation and share it with others! Embrace your creativity in the kitchen. Now, it's time for you to make your own unique bark. Remember, practice makes perfect, so have fun!

Dark Chocolate Raspberry Bark Simple Snack Recipe

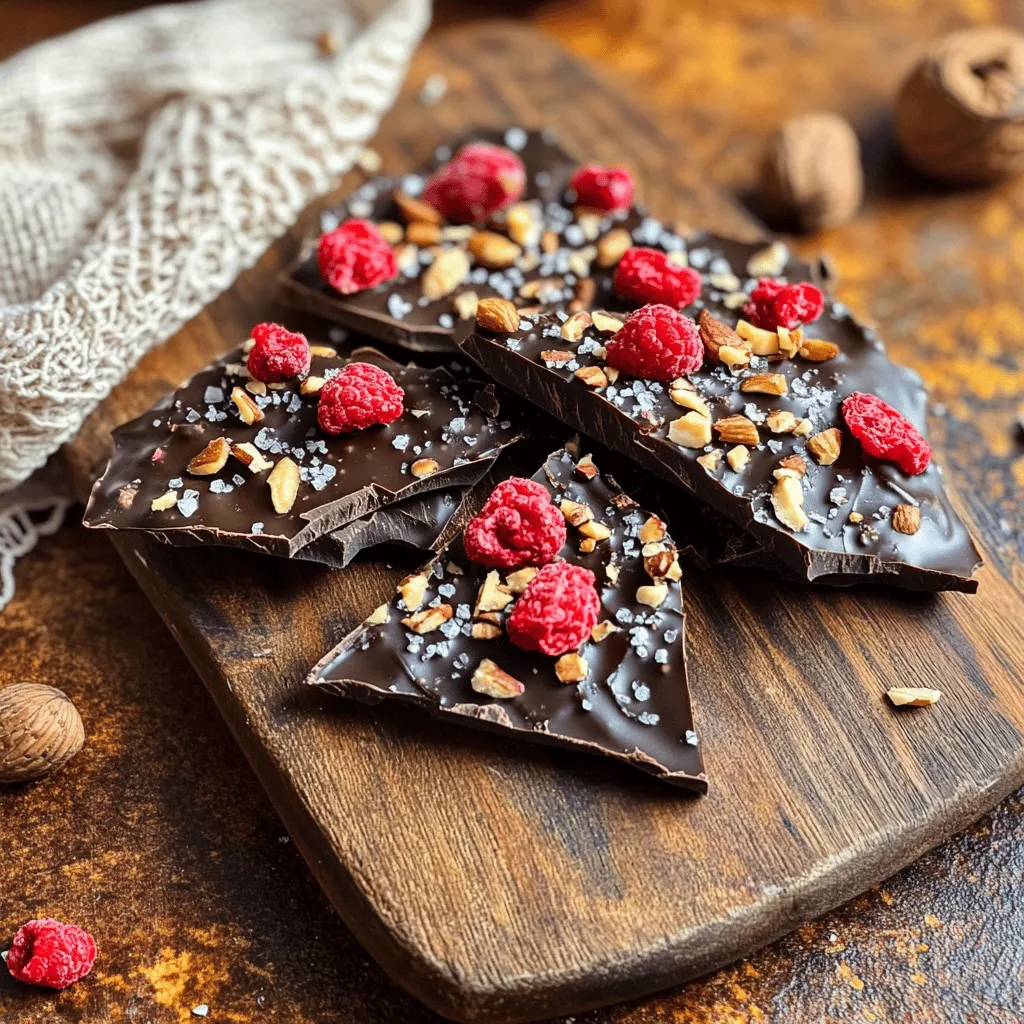
Looking for a quick, delicious snack that packs a punch? This Dark Chocolate Raspberry Bark recipe is simple and perfect

For this tasty dish, you need a few key ingredients: - 4 lobster tails - 1/2 cup unsalted butter (1 stick) - 4 cloves garlic, minced - 1 tablespoon fresh lemon juice - 1 teaspoon paprika - Salt and pepper to taste - Fresh parsley, chopped (for garnish) - Lemon wedges (for serving) These ingredients create a rich, buttery flavor that pairs perfectly with lobster. To make garlic butter lobster tails, gather these tools: - Kitchen scissors - Small saucepan - Baking sheet - Aluminum foil or parchment paper - Brush for coating These simple tools will help you prepare and cook the lobster with ease. Choosing fresh lobster tails is key for the best flavor. Here are some tips: - Look for tails with a firm shell. Soft shells may mean old lobster. - Check for a bright color. Fresh tails have a nice, vibrant hue. - Sniff for a clean ocean smell. If it smells fishy, skip it. - Choose tails that feel heavy for their size. This means more meat inside. Following these tips ensures you get the freshest lobster tails for your meal. For the full recipe, check out Garlic Butter Lobster Tails. First, gather your ingredients and tools. You need a baking sheet, scissors, and a small saucepan. Make sure your oven is ready by preheating it to 375°F (190°C). This step is key for even cooking. Next, wash your hands and clean your workspace. A tidy area helps you cook better. In your small saucepan, melt the butter over medium heat. Add the minced garlic and stir it for 1-2 minutes. Watch closely to avoid burning the garlic. When it smells good, add lemon juice and paprika. Mix it well and season with salt and pepper. You want this garlic butter to be rich and flavorful. Now, take your lobster tails. Use kitchen scissors to cut the top shell. Stop just before the tail fin. Gently pull the shell apart to show the meat. Sit the meat on top of the shell. This helps it cook evenly. Brush the garlic butter mixture over the meat. Make sure it’s well coated. Place the lobster tails on a baking sheet lined with foil. Bake them for 12-15 minutes. They are done when the meat is opaque. For extra flavor, turn on the broiler for the last 2-3 minutes. This gives a nice crisp finish. When done, drizzle remaining garlic butter on top. Garnish with parsley and serve with lemon wedges. Enjoy your delicious lobster tails! For more details, check the Full Recipe. To cook lobster tails just right, start with fresh tails. Select ones that feel firm and are slightly heavy for their size. When you cut the shell, don’t go all the way through. Cut only the top shell, leaving the tail fin intact. Pull the meat out gently and place it on top of the shell. This helps the meat cook evenly. Bake them at 375°F for 12-15 minutes. The meat should be opaque and firm when done. One common mistake is overcooking the lobster. This can make it tough. Always watch the time closely. Another mistake is not seasoning enough. A pinch of salt and pepper really boosts the flavor. Also, don’t burn the garlic in your butter. Cook it just until fragrant. If it turns brown, it might taste bitter. Lastly, don’t skip the broiler step if you want a nice crisp finish. For great flavor, use fresh garlic. Minced garlic adds a strong taste. Mix it in butter and heat it over medium heat. Add lemon juice for brightness. Paprika adds a nice color and a subtle kick. Taste your mix before adding it to the lobster. Adjust the salt and pepper to your liking. Brush it generously over the lobster meat for even flavor. Check the [Full Recipe] for detailed steps on making this dish unforgettable. {{image_2}} Grilling lobster tails adds a smoky flavor that is hard to beat. To grill, follow the same steps for the garlic butter. Instead of baking, preheat your grill to medium heat. Place the lobster tails shell-side down on the grill. Cook for about 5 to 7 minutes. Brush with garlic butter while they cook. This method gives a nice char and keeps the meat juicy. Spices can take your garlic butter lobster tails to the next level. You can add cayenne pepper for heat or Old Bay seasoning for a classic taste. For a fresh twist, try adding fresh herbs like thyme or dill. Simply mix these spices into your garlic butter before brushing it on the lobster. They bring new flavors to each bite. If you don't have an oven, you can cook lobster tails on the stovetop. Use a large skillet with a lid. Melt the garlic butter in the skillet, add the lobster tails, and cover. Cook for about 10 to 12 minutes, basting with the butter. Sous vide is another great option. Set your sous vide to 140°F (60°C). Cook the tails in a sealed bag for about 45 minutes. Finish them by searing in a hot pan with garlic butter for a perfect crust. For a full recipe, check out the Garlic Butter Lobster Tails details above. To keep your leftover lobster tails fresh, let them cool first. Place them in a shallow container. Seal it tightly with a lid or plastic wrap. Store them in the fridge for up to two days. The sooner you eat them, the better they taste! To reheat your lobster tails, use the oven. Preheat it to 350°F (175°C). Place the tails on a baking sheet. Cover them with foil to prevent drying. Heat for about 10 minutes or until warm. If you want, you can also microwave them. Just use a low setting and cover them to keep moisture in. You can freeze lobster tails if needed. Wrap each tail tightly in plastic wrap. Then, put them in a freezer bag. Squeeze out all the air before sealing it. They can last in the freezer for up to three months. When ready to eat, thaw them in the fridge overnight before reheating. For the full recipe, check out the link provided. You can serve Garlic Butter Lobster Tails with many sides. Here are some tasty ideas: - Garlic bread: It soaks up extra butter. - Steamed vegetables: Try asparagus or green beans for color. - Rice: A light lemon or butter rice pairs well. - Salad: A fresh green salad adds crunch. - Potatoes: Mashed or roasted potatoes make a hearty side. These sides balance the rich lobster meat. They also add flavor and texture to your meal. Yes, you can use frozen lobster tails. Just make sure to thaw them first. Place them in the fridge overnight or run them under cold water. This helps keep the meat firm. Cooking times may vary for frozen tails. They might take a few extra minutes to cook fully. Always check the meat for doneness. It should be opaque and firm to the touch. To tell if lobster tails are done, look for these signs: - The meat turns opaque and white. - It should be firm and springy to the touch. - The shells may turn a bright red. You can also use a meat thermometer. The internal temperature should reach 140°F (60°C). This means the lobster is cooked and safe to eat. For the best results, follow the cooking times in the Full Recipe. Enjoy your meal! In this article, we covered how to make garlic butter lobster tails. We discussed key ingredients, tools, and how to select fresh lobster. You learned step-by-step cooking methods, plus tips for perfecting the dish. We also explored storage options and common FAQs. Cooking lobster tails can be fun and rewarding. With practice, you’ll impress everyone with your meals. Enjoy creating and sharing this delicious seafood dish!

Garlic Butter Lobster Tails Easy and Tasty Recipe

Looking to impress your guests with a delicious seafood dish? Let’s make Garlic Butter Lobster Tails! This easy and tasty

To make a delicious gingerbread mug cake, you'll need a few simple ingredients. Each one plays a key role in creating that warm, spiced flavor we love. - 4 tablespoons all-purpose flour: This forms the cake's base. It gives structure and helps it rise. - 2 tablespoons brown sugar: This adds sweetness and moisture. It also gives that deep, rich flavor. - 1/4 teaspoon baking powder: This helps the cake rise. It makes the texture light and fluffy. - 1/4 teaspoon ground ginger: This spice brings warmth and that classic gingerbread taste. - 1/4 teaspoon ground cinnamon: This adds a sweet and spicy note, enhancing the overall flavor. - 1/8 teaspoon ground nutmeg: Just a pinch of this spice adds depth and warmth. - Pinch of salt: Salt balances the sweetness and enhances all the flavors. - 3 tablespoons milk (or any milk alternative): This adds moisture, helping create a smooth batter. - 1 tablespoon vegetable oil: This keeps the cake moist and tender. - 1/4 teaspoon vanilla extract: This adds a lovely, sweet aroma that complements the spices. - Optional: Whipped cream or vanilla ice cream for serving: These toppings add extra creaminess and sweetness. If you have allergies, you can make some easy swaps. Use gluten-free flour instead of all-purpose flour. For dairy-free options, choose almond milk or coconut milk instead of regular milk. When picking ingredients, always choose high-quality. Fresh spices make a big difference in flavor. Look for organic options to boost taste and support sustainable farming. For the full recipe, refer to the sections above. Enjoy your warm and cozy gingerbread mug cake! To start, grab a microwave-safe mug. In this mug, you will combine the dry ingredients. - 4 tablespoons all-purpose flour - 2 tablespoons brown sugar - 1/4 teaspoon baking powder - 1/4 teaspoon ground ginger - 1/4 teaspoon ground cinnamon - 1/8 teaspoon ground nutmeg - Pinch of salt Mix these well. It is key to stir until everything blends evenly. If you do not mix well, you may bite into a pocket of spice or sugar. Next, you will add the wet ingredients. This is where the magic begins! - 3 tablespoons milk (or any milk alternative) - 1 tablespoon vegetable oil - 1/4 teaspoon vanilla extract Pour these into the dry mix. Use a fork to whisk everything together. Make sure to whisk until smooth. This helps avoid lumps. Lumps can ruin the soft texture of your cake. Now, it’s time to microwave your cake. For most microwaves, cook the mug on high for 1 minute and 20 seconds. However, every microwave is different. You may need to adjust the time. Check your cake as it cooks. You will know it is done when it rises and sets in the middle. Once finished, take the mug out of the microwave. Be careful; it will be hot! Allow it to cool for a minute. Now enjoy your gingerbread mug cake warm, perhaps with a dollop of whipped cream or a scoop of vanilla ice cream! This cake is a simple delight that warms the heart. To make the best gingerbread mug cake, avoid common mistakes. One big error is overmixing. Mixing too much makes the cake tough. Stir just until the ingredients blend. Another key tip is to measure accurately. Use measuring cups and spoons for the best results. This ensures the right balance of flavors and texture. When serving your mug cake, think about toppings. Whipped cream adds a nice touch. A scoop of vanilla ice cream pairs well too. For a festive look, sprinkle some cinnamon or nutmeg on top. You can even add a drizzle of caramel sauce. Present your cake in a fun mug to make it special. For added flavor, consider using more spices. Try a pinch of cloves or allspice for warmth. You can also mix in a few chocolate chips for sweetness. Using extracts like almond or maple can change the taste. Flavored syrups can add a twist too. Get creative and make it your own! For the complete method and measurements, check the Full Recipe. {{image_2}} You can easily add chocolate to your gingerbread mug cake. Just mix in some chocolate chips. You can use about 2 tablespoons of semi-sweet chocolate chips for a sweet treat. If you want a richer cake, melt a tablespoon of chocolate into the batter. This adds depth to the flavor. When you add chocolate, you may need to adjust the sugar. The chocolate adds sweetness, so cut back on the brown sugar to about 1 tablespoon. This keeps the cake from being too sweet. You can make this gingerbread mug cake healthier by lowering the sugar. Try using 1 tablespoon of honey or maple syrup instead of brown sugar. This keeps the moisture while lowering the sugar count. For gluten-free options, use almond flour or coconut flour. If you want a vegan version, swap the milk for almond or oat milk. You can use flaxseed meal mixed with water instead of egg for binding. You can customize your gingerbread mug cake for different holidays. In fall, add pumpkin spice to the mix for a cozy twist. Just add 1/4 teaspoon of pumpkin spice instead of the ginger and cinnamon. In winter, try adding cranberries or chopped apples for a burst of flavor. Top your cake with whipped cream and sprinkle with cinnamon for a festive look. For summer, fresh berries make a great topping, adding color and flavor to your dessert. Explore the [Full Recipe] for more ideas on making this cake your own! To keep your gingerbread mug cake fresh, store it in an airtight container. If you have leftovers, put the mug cake in the fridge. Make sure it cools to room temperature first. For longer storage, you can freeze it. Use a freezer-safe container or wrap it tightly in plastic wrap. This keeps it moist and tasty. When it's time to enjoy your leftover cake, reheating is key. The microwave works best. Heat it for about 15-20 seconds. Check it often to avoid drying it out. If you want to add toppings, do it after you heat the cake. Whipped cream or ice cream is best served warm. In the fridge, your gingerbread mug cake lasts about 2-3 days. If you freeze it, it can last up to a month. Always check for signs of spoilage before eating. Look for any off smells or changes in texture. If it feels dry or crumbly, it’s time to toss it. Enjoy your delicious treats safely! Yes, you can make a gingerbread mug cake in an oven. Here’s how: Preheat your oven to 350°F (175°C). Prepare your mug cake in an oven-safe mug or ramekin. Follow the same mixing steps as the microwave method. Then, bake it for about 15 to 20 minutes. Check if the cake is done by inserting a toothpick in the center. If it comes out clean, it’s ready to enjoy! To serve more people, you can scale the recipe. Start by multiplying each ingredient by the number of servings you want. For example, if you want to make four cakes, multiply each ingredient by four. You can mix everything in a large bowl and then divide it into separate mugs. Just remember to adjust the cooking time if you're using larger mugs or baking multiple cakes together. If you need a substitute for brown sugar, you have options. You can use white sugar mixed with molasses. For every cup of brown sugar, use one cup of white sugar and add one tablespoon of molasses. Alternatively, try coconut sugar or maple syrup. Each option may slightly change the flavor, but they add a nice sweetness to your gingerbread mug cake. In this post, we explored how to make a tasty gingerbread mug cake. Each ingredient plays a key role, and we discussed alternatives for common allergens. I shared step-by-step instructions, tips to avoid mistakes, and ways to enhance the flavor. We also covered fun variations and how to store leftovers. Remember, cooking is about finding what works for you. Enjoy creating your own gingerbread cake and making it your own!

Gingerbread Mug Cake Simple and Quick Delight

Do you crave a warm, spiced treat? This Gingerbread Mug Cake is your answer! In just minutes, you can enjoy

To make Cranberry Apple Stuffing Cups, gather these ingredients: - 4 cups bread cubes (preferably day-old sourdough or French bread) - 1 cup apple, chopped (any sweet variety like Honeycrisp or Fuji) - 1 cup dried cranberries - 1/2 cup onion, finely chopped - 1/2 cup celery, chopped - 1/4 cup fresh parsley, chopped - 1 teaspoon sage, dried - 1 teaspoon thyme, dried - 1/2 teaspoon salt - 1/4 teaspoon black pepper - 1 cup vegetable broth - 2 tablespoons butter, melted - 1 large egg, beaten You will need these tools to prepare the stuffing cups: - Large mixing bowl - Muffin tin - Non-stick spray or butter (for greasing) - Whisk - Measuring cups and spoons - Knife and cutting board Using fresh ingredients makes a big difference. Here are my top picks: - Use fresh herbs like parsley, sage, and thyme. They add great flavor. - Choose sweet apples like Honeycrisp or Fuji for a nice balance with cranberries. - Freshly baked bread gives the best texture. Day-old bread works well but use good quality. These ingredients create a lovely mix of flavors and textures in your stuffing cups. For the full recipe, check the instructions shared earlier. Start by preheating your oven to 350°F (175°C). Grease a muffin tin with non-stick spray or butter. This helps the stuffing cups release easily after baking. In a large mixing bowl, combine the bread cubes, chopped apples, dried cranberries, onion, celery, and parsley. These ingredients create a sweet and savory mix. In a separate bowl, whisk together the sage, thyme, salt, pepper, vegetable broth, melted butter, and beaten egg. This mixture adds moisture and binds the stuffing. Pour this broth mixture over the bread mixture. Gently toss until all bread cubes are well coated and moistened. Let the mixture sit for about 10 minutes. This gives the bread time to soak in the flavors. After 10 minutes, gently re-toss the mixture. Now, evenly distribute it into the prepared muffin tin. Press the mixture down lightly to compact it. Bake the stuffing cups in your preheated oven for 25-30 minutes. You want them to be golden brown and crisp on top. Keep an eye on them near the end to prevent burning. Once baked, carefully remove the cups from the muffin tin. Let them cool slightly before serving. For the best texture, use day-old bread. It absorbs moisture without becoming mushy. You can also mix in different herbs to match your taste. If you want a crunchier top, bake them a little longer. If you prefer softer stuffing, cover the tin with foil for the first 15 minutes of baking. This helps keep moisture in. For more details, check out the Full Recipe. To make your Cranberry Apple Stuffing Cups even better, focus on the spices. Fresh herbs add great taste. If you can, use fresh sage and thyme instead of dried. You can also try adding some chopped walnuts or pecans for crunch. A touch of cinnamon gives a warm note. It pairs well with the apples and cranberries. Don't forget to taste the mixture before baking. Adjust the salt or pepper to your liking. Many people forget to let the mixture sit before baking. This step helps the bread soak up the broth. If you skip it, your stuffing cups may turn out dry. Another mistake is overfilling the muffin tin. Leave a little space at the top. This allows them to rise and get crispy. Lastly, make sure the bread cubes are not too big. Smaller pieces mix better with the other ingredients. Serve your stuffing cups warm for the best taste. A nice touch is to drizzle some melted butter on top. This adds flavor and shine. You can also garnish with fresh parsley. This makes the dish look more inviting. Pair these stuffing cups with a side of cranberry sauce or apple chutney. This adds extra flavor and a touch of sweetness. For a festive look, arrange them on a rustic wooden platter. If you want to impress guests, serve with a glass of apple cider. For the full recipe, check out the detailed steps to make these delightful treats! {{image_2}} You can easily make gluten-free cranberry apple stuffing cups. Just swap the bread cubes for gluten-free bread. Look for brands that are dense and hearty. I suggest using day-old gluten-free bread for the best texture. You can also add gluten-free oats to boost the flavor and nutrition. This way, you keep the taste while making it safe for everyone. To create a vegan version, replace the egg with a flaxseed egg. Just mix 1 tablespoon of ground flaxseed with 2.5 tablespoons of water. Let it sit for 5 minutes until it thickens. Use vegetable broth instead of chicken broth, and make sure your bread is vegan. You can also add chopped walnuts or pecans for a nutty crunch! Feel free to get creative with your ingredients. Instead of apples, you can use pears for a different fruity flavor. Dried cherries or raisins work great in place of cranberries. To switch it up further, try adding spices like cinnamon or nutmeg for warmth. You can also mix in cooked sausage or mushrooms for a heartier bite. These swaps can give your stuffing cups a unique twist! To store leftover cranberry apple stuffing cups, let them cool completely. Place them in an airtight container. You can keep them in the fridge for up to four days. If you want to enjoy them later, freezing is a great option. To reheat, preheat your oven to 350°F (175°C). Place the stuffing cups on a baking sheet. Cover them with foil to keep them moist. Heat for about 15 minutes or until warmed through. You can also use a microwave. Heat on medium power for 1-2 minutes. Check often to avoid overcooking. To freeze, wrap each stuffing cup tightly in plastic wrap. Then place them in a freezer-safe bag. They can last up to three months in the freezer. When ready to eat, thaw them overnight in the fridge. Then follow the reheating instructions to enjoy. For best results, do not freeze the stuffing cups with gravy or sauce. Yes, you can make stuffing cups ahead of time. Prepare them up to a day before your meal. After baking, let them cool. Store them in an airtight container in the fridge. When you're ready, just reheat them in the oven. You can use gluten-free bread for a tasty twist. Other options include cooked quinoa or rice. Both add a unique texture. If you like, try cornbread for a sweet flavor. These substitutes will still create delicious stuffing cups. The stuffing cups last about three to four days in the fridge. Be sure to keep them in an airtight container. You can enjoy them as a quick snack or side dish. The flavors will still be great! For the full recipe, check out the detailed instructions above. You now have a clear guide to making delicious stuffing cups. Start with the right ingredients and tools. Follow the step-by-step instructions for perfect texture. Use the tips to enhance flavors and avoid common mistakes. Feel free to try out variations, like gluten-free or vegan options. Remember how to store leftovers properly for future meals. With these details, you can make this dish again and again. Enjoy your cooking adventure!

Cranberry Apple Stuffing Cups Flavorful Holiday Treat

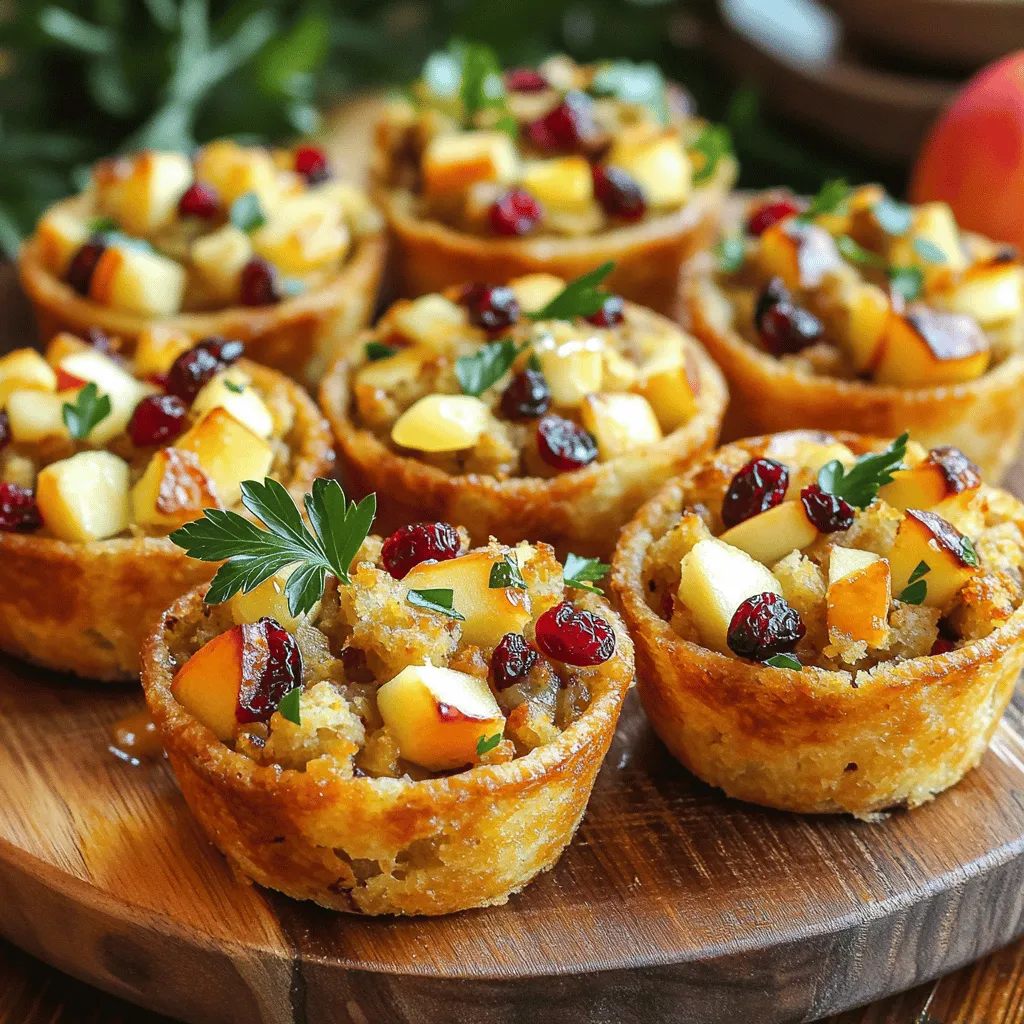
Get ready to impress your guests with my Cranberry Apple Stuffing Cups! These tasty bites combine sweet fruit and savory

- 1 lb shrimp, peeled and deveined - 1 cup buttermilk - 1 cup all-purpose flour - 1/2 cup cornmeal - 1 teaspoon smoked paprika - 1 teaspoon cayenne pepper - 1 teaspoon garlic powder - 1 teaspoon onion powder - Salt and pepper to taste - 8 small corn tortillas - 1 avocado, sliced - 1 cup shredded green cabbage - 1/2 cup fresh cilantro, chopped - Juice of 1 lime - 1/4 cup spicy mayo These ingredients make the firecracker shrimp tacos burst with flavor. The shrimp is the star here. It soaks in buttermilk, which makes it juicy and tender. The coating of flour and cornmeal gives it a crunchy texture. The spices, like smoked paprika and cayenne, add a nice kick. The corn tortillas are soft and warm, holding all the goodness inside. Fresh avocado and cabbage provide a creamy and crunchy contrast. The cilantro adds brightness, and lime juice brings a zesty twist. For an extra touch, you can use spicy mayo, which is easy to make. Just mix mayonnaise with sriracha to your taste. - Fresh lime wedges - Extra cilantro - Sliced jalapeños These toppings can enhance your tacos. Fresh lime wedges add more acidity. Extra cilantro gives a burst of freshness. Sliced jalapeños bring even more heat if you like it spicy. - Calories per serving: Approximately 400 - Protein content: About 25 grams - Healthy fats: Found in avocado This dish is balanced and satisfying. You get protein from the shrimp and healthy fats from the avocado. Each bite is tasty and fun. For the complete recipe, check out the [Full Recipe]. Start by marinating the shrimp. This takes about 30 minutes. Place the shrimp in a bowl and cover them with buttermilk. This helps keep the shrimp moist and adds flavor. For the best taste, use fresh shrimp if possible. You can also add a pinch of salt to the buttermilk for extra flavor. Next, prepare the coating. In a separate bowl, mix the flour, cornmeal, smoked paprika, cayenne pepper, garlic powder, onion powder, salt, and pepper. Stir until all dry ingredients are well combined. The right texture should be slightly gritty but not too thick. This helps the shrimp get a nice crunch when cooked. Now, it's time to cook the shrimp. Heat vegetable oil in a deep skillet. Aim for about 350°F. You can check the temperature with a thermometer. If you don’t have one, drop a small piece of batter in the oil. If it sizzles, the oil is ready. Fry the shrimp in batches for about 2-3 minutes. They should be golden brown and cooked through. Use a slotted spoon to remove them. Place them on a paper towel-lined plate to drain excess oil. Finally, assemble the tacos. Warm the corn tortillas in a dry skillet on medium heat. This should take about 30 seconds on each side. On each tortilla, layer a handful of shredded cabbage, a few pieces of firecracker shrimp, slices of avocado, and a sprinkle of fresh cilantro. For a nice finish, drizzle spicy mayo on top and squeeze lime juice over each taco. The colors and flavors will make your dish pop. For the full recipe, check out the details above. For frying shrimp, I recommend using a deep skillet. This gives the shrimp a nice, even cook. Heat the oil to about 350°F. This temperature helps create a crispy outer layer. Fry the shrimp in batches. This keeps them from crowding and ensures they cook well. If you prefer not to fry, you can also bake or air fry the shrimp. For baking, set your oven to 425°F. Spread the shrimp on a baking sheet and cook for about 10-12 minutes. For air frying, cook at 400°F for about 8-10 minutes, turning halfway through. To make your shrimp pop, add spices or herbs to the coating. Try adding a pinch of cumin or some fresh parsley. You can also customize the sauce. Instead of just spicy mayo, try mixing in honey for a sweet twist. You can also add lime zest to the sauce for extra zing. Adjust the heat by adding more or less cayenne pepper. Firecracker shrimp tacos taste great with sides like rice or beans. A cold drink like lemonade or iced tea pairs well too. For garnishing, add fresh lime wedges or extra cilantro. You can also sprinkle some queso fresco on top for a creamy finish. These little touches make your meal look and taste even better. For the full recipe, check out the entire guide! {{image_2}} You can switch the shrimp for chicken or fish. Chicken thighs work well when marinated. They stay juicy and flavorful. For fish, try flaky white fish like cod or tilapia. They cook fast and absorb flavors nicely. If you want a plant-based option, use tofu or tempeh. Both can soak up the buttermilk and spices. They make a nice meatless taco that everyone will love. When it comes to wraps, corn tortillas are classic. They bring a nice corn flavor. But you can also use flour tortillas for a softer bite. They are easy to fold and hold. For a low-carb choice, try lettuce wraps. They are crunchy and fresh. Just use large leaves, like romaine or butter lettuce. They keep your meal light and healthy. Spicy mayo is a must, but you can get creative. Mix mayonnaise with different hot sauces. Try chipotle sauce for a smoky kick. Or add lime juice for a zesty flavor. You can also explore other sauces. Consider sweet chili sauce for a sweet and spicy mix. You can even go classic with salsa or guacamole. Each sauce brings its own fun twist to the tacos. To keep your firecracker shrimp fresh, store them right. Place shrimp in an airtight container. Keep them in the fridge. They will stay good for up to two days. Avoid stacking shrimp to prevent them from getting soggy. For the tortillas, wrap them in foil or plastic wrap. This keeps them soft and prevents drying. To reheat shrimp and keep them crispy, use an oven. Preheat your oven to 350°F. Place the shrimp on a baking sheet. Heat for about 10 minutes until warm and crisp. For the tortillas, use a dry skillet over medium heat. Warm them for 15 seconds on each side. This helps maintain their texture. You can freeze the assembled tacos, but it’s best to freeze the shrimp and tortillas separately. Wrap the shrimp tightly in plastic wrap, then place in a freezer bag. They can last for up to three months. For tortillas, stack them with parchment paper in between. Place them in a freezer bag too, and they’ll last for two months. Firecracker shrimp tacos are a fun dish packed with flavor. They feature crispy shrimp coated in a mix of spices. The shrimp gets a spicy kick from cayenne pepper and smoked paprika. Each taco has fresh toppings like avocado and cabbage. The spicy mayo adds creaminess and heat. The lime juice brightens the dish, making it lively and tasty. To lower the heat, you can use less cayenne pepper in the coating. You can also skip the spicy mayo or mix it with regular mayo. Adding more avocado and cabbage helps balance the spice. Serve the tacos with lime wedges to cut the heat. This way, you can enjoy the flavor without too much fire. Yes, you can prepare some parts ahead. Marinate the shrimp and store it in the fridge for a few hours. You can also mix the dry coating and keep it in a sealed bag. Fry the shrimp fresh for the best texture. Warm the tortillas right before serving for a soft bite. Assemble the tacos just before eating to keep them fresh. For great firecracker shrimp tacos, try local seafood spots or taco trucks. Many restaurants make their unique versions, so explore your area. Popular chains may offer similar dishes, but check local reviews for the best options. If you want a quick bite, some fast-casual eateries feature shrimp tacos on their menu. For the full recipe, visit the cooking section to learn how to make these tacos step by step. In this blog post, we explored making delicious Firecracker Shrimp Tacos. We reviewed ingredients, cooking steps, and tips to boost flavor. I shared ideas for variations and storage. You can enjoy these tacos with different proteins or wraps. These shrimp tacos are both tasty and easy to make. Experiment with your favorite toppings for a personal touch. Enjoy the fresh flavors and mouthwatering textures!

Fiery Firecracker Shrimp Tacos Simple and Tasty Meal

Are you ready to spice up your dinner with a tasty twist? Firecracker shrimp tacos pack a bold punch and

To create your Pineapple Coconut Rum Cake, gather the following ingredients. Each one brings essential flavor and texture to this delightful treat. - 1 cup all-purpose flour - 1 teaspoon baking powder - 1/2 teaspoon baking soda - 1/4 teaspoon salt - 1/2 cup unsalted butter, softened - 1 cup granulated sugar - 2 large eggs - 1 teaspoon vanilla extract - 1/2 cup coconut milk - 1/2 cup crushed pineapple, drained - 1/2 cup shredded coconut - 1/4 cup coconut cream (optional) - 1/2 cup powdered sugar (for glaze) - 2 tablespoons fresh pineapple juice (for glaze) These ingredients work together to create a soft and moist cake. Each one plays a role in giving the cake its tropical flavor. Make sure to measure your ingredients carefully for the best results. For detailed steps on how to use these ingredients, check the Full Recipe. - Preheat the oven to 350°F (175°C). - Grease and prepare the cake pan. Let's start with the basics. Preheating the oven ensures even baking. Greasing the pan helps the cake come out easily. You can use butter or cooking spray for this step. - Whisk together dry ingredients. - Cream butter and sugar, then add in eggs and vanilla. - Gradually incorporate dry ingredients and coconut milk. First, grab a bowl and whisk the flour, baking powder, baking soda, and salt. This helps mix them well. In a separate bowl, cream the softened butter and sugar together. Do this until it's light and fluffy. Next, add the eggs one at a time. Stir in the vanilla extract. Now, take turns adding the dry mix and coconut milk. Start and end with the flour. Mix until just blended; do not overmix. - Fold in pineapple and shredded coconut. - Pour batter into prepared pan and bake. - Cool the cake before glazing. Now it’s time for the fun part! Gently fold in the crushed pineapple and shredded coconut into the batter. Pour the mixture into your prepared pan. Bake for about 30 to 35 minutes. You can tell the cake is done when a toothpick comes out clean. Once baked, let it cool for about 10 minutes in the pan. Then, transfer it to a wire rack to cool completely. This cooling time is key before adding the glaze. For the full recipe, check out the complete instructions! - Ensure your butter is softened for better mixing. Soft butter blends well, making the cake fluffy. - Drain pineapple well to avoid excess moisture. This step helps keep the cake from becoming soggy. - Don't overmix the batter to keep the cake light. Overmixing can make the cake dense and heavy. - Monitor baking time to prevent dryness. Check at 30 minutes; adjust as needed for your oven. - Pair with tropical fruits or vanilla ice cream for a delightful experience. Fresh fruit adds brightness and flavor. {{image_2}} You can add rum extract for an extra kick. This gives the cake a deeper flavor. If you want a tangy twist, try incorporating lime zest. It brightens the taste and adds freshness. Instead of glaze, use whipped cream. It adds a light and fluffy texture. You can also top your cake with toasted coconut flakes. This gives a nice crunch and enhances the tropical feel. For a gluten-free option, use almond flour. It works well and keeps the cake moist. If you're looking for vegan options, simply substitute eggs and butter with plant-based alternatives. This makes the cake accessible to more people. For the full recipe, check out the detailed instructions. To keep your cake fresh, place it in an airtight container. This helps maintain its moist texture. You can store it at room temperature for a few days. If you want it to last longer, refrigerate it. The cooler temperature will help preserve the flavors for up to a week. Want to save some for later? Wrap individual slices in plastic wrap. Then place them in a freezer bag. This makes it easy to grab a slice when you want a treat. When you're ready to enjoy it, thaw the slices at room temperature. This way, they taste just as good as fresh! If you want that warm, fresh-out-of-the-oven feel, try microwaving a slice. Just a few seconds will bring it back to life. You can also warm it in the oven. Set the temperature to 350°F (175°C) for about 5 to 10 minutes. This gives you a nice, crispy texture on the outside! For the full recipe, check out the Pineapple Coconut Paradise Cake section. Pineapple Coconut Rum Cake lasts about 3 to 5 days when stored correctly. Keep it in an airtight container at room temperature for the best taste. If you want it to last longer, refrigerate it. Just make sure to wrap it well to prevent it from drying out. Yes, you can use fresh pineapple! Fresh pineapple gives a bright, juicy flavor. Just chop it into small pieces and drain any extra juice. This helps keep your cake from getting too wet. Fresh fruit adds a nice crunch and a delightful taste. Pair your cake with tropical drinks for a perfect match. A cold piña colada or a fruity mojito works great. A light coconut water or a refreshing iced tea can also enhance the flavors. These drinks will make your dessert even more enjoyable! This cake stands out due to its rich flavors and moist texture. The blend of sweet pineapple and creamy coconut creates a tropical paradise in every bite. The glaze adds a perfect touch of sweetness. With easy steps in the Full Recipe, anyone can make this delightful treat. This article covered how to make a tasty Pineapple Coconut Rum Cake. We discussed the ingredients, step-by-step instructions, and tips to perfect your cake. I shared ideas for variations and storage tips to keep it fresh. Enjoying this cake brings a taste of the tropics to your kitchen. With a few simple steps, you can impress family and friends. Remember, baking can be fun and rewarding. Happy baking!

Pineapple Coconut Rum Cake Tasty Tropical Delight

If you crave a sweet escape, my Pineapple Coconut Rum Cake is just what you need! This easy recipe blends

To make the Cheesy Spinach Artichoke Dip, you need fresh and tasty ingredients. Here’s what you will need: - 1 cup fresh spinach, chopped - 1 cup artichoke hearts, drained and roughly chopped - 1 cup cream cheese, softened - 1 cup sour cream - 1 cup shredded mozzarella cheese - 1/2 cup grated Parmesan cheese - 2 cloves garlic, minced - 1 teaspoon onion powder - 1 teaspoon red pepper flakes (optional, for a kick) - Salt and black pepper to taste These ingredients blend together for a creamy and cheesy dip. The fresh spinach adds a nice green color and a health boost. The artichokes give it a unique flavor that pairs well with the cheeses. Using cream cheese and sour cream makes this dip rich and smooth. The garlic, onion powder, and red pepper flakes bring out a great taste. Feel free to adjust the salt and pepper to your liking. This recipe is easy, and I love how it brings people together. You can serve it with tortilla chips or veggie sticks. For the full recipe, check the complete instructions. Enjoy the fun of making and sharing this dip! - Preheat oven to 350°F (175°C). - Prepare a baking dish by greasing it. - Combine cream cheese, sour cream, and minced garlic. - Mix until it is smooth and creamy. - Stir in chopped spinach, artichoke hearts, mozzarella, Parmesan, and onion powder. - Add salt, black pepper, and red pepper flakes if you want heat. - Transfer the mixture to the greased baking dish. - Spread the mixture evenly in the dish. - Top with extra mozzarella for a cheesy crust. - Bake for 25-30 minutes until it is golden and bubbly. - Allow it to cool for a few minutes before serving. - Serve with tortilla chips or fresh veggie sticks for dipping. - For the full recipe, check out the previous section. To make your cheesy spinach artichoke dip even better, consider adding some spices. You can try: - Cumin for warmth - Dill for a fresh taste - Smoked paprika for a hint of smoke If you want richer flavor, swap out some sour cream for cream cheese. You can also use a mix of fresh and dried herbs. This adds depth to your dip. Presentation matters, especially for gatherings. Here are some garnishing tips: - Top with fresh herbs like parsley or chives. - Drizzle a bit of olive oil on top. For a fun look, serve the dip in a bread bowl. Place it on a platter with tortilla chips and veggie sticks around it. This invites guests to dig in. Avoiding common mistakes can make your dip perfect. First, don’t overmix the ingredients. This keeps your dip creamy. Second, watch your baking time. Bake until it bubbles and turns golden brown. This ensures full flavor and a nice texture. {{image_2}} To add some heat to your dip, try adding jalapeños or a splash of hot sauce. I love the kick it gives. Diced jalapeños bring a fresh, zesty flavor. If you prefer, a few dashes of your favorite hot sauce can also work wonders. Adjust the amount based on your spice level. Remember, it's all about your taste! You can switch up the cheeses for a different taste. Try using cheddar or gouda instead of mozzarella. Each cheese brings its own flavor. For a lighter dip, consider using cream alternatives. Greek yogurt can add a creamy texture without the extra calories. Mix and match until you find your perfect blend! If you're looking for a vegan option, there are great substitutes. Plant-based cream cheese and yogurt are excellent choices. They keep the dip creamy and rich. You can also use cashews for added texture and flavor. Soak them in water, blend, and add to your mix. This keeps the dip delicious and guilt-free! For the full recipe, check out the [Full Recipe]. To store your Cheesy Spinach Artichoke Dip, let it cool first. Then, place it in an airtight container. You can keep it in the fridge for up to three days. When you want to reheat it, use the oven or a microwave. If using the oven, heat it at 350°F (175°C) for about 15 minutes. Stir it halfway through to warm it evenly. If using a microwave, heat it in short bursts, stirring in between. Yes, you can freeze Cheesy Spinach Artichoke Dip! To freeze, let the dip cool completely. Then, transfer it to a freezer-safe container. It can last up to three months in the freezer. When you are ready to enjoy it, thaw the dip overnight in the fridge. After thawing, reheat it in the oven at 350°F (175°C) for about 25 minutes or until it is hot and bubbly. Enjoy your delicious dip again! Cheesy Spinach Artichoke Dip lasts about 3 to 5 days in the fridge. To keep it fresh, store it in an airtight container. Always check for any signs of spoilage before eating. Yes, you can make this dip ahead of time. Prepare it and store it in the fridge. When you’re ready to serve, just bake it until hot. This makes it easy for parties or gatherings. You can serve this dip with a variety of dippers. Here are some great options: - Tortilla chips - Fresh veggie sticks (like carrots and celery) - Pita bread or crackers - Sliced baguette Yes, you can make Cheesy Spinach Artichoke Dip in a slow cooker. Simply mix all the ingredients as per the Full Recipe. Then, pour the mixture into the slow cooker. Cook on low for about 2 to 3 hours, stirring occasionally. Enjoy warm with your favorite dippers! This blog post covered everything you need to know about making Cheesy Spinach Artichoke Dip. We discussed the key ingredients, step-by-step baking instructions, and tips to enhance flavor. I also shared variations to suit your taste and ideas for storage. With this easy guide, you can wow your guests at any gathering. Whether you want it spicy or creamy, there’s a version for everyone. Enjoy your delicious dip!

Cheesy Spinach Artichoke Dip Flavorful and Easy Recipe

If you’re craving a creamy, savory snack, you’re in the right place! My Cheesy Spinach Artichoke Dip is an easy

To make cinnamon sugar apple chips, you need just a few simple ingredients: - 2 large apples (such as Fuji or Honeycrisp) - 2 tablespoons granulated sugar - 1 teaspoon ground cinnamon - 1 tablespoon lemon juice - Pinch of salt These ingredients work together to create a tasty snack. The apples give a natural sweetness, while the sugar and cinnamon add flavor. When choosing apples, I like to use Fuji or Honeycrisp. They are sweet and crisp. Their texture holds up well during baking, making them perfect for chips. You can also use Granny Smith apples for a tart option. The tartness balances the sweetness of the sugar. If you want to skip granulated sugar, try using coconut sugar or honey. Both options give a unique flavor. For a healthier twist, consider using Stevia or maple syrup. For cinnamon, you can mix in nutmeg or pumpkin spice for a fun change. Each choice will add a different taste to your apple chips. Start by washing and drying your apples. You can choose Fuji or Honeycrisp for the best flavor. Slice them thinly, about 1/8-inch thick. A sharp knife works well, but a mandoline slicer makes it easier. Thin slices help create that perfect crunch. In a small bowl, combine 2 tablespoons of granulated sugar and 1 teaspoon of ground cinnamon. Add a pinch of salt to enhance the flavor. Mix it well until the sugar and cinnamon blend together. This mixture will coat your apple slices with sweet and spicy goodness. Preheat your oven to 225°F (107°C). Line two baking sheets with parchment paper. Toss the apple slices in lemon juice to prevent browning. Lay them flat on the baking sheets, avoiding overlap. Evenly sprinkle the cinnamon sugar mix over the slices. Bake for 1.5 to 2 hours, flipping halfway. Keep an eye on them to avoid burning. Once they cool, they will become crunchier. Enjoy your healthy snack! For the full recipe, check the section above. To get the best crunch from your apple chips, slice them thinly. Aim for slices about 1/8-inch thick. The thinner the slice, the crispier the chip. Use a sharp knife or a mandoline slicer for even slices. Make sure to lay them out in a single layer on your baking sheets. Overlapping slices can lead to soggy parts. Bake them slowly at a low temperature, around 225°F (107°C), for 1.5 to 2 hours. Flip them halfway through to ensure even baking. Keep a close eye towards the end to avoid burning. Apple slices turn brown quickly after cutting. To keep them looking fresh, toss the slices with lemon juice right after slicing. The citric acid in the lemon juice slows down browning. This step helps your chips stay pretty and tasty. You can also soak the slices in lemon water for a few minutes before baking. Just make sure to dry them well before adding the cinnamon sugar. Finding the right mix of cinnamon and sugar is key. I recommend using 2 tablespoons of granulated sugar and 1 teaspoon of ground cinnamon. This ratio gives a sweet and spicy taste that highlights the apples. If you prefer a stronger cinnamon flavor, feel free to add a bit more cinnamon. Mix the sugar and cinnamon in a small bowl before sprinkling it on the apple slices. This ensures an even coating. Adjust the sweetness by adding or reducing sugar as per your taste. For the full recipe, check out the entire process and enjoy your healthy snack! {{image_2}} You can use many apple types for your chips. Fuji apples are sweet and crisp. Honeycrisp apples are also great, offering a juicy bite. For a tart flavor, try Granny Smith apples. Each type brings a unique taste. Mixing different apples can create a fun flavor blend. Experiment until you find the mix you love! While cinnamon is the star, you can add other spices. Nutmeg offers warmth and depth. Cloves add a sweet and spicy kick. You can mix these spices with cinnamon for more flavor. Start with a small amount and adjust to your taste. This way, you can make your chips unique and flavorful. Want to elevate your apple chips? Try adding toppings! A drizzle of melted chocolate makes them sweeter. Just let the chips cool first. You can also sprinkle a bit of sea salt for a salty-sweet mix. These toppings can transform your snack into a gourmet treat. Feel free to get creative and make it your own! To keep your cinnamon sugar apple chips fresh, store them in an airtight container. Glass jars or plastic containers with tight lids work well. Avoid using paper bags, as they let air in. If you live in a humid area, it’s best to add a few silica gel packets to absorb moisture. This keeps the chips crunchy and tasty. For longer freshness, place your apple chips in a cool, dry spot. A pantry or cupboard works best. Keeping them away from direct sunlight helps too. If you notice any chips losing their crunch, you can re-bake them at a low temperature for a few minutes. This will revive their crispiness. You can freeze apple chips to enjoy later. Just place them in a freezer-safe bag or container. Make sure to remove as much air as possible before sealing. When you’re ready to eat them, thaw in the refrigerator. Reheat them in the oven at 200°F (93°C) for about 10 minutes. This brings back their crunch. You can follow the Full Recipe for best results. To enhance store-bought apple chips, try adding a dash of fresh cinnamon. You can also sprinkle on a bit of sea salt for contrast. Mixing in a touch of vanilla or maple extract can add depth. For a fun twist, pair them with a yogurt dip. This adds creaminess and extra flavor. Yes, you can use honey, agave, or maple syrup. Just remember, these liquids will change the texture. If you prefer a dry sweetener, try stevia or erythritol. Adjust the amount to suit your taste. These alternatives can help you enjoy sweet flavors without refined sugar. Cinnamon sugar apple chips offer several benefits. Apples are high in fiber, which aids digestion. They contain vitamins A and C, boosting your immune system. Cinnamon has antioxidant properties and may help regulate blood sugar. This snack is a low-calorie option compared to many chips. You can enjoy a flavorful crunch without guilt. For the full recipe, check out the details above! Making apple chips is simple and fun. Start by learning about the right apples and flavors. Follow the steps for preparing, mixing, and baking for the best results. Use my tips to make your chips crispy and avoid browning. Don’t be afraid to experiment with variations or toppings. Store your chips well to keep them fresh. Now you have all the tools to create tasty apple chips at home. Enjoy your healthy snack and share it with friends!

Cinnamon Sugar Apple Chips Healthy Crunchy Snack

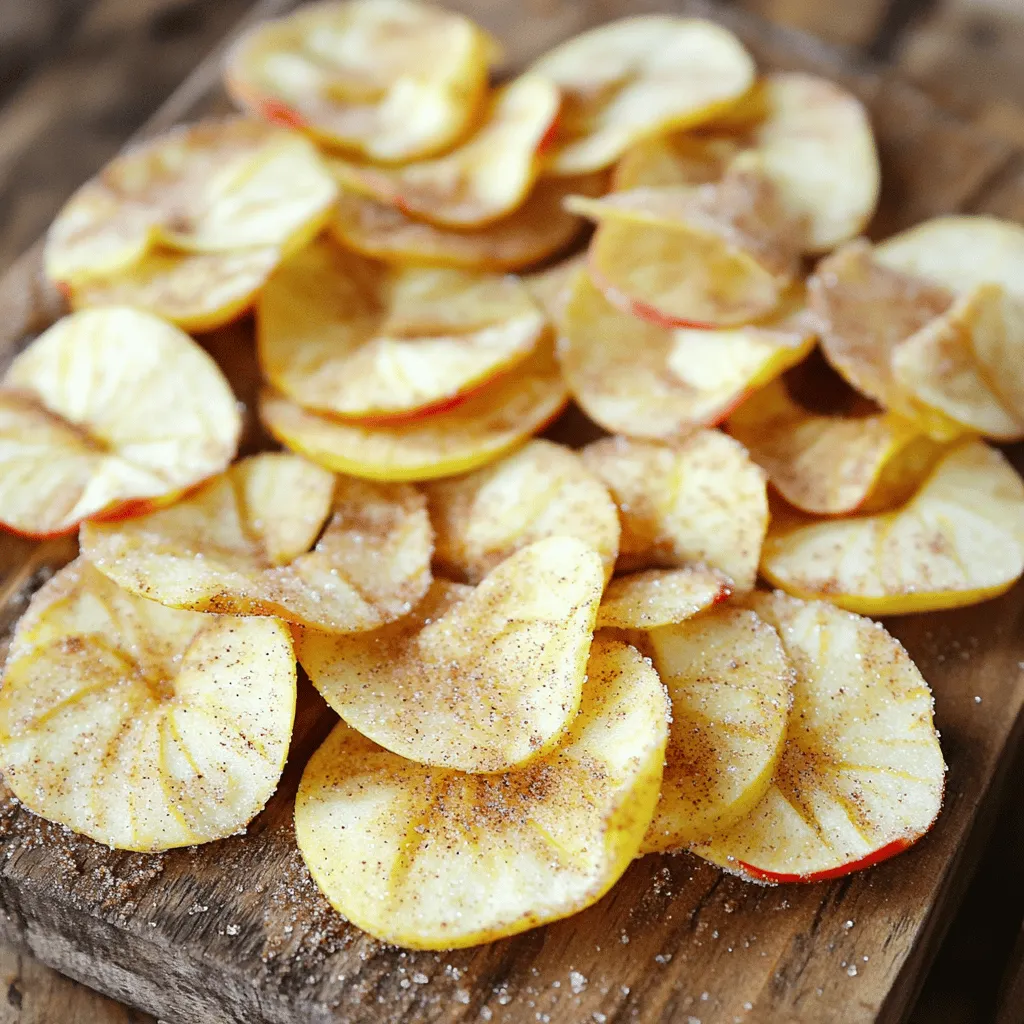
Looking for a tasty yet healthy snack that satisfies your cravings? Cinnamon Sugar Apple Chips are the perfect solution! These

Cranberry orange scones are a tasty treat. They combine tart cranberries and sweet orange. This recipe is simple and quick. You will need a few basic ingredients to start. - 2 cups all-purpose flour - 1/3 cup sugar - 1 tablespoon baking powder - 1/2 teaspoon salt - 1/4 cup unsalted butter, cold and cubed - 1/2 cup dried cranberries - Zest of 1 large orange - 1/2 cup heavy cream - 1 large egg - 1 teaspoon vanilla extract - 1 tablespoon orange juice (freshly squeezed) - 1 egg wash (1 egg beaten with 1 tablespoon of water) Each ingredient plays a key role in flavor and texture. The flour gives the scones structure. Sugar adds sweetness. Baking powder helps them rise. Salt enhances all the flavors. Cold butter adds flakiness. Dried cranberries provide chewiness. Orange zest adds bright flavor. Heavy cream makes the scones rich and moist. The egg helps bind everything. Vanilla gives depth. Fresh orange juice brings a burst of citrus. The egg wash gives a lovely golden color when baked. Using high-quality ingredients helps make your scones even better. I recommend organic flour and fresh oranges for the best flavor. For a fun twist, try adding a pinch of cinnamon to the dry mix. This simple recipe will surely impress your family and friends. 1. Preheat your oven to 400°F (200°C) and prepare your baking sheet with parchment paper. This step helps to avoid sticking and makes cleanup easier. 2. In a large mixing bowl, combine the dry ingredients: flour, sugar, baking powder, and salt. Whisk them well until they blend together. This ensures even flavor throughout the scones. 3. Add the cold, cubed butter to the dry mix. Use your fingers or a pastry cutter to work the butter in until the mixture looks like coarse crumbs. This step is key for flaky scones. 1. Now, stir in the dried cranberries and the orange zest. Mix until they are evenly spread throughout the dough. This adds bursts of flavor with each bite. 2. In a separate bowl, whisk together the wet ingredients: heavy cream, egg, vanilla extract, and orange juice. This will add moisture and richness to your scones. 3. Pour the wet mixture into the dry ingredients. Stir gently until just combined. Avoid overmixing to keep the scones tender. 1. Turn the dough out onto a lightly floured surface. Knead it gently just 3 to 4 times to form a disc about 1-inch thick. This shapes the dough without toughening it. 2. Cut the disc into 8 equal wedges. Arrange them on your prepared baking sheet. This step makes sure they bake evenly. 3. Brush the tops with the egg wash for a nice golden color. It gives your scones a beautiful finish. 4. Bake for 15 to 18 minutes or until they turn lightly browned. A toothpick should come out clean when inserted. This means they are done. These steps will guide you to create delicious cranberry orange scones. For all the details, check out the Full Recipe. Enjoy your baking! - Ensuring optimal oven temperature: Preheat your oven to 400°F (200°C). This helps the scones rise and bake evenly. Use an oven thermometer if you have one. It can help you check if the temperature is right. - Using cold butter for flakiness: Use cold, cubed butter. It creates a nice, flaky texture. When you mix it into the flour, don’t let it melt. It should stay cold to make the scones rise well. - Pairing with beverages like tea or coffee: These scones taste great with tea or coffee. The bright orange flavor and tart cranberries match perfectly with warm drinks. - Additional toppings: You can add toppings for extra flavor. Try dusting with powdered sugar. Whipped cream adds richness. Orange marmalade brings a sweet touch that works well too. - How to store for freshness: Keep the scones in an airtight container. This keeps them soft and fresh. Store at room temperature for up to three days. - Freezing instructions for longer storage: To freeze, wrap each scone tightly in plastic wrap. Place them in a freezer bag. They can last up to three months. When ready to eat, thaw at room temperature or warm in the oven. For a full recipe, check out the Cranberry Orange Delight Scones. {{image_2}} You can switch up the flavors in your cranberry orange scones easily. If you don't have dried cranberries, try using raisins or blueberries instead. Both options add sweetness and a burst of flavor. Adding nuts can also enhance your scones. Walnuts or pecans provide a nice crunch and rich taste. Chop the nuts finely and mix them in with the cranberries. This simple change makes the scones even more enjoyable. If you need gluten-free scones, use gluten-free flour. Many brands offer great options that work well in baking. Just make sure to check the packaging for instructions. For a vegan version, you can substitute the butter with plant-based butter. Use an egg replacer like flaxseed or applesauce instead of the egg. This keeps the scones moist and fluffy without using animal products. These variations let you enjoy delicious scones while catering to your taste and dietary needs. You can find the full recipe above for detailed steps. Cranberry orange scones are a sweet, fluffy pastry. They mix tart cranberries with bright orange zest. This combination makes them perfect for breakfast or tea time. The scones are light and flaky, with a lovely golden crust. They are easy to make and a joy to eat. You can tell your scones are done when they are lightly golden on top. Insert a toothpick into the center. If it comes out clean, your scones are ready. They should also feel firm to the touch. Bake them for about 15-18 minutes at 400°F (200°C) for the best results. Yes, you can make the dough ahead of time. Mix it and shape it into a disc. Wrap it tightly in plastic wrap and refrigerate. Use the dough within 24 hours for the best taste. When you are ready, cut the scones and bake them as usual. Absolutely! Baked scones freeze very well. Allow them to cool completely after baking. Place them in a freezer-safe bag or container. They can last for up to three months. To enjoy, thaw them at room temperature or warm them in the oven. Store leftover scones in an airtight container. Keep them at room temperature for up to two days. If you want to keep them longer, refrigerate them. You can also reheat them in the oven for a few minutes. This will help restore their flaky texture. For a full recipe, check out the Cranberry Orange Delight Scones. One serving of these cranberry orange scones is one scone. Each scone has about 200 calories. This makes them a nice treat without being too heavy. - Total Fat: 8 grams - Carbohydrates: 31 grams - Protein: 3 grams These facts show a balanced mix of fats, carbs, and protein. The fats mostly come from the butter, while the carbs come from flour and sugar. Cranberries and oranges offer great health benefits. Cranberries help fight infections and are good for your heart. They are high in antioxidants, which protect your body. Oranges provide a boost of vitamin C. This vitamin helps your immune system stay strong. Together, these fruits make the scones not just tasty but also good for you. Enjoying these scones can be a fun way to add nutrients to your diet. If you want the full details on how to make these delicious treats, check out the Full Recipe. This blog post covers how to make delicious cranberry orange scones. We explored the ingredients, preparation steps, baking tips, and variations. Remember to use cold butter for a flaky texture. Pair your scones with tea or coffee for a treat. Store them well to keep them fresh. You can also modify the recipe to fit your needs. Try different flavors or dietary options. Enjoy your baking adventure and share these tasty scones with friends and family!

Cranberry Orange Scones Delightful and Easy Recipe

If you’re craving a treat that’s both zesty and sweet, look no further than my Cranberry Orange Scones! This delightful

Older posts
Page1 Page2 … Page77 Next →

dsad

© 2025 greenmealmap • Built with GeneratePress

Our Policies

  • Copyright Policy
  • Cookie Policy
  • GDPR Policy
  • Privacy Policy
  • Disclaimer
  • Terms Of Use

More Information

  • Home
  • About
  • Contact
  • Appetizers
  • Dessert
  • Dinner
  • Drinks
©2025, greenmealmap About Back To Top