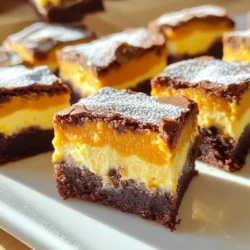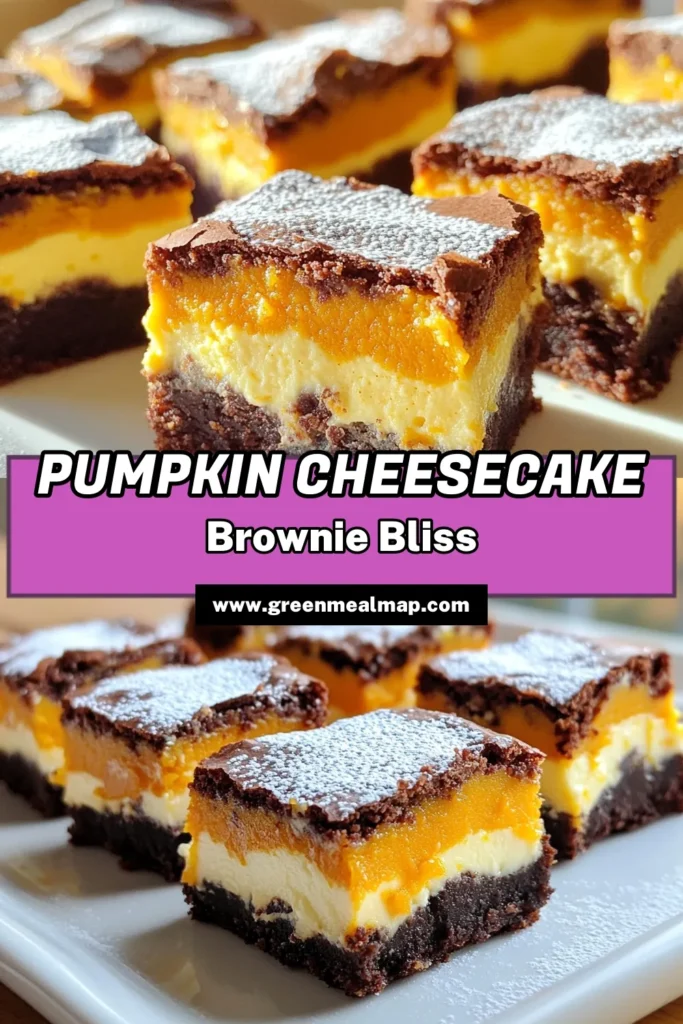
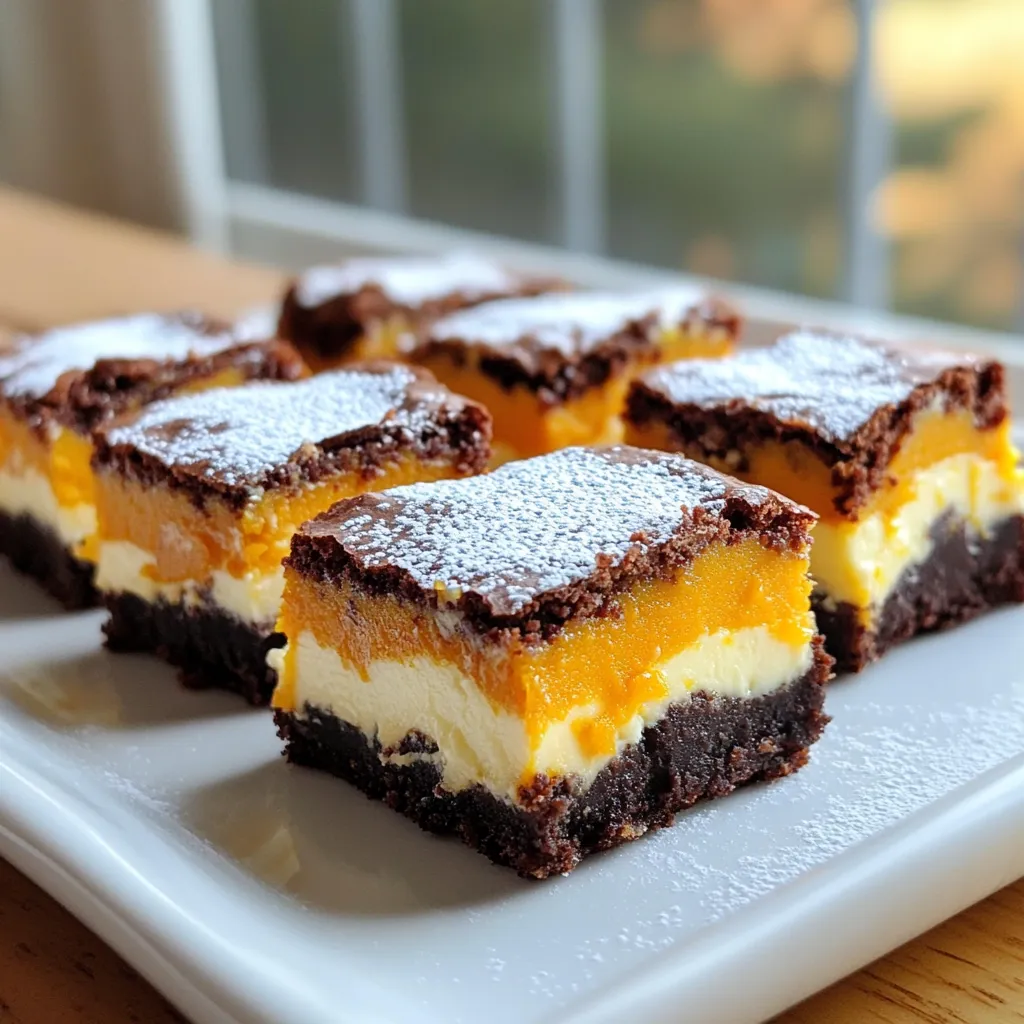
If you love fall flavors, you need to try these Pumpkin Cheesecake Brownie Bites. They blend rich brownie with creamy pumpkin cheesecake, creating the perfect treat. I’ll guide you through each step, from gathering ingredients to cooling these bites. With my tips, you’ll achieve the right texture and avoid common mistakes. Let’s get baking and make a dessert that’s sure to impress your friends and family!
Ingredients
List of Ingredients
– 1 cup pumpkin puree
– 2 oz cream cheese, softened
– 1/2 cup sugar
– 1/2 teaspoon vanilla extract
– 1/2 teaspoon ground cinnamon
– 1/4 teaspoon ground nutmeg
– 1/2 cup unsweetened cocoa powder
– 2/3 cup all-purpose flour
– 1/2 teaspoon baking powder
– 1/2 teaspoon salt
– 3/4 cup granulated sugar
– 1/2 cup melted butter
– 2 large eggs
– 1 teaspoon vanilla extract (for brownie mix)
Quantities required for each ingredient
You’ll need just the right amounts to make these treats shine.
– Pumpkin puree: 1 cup gives a rich flavor.
– Cream cheese: 2 oz creates a creamy texture.
– Sugar: You’ll use 1/2 cup for the cheesecake and 3/4 cup for the brownie mix.
– Vanilla extract: 1/2 teaspoon for the cheesecake, plus 1 teaspoon for the brownie mix.
– Ground cinnamon: Just 1/2 teaspoon adds warmth.
– Ground nutmeg: A pinch of 1/4 teaspoon enhances the spice.
– Cocoa powder: 1/2 cup provides that deep chocolate flavor.
– All-purpose flour: Use 2/3 cup for a good base.
– Baking powder and salt: 1/2 teaspoon each helps the texture.
– Melted butter: 1/2 cup adds richness.
– Large eggs: 2 eggs help bind everything together.
Recommended brands or substitutes
For the best taste, I recommend using high-quality ingredients.
– Pumpkin puree: Canned options like Libby’s work well. You can also use homemade puree.
– Cream cheese: Philadelphia is a classic choice. If you need a dairy-free option, use cashew cream.
– Sugar: Granulated sugar is best, but you could try coconut sugar for a twist.
– Vanilla extract: Pure vanilla extract is ideal. I avoid imitation for better flavor.
– Cocoa powder: Look for unsweetened varieties like Hershey’s or Ghirardelli.
– Flour: All-purpose flour is great, but you can use gluten-free flour for a swap.
Step-by-Step Instructions
Preheating and preparing the muffin tin
First, you need to preheat your oven to 350°F (175°C). This step is key for even baking. While your oven heats, line a mini muffin tin with paper liners. You can also grease it well if you prefer. This makes it easy to remove the bites later.
Making the cheesecake filling
In a mixing bowl, combine 1 cup of pumpkin puree, 2 ounces of softened cream cheese, and 1/2 cup of sugar. Add 1/2 teaspoon of vanilla extract, 1/2 teaspoon of ground cinnamon, and 1/4 teaspoon of ground nutmeg. Mix these ingredients until the mixture is smooth and creamy. Set this filling aside; it will add rich flavor to your bites.
Preparing the brownie batter
In a large bowl, whisk together 1/2 cup of melted butter and 3/4 cup of granulated sugar. This step helps blend the ingredients well. Add 2 large eggs and 1 teaspoon of vanilla extract. Whisk until everything is fully mixed. Next, sift in 1/2 cup of unsweetened cocoa powder, 2/3 cup of all-purpose flour, 1/2 teaspoon of baking powder, and 1/2 teaspoon of salt. Stir gently until the mixture is just combined. Be careful not to over-mix it!
Assembling the brownie bites
Now it’s time to fill the muffin tin. Spoon about 1 teaspoon of brownie batter into each muffin cup. Then, add 1 teaspoon of the pumpkin cheesecake filling on top. Finally, cover with another teaspoon of brownie batter. Make sure the cheesecake filling is partially covered. This layering creates a delightful surprise in each bite.
Baking and cooling instructions
Place the muffin tin in the preheated oven and bake for 18-20 minutes. To check if they are done, insert a toothpick into the center. It should come out mostly clean. Once baked, allow the brownie bites to cool in the tin for 10 minutes. After that, transfer them to a wire rack to cool completely. For a special touch, you can dust them with powdered sugar or add a dollop of whipped cream on top. Enjoy your delicious treats!
Tips & Tricks
How to achieve the perfect texture
To make pumpkin cheesecake brownie bites with the right texture, focus on the batter. Mix the brownie batter until just combined. Over-mixing can make them tough. When making the cheesecake filling, ensure the cream cheese is soft. This helps it blend smoothly with the pumpkin puree. A smooth mixture gives a creamy, rich filling.
Flavor combinations to enhance the bites
You can add more flavors to your bites. Consider mixing in chocolate chips for extra sweetness. A pinch of ginger or cloves can give a warm spice note. You might also try different extracts, like almond or maple, for a unique taste. These flavors work well with pumpkin and cream cheese.
Common mistakes to avoid
One common mistake is not preheating the oven. Always ensure your oven is hot before baking. This helps the bites rise properly. Another mistake is filling the muffin cups too much. Only fill them halfway to allow room for rising. Finally, do not rush the cooling process. Letting them cool in the tin first helps them hold their shape better.
Variations
Gluten-free alternative
You can easily make these bites gluten-free. Use a gluten-free flour blend instead of all-purpose flour. This swap keeps the texture nice without losing flavor. Many brands offer great gluten-free options. Just check for a blend that includes xanthan gum for the best results.
Adding spices or chocolate chips
To jazz up your brownie bites, add spices or chocolate chips. A pinch of ginger or allspice can add warmth. You could also mix in semi-sweet or dark chocolate chips. This extra touch brings out the rich flavors of pumpkin and chocolate.
Serving suggestions
Serving these bites with festive toppings makes them even more special. Dust them with powdered sugar for a sweet touch. A dollop of whipped cream on top adds creaminess. For a fun twist, drizzle caramel or chocolate sauce over them. These toppings not only taste great but also make your dessert look stunning!
Storage Info
Best practices for storing brownie bites
To keep your pumpkin cheesecake brownie bites fresh, store them in an airtight container. This helps prevent them from drying out. Place parchment paper between layers to avoid sticking. If you have leftovers, they will stay soft and tasty this way. Always let the bites cool completely before storage.
How long they last in different conditions
In the fridge, your brownie bites will last about five days. They may lose some flavor after that. If you store them at room temperature, they stay good for about three days. Avoid direct sunlight and heat. For the best taste, eat them within the first few days.
Freezing instructions for later enjoyment
Freezing these bites is simple and perfect for later cravings. First, let them cool completely. Then, wrap each bite in plastic wrap. Place the wrapped bites in a freezer bag or container. Label them with the date. They can last up to three months in the freezer. To enjoy, just thaw them in the fridge overnight.
FAQs
Can I use fresh pumpkin instead of canned?
Yes, you can use fresh pumpkin. Just cook the pumpkin, then mash it until smooth. Make sure to remove any excess water. This will keep your brownie bites from getting too wet.
How do I know when the brownie bites are done?
Check them after 18 minutes. Insert a toothpick in the center of a bite. If it comes out mostly clean, they are done. The edges should look firm, and the center should be slightly soft.
What can I substitute for cream cheese?
You can use Greek yogurt or mascarpone cheese. Both options will give a creamy texture. If you want a dairy-free choice, try silken tofu blended until smooth.
Are these bites suitable for special diets?
They can be made to fit various diets. To make them gluten-free, use a gluten-free flour blend. For a dairy-free version, substitute the cream cheese and butter with plant-based options. Always check ingredient labels for allergens.
We explored the key ingredients for your brownie bites, including quantities and brands. I shared step-by-step instructions for making them, from prepping the tin to baking. I offered tips for perfect texture and flavor, plus common mistakes to avoid. Then, we discussed fun variations and smart storage practices.
In summary, these brownie bites are easy, tasty, and perfect for any occasion. Enjoy making them your own!