No-Bake Peanut Butter Granola Cups Simple Snack Idea

WANT TO SAVE THIS RECIPE?

Looking for a tasty snack that’s easy to make? These No-Bake Peanut Butter Granola Cups are perfect for you! I’ll share my simple recipe that requires no baking, just mix and chill. Packed with flavor and nutrients, these cups make a great grab-and-go treat. Whether you want to fuel up after school or need a quick bite at work, this snack idea will not disappoint. Let’s dive in!

Ingredients

Complete list of ingredients

To make No-Bake Peanut Butter Granola Cups, you need:

– 1 cup rolled oats

– ½ cup natural peanut butter

– ¼ cup honey or maple syrup

– ½ cup chocolate chips (dark or semi-sweet)

– ½ cup chopped nuts (almonds, walnuts, or pecans)

– ¼ cup dried fruit (cranberries or raisins)

– ½ teaspoon vanilla extract

– Pinch of salt

Nutritional information per serving

Each serving has about:

– Calories: 150

– Protein: 4g

– Carbs: 18g

– Fat: 7g

– Fiber: 2g

– Sugars: 6g

This snack offers a nice mix of protein and healthy fats.

Optional ingredient substitutions

You can swap some ingredients for a twist:

– Use almond butter instead of peanut butter.

– Try agave nectar instead of honey.

– Replace chocolate chips with dried coconut or sunflower seeds.

– Use walnuts or pistachios for different flavors.

These swaps keep your snack fun and tasty!

Step-by-Step Instructions

Preparation of dry ingredients

First, gather your dry ingredients. You need 1 cup of rolled oats, ½ cup of chopped nuts, and ¼ cup of dried fruit. You can use cranberries or raisins. In a large mixing bowl, add the oats, nuts, and dried fruit. Mix them well. This step helps spread the flavors evenly.

Making the peanut butter mixture

Next, we create the peanut butter mixture. Take ½ cup of natural peanut butter and ¼ cup of honey or maple syrup. Place them in a microwave-safe bowl. Heat this mix for about 30 seconds. It should be warm and easy to stir. Remove it from the microwave. Now, stir in ½ teaspoon of vanilla extract and a pinch of salt. Mix until it’s smooth and creamy.

Assembling and setting the granola cups

Now it’s time to combine everything. Pour the peanut butter mixture over the dry ingredients. Mix well until all the dry ingredients are coated. Gently fold in ½ cup of chocolate chips. Be careful not to melt them too much.

Then, prepare a muffin tin. You can line it with paper liners or lightly grease it. Spoon the granola mixture into each cup. Press down firmly with your fingers or a spoon. This helps them hold their shape.

Finally, place the muffin tin in the refrigerator. Let it sit for at least 30 minutes. This helps the cups set. Once they are firm, you can remove them from the tin. Enjoy them right away or store them in an airtight container in the fridge for up to a week.

Tips & Tricks

How to achieve the best texture

To get the best texture in your granola cups, use rolled oats. They hold up well and give a nice chew. Mixing in chopped nuts adds crunch. I love using almonds or walnuts for this recipe. Make sure to pack the mixture tightly in the muffin tin. This helps the cups hold their shape when set.

Cooking and preparation shortcuts

You can save time by measuring everything before starting. This way, you won’t scramble to find ingredients. To heat the peanut butter and honey, use the microwave. Just 30 seconds is enough to warm them. Stir well to combine. If you want, use a food processor to mix the dry ingredients quickly.

Serving suggestions for maximum appeal

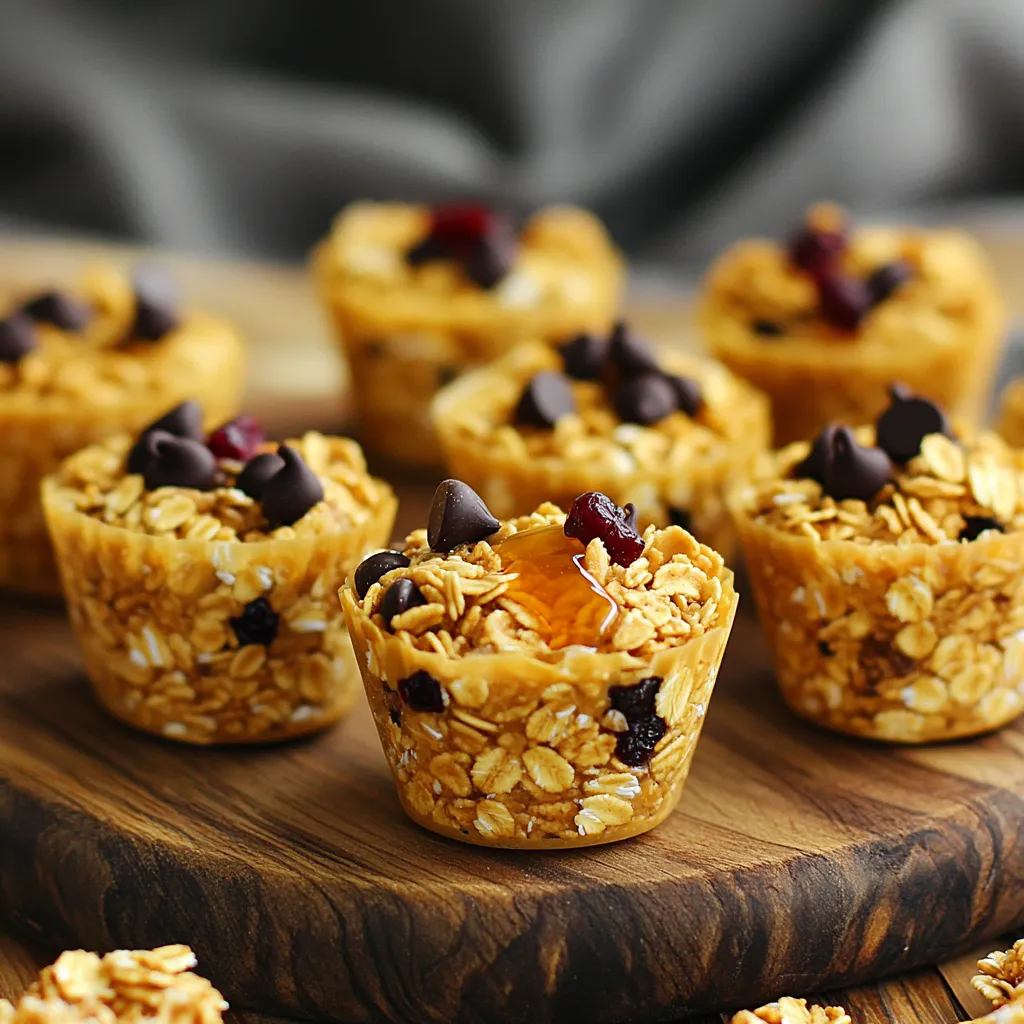
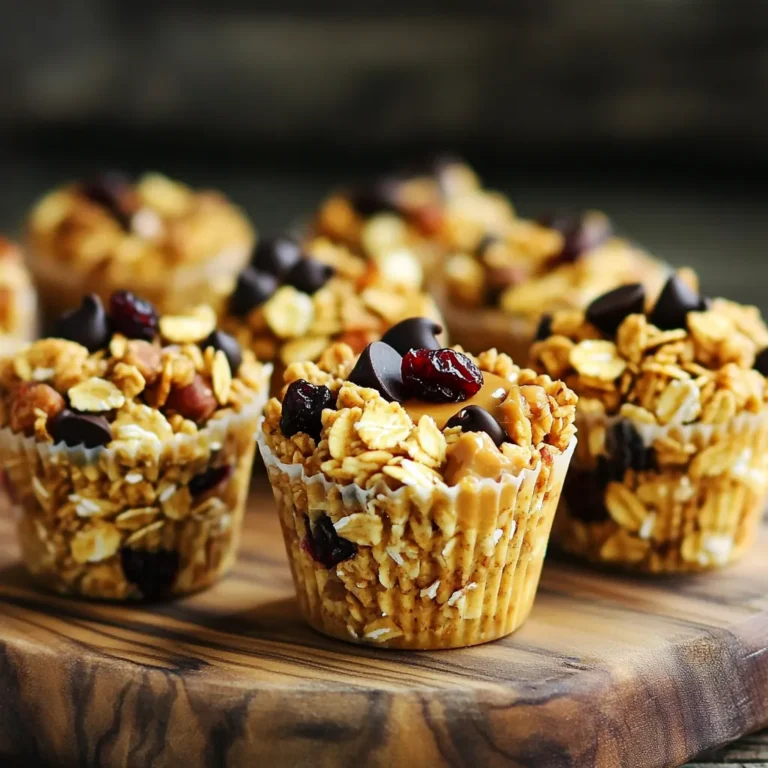
For a lovely presentation, arrange the granola cups on a platter. Drizzle extra honey on top for sweetness. Add a few whole nuts as a garnish. This makes them look inviting and tasty. You can also serve them with yogurt or fresh fruit on the side. This adds color and flavor to your snack!
Variations

Alternative nut butters

You can switch peanut butter for other nut butters. Almond butter, cashew butter, or sunflower seed butter work great. Each brings a different taste and texture. Almond butter adds a nutty crunch. Cashew butter is creamier and sweeter. Sunflower seed butter is great for nut-free options.

Using different sweeteners

Honey and maple syrup are popular choices, but you can get creative. Try agave nectar, brown rice syrup, or coconut sugar. Each sweetener gives a unique flavor. Agave is mild and works well if you want less sweetness. Brown rice syrup makes the cups chewy.

Incorporating other add-ins (like seeds or spices)

Feel free to add more fun ingredients! Chia seeds or flaxseeds boost nutrition. They add fiber and omega-3s. You can also mix in spices like cinnamon or nutmeg for extra flavor. A pinch of sea salt can enhance all the tastes too. These small changes can make your granola cups even better!

Storage Info

Best practices for storage

To keep your no-bake peanut butter granola cups fresh, store them in an airtight container. This helps prevent moisture and keeps them crunchy. You can place parchment paper between layers to avoid sticking. Always store them in the refrigerator for the best taste and texture.

How long granola cups will last

If stored properly, these granola cups will last about a week in the fridge. After that, they may start to lose their texture and flavor. Keep an eye on them, and if you notice any changes, it’s best to toss them out.

Freezing options for longer storage

You can freeze these granola cups for longer storage. Wrap each cup in plastic wrap or place them in a freezer-safe bag. They can last up to three months in the freezer. When you’re ready to enjoy, thaw them in the fridge overnight. This way, they’ll be ready for a quick snack anytime!

FAQs

Can I use quick oats instead of rolled oats?

Yes, you can use quick oats. Quick oats will make the cups softer and less chewy. They absorb liquid faster than rolled oats. This means your granola cups may not hold their shape as well. If you prefer a firmer texture, stick with rolled oats.

How do I make these granola cups vegan?

To make these granola cups vegan, swap honey for maple syrup. Use a peanut butter brand that has no added oils or sugars. Ensure your chocolate chips are dairy-free, too. With these changes, you will have a tasty vegan snack!

What can I substitute for honey or maple syrup?

You can use agave nectar or brown rice syrup in place of honey or maple syrup. Both options are sweet and will work well. You may also try coconut sugar mixed with a little water for a different flavor.

This blog post covered all you need to make tasty granola cups. We discussed every ingredient, cooking steps, and storage tips. You can also explore fun variations and shortcuts for easier prep. Remember, you can swap nut butters or sweeteners to match your taste. By following these steps, you can create delicious snacks that fit your needs. Keep these tips in mind for the best results. Enjoy your cooking and the tasty treats that follow!
To make No-Bake Peanut Butter Granola Cups, you need: - 1 cup rolled oats - ½ cup natural peanut butter - ¼ cup honey or maple syrup - ½ cup chocolate chips (dark or semi-sweet) - ½ cup chopped nuts (almonds, walnuts, or pecans) - ¼ cup dried fruit (cranberries or raisins) - ½ teaspoon vanilla extract - Pinch of salt Each serving has about: - Calories: 150 - Protein: 4g - Carbs: 18g - Fat: 7g - Fiber: 2g - Sugars: 6g This snack offers a nice mix of protein and healthy fats. You can swap some ingredients for a twist: - Use almond butter instead of peanut butter. - Try agave nectar instead of honey. - Replace chocolate chips with dried coconut or sunflower seeds. - Use walnuts or pistachios for different flavors. These swaps keep your snack fun and tasty! First, gather your dry ingredients. You need 1 cup of rolled oats, ½ cup of chopped nuts, and ¼ cup of dried fruit. You can use cranberries or raisins. In a large mixing bowl, add the oats, nuts, and dried fruit. Mix them well. This step helps spread the flavors evenly. Next, we create the peanut butter mixture. Take ½ cup of natural peanut butter and ¼ cup of honey or maple syrup. Place them in a microwave-safe bowl. Heat this mix for about 30 seconds. It should be warm and easy to stir. Remove it from the microwave. Now, stir in ½ teaspoon of vanilla extract and a pinch of salt. Mix until it’s smooth and creamy. Now it’s time to combine everything. Pour the peanut butter mixture over the dry ingredients. Mix well until all the dry ingredients are coated. Gently fold in ½ cup of chocolate chips. Be careful not to melt them too much. Then, prepare a muffin tin. You can line it with paper liners or lightly grease it. Spoon the granola mixture into each cup. Press down firmly with your fingers or a spoon. This helps them hold their shape. Finally, place the muffin tin in the refrigerator. Let it sit for at least 30 minutes. This helps the cups set. Once they are firm, you can remove them from the tin. Enjoy them right away or store them in an airtight container in the fridge for up to a week. To get the best texture in your granola cups, use rolled oats. They hold up well and give a nice chew. Mixing in chopped nuts adds crunch. I love using almonds or walnuts for this recipe. Make sure to pack the mixture tightly in the muffin tin. This helps the cups hold their shape when set. You can save time by measuring everything before starting. This way, you won’t scramble to find ingredients. To heat the peanut butter and honey, use the microwave. Just 30 seconds is enough to warm them. Stir well to combine. If you want, use a food processor to mix the dry ingredients quickly. For a lovely presentation, arrange the granola cups on a platter. Drizzle extra honey on top for sweetness. Add a few whole nuts as a garnish. This makes them look inviting and tasty. You can also serve them with yogurt or fresh fruit on the side. This adds color and flavor to your snack! {{image_2}} You can switch peanut butter for other nut butters. Almond butter, cashew butter, or sunflower seed butter work great. Each brings a different taste and texture. Almond butter adds a nutty crunch. Cashew butter is creamier and sweeter. Sunflower seed butter is great for nut-free options. Honey and maple syrup are popular choices, but you can get creative. Try agave nectar, brown rice syrup, or coconut sugar. Each sweetener gives a unique flavor. Agave is mild and works well if you want less sweetness. Brown rice syrup makes the cups chewy. Feel free to add more fun ingredients! Chia seeds or flaxseeds boost nutrition. They add fiber and omega-3s. You can also mix in spices like cinnamon or nutmeg for extra flavor. A pinch of sea salt can enhance all the tastes too. These small changes can make your granola cups even better! To keep your no-bake peanut butter granola cups fresh, store them in an airtight container. This helps prevent moisture and keeps them crunchy. You can place parchment paper between layers to avoid sticking. Always store them in the refrigerator for the best taste and texture. If stored properly, these granola cups will last about a week in the fridge. After that, they may start to lose their texture and flavor. Keep an eye on them, and if you notice any changes, it's best to toss them out. You can freeze these granola cups for longer storage. Wrap each cup in plastic wrap or place them in a freezer-safe bag. They can last up to three months in the freezer. When you're ready to enjoy, thaw them in the fridge overnight. This way, they’ll be ready for a quick snack anytime! Yes, you can use quick oats. Quick oats will make the cups softer and less chewy. They absorb liquid faster than rolled oats. This means your granola cups may not hold their shape as well. If you prefer a firmer texture, stick with rolled oats. To make these granola cups vegan, swap honey for maple syrup. Use a peanut butter brand that has no added oils or sugars. Ensure your chocolate chips are dairy-free, too. With these changes, you will have a tasty vegan snack! You can use agave nectar or brown rice syrup in place of honey or maple syrup. Both options are sweet and will work well. You may also try coconut sugar mixed with a little water for a different flavor. This blog post covered all you need to make tasty granola cups. We discussed every ingredient, cooking steps, and storage tips. You can also explore fun variations and shortcuts for easier prep. Remember, you can swap nut butters or sweeteners to match your taste. By following these steps, you can create delicious snacks that fit your needs. Keep these tips in mind for the best results. Enjoy your cooking and the tasty treats that follow!

No-Bake Peanut Butter Granola Cups

Indulge your sweet tooth with these easy No-Bake Peanut Butter Granola Cups! Packed with wholesome oats, crunchy nuts, and a touch of chocolate, these delightful treats are perfect for a quick snack or a healthy dessert. With just a few simple steps, you can create a delicious batch that the whole family will love. Click through to explore the full recipe and get ready to enjoy this scrumptious, guilt-free treat!

Ingredients
  

1 cup rolled oats

½ cup natural peanut butter

¼ cup honey or maple syrup

½ cup chocolate chips (dark or semi-sweet)

½ cup chopped nuts (almonds, walnuts, or pecans)

¼ cup dried fruit (cranberries or raisins)

½ teaspoon vanilla extract

Pinch of salt

Instructions
 

In a large mixing bowl, combine the rolled oats, chopped nuts, and dried fruit. Mix well to distribute the ingredients evenly.

    In a microwave-safe bowl, heat the peanut butter and honey (or maple syrup) together for about 30 seconds, or until warm and easy to stir. Remove from the microwave and stir in the vanilla extract and a pinch of salt until smooth.

      Pour the peanut butter mixture over the dry ingredients and mix until everything is well coated.

        Fold in the chocolate chips gently to ensure they are incorporated without melting too much.

          Line a muffin tin with paper liners or lightly grease it. Spoon the granola mixture into each cup, pressing down firmly with your fingers or a spoon to pack it tightly.

            Place the muffin tin in the refrigerator for at least 30 minutes to allow the cups to set.

              Once set, remove the granola cups from the tin and serve immediately, or store them in an airtight container in the refrigerator for up to a week.

                Prep Time: 10 min | Total Time: 40 min | Servings: 12 cups

                  - Presentation Tips: Arrange the granola cups on a serving platter, drizzling a little extra honey on top and garnishing with a few whole nuts for a charming touch.

                    WANT TO SAVE THIS RECIPE?

                    Leave a Comment

                    Recipe Rating