If you’re a fan of sweet treats, you’ll love making Cherry Chocolate Chip Ice Cream. This fun recipe blends juicy cherries with rich chocolate chips, creating a cold delight for hot days. Whether you choose fresh or frozen cherries, this ice cream is easy to make and full of flavor. I’ll guide you step-by-step, with tips to make it perfect. Let’s dive into this tasty adventure together!
Ingredients
Fresh or Frozen Cherries
You can use 2 cups of fresh or frozen cherries for this recipe. Fresh cherries bring a bright taste. Frozen cherries are a great option too. They work well when fresh cherries are out of season. Make sure to pit and halve them before use. This step is very important to enjoy smooth ice cream.
Dairy Ingredients
For the creamy base, use 1 cup of heavy cream and 1 cup of whole milk. Heavy cream gives a rich texture. Whole milk adds a touch of lightness. Together, they create a smooth mouthfeel that pairs well with cherries and chocolate.
Sweeteners and Flavorings
We need 3/4 cup of granulated sugar to sweeten the mix. Sugar not only adds sweetness but helps with the ice cream’s texture. Add 1 teaspoon of vanilla extract for a warm flavor boost. A pinch of salt balances the sweetness. Finally, include 1 tablespoon of lemon juice to enhance the cherry flavor. Don’t forget 1/2 cup of mini chocolate chips for a fun crunch!
Step-by-Step Instructions
Preparing the Cherry Mixture
Start with your cherries. If you use fresh cherries, wash them well. Remove the pits and cut them in half. If you choose frozen, let them thaw a bit. Place the cherries in a medium saucepan. Add the lemon juice. Cook on medium heat for about 5 to 7 minutes. You want the cherries to soften and release their juices. Once cooked, set the mixture aside to cool.
Mixing Dairy and Sugar
Grab a mixing bowl. Add the heavy cream, whole milk, granulated sugar, and vanilla extract. Don’t forget a pinch of salt! Whisk the mixture well until the sugar dissolves completely. This step makes your ice cream creamy and sweet. Make sure everything is mixed evenly.
Churning the Ice Cream
Now, fold the cooled cherry mixture into your cream mixture. Gently mix to spread the cherries throughout. Next, add the mini chocolate chips. Stir carefully so the chips don’t break. Pour this delightful mixture into your ice cream maker. Churn according to the maker’s instructions, usually for about 20 to 25 minutes. Your ice cream will reach a soft-serve consistency. For firmer ice cream, transfer it to an airtight container. Freeze for at least 4 hours before serving.
Tips & Tricks
Achieving the Perfect Texture
To get that creamy texture in your Cherry Chocolate Chip Ice Cream, start with cold ingredients. Use cold heavy cream and milk. This helps the ice cream churn well. If you want it firmer, freeze it longer. After churning, place it in an airtight container. Let it freeze for at least four hours. This gives it a nice scoopable feel.
Serving Suggestions
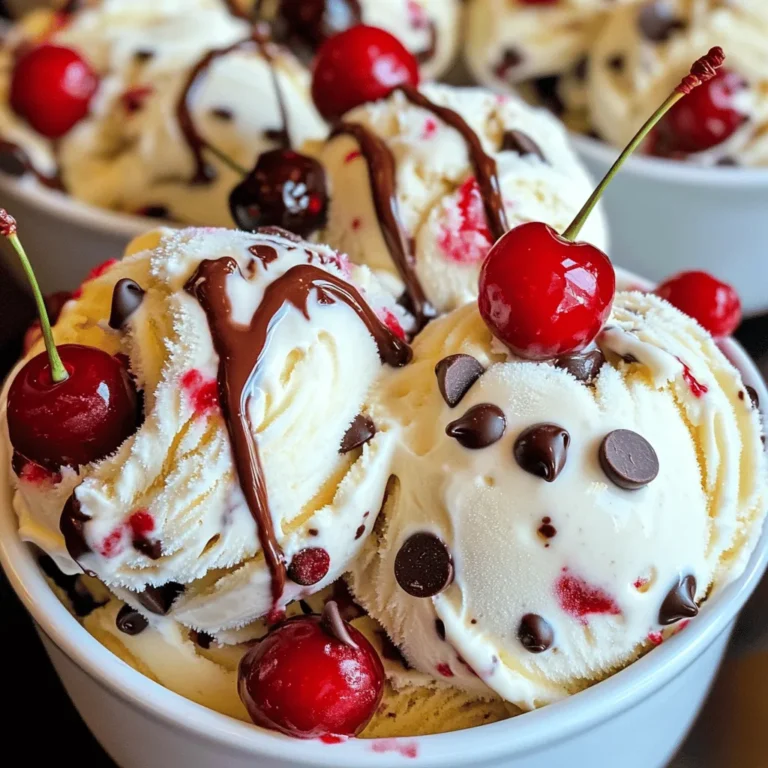
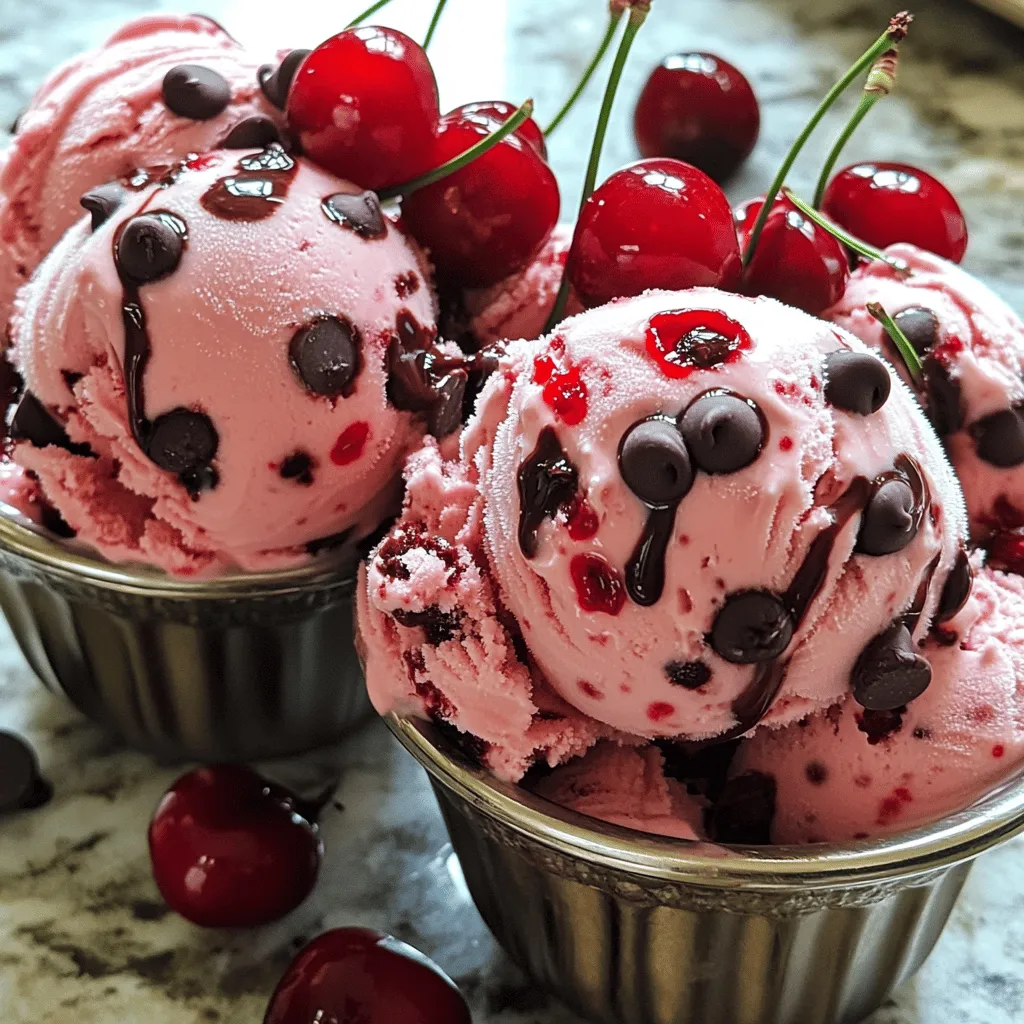
Serve your ice cream in chilled bowls. This keeps it from melting too fast. Top it with fresh cherries for a pop of color. A drizzle of chocolate sauce makes it look fancy. You can also add whipped cream or nuts for extra crunch. This makes each scoop fun and tasty.
Enhancing the Flavor
To boost the flavor, try adding a splash of almond extract. It pairs well with cherries. You can also mix in a pinch of cinnamon for warmth. Always taste your mixture before churning. Adjust the sweetness if needed. This ensures every bite is just right.
Variations
Using Different Fruits
You can change the flavor using different fruits. Try raspberries or strawberries. They add a nice twist. You can also use peaches for a summer treat. Just remember to adjust the sugar. Some fruits may need less sugar than cherries.
Chocolate Variations
Want more chocolate? Add cocoa powder to the cream mix. Start with 1/4 cup and adjust to taste. If you love dark chocolate, swap in dark chocolate chips. You can even drizzle melted chocolate on top when you serve it.
Dairy-Free Alternatives
For a dairy-free version, use coconut milk instead of whole milk. Almond milk works too, but it may change the flavor. Use a dairy-free cream to keep it rich. You can also find dairy-free chocolate chips. This way, everyone can enjoy a scoop!
Storage Info
Best Practices for Freezing
To keep your cherry chocolate chip ice cream fresh, use an airtight container. This prevents ice crystals from forming. Make sure to fill the container to the top. This minimizes air exposure. Label the container with the date. This helps track how long it has been frozen.
How to Defrost
Defrosting ice cream takes a bit of care. Move the ice cream to the fridge for about 30 minutes. This allows it to soften slowly. You can also let it sit at room temperature for 10-15 minutes. Just don’t leave it out too long, or it will melt too much.
Shelf Life of Cherry Chocolate Chip Ice Cream
When stored properly, this ice cream lasts about 2-3 weeks in the freezer. After that, it may lose flavor and texture. Always check for ice crystals or off smells. If you notice these signs, it’s best to throw it away. Enjoy it while it’s fresh for the best taste!
FAQs
Can I use frozen cherries instead of fresh?
Yes, you can use frozen cherries. Just thaw them first. Frozen cherries work well in this recipe. They still give great flavor and texture.
How long does it take to churn the ice cream?
Churning the ice cream takes about 20 to 25 minutes. Follow your ice cream maker’s guide. The mixture should look like soft serve when done.
Can I make this ice cream without an ice cream maker?
Yes, you can make it without an ice cream maker. Pour the mixture into a shallow dish. Freeze it for about 1 hour, then stir it well. Repeat this every 30 minutes until it firms up. This method takes longer but works well.
In this post, we explored how to make delicious cherry chocolate chip ice cream. We covered the ingredients, like fresh or frozen cherries and dairy options. I shared step-by-step instructions for mixing and churning the ice cream. Tips helped achieve the perfect texture, while variations showed how to use different fruits. Lastly, storage info ensures your ice cream stays great longer. Enjoy making this treat and feel free to experiment with flavors. Your homemade ice cream can bring joy and taste to any day!

